Pro-Rig V2.0 - Home Built Compact Composite Pop-up

CoyoteThistle

Adventurer
We managed to get in a short trip over the weekend. Spot called Monache Meadows in the southern Sierras. First real 4X4 road we have done since I installed the airbags and Daystar cradles - they worked great. Kept the bags at 55psi, aired the tires down to 25psi front and 30psi rear and the ride was surprisingly good. Was considering ditching the bags and getting a heavy duty leaf pack, think I'll stick with the bags now though and get medium duty leafs.

Got in to the camp area at the end of the road Saturday evening. About 20 rigs scattered about but lots of space left (I get the impression this place gets really busy some weekends). Our nice shady camp spot reminded me I need to get the deployable solar panels going. Pretty spot right on the river though.


We also finally overcame our fear of the porta potti :confused: and got it up and running for the first time. The results:


Happy campers :p. Surprisingly well engineered this thing - no evil smells even after being sealed up in our tiny camper for the drive home.

All the other campers packed up and headed out Sunday morning, several going out of their way to get a photo of their rigs crossing through the river - come on guys, it's only like 8 inches deep:rolleyes:. Anyway, a friendly father-son team arrived and camped about a quarter mile up river from us. Got to hear some stories of what this place was like 40 years ago (father) and chuckled at some panicked looks (son) as we stumbled upon his "secret" weed smoking spot down in the willows that happened to look like a good "secret" fishing spot :).

Fished and hiked all day Sunday - perfect weather and no bugs.


After another chilly night (more love for the Propex heater!), we headed out Monday AM. Passed no one else on the jeep trail. Saw more wildlife than cars on the whole drive back down to the highway. Good trip.

Camper to come off the truck and enter the "shop" next. Work to be done before ski season starts...

matt
 

CoyoteThistle

Adventurer
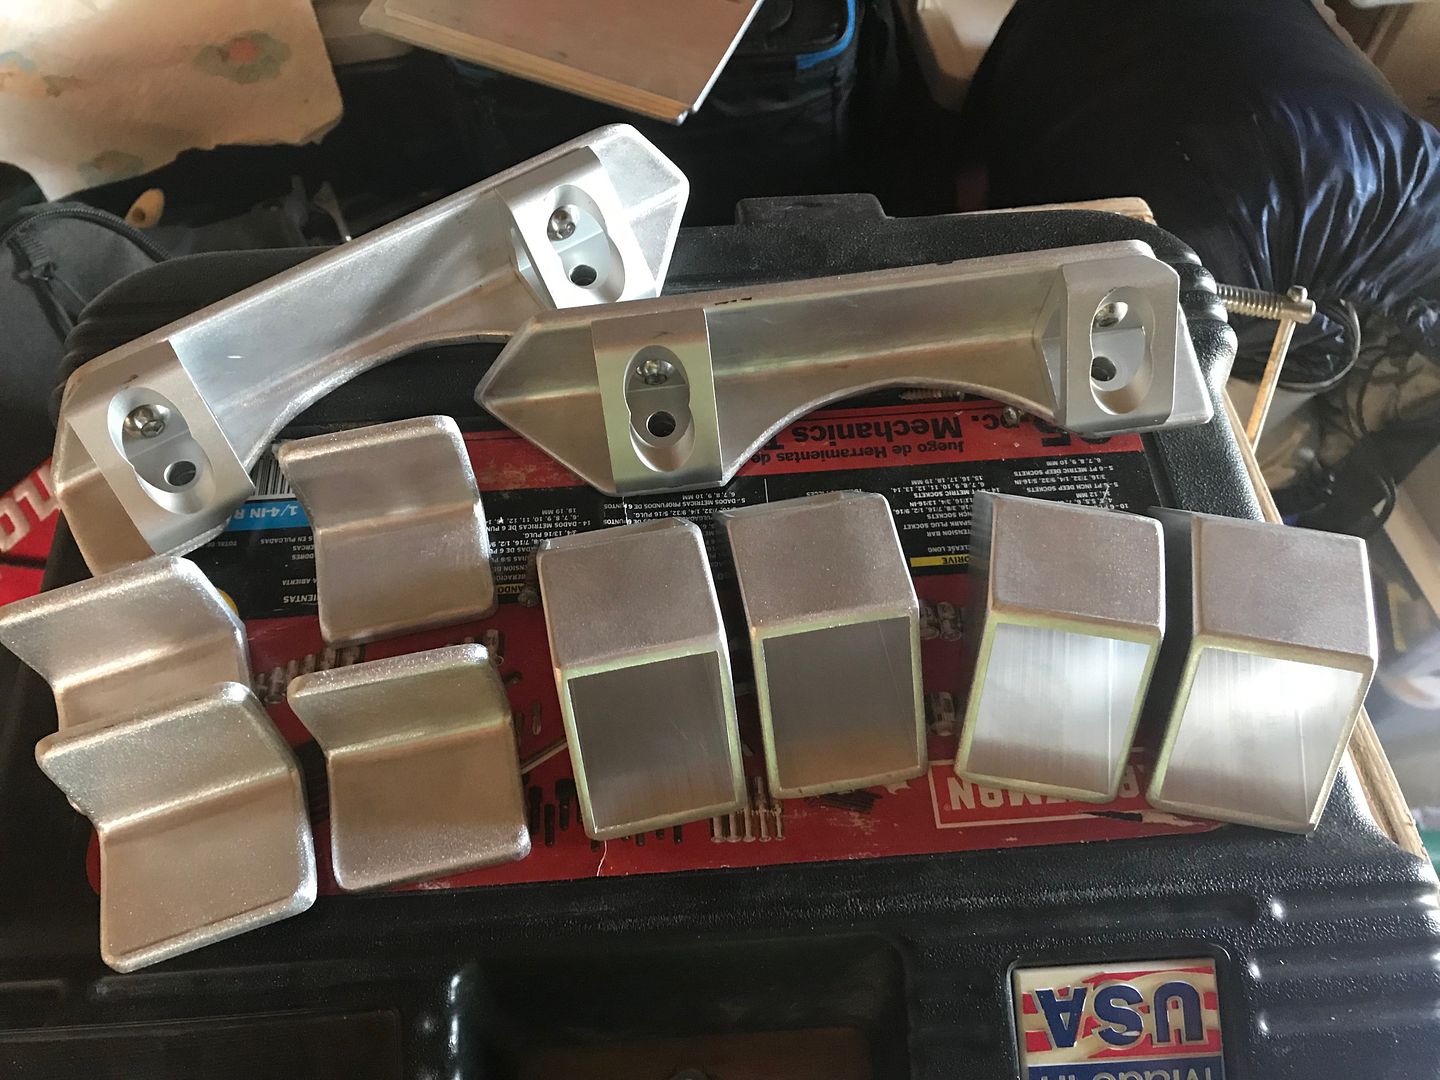
A little progress to report on the electric lift project. Got the mounts designed and built.


All aluminum since that's what I can work with with my tools. Forces shouldn't be too great since the scissor lifters will be doing most of the work, but did my best to over engineer these. Rear lowers at top (curve goes around the tail light). Four upper mounts at lower left - pretty simple! Lower right are for stabilizing the body of the actuator. Need to finish the front lowers and then drill a bunch of mounting holes. Then I guess it'll be time to drill holes in the camper - that part makes me nervous (I'm out of practice ;)).

Above photo shows how much an iPhone camera distorts at the edges - the four pieces at lower left are actually exactly the same size. As are the four at lower right. The photo just kinda freaked me out and I had to go out to the garage and double check - whew!

Wiring and switch gear ready to go in. Just need to find some spare time!
 

CoyoteThistle

Adventurer
Had some time to get work done today. All four upper mounts installed.


They are anchored in to 1.5" of plywood behind the aluminum angle. They seem really solid.

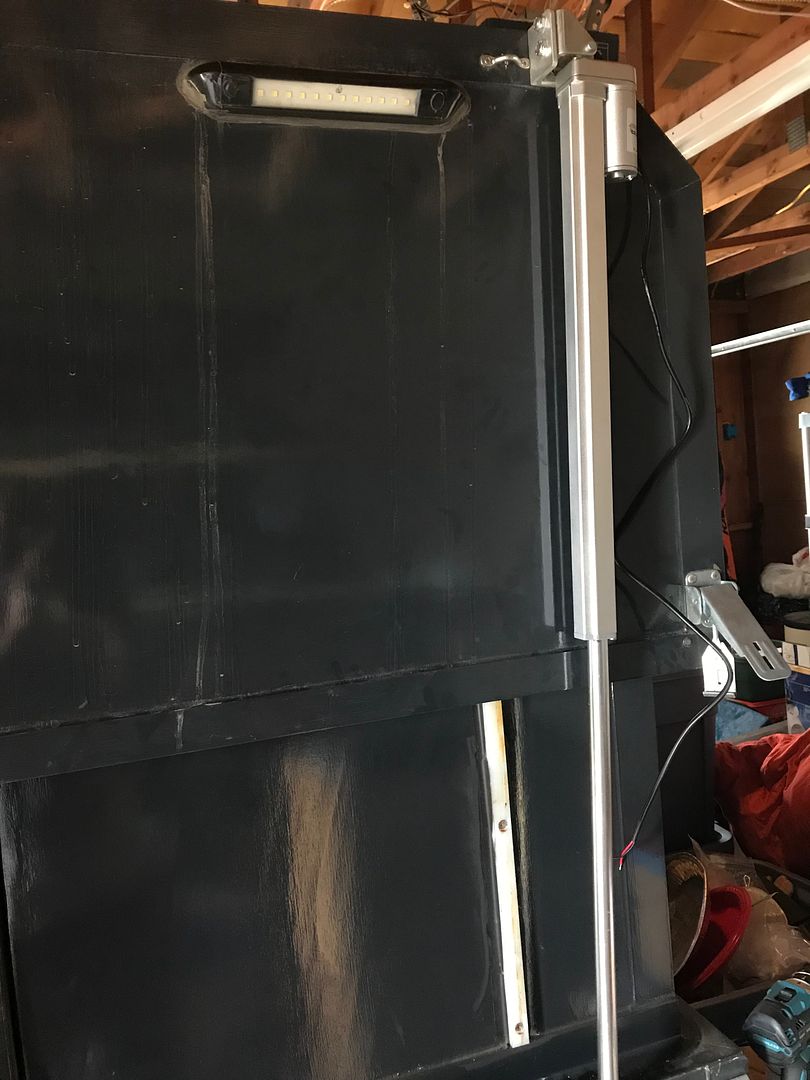
Here's an actuator hanging in place. I think they will look pretty good in the end.


Also got the rear lower mounts on.


They seem very solid but I'll watch carefully for signs of flex when I get the wiring done and test the lifters. That's the shaft of the actuator in this shot. The actuators will not be connected to the lower mounts. I'll add an adjustable "landing pad" on to the lower mount to fine tune the maximum height to get just the right amount of compression on the seals between the slide-up and the main body.

Still fiddling with the front lower mounts, that's next...
 

CoyoteThistle

Adventurer
Well, a solid two months without any real work on the camper finally came to an end this weekend. Minor progress but it felt good to do something.

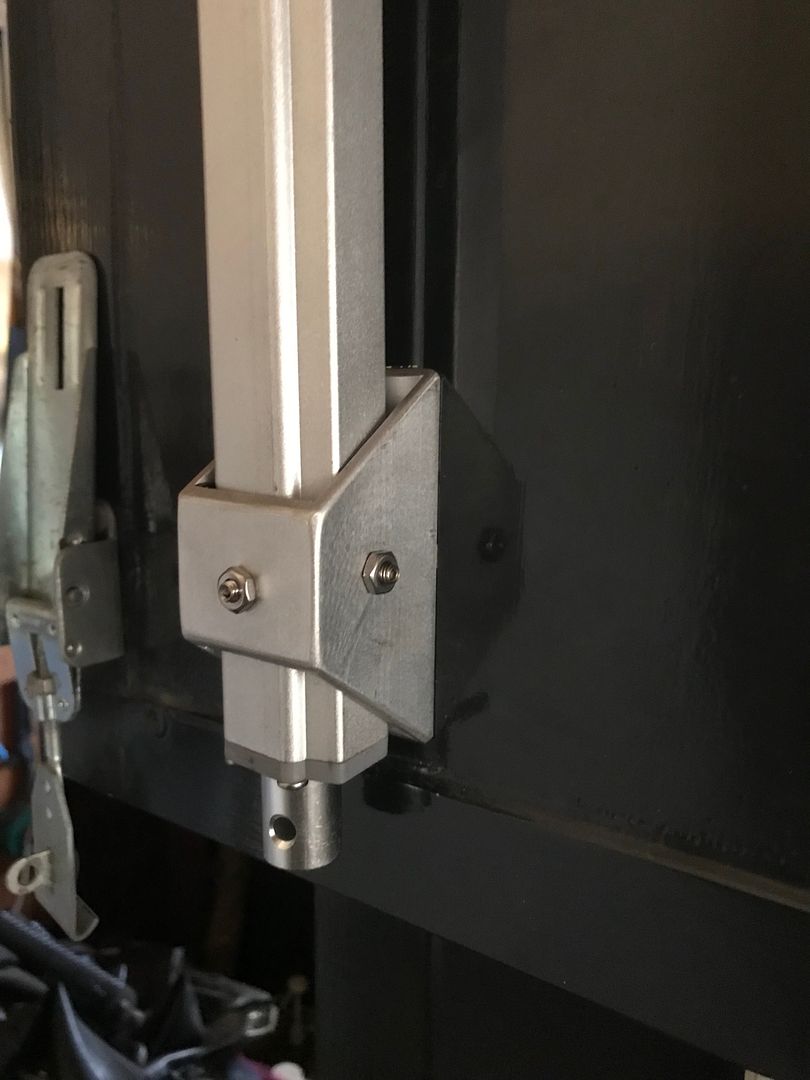
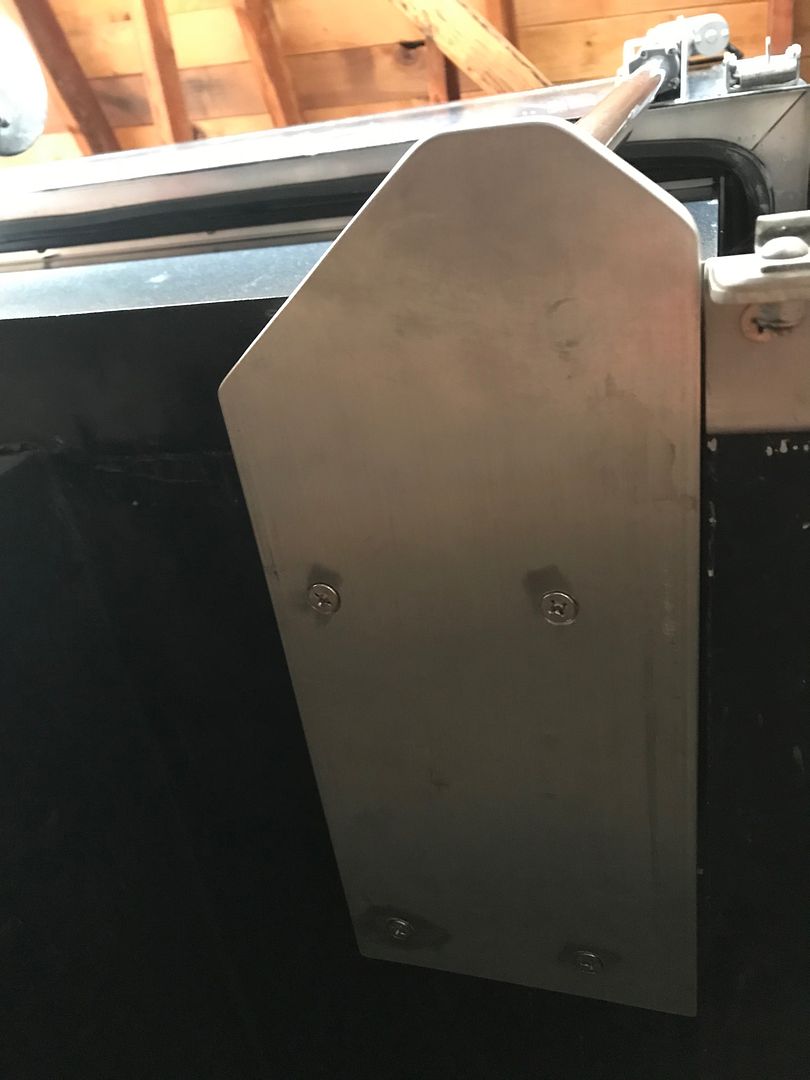
Work on the lifters resumed. I've been playing around with the final design for the lower mounts. Here's what I settled on, behold, the trapezoid bracket:


The two setscrews keep the lifter snugly in place. Jam nuts keep the setscrews from working loose (hopefully). There's some rubber lining inside the trapezoid opposite the setscrews.

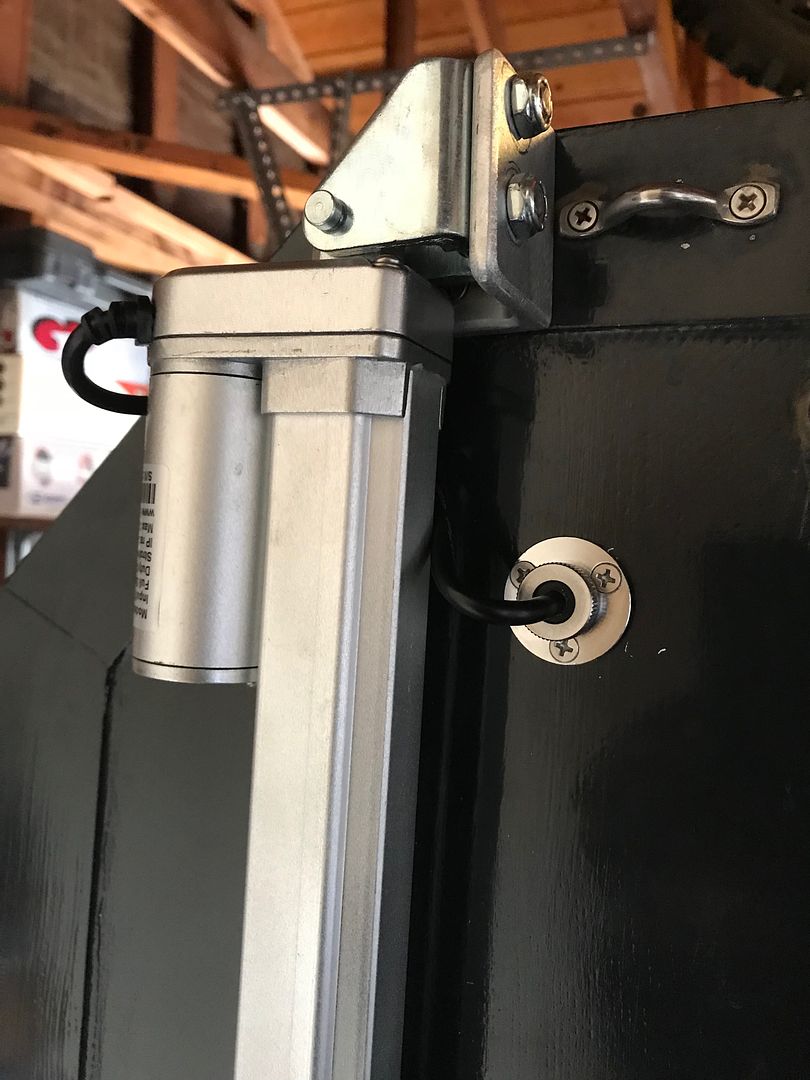
Upper mounts as before. Wiring passes inside through a "waterproof" thru-hull thingy.


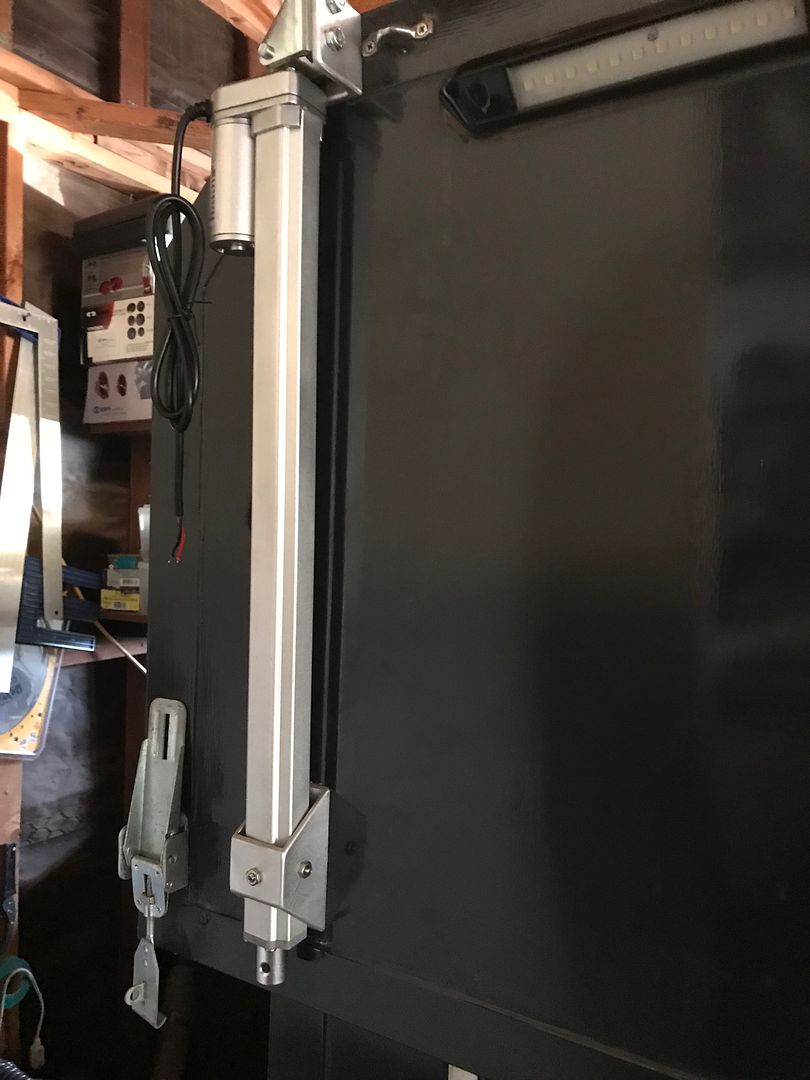
Final look is something like this.


Not too bad looking. Two more to mount on the front and lower brackets to finish up, then wiring, then testing, then camping!
 

CoyoteThistle

Adventurer
Got all four lifters mounted. Time for wiring. In my reading and research on these electric lifters, it seems that their speed is very sensitive to the voltage they see - important in a camper context as a longer wire run for a given lifter means more voltage drop so that lifter will be slower than other lifters with shorter wire runs. Getting things synched up can be a major pain for some builders. My first attempt at avoiding issues is super low-tech.

First, I used pretty heavy gauge wire (14 awg) to minimize voltage drop. Second, I wired the front two lifters separately from the back two through two different switches (for some manual control as needed). Third, for each pair of lifters (front and back) I ran a common 14 awg wire to a junction; from the junction, the length of wire to each lifter was the same (i.e., both should see the same voltage). The scissor lifters should help keep things going up straight side-to-side and front-to-back things can get pretty unequal before there is trouble. That's the plan anyway.

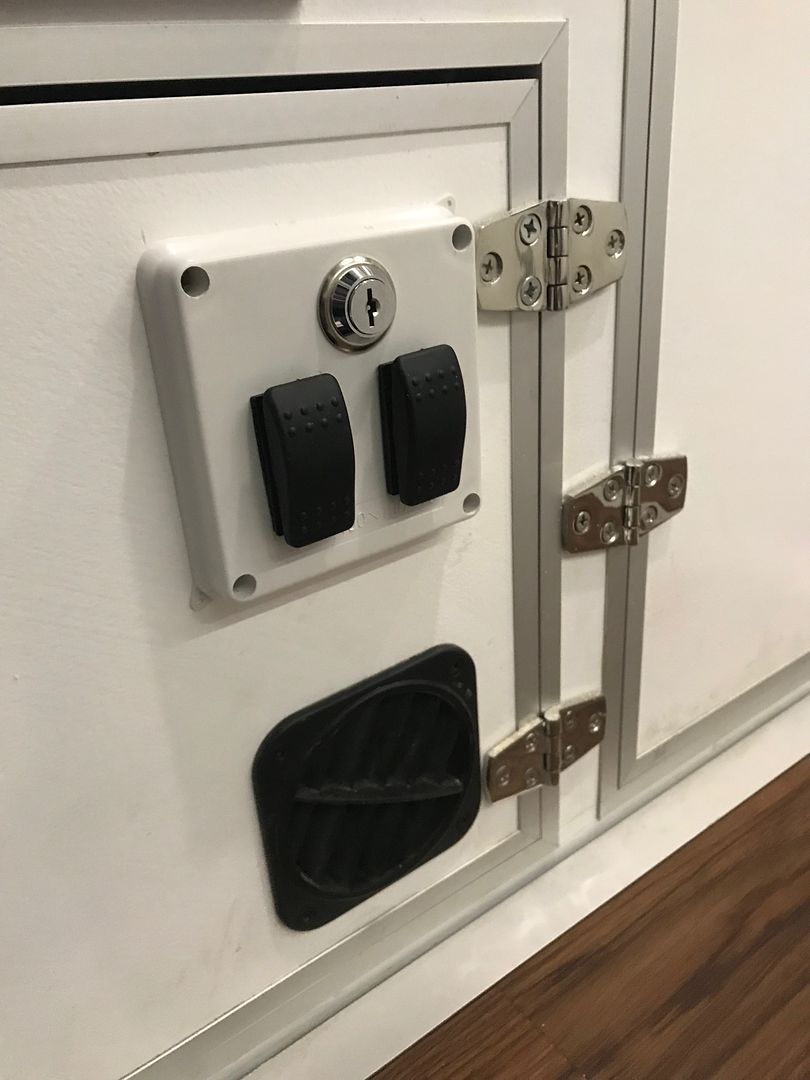
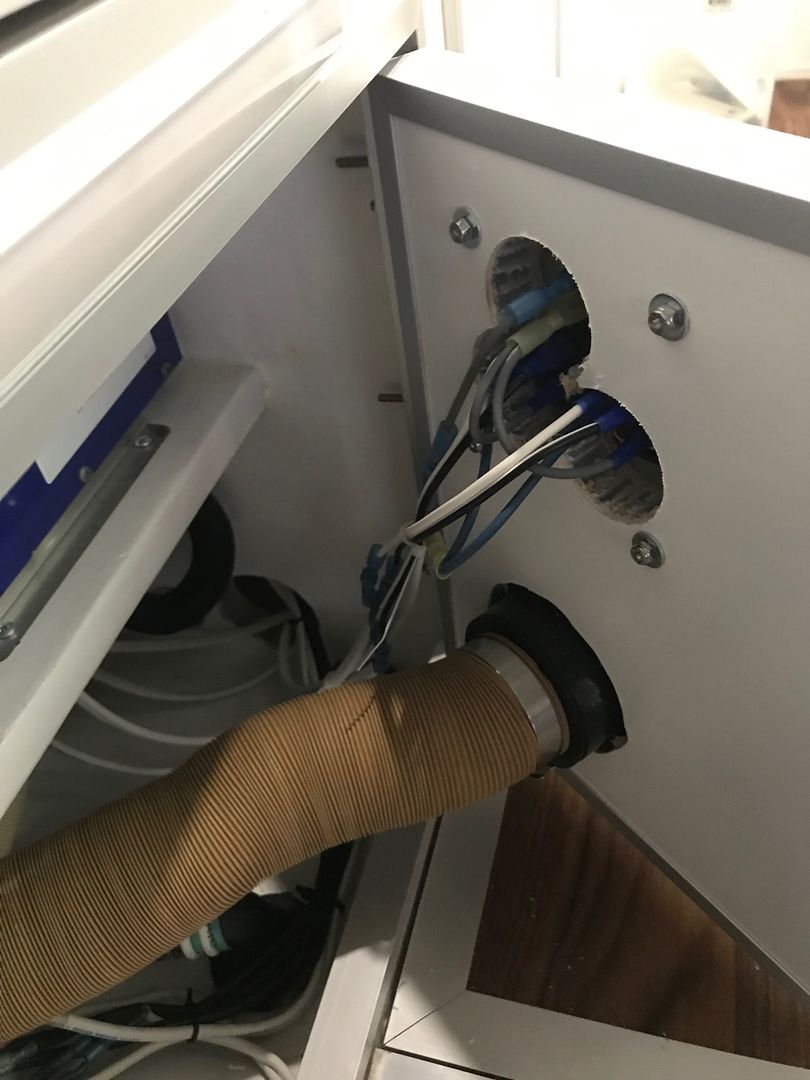
So, an afternoon of contorting my body to get back in to where the wiring goes, pulling the fridge out, drilling a new hole or two, and voila, wiring is done. Switch panel is mounted in the heater cabinet door.


Key switch is less for security, more for making sure that accidental movement is avoided. Switches are three way momentary for up and down, one for the front pair of lifters, one for the rear pair. Wiring back there looks like this.


This is already a strange cabinet door since it has the heater ducting going through it, figured some wiring wouldn't make it any more odd. This is a good location to get to the switches from outside the camper through the lower door too. Power comes from the main circuit breaker panel.

With the wiring done, I've just done a little testing. The front pair have a longer wire run so they should be a bit slower. So, of course, initial testing shows the front ones moving just a bit faster - ******?? Hopefully not enough of a difference to worry about, but still. Good news is each pair seems to be moving in almost perfect synch. This is with no load yet but at least that part seems hopeful.

Need some help from my lovely and talented assistant to get the front lower mounts finished up, then some real testing. Death Valley run over New Years weekend is the plan!!
 

CoyoteThistle

Adventurer
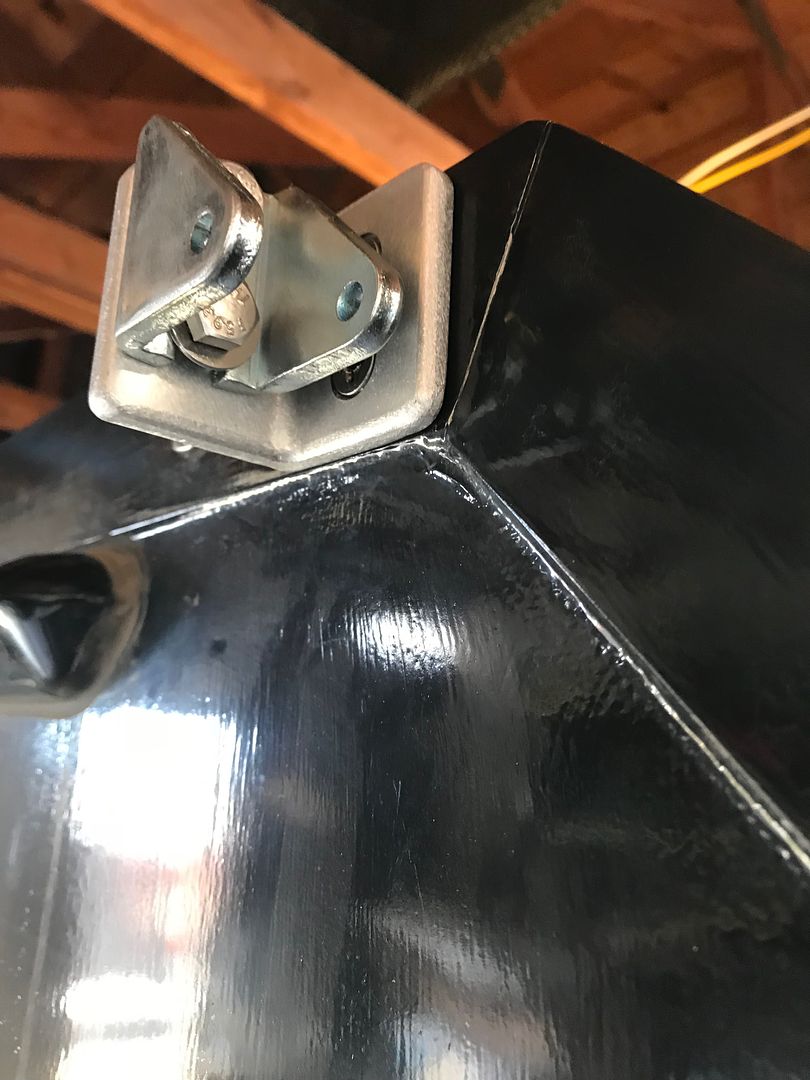
Front lower mounts installed. This is looking up from ground level at one.


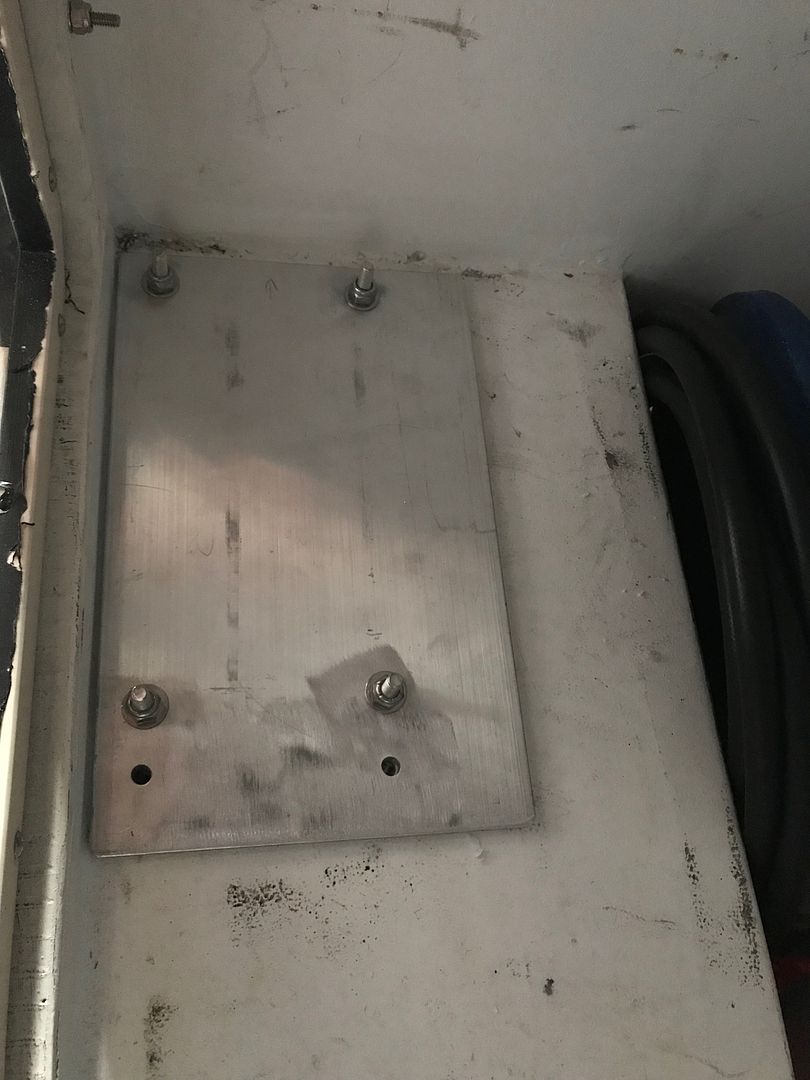
Just 1/4" aluminum plate thru-bolted. I know flat plate like this is not the strongest design so this is kind of a test to see if it seems strong enough or needs some reinforcement. Primary advantage of the flat design is that the mount/dismount jacks can still be used under the front corners. I used a largeish backing plate inside to spread the load.


So, with that done, it was time to see if it all works. First test was the lowering test (least stress). I did some up and down in the mid part of the travel range where the scissor lifts were still taking much of the load. It all seemed to work smoothly. No strange sounds suggesting stress or binding. Next, lowered it all the way down. Again, all seemed to be working as planned. Then a lift from the down position - the maximum stress test. Again, no drama at all and no unevenness or binding detected. I couldn't detect any deflection in the front lower mounts under max load so maybe they will work. Something I'll keep an eye on though. Too soon to declare victory, but so far I'm pleased with the results.
 

CoyoteThistle

Adventurer
Just back from four+ days off the paved roads in Death Valley. New lifters, lots of dust, miles of truly awful washboard roads, treacherous icy roads, high winds and lots of locked bathrooms. Where to begin...

Time to load up.
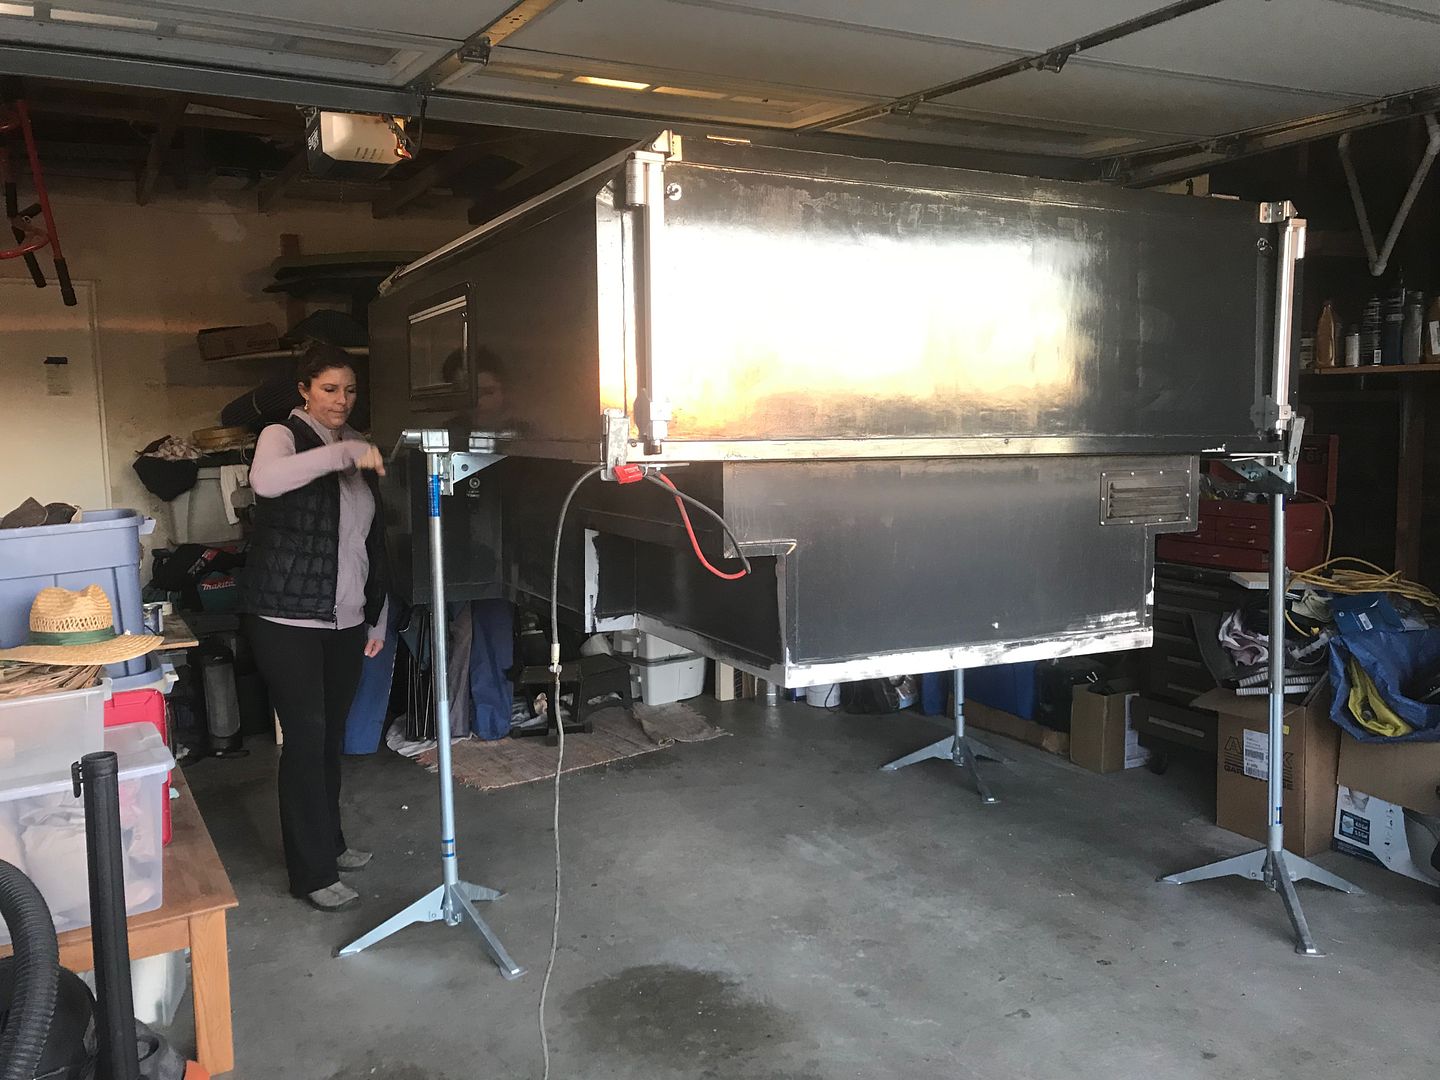

Here Sheri is even more scared than she looks – those jacks do not seem stable up that high, but they seem to do the job.

New for this trip is a roof basket.
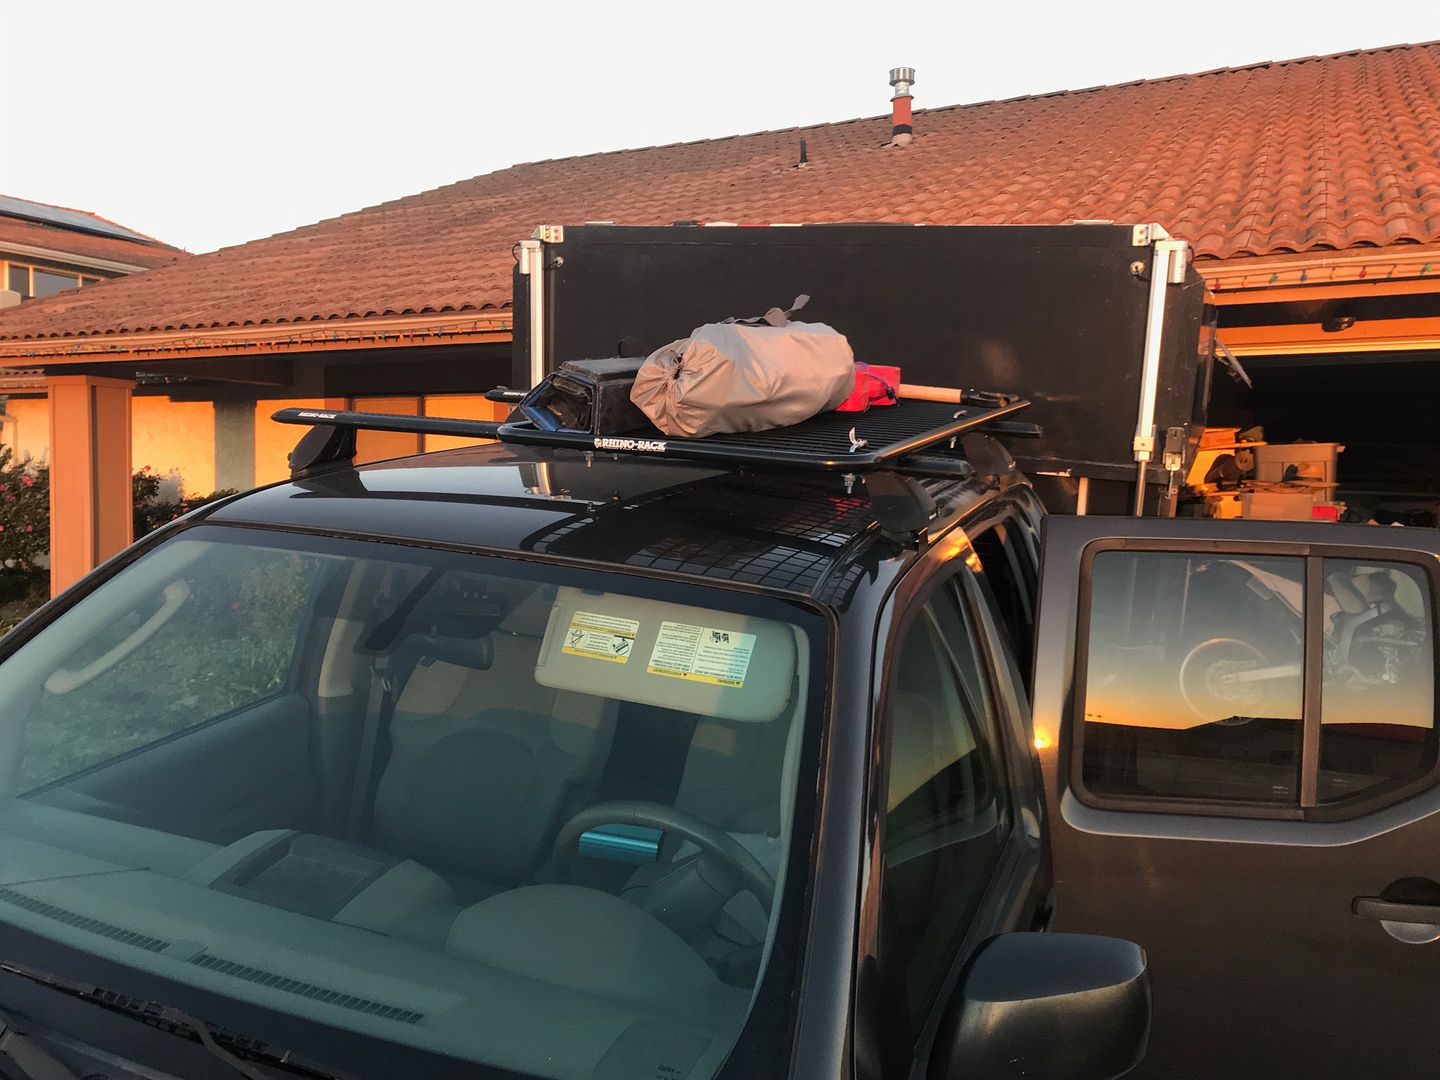

No taller than the camper when empty. Passenger side of the rack will be for skis or other stuff. The basket worked well to decrease back seat clutter.

Despite both having Friday off, we got a late departure; finally pulling in to Panamint Springs Campground just before 10PM. Our friends arrived much earlier and reserved a site for us, excellent! The electric lifters seemed very loud in the mostly quiet campground at that hour but it all worked as planned - set up and we were inside with the heater going and beers cracked in record time. I like!!

Saturday we drove up over Hunter Mountain. Our friends in a 2009 Tacoma TRD hadn't done much wheeling so they were getting the feel of steep and rocky roads and having a blast. We all enjoyed epic views and great pinyon-juniper forest up to about 7,000 feet.


We checked out the local accommodations (Hunter Mountain Cabin) but decided risk of inhaling some Hanta Virus was exceedingly high so moved on after signing the quest register.

Coming down the more-or-less north-facing side of the mountain, we encountered several patches of snow/ice. Eventually, we saw three old (early 60's??) Land Rovers pulled off the road with lots of gear strewn about. A guy came up towards us over a steep icy patch of road waving his arms. Seems while coming through this patch, one of the rigs in the party started to slide, lost steering and tipped over. All were okay and they had already winched the vehicle up and out of the road. We offered assistance but they had it all well under control. They had tossed some dirt on the ice and gave us some advice on the safest line and we proceeded without issue. Squeezing by the three rigs as we carried on down the mountain, we looked in to some rather traumatized looking faces belonging to some of the children in the Land Rover party. Don't blame them, must have been scary stuff.

A few side trips to old mines and cabins and eventually down to Teakettle Junction. Lots of teakettles.
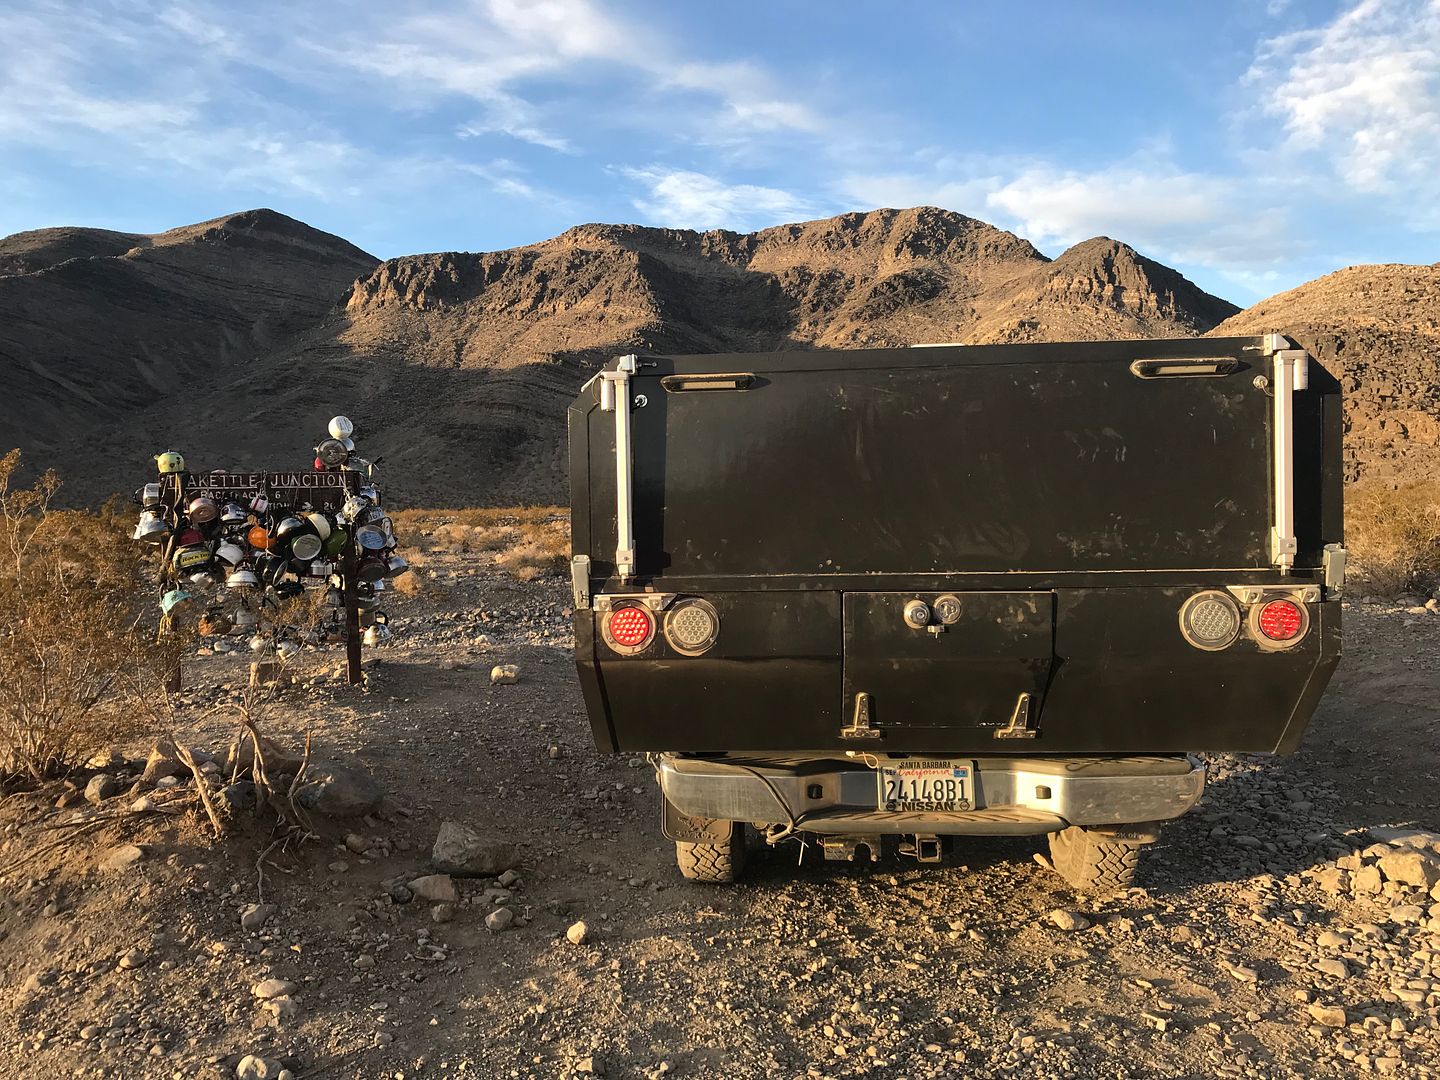

Here we pick up the road to Racetrack Playa - a notoriously rough washboard road. It lived up to it's reputation. I was constantly watching my mirrors to make sure the camper was still there - no speed seemed to help smooth out the bumps so we just rattled violently along. Reached Homestake Dry Camp just before dark, squeezed in to a site - about 10 other rigs spread out in the area. Checked the camper mounts and all seemed well. Set-up was again a breeze. Cold night but we slept well thanks to the heater.

Spent the next day hiking to some nearby mines and other nearby sites of interest. Pretty well preserved leftovers from a WW II era lead mine. All of the vertical and horizontal shafts had been blocked off by the NPS with heavy cable nets, many of which have subsequently been cut to allow access. The nets keeping folks out of the seemingly bottomless vertical shafts like the one below this structure were thankfully still intact.


Hiking back down towards camp, we saw that everyone else cleared out of the camp and we had it to ourselves.
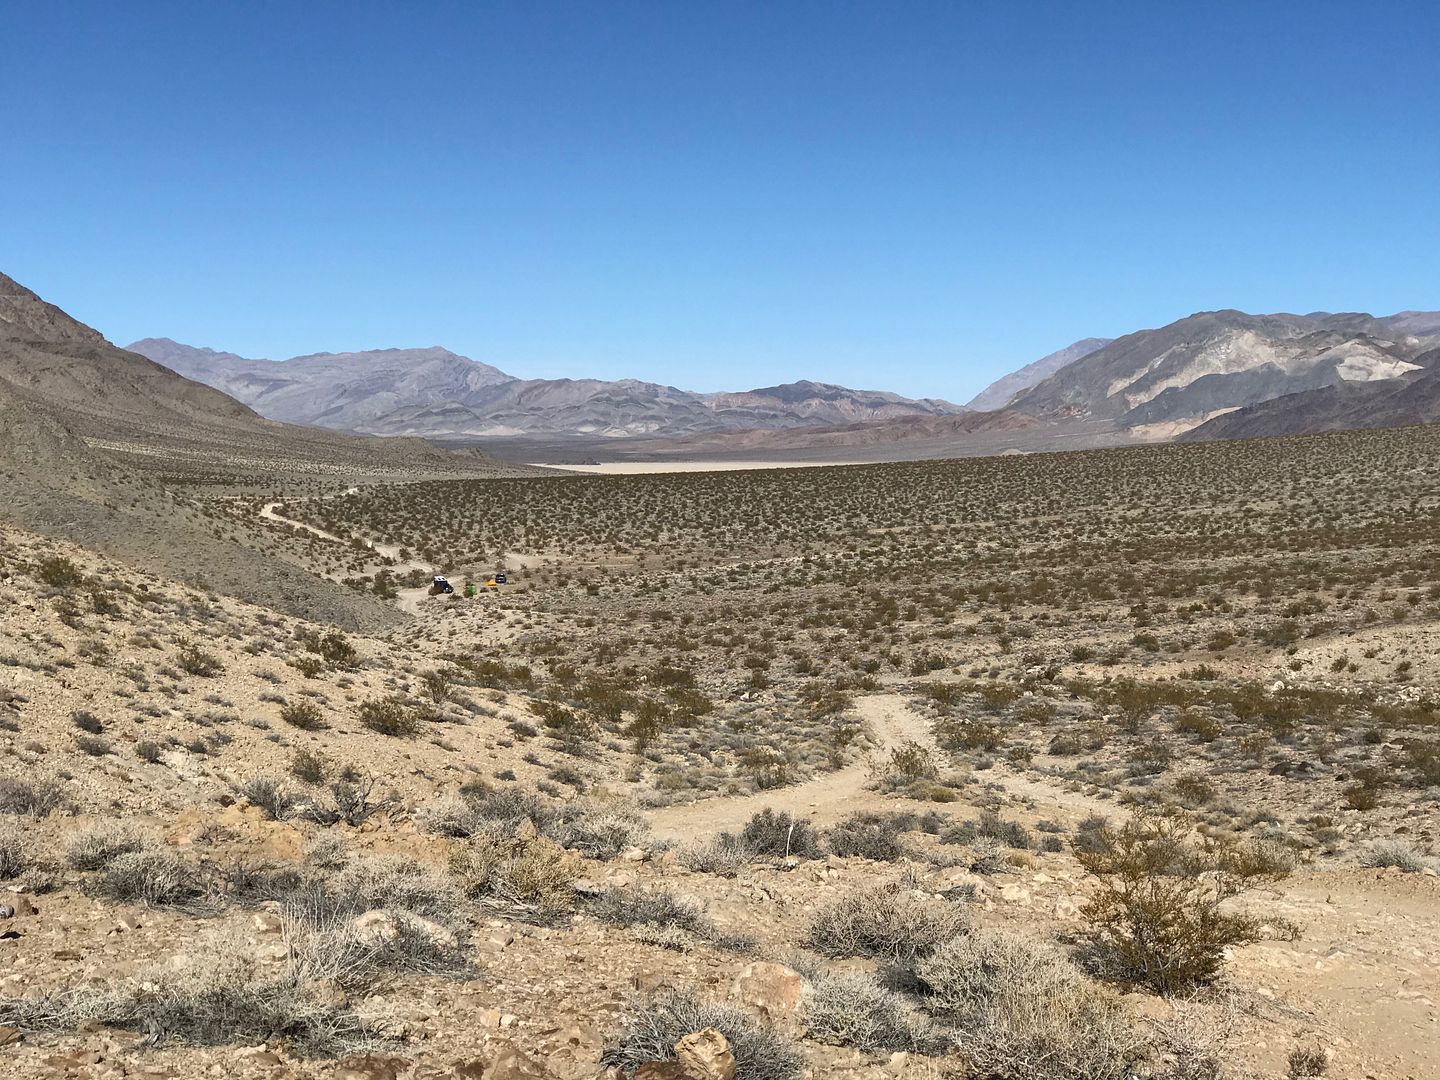

Can you spot the Pro-Rig? Pretty good solitude for a National Park.

A scramble up a rock formation led to more epic views.


Found some cool fossils in the rocks here but the sun was getting low so we headed back to camp for dinner and sleep.

The next morning we visited the famous Racetrack Playa "sailing rocks". Always a cool site to see.


We headed back out Racetrack Road for another hour+ of washboard suffering.

Quick stop at Ubehebe Crater.


Inspected the camper mounts again here and was very happy to see that all was totally secure and nothing seemed to be moving. Ended the day with a run down Titus Canyon. The late afternoon/evening light was amazing. View from Red Pass


Quick stop at the ghost town of Leadville and the last light of the day
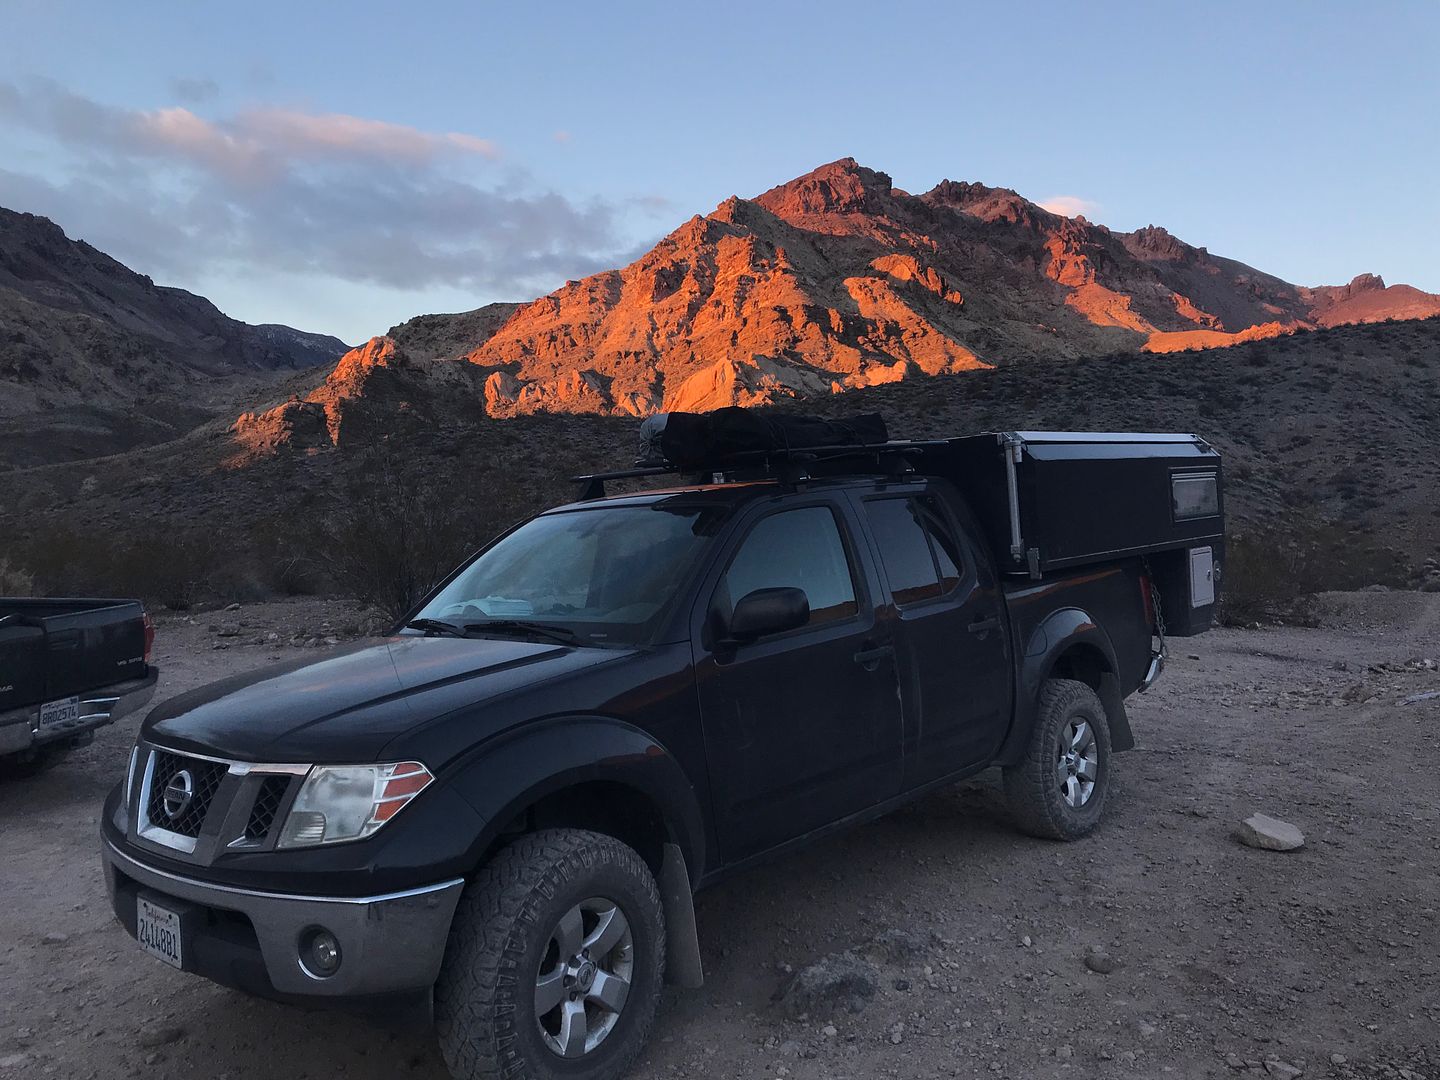


Then we finished in the dark. Good stuff.

Landed at Mesquite Springs Campground so we could have a New Years Eve fire. Though officially not open due to the government shut down, there were quite a few rigs in there and it was free - bathrooms were locked up though as they were through much of the park. We gave the porta potti a real test this trip. Had a fire despite the high winds and cold temps and made it to "Central Time New Years" (10PM local), popped the champagne, then crawled off to bed.

Slow start in the morning but got the trauma of the porta potti clean up out of the way at the dump station - much better place to do this than the bathroom at home. Did a last hike up the lower narrows of Titus Canyon (that we drove in the dark), nice way to end the adventures.

While eating some lunch at the mouth of the canyon, we had an interesting talk with an NPS ranger about the government shutdown. He is "essential" so he's working and hoping to get paid eventually. I pressed him a little for an insiders opinion and he opened up a bit - what seemed to gall him the most is the significant waste of money it was costing the government to pay all the NPS employees to "shut things down" and then eventually "re-open" them, he had several projects halted in mid stride that would have to be started from scratch (more wasted time/money), etc., etc. All the while the park was generating no revenue from camping or entrance fees (despite a lot of us entering and camping). His commentary was decidedly apolitical, but his frustration was pretty real.

Stopped in Stovepipe Wells to air up the tires and then headed towards home.

Camper summery:
- Love the new lifters, they worked just as hoped and made set-up WAY easier. I have a few minor upgrades to add to them mulling around in my head now.
- I have more confidence than ever in the current mount system - there was a lot of very rough driving on this trip and nothing moved.
- I always expected the seals around the back door would allow lots of dust to get in - I know I don't have a perfect seal but there just were no dust issues inside despite lots of miles of dusty roads.
 

CoyoteThistle

Adventurer
Since the lifters seem to be working, I went ahead and took the next step. Three goals: 1) use the actuators to hold the slide-up firm at the full up position, 2) use the actuators to pull the slide-up down (against the springs on the scissor lifters), and 3) use the actuators to secure the slide-up in down position during driving.

Current designs for this aren't especially elegant, but I want to see how the concepts work before getting too fancy. Here's the solution to the first goal:


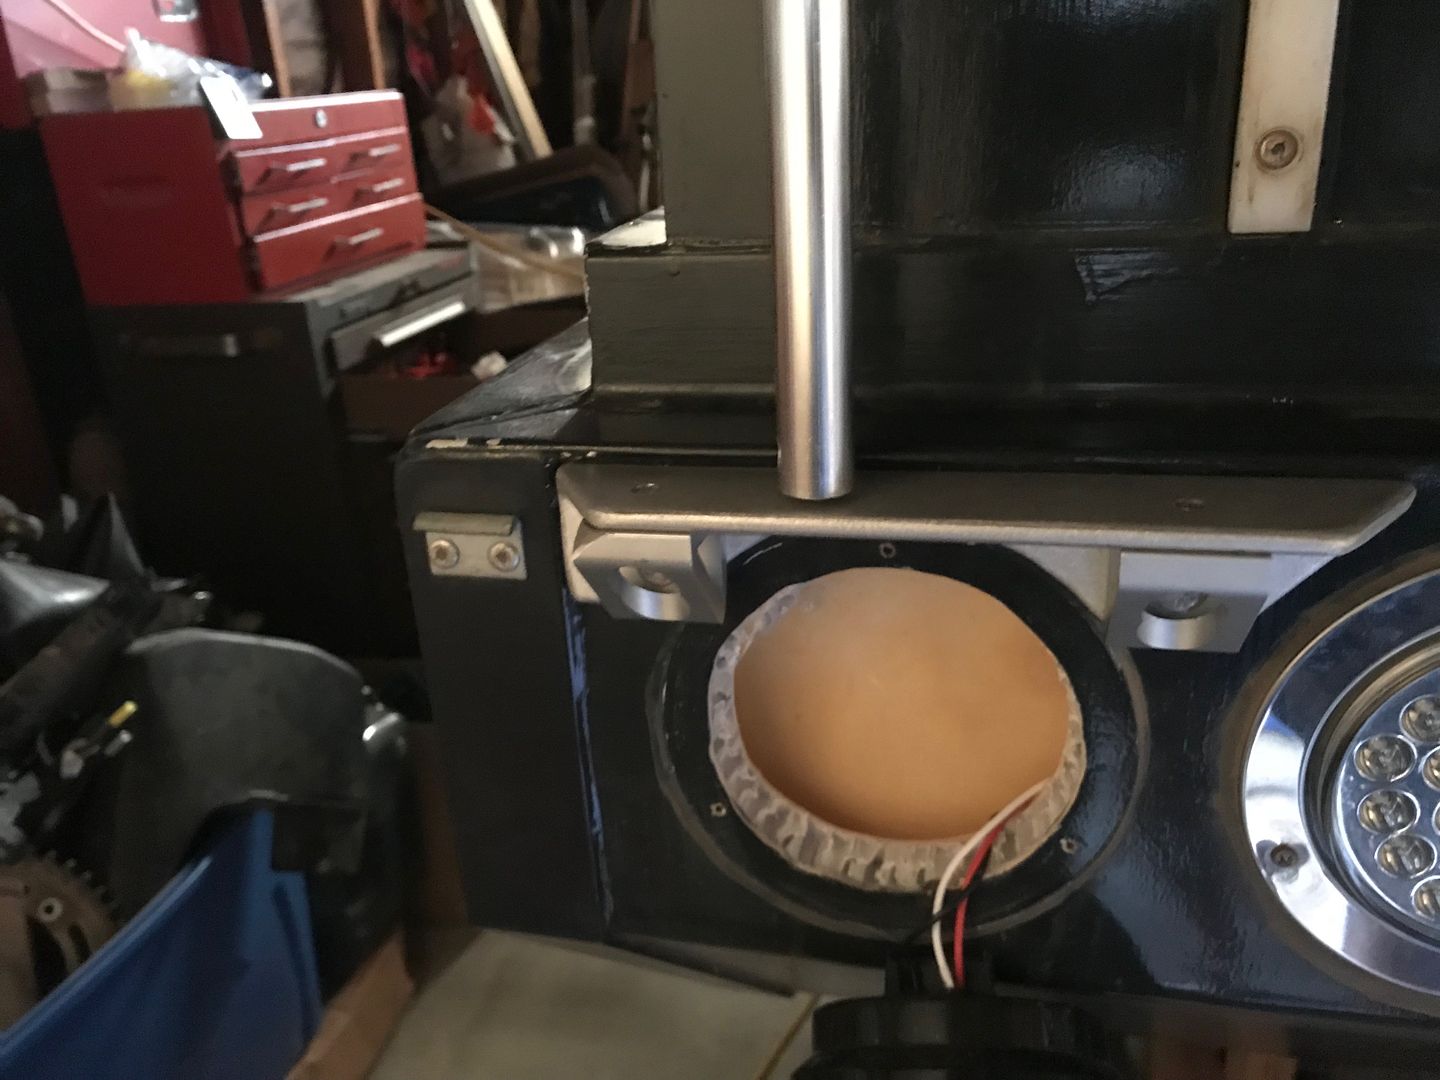
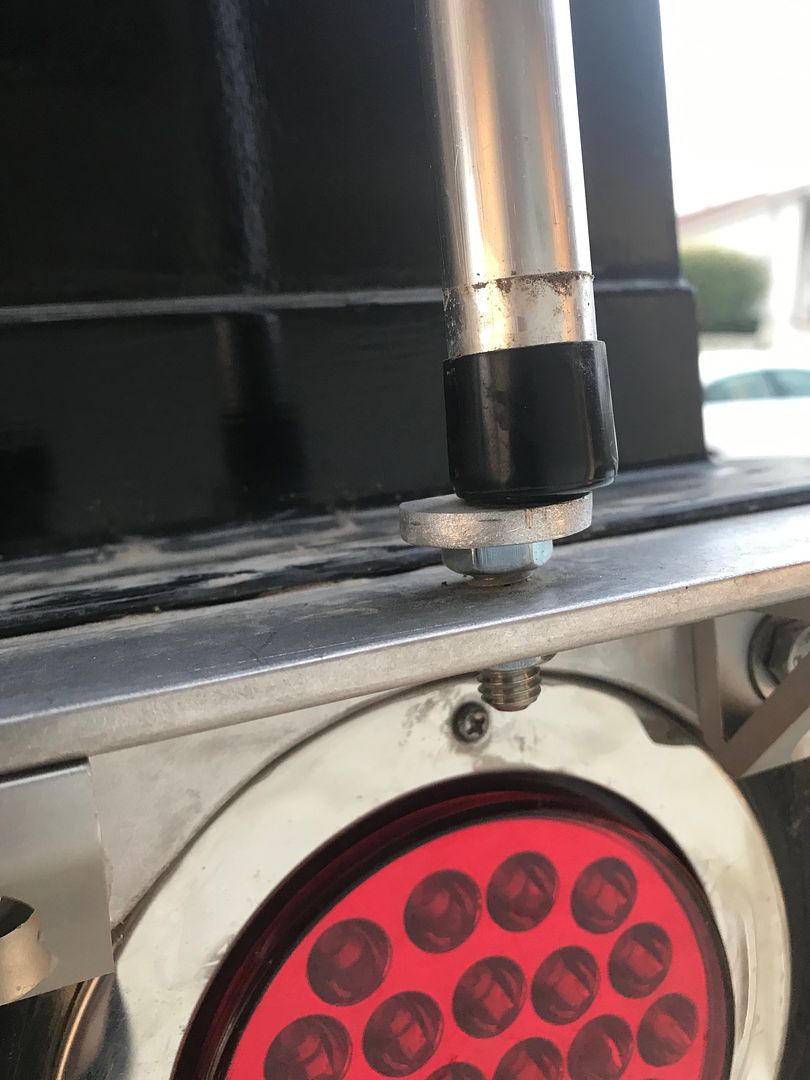
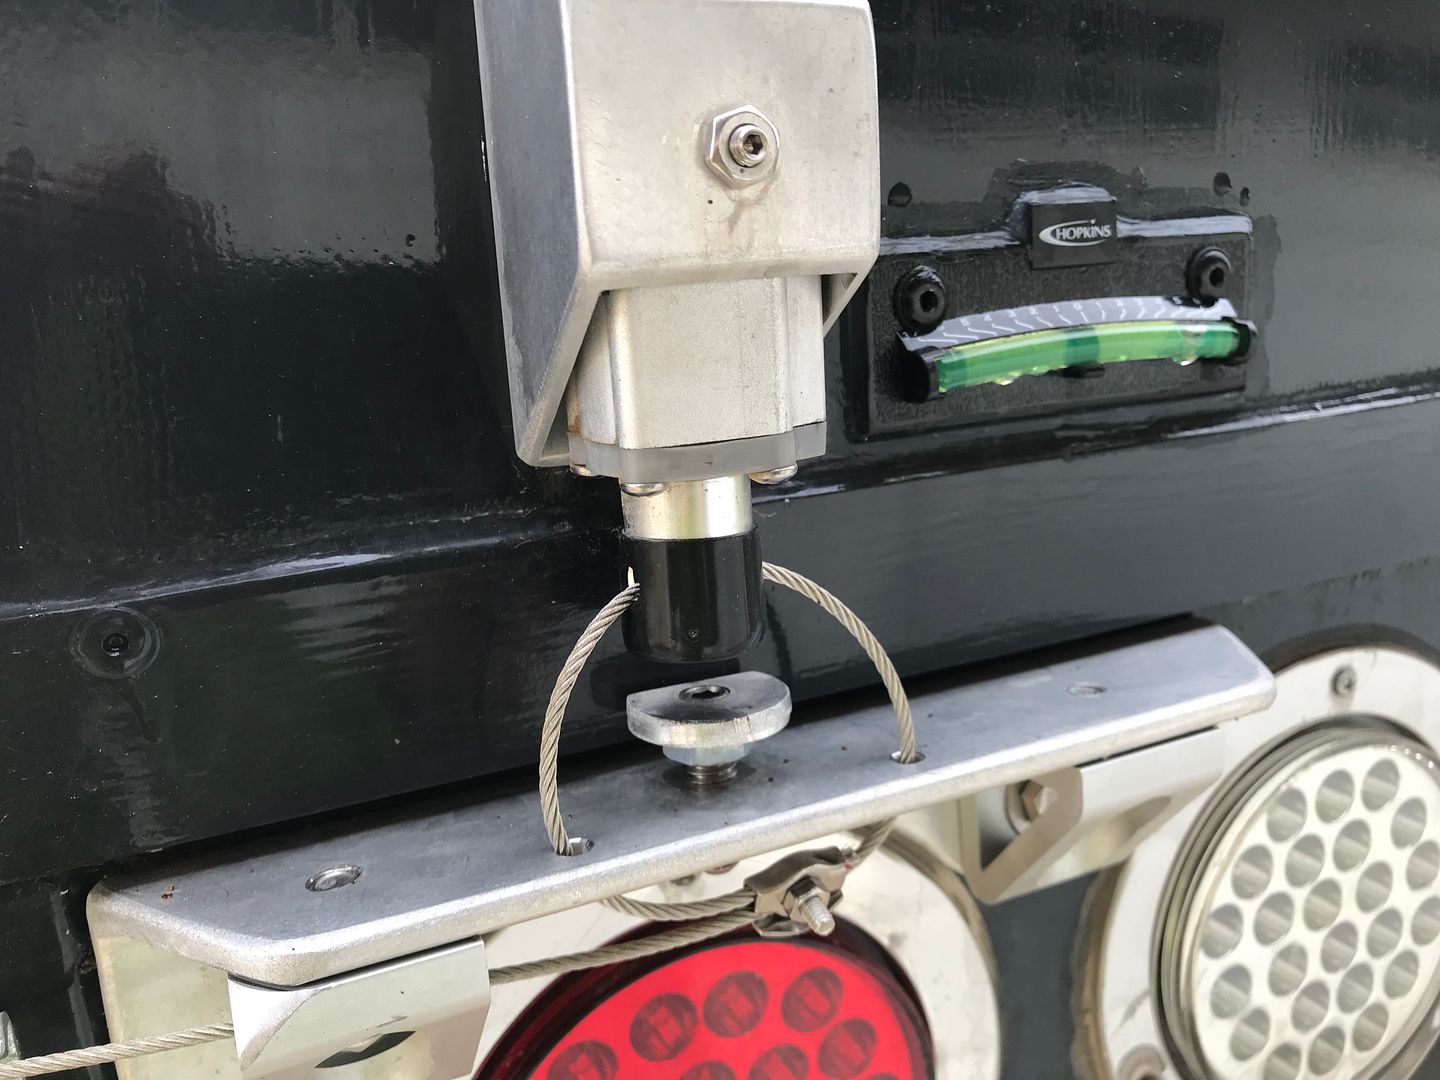
Aluminum disk, set screw and jam nuts. The disk is threaded and the jam nut holds it in place. This is the platform for the actuator to land on. The lower mount on the camper is threaded and the set screw is adjusted at this point to get the right amount of compression on the seal between the slide-up and main camper body at full actuator extension. A second jam nut underneath locks it all in place. One at each corner, all adjusted just right.

For goal two and three, this is the design:


A short length of stainless wire rope. This pic is the down position with just a bit of tension on the wire. Slide-up cant go up unexpectedly with these (don't know how it would but, just to be safe...). When lowering, these catch and pull the slide-up down the first 12 inches or so, then the weight of the slide-up overcomes the springs and it drops the 1/2" or so and the actuators then control the descent from there.

It seems to be working as designed so far. If it continues to perform well, I can remove the big (ugly) latches on the four corners
 

CoyoteThistle

Adventurer
Enjoying some more time to work on the camper lately. Couple other little projects completed.

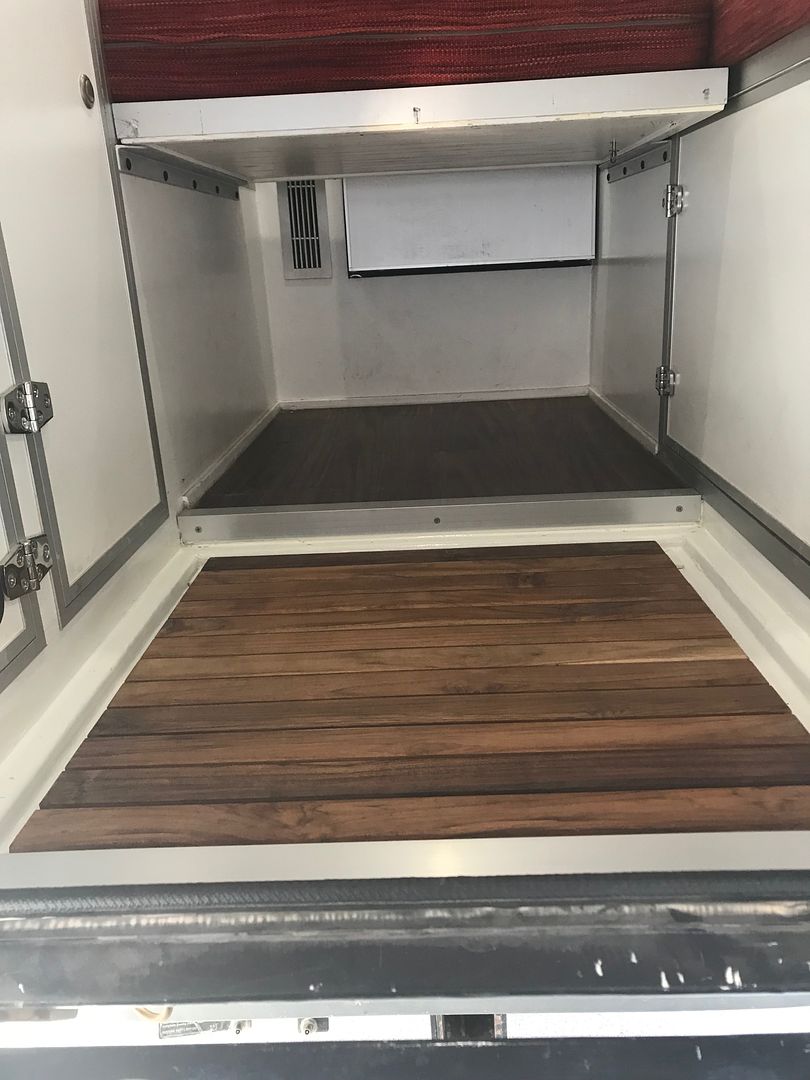
First is an alternative sleeping setup. It utilizes the trapdoor for the shower to bridge the gap between the seats to make a "low bed".


This is looking forward from the entry door. Some aluminum angle attached to the fronts of the seats/cabinets. These support the trapdoor. The cushions then fit in to make a 70-inch bed. I'm about 70 inches tall but laying on a diagonal, I fit just fine with room for a pillow and such.


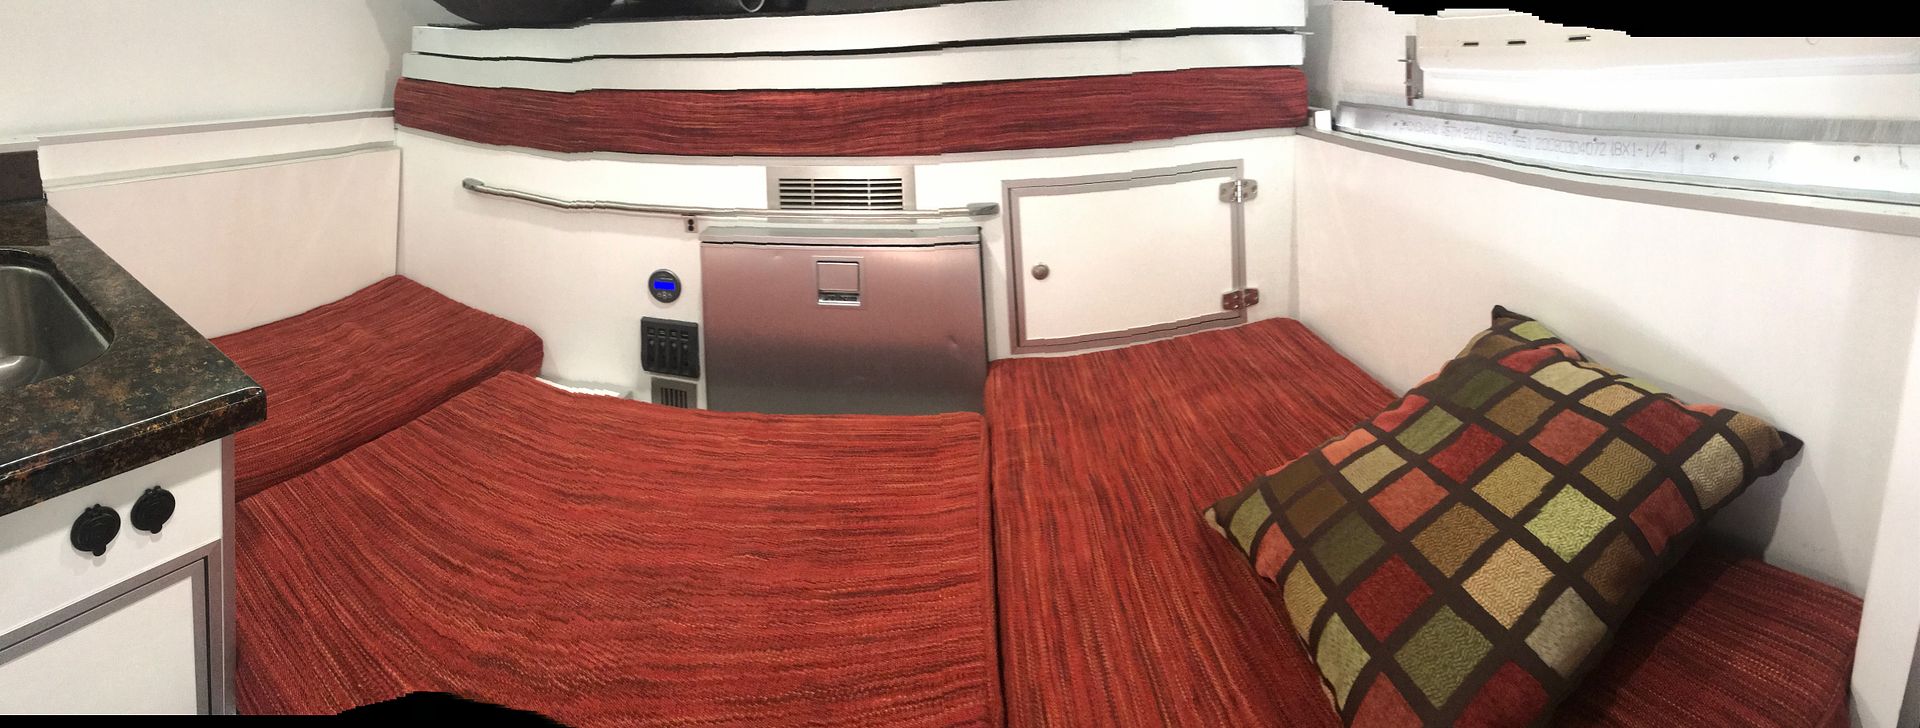
Slightly distorted panorama, but I think you get the idea. This sleeping arrangement is only for solo trips. I can leave the main bed platforms at home for simplified setup. Also, when sleeping with the pop-top down (wet/snowy weather),this lower position will be much more comfortable; room to sit up and such.

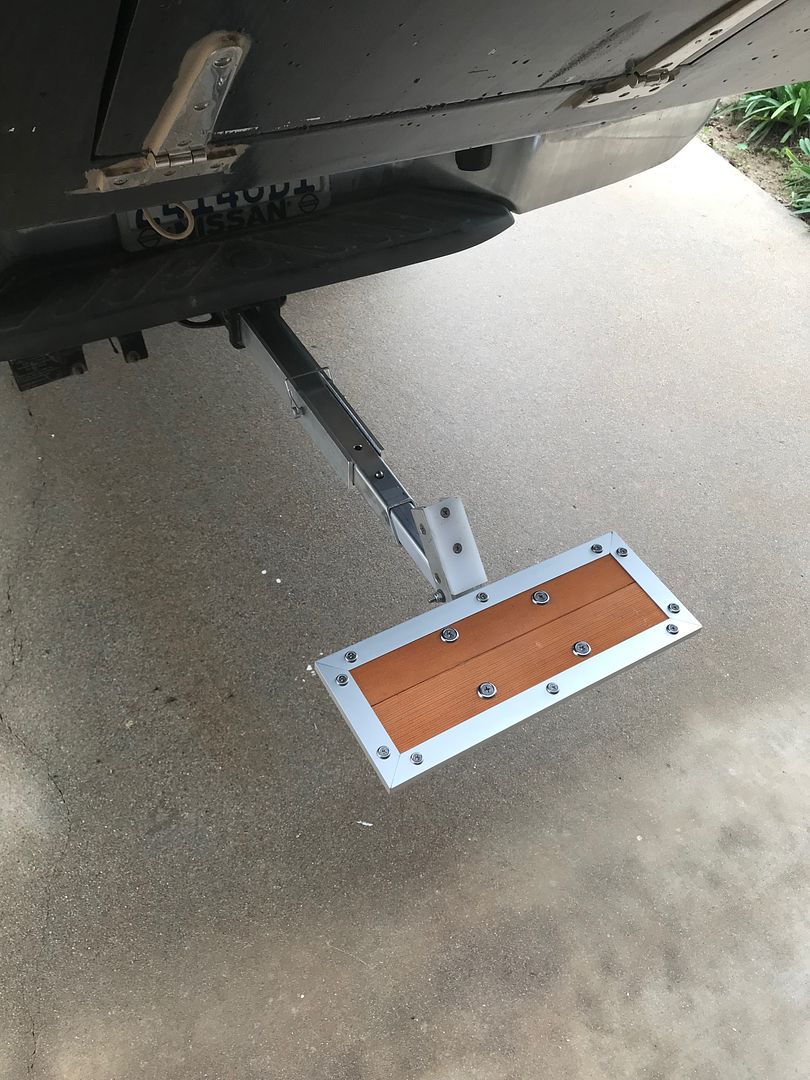
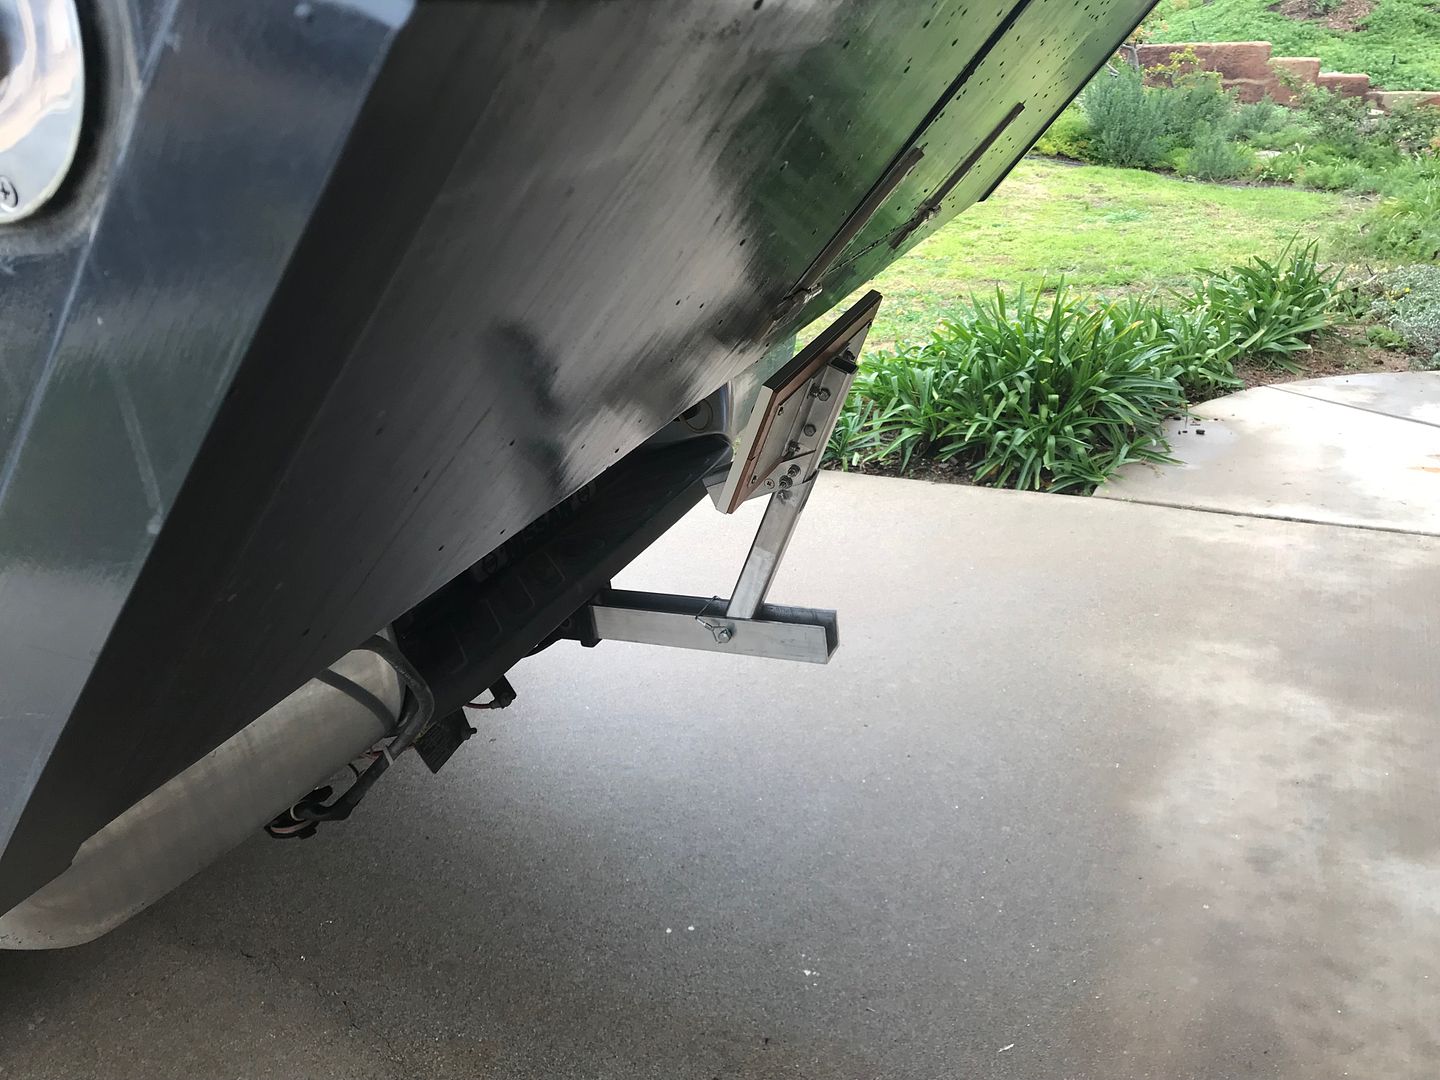
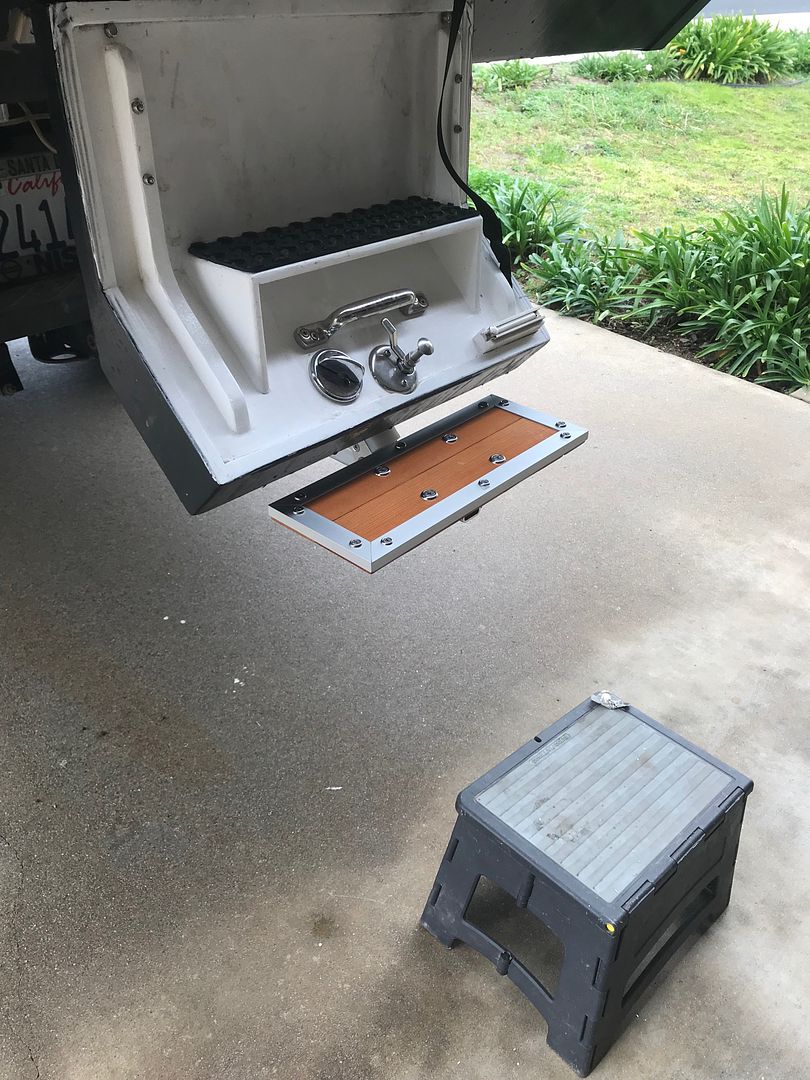
Next project was to re-design the rear step. The old one telescoped but had lots of flex. New design uses the same step but a more rigid extension from the receiver hitch.


Similar to before but instead of telescoping all the way in/out, this one telescopes a bit and then folds up like so for travel:


If off-roading, the whole apparatus would come out to avoid dragging it. Here it is in use:


Step in the lower door seems real solid with this setup. Some real-world testing to ensue, will report back...
 

ITTOG

Well-known member
Great build. I enjoyed reading through it. I use a cargo trailer so I don't need to build as much as you but may look into using the laminated panels to build some shelving. Did you build any drawers? if yes, did you use the panels or solid wood?
 

CoyoteThistle

Adventurer
Great build. I enjoyed reading through it. I use a cargo trailer so I don't need to build as much as you but may look into using the laminated panels to build some shelving. Did you build any drawers? if yes, did you use the panels or solid wood?

Thanks man, glad you enjoyed it! For my one drawer I did use plywood (1/4" IIRC) and I glued a honeycomb core panel to the front just so it matches the look of the rest of the cabinet doors.
 

ITTOG

Well-known member
Did you give any thought to using fiberglass on all the outside corners instead of aluminum? It doesn't seem anyone does that but I haven't figured out why.

If I ever build something that would be my plan. If I feel more strength is required I would lay down sheet metal first and then glass.

Sent from my Pixel XL using Tapatalk
 

Forum statistics

Threads
188,276
Messages
2,904,787
Members
229,805
Latest member
Chonker LMTV
Top