Project Flift, a 1986 Four Wheel Campers Fleet shortening documentation thread!

Atl-atl

Adventurer
Gotta show off my latest project. Quite time consuming but turned out perfectly on the first try! The material is carhartt colored duck cloth. Same as I used for the couch cushion. I got an 80x60" piece of 4" thick medium density foam from a commercial foam place in town and trimmed it to fit the bed area. Then built the cover from scratch. It has 8 feet of zipper going one foot past each corner on the back(front of the vehicle) of the mattress so it can be removed and cleaned if necessary. Ill get better pictures inside the camper in the daylight tomorrow but I had to throw it in and put a light in there so I could test it out! The interior is really coming together...finally.

32981974018_f86cee69f4_b.jpg


39892373653_0912820b86_b.jpg


32981973688_05122c6e5f_b.jpg


32981973638_736f8e99e2_b.jpg


32981973608_5399f662cc_b.jpg
 

Atl-atl

Adventurer
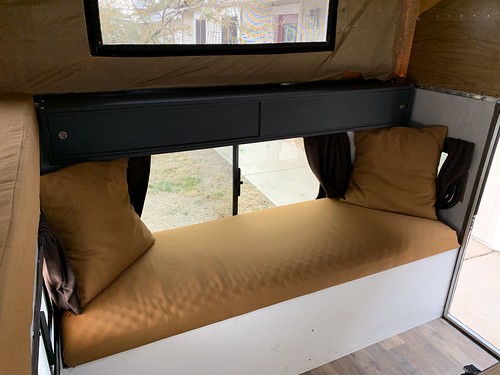
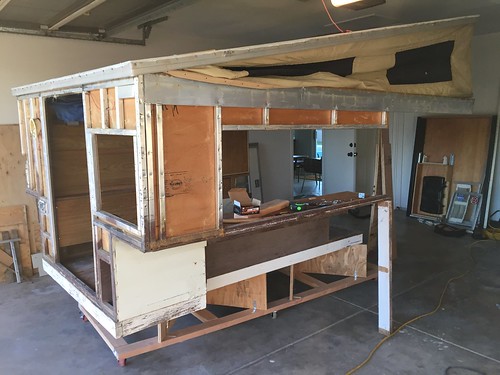
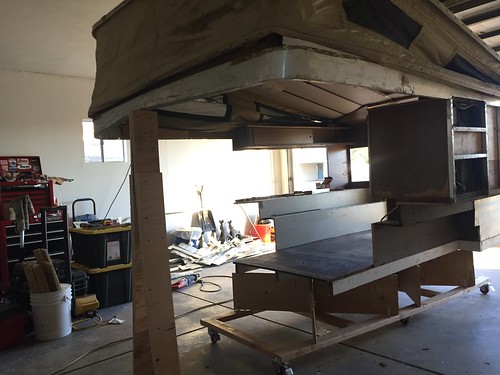
After installing the mattress it was clear that my conduit lift mechanism wasnt going to work. It mounts too low and wouldnt let the roof down far enough. I was planning on putting some bead board on it to make it look better but we'll just be realistic here and say it looked like crap and was never going to look good HAH! Instead of redoing it I decided to try rebuilding the lift panels using that factory spring loaded piano hinges. So I dove head first into researching lift panel rebuilding and went to town. Thankfully my rear lift panel is still intact and functioning correctly so I have a working unit to measure and confirm hinge placement etc. My local Lowes actually stocks 5mm thick, 4x8' sheets of sanded, one-side primed Poplar plywood and its only $17 per sheet!!! Talk about blown away. I feel like I need to buy a whole bundle for future use.

Removing the rivets from the 3 hinges might have been the single most painstaking task of this whole remodel. It took me 5 hours to get all of them out and get the hinges straightened/flattened and back into working order...holy ********.
39924927063_08a84bff3f_b.jpg


46837894712_6025104615_b.jpg


46837893092_014fc24f3d_b.jpg


46889844681_46147ec2d0_b.jpg


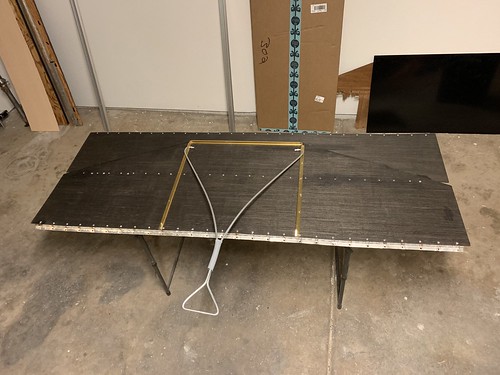
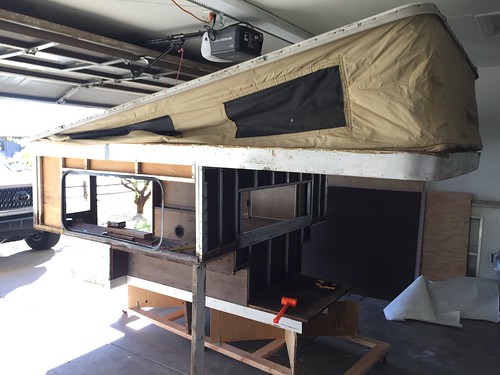
I had them rip the plywood at Lowes to the same height as my rear lift panel pieces. Then I traced the old shape onto the new plywood, taped the cuts and cut the remaining bits with a circular saw. It worked out quite well. I sanded and stained the panels with Minwax 2718 Ebony. I had one chip that I glued so I havent stained that little bit but it turned out really well otherwise. Im thinking about redoing the rear panel just because I like the look of this one.

46837894332_97dd33b32e_b.jpg


39924926233_82ff3bfe41_b.jpg


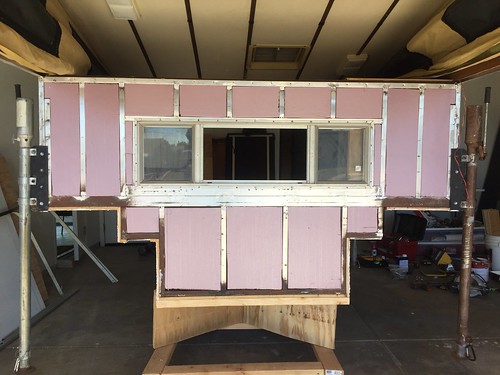
I need to find some different rivets that are the same 1/8" shaft but with a larger cap. These just look too small, like they will pull through the panel.
33014537648_2551c29857_b.jpg
 

Atl-atl

Adventurer
It sure doesn't look like much but this might be my most proud moment of the remodel. If I were to do it all over again I would use new piano hinges. They got so beat up removing all the old rivets it made for an extremely difficult time reinstalling new rivets. It took 3 full days to do this one panel, from getting the hinges off the old panels to finishing the new panel. Id wager that starting with all new parts I could build one of these in a few hours.

Hopefully its the correct height HAHAHAHA

46912809661_8f16fa98cb_b.jpg
 

Atl-atl

Adventurer
Work work work, camper camper camper...Almost done with the interior, only 12 items left on my to-do list hah.

Finally got the under counter area buttoned up to a point Im happy. Took a long time to redo the supporting structure for the counter top and have it work correctly with the cabinet face. I bought some sheets of ABS plastic that I was going to make a new face out of but decided against it. I wound up sanding and re-painting the existing cabinet face and then installing it much more securely onto the new cabinet structure. Also I strapped down the water tank so I don't have it coming loose and leaking again! Also also I got the water pump working!!


31981248637_a00407a98e_b.jpg


Next up I decided to strip, sand and paint the upper storage thingy that goes above the couch. I wasnt going to use it but decided I will. It was falling apart and needed a lot of work. Painted it the same color as the cabinet face. That was most of todays project.
46922398941_50c197b068_b.jpg


33047047938_b24fe4f399_b.jpg
 

BajaSurfRig

Well-known member
Gotta show off my latest project. Quite time consuming but turned out perfectly on the first try! The material is carhartt colored duck cloth. Same as I used for the couch cushion. I got an 80x60" piece of 4" thick medium density foam from a commercial foam place in town and trimmed it to fit the bed area. Then built the cover from scratch. It has 8 feet of zipper going one foot past each corner on the back(front of the vehicle) of the mattress so it can be removed and cleaned if necessary. Ill get better pictures inside the camper in the daylight tomorrow but I had to throw it in and put a light in there so I could test it out! The interior is really coming together...finally.

32981974018_f86cee69f4_b.jpg


39892373653_0912820b86_b.jpg


32981973688_05122c6e5f_b.jpg


32981973638_736f8e99e2_b.jpg


32981973608_5399f662cc_b.jpg
Do you leave the mattress up top while the camper roof is down? If so do you have any mold issues?
 

Atl-atl

Adventurer
Do you leave the mattress up top while the camper roof is down? If so do you have any mold issues?

I havent camped in it yet so I cant answer your questions yet! I plan to leave it up there at all times. I live in Arizona though and the camper lives in my garage. Id wager I wont have any mold issues. But I purposely made the mattress cover removable so it can be cleaned.
 

Atl-atl

Adventurer
TONS of stuff came together today! Installed the new lift panel, what a huge pain in the ass. Its still not totally done but its holding up the roof. Its a little too tall so I need to figure some things out. Installed the fixed up storage compartment over the couch. Installed the remaining bits of the cabinetry that I repainted. Sewed some throw pillows out of scraps from the mattress cover fabric. Needs a different touch though.

Almost done, planning to camp Feb 8-10, then Ill probably list it for sale hahahaha.

46881214832_b18f003bf3_b.jpg


46881214342_7cc55c1640_b.jpg


33057976698_478b43bdbe_b.jpg


39969026823_77069ccd87_b.jpg
 

Bob joe

New member
I don't know if I missed it while reading your build. but was all the factory welds on the inside of the frame or the outside? Looks really nice
 

Atl-atl

Adventurer
I don't know if I missed it while reading your build. but was all the factory welds on the inside of the frame or the outside? Looks really nice

Most of the welds were only one sided and on the outside of the frame. Some were two sided but surprisingly few. Im not sure if this is to allow flex, save money/time or what. Ive never seen the frame of a modern FWC to know if they still do it this way.
 

Bob joe

New member
Most of the welds were only one sided and on the outside of the frame. Some were two sided but surprisingly few. Im not sure if this is to allow flex, save money/time or what. Ive never seen the frame of a modern FWC to know if they still do it this way.
Thank you I'm about to get the same one. Really nice to see one taken apart before I tear into it. The plywood on the over hang where the bead is looks like it's just resting on the lip of the frame? And the floor pack looks like it's just screwed into the aluminum frame? One length of plywood front to back for each peace of the Floor pack
 

Atl-atl

Adventurer
Thank you I'm about to get the same one. Really nice to see one taken apart before I tear into it. The plywood on the over hang where the bead is looks like it's just resting on the lip of the frame? And the floor pack looks like it's just screwed into the aluminum frame? One length of plywood front to back for each peace of the Floor pack

Nice! Yeah the plywood for the cabover just rests on the lip of the aluminum frame. Since I modified mine so much I couldnt find 3/4" plywood in big enough sheets to use a single piece. Mine measures 78x52. I found a local lumberyard that had 96x72 sheets of 5/8" but I didnt know if it would be strong enough to support two people up there. Also it would be extremely difficult to get into place in one piece. I wound up using two sheets and silicon-ing the seam.

As for the floor, yes its one sheet of 3/4" and its attached to the aluminum frame at the front and back. Then its attached to the wood sides.

Please ask any questions you have during your project!
 

Atl-atl

Adventurer
Ad from wtw

Ive decided to sell my 1986 Fleet so I can buy a new one. Everything was done by me. It has been shortened 20 inches to something along the lines of a current gen Swift. Fits inside the bed of a long bed 2nd gen or 3rd gen Tacoma with the tailgate closed. Most of the "popped up" pictures are from before I installed the new front lift panel so the soft sides dont look taught. All the work was done by me. It has hundreds of hours into it, everything works. Build thread is over on expedition portal, just ask. Ill gladly talk at length to anyone seriously interested. 12,000 btu furnace, 3 way fridge/freezer, 12v and 120v shore power etc. Located in Phoenix AZ.

$7500obo
https://phoenix.craigslist.org/nph/rvs/d/phoenix-1986-four-wheel-campers-fwc/6816502773.html


Before and after pics
46881802852_1ac19e6c44.jpg


46933893961_c8f902ac3f.jpg


Misc. pics, I have hundreds more.


[video]


46881214342_7cc55c1640.jpg


33057976698_478b43bdbe.jpg


39969026823_77069ccd87.jpg


46912809661_8f16fa98cb.jpg


31981248637_a00407a98e.jpg


45983541994_7ed085493d.jpg


32802367298_df16c1d6a0.jpg


45762407135_d378dd7c27.jpg


39712662383_0fb58db680.jpg


46060215721_f29ee0f4e5.jpg


32133105378_d3330541b1.jpg


45945037292_ba173d616f.jpg


44760404425_7e0c6448c0.jpg


30734026437_143f04b745.jpg


45640079692_a3254a459f.jpg


32025620308_0c62a6dc5b.jpg
 

BajaSurfRig

Well-known member
Out of curiosity why are you selling this for a newer one? What features do you want that you don't have on this one currently.

Well done on the remodel, thanks for all the info!
 

Forum statistics

Threads
186,619
Messages
2,888,177
Members
226,715
Latest member
TurboStagecoach
Top