Project T100: "Baja Explorer Ver. 2"

G100

Adventurer
CB Install

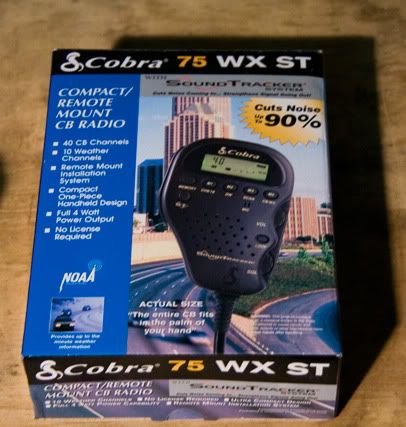
Another Baja mission is on the horizon so time to start working on the truck again. This time I am going to be traveling with two other rigs for three weeks, so we have all decided its time for an upgrade from the little motorolla FRS two way radios and time to get some CBs. Being that this is my daily driver, I wanted something small that wasn't very obtrusive on or below the dash, and didn't want another cord dangling around getting tangled up with my cell phone charger or Ipod cords. So i decided on the Cobra 75: Small, detachable, and has the weather radio function. I really like that I can detach it and put it in the glove box if I don't want it around.

So this showed up on my door step and I immediately started the install.
cb01.jpg


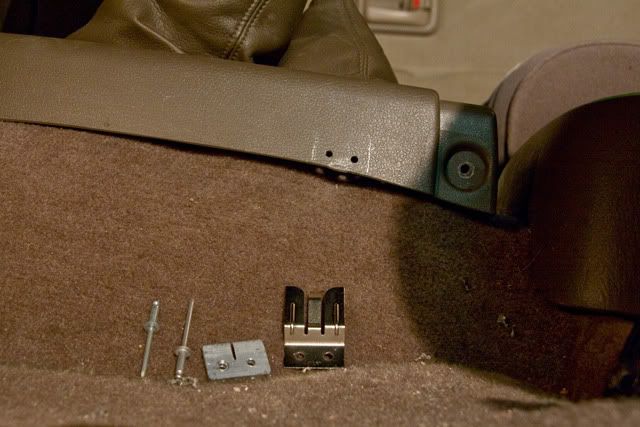
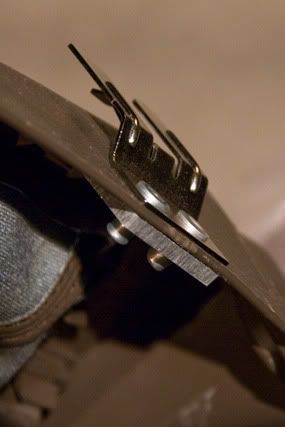
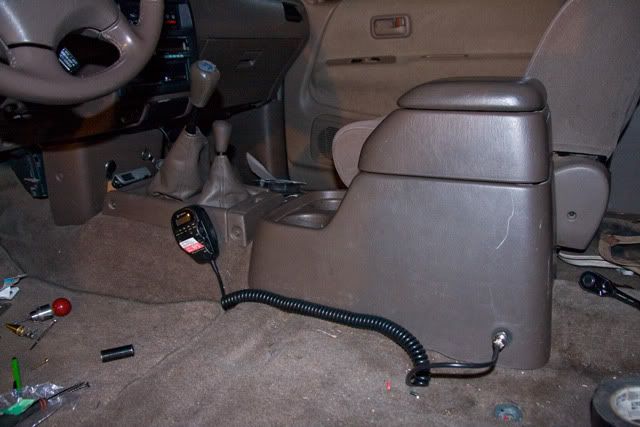
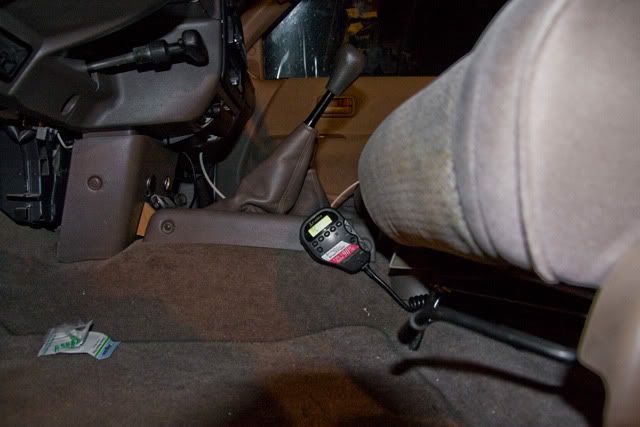
The first thing I did was figure out where I wanted the mic/unit, located so that it is in a convient spot to grab. I decided on the side of the stick shift console. Here it is out of the way but in a safe location and very easy to grab. I mounted it inplace with pop rivets and put a piece of 1/8 inch aluminum as a backer for strength.

cb02.jpg
cb03.jpg


The cobra 75 comes with a piece that is about the size of a cube of butter that everything plugs into: power, antenna, external speaker, and has a quick disconnect for the mic/unit. So this needs to be mounted where you can route all those wires to.

75WXST.jpg


I found a place in the center console mainly so that the coiled wire coming off the unit/mic would run completely out of the way next to the seat. It wasn't a problem at all running the power, antenna, and external speaker wires under the carpet to console.

cb04.jpg


cb05.jpg


cb06.jpg

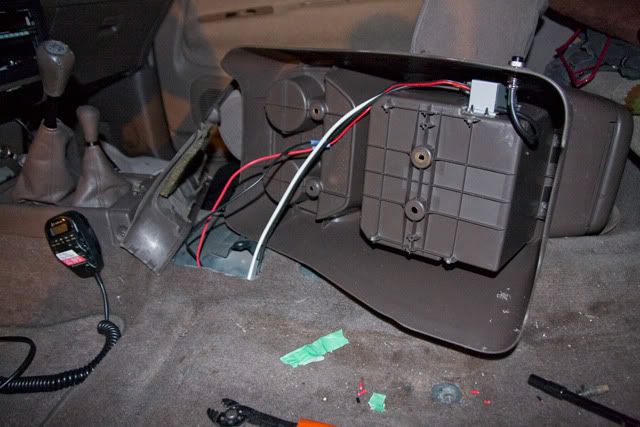
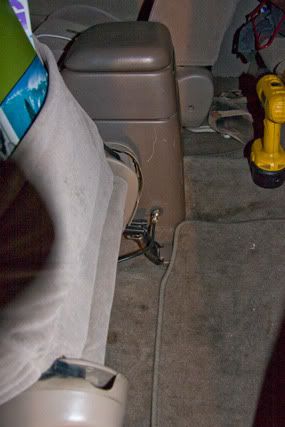
With the seat installed the wire runs around the seat post so that when the cord is stretched it pulls on the plug straight out not sideways so that the plug or the console won't bend or break.

cb07.jpg


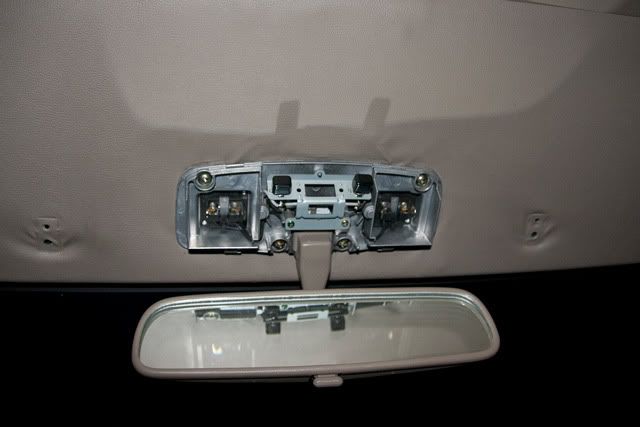
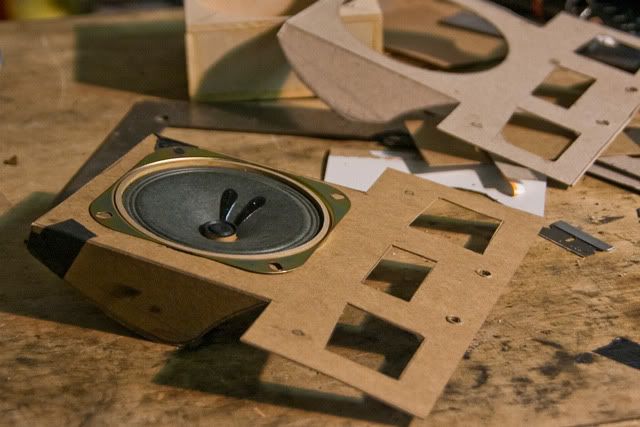
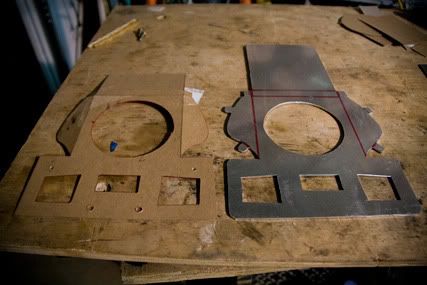
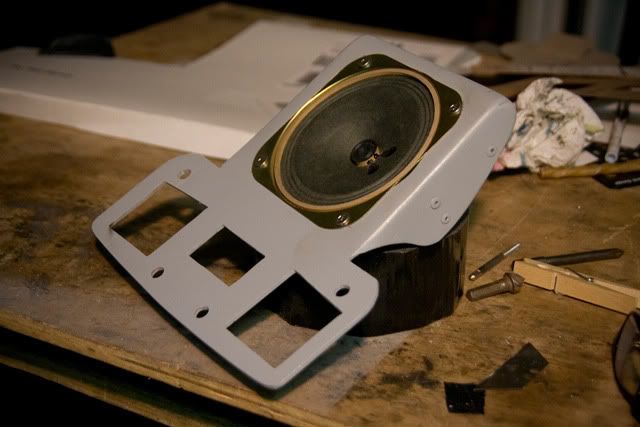
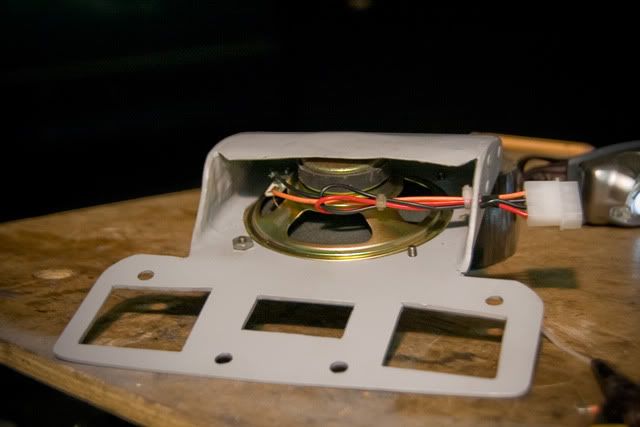
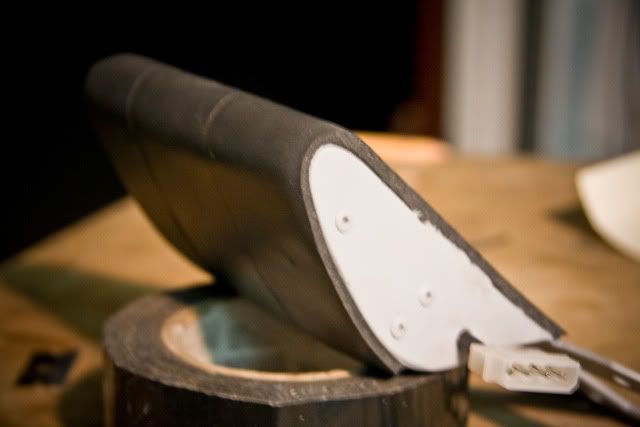
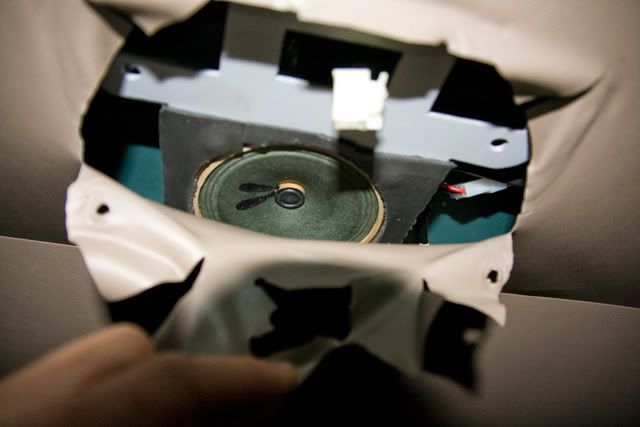
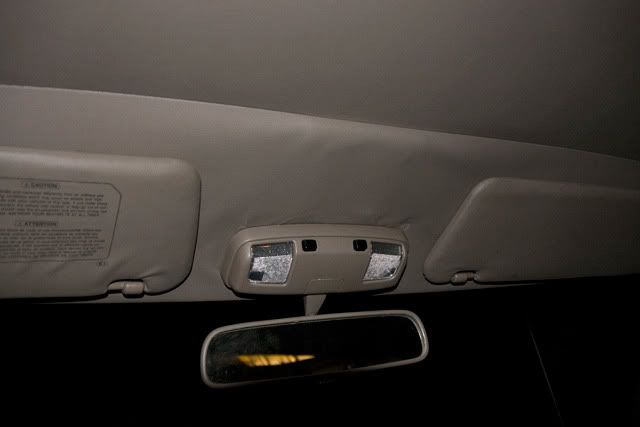
I had everything above done in about 3 to 4 hours after UPS left the package at my door. I am very happy with the install, it is completely out of the way, very easy to grab, and when I am having a conversation the mic can easily lay in my lap. Now I need to work on an external speaker?Anyone have any suggestions I am hoping to put it up by my rear view mirror in the head-board.
 

Every Miles A Memory

Expedition Leader
Please let me know how you like this unit. I've been looking at this model and wasn't sure if it would work as good as the bigger models. I want it for all the same reasons you want it. I don't want something big hanging under the dash and like how small this unit is.

Install looks awesome!
 

PHXtaco

Adventurer
Very nice install. I too will be interested in how you like it. I never have the mike plugged in on my CB because it is...
another cord dangling around getting tangled up with my cell phone charger or Ipod cords
 

G100

Adventurer
CB External Speaker

I wasn't sure if this was going to work when I started, but I wanted my external speaker to be hidden away behind the headliner up buy the rearview mirror and map lights. I would have liked to remove the entire headliner to see what I was dealing with, but this would have taken so long and I would have had to take apart so much that decided it was not an option. So I had to do everything like an arthroscopic surgeon from the small hole in the headliner for the map lights, of course I ended up tearing it a little but not to bad. For my speaker I got a 4" speaker from fry's for less then $3.

This is map light / rear view mirror assemby, my plan was to use this as my mount and create a plate that is sandwiched behind this assembly.
CBexternalSpkr08.jpg


I started with cardboard.
CBexternalSpkr01.jpg


It seemed that it might work so I transfered it to a piece of 1/8" aluminum plate.
CBexternalSpkr02.jpg


Here it is folded and cleaned up.
CBexternalSpkr04.jpg


I needed simple way to connect the wires once i got the speaker up in there because there is no way I can get any tools up in there. So I went to radio shack and found this "computer fan extension cord", it has both a male and female end, so it worked perfect for $2. It has four wires, I only need two, it doesn't really matter and I figure maybe down the line I can use the extra wires for something else.
CBexternalSpkr05.jpg


I then covered it in neopreon foam tape to make sure the back didn't rattle against the roof and also on the front to create a smooth look when the headliner stretches around it.
CBexternalSpkr06.jpg


Here is a veiw of it in place. This is the hole that I had to do everything through, as you can see i tore the edges a little.
CBexternalSpkr07.jpg


The finished product. I fixed the tears with a little tape on the back side. The camera flash adds more shadows then normal, in daylight you can barely see anything at all.
CBexternalSpkr09.jpg


Its real nice having the speaker up there, the CB is easier to hear while the radio is on, maybe because the speaker is closer to your ears. Its also seems like because the sounds are coming from different directions it is easier to pay attention to just the CB and kinda tune out the radio.
 

Every Miles A Memory

Expedition Leader
That's an awesome idea...my only concern is crossing one of the security check points in Baja or Mexico, and having them question what is hidden in your headliner :costumed-smiley-007 I'd hate to have some guy tearing it out or it resulting in a cavity search because they think you're smuggling...LOL
 

G100

Adventurer
Manual Locking Hubs

Well, I have had the BFGs for almost 3 months and while they do work good offroad, on-road I have lost 2 MPGs or more, I haven't calculated out the difference my odometer will read with the tires being a bit bigger, but I doubt its much going from 265/65r17 to 265/75r16. 2 MPGs is a lot for a daily driver, my range went from 400 miles to a tank down to 350. So in my quest to get some miles back I started looking for some manual locking hubs on craigslist. I would have prefered Aisins but found some Warns for $100 off of some guy with a 4runner who switched to a soild axel. I asked the guy how much of difference he saw and he said 2-3 MPGs.

Hubs-01.jpg


I quickly took them apart, cleaned them up and painted them black.

Hubs-02.jpg


Hubs-03.jpg


Before:
Hubs-04.jpg


After:
Hubs-05.jpg


The following is for the next guy who is planning to do this, cause I couldn't find much to let me know what I was in for:

Super easy install, could do both sides in under an hour, don't even need to take your tire off but probably makes it a lot easier if you do. I am no mechanic so please correct me if I'm wrong but this is what I did.

Remove dust cap so that you can remove retainer bolt and washer.
HubsINST-01.jpg


To help you pop off the standard hub which has conical lock washers, I used two bolts (M10, I think) and threaded them into the two vacant holes prying the hub off. Once the hub as seperated a little bit you can back the bolts out then tap the hub back in with a hammer and the washers will fall out.
HubsINST-02.jpg


Now you can remove the standard hub.
HubsINST-03.jpg


I carefully removed the gasket with a razor blade to use with the manual locking hub even though it had an o-ring.
HubsINST-04.jpg


Bolt on the manual hub body without the cap.
HubsINST-05.jpg


Replace retainer bolt and washer.
HubsINST-06.jpg


Screw on cap assembly, have the selector pointing at 4X2.
HubsINST-07.jpg


Thats it.
 

Shiryas

Adventurer
G100,

I put the manual hubs on my 95 XCab and eventually removed the ADD section from the differential also. I think its a worthwhile mod in regards to eliminating the "Automatic" 4wd and going with something simple. Supposedly the Aisin hubs are stronger, I went with the Warn units with the thought that if something is going to fail, that is where I would prefer it break at. Not the diff, nor the CV's.

I did not see the MPG improvement but the truck drove a great deal nicer without all the extra rotating mass, in braking and general feel but dramatically in steering, much lighter.

One mod that I do not see mentioned very often any more that I would recommend is to remove the studs on the drive flange where the CV's bolt to the differential. You then can either grind the shoulders of the studs a little bit or replace the stud and nut with a bolt and nut. After you have done this, if you have a CV problem you can remove the hub locker, remove the bolt on the end of the CV in the hub (10mm?), remove the bolts and nuts that you have modified and that's it, you can now remove the CV without even taking the wheel off.

toydiff.jpg

In this picture you can see the flange and studs I am talking about on the right side of this picture, which conveniently enough is also the passenger side of the differential. These flanges are pressed in and have a simple spring clip on the end to hold them in, they pried out real easy, just protect the seal underneath.

Cheers, Chris
 

PoindexterS

New member
Awesome!!! I have been looking into this recently for my T100. Some folks say they did it and saw no mileage difference. I think it has to help as the only thing left turning when unlocked is the tires and wheels. And with the lift I put on (ToyTec) my CV axles are almost too steep. This will help in that they will only turn when locked in. Thanks for the pictures and write-up!

Well, I have had the BFGs for almost 3 months and while they do work good offroad, on-road I have lost 2 MPGs or more, I haven't calculated out the difference my odometer will read with the tires being a bit bigger, but I doubt its much going from 265/65r17 to 265/75r16. 2 MPGs is a lot for a daily driver, my range went from 400 miles to a tank down to 350. So in my quest to get some miles back I started looking for some manual locking hubs on craigslist. I would have prefered Aisins but found some Warns for $100 off of some guy with a 4runner who switched to a soild axel. I asked the guy how much of difference he saw and he said 2-3 MPGs.

Hubs-01.jpg


I quickly took them apart, cleaned them up and painted them black.

Hubs-02.jpg


Hubs-03.jpg


Before:
Hubs-04.jpg


After:
Hubs-05.jpg


The following is for the next guy who is planning to do this, cause I couldn't find much to let me know what I was in for:

Super easy install, could do both sides in under an hour, don't even need to take your tire off but probably makes it a lot easier if you do. I am no mechanic so please correct me if I'm wrong but this is what I did.

Remove dust cap so that you can remove retainer bolt and washer.
HubsINST-01.jpg


To help you pop off the standard hub which has conical lock washers, I used two bolts (M10, I think) and threaded them into the two vacant holes prying the hub off. Once the hub as seperated a little bit you can back the bolts out then tap the hub back in with a hammer and the washers will fall out.
HubsINST-02.jpg


Now you can remove the standard hub.
HubsINST-03.jpg


I carefully removed the gasket with a razor blade to use with the manual locking hub even though it had an o-ring.
HubsINST-04.jpg


Bolt on the manual hub body without the cap.
HubsINST-05.jpg


Replace retainer bolt and washer.
HubsINST-06.jpg


Screw on cap assembly, have the selector pointing at 4X2.
HubsINST-07.jpg


Thats it.
 

G100

Adventurer
PoindexterS: I thought the same thing "how could it possibly not help", but I have gone through a couple tanks of gas already and I haven't seen any improvement in MPGs. The mod is totaly worth it for saving your CV boots, i just recently had mine changed, pretty pricey.

This being a side note I have been getting a sputter or hestitation when accelerating so I changed my spark plugs and wires this last weekend, truck runs great now, the sputtering is gone and I feel like I have more power (here is a helpful link). I am hoping that maybe this is part of the reason my MPGs dropped (even though I know it is all the tires.)
 

tstege

Observer
G100 I really like the build stumbled on it while looking for a new camper shell. I am about to order a tradesman and was wondering what you think of yours so far. I am basically looking at the same shell you have but with the doors on the side and a rack from them since I do not have a welder? Anyway any feedback is helpful as its a pricey decision ($2800) was the quote I got. Great build, Tyler
 

Forum statistics

Threads
186,667
Messages
2,888,624
Members
226,767
Latest member
Alexk
Top