Project T100: "Baja Explorer Ver. 2"

wyotoyo

New member
They have helped already. I am going to put my build up soon. Working on the truck now.

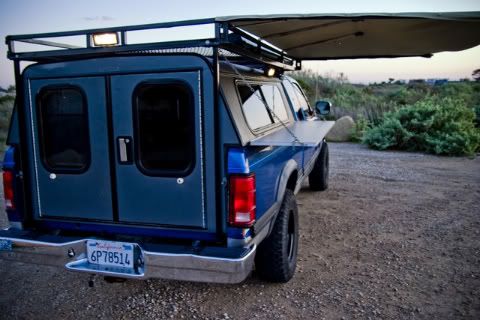
The rear window and boot are bold. I commend you.
I saw an old truck the other day that permanently fixed the cab to the topper with padding and vinyl. Pretty much an SUV now. Good idea, but the sliding window takes the cake.
 

G100

Adventurer
Its been some time since I have posted anything on my build-up, but don't think thats because I haven't been working on my truck, quite the opposite. I just haven't had time to post cuz I have been in the garage or down in Mexico. :sombrero:

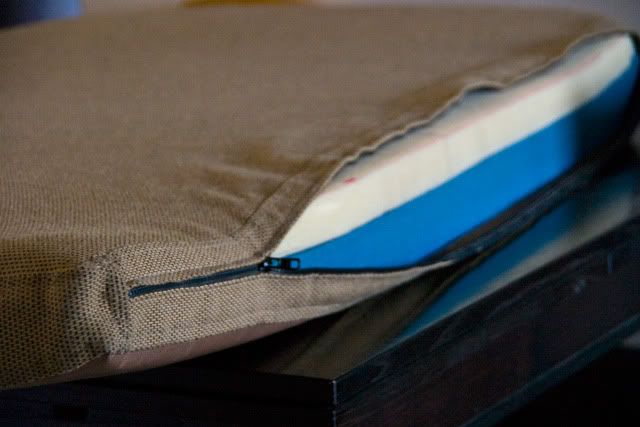
To start off here is a quick peak at my mattress that I put together:

It is a three piece mattress folding in a accordian style. This is real nice for a number of reasons. It is real easy to fold it up and unfold, you can fold up your bed completely made, pillows and all if you wish. When I am packing up, I make the bed, fold it up, and put a blanket over it so I can pack stuff on top if I need, then when I get to where I am going all I have to do is just unfold it and its ready to crawl in. It can also fold into a couch real easy, if you want.
Mattress01.jpg

mattress02.jpg


I also put a zipper at the fold for the last section, so that I can detach that section and use it for a cushion if I need to. This is also nice because that section, being at the end, tends to get a lot more dirty a lot quicker, so I can pull it off and wash it without having to pull apart the whole mattress.

mattress03.jpg


As for the materials I used, the top and sides are made of Sunbrella, a pricey but worth it, water-resistant, very durable material. For the bottom I used a vinyl, plastic type material that is basically indistructable and a little cheaper then the Sunbrella. I got all this material and my zippers from a spot in Chula Vista, San Diego called UFO (upholstery fabric outlet). For the foam I went to the same shop I went to for my window boot, foamonline.com, I went with 2.5" of Evlon foam topped with 1.5" of memory foam, super comfy. It took about 4 or 5 nights to put it all together, it wasn't that tough. I'm no upholstery master. Just cut my pieces a half inch larger on all sides, made my lines with marker on the material that I had to sew on. Then folded over that half inch and put a seam along the edge. I did it all inside out so that you can see any of my mistakes. I even took a little torch and synged all the edges of the sunbrella so that it wouldn't unravel.
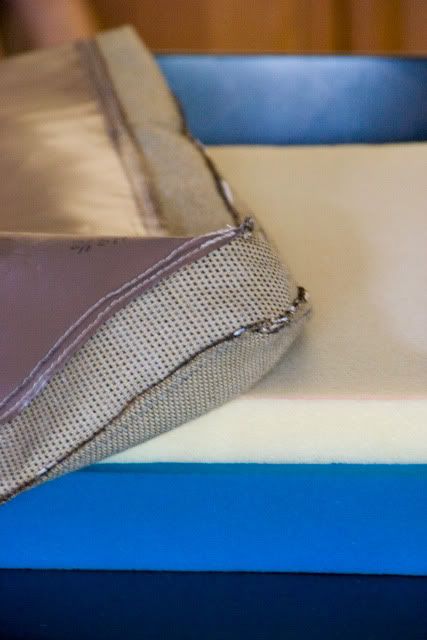
mattress05.jpg


The foam guy told me to make the dimensions of the mattress .5" smaller in both width and length, and an 1" smaller in height, so that the foam fills the mattress snugly, and you won't have a lot of wrinkles. It seemed to have worked.
mattress04.jpg


It was a little investment and a lot of work, but worth it because you can't have an uncomfortable bed when you plan on doing long trips.
 

G100

Adventurer
The Rear Bumper Build

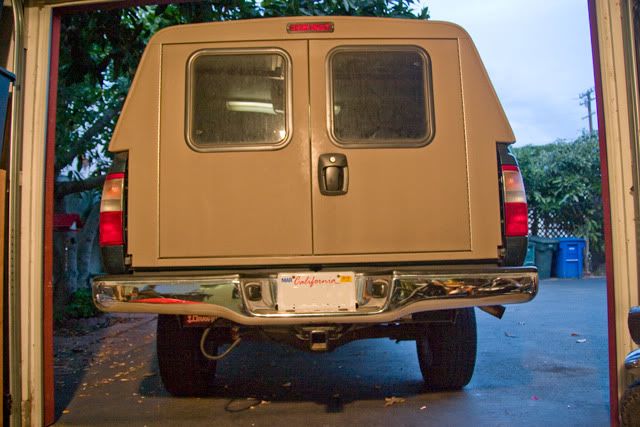
My decision to make a rear bumper spawned from the planning of my custom roof rack. My rack is going have supports that come straight up from the rear bumper, very similar to my old dakota’s set up.
Truck_08.jpg

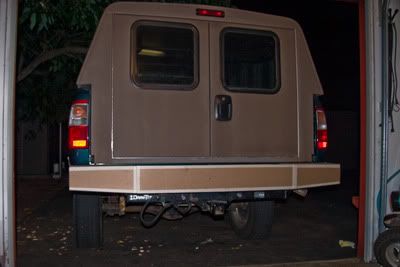
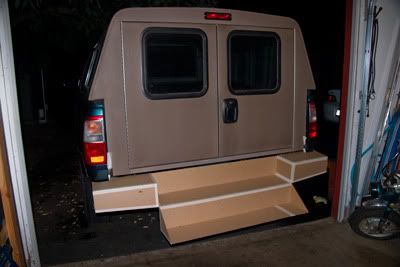
I could have just drilled holes in my stock bumper, but after looking around on the portal and seeing all these rigs with bad-as bumpers, I started to want more. So I figured why devalue my stock Toyota bumper by drilling holes in it when I could just sell it and use that money to make my own. I started looking around trying to come up with some ideas of what I wanted to do. So I went camping, the best ideas come from getting out there and figuring out what you need. The one problem my wife and I have with the new truck when camping is the what a PITA it is to get in and out of the back of the truck because it is so much higher, we use a milk crate as a step but it just doesn’t work that well. So I came up with this idea to have a fold down step incorporated into the bumper so that when it is folded up it you can’t tell that it is even there.
Here is shot of my idea in card board.
Bumper_01.jpg
Bumper_02.jpg

This is what I started with:
Bumper-03.jpg

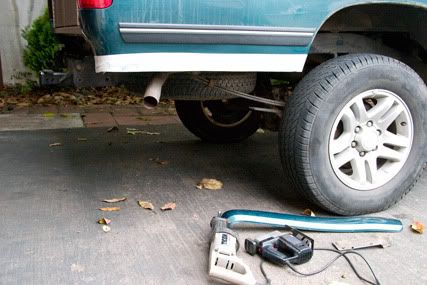
When I took off the bumper I noticed that it had a separate set of holes that would raise it 2”. I am assuming that this is for a when you put on a body-lift. I noticed that the trailer hitch had the same thing, so I moved the trailer hitch to the higher set of holes increasing the rear clearance 2”, this should help with departure and approach angles because the T100 has a lot hanging over the rear wheels.
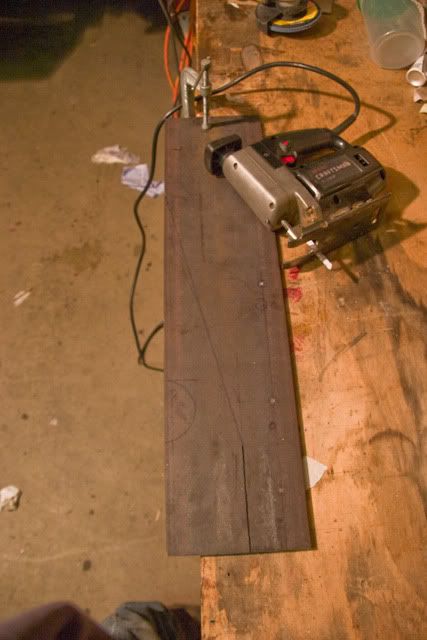
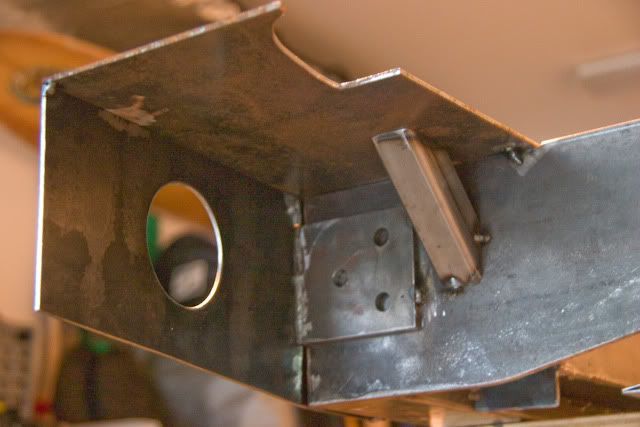
Now I don’t have the most extensive set of tools for metal fabrication. I have a little mig welder, a 4 ½” angle grinder, a mini drill press and an abrasive cut-off saw. So doing things the easy way isn’t really an option, I have to use what I got to try and get this done. I learned this very quickly in Step 1: Frame Mounts. I used ¼” plate steel and had to cut it with a jig-saw. Between changing blades and having to stop and wait for the jig saw to cool down so that I could actually hold it without burning the palm of my hand, it ended up taking about 2+ hours for each mount.
Bumper-04.jpg

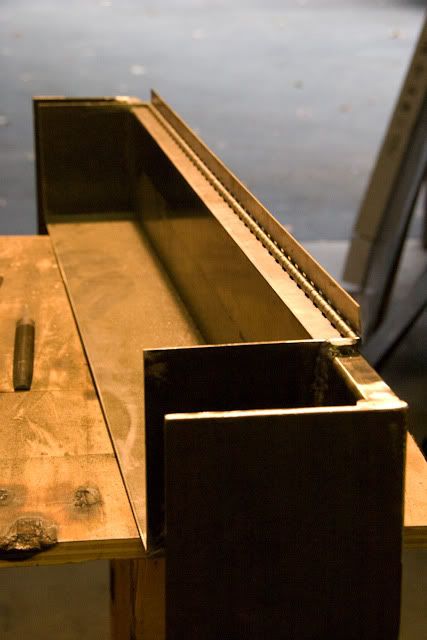
Once I got the frame mounts on and leveled, I tacked on my cross-member a piece of 1/8” 1”x3”
Bumper-05.jpg

Then I started tacking on the side and bottom plates that will form the inner step. I used 1/8” plate for this, you’ll notice that the sides extend about ¼ of an inch beyond the cross-member piece, this is to make room for the hinge so that it can be hidden on the inside.
Bumper-06.jpg

Bumper-08.jpg


Back to the Portal I went to do some researching on how the other home-made bumpers did their recovery points/shackle mounts. I decided that going with weld-through mounts would probably be the best idea, so I found some weld-on shackle mounts on ebay pretty cheap. I copied an idea I saw by welding a small piece of ¼” plate to the shackle mount then threading it though a hole in the face of the bumper and welding it to the frame mounts. So I had to start by cutting a long rectangular hole in the plates that are going to be the sides of the bumper.
Bumper-07.jpg

Here is a shot of a quick mock up after I cut the first hole. You can see I set up some pieces to see how the rack was going to work out.
Bumper-09.jpg
 

G100

Adventurer
Rear Bumper Build part 2

I ‘m also planning on putting some reverse lights in, just to the side of the recovery points. I did a lot of looking around to find the ones I wanted, I didn’t want them to be too large, so I ended up going with Delta Pipe-Lights. They are 3.5” Xenon lights that are supposed to be waterproof. They came with all the wiring, relays and fuses necessary for installing them.
Bumper-12.jpg

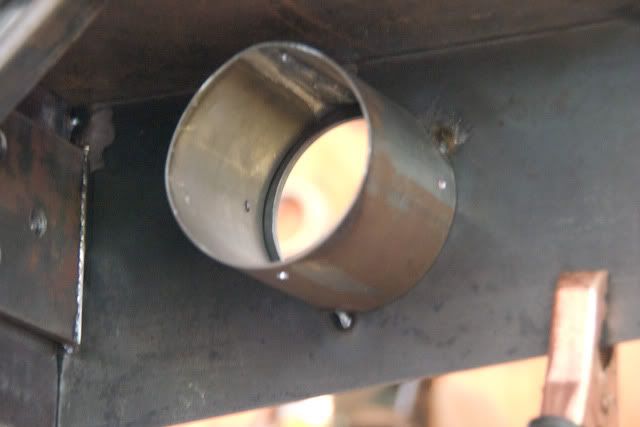
I used a 3.5” hole-saw to drill out the holes, I toyed with the idea of adding some small pieces of 1/8” rod to create a screen for protecting the lights, but instead I’m going to just recess in them a little bit.
Bumper-13.jpg


Bumper-14.jpg

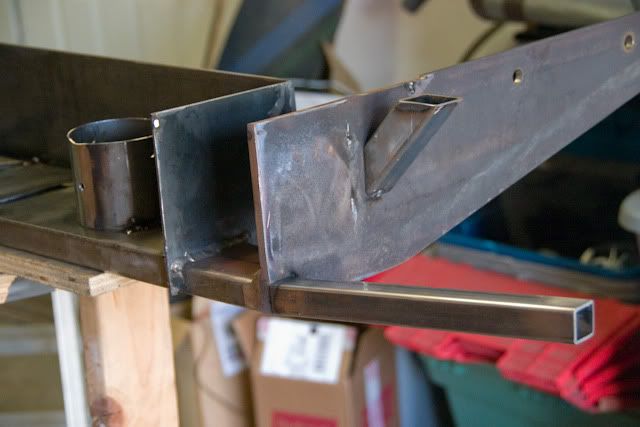
In the picture from the back you can see I added a piece of 1.25” square tubing to reinforce where the rack supports are going to be resting on top of the bumper. You can also see the plate that is welded to the shackle mount with the holes drilled for the plug welds.

For mounting the lights, I ended up getting some 4 ½” 16 guage tubing and cutting a section out of it to make the right size, pinched it together in a vise and welded it up.
Bumper-16.jpg
Bumper-17.jpg


I had to cut off the original mounting tabs on the lights.
Bumper-15.jpg

Once I mounted the light tube thing I had just enough room to put on a piece of 1” square tubing below.
Bumper-18.jpg


Bumper-19.jpg

This was a tricky piece to cut, its hard to see in the photo, but it is tilted up at an angle and its tilted in, so it was a compound angle cut.

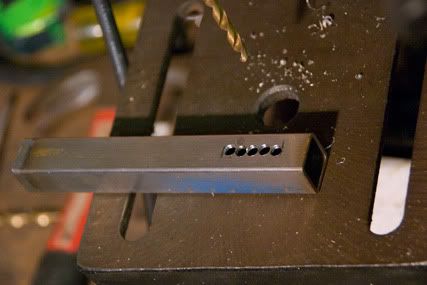
To hold the lights in the tube mount I drilled some holes in the tube and then I will drill and tape some corresponding holes in the lights on the top, bottom and sides. A couple of small stainless steel bolts should hold them in just fine.
Bumper-20.jpg

Bumper-21.jpg

A view from the top while test fitting.
Bumper-23.jpg
 

G100

Adventurer
Rear Bumper Build part 3

I ended up adding on one more frame mount, this one is perpendicular to the others which I think is good and will really help. It is actually bolted to the mounts for the trailer hitch. I was thinking it is probably a lot of extra weight having frame mounts for both the trailer hitch and bumper, I should have considered just using the existing trailer hitch frame mounts, but it would have been a lot of work redesigning them to work with both the bumper and the trailer hitch.
Bumper-25.jpg
Bumper-26.jpg

Once I got it all fitting correctly I welded on the top plates. This is when it really started looking like a solid bumper.
Bumper-24.jpg


Now I get to start working on the fold down step. It is really pretty basic. The hinge is a stainless steel piano hinge, I went stainless so I don’t have to worry about rusting or getting it painted really well. The hinge is going to be welded to the step and pop riveted to the bumper. The reason I am not welding it to the bumper is so that if it gets bent somehow and won’t shut properly I can pull it off easily and replace it or just leave it off all together if I need to. So I drilled holes in the hinge on both sides one side for plug welds and the other for the rivets.
Bumper-27.jpg
Bumper-28.jpg

The hinge had to be placed just perfectly so that it would open all the way and close properly, this was achieved with a lot of trial and error, aka PITA. To keep the step from bowing in the middle when you step on it, I put a piece of 1/8” thick ¾” square tubing on the outside edge of the step. The ends of this “stiffener tubing” will also serve the purpose of being the receiving end of a sliding plunger latch that will hold the step in the closed position. I caped the “stiffener tubing” and added 1.5” of ¾” square stainless steel tubing on each end so that it won’t rust inside because it will not be painted.
Bumper-31.jpg


Bumper-35.jpg


The latch is made up of the same ¾” square stainless steel tubing caped on one end. Inside is a 2.5” long spring and a piece of 5/8” round stainless steel tubing caped off and rounded on one end that will be the plunger.
Bumper-32.jpg

To be able to move the plunger back and forth I cut a long rectangular hole in the housing and drilled and tapped a hole in the plunger. This will receive a long stainless steel machine screw with a thumb knob on top.
Bumper-33.jpg
Bumper-34.jpg


Then I kind of ran into some problems. The top plate was warped from welding and so the latch wasn’t perfectly in-line with the receiving end of the “stiffener tubing”. So I had to cut out a section in the top make sure it was level so that the plunger could freely move in and out, then weld it in place.
Bumper-36.jpg
Bumper-37.jpg

Bumper-38.jpg
 

RMP&O

Expedition Leader
nice fab work....your window conversion came out sweet! Real nice to have a rear power window in an old truck!
 

G100

Adventurer
Rear Bumper Build part 4

So after I got the fold down step and latches in and working, all that is left to do is to put on the sides. . . well, that would have been nice.
Bumper-39.jpg


Now this next step I can definitely blame the Portal on. I was going to be simple and just cut out a square plate, weld it on, and call it done. But the Portal got into me and told me “You need rear sliders”. Damn! I was almost done. . . . Nope. So I had to break out the saws and start cutting up the truck.
Bumper-41.jpg

Now I wasn’t really building these as hard core sliders cause I don’t think I’ll ever really need them, I was building these more as a small step to be able to get up to the rack. I think they will be real useful for when I have put on and strap down the longboards.
Bumper-42.jpg

I used pieces of 1/8” thick 1”x3” and it is supported in the front with 1/8” thick 1.25” square tubing. Hopefully this will be strong enough to be able to use a high-lift jack if I ever get into a situation. Then to close off the sides of the bumper I recessed in a little foot step.
Bumper-43.jpg

Bumper-44.jpg

I found someone to sandblast it for me before I took it in to the Line-X shop. It really made it look good it kind of gave it a primered look.
Bumper-45.jpg

Bumper-46.jpg


Then really running low on time before a 16 day trip to baja. I sent it off to get it Line-Xed. I got it back the day before I was supposed to leave. Unfortunately I couldn’t work on it for a day to let it harden. I still had to do a lot of final touches, put in the lights, do some dremel-ing so that the step would shut, and then paint all the areas black that didn’t get hit with Line-X or that I had to remove material. So it sat in my drive-way for a day, while I packed up everything.
Bumper-47.jpg

Bumper-48.jpg


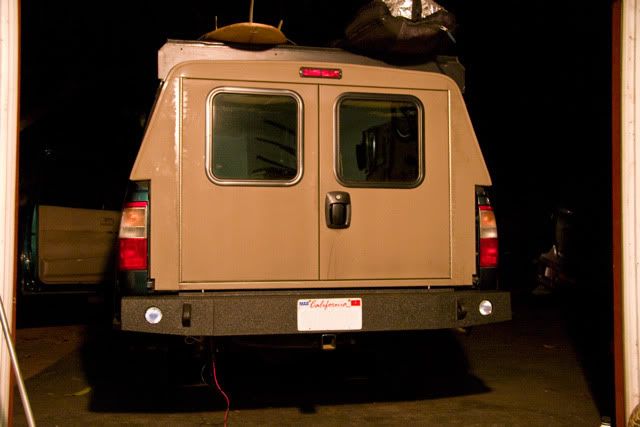
These next pictures are taken at 2 am on the day (or should I say the morning after) I was supposed to leave. You can see that I was still working on the electrical for the lights. I ended up calling it a night and finishing up the electrical at 7am in the morning right before I left for Baja.
Bumper-49.jpg


Bumper-50.jpg
 

G100

Adventurer
Nicely done. The step idea is great. how much do you think it weighs?

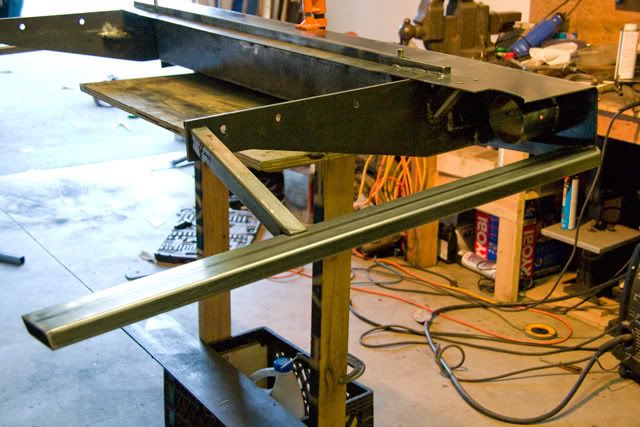
Not sure if I had to guess I would say between 125 and 150 lbs. I was able to pick it up by myself and put it up on the work table that you can see in the pictures, but that was before it was Line-Xed and that probably added some pounds.
 

G100

Adventurer
That looks incredible!!! Boy got skills!!! :sombrero:

What are you going to do for a license plate light?

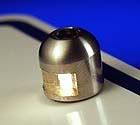
Yeah, I've been trying to figure out what I am going to do about that. I want something really low profile, I really want to do something like these LED Bolts, you can get them in black also:
lightnboltplate.jpg
domed_head.jpg

the problem with these is the wires come out the back and it would be tough to get that to work with the step. I would probably have to cut down the threads which would be tough not to cut the wires, then come up with some way to concel the wires running to back.
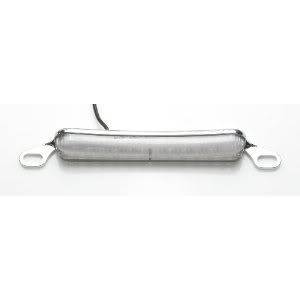
So my current plan is to use something like this:
31XKLl2HHEL__SL500_AA300_.jpg

This is the lowest profile thing that I have found, and I can run the wires behind the plate and so it will work with the fold down step. Even though it is pretty small I dont like it very much, but I feel I might have to go this route.

????If anyone has any other ideas I would love to hear them????
 

Forum statistics

Threads
188,157
Messages
2,902,926
Members
229,582
Latest member
JSKepler
Top