Project Weekend Warrior (A slow Chevrolet Dmax Express Camper Build)

Campbulance

Observer
David, Thanks for the reply.

What would you estimate the battery time on a fridge like this would be. I haven't opened it yet and don't have any numbers for it. I love how you can't find power specs except for on the item itself. Makes planning hard. I got the idea from a friend who uses one successfully off 1 battery. So my plan was to have approximately 230 Ah of battery with 200 watt solar panels, I will have shore power capability but would like to make sure it can handle weekends with out it. My typical trips are going to be limited to weekends only so a Friday to Sunday type of deal. I will most likely still try it out and see. I can always sell it and upgrade at a later point. Thanks.
 

wheels5150

Observer
You may be fine if you somewhat control how often it's is powered up and how long it is on. Turn the inverter on for an hour or two - turn it off for a couple hours. Fridge should stay cold enough and it won't suck your batteries dry.
 

Campbulance

Observer
Take a look at these two threads from sportsmobileforum.com. He installed a dorm style fridge, although it doesn't have separate freezer and fridge compartments. He is running 200w of solar and appears to be happy with the results.

http://www.sportsmobileforum.com/viewtopic.php?f=40&t=16283

http://www.sportsmobileforum.com/viewtopic.php?f=14&t=16436&start=15

Thanks for the links. I can't seem to see the images though even though I am a logged in. I have a feeling the pictures tell a thousand words in this case, since he doesn't actually describe what he does in words.
 

Campbulance

Observer
Ventilation Fan Installed

So yesterday I installed my roof vent. I must say it is harder on the nerves than the actual process. I spent some time figuring out the location for the vent. The original spot I wanted to locate it was blocked by the cross ribs inside the roof skin( I could have cut through them but in my experience cutting through double sheet metal is a pain in the but) and the other spots were blocked by the roof rack cross bars.

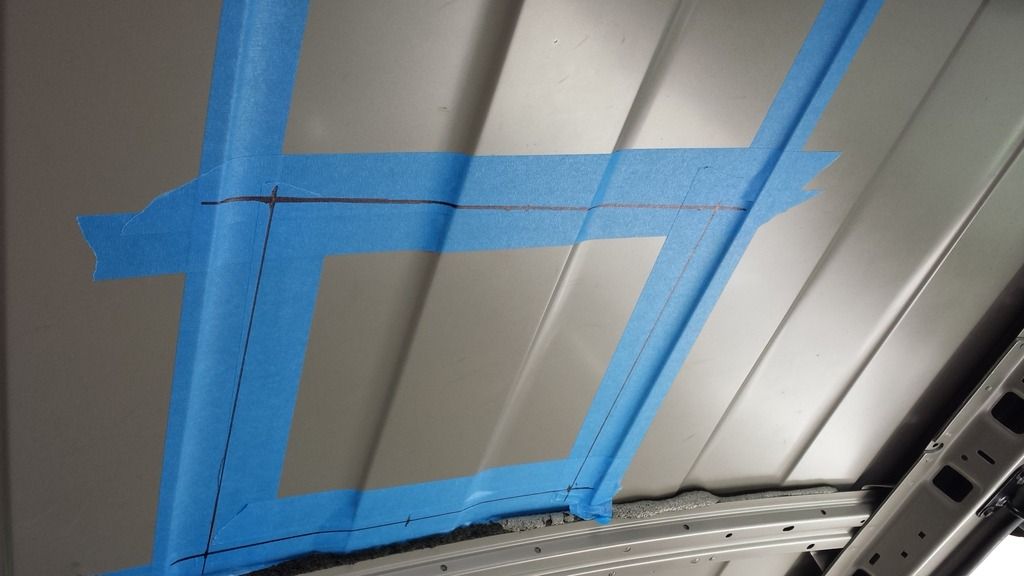
Once I determine the location I lined the area with blue tape and measured and marked my slot. I drilled 4 holes in the corners for relief of the saw blade. I just used a cheap air saw from harbor freight. Note, I did all this from inside the van vs. on top. Once the pilots were drilled I went up top side to see the corners. Unfortunately it was a little further back than I had anticipated relative to the roof rack. It would be close, but really I was fully committed since I already drilled. Note measure 3-4 times. The location was so that the screws would clear the rib in the front.

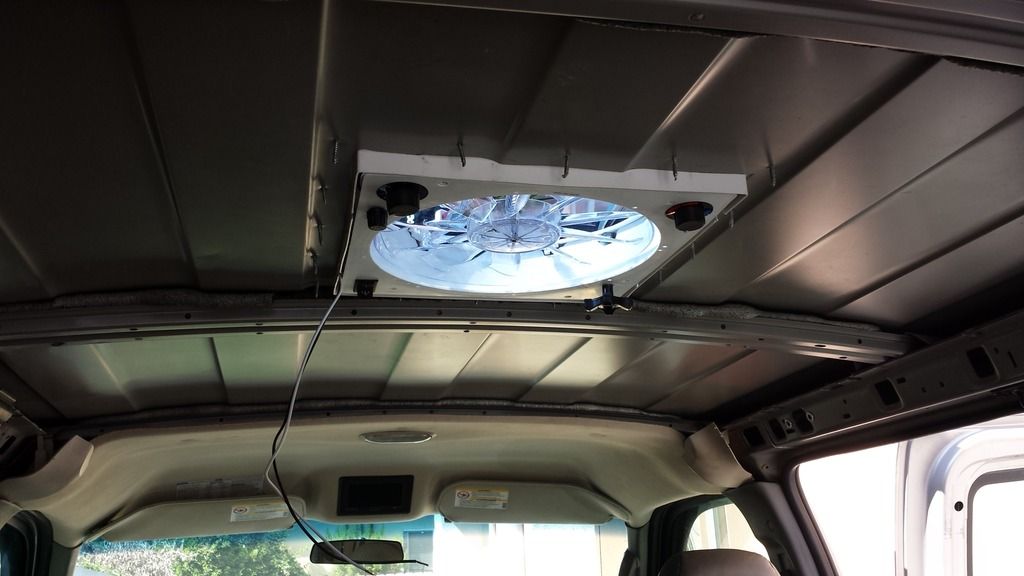
I took the air saw and cut out the 4 sides. Once the hole was cut out I checked the fitment of the fan. Once that was good I put the fan up and center punched the hole locations and drilled the pilot holes for the sheet metal. To protect the metal I sprayed a primer along the edges.

Next came time to mount the fan. I first tested the fan by hooking it up to a car battery. I didn't want to permanently fix something to the van that was broken from the get go. To mount the fan and seal it against the sheet metal I used 1/8" thick by 3/4" wide Butyl tape (
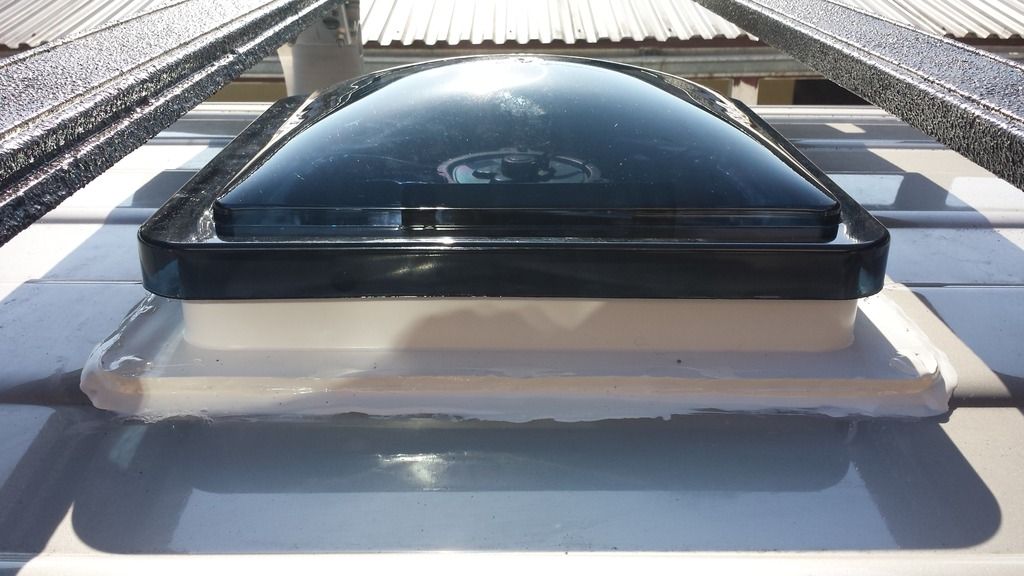
http://www.amazon.com/gp/product/B001FCB4JS?psc=1&redirect=true&ref_=oh_aui_detailpage_o00_s02) adhesive. In the ridge I ended up using 2 layers and pressed it into the corners. I then put a layer around the 4 edges. I then dropped the fan into place and screwed it down. I used some self leveling sealant on the screw heads and a bead around the flange where it meats the body. If I were to do this again, I would not use the self leveling sealant around the perimeter. It is too thin to build an edge.

I also, installed some wind(rain hopefully) guards. They are stuck on with 3M tape so I am not sure how long they will survive. They were like 35 on amazon and cheap and easy mod. Bought them so I could crack the windows at night for ventilation even if it is raining out. Plus they make the van look a bit better. You can see them in the exterior shot.

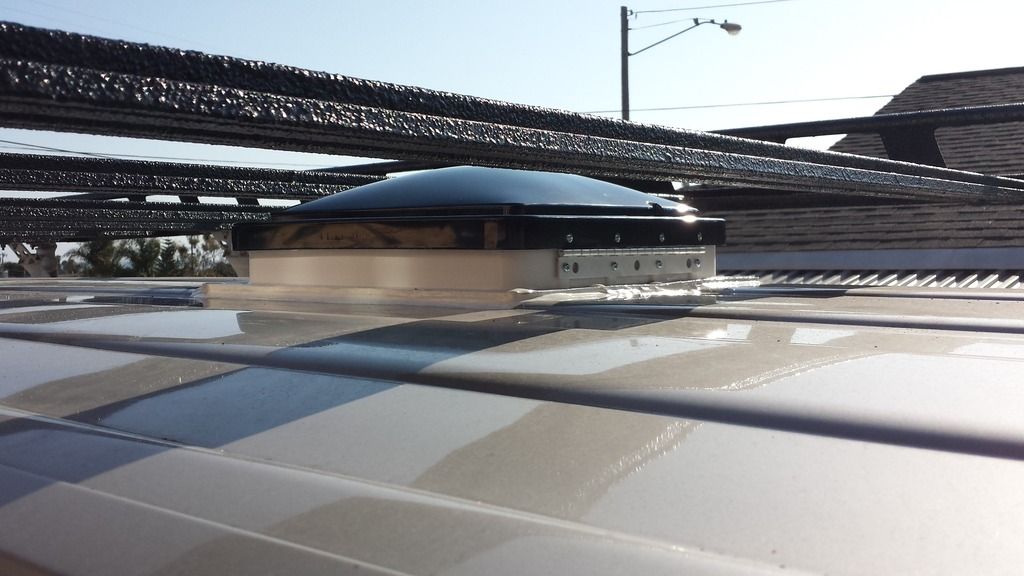
Here are the picture. Sorry I forgot to take in process pics but here is 1 of the outline and a few installed top and bottom. My location ended up being to tight to the roof rack and stopped the vent from opening. It wasn't by much so I ended up unbolting the rack and pushing it back the distance it needed to clear with a mallet.

You can see how I wanted it to be close to the front rib as possible. I probably could have tucked it another .25-.5 inch foward but it all worked out.


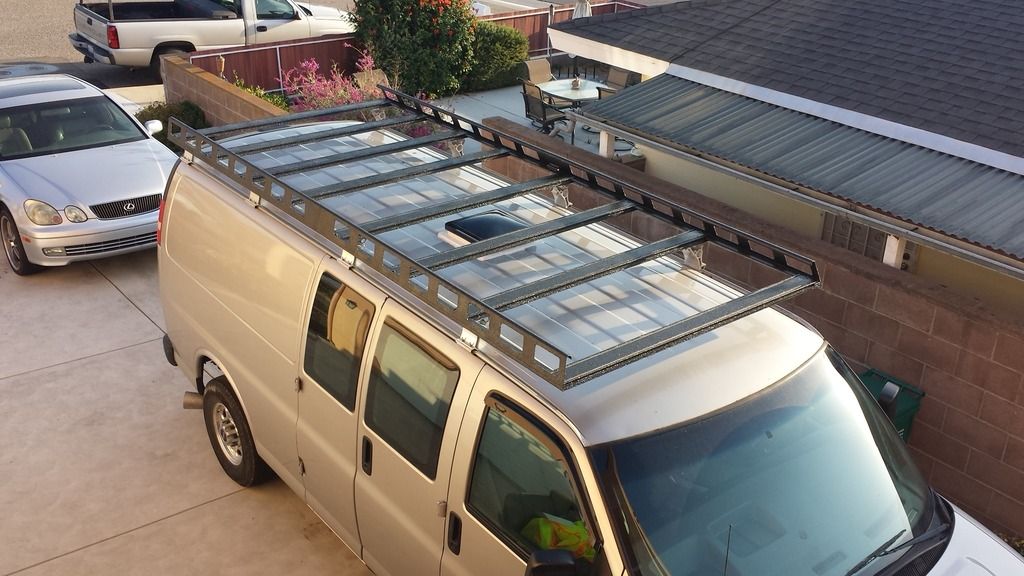
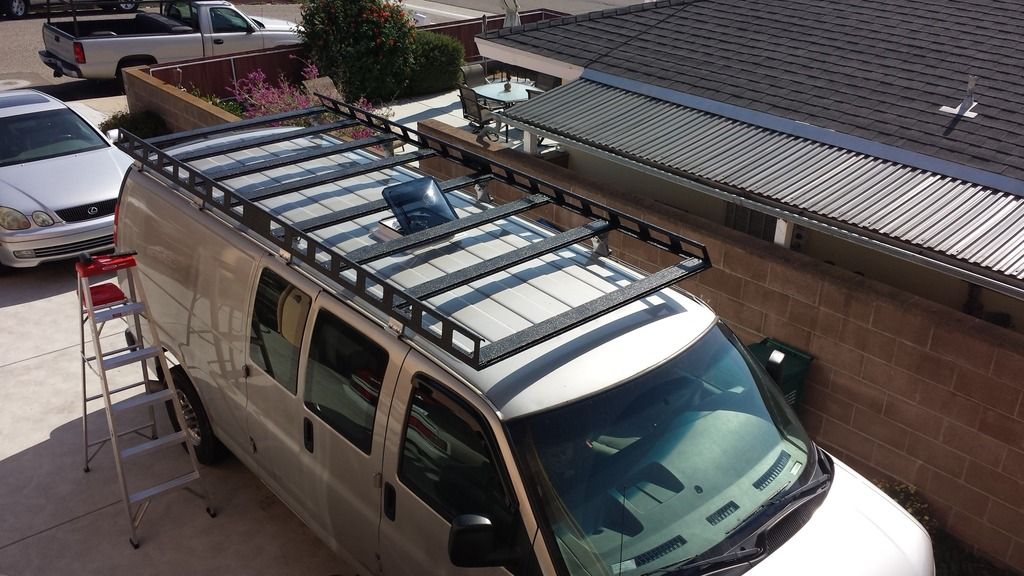
You can see how close it was to ther rear bar. Not sure if this was before or after I puched the rack back.


mikracer

Adventurer
Thanks for the links. I can't seem to see the images though even though I am a logged in. I have a feeling the pictures tell a thousand words in this case, since he doesn't actually describe what he does in words.

The site is having issues with pics right now. Hopefully they will be back up tomorrow...I think they are switching servers or hosts or something.
 

dar395

Adventurer
Thanks for the links. I can't seem to see the images though even though I am a logged in. I have a feeling the pictures tell a thousand words in this case, since he doesn't actually describe what he does in words.

We just meet up with Leonard and wife Jo this past week-end, Leonard's van is a work of art for the DIY, in ten minutes I was sold on his dorm frig install, he has many video's on U-tube and should be able to find them searching for "Self built Sportsmobile" his is a 15 year build and has many great idea's.
 

Campbulance

Observer
We just meet up with Leonard and wife Jo this past week-end, Leonard's van is a work of art for the DIY, in ten minutes I was sold on his dorm frig install, he has many video's on U-tube and should be able to find them searching for "Self built Sportsmobile" his is a 15 year build and has many great idea's.

Thanks for the info. I did a search but couldn't find the videos yet. Do you happen to know his user name?

In other news I am going to get ready to do the insulation. About to place the order to Home Depot.

I am going to go with these 2 items.

This is the first layer. I am going to go with the aluminum side towards the sheet metal. This will hopefully give me some sound dampening as well as insulation.
http://www.homedepot.com/p/UltraTou...30000-11475/100656747?quantity=1&str_nbr=1052

This will be the outer layer/Vapor Barrier.
http://www.homedepot.com/p/Reflecti...ion-BP48100/202092205?quantity=1&str_nbr=1052

I will cover it up with some wood paneling of some sort.

For the floor I haven't decided the route I want to go yet. I am leaning towards this
http://www.autoanything.com/cargo-liners/60A5557A0A0A3713609.aspx

I like that it is custom cut and will save some work. The reviews seem good on it and I have seen some camper van conversion folks use it and like it.

At some point I will have to work in my electrical stuff as well, and start gathering components.
 

Campbulance

Observer
Not much happened to the van this weekend. I did collect some parts for it though. A guy somewhat local had some doors from a passenger van with pop out windows. I picked up the two barn doors and the two rear doors. They came with all the insides and panels. The big question I am asking myself is how to go about getting the windows onto my van. The way I see it I have a few options. Put the doors on complete as they are, Which will be white doors on Bronze van. Option 2 Paint the doors and then put them on, (I am not a pro but can spray them in the garage with ok outcome). Option 3 cut out the windows of the stock doors and install the vented windows. Any advice is recomended.

I also picked up the radiant barrier still waiting for the reflectix. I will probably start cleaning the panels and gluing the radiant barrier over the week and weekend coming up.
 

Campbulance

Observer
Weekend work update.

Saturday:
I cleaned the walls and floor, in preparation for the insulation. When I pulled the floor cargo mat there was some little rust particles probably from metal shavings being left in it when they drilled mounting holes for whatever was in there before. Some Sprayaway and some scotchbrite took care of the surface stuff. There are probably 1 or 2 spots that could use a shot of rust inhibitor. I also vacuumed it for good measure. Once cleaned I started on some templates using butcher paper. For me this was sufficient for the insulation and skipped going to cardboard. I got 3 large panels and 1 small one done before I called it quits. Forgot to get pictures of those.

Starting out:


After some cleanup


Sunday:
I took the 4 templates and started out cutting out the insulation and reflectix doing 1 panel at a time. I did a the smallest one first to determine the process and figure how I am going to do it. I ended up using spray contact cement from Home Depot(tried new brand otherwise would have just used 3m 77 spray). I sprayed the small piece and the wall and then fitted it inside. I did my best to get underneath the open rails where I could. Then I put the reflectix in and taped it to the panels using cold weather duct tape. I used the cold weather stuff since using it at my work we find it holds better to most things than the others. We have ran it up to 250 degrees in an oven and it held better than the stuff rated for the higher temperature.

The back side of the insulation:


That piece in place:


The Reflectix on top:


The first side being done:


Unfortunately I did not have my shore power plug so I will most likely need to cut into the insulation. I decided to call it a day after the first wall was completed. I will do the top and other side next weekend. I will be leaving the doors until I figure out my approach for my replacement window/door assembly I purchased last weekend. I was pleasantly surprised at the sound damping qualities of the method I chose. when I tap the right side it rings when i tap the left side it thuds. Hopefully it will be really quiet when I get everything completed.
 

Campbulance

Observer
Made more progress on the van this weekend. I am heading to Yosemite for its first camping trip this weekend. Before then I wanted to get the insulation done and the vent installed. This weekend I repaired some of the tape job on the insulation, installed the bedrug and changed the oil and fuel filters. For some reason the tape popped loos in a few spots on some of the vertical rails and roof. Overall I also like the ready made carpet and it really gives it a comforting feel. I also used the leftover reflectix to make some window inserts.

I did some shopping for the trip also. This trip is to spend some time brainstorming what I want/need for my van build. After camping I hope to have a clearer picture of what to do. Anyways here are some pics. I still need to insulate the doors and wheel wells.


Campbulance

Observer
Just a quick update. I made it to Yosemite and back in one piece. The insulation and floor worked out very well, as well as the Reflectix window inserts. The temperature swings were from 85+ to probably around 60-70 at night. I slept on my futon with a memory foam mattress pad. I used a sheet and a light comforter instead of a sleeping bag. The ventilation fan was fully opened and the front windows were cracked about 3-4 inches the whole weekend. I do not have house batteries yet so the fan was not operating(didn't need it at all). I have rear vented windows to install as well so should get even better. Day or night the temperatures stayed fairly constant inside with out much fluctuation. I slept in a t-shirt and shorts. All in all, the maiden voyage met my expectations. With the Reflectix window inserts it is very dark inside and I needed a light to see anything even during the day.

My friend that came with me has an e350 passenger van with platform bed in the back. It was a little tall with the mattress just below the window level. His first night his family was very hot with two people and baby. His second night he slept on the floor and was very cold. He had some reflectix window inserts in all the windows as well. In comparison I felt much more comfortable.

Things to address (movement related):
Van rack needs a wind deflector to quite the wind noise and reduce the vibrations in it above 50mph.
Radiator fan is always running when driving on the freeway. Source of more noise.

Things that are added to the wish list.
Front door window screens. Friend had some magnetic ones from Sportsmobile for $35 dollars, a worthwhile investment.
 

Campbulance

Observer
So took a break from my build after camping. I am going to start getting back into it soon. I had a question about insulation. I have enough material left over to perhaps put a second layer in. Is there a thing as having too much insulation? I still need to do the doors, but even with them open I felt very comfortable in the van as is. Although it has not been in extreme temperatures, I would say as high as 90 as low as 40.

As for the next step, I am thinking about laying out my wiring first so it can be routed behind my panels. Then do the panels, followed by completion of the electrical system components.
 

real3175

Observer
Don't really have much experience with insulation but I know when it gets down to 20 degrees Fahrenheit the more insulation the better. Very excited to see you progress.
 

Campbulance

Observer
Don't really have much experience with insulation but I know when it gets down to 20 degrees Fahrenheit the more insulation the better. Very excited to see you progress.

Thanks. I might as well go for it. If not the material will just be sitting in my garage.

This weekend I started messing with the passenger van doors I bought for the vented windows. I was taking the pieces off one of the doors and Chevy doesn't like to make removal easy. The window hinge post, connected to the door was attached with 1/4" hardened steel rivets. They ate up my cheapy drill bits. I used a dremel to cut the heads off but that eats the disc quickly as well. I will need to buy legit drill bits instead of the cheesy hardware store ones.
 

Forum statistics

Threads
188,637
Messages
2,908,154
Members
230,800
Latest member
Mcoleman
Top