Pugsly's FG rebuild thread

pugslyyy

Expedition Vehicle Engineer Guy
Lots of boring tasks completed today.

- decided that I had really and truly found and patched the leak in the cabover portion of the Bigfoot truck camper. I had dropped / opened up ceiling/wall panels and have had a fan running since I found the leak to dry everything out. We've had a couple of really big storms since the repairs and it all seems good to go now. Reinstalled the headliner / trim / insulation and added in foil tape to seal the interior so that in winter moisture from the interior won't migrate into the insulation. Foil tape is one of those amazing products that it is kinda hard to go wrong with.
bigfoot bedroom insulation.jpg

- reinstalled the TV/Blue-Ray/etc in the bedroom, with lots of split-loom to make it tidy. The TV mount is a floor-to-ceiling affair so I need to get it back in place before I put the mattress back in (which fortunately was removed prior to the leak). It had worked its way loose so I put some adhesive-backed velcro between it and the wall panel. The combination of velcro and screws is really good for handling vibration.

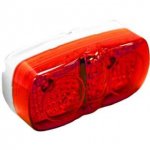
- swapped out the 5 red clearance lights on the back of the Bigfoot for LEDs. Any day I get to use heat shrink is a good day. :)
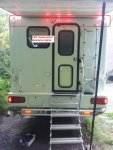
rear clearance lights LED upgrade.jpg133954301_clearance-4-in-led-marker-oblong-light-red-cw1544r-at-.jpg

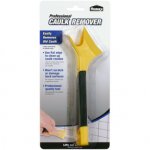
- stripped all the caulk off of the passenger side of the Bigfoot and cleaned with mineral spirits. This took a long time, and I've figured out that one removal tool is good for a side. I need to go buy two more tomorrow. They work nicely, sturdy enough to get the job done but soft enough not to mar the gelcoat.
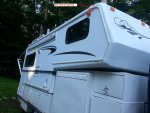
Bigfoot passenger side caulk and screw guard replaced.jpg041072580052lg.jpg3005d36d-8042-482c-a94f-dda2aef372fa_300.jpg

- Laid down a lot of 3M 5200 sealant. I don't use the fast cure, I like the longer working time of the standard cure stuff and I'm usually not in a rush. It also means if I don't use the entire tube at one go I'll probably still be able to use it in a day or two.
91230+016.jpg

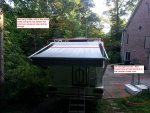
- tried to figure out what is going on with the rear awning on the Bigfoot. It is a Carefree which is a decent enough brand but the Fiesta is an OEM grade awning and I'm not sure whether I need to repair or replace it - seven years of sun having taken its toll on the vinyl. (Or if in fact I need a rear awning at all.) The weather forecast is good so I have it extended tonight, and I sprayed it down with Wet&Forget to see if that will clean it up a bit. There are no really gentle options for cleaning up mold/mildew but I like this better than bleach, etc.
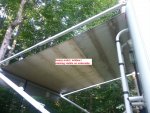
rear awning bottom view.jpgrear awning top view.jpg
0087928800014_500X500.jpg
 
Last edited:

Amesz00

Adventurer
thanks I'll def use a tile blade thanks for the hint. I have a grinder but I think I'll be steadier with the saw instead of freehanding it with a grinder.

Hmm, I also have a rotozip maybe I'll think about using it with an appropriate bit...

meh, i used a jigsaw on mine, then a rough file then a fine file to clean it up. with masking tape on it like john said. used a steel ruler to mark a good curve.
 

mhiscox

Exp. Leader Emeritus
I'm not sure whether I need to repair or replace it - seven years of sun having taken its toll on the vinyl. (Or if in fact I need a rear awning at all.)
Note that you're holding an election ;) but I cast a vote for keeping the awning. I don't have one over the rear door of the Sprinter and I'm thinking I'll need to add one, as the afternoon sun comes in pretty strong with the rear open. You've got a smaller area, so maybe sun protection is less important, but we also like being under cover when transisting from bad weather outside to the cabin; lets you get the muddy shoes and wet jackets off. Of course, I don't know the downside to keeping it (assuming it cleans up), but it seems handy to have.

Nice to see the "restoration" coming along so well. Impressive work.
 

pugslyyy

Expedition Vehicle Engineer Guy
Note that you're holding an election ;) but I cast a vote for keeping the awning. I don't have one over the rear door of the Sprinter and I'm thinking I'll need to add one, as the afternoon sun comes in pretty strong with the rear open. You've got a smaller area, so maybe sun protection is less important, but we also like being under cover when transisting from bad weather outside to the cabin; lets you get the muddy shoes and wet jackets off. Of course, I don't know the downside to keeping it (assuming it cleans up), but it seems handy to have.

Nice to see the "restoration" coming along so well. Impressive work.

Got some more caulking done today, that's a task that seems endless. Cut away the old, brush it, clean it with mineral spirits, lay down new. Exciting times!

I'm leaving the awning extended for now, I actually want to see how the fabric holds up to a bit of weather (it seems pretty brittle) - if the thing is going to fall apart I would rather it happen in my driveway. Any suggestions on economical sources for replacement awning? (just the fabric)
 

mhiscox

Exp. Leader Emeritus
Any suggestions on economical sources for replacement awning? (just the fabric)
Given you'd have the old awning for a template, if you gave any sewing ability (or the initiative to give it a try), you can get whatever material you need from an online source like Sailrite.com. At a minimum, you can see the full range of what's available in Sunbrella and similar fabrics.

Also, if you consider the DIY route, you'll sometimes find appropriate material for an awning for sale fairly cheap on eBay.
 

dhackney

Expedition Leader
... I cast a vote for keeping the awning. ...

+1


we also like being under cover when transitioning from bad weather outside to the cabin; lets you get the muddy shoes and wet jackets off

We found that if we were going to be anywhere for more than one or two days, it was worth deploying the rear awning.


.... I don't know the downside to keeping it

a. Weight, up high where you least want it. Of course, with that particular rig, the weight of the rear awning is not so much of an issue relative to the grand scheme of things. Who built this thing, anyway?

b. It's a bit fiddly to deploy, although Jon is a lot taller than I am, so it will be easier for him.

c. Like any manual awning, you need to stow it if there's going to be high winds, etc.


... but it seems handy to have.

Very much so.


Nice to see the "restoration" coming along so well. Impressive work.

Very much agreed.

Fantastic to see it coming back to life and becoming the Pugsly Fuso!
 

dhackney

Expedition Leader
Got some more caulking done today, that's a task that seems endless. Cut away the old, brush it, clean it with mineral spirits, lay down new. Exciting times!

Wax on, right hand. Wax off, left hand. Wax on, wax off. Breathe in through nose, out the mouth. Wax on, wax off. Don't forget to breathe, very important.

:)
 

pugslyyy

Expedition Vehicle Engineer Guy
+1


We found that if we were going to be anywhere for more than one or two days, it was worth deploying the rear awning.


a. Weight, up high where you least want it. Of course, with that particular rig, the weight of the rear awning is not so much of an issue relative to the grand scheme of things. Who built this thing, anyway?

b. It's a bit fiddly to deploy, although Jon is a lot taller than I am, so it will be easier for him.

c. Like any manual awning, you need to stow it if there's going to be high winds, etc.


Very much so.


Very much agreed.

Fantastic to see it coming back to life and becoming the Pugsly Fuso!

Thanks! The big thing with the awning is that it is just in generally bad shaped - the system just has not held up well. So it is more a question of whether to bodge some sort of a repair to the current awning or take it off and replace with a new one that is more robust and easier to deploy.

I want to try using this one (unless it completely falls apart on me) for a while and suspect the direction to take will become self evident.
 

pugslyyy

Expedition Vehicle Engineer Guy
The last week I've been taking care of some details - more removing and re-applying caulking, reinstalling my roof vent covers, converting my work lights to LEDs, etc. Nothing terribly exciting to document. I do have a welding shop scheduled to make my modifications to the service body over the rear wheel arches next week, so that should be interesting. I have some prep to do tomorrow to be ready for that.

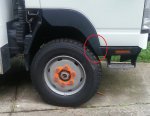
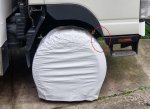
Today I trimmed the PS front wheel arch. Here's the obvious clearance issue -

PS front wheel arch trim 0.jpg

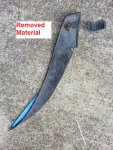
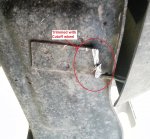
I trimmed the fiberglass with a diamond blade jig saw as recommended and then used a cutoff wheel to remove the now superfluous lower retaining bolt mount.

PS front wheel arch trim 4.jpgPS front wheel arch trim 3.jpg

With this result

PS front wheel arch trim 1.jpg

I'm not sure if there are any other rub spots, there may be additional mods required once I test lock-to-lock.
 

Ford Prefect

Expedition Leader
Most vehicles I have worked with will have a directional swing. If the control arm is in front it will swing up and back, if the arm is in the rear it will swing up and forwards when the springs compress. I would just check that and see where the tire is most likely to go, then match it with possible suspension travel, and you should know.

Looks good!
 

pugslyyy

Expedition Vehicle Engineer Guy
Most vehicles I have worked with will have a directional swing. If the control arm is in front it will swing up and back, if the arm is in the rear it will swing up and forwards when the springs compress. I would just check that and see where the tire is most likely to go, then match it with possible suspension travel, and you should know.

Looks good!

Well this is leaf sprung solid axles so probably won't be a lot of movement fore-and-aft though I've seen plenty of movement on coil sprung vehicles! I trimmed the driver side today, and have an appointment on Thursday to do the mods to the service body over the rear axle.
 

pugslyyy

Expedition Vehicle Engineer Guy
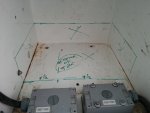
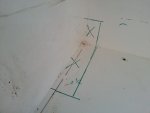
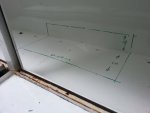
The truck has been at the fab shop getting the mods made to accommodate the larger wheels installed as part of the SRW conversion. I'll have pictures of the changes coming up soon, but this is the basic mod -

Driver side
service body driver side front.jpgservice body drivers side middle.jpgservice body drivers side rear.jpg

Passenger side
service body passenger side.jpg

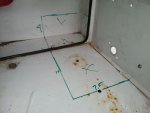
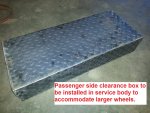
...and here's one of the boxes ready for install.
passenger side wheel clearance box ready for install.jpg
 

Forum statistics

Threads
189,672
Messages
2,919,590
Members
232,700
Latest member
bradbarbz
Top