Purchased an Expedition G Wagen

McBride

Adventurer
Psychiatrist wanted

Didn't make the AZ trip as planned but thanks for the well wishes. Work obligations got in the way thru the end of Thursday and 3 days isn't long enough to make the route I was looking in to. I was able to get some important housework done instead. I'll do it soon - have it all mapped out. The 5 day fishing trip on the 25th is going to happen come he'll or high water.

I have continued to get parts for modifications and tweaks to G-ronimo. On Monday she goes to the awning company to get measured for the custom window coverings and awning. She then goes to the mechanic on Thursday to have fluids and belt changed and the auxiliary fuel filter water trap installation. The pre-formed elbows for the rub rails have arrived so now I can proceed with fabrication on that. Next weekend I'll finish installing the InReach/Ipad nav and Bluetooth audio system (Ipad pairs with the new stereo too) using Ram and Joy Factory mounts. I'm just about done reconfiguring the placement of the house battery and propane tank; extending wires and hoses and such. The new setup will be easier to use and will distribute more weight forward in the camper.

Hope the rest of you are getting out too.
 

McBride

Adventurer
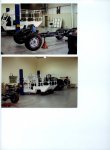
Original build pics

My mechanic found some pics of when the G was being built at Europa. He is Marc Beyer, the guy wrenching on the engine in the article pic. There is also one of him with the engine when it was still in Germany. Pretty cool to see it in pieces. It looks like they built the @#%& out of the camper frame.
 

Attachments

  • Europa Pics 012.jpg
    Europa Pics 012.jpg
    496.1 KB · Views: 158
  • Europa Pics 017.jpg
    Europa Pics 017.jpg
    498.1 KB · Views: 141
  • Europa Pics 016.jpg
    Europa Pics 016.jpg
    486.5 KB · Views: 165
  • Europa Pics 018.jpg
    Europa Pics 018.jpg
    501.3 KB · Views: 124
  • Europa Pics 022.jpg
    Europa Pics 022.jpg
    494.3 KB · Views: 122
  • Europa Pics 023.jpg
    Europa Pics 023.jpg
    486.4 KB · Views: 116
  • Europa Pics 002.jpg
    Europa Pics 002.jpg
    458.5 KB · Views: 123
  • Europa Pics 003.jpg
    Europa Pics 003.jpg
    526.6 KB · Views: 122
Last edited:

McBride

Adventurer
Trip Pics

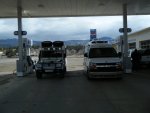
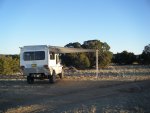
Here are a few photos from my last trip. Weather was rain/snow mix, high winds at times and fishing wasn't great. Oh well. Winter in northern New Mexico. Being out was fun. My friends were in a Roadtrek 210 so we stuck to roads and developed campgrounds. He liked my G so much we are going to Denver next week and he is going to look at an EarthRoamer. With that he can join me on the offroad trips. Should be fun to see one in person - 41" military beadlocks!

The pics are, the San Juan, G-ronimo and the Roadtrek, the Red River/Rio Grande confluence, the Rio Grande Gorge and my last campsite overlooking the Rio Grande.
 

Attachments

  • March 2014 016.jpg
    March 2014 016.jpg
    573 KB · Views: 63
  • March 2014 019.jpg
    March 2014 019.jpg
    514.9 KB · Views: 73
  • March 2014 025.jpg
    March 2014 025.jpg
    560.3 KB · Views: 63
  • March 2014 032.jpg
    March 2014 032.jpg
    540.1 KB · Views: 58
  • March 2014 035.jpg
    March 2014 035.jpg
    511.4 KB · Views: 55
Last edited:

McBride

Adventurer
A couple of new additions

Some recent additions are a military inspired antenna mount with a new antenna, an Ipad on a Joy Factory carbon fiber arm, an InReach satellite communicator on a Ram mount and a couple of Expedition Portal Stickers to dress things up a bit.

The GPS/Ipad combo is nice for navigation while driving. I have the DeLorme map app, the Motion X map app and the Benchmark New Mexico atlas at this point. It is easier to use while driving than my usual map books and I love that it shows my speed and altitude.

I also paired the Ipad with my stereo so now I can listen to ITunes on the camper speakers (which need some serious upgrading).

I hardwired an additional magnadyne charging port up where the carbon arm mounts so I don't have cords running all over the place. It has the 2amp Ipad usb port, a regular usb port and two 12v sockets. Now the vehicle has a total of 6 hardwired usb ports and 5 12v sockets - super handy.

I got the antenna mount from Burque Doka on this forum. I think I was lucky and got the last set. I haven't mounted the rear one yet - waiting to get a ham radio and the antenna will go on the rear mount. He did a nice job.

I just checked out MHiscox EarthRoamer Jeep and absolutely love the graphics he came up with. I kind of think something like that would break up the rather large, flat white sides of the camper. Someday....
 

Attachments

  • March 2014 005.jpg
    March 2014 005.jpg
    521.4 KB · Views: 80
  • March 2014 023.jpg
    March 2014 023.jpg
    527 KB · Views: 75
  • March 2014 003.jpg
    March 2014 003.jpg
    511.8 KB · Views: 72
  • March 2014 041.jpg
    March 2014 041.jpg
    535.6 KB · Views: 68
  • March 2014 042.jpg
    March 2014 042.jpg
    506.7 KB · Views: 74
Last edited:

swb

Observer
he is going to look at an EarthRoamer

I had not heard of them so looked it up. Had a good laugh at some of the marketing speak "An EarthRoamer XV is a compact, energy efficient, solar powered luxury home"

Compact? Solar powered? Efficient?
Only in America.
 

McBride

Adventurer
That is funny. Maybe when compared to the usual American 40' diesel pusher RV with 4 slide outs. For my friend the main points are that it is nicely appointed, well equipped and can handle backcountry terrain - get away from the crowds and highways. I hope he gets it and we can go on caravan adventures together. I can't wait to see the beast in person.

William
 
Last edited:

McBride

Adventurer
Awning and window covers pics

I picked up my new custom awning and window covers for G-ronimo last week.

They are made from a medium/heavy duty synthetic awning fabric.

Window covers - the original plan was to make the window covers with Velcro on the perimeter of the backside. The velcro was to hold 1/2" dia x 1/4" thick neodymium magnets in place and the whole covering would be placed over the window and the magnets would stick to the steel frame which the windows are mounted within. This steel frame is in the camper wall and isn't visible. This didn't work as the magnets weren't powerful enough to hold well thru both the Velcro and the marine plywood paneling.

To solve the problem, I took a hot 1/2" diameter rod and seared the plastic velcro so that there was a smooth indentation burned into it. I then sanded one side of each magnet, cleaned it and attached it to the Velcro using a gel catalyzed cyanoacrylic adhesive. The bond is excellent and you can't pull them off without tearing the fabric.

So now each window cover has a magnet on about 12" centers around the perimeter. If I want privacy, I just grab a panel and place it over the window and it sticks there nicely. No rinky dink RV type curtain rods to deal with and the panels can be stowed in one of the lazarettes until they are needed.

Awning - the awning attaches to the rub rail along the roofline and has grommets about every 6" to pass the ball bungee cords thru. I found I only need about 6 bungees to hold it in a 15 mph wind. The outer edge has three grommets about 4" in from the edge and another row about 2' in from the edge. The poles go thru these grommets and a line goes over the tip of the pole and gets guyed to an 18" stake I made out of 1" angle iron. There are three poles. The awning is @ 10'x10'. I have the option of using the second row of outer grommets to make it 10'x8', and have a 2' flap hanging down for extra sun/weather protection.

It takes about 30 seconds to put all of the camper window covers up and less than 10 minutes to set the awning up. That includes pounding the stakes and tying the guys. Taking it down took about 4 minutes, including a quick fold-up of the awning. It gets stowed inside the vehicle under the bench seat.

I had covers made for the windshield and passenger/driver windows but I need to take them back and have them trimmed a bit so that they fit better.

All in all I'm super happy with how it came out.

Here are some pics.
 

Attachments

  • awning pics 005.jpg
    awning pics 005.jpg
    539.2 KB · Views: 68
  • awning pics 009.jpg
    awning pics 009.jpg
    534.1 KB · Views: 60
  • awning pics 020.jpg
    awning pics 020.jpg
    515.9 KB · Views: 64
  • awning pics 021.jpg
    awning pics 021.jpg
    507.9 KB · Views: 63
  • awning pics 022.jpg
    awning pics 022.jpg
    525.4 KB · Views: 63

McBride

Adventurer
you can swap the injection pump of your 602 and use the one of a 662 engine( korando) ..is the same engine but all mechanical....i have these set up in my w460 300gd.

Your 460 has a 602.983? I think that is what I have, not sure how to tell exactly.

William
 

McBride

Adventurer
some more pics

Here are a few more pics of some G-ronimo improvements.

You will note that I messed up the install of my Expedition Portal sticker (I tried to do it while on the phone).

Some are of the tables set up inside in their floor receptacles. I haven't taken these on my trips this winter as I've found that they aren't really necessary and they take up a lot of room in the aisle space. I'll use them in the summer when I'll put them on their auxiliary tripod bases and use them outside for the cook stove and prep surface.

I also installed a Nicro stainless day/night solar fan in an attempt to eliminate condensation on the aluminum ceiling in sub-freezing temps. It didn't quite do the trick but the ventilation is nice. When it is freezing out I still have to take a towel and wipe the condensation off of the ceiling before I hit the sack. Most of the condensation comes from cooking on the propane stove. I'll install a more powerful 12v vent before next winter and it will get an exterior bash guard as well - I'm afraid of ripping it off on a branch. The low, steady air flow of the Nicro keeps the camper air from stagnating.

There is also a pic of the Magnadyne usb/12v charger I installed next to the Joy Factory Ipad arm mount. I put this in so there would be a convenient place to plug in the Ipad and not have cords all over the place. The cord gets wrapped a couple of times around the arm between the charger and device. It does the trick.

One pic is of the Earthroamer a friend of mine bought last week. We went to Denver on Thursday and he decided to go for it. Very nice rig. He'll love using it. Very skilled and hardworking crew building them. As you would imagine, it is a very well engineered and refined build.
 

Attachments

  • fan and tables 007.jpg
    fan and tables 007.jpg
    515.4 KB · Views: 82
  • fan and tables 008.jpg
    fan and tables 008.jpg
    515.9 KB · Views: 81
  • fan and tables 009.jpg
    fan and tables 009.jpg
    519.4 KB · Views: 81
  • fan and tables 003.jpg
    fan and tables 003.jpg
    545.8 KB · Views: 80
  • fan and tables 002.jpg
    fan and tables 002.jpg
    563.4 KB · Views: 76
  • fan and tables 010.jpg
    fan and tables 010.jpg
    516.6 KB · Views: 80
  • fan and tables 015.jpg
    fan and tables 015.jpg
    511.4 KB · Views: 88
  • 001.jpg
    001.jpg
    526.1 KB · Views: 91

mapper

Explorer
Just found this. I really, really like the simplicity of the camper as built. Lines up with the utilitarian aesthetic of the G so well. Honestly this is one of the few built vehicles I've seen that I really like, too many are way over-the-top, in my opinion. This rig is just perfect, right down to the Recaros. :drool:

Glad to see you sharing your experiences here.
 

McBride

Adventurer
Just found this. I really, really like the simplicity of the camper as built. Lines up with the utilitarian aesthetic of the G so well. Honestly this is one of the few built vehicles I've seen that I really like, too many are way over-the-top, in my opinion. This rig is just perfect, right down to the Recaros. :drool:

Glad to see you sharing your experiences here.

Thanks Mapper.

I hope I learn as much in the next year as I have in the last.

The design credit of the vehicle goes to Dave Holland, the first US G Wagen importer. I've done some tweaks and add-ons since it has been in my care - nothing major.

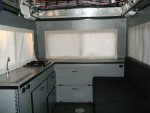
I can say the design has been a joy to use and I couldn't improve on the interior layout if I tried.

The handling is flat, predictable and stable and the power to weight ratio is adequate. Even with the Mud Terrains it tracks like a laser with no tendency to wander.

Of all the things Dave did the two things I appreciate the most are that he kept the weight low and there are lots of big screened windows that open. There are no upper cabinets or anything heavy above the height of the counter. That is the biggest flaw I've noticed on most builds. That, tiny windows and just trying to fit too much stuff in such a small space. Just my opinion.

That being said I think it could stand to lose about 250lbs from the camper, putting it at 6650lbs fully loaded. That is a goal of mine in the coming year and it shouldn't be a problem, just $$$ and time.

I also feel the top 1" of my Bilstein shocks are starting to go. It doesn't seem like there is much initial dampening when I'm driving really slow on a pitchy road. Is that how shocks start to fail? The faster I go the stiffer they get. My road is 9 miles of pitchy washboard hell! I have the heavy ORC springs and will be looking for a complimentary heavy duty shock set, preferably adjustable and rebuildable. Any advice from experienced members is appreciated.

Thanks again for you compliments.

William
 

mk216v

Der Chef der Fahrzeuge
William, I've enjoyed my Koni HT-Raid's. They are MASSIVE, so much larger in diameter than a Bilstein.
Adjustable only off the rig(compress and turn), rebuildable I assume(they come from Koni Holland).
Mario(I forget his name on PointedThree) from Idaho turned me on to them. A great match for my OEM HD Red3/Brown2 springs.
 

Forum statistics

Threads
189,923
Messages
2,922,236
Members
233,083
Latest member
Off Road Vagabond
Top