"Q" Flight's RB E250 Quigley Build

pugslyyy

Expedition Vehicle Engineer Guy
One concept that I resisted and didn't understand but now appreciate in this build is how well layering deadens and insulates.

I basically have created 2 shells with are independent of eachother inside the van. A thick insulation shell and another insulated finish surface shell. Because they have some dead space or at minimum are able to shift and minimally move independent from eachother it takes much more energy to transfer heat/cold or noise/vibrations from outside the vehicle to the inside.

What did you do inside the dash? I seem to have a lot of noise making its way through there and I have a lot of empty space in mine - planning to tuck a lot of insulation up in there.
 

flightcancled

Explorer
Nothing yet. I'll start with the dog house and front doors and work my way deeper and deeper into the depths of plastic clip hell until I can live with it.

When I drove the van home my impression was that the front I could live with and that the back was a miserable rattle trap. Now the back seems silent and all I hear is what is coming out of the cab.

I hope that extending the foam floor forward of the seats and doing a few layers of deadening in the doors and areas near the engine will be good enough.
 

pugslyyy

Expedition Vehicle Engineer Guy
Nothing yet. I'll start with the dog house and front doors and work my way deeper and deeper into the depths of plastic clip hell until I can live with it.

When I drove the van home my impression was that the front I could live with and that the back was a miserable rattle trap. Now the back seems silent and all I hear is what is coming out of the cab.

I hope that extending the foam floor forward of the seats and doing a few layers of deadening in the doors and areas near the engine will be good enough.

My doghouse cover seems very well insulated. Most of the motor noise we are hearing seems to be coming from over the top of it, not through it.

Since my van had been a contractor work van, it had screws rattling around in quite literally every hole and crevice of the body. We've been gradually finding and removing them - combination of magnets on a stick, long vacuum extensions, etc.
 

Desert Dan

Explorer
Q Flight

Nice build. What are the dimensions of your bed/ bench set up? Are you going to sleep length-wise or cross-ways to the van?
Is the C frame anchored to the walls?
 

flightcancled

Explorer
I plan to have a peak around when I replace my head unit, but I imagine that pulling off the dash is going to be miserable. Also you wouldn't want to compromise the passenger side air bag's functionality somehow.

Off the top of my head I believe it is 70"x 54". Full width starting from the rear doors and endjng just in front of the wheel wells. So sleeping sideways in the van there is room for someone who is 5'10" like me.

Here is the bed being cut out of a queen sized topper for scale.
a263121161da6f8dbd6b805e6d3d2d57.jpg


Also here is the trick to making the insert: cut one half of the bed out so it sits perfectly on the frame
19c1420a8d221f2dfbc974c9a0b2c1d6.jpg


Now take 1.75" off the inside. Cut this out so that you wind up with a scrap piece that looks like a carpenter's square.
8132234ffcbb10842b76c744a3c6f547.jpg


Copy that piece
0ad152a06412e941b4f547eed81ac1d8.jpg


Measure the rectangular gap and cut a piece .5" shorter and .75" narrower to allow for the carpeting.

Now when you go to the foam put the C together. Add the carpenter's square piece to trace the inside of the C. This will create an overhang that is flush to the frame.
13df6612fcb52d29aa95fc1b2703102c.jpg

(Otherwise your legs would be on the 2x4 frame when you sat down.)

Take the foam square and line it up so it is flush to the front edge and centered side to side. One complete everything will slide in and out easily and be flush.

Finally I think I over engineered with the removable cross brace. The bed seems plenty sturdy without it. With 2 people I'll probably be happy to have it though.

Modified the doors for towing mirrors after work today. Not bad at all to do.
565676950fcd8e77b108dbf223b069c0.jpg
 
Last edited:

flightcancled

Explorer
fbdfa3d7758532b93528ef1108956bff.jpg


dfcb0db4503e66daac83ae6d7793e96b.jpg


Took 2 weeks off the build while I was in Chile.

Before I left I ordered new composite headlights. I was shocked to discover that they need a different connector to the bulb the contractor ones that came stock. That put the brakes on a quick swap.

New GPS head unit got swapped in today. I'll be running a back up camera to the rear while I am doing my other electronic upgrades.

RE: Deadening the dash from the inside.
Poked my head around while I had the dash off today. You could definitely add fat mat under there. Would it do a lot? I don't know. One thing to think about is would the trapped heat cook your head unit. For now I will just turn my music up.

Pro tip: start pulling the dash at the headlight switch. Pull it all the way out and look for the release tab which lets it slide off the metal rod. I had a hell of a time in my jetlag fog figuring that out.

The new mirrors are such an improvement. Highways were a bit scary before. The other ones had me looking over the roofs of small cars.

c6e9e9d9f0350b3b00bb996e146225eb.jpg
 

patoz

Expedition Leader
Alex, I learned the hard way about the headlight switches when I was about 20 y/o working on my Mustang. I went through so much aggravation figuring that out, that I have never forgotten it. Back then (early 70's) there was no internet to do a quick search and find out how to do something.

What GPS unit did you get? I've been considering one that allows a camera to be plugged in also, due to limited space on my dash, but that has it's drawbacks too. For my situation, I really need two cameras, one for the back of the tow vehicle, and one for the back of the ambo/camper trailer.
 

flightcancled

Explorer
3a91502bb2fb24c0a876e9b396abfa8e.jpg


So far so good! Not super expensive, but works very nicely. As of right now I haven't run the backup camera, but it is ready to go.

I would say run a backup camera off the head unit and a separate independent screen for the trailer with a hookup at the hitch like your trailer lights. That would be the easiest and most effective.
 

patoz

Expedition Leader
Yeah, that's probably what I'll do. I may even look into a wireless camera for the trailer, since it's so far back.
 

flightcancled

Explorer
Still gathering parts and trying to decide how crazy I am going to go with the electronics in this van. I want to do as much as possible in one shot rather than make a mess adding things one at a time.

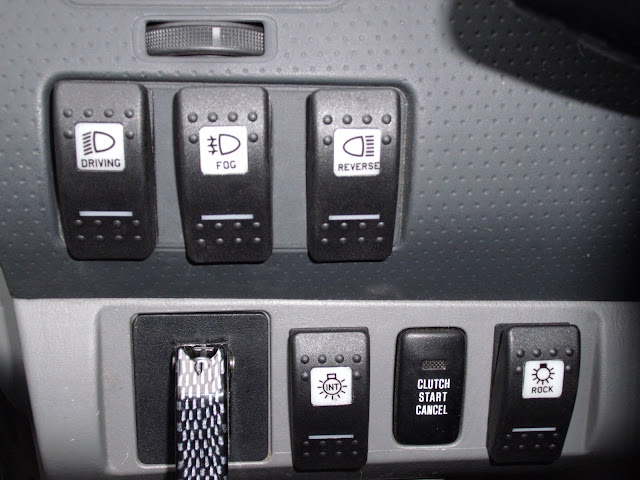
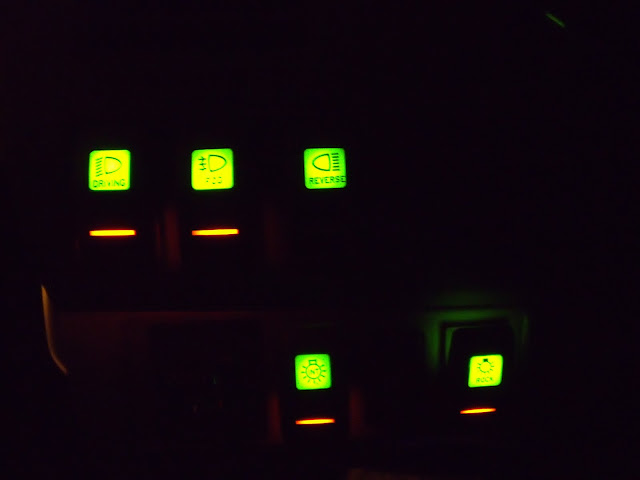
One of the issues I am having is the front of these vans doesn't leave any good options for adding switches. The previous owner hid the flasher and fog switches below the steering wheel, but they are easy to bump and a pain to reach if you're camping inside the van.

I started by looking for an ambulance console that I could retrofit, but at most I plan on using 4-5 switches, not 15-20.

Has anyone played with one of these? I'm thinking of mounting it on the dash above the temp controls.

IMG_1021_1.jpg


MUD UK Mini-Pod


I used these guy's products in my Tacoma and loved them.

2010-3-23%20083.jpg


2010-5-09%20039.jpg


Oh and what would this be without a pic of Q now and again?
ab1545edb0fcc0e92a365a9428fc6f24.jpg
 

flightcancled

Explorer
I've been running wires throughout Q as I inch along in my electrical build out. It would really help if I could nail down exactly what I want in the first place. I've only spent a few nights in Q and those were to pass out after holiday parties, not camping by any means. I'll post up once I've figured myself out.

In the meantime I finally "finished" the interior. As was my doors were still naked except for some tape to keep my insulation safe from condensation.

Cardboard templates and some work with a jigsaw gave me panels:
51a89217e9d92822807e7cb51666b6e3.jpg


The side doors I decided to give a plush look with leftover Reflectix. The rears will take more abuse so I put the carpet straight onto the board.
9cf5a4c3f04983ce17e4095dee7720c6.jpg


Installed
42ccf5d37e9761877ad35e7712ec586b.jpg


bd48e59f5db4ca07d8b512acf9c88b95.jpg


I also installed new headlights. These are the non OEM Eagle Eye or something lights. Took a little shimming to get the mounting hardware to lock in properly, but I have both more light, and a better distribution on the road.
ff2e05a660d980b919c5072a4ef4ef87.jpg
 

flightcancled

Explorer
I've been getting a lot of headway done in the tedious wiring.

Front and rear doors have Kenwood speakers installed. The addition of rear speakers has been the absolute best way to reduce road noise so far!

Main power bus has been installed and is awaiting the switch panel for completion.
20f97d316244d17a130d9eab809f3274.jpg


I mounted the overhead LED lights in using strips of vynel siding. Enough for the screws to securely fasten, but also light and thin.

02b151310e4b27d720e7e3cbff04c4b7.jpg


02af89d988f3c27a009dd76243250429.jpg


Overhead lights have been separated into a door circuit and an optional camping circuit. With a switch near the door. I also gave myself an LED night light so I don't have to blind myself when I need something at night. I had 2 of these kicking around. I'll probably paint the other one with black bed liner and swap it in.
86f6217ebabb4232569ac713bf61ffaa.jpg


Now time to order some more toys and keep it rolling. Spring is coming!
 

DAV!D

Adventurer
Painted.


Thought I had the T55+ kicking around still in my kit, but unfortunately the seats will have to wait until tonight to get pulled so I can do the front as well. No reason to let the leftover paint harden. I lost 1/3 of my gallon can of POR15 by letting it sit for just 3 weeks last time.

Sent from my SM-G900V using Tapatalk


Just a tip I learned. When you close an opened can of paint, cover the opening with Saran Warp before putting the lid on. I have a can of Por15 that was opened 1.5 years ago and it's still good. Added bonus is it doesn't let the top get glued in place.
 

Forum statistics

Threads
189,833
Messages
2,921,453
Members
232,931
Latest member
Northandfree
Top