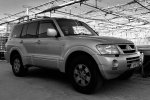
Rambo Penguin's Gen 3 Build!

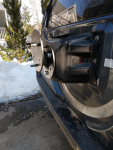
Another thing i did was shorten my hitch. That stupid thing would drag on everything. I cut 2” out of it, rewelded it and used the removed sections as scab plating. Should be just as strong as before and now it will spend less time dragging all over the trail


jV38Ys9l.jpg


NVpxtZFl.jpg


BwfI0eBl.jpg


vJs8TNUl.jpg
 

evomaki

Observer
Nice welds. Saw your earlier post on this thread about upgrading your springs. Another option to consider are the springs from Adventure Driven Design. I bought those for my Gen3 and they fit well. Those springs felt like they were the max you could realistically put on one of these vehicles. As it was, in the rear I had to rubber cement the lower spring perch to the control arm to keep it in place during install. It wanted to flop out of place during installation.

One interesting note about the Gen 3 rear suspension, which your earlier pics reminded me. It is an identical multi-link design as found in the Evo, it's just that all the bits are about 60% bigger. It is a very good design.

Thank you sir! I did consider the ADD springs but the OME one's fit my budget and a lot of the builds that have inspired mine are running that set up. I am a big fan of the rear suspension on these, but i didn't know that it was like a beefed up evo. That's cool. The front suspension is the Achilles heel of this rig IMO. no flex or ways to upgrade it other than building a totally custom long travel set up worth more than the whole car combined haha.
 

coffeegoat

Adventurer
While you were shortening the hitch is the a reason you didn't cut the reciever off and weld it to the top of the cross bar?
 
While you were shortening the hitch is the a reason you didn't cut the reciever off and weld it to the top of the cross bar?

Good question. This is very common advice, however I think it might be more applicable for different hitch set ups. It would have required a lot of fancy cutting to get the hitch off the cross bar, and then it would have poked out from the plastic bumper, and the bar would still hang down low. So the route I went solves most of that and I felt like I could trust my welding on that part of the structure. I’m not sure this will be my final solution to the hitch problem but it works well for now
 
The new stance of your ride...is inspiring as hell. Very very impressive. Looks mean as hell.

Thank you very much! When I first settled on buying a Gen 3 one of my big goals was to make it look good since I think they are so ugly stock. The bigger tires and wider wheels make it drive like a tank too
 
Rambo,
Did your new 33" wheel fit on the spare wheel mount on the tailgate door?
Thanks.

It did not. I had a lot of people tell me it would fit without any mods.. that was not my experience.

When I ran a 285/75/16 Ko2 (new) on the stock wheel it was too big to clear the bumper and it interferes with the rear wiper arm

With the new wheels 8” wide -11 offset it still didn’t clear the bumper but now the wiper arm has plenty of room. I reworked the stock tire mount and raised the tire mounting point by about 1”. I welded some bolts to the backside of the mounting plate and now I’m just using lug nuts to keep it secure.
4309afe10dd32536d3556a7b1e42f4e9.jpg


That picture kinda shows what I’m talking about. Now the tire and wheel fit no problem
 

SONICMASD

Adventurer
Regarding the Big3 wire upgrade, were there any hangups to watch out for on this job because I'm going to do it in the near future. It's been awhile since I looked at the cables but doesn't the battery ground go into like a wire loom with other wires and the battery positive has that big factory fuse box thing attached to it?
 
Regarding the Big3 wire upgrade, were there any hangups to watch out for on this job because I'm going to do it in the near future. It's been awhile since I looked at the cables but doesn't the battery ground go into like a wire loom with other wires and the battery positive has that big factory fuse box thing attached to it?
Great question. Sorry for the late response. There weren't any hang ups when I did mine. Basically you don't need to replace any of the wires, you just run a second set in addition to what is already there from the factory. So i left my alternator wire and factory ground and just added an additional ground and another alternator wire (both in 2awg).
 

goodwoodweirdo

Adventurer
Thanks for the clear write up, taken it all on board as I also have a 2003 Diesel with around 165k kms wanted a budget build, sold a HJ75 camper, also towing is a big part of my ownership. I really feel the Pajero is under rated and love mine. I'm rather restricted to what mods I can do due to Belgium road laws.. I plan on a intergrated light bar, like very much your black powder coated wheels, have a snorkle to fit and all the rest will be internal camping mods ohhh and yes replace the sagging rear end .... Please keep up sharing your finds...
cheers
Matt

pajero.jpeg
 

plh

Explorer
It did not. I had a lot of people tell me it would fit without any mods.. that was not my experience.

When I ran a 285/75/16 Ko2 (new) on the stock wheel it was too big to clear the bumper and it interferes with the rear wiper arm

With the new wheels 8” wide -11 offset it still didn’t clear the bumper but now the wiper arm has plenty of room. I reworked the stock tire mount and raised the tire mounting point by about 1”. I welded some bolts to the backside of the mounting plate and now I’m just using lug nuts to keep it secure.
4309afe10dd32536d3556a7b1e42f4e9.jpg


That picture kinda shows what I’m talking about. Now the tire and wheel fit no problem

I did this instead. Gives a little extra space to get the Trasharoo straps around the tire easily too.TireHolder.png
 

Forum statistics

Threads
188,293
Messages
2,905,040
Members
229,961
Latest member
bdpkauai
Top