Rango.....1942 Willys MB

Metcalf

Expedition Leader
Operation brass float was a success....

20121101_172055.jpg


20121101_172125.jpg


20121101_180321.jpg


It took a little bit of time to tune it in. I found that I needed to not only adjust the needle tab, but also the main body a bit to get everything where I wanted.

I used the quarter trick to set the level. The fuel is just barely touching the quarter. This is where I had it at the last Moab trip and it seemed to work very well.

make sure to try and make the needle tab hit the needle basically flat. This helps keep the needle from trying to bind in the seat.

The new float was like $13 with tax, I can't complain for a zero wait time out the door price.

A note. If you get the float level to low I think it starts to effect the air fuel ratio more than you would think. I stuck the #45 jets back in and reset the idle mixture. Both idle screws ended up 2 turns out for a 14-14.5:1 idle mixture. After a quick drive to check the cruise mixture it ended up a little lean at 15:1+. I will drop in a #46 jet in one hole and see if that helps. It's much cooler out so I think that might be why I got a slightly different reading than before, and perhaps the new float level, shape, etc ( when I was in moab before I adjusted anything the float level was higher than I remembered setting it at.

Hopefully I will get a few more parts in.

I having been thinking about trying to make a baffle in the fuel bowl to help with slosh.....
 

Metcalf

Expedition Leader
Well, I guess I will be trying some of this.....

bob-20217-1_w_m.jpg


....in the fuel bowl.

Methanol rated fuel cell foam.

Amazon has a good price on the stuff, but the wrong picture. RJS 20217-1. The '-1' is the important part. It's about twice the cost for the methanol rated stuff. Summit has it too...

http://www.summitracing.com/parts/BOB-20217-1/

My plan is to make a small block that will fill the void in the drivers side of the fuel bowl opposite the float. This should help keep most of the fuel in the bowl from sloshing. The float displaces most of the fuel on the passenger side of the fuel bowl.

As a secondary function the foam should act to slow down any fuel going out the vent hole in my 'slosh-o-matic 2000' top cover gasket. The foam will be right under the hole. This should help my odd flooding problem when the vehicle rocks side to side violently.

I think I can cut a block of foam that will hold itself in place using the shape of the bowl in the rear corner and the hole for the vent in the top cover gasket. Worst case I will have to make a small wire retainer or something.

The chunk of foam I bought is WAY bigger than I needed. If anyone wants to try something similar I can trim you off a piece of foam for a small fee :)

I did a little digging and saw this technique being used in other applications so I think it has promise. The methanol rated foam should last much longer than the normal stuff. I will probably change it out every season anyways. With the valve on the fuel inlet I could also run the carb bowl dry for storing the vehicle for long periods.

Fun stuff.....
 

Metcalf

Expedition Leader
A few pics by someone much better with a camera than I am...

579002_368013696617099_217761052_n.jpg


58822_368032606615208_473924324_n.jpg


644619_368013456617123_204179893_n.jpg


From these guys that we passed on our Steel Bender trip.

Axel Off Road Gear & Apparel | Facebook

They where with the Jeepers Jamboree run and going the normal way on the trail. This makes you go down 'The Wall' on Steelbender, we where going up. This is much more fun I think, but the rest of the trail is just kinda boring though....
 

Metcalf

Expedition Leader
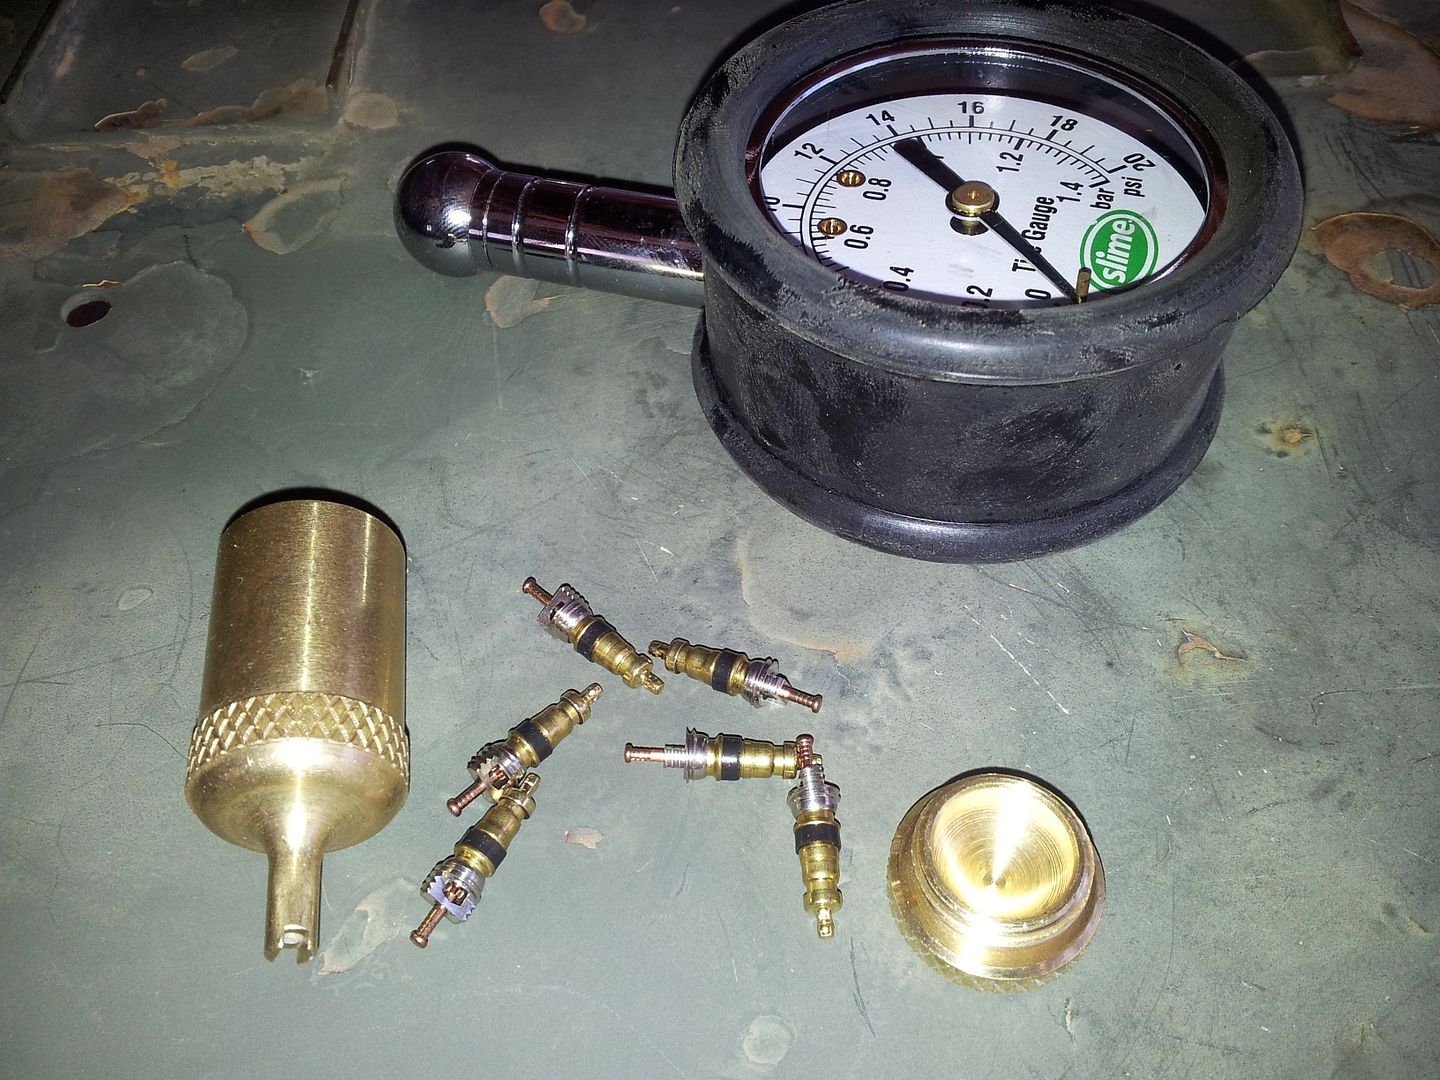
I finally got off my lazy rear end and did something...

20121114_171716.jpg


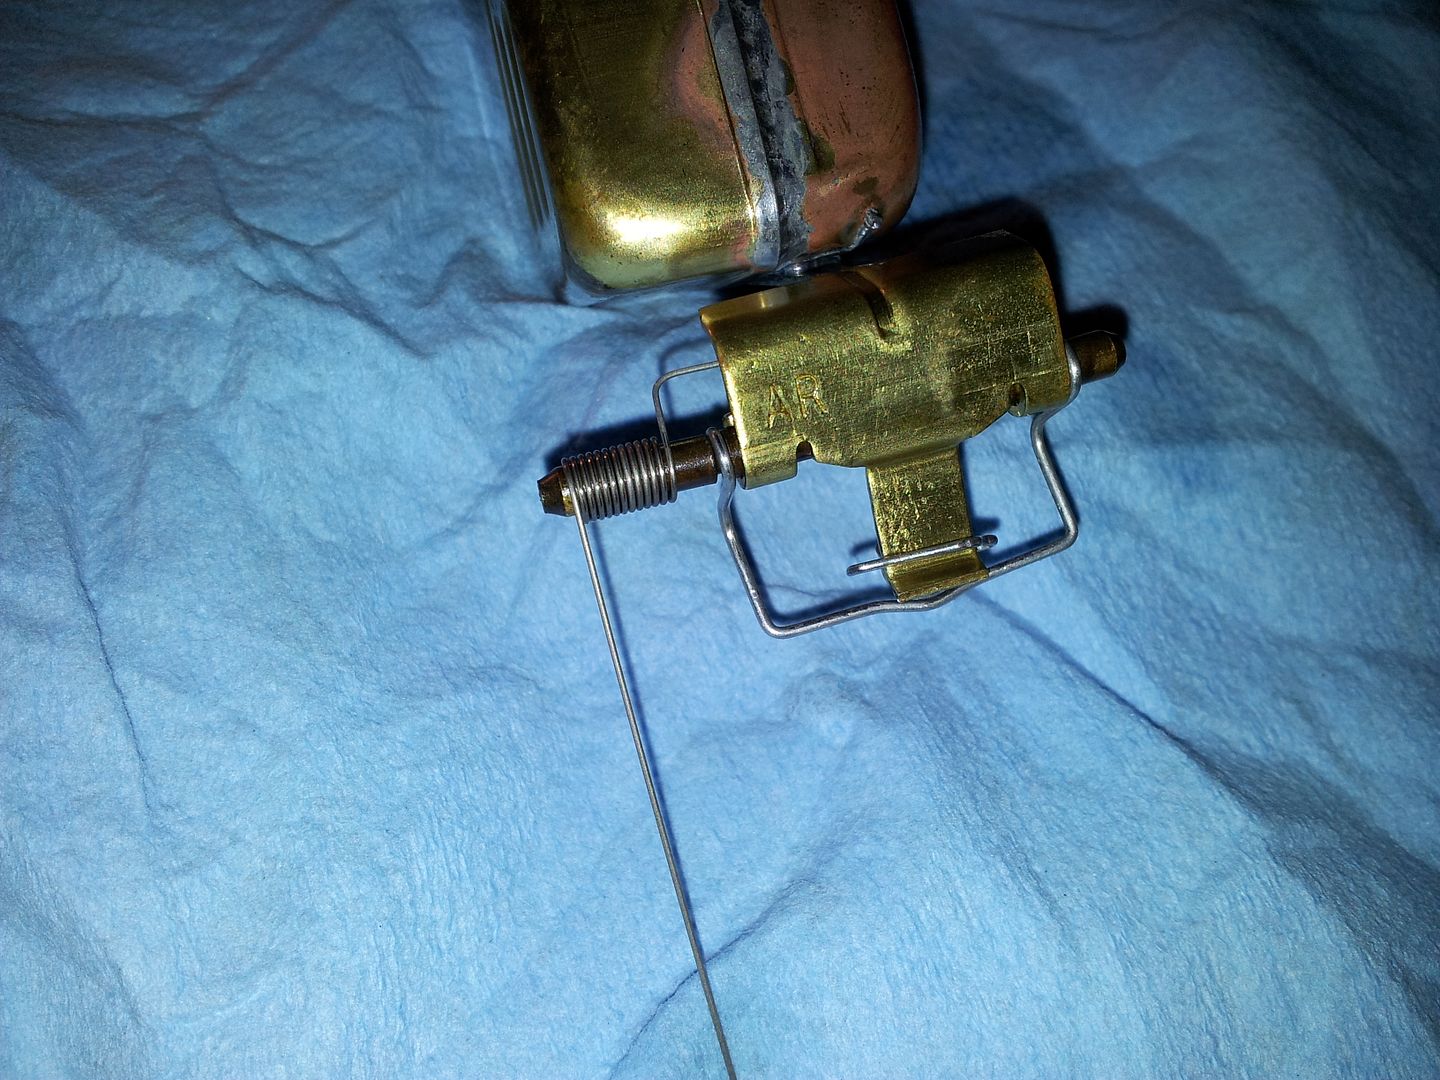
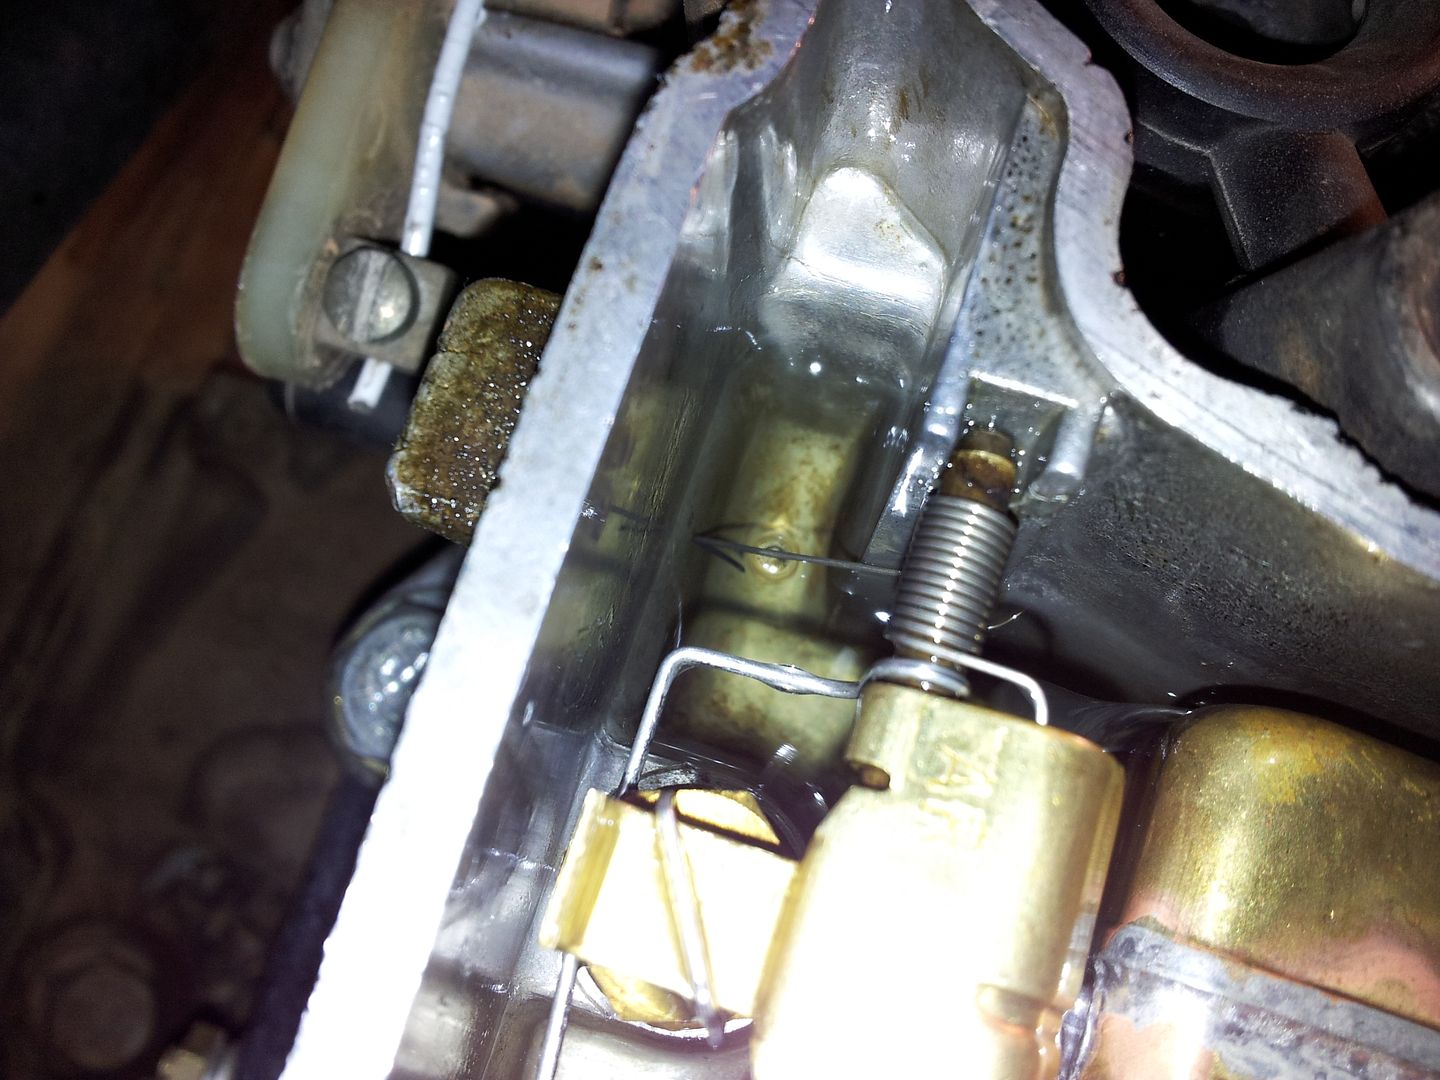
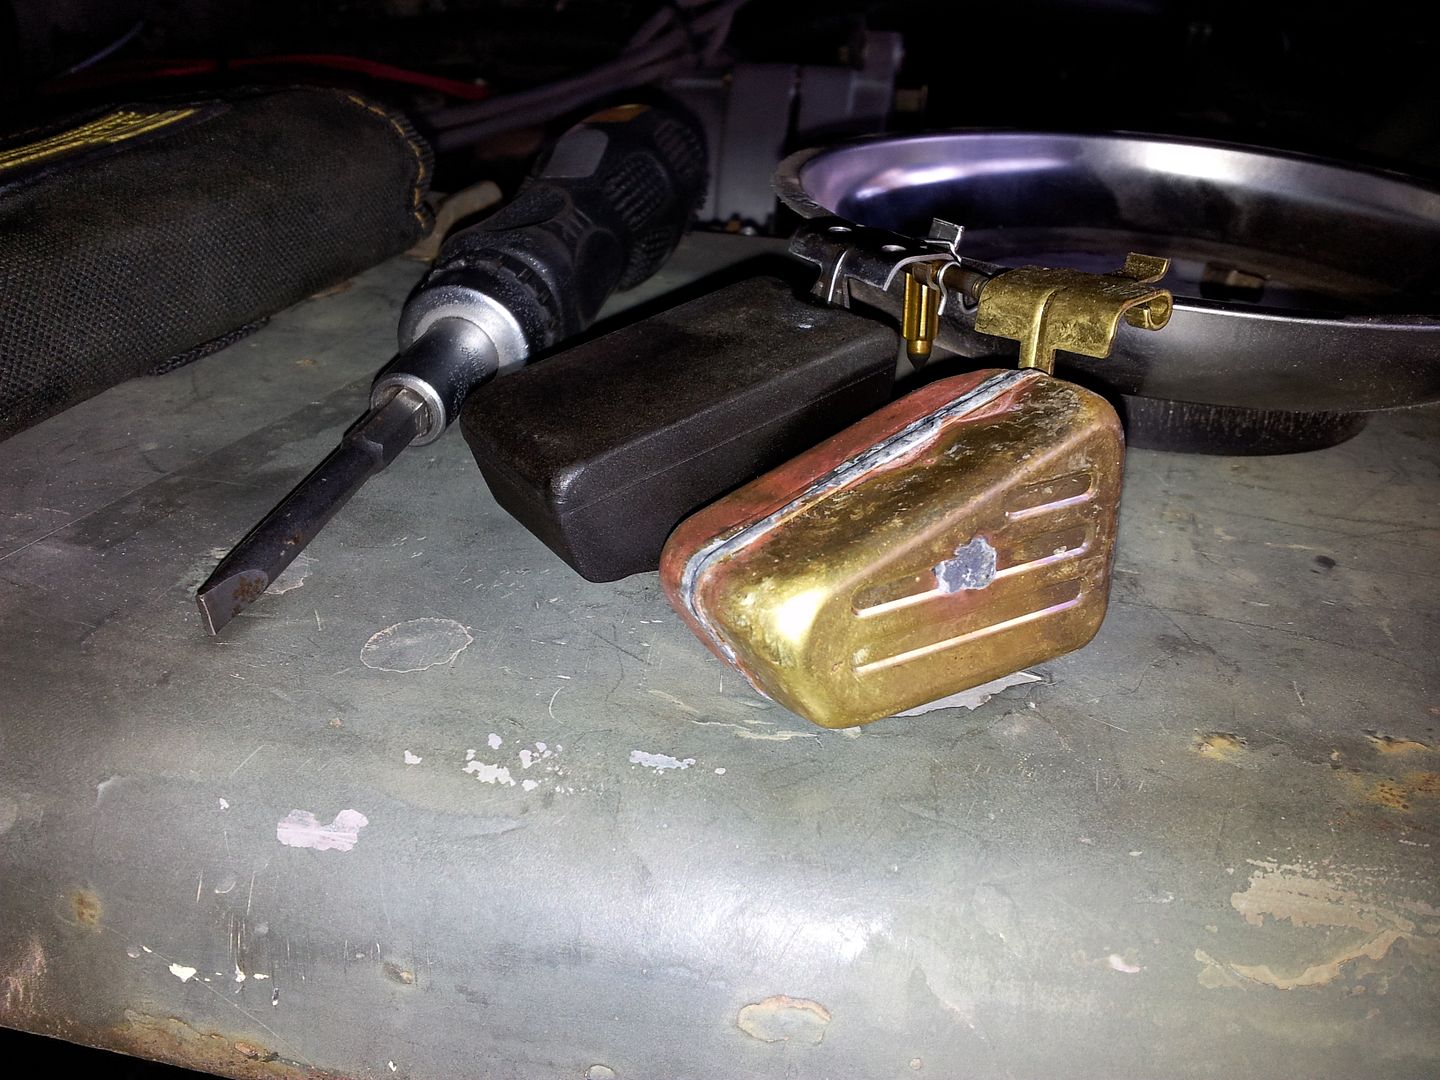
This is the elusive float spring from a late model 2150 carb. As far as I can tell one end goes under the float to help it go in the closed position. It is a VERY light spring however and doesn't help much.

20121114_173226.jpg


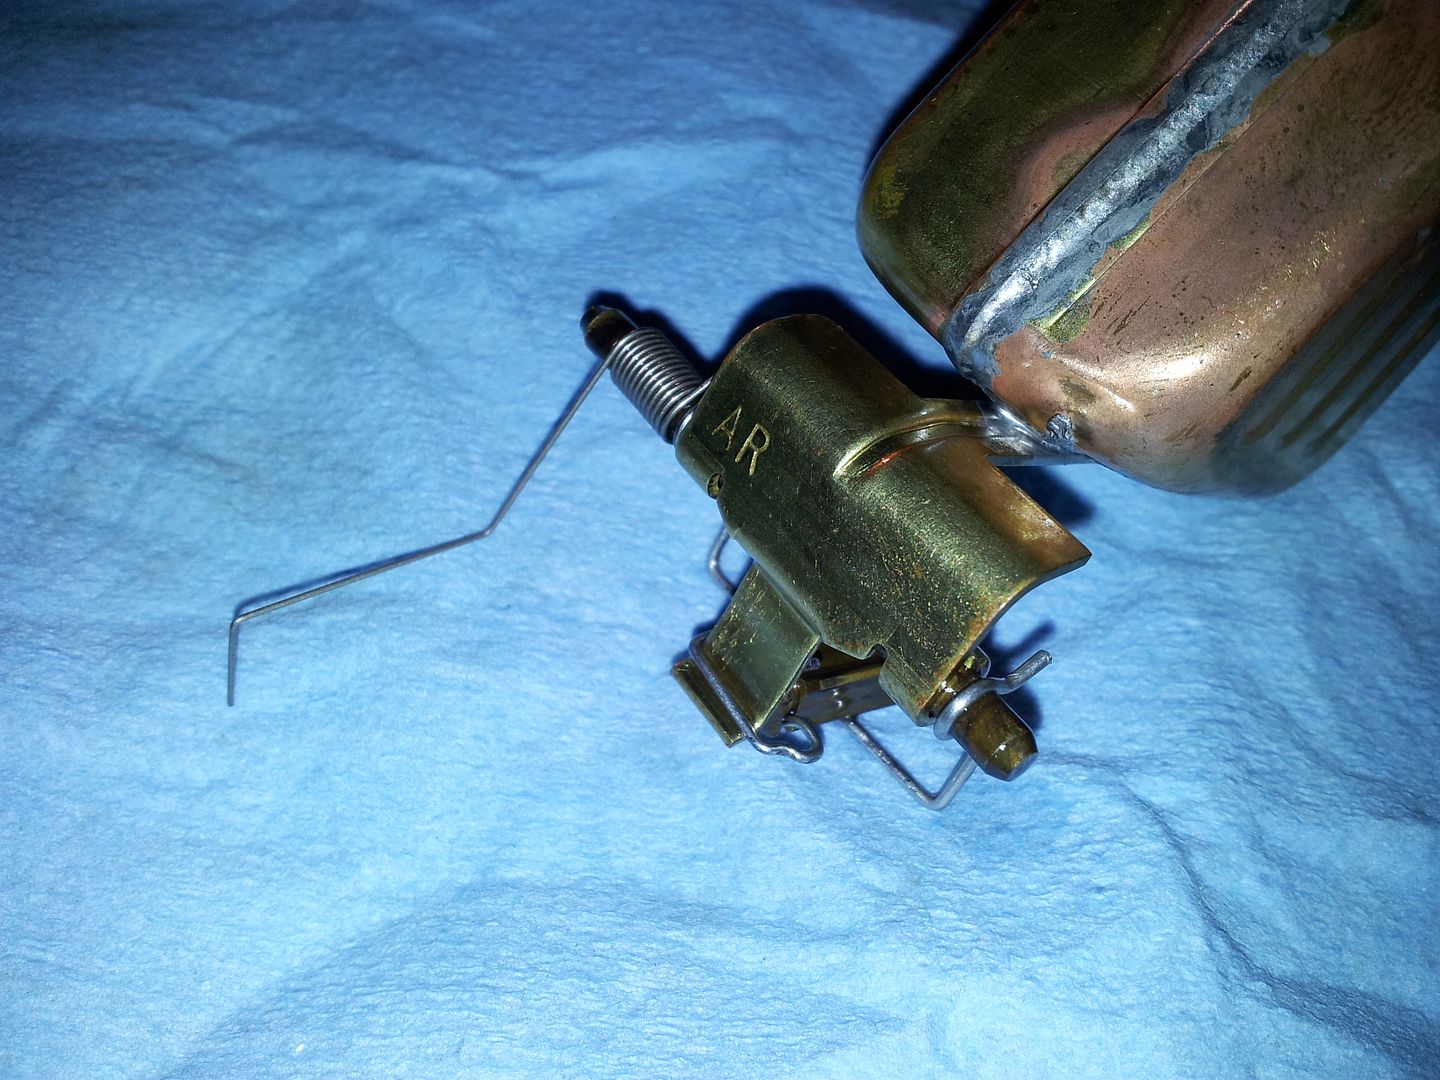
I ended up modding the end of my spring like this. I wanted just a little more tension on the spring. The spring end pushes against the wall of carb bowl.

20121114_173530.jpg


This is what it looks like installed. I have seen a few different pictures of ways to install it, but this seemed to work the best for me. My spring wasn't long enough to hit the bottom of the bowl like some I have seen?

20121114_173908.jpg


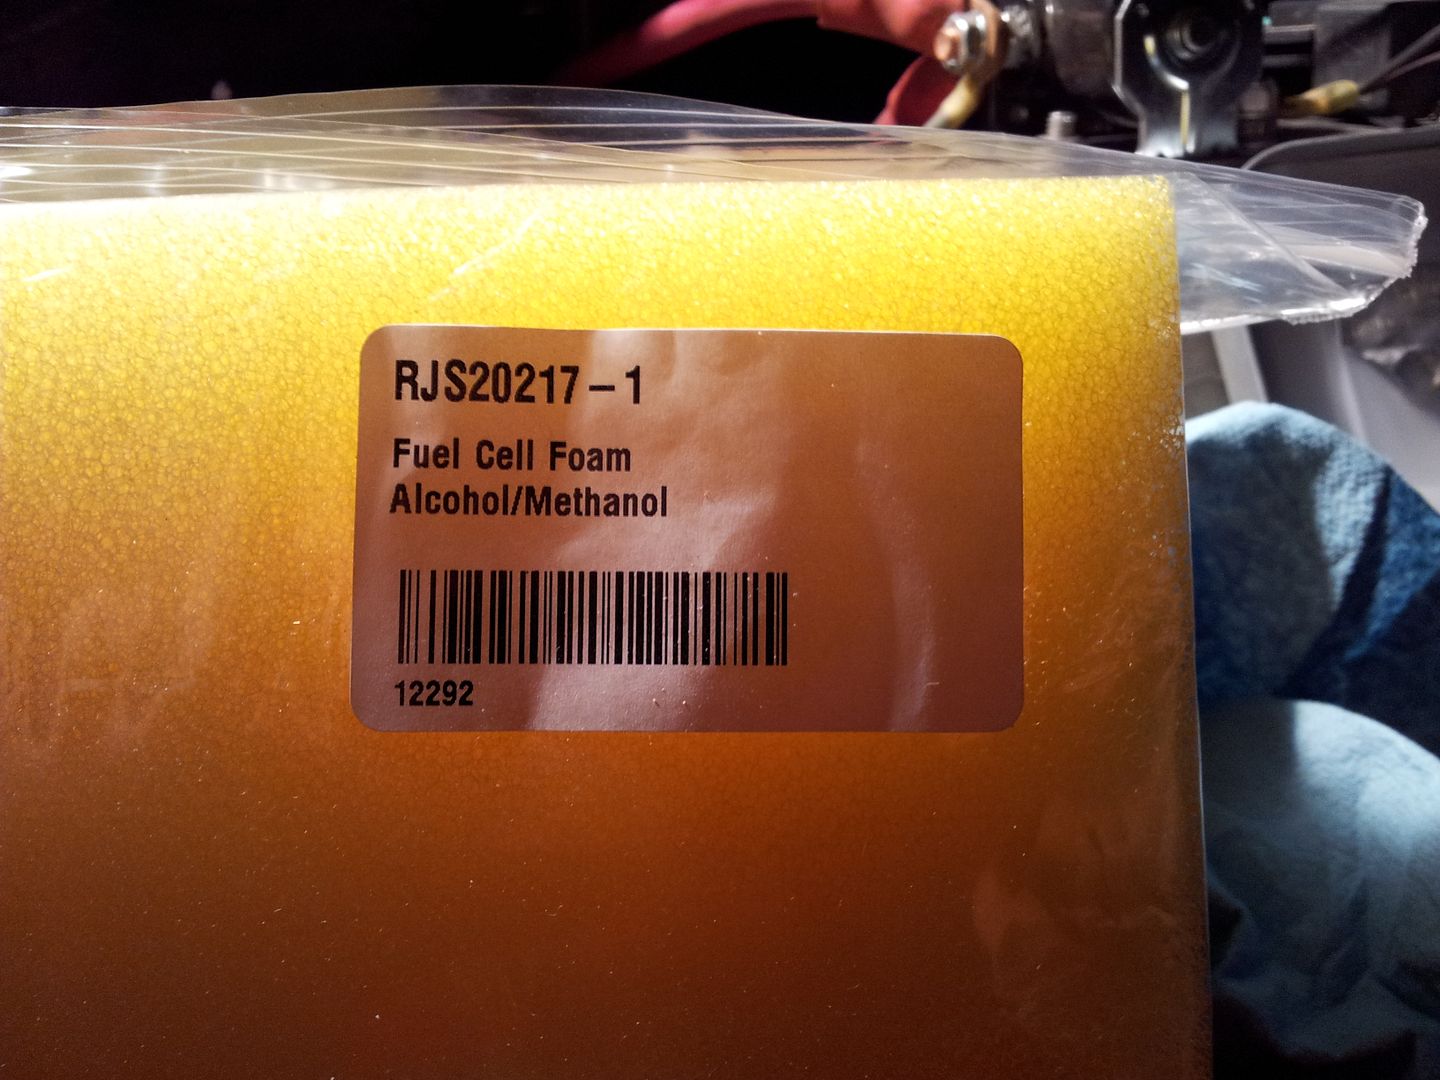
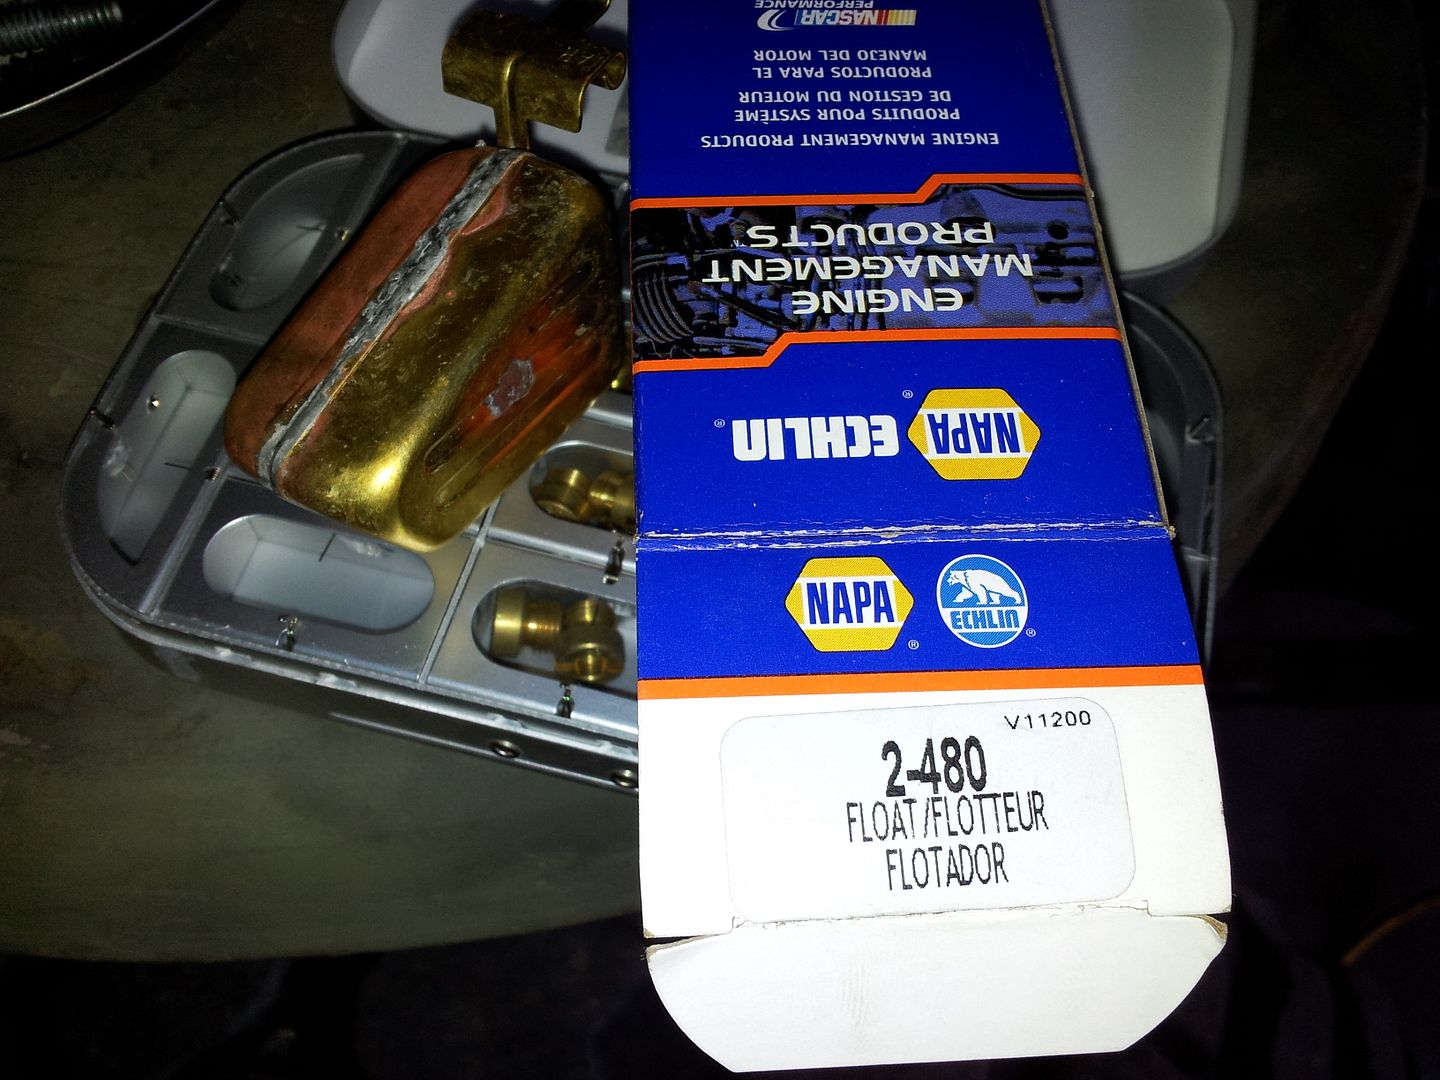
I then started playing with this stuff....

20121114_173839.jpg


The as delivered block was a little big....

20121114_175038.jpg


This is how much you need. Not much. I have extra if your interested in trying the idea.

20121114_175915.jpg


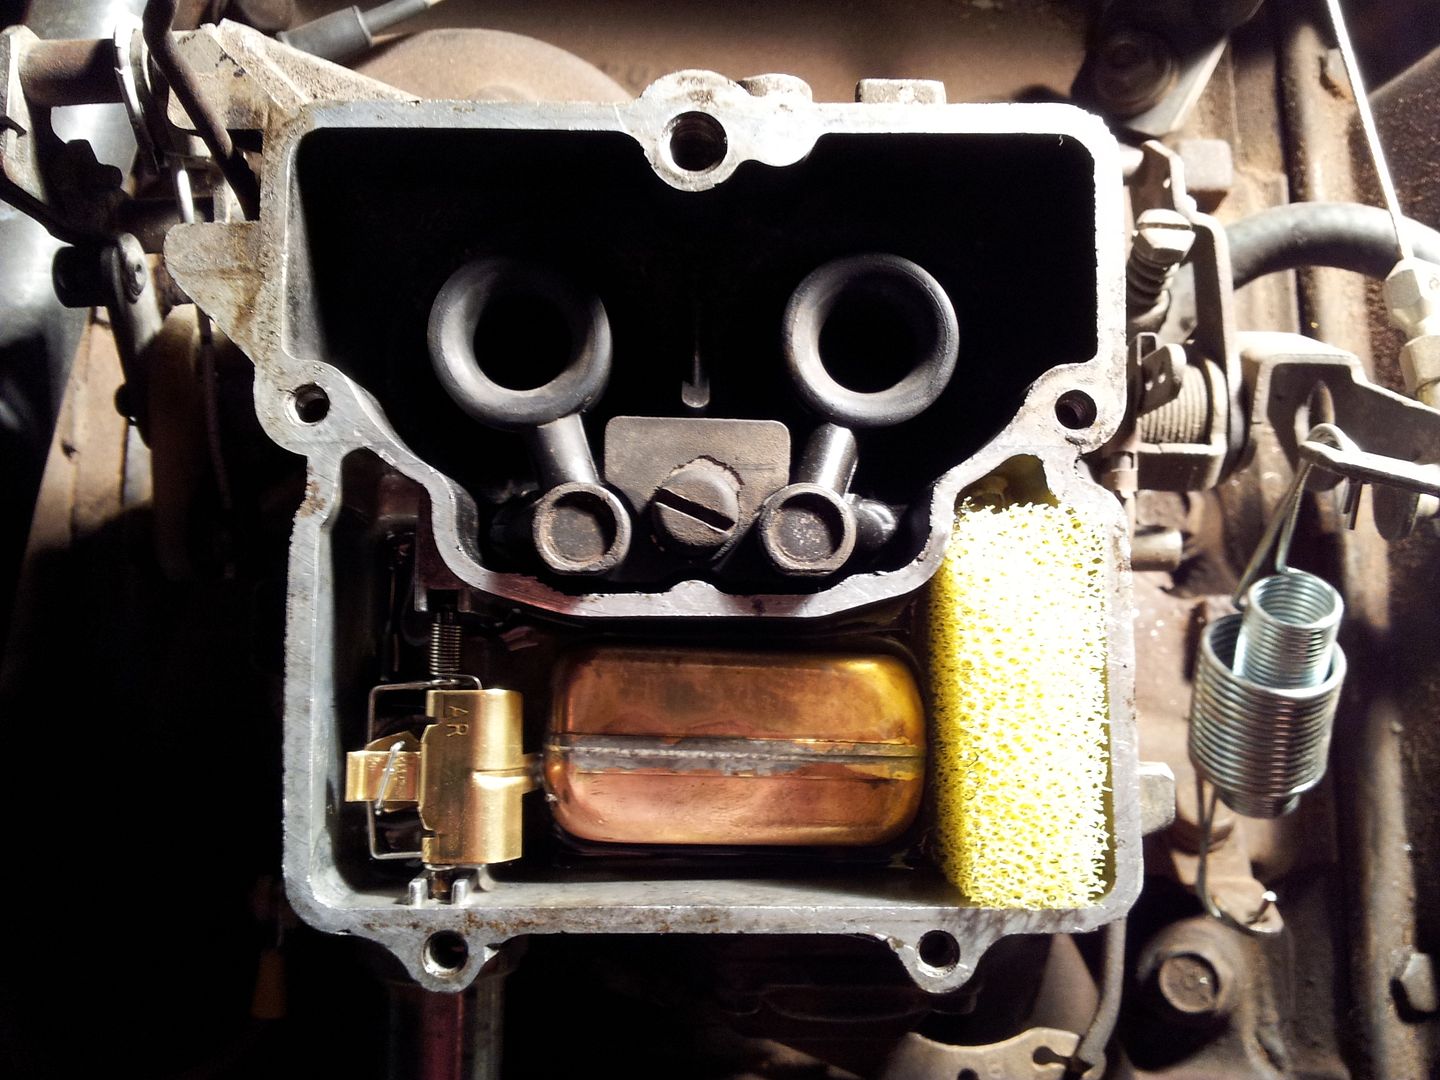
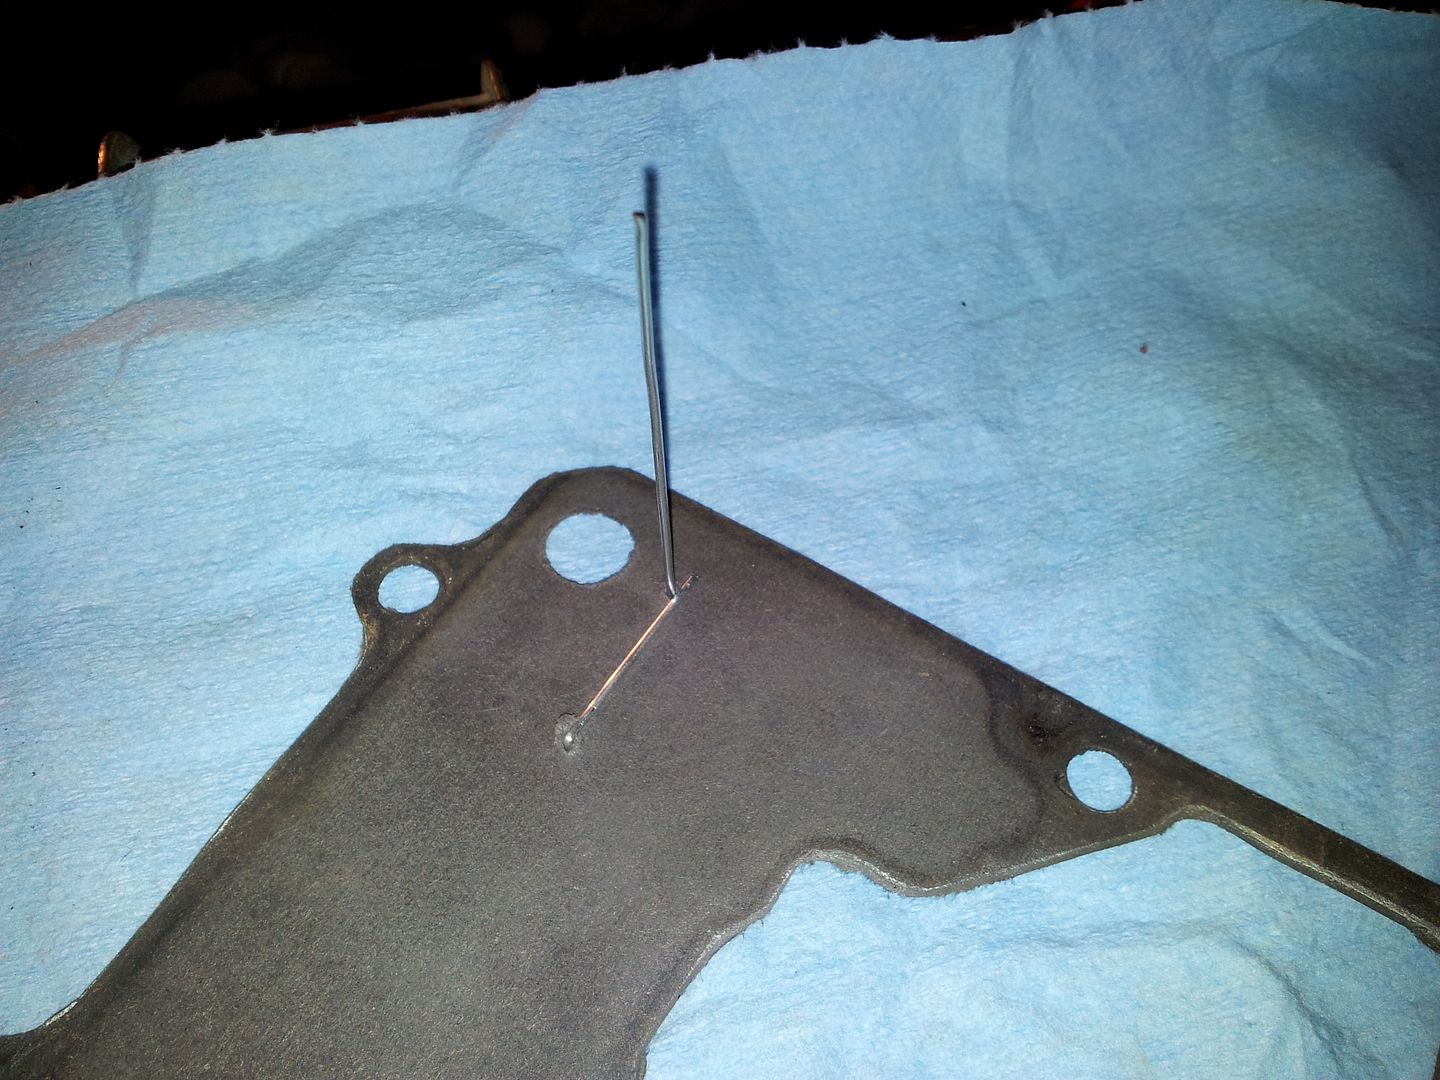
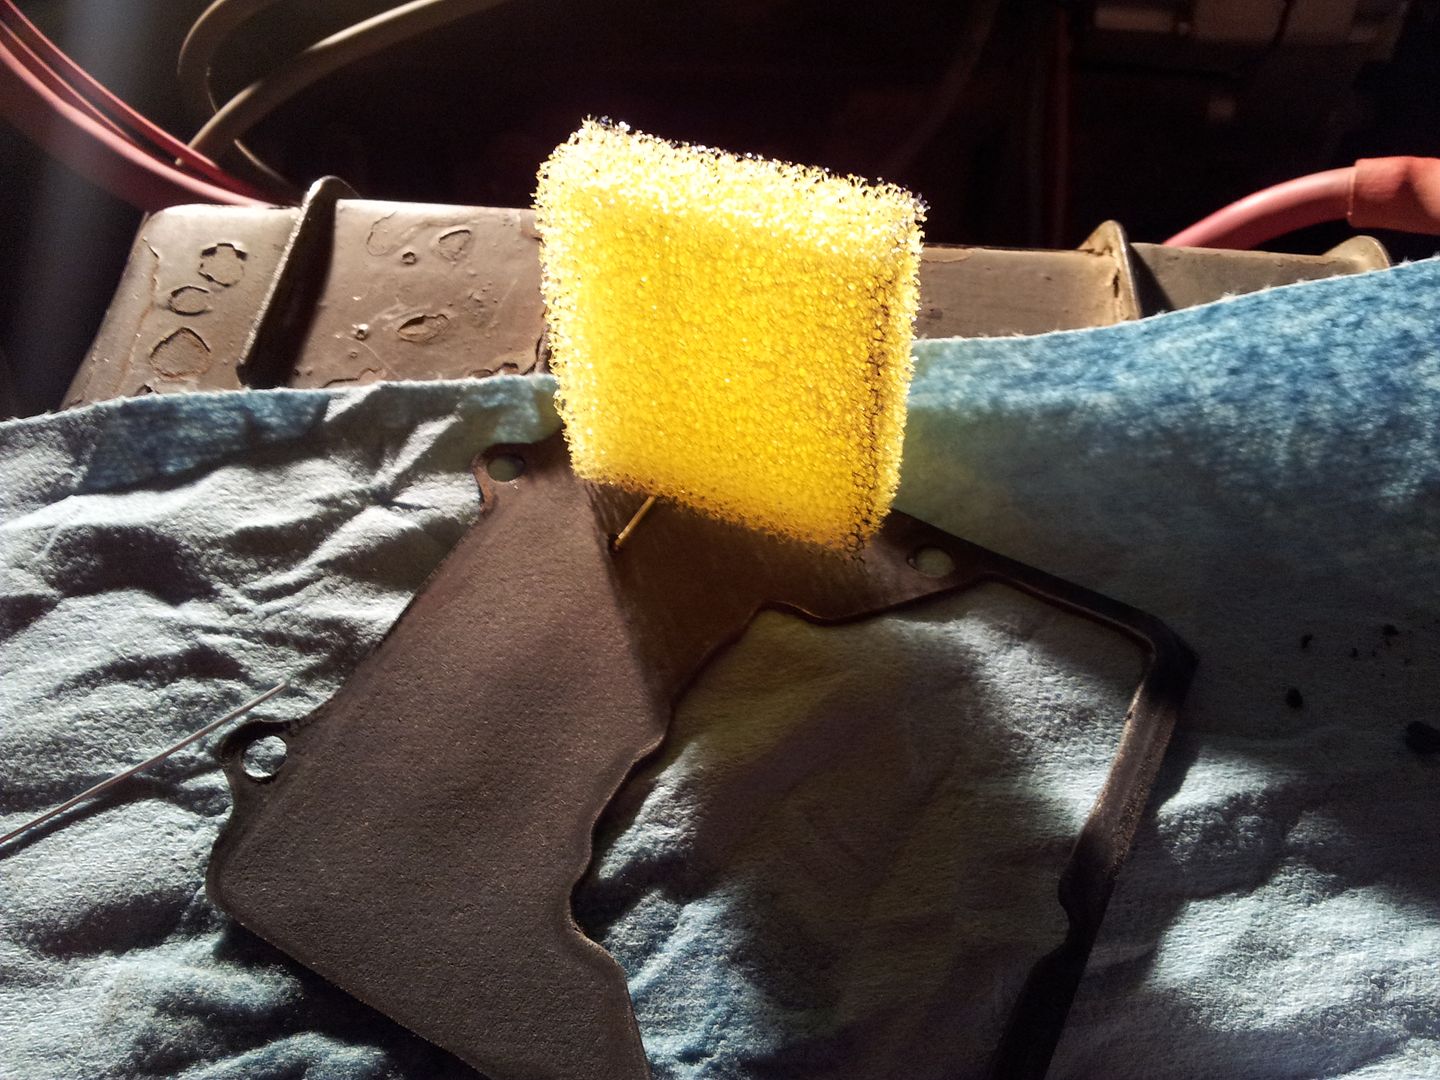
I was worried about the foam migrating over into the float while off road so I came up with this. I made two small holes in my modified top cover gasket and used some stainless steel wire to make a spike that would stab into the foam. The wire is locked into the gasket so it can't lean to the center.

20121114_180022.jpg


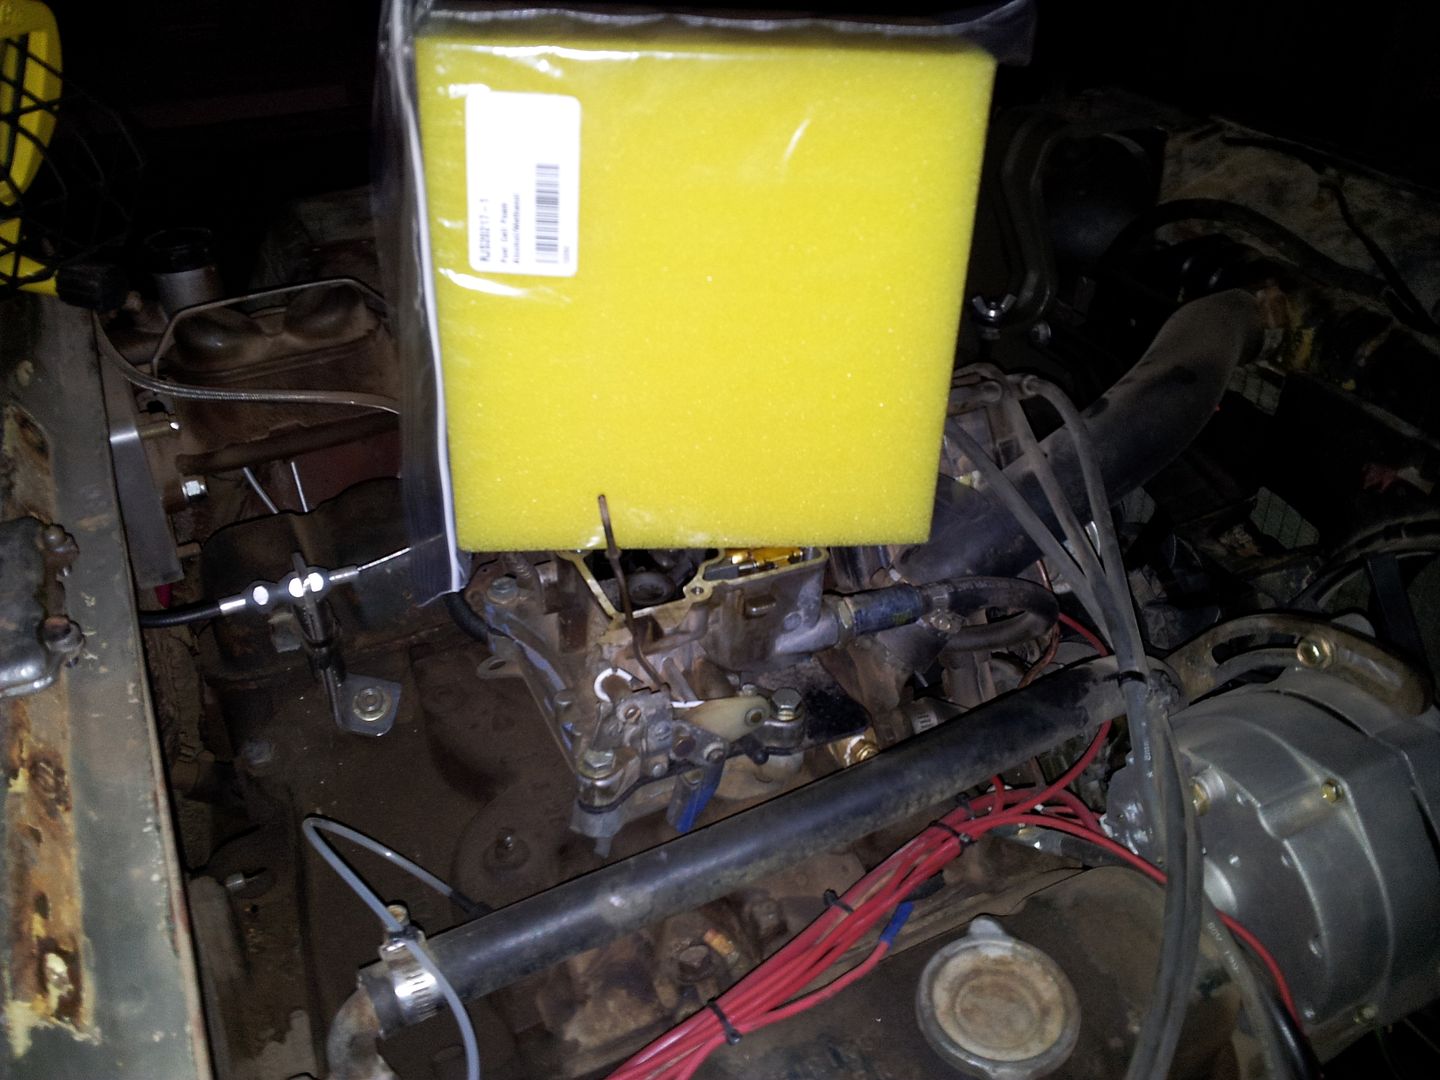
The foam block goes onto the spike. then the entire thing gets inserted into the carb as a unit. It is a little messy to pull out for jet changes if you don't leave the foam in the bowl.

A few notes....

-Everything seems to work just like before. I wasn't really having too many issues before except for one situation if I took a side to side rocking hit to the chassis it could go rich and stall. It didn't do it every time. I haven't been able to replicate that with the new mods.

-I have a slight transition flat spot now. I don't remember this before. I went up one hole on the accelerator pump arm and it 90% disappeared. I think the foam might have an effect on the accelerator pump input passage? I don't know for sure. I need to pull the baffle and see if that fixes the problem....

-The float level didn't change with the foam. It basically just slightly decreases the amount of fuel in the bowl slightly, but the float operates just like before.

-The foam covers the vent hole in the top gasket so hopefully any fuel slosh out that hole is further minimized.

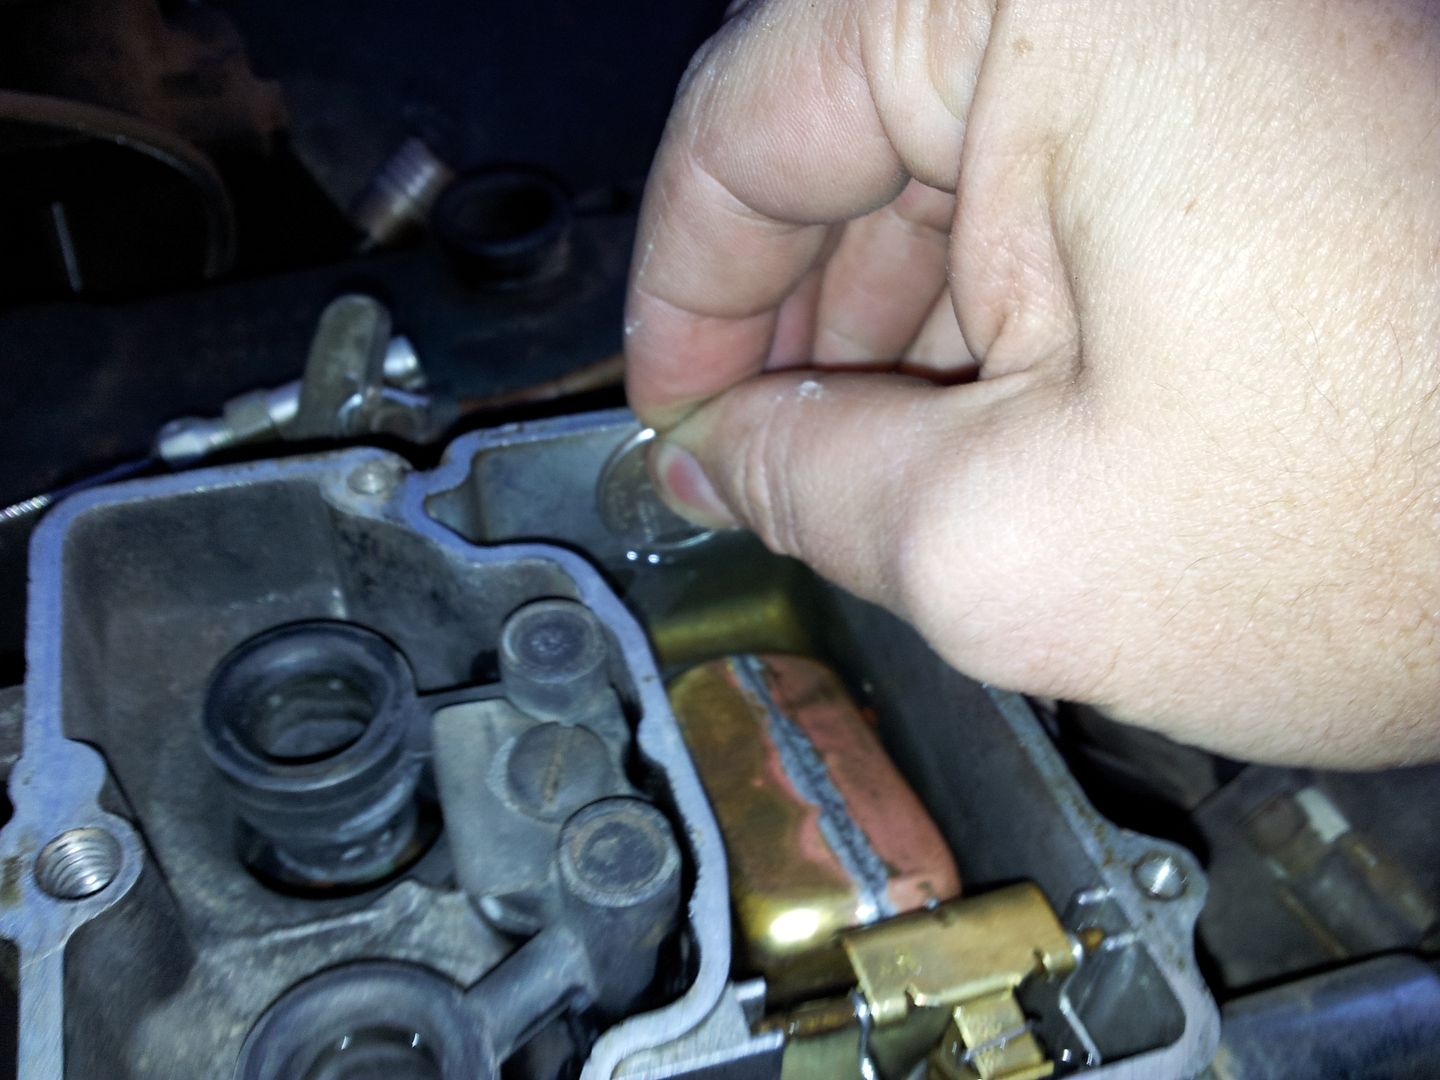
-The float spring DOES effect your float level. It basically adds buoyancy to the float. It is slight, but I did have to adjust the float back down. I used the quarter trick to reset it.

I need to do more testing but it didn't seem to hurt anything at all. I can only imagine that it would help with fuel slosh in the bowl.
 

Duder

New member
Much respect for this build. Such a cool little rig. In the pictures above it almost just looks like a regular MB with some bigger tires and a bikini top. But I suppose that was the intent! Looks like a great way to enjoy some historic sheetmetal.
 

Metcalf

Expedition Leader
Thank you very much! Yes, you pretty much summed it up. Take a bunch of old stuff and make something 'new' and fun. Recycling at its finest :)
 

VanIsle_Greg

I think I need a bigger truck!
The best part of this build is totally the originality of the whole look. Too many people hack these up and then paint them metallic orange or something equally inappropriate. The original patina and the finish, the overall look is perfect. One of my fav flat fender jeeps no question.
 

piffey263

New member
this is a truly awesome build. I'm loving the stuff involving the carb and drivetrain its even better cause i'm running a similar setup as far as engine goes. i'm finally looking forward to rebuilding my carburetor.
 

Metcalf

Expedition Leader
20121117_131254.jpg


The fuel inlet is NOT 1/8" npt. It measures .495" OD on the threads. I didn't have a pitch gauge. I will do a little more digging and see if I can figure it out. I guess I will basically need to make a fitting to adapt to 1/8" npt or something.

In other news....

-My transition stumble was a lean condition. Cold dense air makes a pretty big difference on air fuel mixture, a lot more than most would think. I ended up going all the way back up to a #46 and a #47 jet to get back into the sweet spot. This surprised the heck out of me. With the jet change the stumble went away and I was able to go back down to the original hole on the accelerator pump arm.

-A bit of odd news on the foam in the fuel bowl. I think there must be small particles of foam left inside the foam from the manufacturing process. I had a blockage in the carb on one side. I thought this was causing my lean stumble condition. I had to clean out the booster assembly to get it working right again. So....for now....I took the foam out. I'm not sure what to do about the contamination problem in the bowl? I'm thinking perhaps I need to use something like a metal screen as a baffle in the bowl? Does anyone have a picture of what the 2150 float baffle/insert looks like?

-The float spring seems to be working well. I tried and tried to reproduce the rich stumble ( with side to side hits ) that I was getting and could not. I tried getting it to stumble of left or right turns and could not. This was without the foam at this point. The wet float level is set with a quarter and the edge JUST touching the fuel. My float spring was slightly modded to provide a touch more force with the bent leg. I probably changed the jets about 2-3 times trying different things. Once I got the hang of it the spring didn't add any complications. You basically just have to hold the leg of the spring on the back of the float while you assemble stuff.

-The carb still has a slightly lean spot in the transition between the main circuit and the power valve circuit. I need to try a few different power valves, or perhaps a dual circuit power valve?

-The WOT mixture is till too rich. It dips into the 10-11:1 range sometimes. I need to pull the carb and see about making a PVCR jet system. I purchased a set of drill bits especially for this, hopefully I can make my own jets for this.

Some misc stuff....

20121117_113448.jpg


About $20 total at Amazon.....

20121117_113555.jpg


I love this little valve core tool. It is machined brass and has a little compartment inside for spare valve cores. I think there is like 6 included with the unit for like $10 or less.

Then a decent 1-20psi gauge. My old low pressure gauge finally wore out after about 10 years of bouncing around. Street pressure on the Willys is less than 20psi most of the time so it works out well.
 

justcuz

Explorer
I have to admire your tenacity with the Autolite carb, but in all honesty you should give the Rochester on your spare engine a try. I have run them on lots of GM engines and in my experience they are even simpler and more foolproof than the Autolite. I don't recall stallout issues with them at all. I have the old Rochester carb book by Doug Roe and followed it religiously, lots of good info there and probably real cheap used on ebay or Amazon. Covered all Rochesters, 1,2 & 4 barrels.
 

Metcalf

Expedition Leader
I ran the factory Rochester for a number of years. Then a holley 2bbl. Now the Autolite. The Autolite has been the best of the bunch. I'm currently being REALLY picky with its performance overall. It does things I NEVER thought a carb could do off road but everything has a little quirk or two....
 

justcuz

Explorer
The biggest problem I ever had with Rochester 2 barrels was the base plate. In early V8 engines the base plate was cast iron and had the heat riser from the exhaust crossover feed directly into the underside of the base plate. Eventually the gasket would weaken and the exhaust gases would blow out the gasket, causing vacuum leaks, poor running, mixture issues and a general inability to tune the carb. I would just clean the exhaust passages and tap them for an allen head pipe plugs. Heat still went to the base of the carb, but the exhaust gases were not flowing into the base plate blowing the gaskets out. I don't recall any major issues other than that. I also seem to remember that the Rochesters were pretty fuel efficient when adjusted properly. Of course being a Chevy guy all my carbed stuff has Rochester carbs and I have just learned to fix them. Hell even Dodge and Ford installed quadrajets on some of there products. I never bothered invested the time learning about Holleys, but I have played with the Autolites on a couple of Ford trucks I've owned. They are a pretty simple carb too.
 
Last edited:

Metcalf

Expedition Leader
I fiddled and fiddled with mine and couldn't get it to work like I wanted.

When I installed the holley I sealed the heat riser with pipe plugs also....
 

justcuz

Explorer
Looks like your getting the Autolite dialed. I have never had much experience with Holleys, but the guys that know them swear by them. Too many variables for me to invest time learning about them.
 

Forum statistics

Threads
188,471
Messages
2,905,532
Members
230,428
Latest member
jacob_lashell
Top