Rango.....1942 Willys MB

MrBeast

Explorer
No adjusters like a 14-bolt, Ford 9", or Toyota 8".

All the adjustment is done with shim stacks on the carrier bearings.
The preload is done by adding 'extra' shim on both sides to make it a press fit of sorts.

I got you, sounds like a bit of a pain in the butt.

Is the Dana 60 this way too?
 

Metcalf

Expedition Leader
Yes. All the dana stuff is the same way I think......25/27/30/44/60/etc.

You can change the shims to be outside the carrier bearings but it can be a little bit of a pain in the rear finding some parts. Most ARBs are set up this way in Dana axles I think.

Its not THAT bad, but it does add an extra step or ten depending on how long your setup takes. Having some setup bearings can make life a lot easier in the long run. Also, not having the axle housing in the vehicle if at all possible would be better.
 

Metcalf

Expedition Leader
Some install notes from the rear gear install.

The carrier bearings on early 19 spline pre-1970/71 rear Dana 44 are different than your normal D44 IF you retain the factory carrier. I have a rear powr-lok that I converted to 30-spline that I will be keeping for a bit. This carrier uses the smaller ID carrier bearings.

The bearing part is #25577.
Taper Bearing Cone; Bore=1.688", Length=1", Radius=0.14"

They use the same 25523 race as the larger ID bearing.

I didn't take a begining backlash or pattern. I am going with gears that are about 40 years newer so I didn't really see the point.

I did record the original shim values.

Pinion depth shim, .021
Preload shim,
Carrier RH, .040
Carrier LF, .057

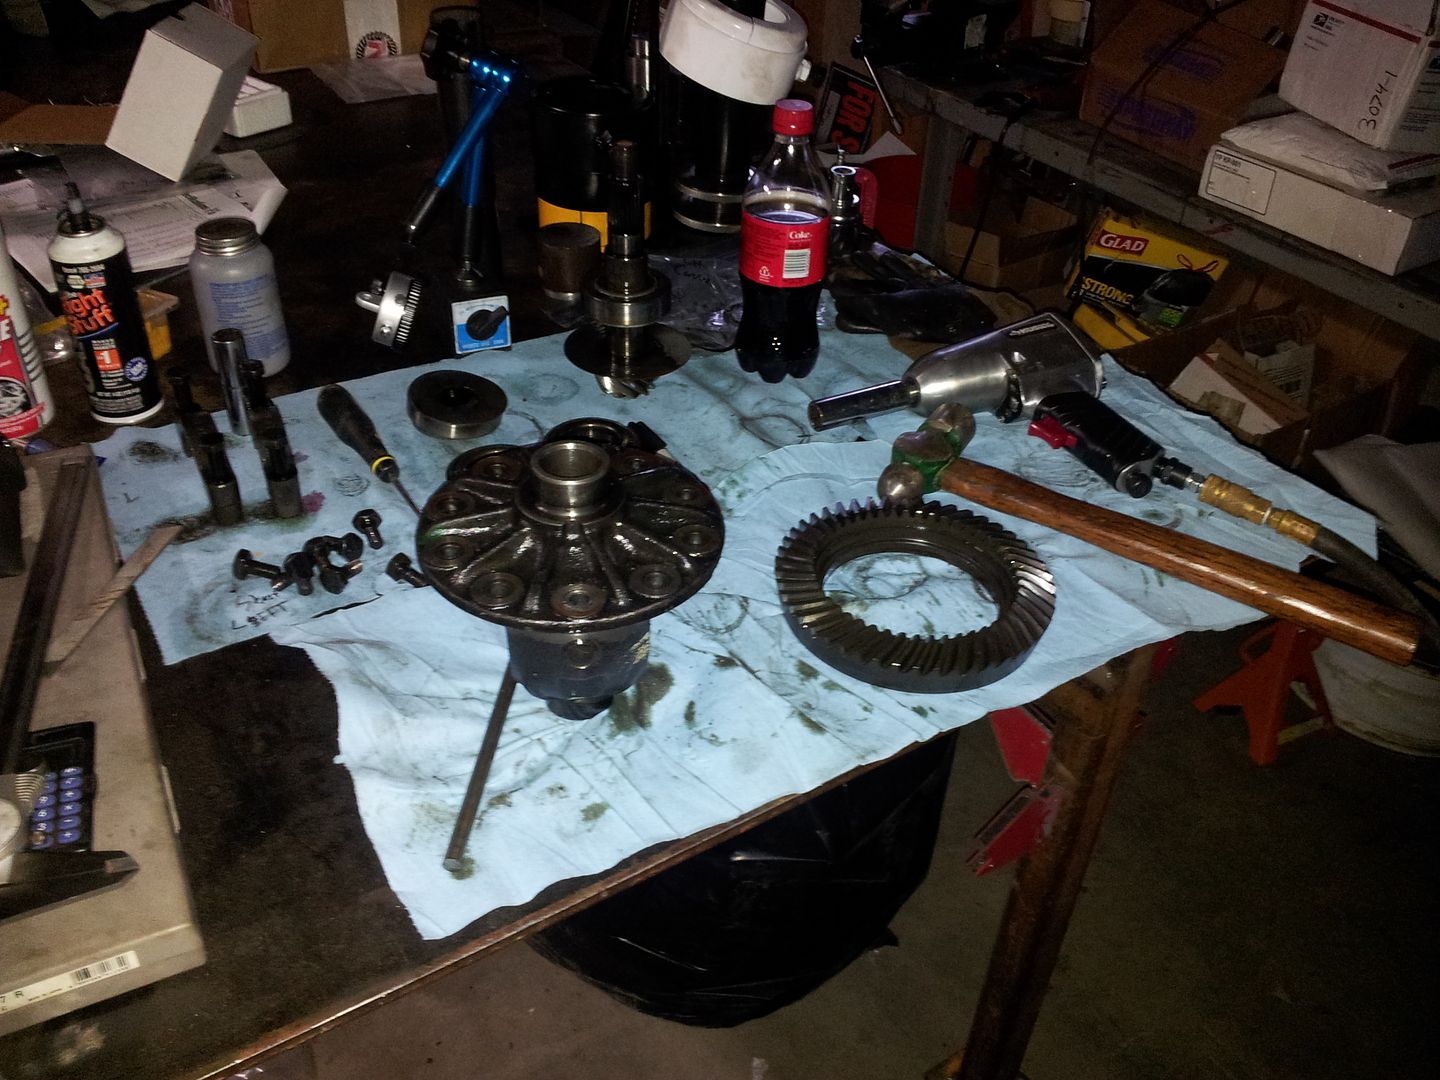
I stripped the carrier down and pressed on JUST the bearings with no shims to see how much space is in the carrier. Note: Make sure the bearings seat all the way. I had to make a little press tool to get the bearings to go all the way onto the carrier without shims.

I then stuck the carrier back in the housing and measured the total side to side movement of the housing. This is done WITHOUT the pinion in place.
It took a few tries before I could get repeatable numbers on the dial indicator.

Total value from full left to full right was .081-.082

If you add up the total old shim stack it was .097 total. That would equal about .015-.016 carrier bearing preload.

Then you remove the carrier again. That thing is getting pretty heavy.

Now you install the pinion. I started with the old .021 shim stack as a point to start. My oem gears did not have any markings, my aftermarket ones did not either. The depth shims on this axle go under the inner pinion bearing race. I didn't have a yoke so I had to improvise something for the old pinion nut and washer to push against to get some pinion preload. I carefully got the pinion torqued up to about 10 inch pounds. That should work ok for a depth test.

The carrier goes back in at this point with no shims under the bearings. You measure the distance for the shim stack on the left hand side of the carrier. You push the carrier one way and then the other....make sure to rotate the pinion a little to see if your fully contacted.

This value came out to .058-.059.

Not this seems similar to the old shim stack for this side ( was .057 ) but this shim stack has NO preload figured in.

So....starting shim on the left side should be .058 and the right side is .081-.082 minus .058 for a value of .024ish. I will probably go a little shy on the left side to allow for a little backlash and add a few thousands for a touch of carrier preload so there is no slop in the pattern. This only needs to be like .001-.003 if that. If you add any preload during the setup pattern phase make sure to keep track of it and not add too much when you add shim for the carrier bearing preload in the final assembly with the case spreader.

This gear stuff takes a bit that is for sure!

More tomorrow.
 

Metcalf

Expedition Leader
Gear setup round one thru three....

Round one.


Drive


Pinion shim .021-.022
LH carrier .050
RH carrier .035
Carrier preload, .003
Backlash average .009

Round two....


Drive


Coast

Pinion shim .025-.026 ( added .005 to the pinion depth shim )
LH carrier .050
RH carrier .035
Carrier preload, .003
Backlash average .008

Round three


Drive


Coast

Pinion shim .030 ( added .005 to the pinion depth shim )
LH carrier .050
RH carrier .035
Carrier preload, .003
Backlash average .006-.007

I think I am getting close? I am going add .003 to the pinion depth and see what that gives me. I think I will have to subtract some LH carrier shim and add RH carrier shim to give me a touch more backlash at that point?

Edit: my brain hurts....
 

Metcalf

Expedition Leader
The next rounds.....

Round 4.


Drive


Coast

Pinion shim .033 ( +.003 deeper over last )
LH carrier .050
RH carrier .035
Carrier preload, .003
Backlash average .006 ( quick average over 2-3 teeth )

This looked pretty good I think. I wanted to see what too far would do so I tried a little more pinion shim....

Round 5.


Drive


Coast

Pinion shim .036 ( added another .003 to depth )
LH carrier .050
RH carrier .035
Carrier preload, .003
Backlash average. .005-.004

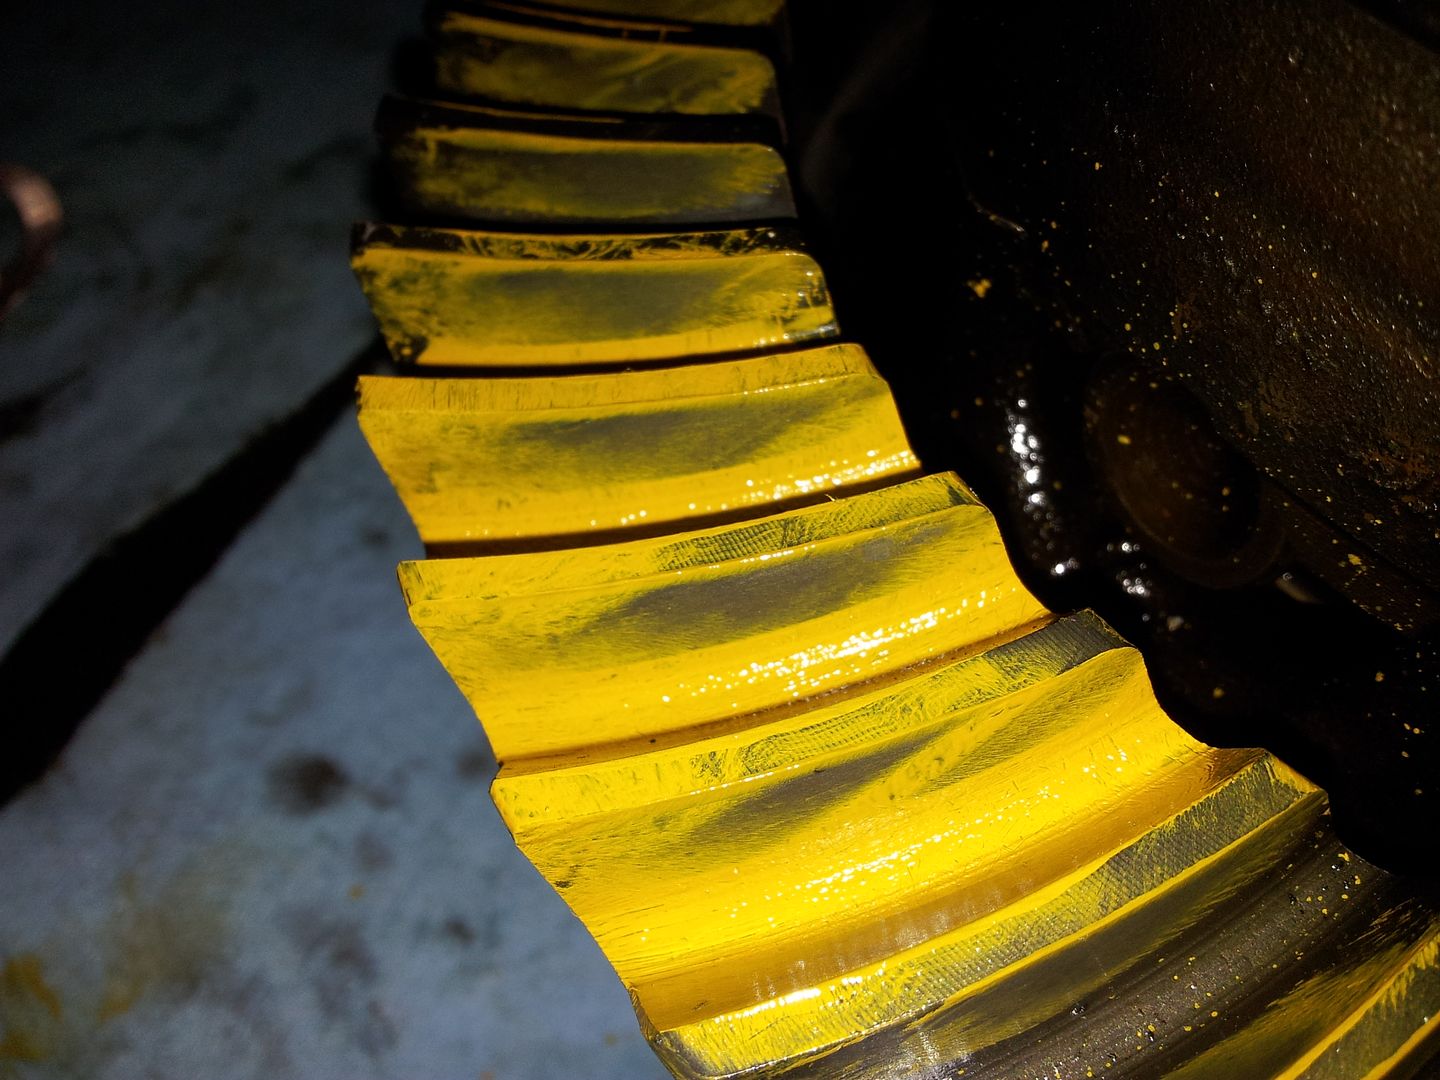
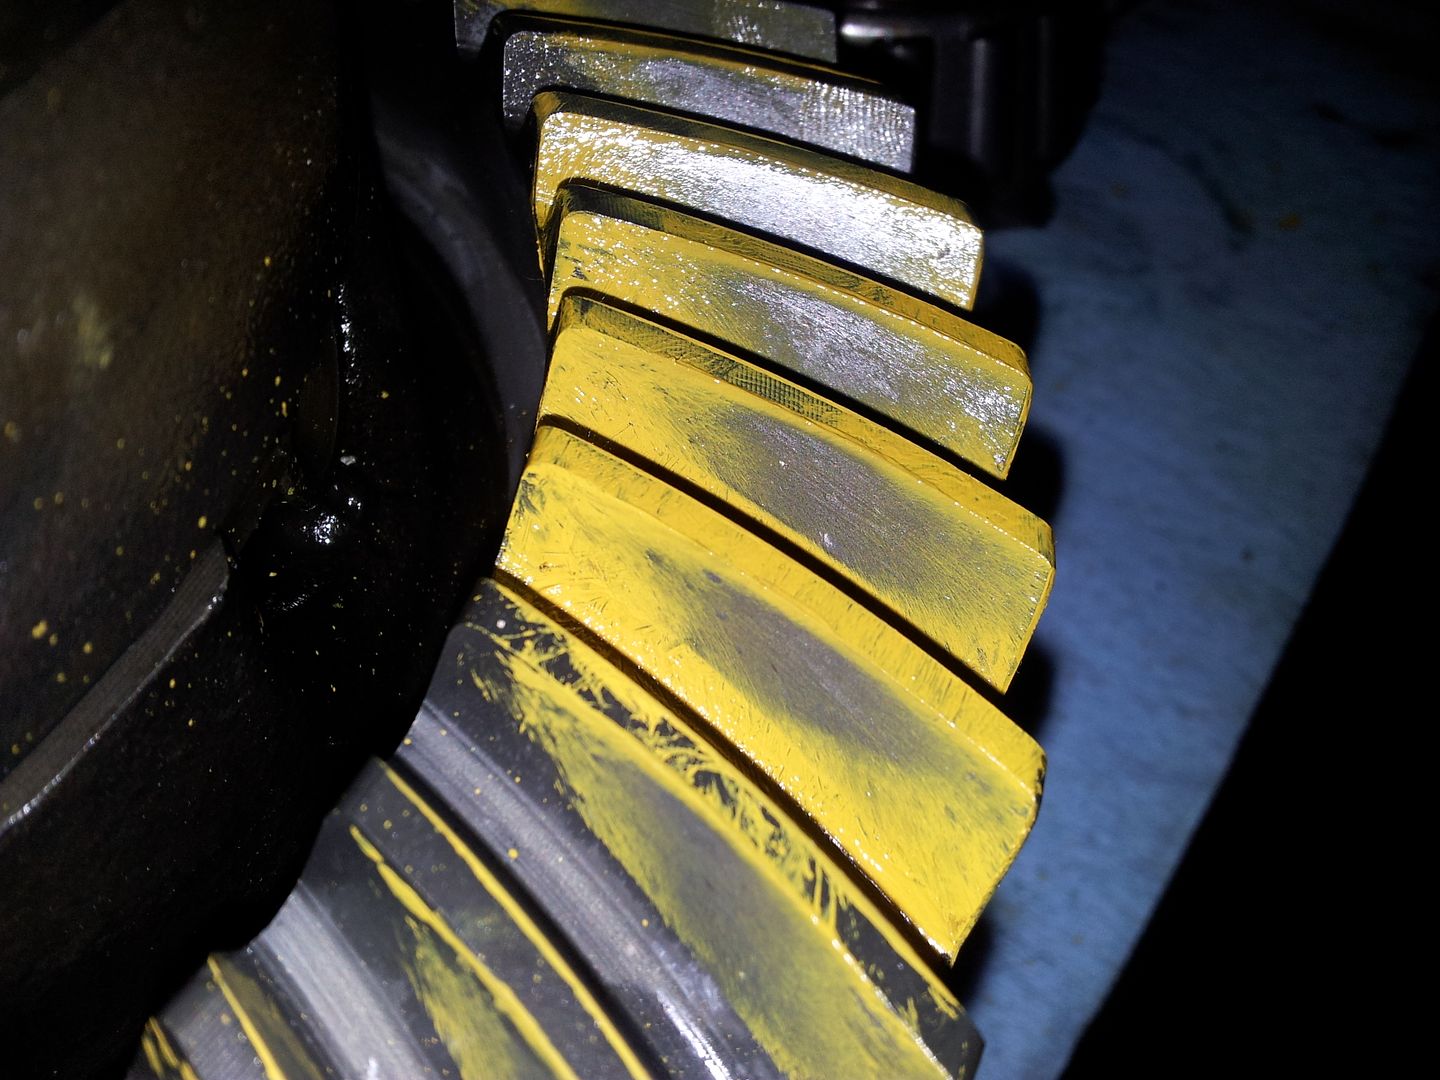
This was too far I think. The drive pattern started to touch the inside edge of the tooth. The coast patter was pretty far to the outside.

I think I knew that this was going to be too deep, but I wanted to know for sure.

Round 6 went back to the settings of round 5.


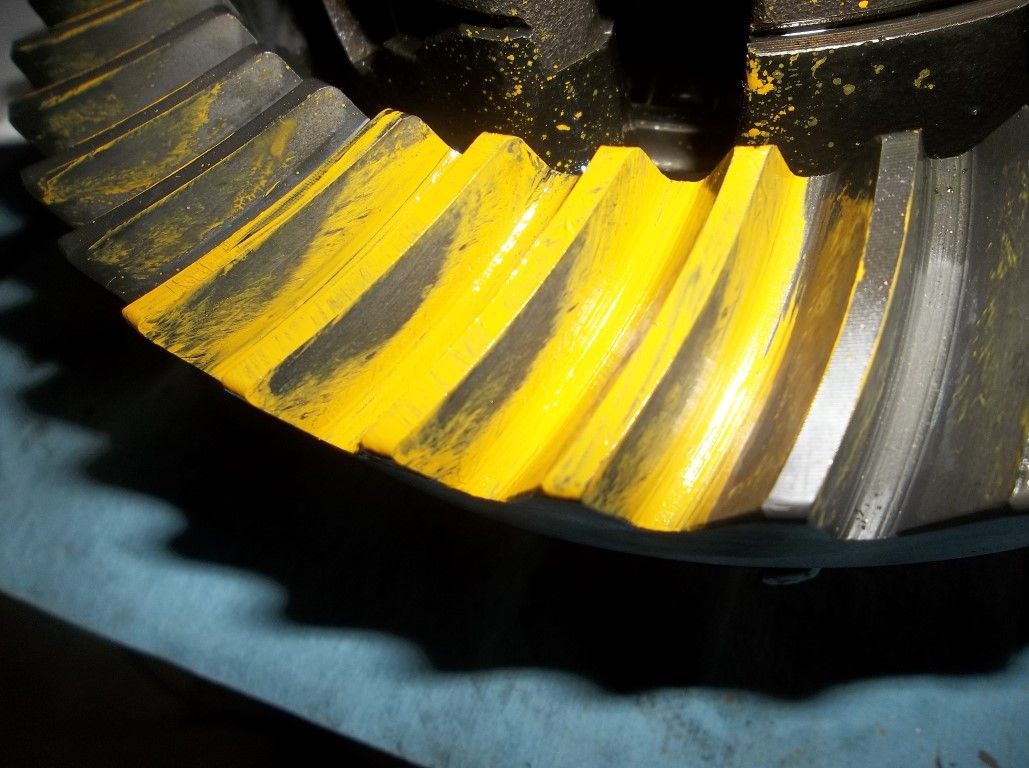
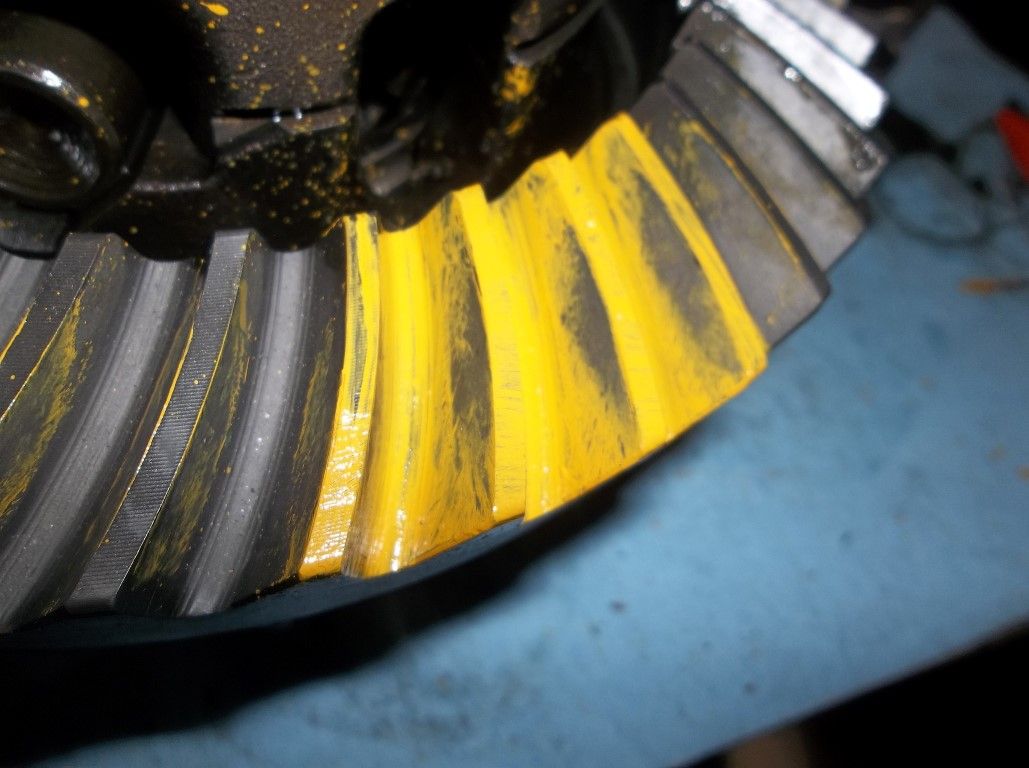
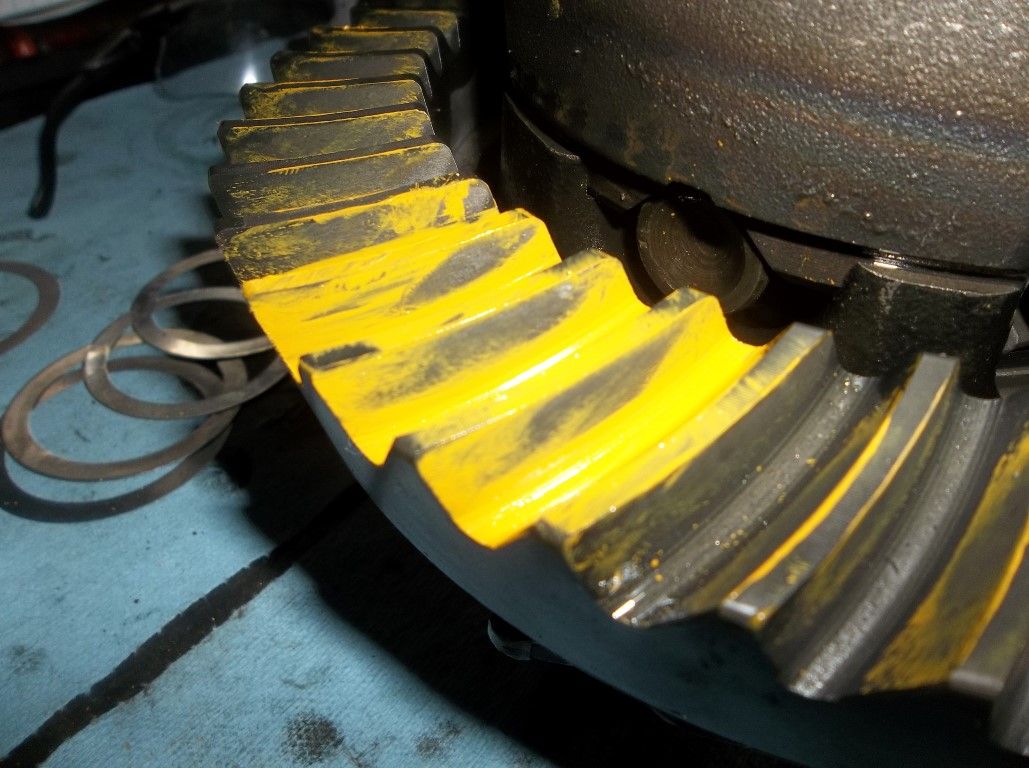
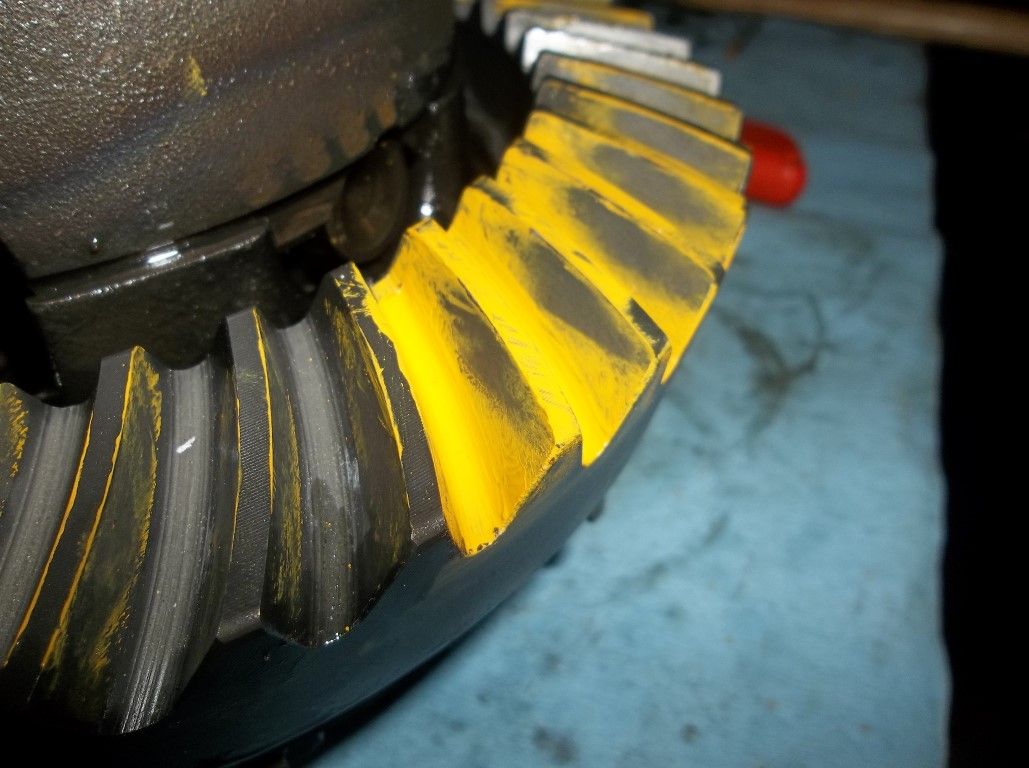
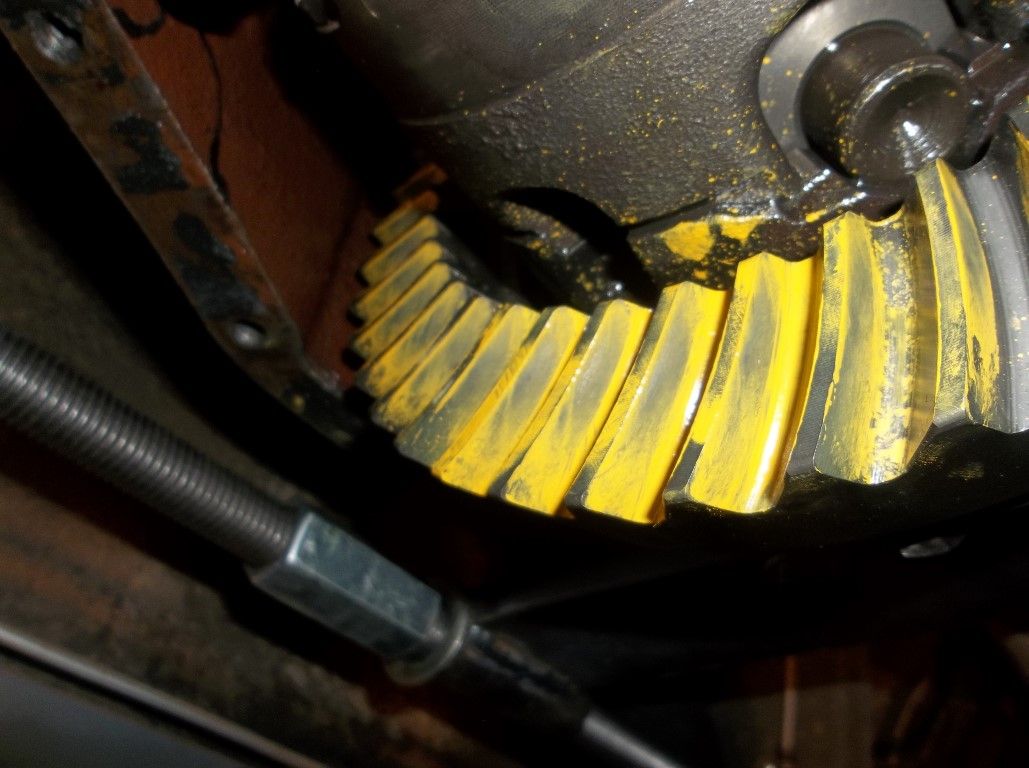
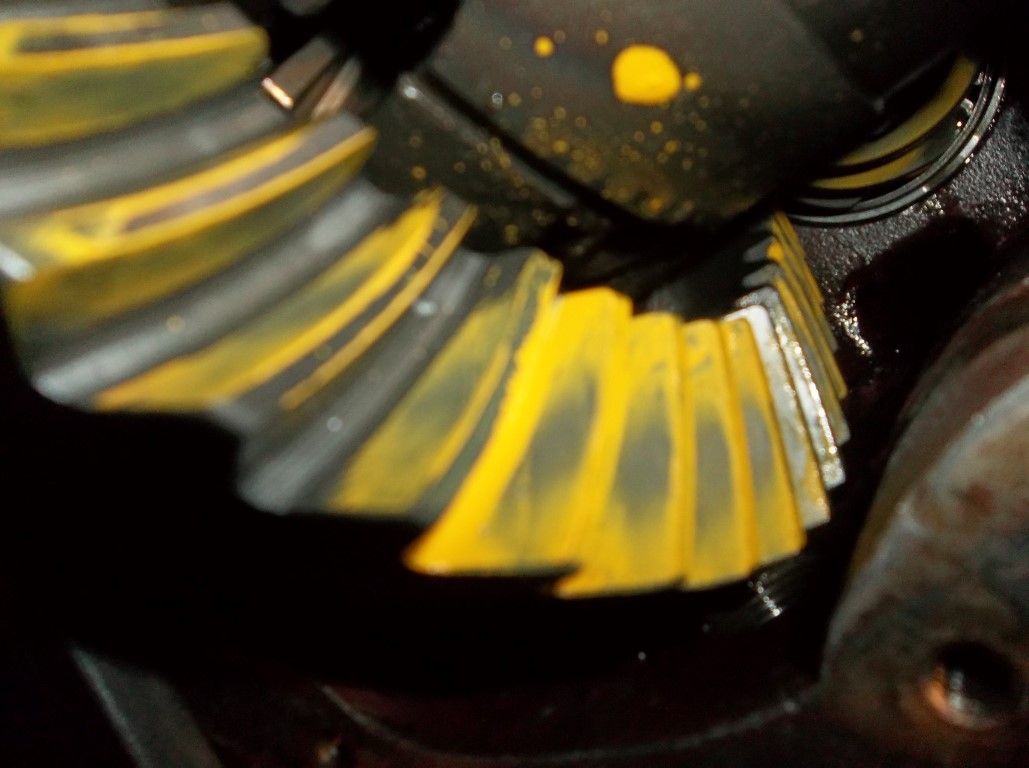
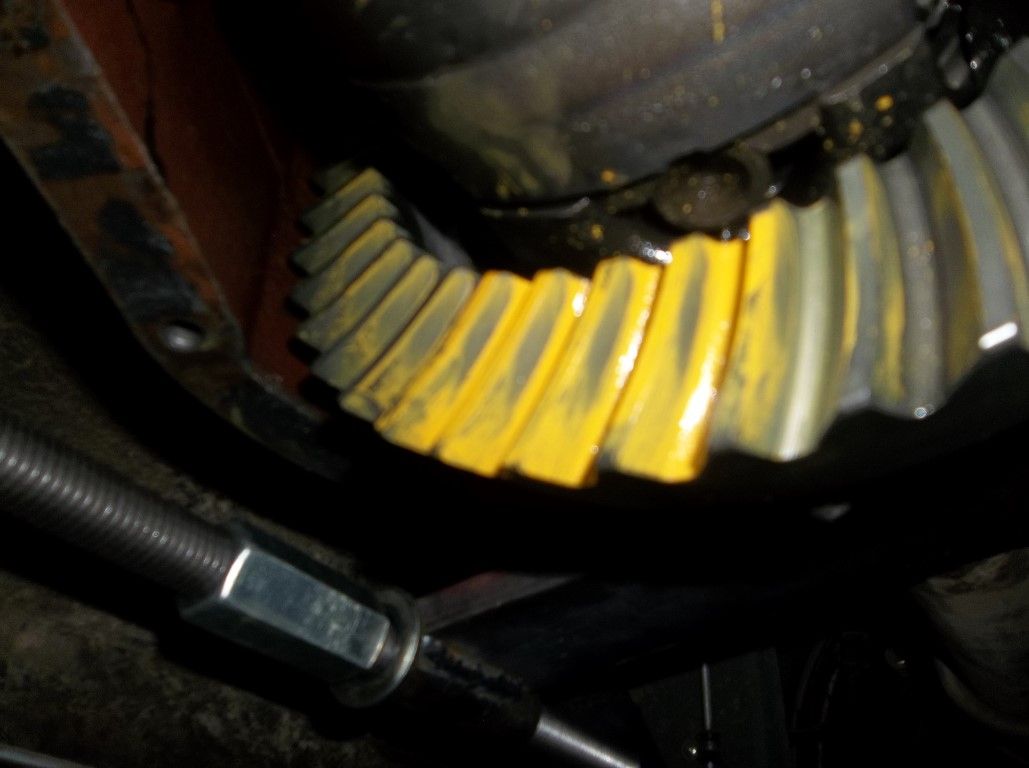
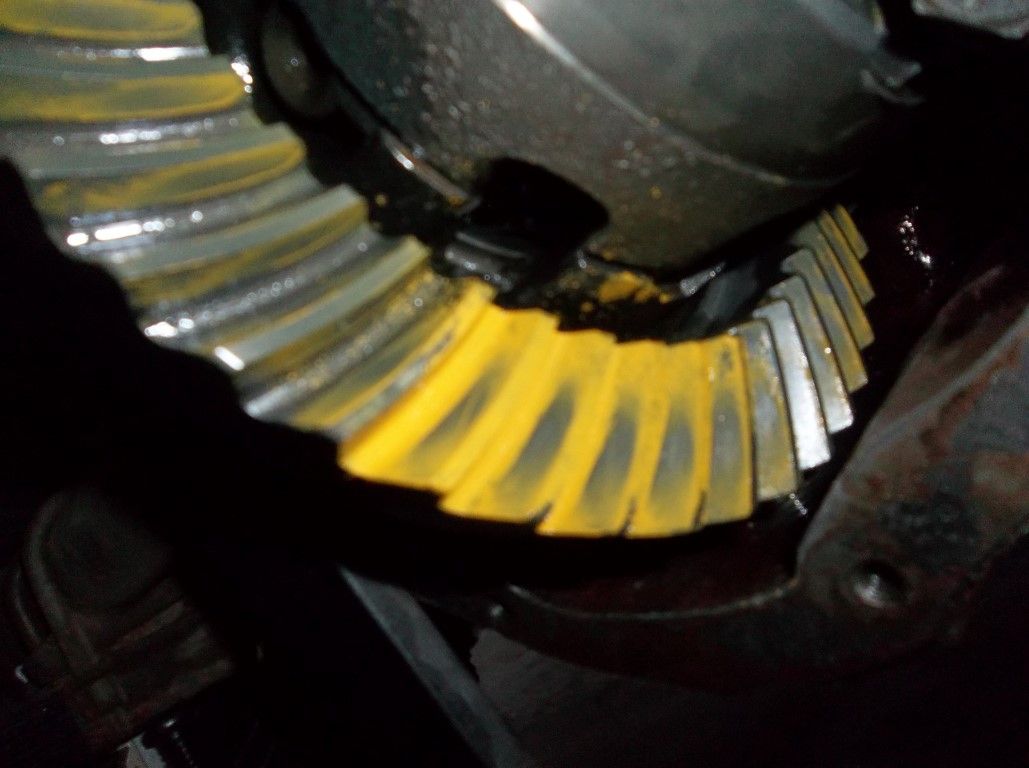
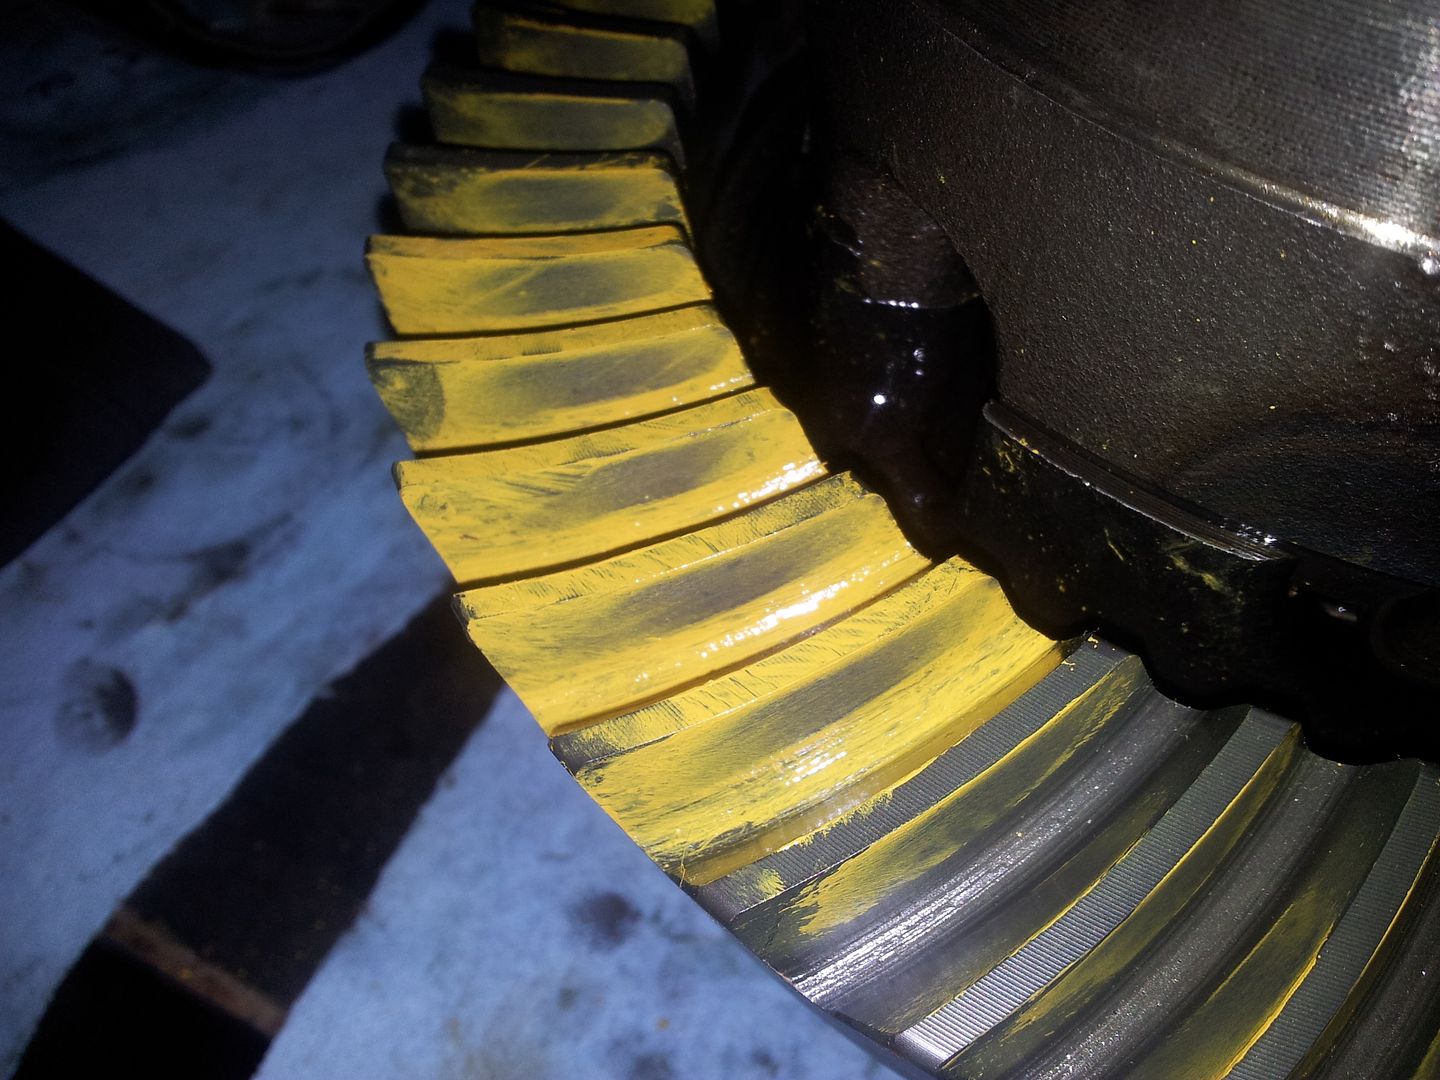
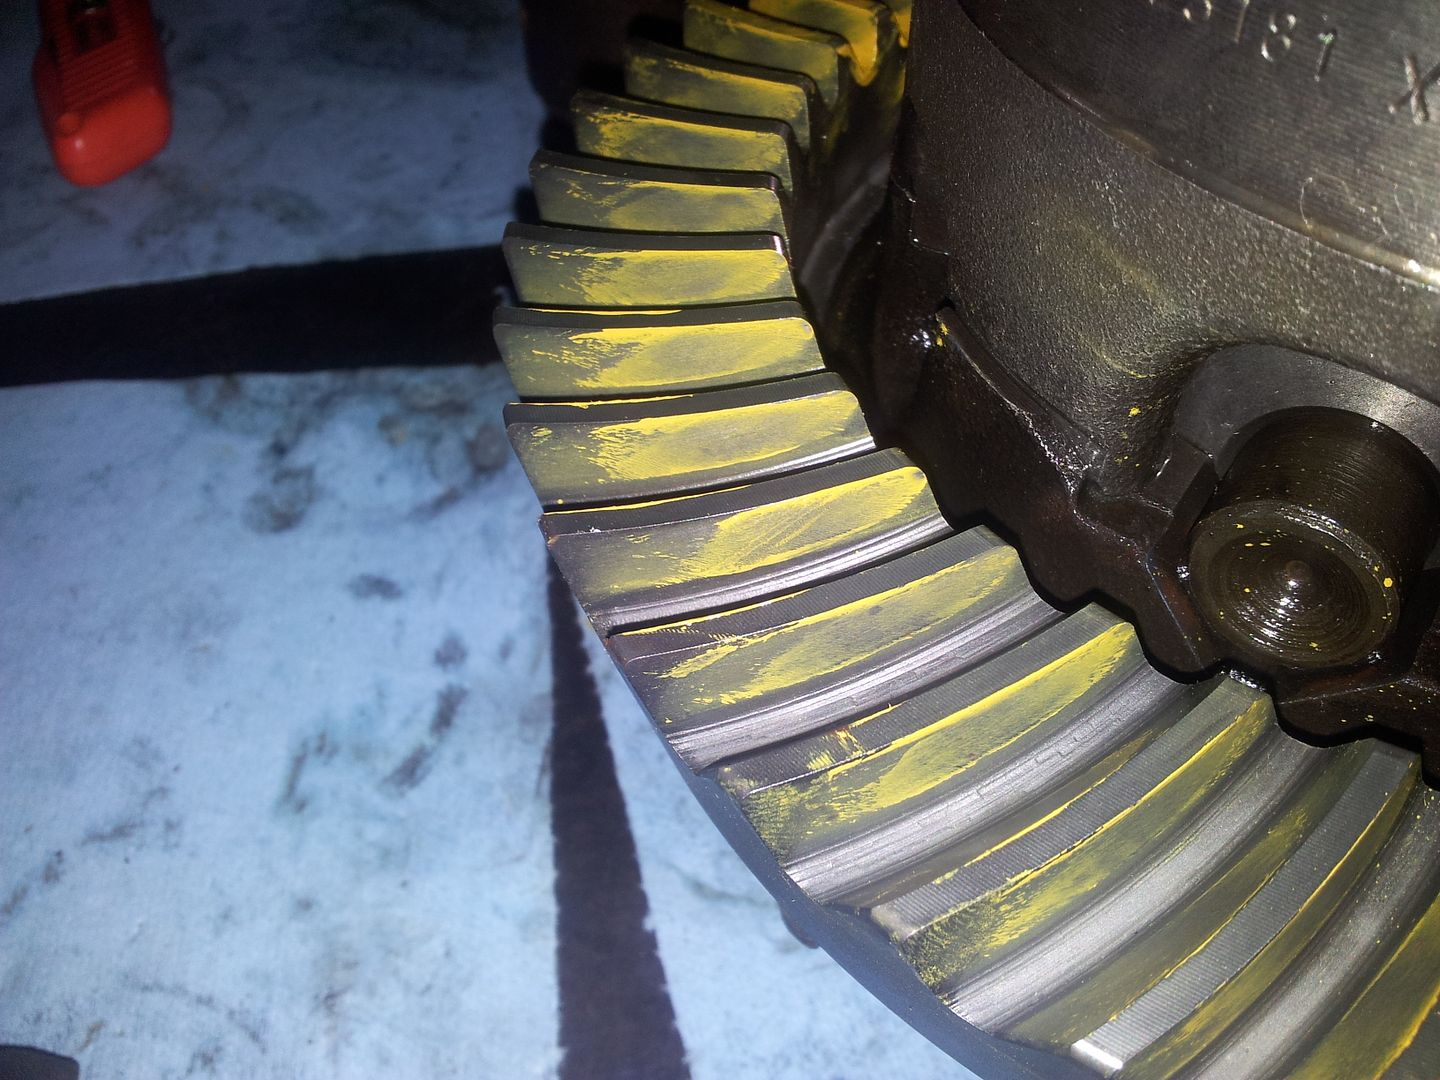
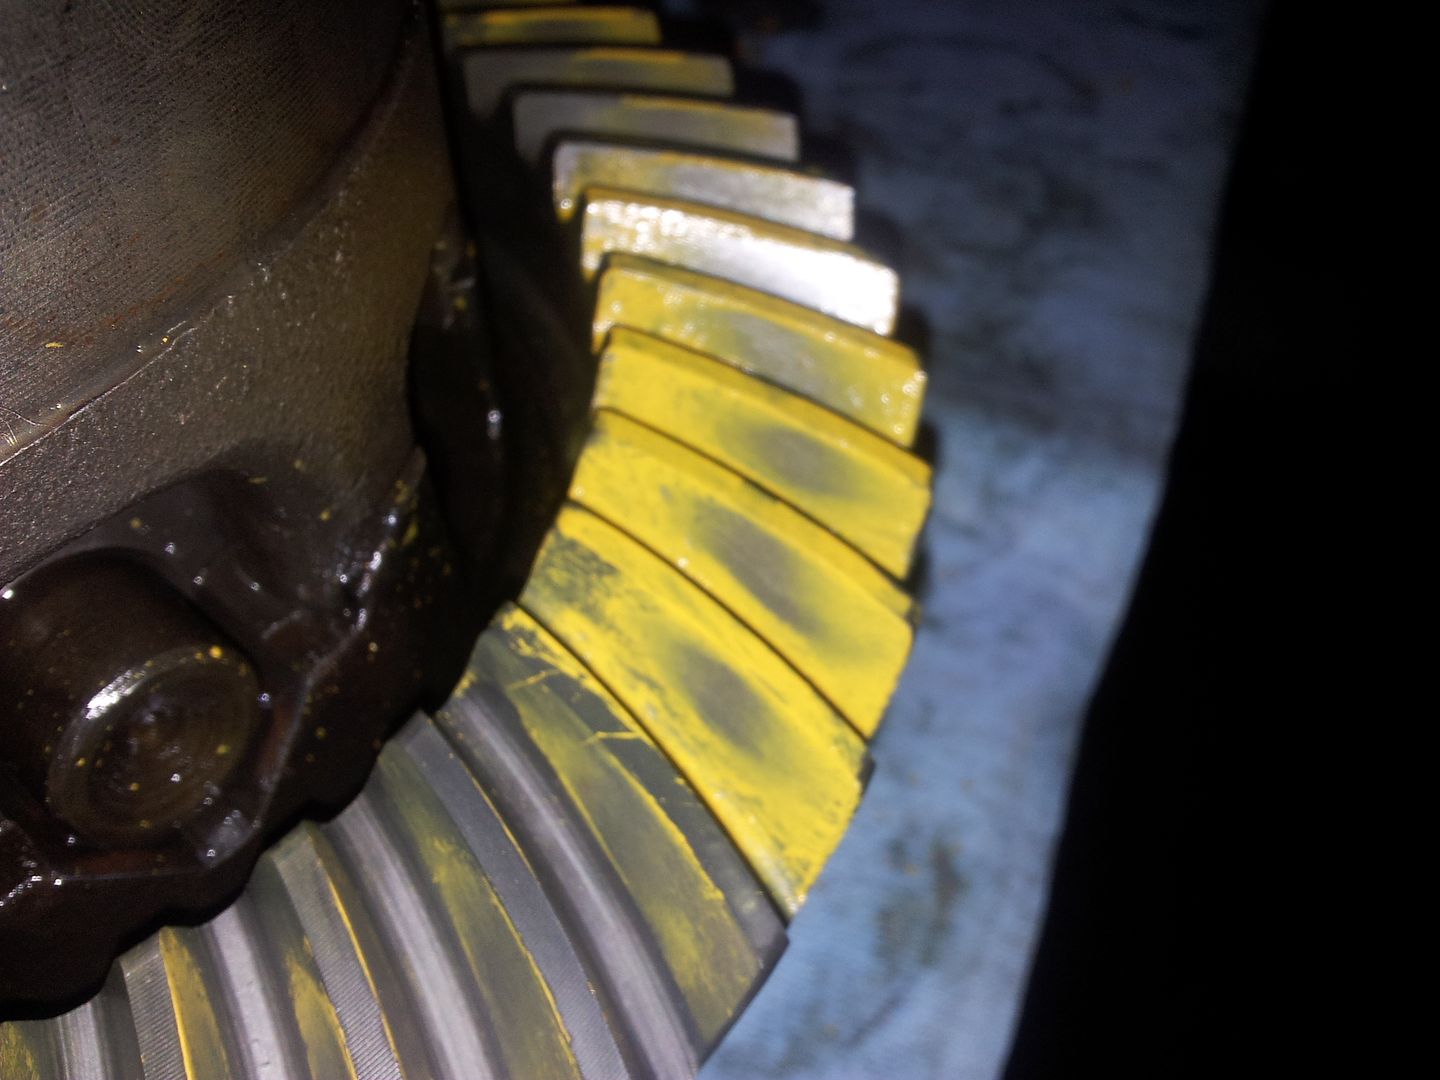
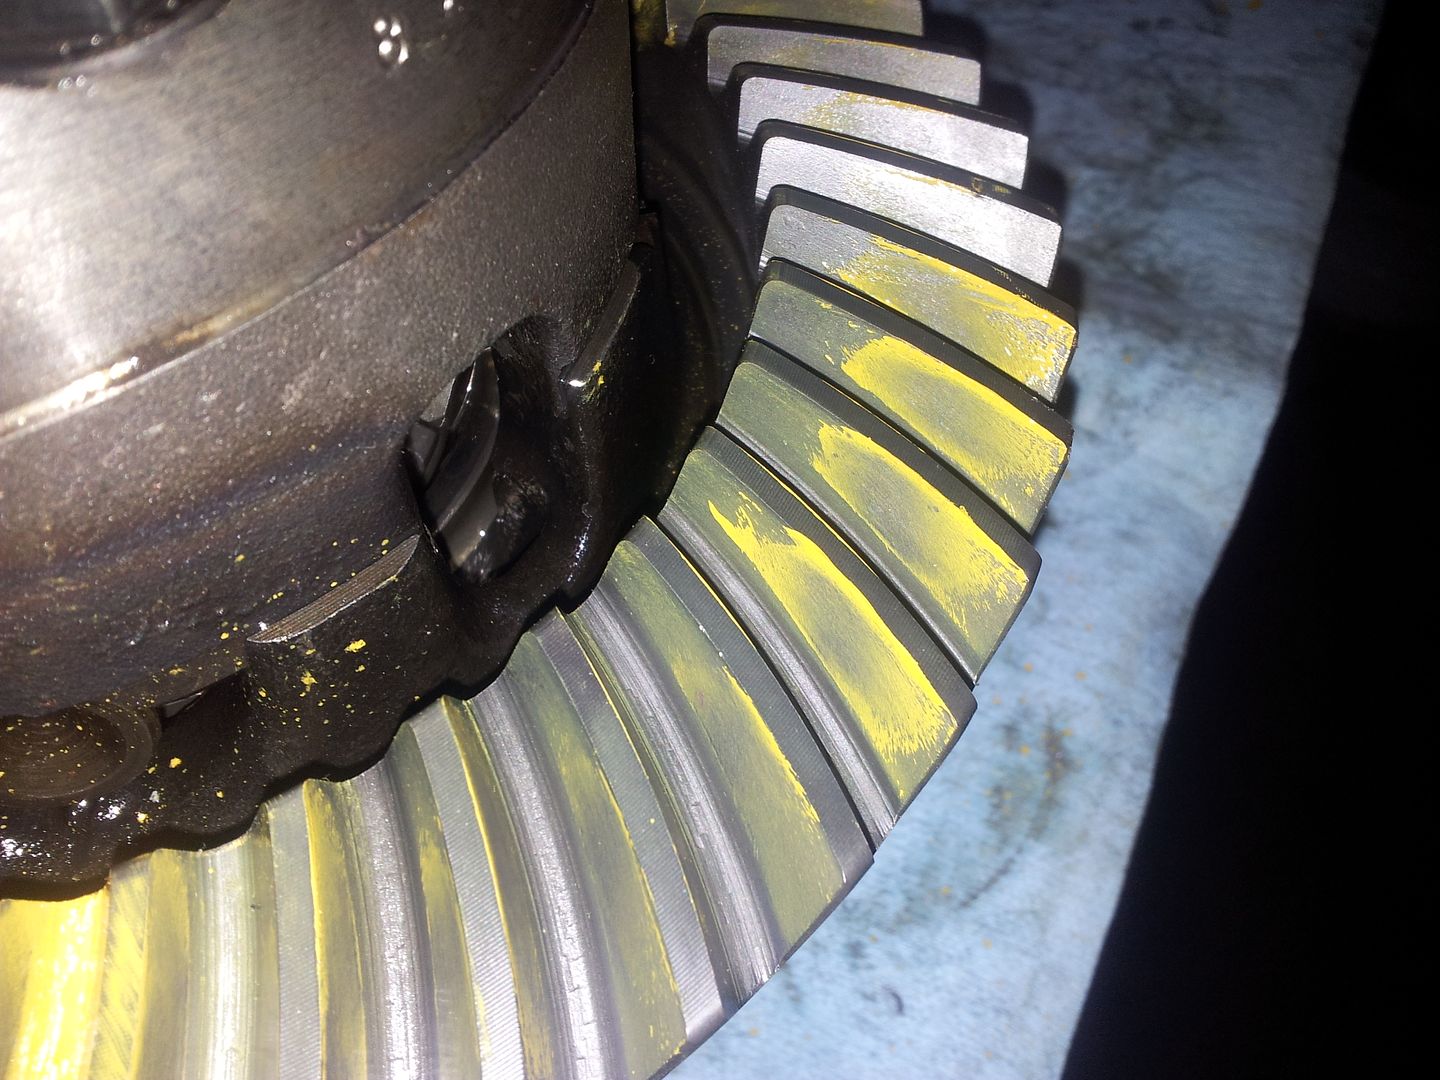
Drive. I think that is about as good as I am going to get. The pattern is fairly centered on the tooth but slightly to the inside which I think is good for the drive side? It moves out under pressure?


Coast. Again. Not bad? The pattern is a compromise I think. I would have liked to see it be further inboard? All in all pretty happy with that....

Pinion shim .033
LH carrier .050
RH carrier .035
Carrier preload, .003
Backlash average. .00585 This was a 10 tooth average around the whole ring gear.

I think this is where I will stop for pinion depth unless anyone sees a major problem?

I am debating adding a little backlash? I still need to preload the carrier more. I am currently at .003 preload. I could add .003 to the left hand side and .005 to the right hand side. This should give me a little touch more backlash if I am thinking about things right? I think a solid .006-.007 average would be ok? Maybe I should just leave it where it is at?

Thoughts? Suggestions? Colorful commentary?
 

Jim K in PA

Adventurer
Backlash looks a bit on the tight side but otherwise you look like you are there for pinion depth. I would get BL to 006-.008. It will open a bit with wear, but will close with heat. Just went through this with the rear D44 in my LJ Rubicon. We had to shim the hell out of the pinion to get the depth/pattern right.
 

Metcalf

Expedition Leader
Backlash looks a bit on the tight side but otherwise you look like you are there for pinion depth. I would get BL to 006-.008. It will open a bit with wear, but will close with heat. Just went through this with the rear D44 in my LJ Rubicon. We had to shim the hell out of the pinion to get the depth/pattern right.

That was generally what I was thinking. I think I am going to add a .005 of the right side of the carrier and a .003 on the left side in preload. That will give me .011 in total preload ( I already have .003 ) and should give me just a HAIR more backlash. I would like to get a solid average between .006-.007. The gears are new and will wear in a bit like you mentioned. Sound about right?
 

blakeape

Adventurer
I really like the case spreader! I have borrowed one a few times working on my Dana 60's, but might just have to build one next time I'm in the need. Where are you headed in MT. I'm up in the NW corner near Glacier National Park. I'll be wheeling and camping our local trail "Blacktail/Wild Bill" this weekend and paddling the Lochsa next weekend. If you're in the area we should try to do a little wheeling.
 

Metcalf

Expedition Leader
I really like the case spreader! I have borrowed one a few times working on my Dana 60's, but might just have to build one next time I'm in the need. Where are you headed in MT. I'm up in the NW corner near Glacier National Park. I'll be wheeling and camping our local trail "Blacktail/Wild Bill" this weekend and paddling the Lochsa next weekend. If you're in the area we should try to do a little wheeling.

I will be around the Missoula area.

The case spreader works sweet. You do need to use a dial indicator to see how much you spread the case. It is REALLY easy to get .015 of spread.
 

Metcalf

Expedition Leader
Rear install done.

Not much to report on the install.

Pinion preload was a bit of trail and error. I think it took about 5 tries to get it right. I ended up with just about 6-8 inch pounds rolling. That is suppose to be good for used bearings. That actually felt a little tight but I will roll with it. I installed the new yoke and new pinion seal. I didn't forget to install the pinion seal splash guard baffle thing.

I kept the pattern the same but added a .005 shim on the right of the carrier and a .004 on the left side of the carrier for preload. That gave me a total of .012 of preload. It shifted the backlash EVER so slightly. I gained about .001 on backlash I think. My backlash average was .006-.007 and I couldn't find a low or high tooth beyond that.

Preload in the case was pretty easy with the spreader. It still took a few wacks with the deadblow to get it in. I think if you would have had the axle on the table it would have went in.

I got everything bolted up. Found a slightly loose wheel bearing on the passenger side rear. Fixed that really quick.

First drive.

It's lower that is for sure!

It feels a little more peppy overall. Once you get into 3rd gear you can pretty much run it down to 600rpm and it will pull back up without much issue. I think you can almost start in 3rd. I like my clutch so I don't really need to do that. If your rolling you can be in 3rd though you don't need 2nd for driving around town, maybe parking. 1st gear high kinda feels like low range. I think I could do some pretty decent wheeling in high range for sure.

4th gear is MUCH nicer than before, I can really use it now. You can go down to 1500 in 4th and still pull up from it. 2000rpm is about 40 I think and the engine seems very happy pulling that. 2500-2600 is a sweet spot in 4th for sure. That should be 50mph. I didn't get to cruise any faster than that yet. I need to go down to the highway. It cruises at 45-50 completely off the power valve.. Air fuel is happy in the 13.5-14 range. Get on it and the power valve kicks in and you go to 12:1 or a little richer. I was trying not to hot rod the fresh gears.

If the weather holds I am going to drive it this weekend and try and get some good heat cycles on the new rear gears.

I fooled around in low range 2wd a bit. It feels pretty dang low!

1st low feels really low. No stopping it with the brakes. I am sure in 4wd it will be different, but the front tires lock up and the rear tires keep trying to push. I need to see what happens on pavement :) It seems to crawl pretty dang slow. Its only 83:1 but with 35s and the buick chugging along that feels pretty slow. It will be interesting to see how it does in the deep snow. The motor seems pretty happy to chug so I may be able to lower the idle significantly. I need to make a little hand idle control or something.....

2nd low feels like a very usefull low range gear. It will idle along in 2nd no problem up the driveway. It doesn't really even pull the idle down.

3rd low. It will idle along in that gear too. Chug chug chug.

4th low. The transfer case starts to whine a bit at those speeds.

Overall I am VERY happy with the 5.38s so far. I am sure I will wish for something a little different at certain times, but i think the 5.38s for around here most of the time will be really useful with the 35" tires. I want to be able to use 4th gear high range from about 40-55 and I think that this will let me do that on the canyon roads that are about 40-45 speed limit.

Another note. I think I may have had some 'clunk' in the rear axle before. It seems a little tighter on and off the gas. Looking at my old pinion it looks like it might have been wearing a little funny maybe? The rear axle was about 40 years old. I also may have had a slight whine on the highway before that has now gone away? I might just be imagining things. The tires and wind noise make it hard to pick out individual noises sometimes.

More testing tomorrow. I still have the 4.30s in the front though so no 4wd stuff till later. I want to get some cycles on the rear axle before the big trip.
 

Metcalf

Expedition Leader
Just some little stuff while I put some break in cycles on the rear gears...


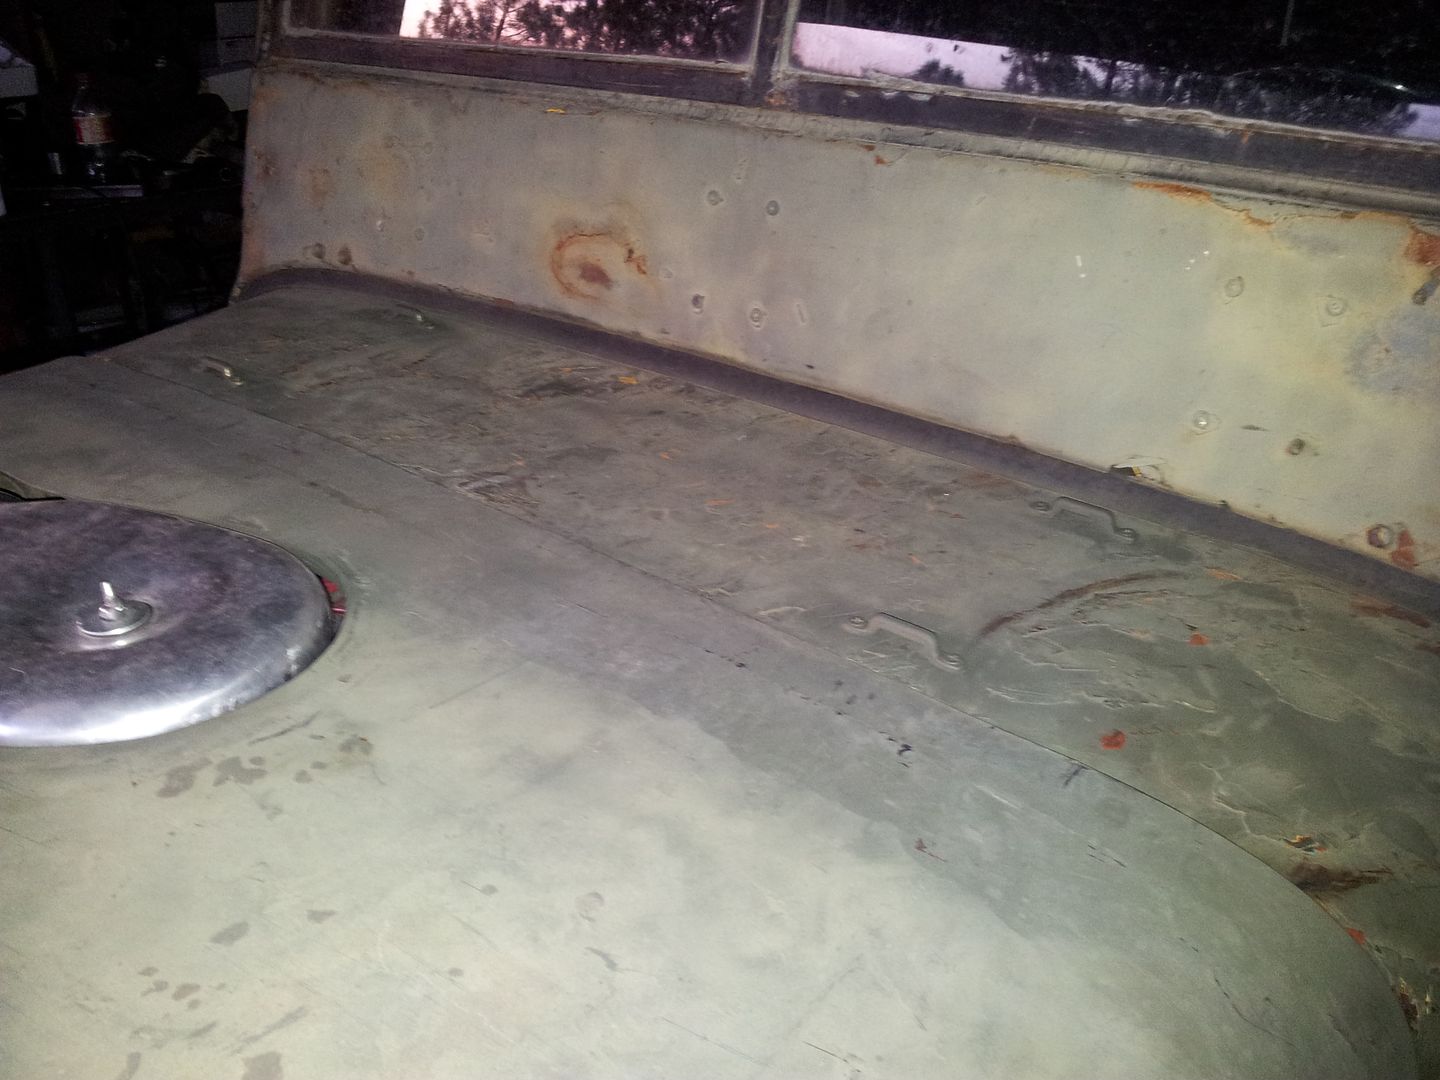
I added some footman loops on the cowl to allow strapping down some longer items like champ chairs and such. In a flat fender you need to get pretty creative about gear storage.


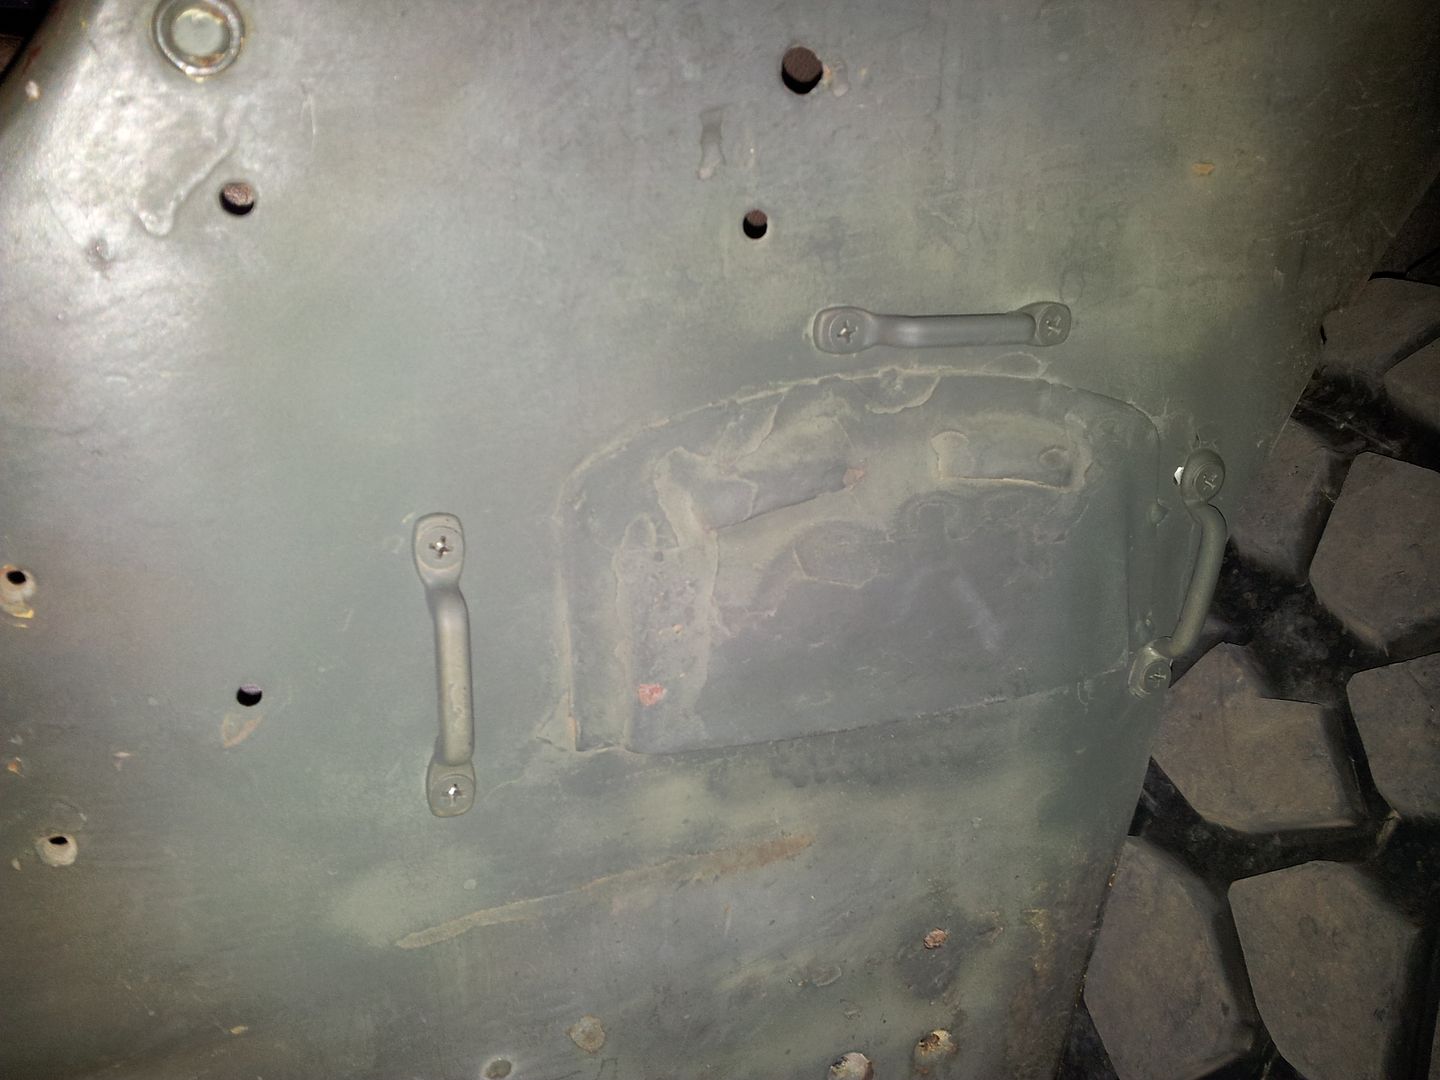
I also got the footman loops added for the shovel and axe straps. I am still waiting on brackets. Oh hum.....


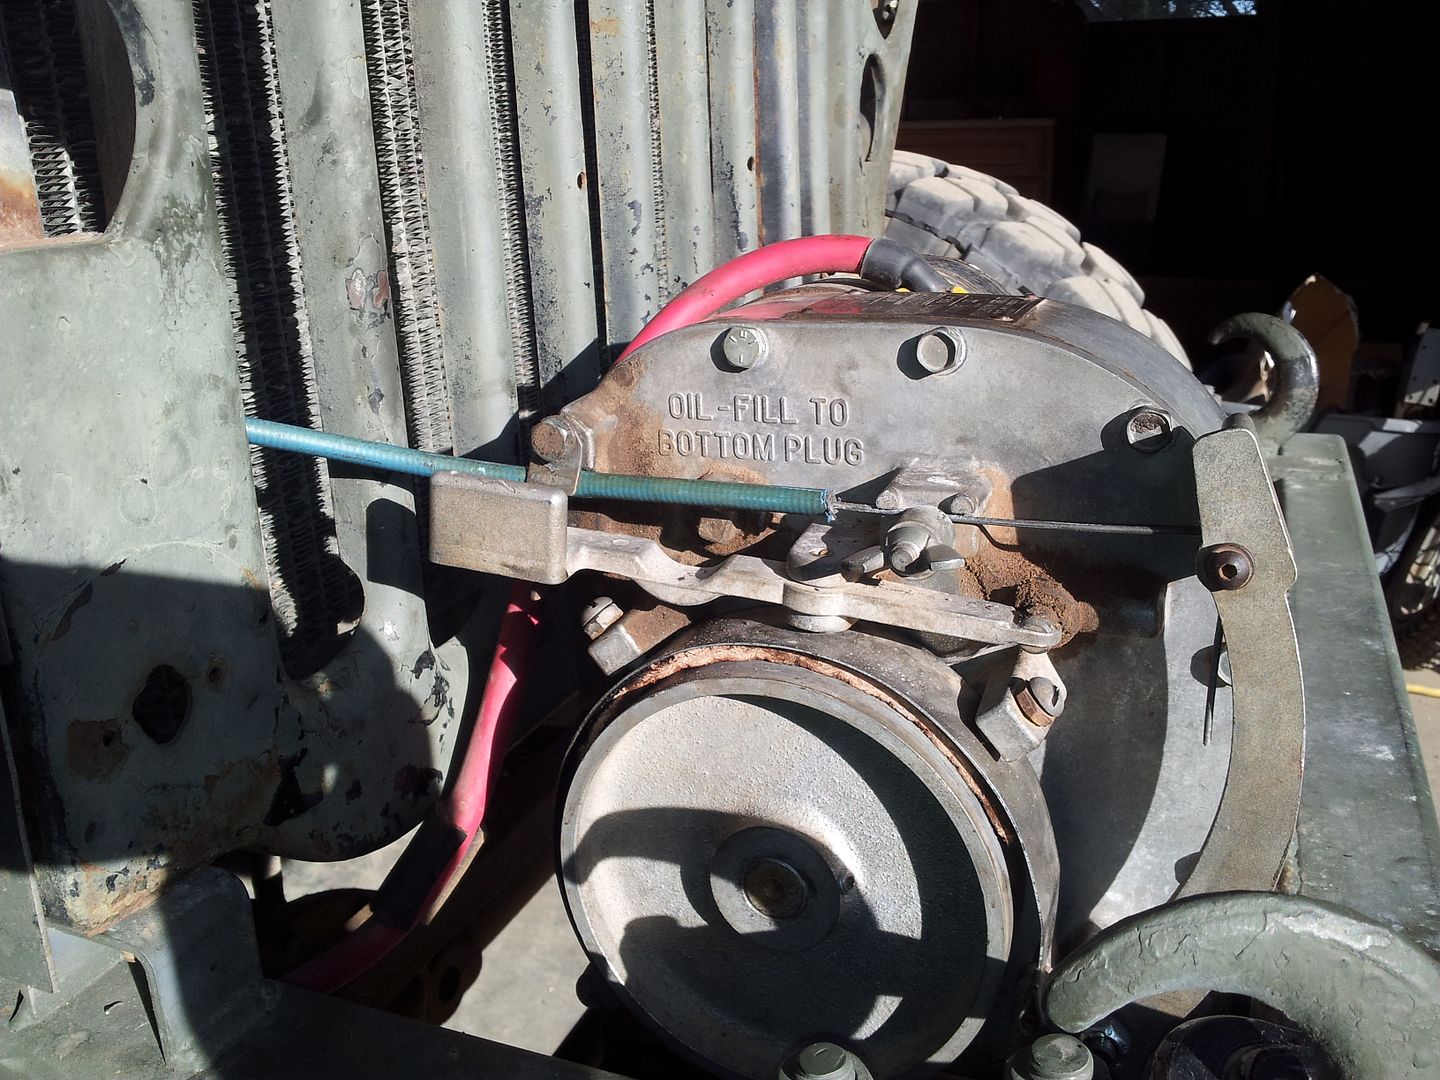
I relined the factory drum brake on the old Belleview winch. I used the factory control cable that came with the winch to control the brake....


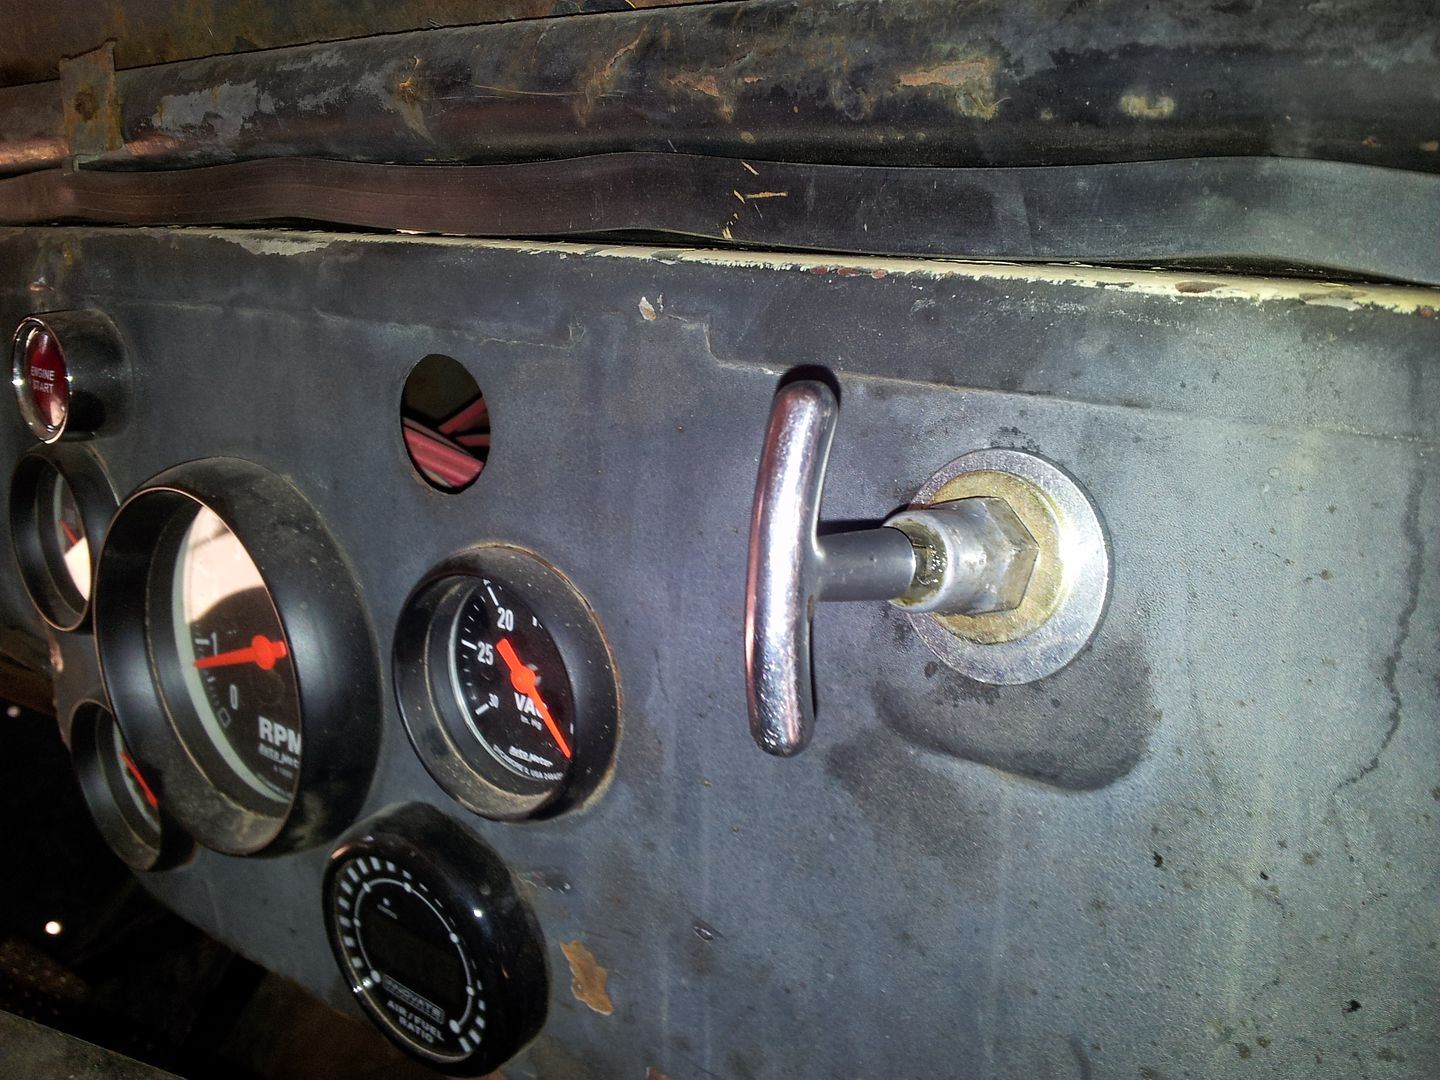
I installed the brake control cable in the factory e-brake location. This allowed me to run the control cable down the inner fender and through the grill. The factory control cable is kinda neat. Basically you pull to activate the brake and then twist the handle to lock it in position. The old cable needed a little oil and cleaning but it seems to work pretty well....

A few more drives and a few more small projects tomorrow.
 

Metcalf

Expedition Leader
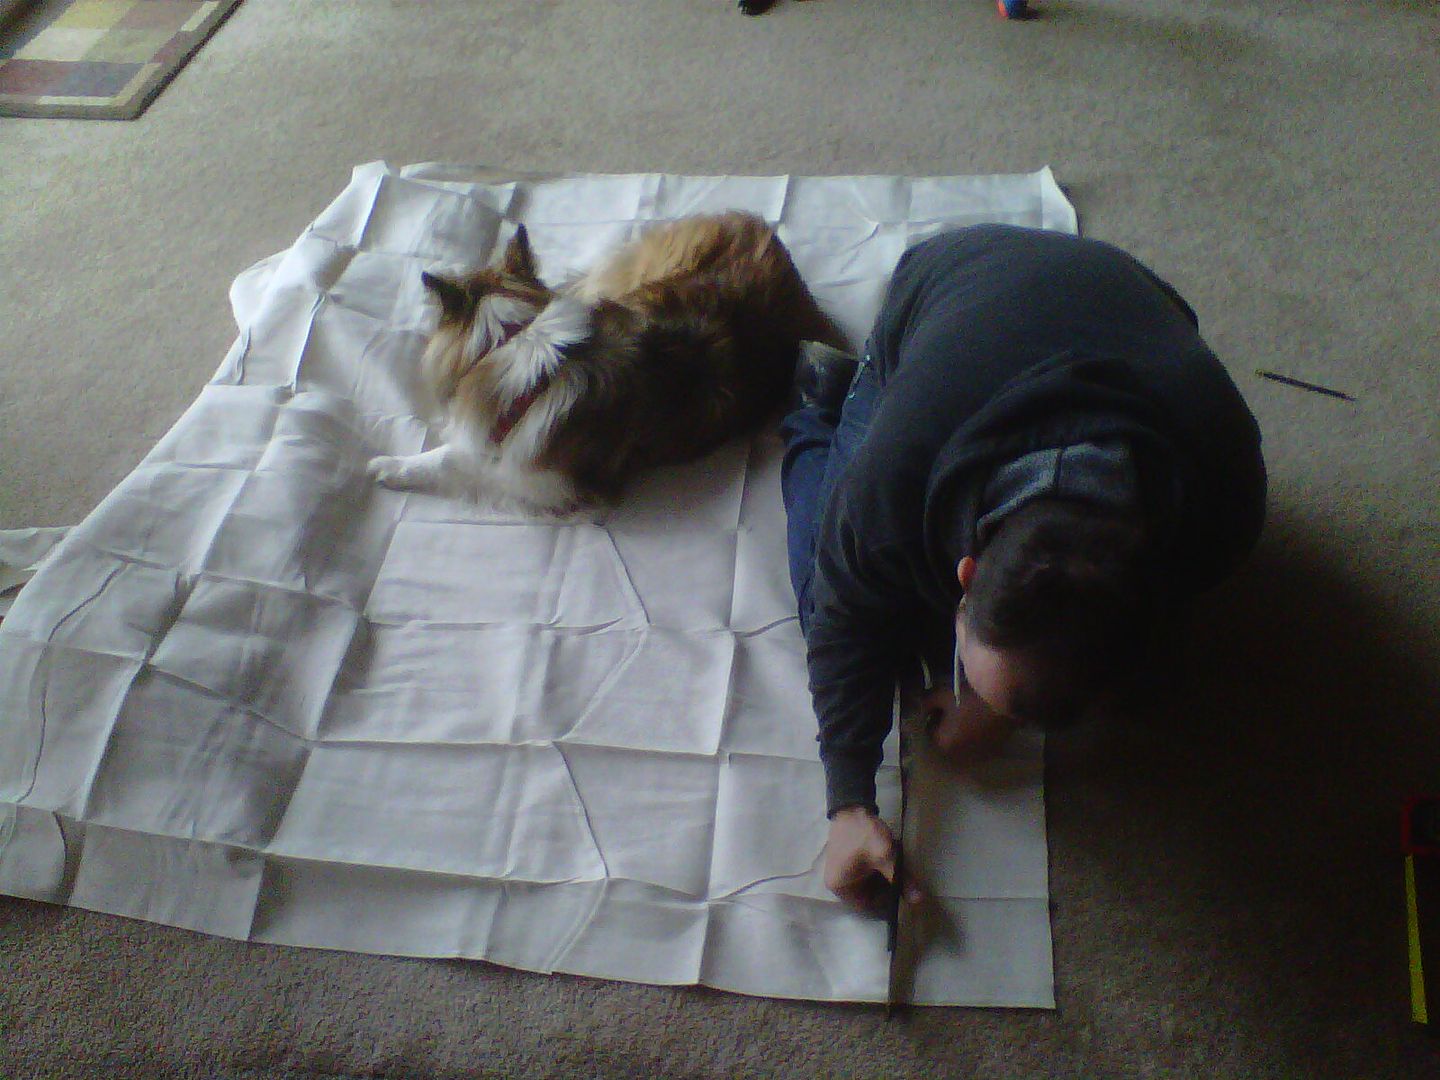
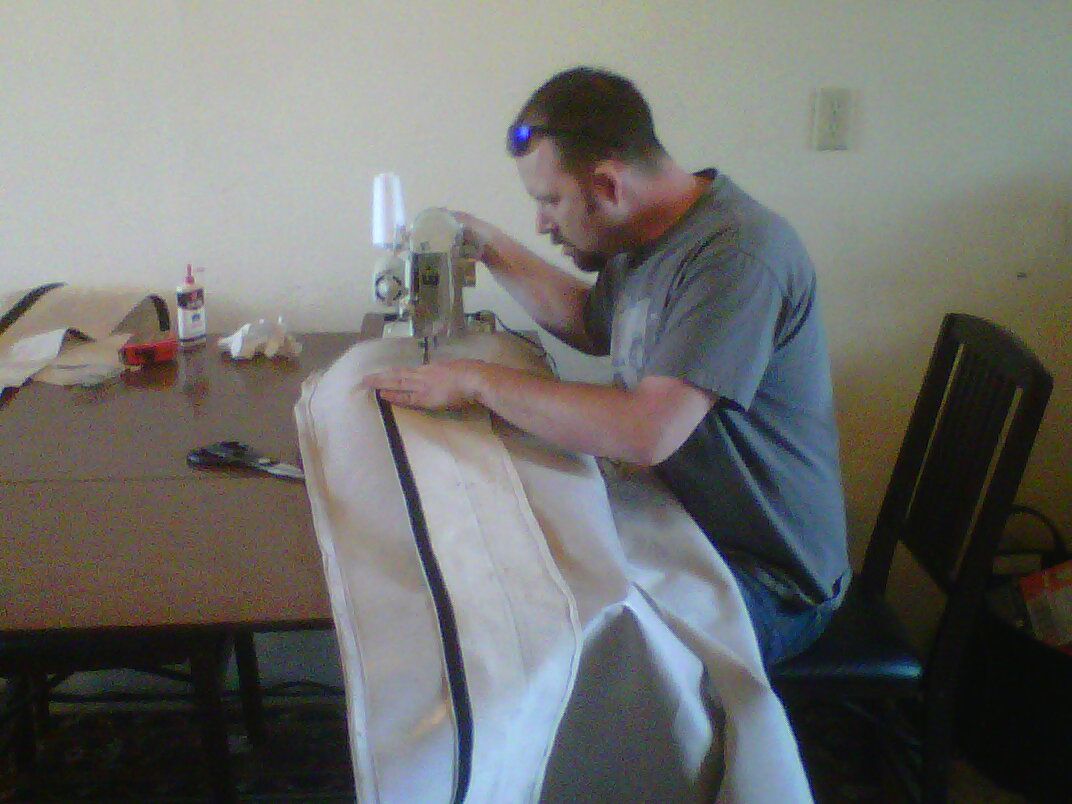
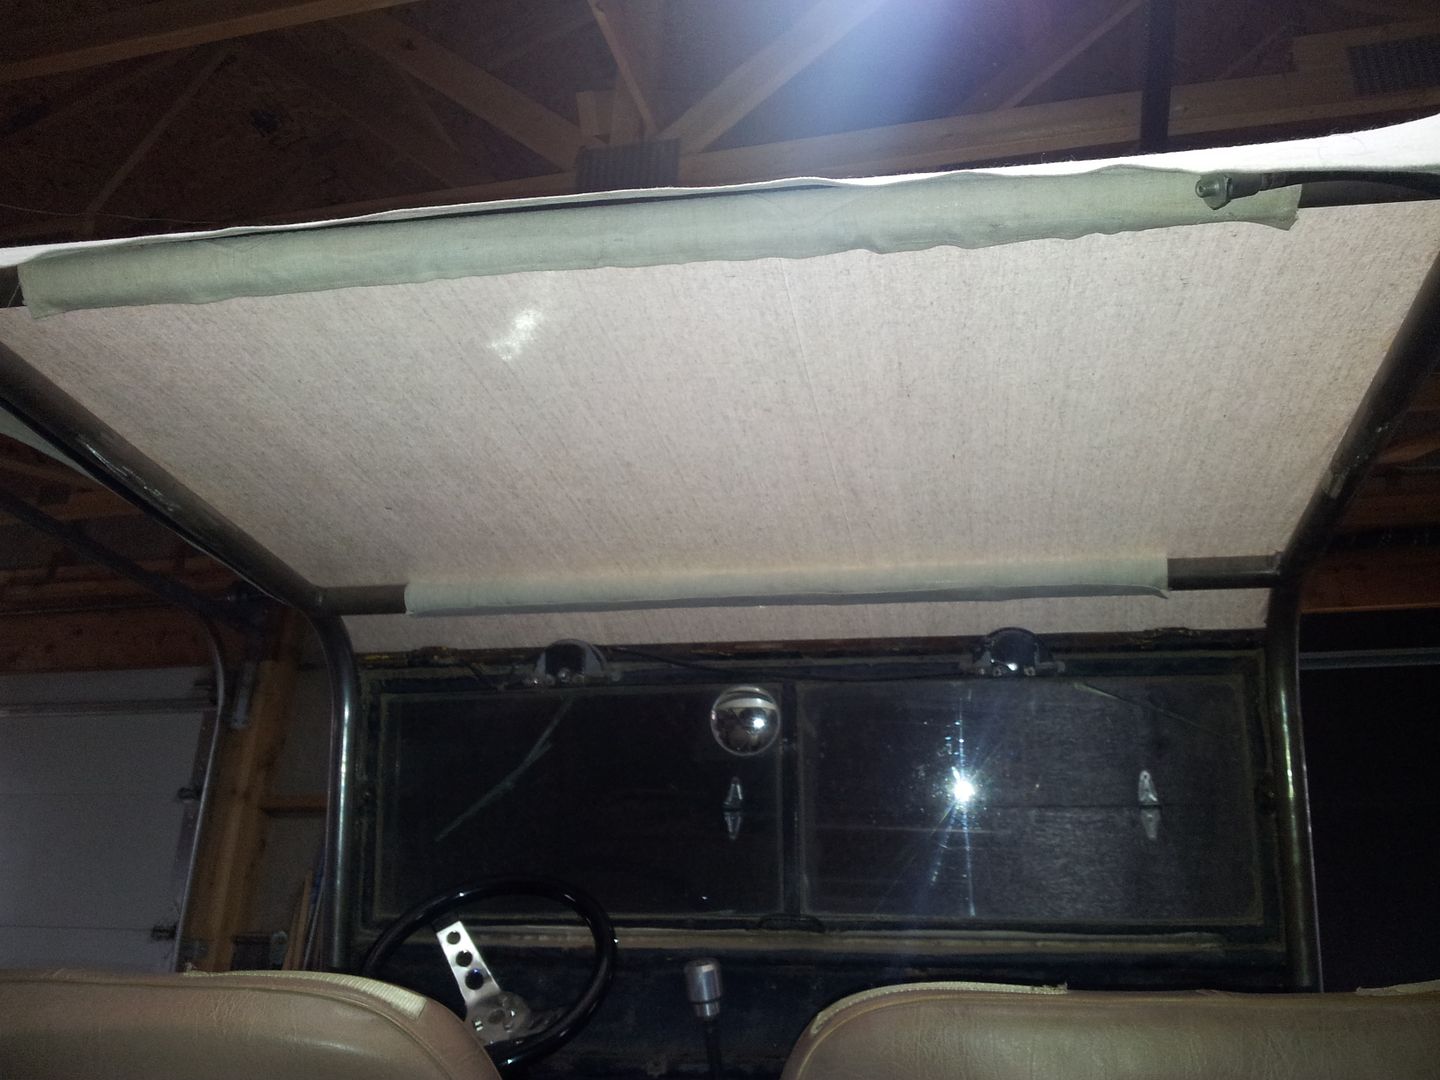
Some sewing?


Cut. I dog was helping immensely.


Sew. This kinda stuff always takes forever. I had to do a little work on my $25 sewing machine. It was making some odd noises which turned out to be a lack of lubrication.


The change. I added two velcro wraps on the A and B pillar spreaders. This REALLY helps keep the bikini top from flapping. I also added a few sections of velcro for some future attachment of some side panels to keep some weather out of the inside....maybe. My 1st experiment in making a door panel didn't work that well. At least the bikini top worked out well.
 

Metcalf

Expedition Leader
Great idea! What are you doing to keep the side edges from flapping as well?

Nothing so far. With the top snug the sides don't seem to flutter much.

I have some velcro on the sides that I can use to hold the sides down with a little work. I am going to try and make a side curtain of some kind that I can attach easily and quickly for the odd rain shower. I don't have any totally great ideas there yet. I tried something this afternoon but I was pretty worn out by then. I have a few other ideas to try later.

I need to get the new front gears installed this week....
 

Metcalf

Expedition Leader
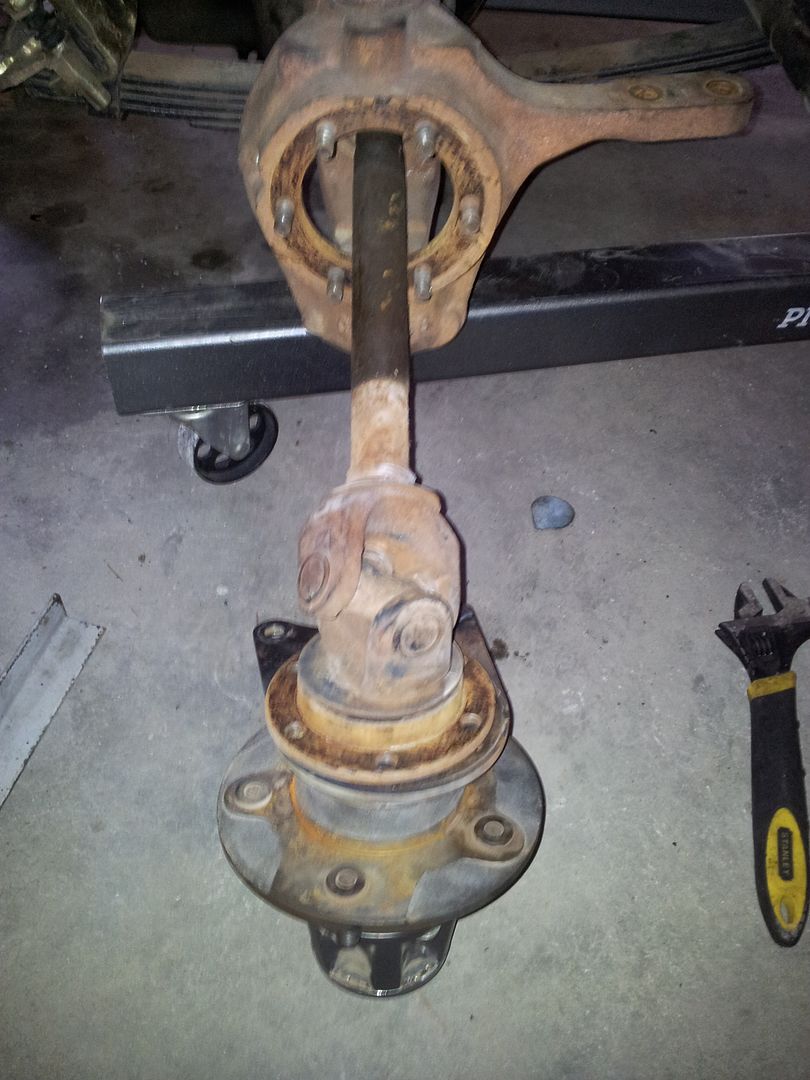
Started the front gear install by tearing the front end apart....


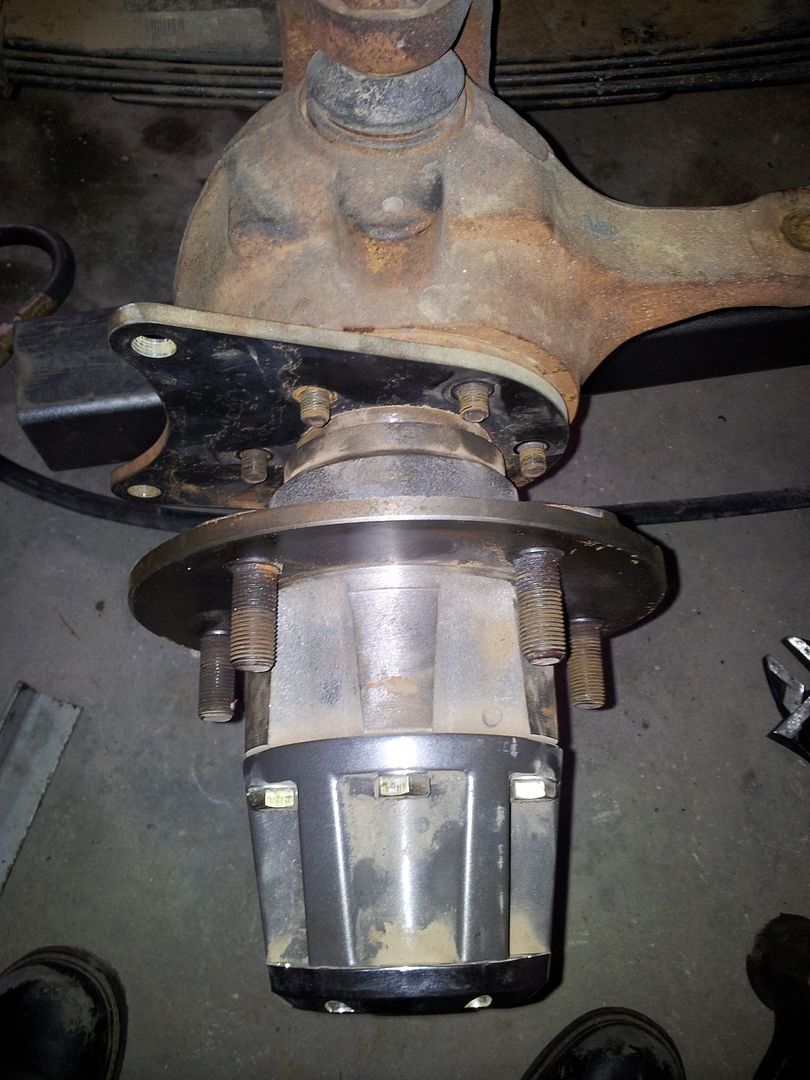
I got this far. Total dis-assembly of the front for gears and all the bearings are pulled. Everything still looked really good. No loose anything anywhere. The pinion was marked +2 which is nice for a reference point.


I REALLY like my front disc brake conversion! Two bolts on the caliper. Slip the rotor off, six nuts on the spindle stud and the entire spindle, bearing hub, locking hub, and axle shaft package come out as one unit. No need to mess with the wheel bearings AT ALL!

A short cliff notes on the brake conversion for new readers that might have not made it through the entire thread.

-Factory spindle and wheel bearing hub
-wheel studs for the factory drum brake application
-My custom designed brake adapter bracket
-1995ish Geo Tracker/Suzuki Sidekick calipers and caliper mounts
-1995ish Gdo Tracker/Suzuki Sidekick rotors
-Drill the lug mounting pattern holes out SLIGHT to fit over wheel studs.
-1985 Honda accord front brake line
-metric brake fitting adapted at the frame.


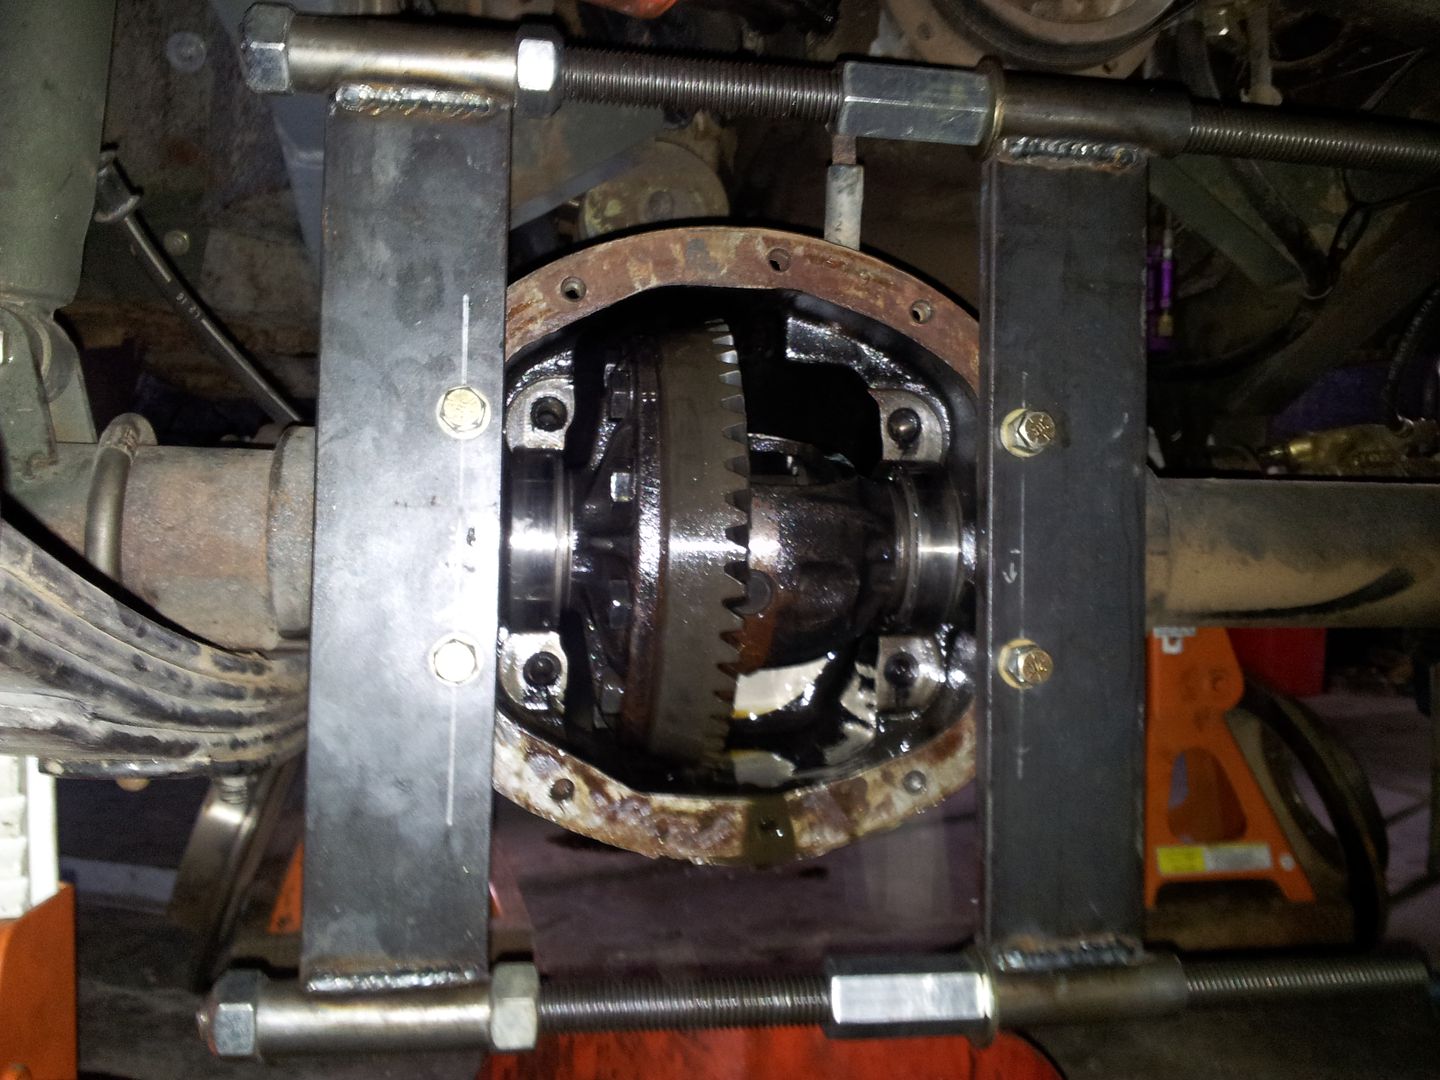
The case spreader worked but required a bit of modification. The mounting holes have to be elongated slightly. The mounting spread on a D44 was 3.5" almost exactly. On a Dana 30 it is about 3 3/8 - 3 7/16. I used a 3/8" round file to elongate the holes.

On the front diff the case spreader arm would not clear the U-bolt plate so it had to be removed from the install.

This machine sits very low so the suspension had to be at about full droop to get the case spreader to clear the frame. I built the spreader large enough to take a 12" ring gear so it was a tradeoff on the smaller sizes.

Hopefully tomorrow I can get the setup bearings made, housing measured, and the starter shim packs figured out....
 

Forum statistics

Threads
188,342
Messages
2,905,818
Members
229,959
Latest member
bdpkauai
Top