You are using an out of date browser. It may not display this or other websites correctly.
You should upgrade or use an alternative browser.
You should upgrade or use an alternative browser.
Redeth's Overland Trailer Build
- Thread starter Redeth005
- Start date
X2 on your propex youtube video. I know I read before you are in California but you sound very northern Minnesotan or maybe Saskatchewan?
Anyways, how are you and Nd4spdse running your ducts from the trailer to the rtt without having animals getting into the trailer. My trailer is similar to both of yours and I have a crazy idea to cut a hole in the floor of the rtt to run the heat duct to the trailer and then a couple more holes for exhaust and cold air intake.
I have had raccoons before give me trouble when I leave doors to the trailer open so I'd like to know how you do it. Alternative method for meeould be a portable box that stays outside the trailer when in use. I just dont like how easily it could be stolen when not in use.
Redeth005
Adventurer
Thanks buddy. Those 4runners are my favorite body style.Great trailer and love the old 4Runners!!!
I wanted to say, I found your video on your Propex heater review and I really appreciate all the information you provided! Thanks for doing it!
X2 on your propex youtube video. I know I read before you are in California but you sound very northern Minnesotan or maybe Saskatchewan?
Anyways, how are you and Nd4spdse running your ducts from the trailer to the rtt without having animals getting into the trailer. My trailer is similar to both of yours and I have a crazy idea to cut a hole in the floor of the rtt to run the heat duct to the trailer and then a couple more holes for exhaust and cold air intake.
I have had raccoons before give me trouble when I leave doors to the trailer open so I'd like to know how you do it. Alternative method for meeould be a portable box that stays outside the trailer when in use. I just dont like how easily it could be stolen when not in use.
You're welcome guys It was hard to find good reviews on this heater. I was frustrated trying to learn more so i just had to make a video to help others out in similar situations. I went ahead and bought the heater and was happy with how it worked but it very well could have backfired on me lol I'm glad it works great though.
Yes i am Californian. Los Angeles to be more precise. MAybe i should look into vacationing in Minnesota; I'll fit right in lol
As for heater ducting. I plan to route the ducting through the center joint where the RTT opens up. A the large hinged joint in the middle there is a small flap that when lifted up exposes a small space where the duct can easily fit into. NO HOLES REQUIRED! don't drill through the floor of your RTT. Even if it didnt work his way i would have just planned to route the duct in through the annex. But the hinge portion for the RTT seems to be a great spot.
Here is where im talking about:
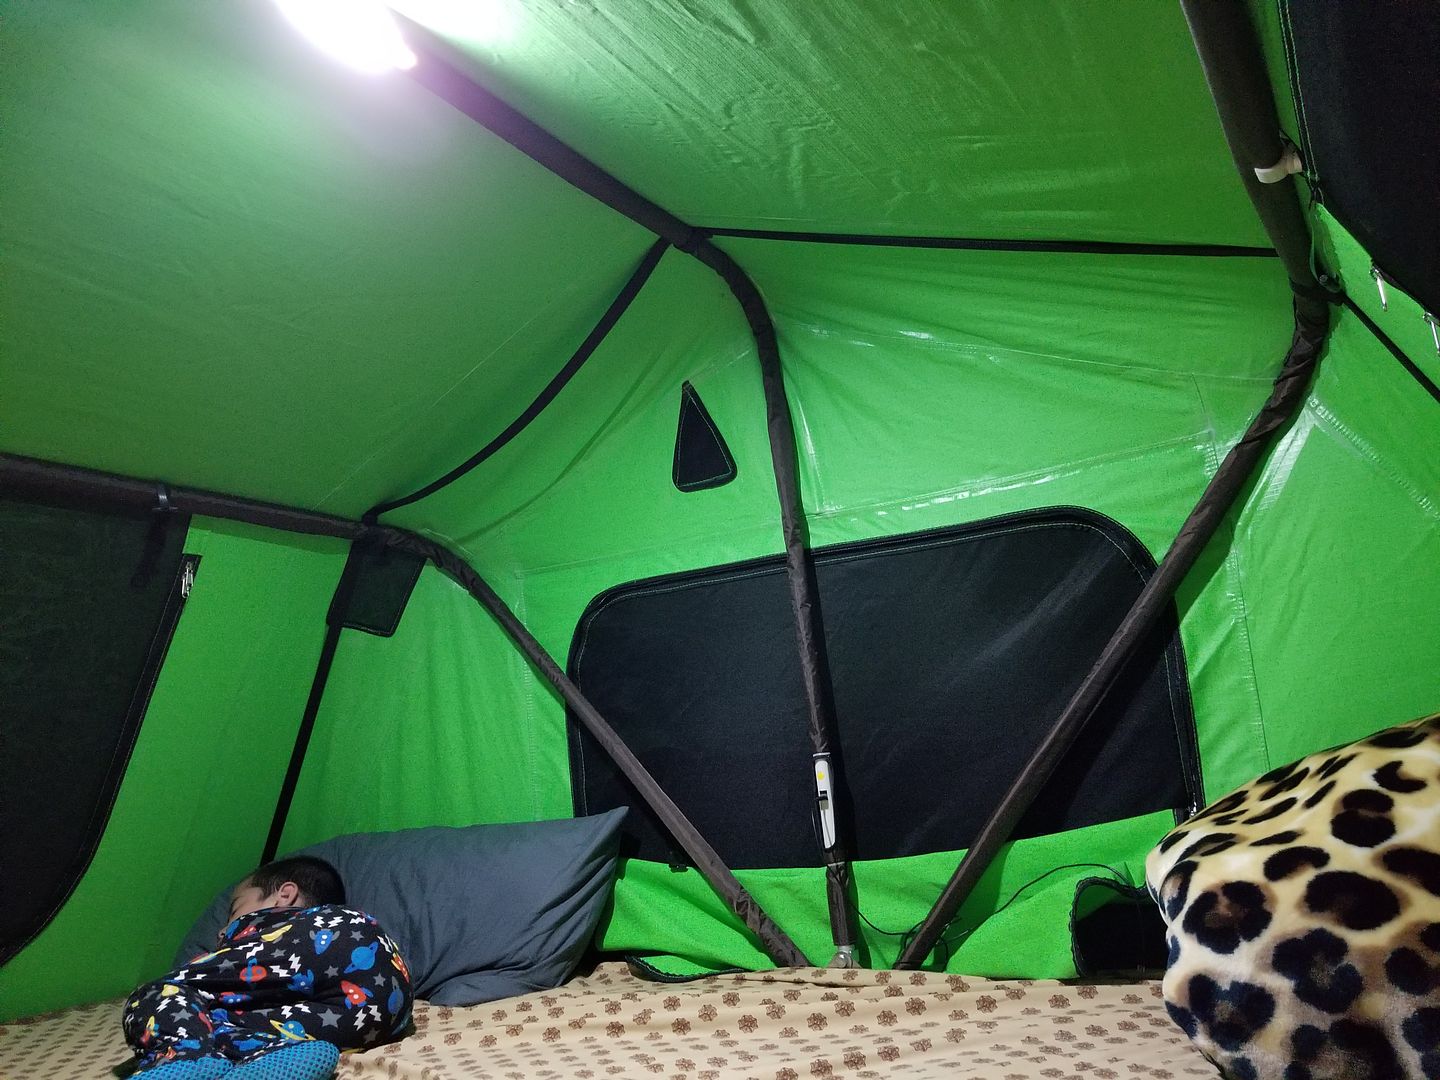
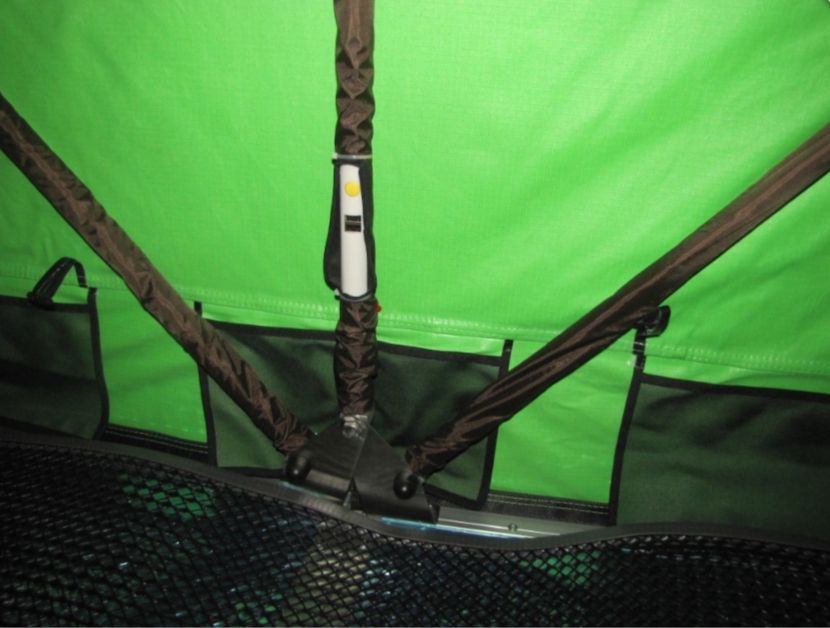
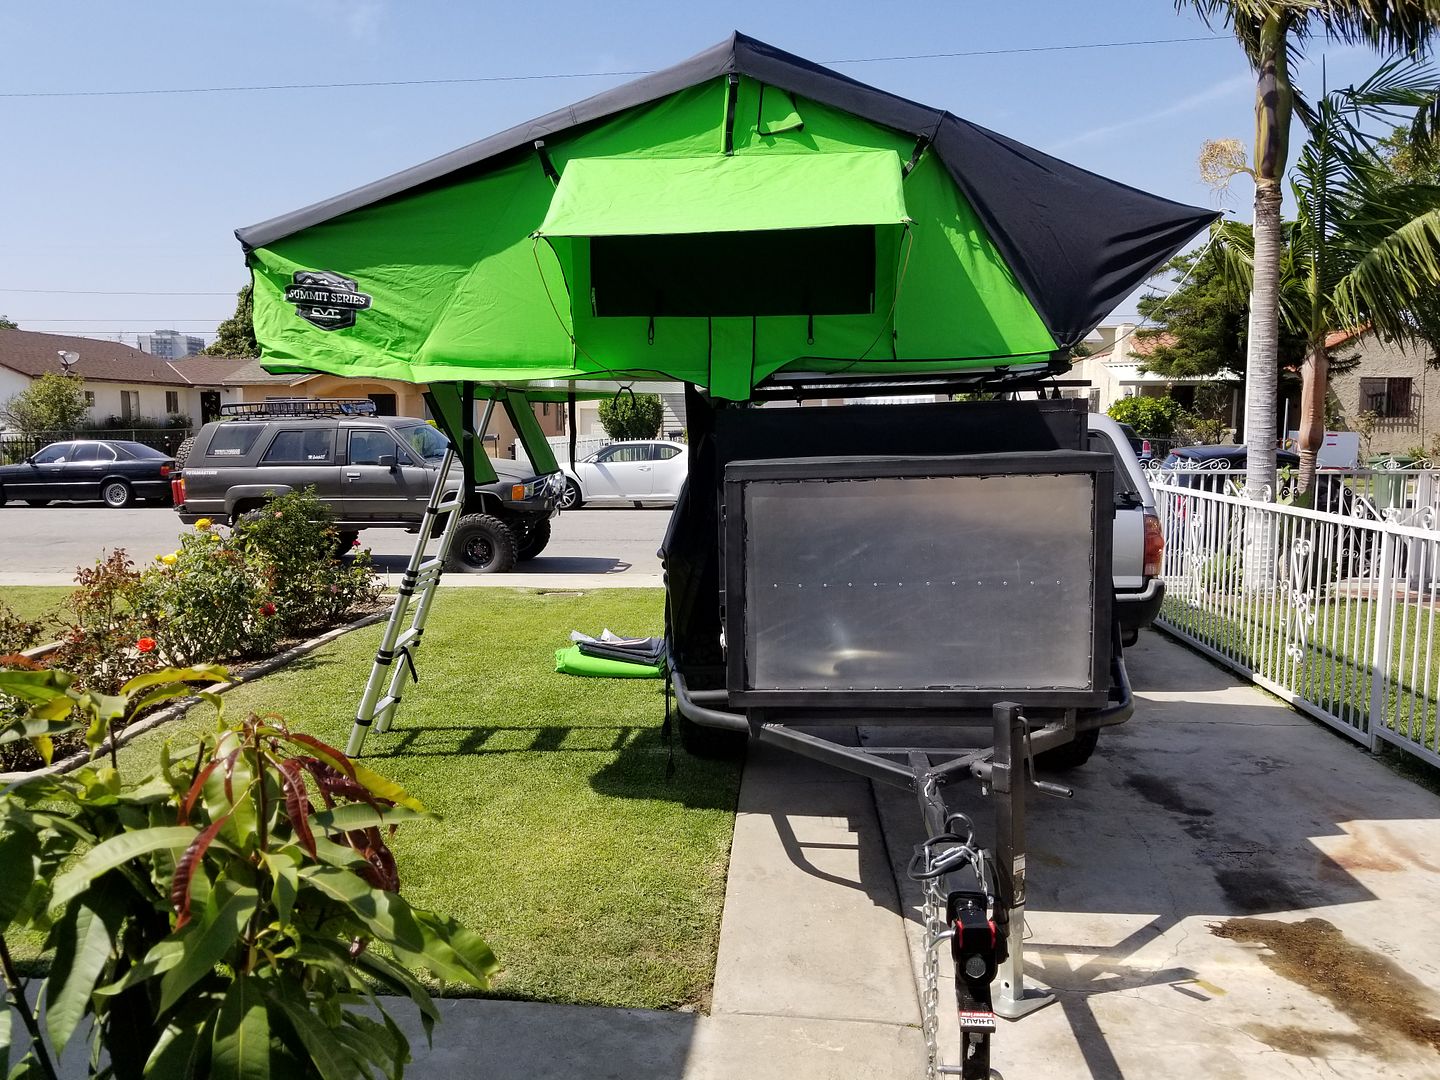
--------------------------------------------------------------------------------------------------------------------------------------------------------------------------------------------------------
As for how i plan to route the duct through the front compartment.... well that's still in the works. It is actually one thing i am currently brainstorming. I like the many ideas that this guy on youtube (use: Tinskipper) suggested on his video here: https://youtu.be/izEKeACJglY
If you look at the comments section you'll see where i asked him a few things and where he replied. But basically here is the links to the 2 hoses that he uses in his video. Together they fit within on another which makes it possible to have that telescoping effect for storage. each heater duct is 5ft. So that makes 10ft when extended and puts away neatly at 5ft. He uses a 55mm and a 60mm heater duct.
55mm Duct:
http://www.suremarineservice.com/W441-376.aspx
60mm Duct:
http://www.suremarineservice.com/398-497.aspx
Right now the only thing i still need to find is that exhaust fitting that he used for a pressed fit of that duct to the heater. He said he used a "2.5(outside diameter) x 2.25(inside diameter) exhaust fitting"
I Just got done buying the 2 hoses so i'll update you guys some more when everything comes in the mail.
---------------------------------------------------------------------------------------------------------------------------------------------------------------------------------------------------------
Here's a few other items i bought to contribute to that front compartment. (from one of my earlier posts)
Hatch. This Hatch is basically meant for kayaks but i dont see why this cant work. It is a 4" waterproof hatch that twists on and off. I like it because since it is meant for kayaks the hatch is waterproof when closed. i can use this hatch to run the heater ducting from the inside of my front compartment through the front wall and up into my tent with about 1" around the duct once it is connected. Then when its time to pack up i just remove the ducting and close up this port. It only costs $13.99
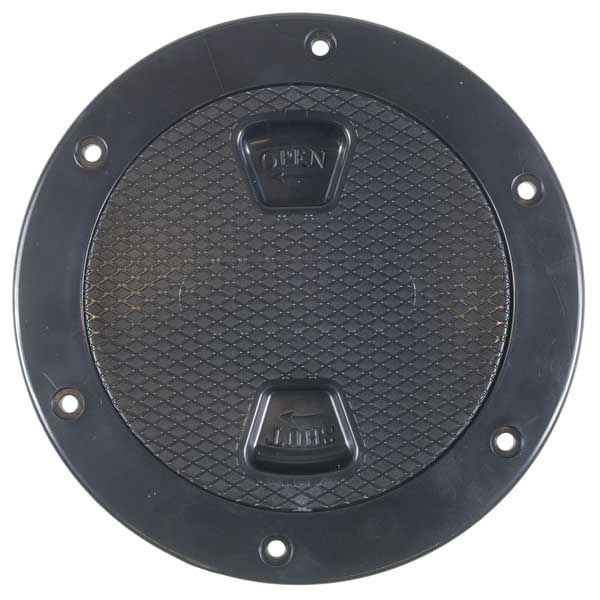
https://www.westmarine.com/buy/west...o2wnybo1GwA1bowMZp5X-nd3lrMEHNSgGABoCFHDw_wcB
Now as for running power from my 7 pole into the front compartment where i plan to run the 12v batteries here is what i plan to use. These are Marine grade so they will have a water tight seal.
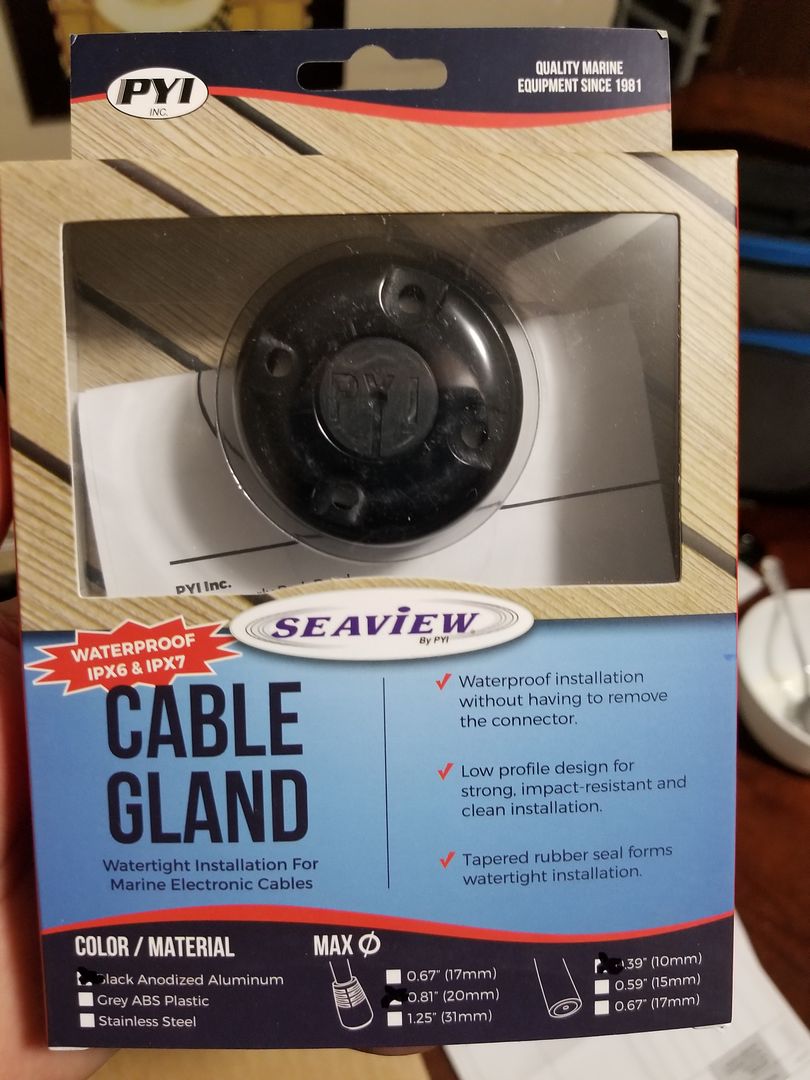
Now this one is aluminum so it was more pricey. but you can get plastic ones for WAY cheaper. this one in particular cost me $27.99 I bough 2 of these because i may need another one for the exterior LED lighting. We will see. But it will definitely be put to use.
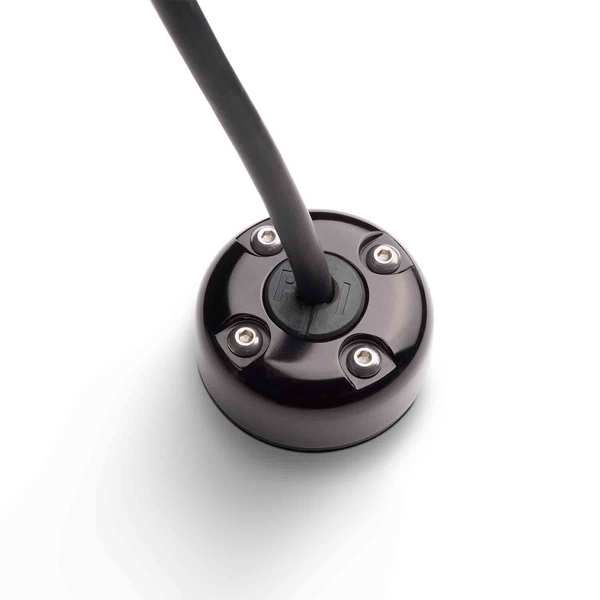
https://www.westmarine.com/buy/pyi-...sv0jayv1gAm5TxtIQEam1rcRNgewZaG_X7xoCQ5fw_wcB
Next i am going to have to find a safe way to pass the propane line into that front compartment to feed my Propex heater. This one has to be waterproof but still be able to pass through the solid aluminum wall. I need to research this one a bit more. I'm open to any ideas or suggestions if you all have any. I was thinking of possibly using something like the quick disconnect that "Tinskipper" from that youtube video used. But i do need to research that part a bit more.
Last edited:
Redeth005
Adventurer
I Found the exhaust fitting that "Tinskipper" used in that youtube video. 2-1/4" ID x 2-1/2" OD. which is basically what he used.
It costs $3.27 This was the hardest piece to find! It seems like that size is discontinued or non existent in many other online vendors.
Here is the link:
http://www.ebay.com/itm/Nickson-Ind...ash=item5b3ccae9ec:g:LmkAAOSwe-FU80T9&vxp=mtr
Anyway just in case the link is ever broken in the future just look the Ebay vendor up he goes by "541variations" he has a 99.1% positive feedback rating.
Just thought i would share that. Now i wait anxiously for pars to arrive lol
Nd4SpdSe
Adventurer, eh?
We've had racoons wander around, but never in the trailer. It's probably too high or not that easily climbable. When the trailer's top is up, it does have a canvas that closes all around it. I also lock the tailgate as well to make it much harder to get in. It's pretty much impossible to open when the top is down. The heater is however bolted down to the trailer, and the heater bolted down to the boxes, it's not easily going anywhere. Anything is really stealable; RTT's even get stolen. You just have to do what you can to take the best precautions you can. While I'm still working on some of the details of the install, I do want to be able to run it with the tailgate closed for reasons of weather/animals/thieves. Mind you, I didn't think it was going to be a problem, but trying to find a 60mm duct 90 degree elbow is proving to be a challenge, and the ducting itself doesn't have enough flex to do what I need it to do easily, but I could force it to close the tailgate. I find a few options on the net, 1-2 from overseas with crazy shipping prices. I can find some options on McMaster-Carr, but I'll need to measure the proper ID of the duct to see what will work.Anyways, how are you and Nd4spdse running your ducts from the trailer to the rtt without having animals getting into the trailer. My trailer is similar to both of yours and I have a crazy idea to cut a hole in the floor of the rtt to run the heat duct to the trailer and then a couple more holes for exhaust and cold air intake.
I have had raccoons before give me trouble when I leave doors to the trailer open so I'd like to know how you do it. Alternative method for meeould be a portable box that stays outside the trailer when in use. I just dont like how easily it could be stolen when not in use.
Exactly. I've seen this done a few times and I now do it myselfAs for heater ducting. I plan to route the ducting through the center joint where the RTT opens up. A the large hinged joint in the middle there is a small flap that when lifted up exposes a small space where the duct can easily fit into. NO HOLES REQUIRED! don't drill through the floor of your RTT. Even if it didnt work his way i would have just planned to route the duct in through the annex. But the hinge portion for the RTT seems to be a great spot.
As for how i plan to route the duct through the front compartment.... well that's still in the works. It is actually one thing i am currently brainstorming. I like the many ideas that this guy on youtube (use: Tinskipper) suggested on his video here: https://youtu.be/izEKeACJglY
If you look at the comments section you'll see where i asked him a few things and where he replied. But basically here is the links to the 2 hoses that he uses in his video. Together they fit within on another which makes it possible to have that telescoping effect for storage. each heater duct is 5ft. So that makes 10ft when extended and puts away neatly at 5ft. He uses a 55mm and a 60mm heater duct.
55mm Duct:
http://www.suremarineservice.com/W441-376.aspx
60mm Duct:
http://www.suremarineservice.com/398-497.aspx
I Just got done buying the 2 hoses so i'll update you guys some more when everything comes in the mail.
THAT'S IT! I've been looking for that video for weeks! Thank you! I'll have to watch this video later on my lunch or tonight!
Here's a few other items i bought to contribute to that front compartment. (from one of my earlier posts)
Hatch. This Hatch is basically meant for kayaks but i dont see why this cant work. It is a 4" waterproof hatch that twists on and off. I like it because since it is meant for kayaks the hatch is waterproof when closed. i can use this hatch to run the heater ducting from the inside of my front compartment through the front wall and up into my tent with about 1" around the duct once it is connected. Then when its time to pack up i just remove the ducting and close up this port. It only costs $13.99
https://www.westmarine.com/buy/west...o2wnybo1GwA1bowMZp5X-nd3lrMEHNSgGABoCFHDw_wcB
Hmm. That's not a bad idea. I've been looking at putting in a section of ABS 3" as way to store the duct with a waterproof cap, accessible from outside, and just open the cap and slide the ducting out and pop it into the tent. This will more likely be on the air intake side of the heater as a way to grab heated air from the tent as opposed from outside for when it's really cold, but the place I got it from suggested against running the intake longer then a few feet for reduced performance, but Wabasto tech I talked to said there's absolutely no problem on intake length. Maybe the store techs thought I meant the combustion intake? The hot side may be something similar as a way just to store the duct. Whatever way I figure out, the point, as is with the entire concept of the setup and trailer, is to make it as quick and easy as possible.
Just an idea about how you can maximize your cooler space. I went on a 10 day sailing cruise of the San Juan Islands with a guy who built his 36' catamaran himself! Anyhow, his coolers were ply and styrafoam jobs he built with epoxy and glass. His wife made many of the meal ahead of time and froze them. That way the food itself is a part of the cooling system! Don't open the cooler much, and not much heat transfer takes place. His system still had frozen meals on the 10th day out. Not hot up there, but the idea still stands. Have a smaller cooler for drinks that you get out daily. Your two cases of water bottles are also perfect for adding cooling power--just freeze them before you go. You might need a separate freezer at the house to hold all that prior to a trip though. Either way it really makes a cooler perform, especially one like yours.
Dan
Dan
Redeth005
Adventurer
Holy crap i hadn't thought about that. Now thats a great idea. I guess i can always let meat to thaw out by leaving it out on the table when camping in summer. Thanks for the tip. Love the frozen water bottle idea; i do that for work all the time. I cant believe i didnt bother using it for camping sooner.Just an idea about how you can maximize your cooler space. I went on a 10 day sailing cruise of the San Juan Islands with a guy who built his 36' catamaran himself! Anyhow, his coolers were ply and styrafoam jobs he built with epoxy and glass. His wife made many of the meal ahead of time and froze them. That way the food itself is a part of the cooling system! Don't open the cooler much, and not much heat transfer takes place. His system still had frozen meals on the 10th day out. Not hot up there, but the idea still stands. Have a smaller cooler for drinks that you get out daily. Your two cases of water bottles are also perfect for adding cooling power--just freeze them before you go. You might need a separate freezer at the house to hold all that prior to a trip though. Either way it really makes a cooler perform, especially one like yours.
Dan
Redeth005
Adventurer
So those of you who follow the Instagram page know that i have neglected to update my online forum build threads. I have a lot to update you guys on so be patient.*
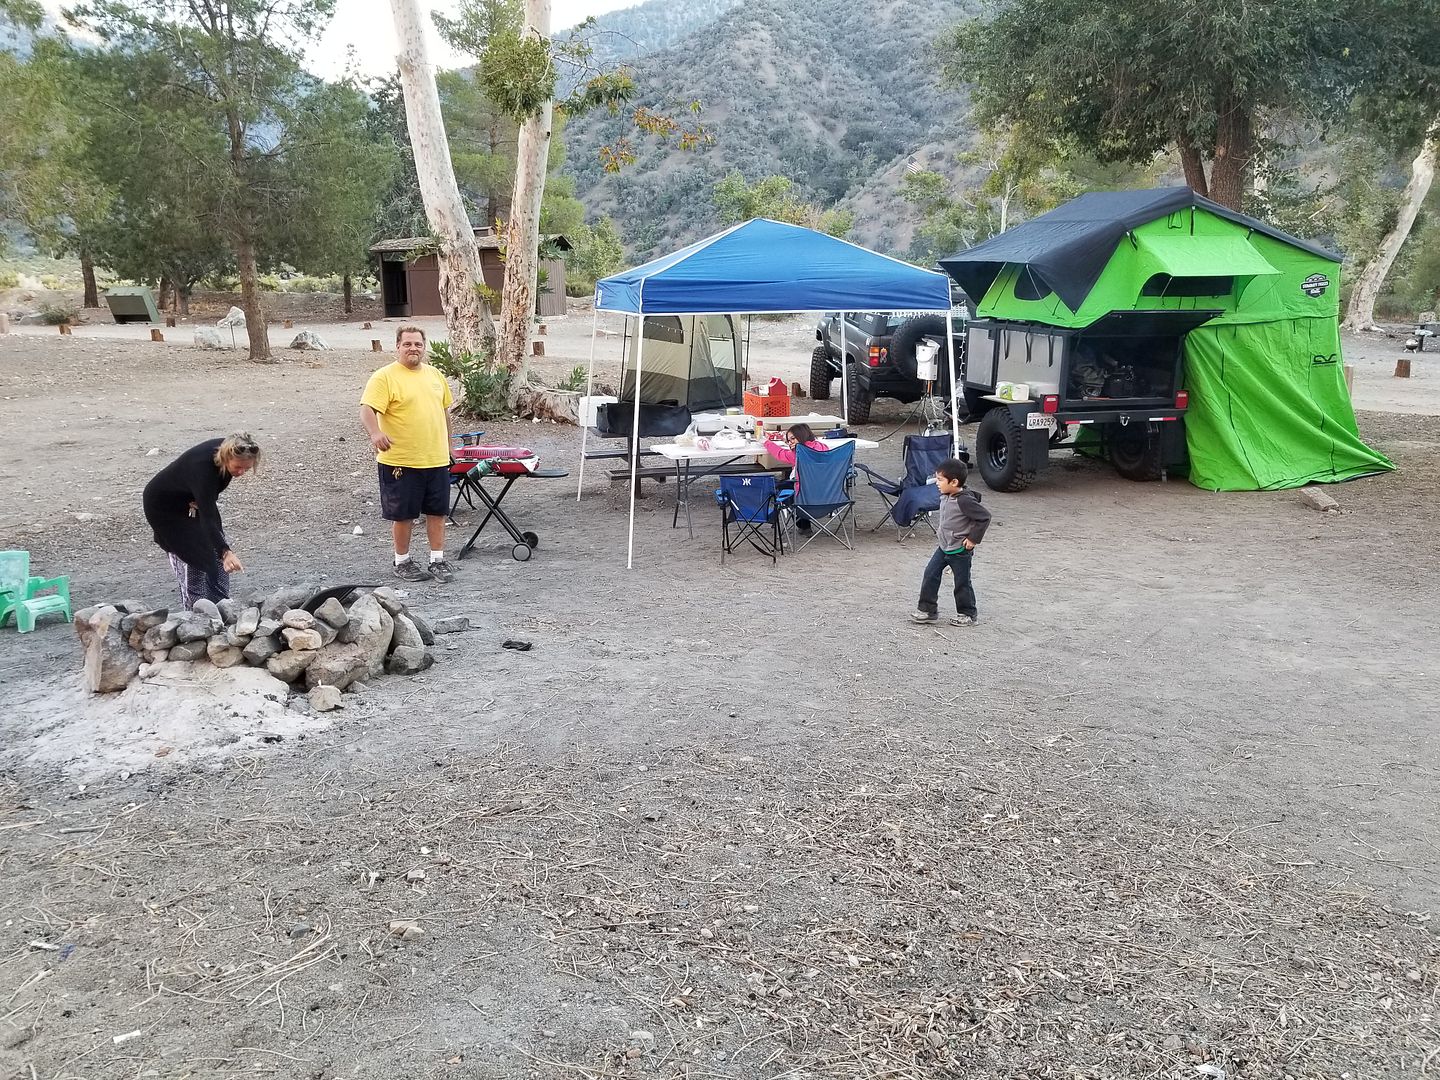
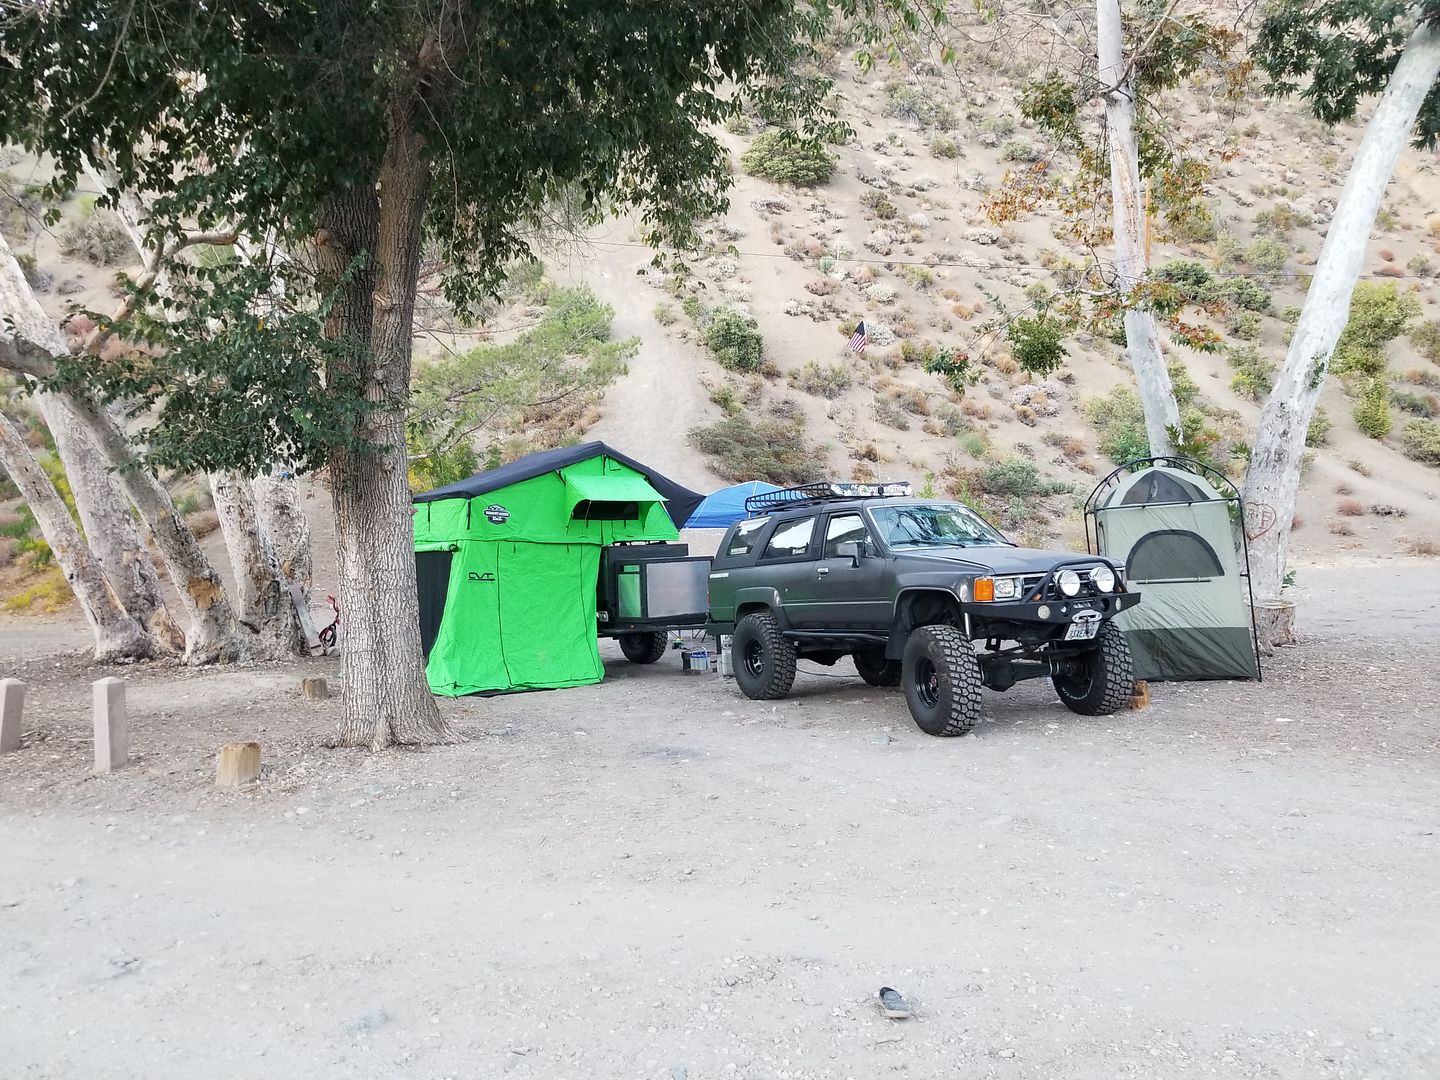
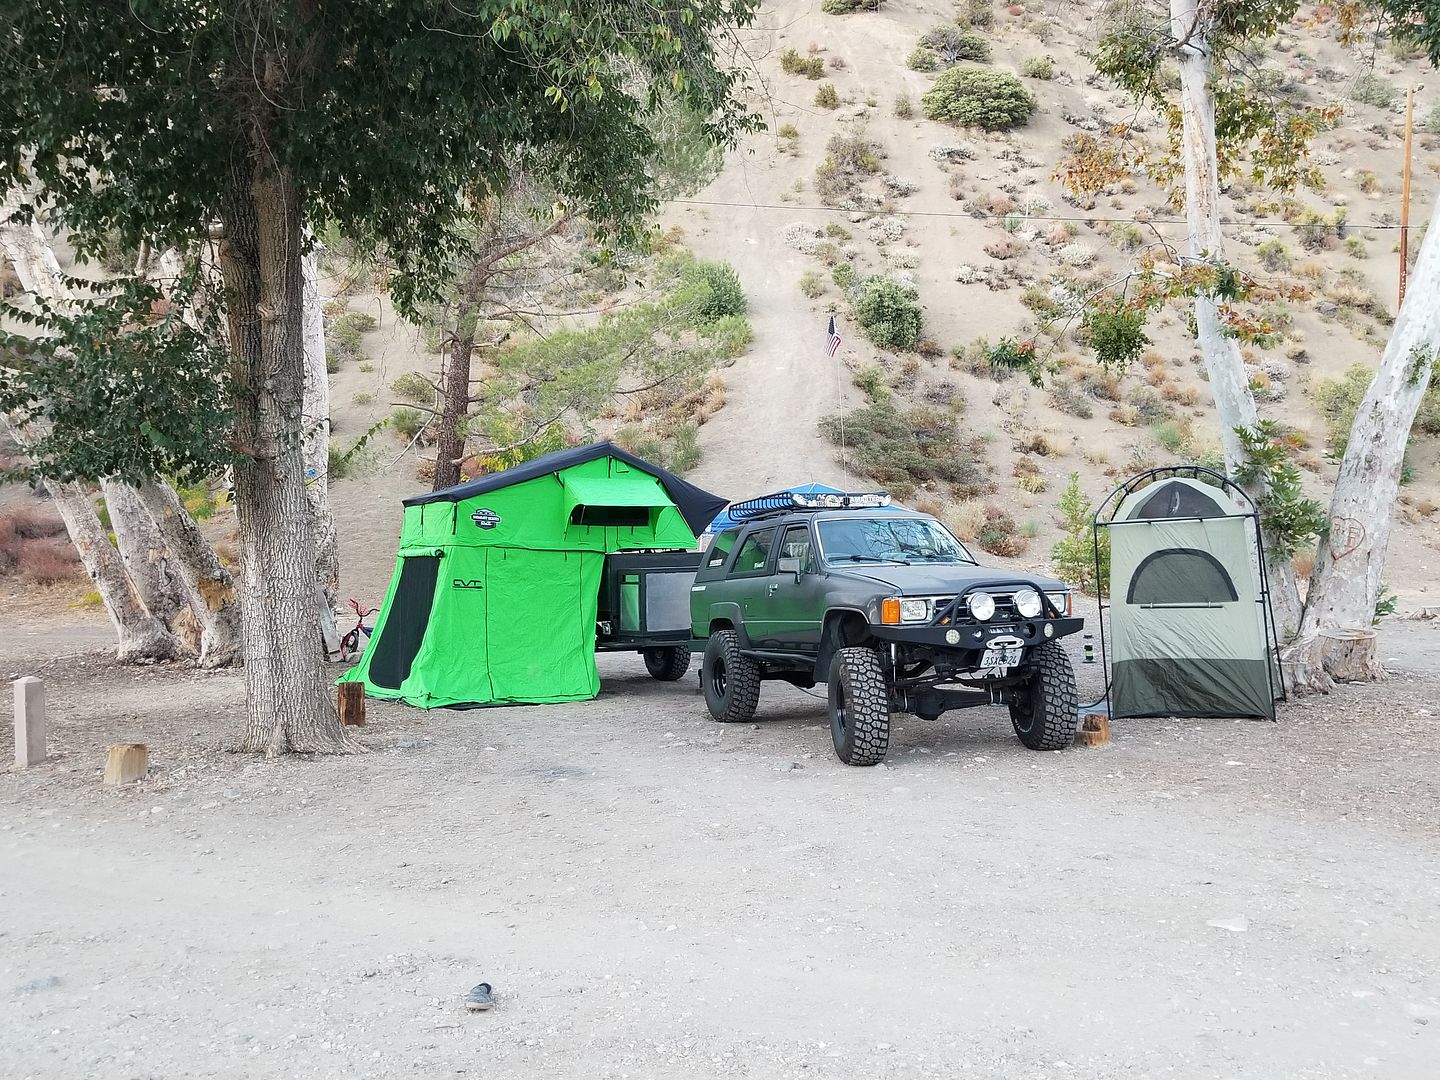
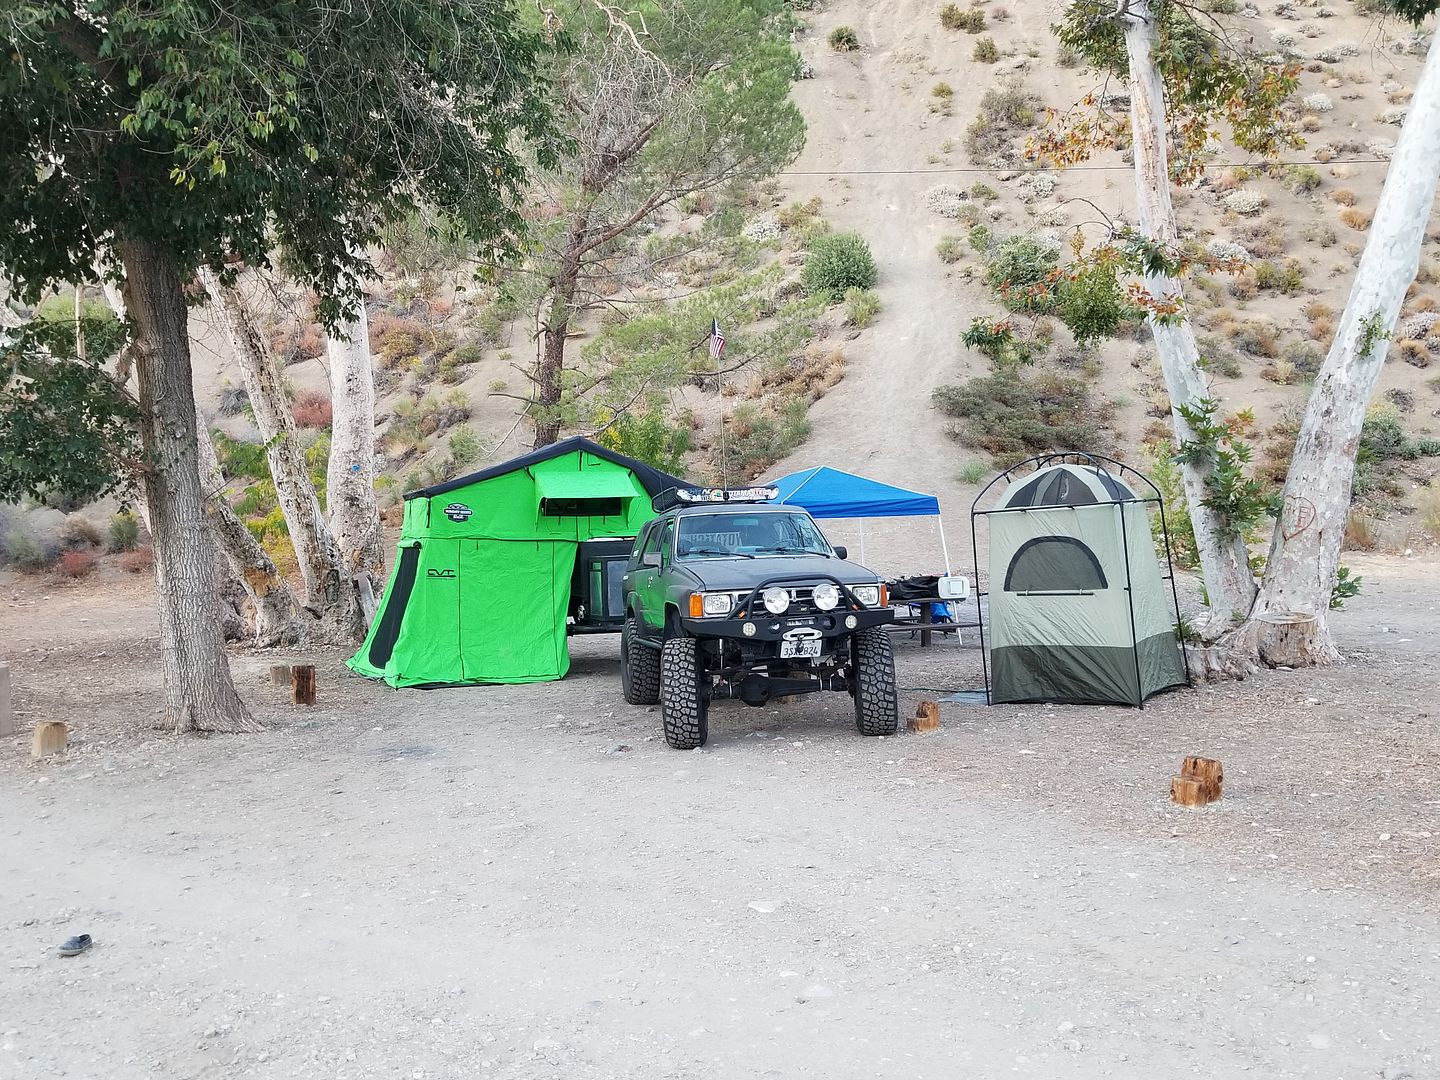
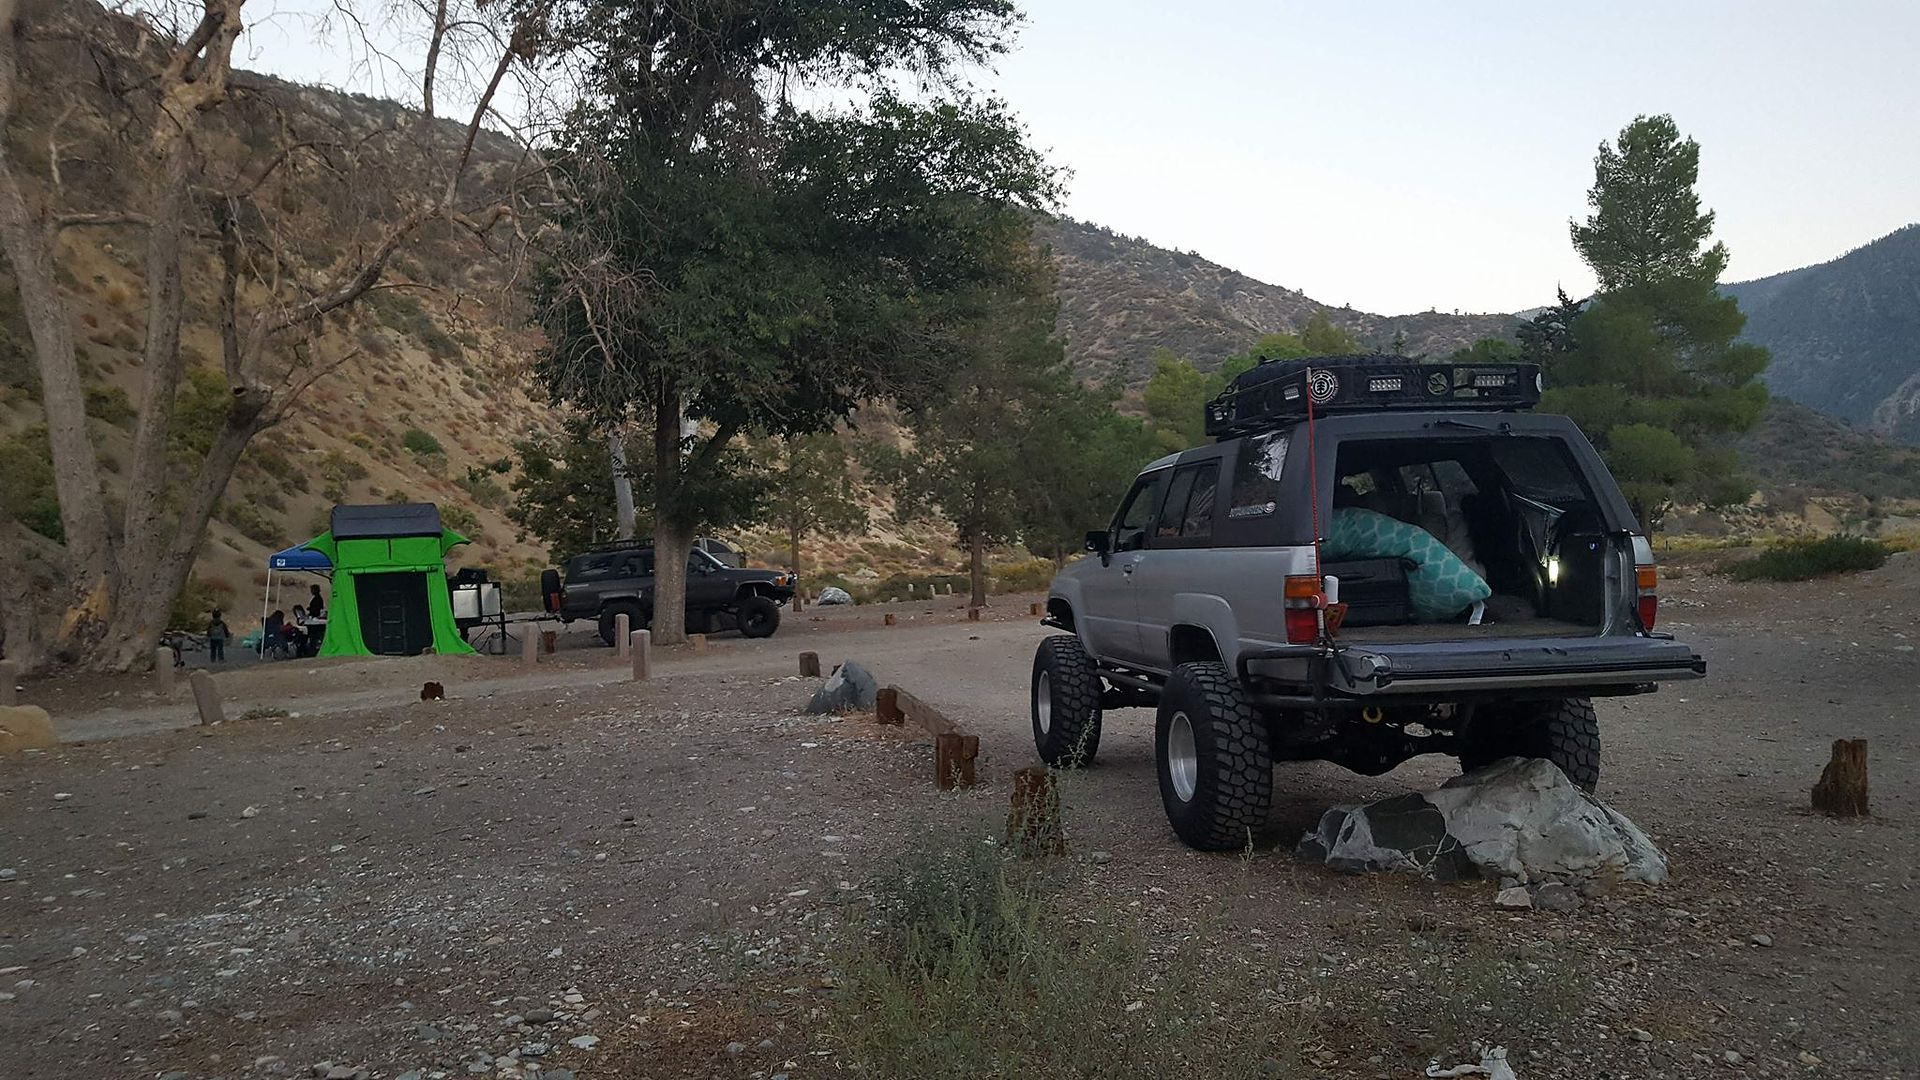
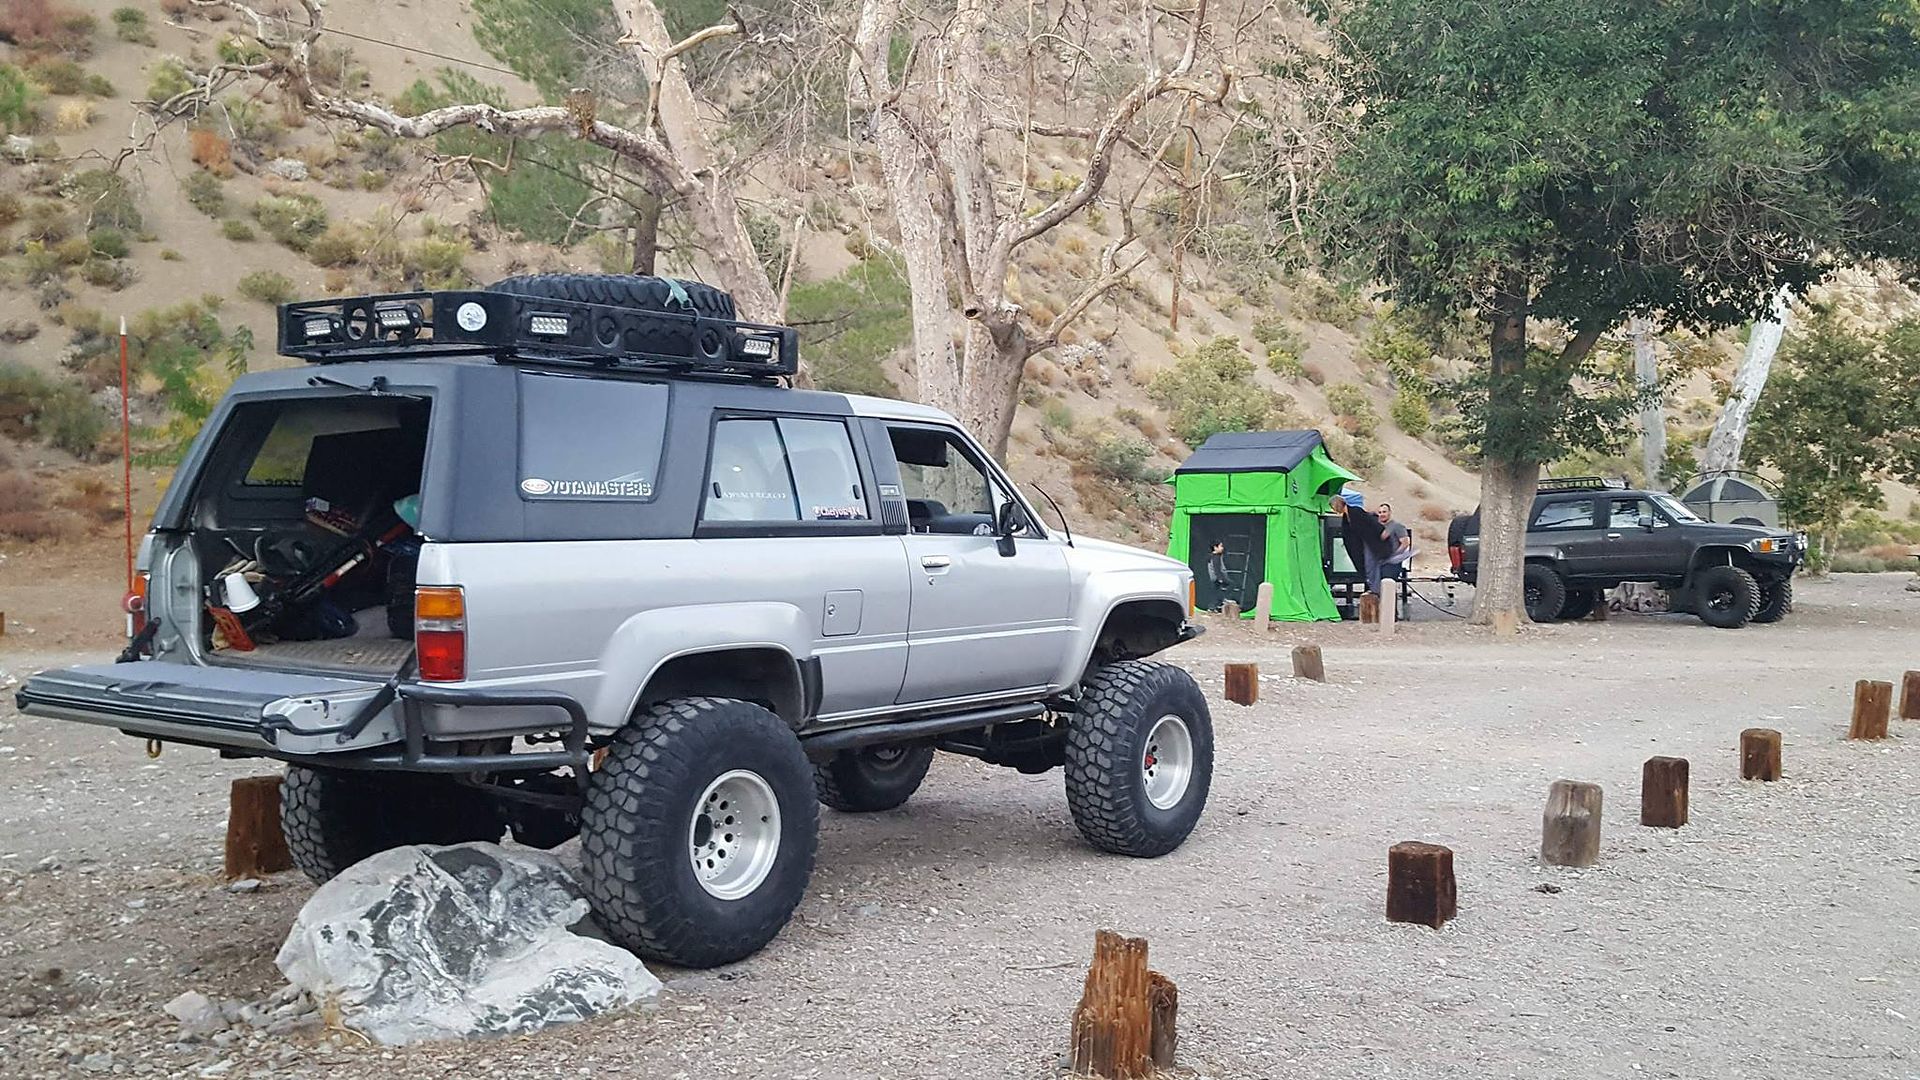
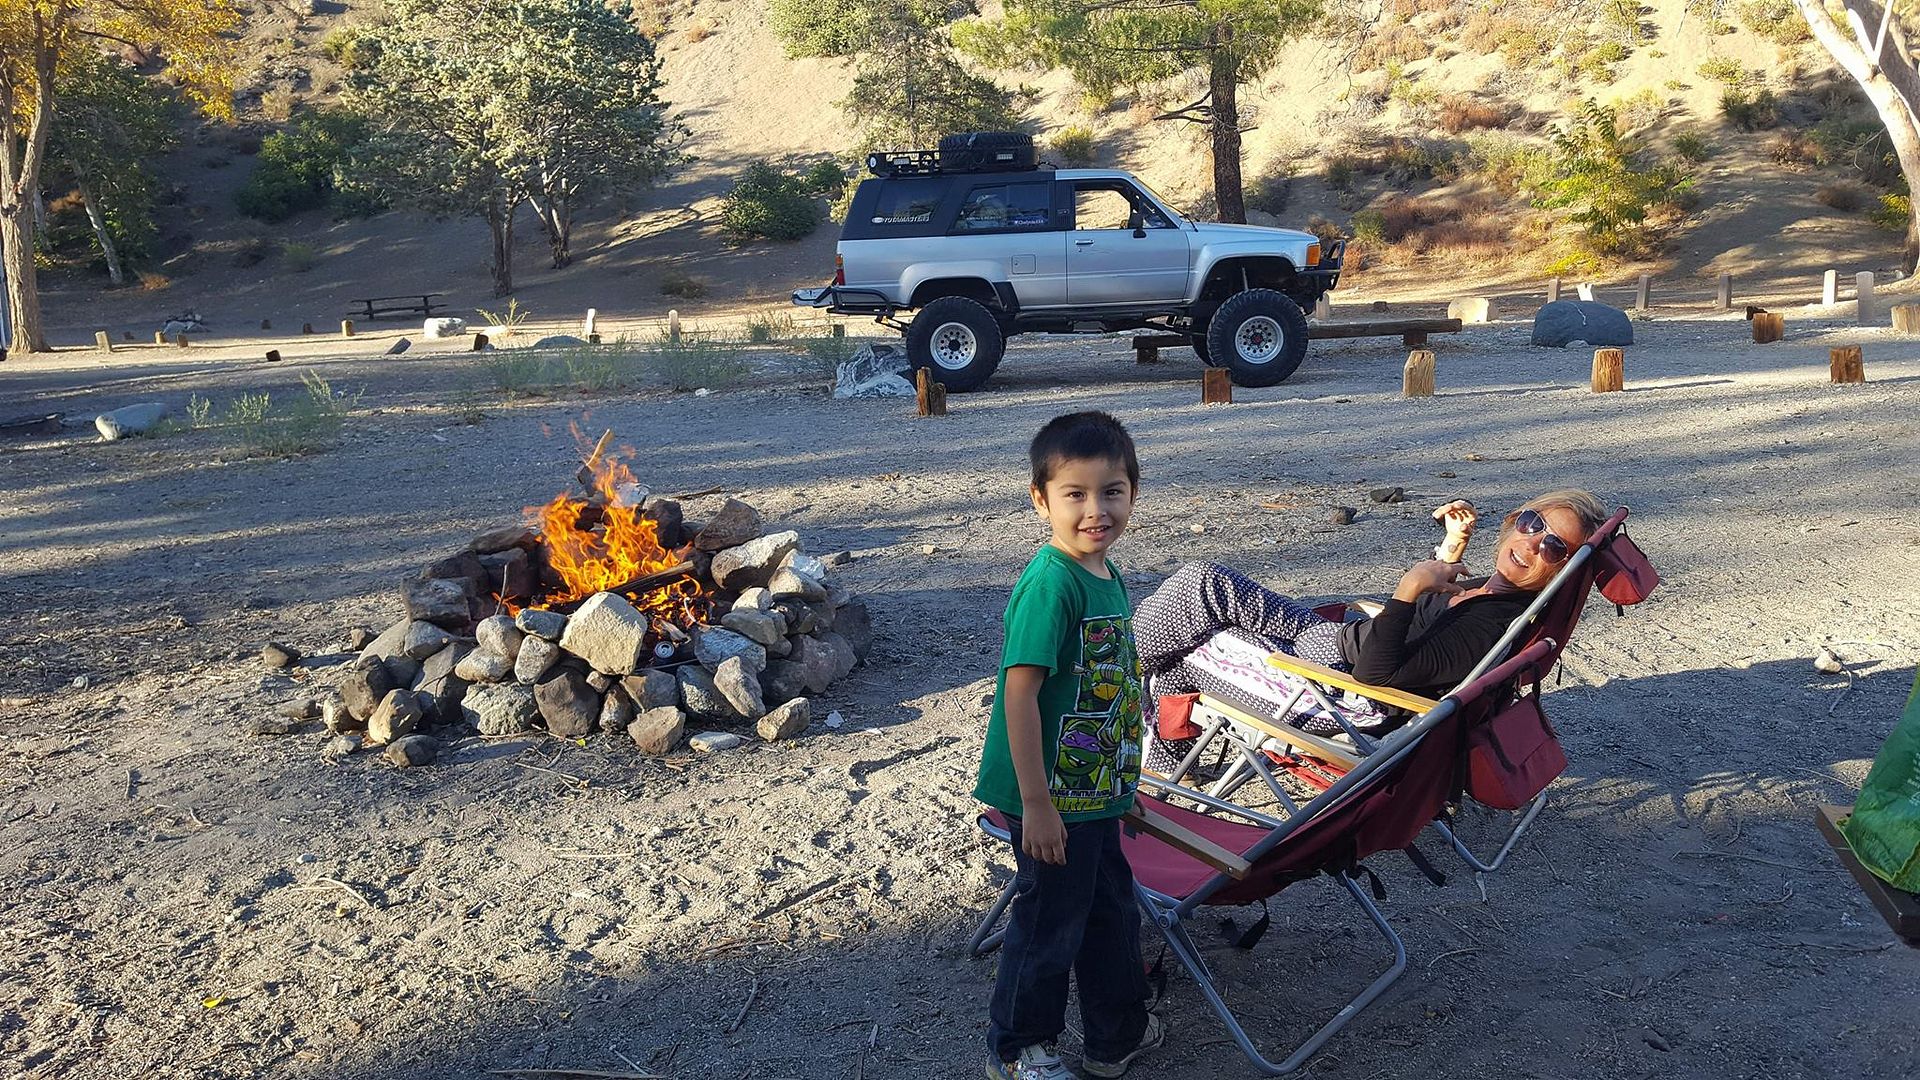
Since the last trip to Lake Elsinore we have taken a trip up to Angels crest national forest for a fun weekend trip of just dry camping with Chefyota4x4 and his girlfriend. This was back in Sepember 29th to* October 1, 2017.*
Here are the pix for that trip:
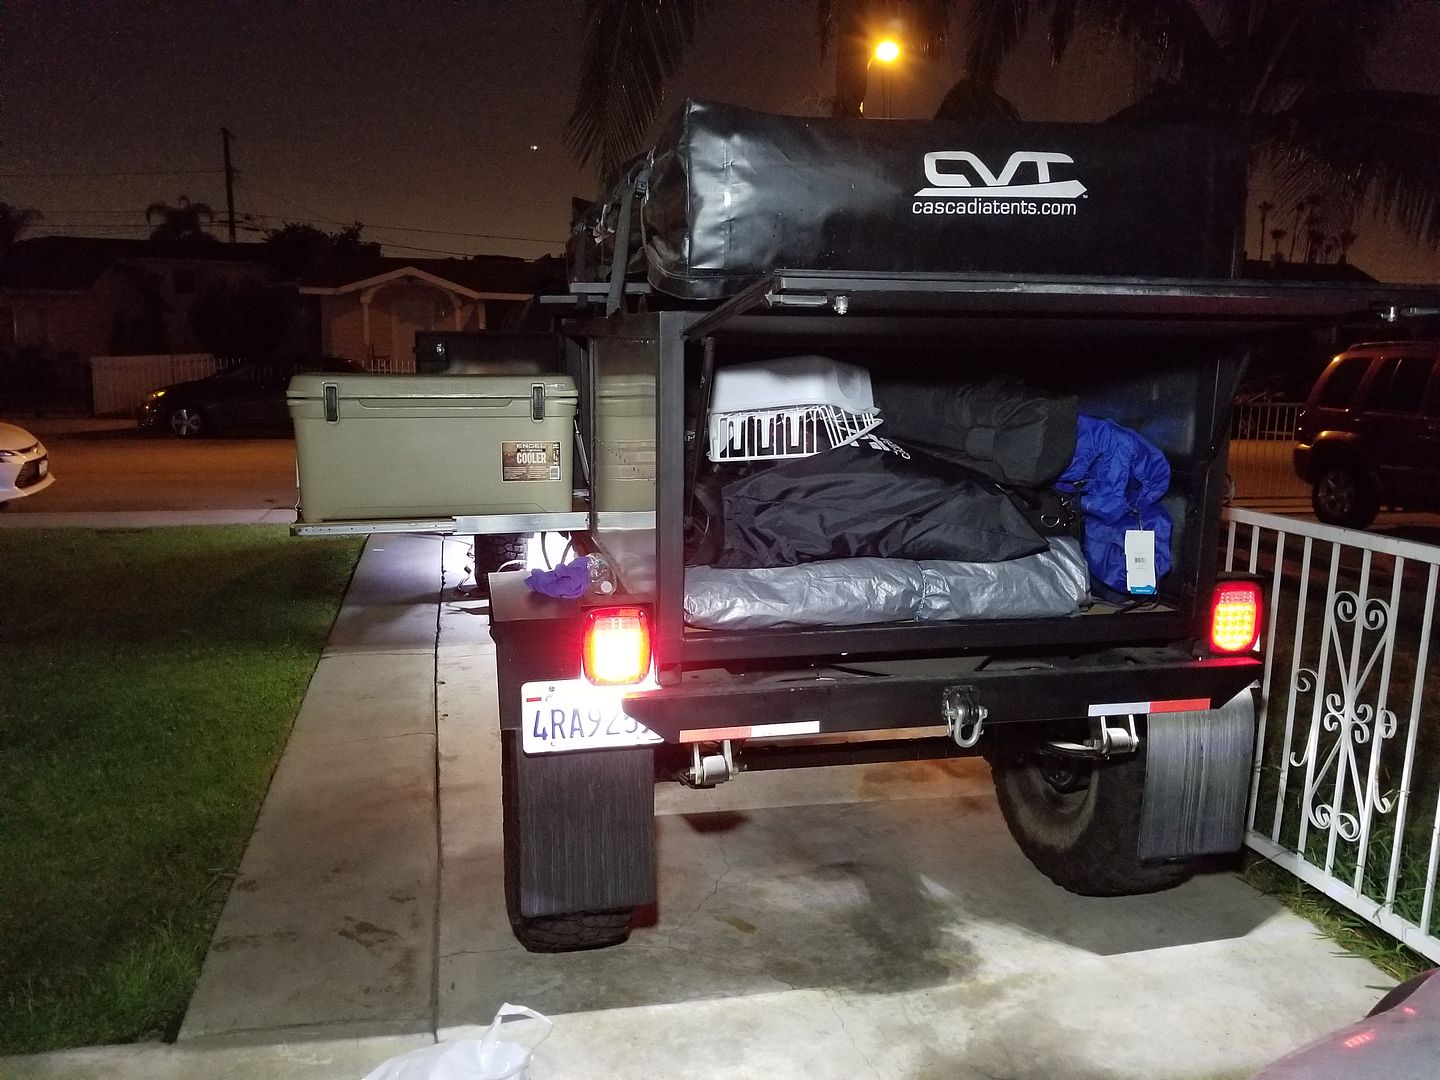
All packed and ready to go*
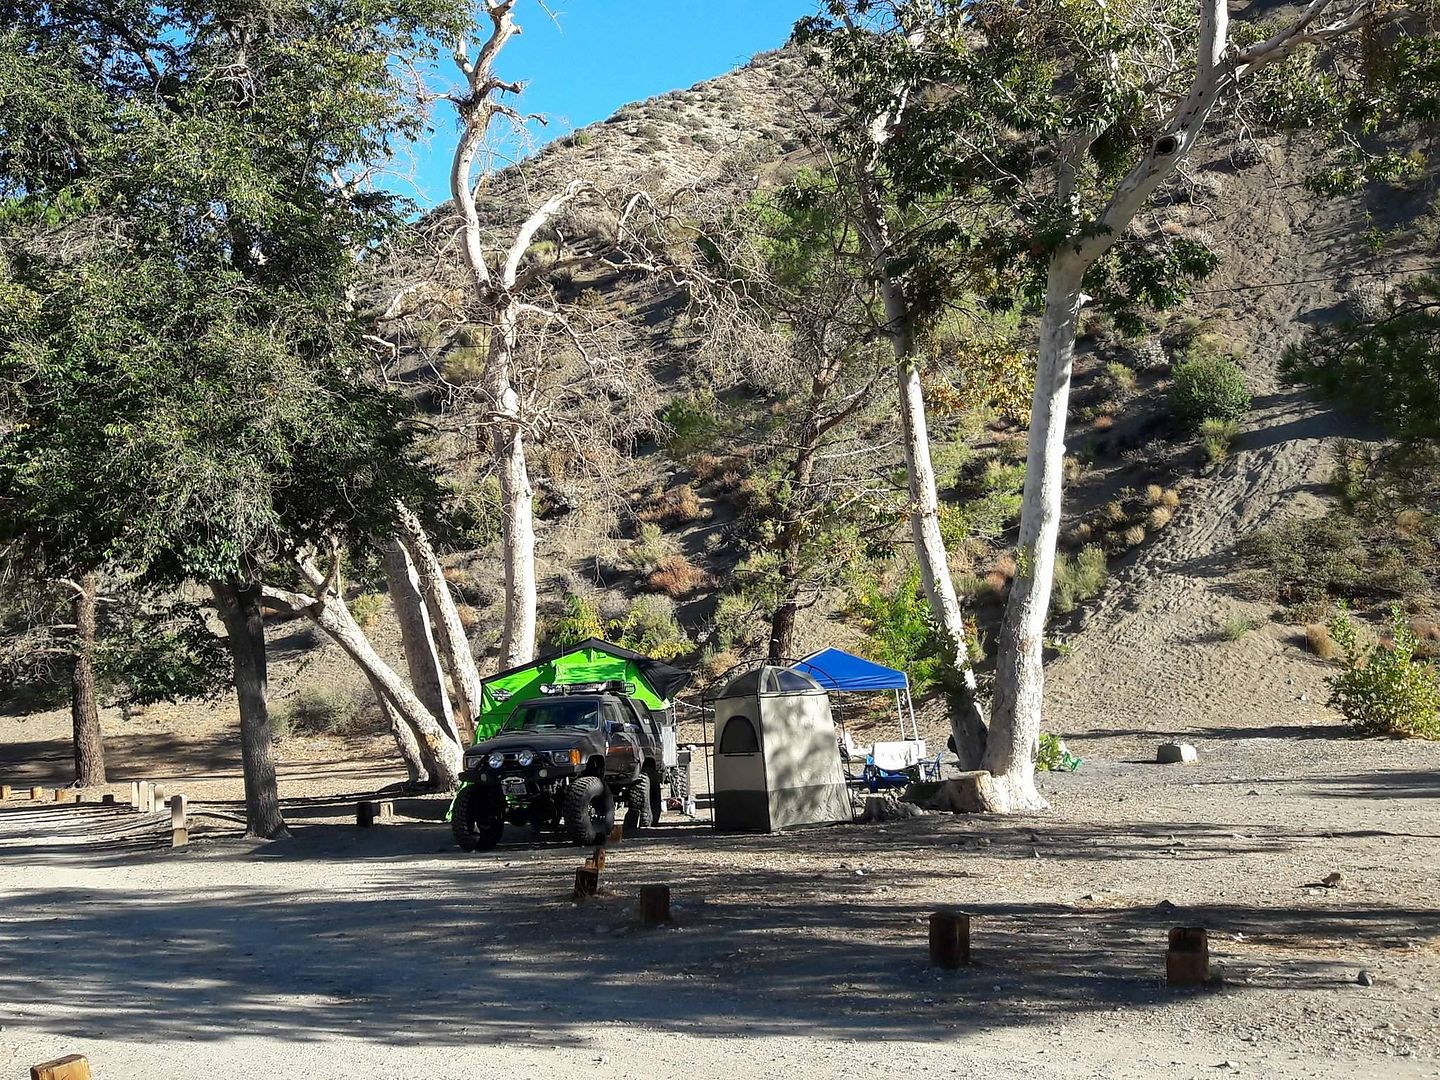
Pix of our campsite
We had a really great campsite. Literally in between a few trees. The other spots were in very open terrain some with maybe only 1 tree. This one was definitely the best.
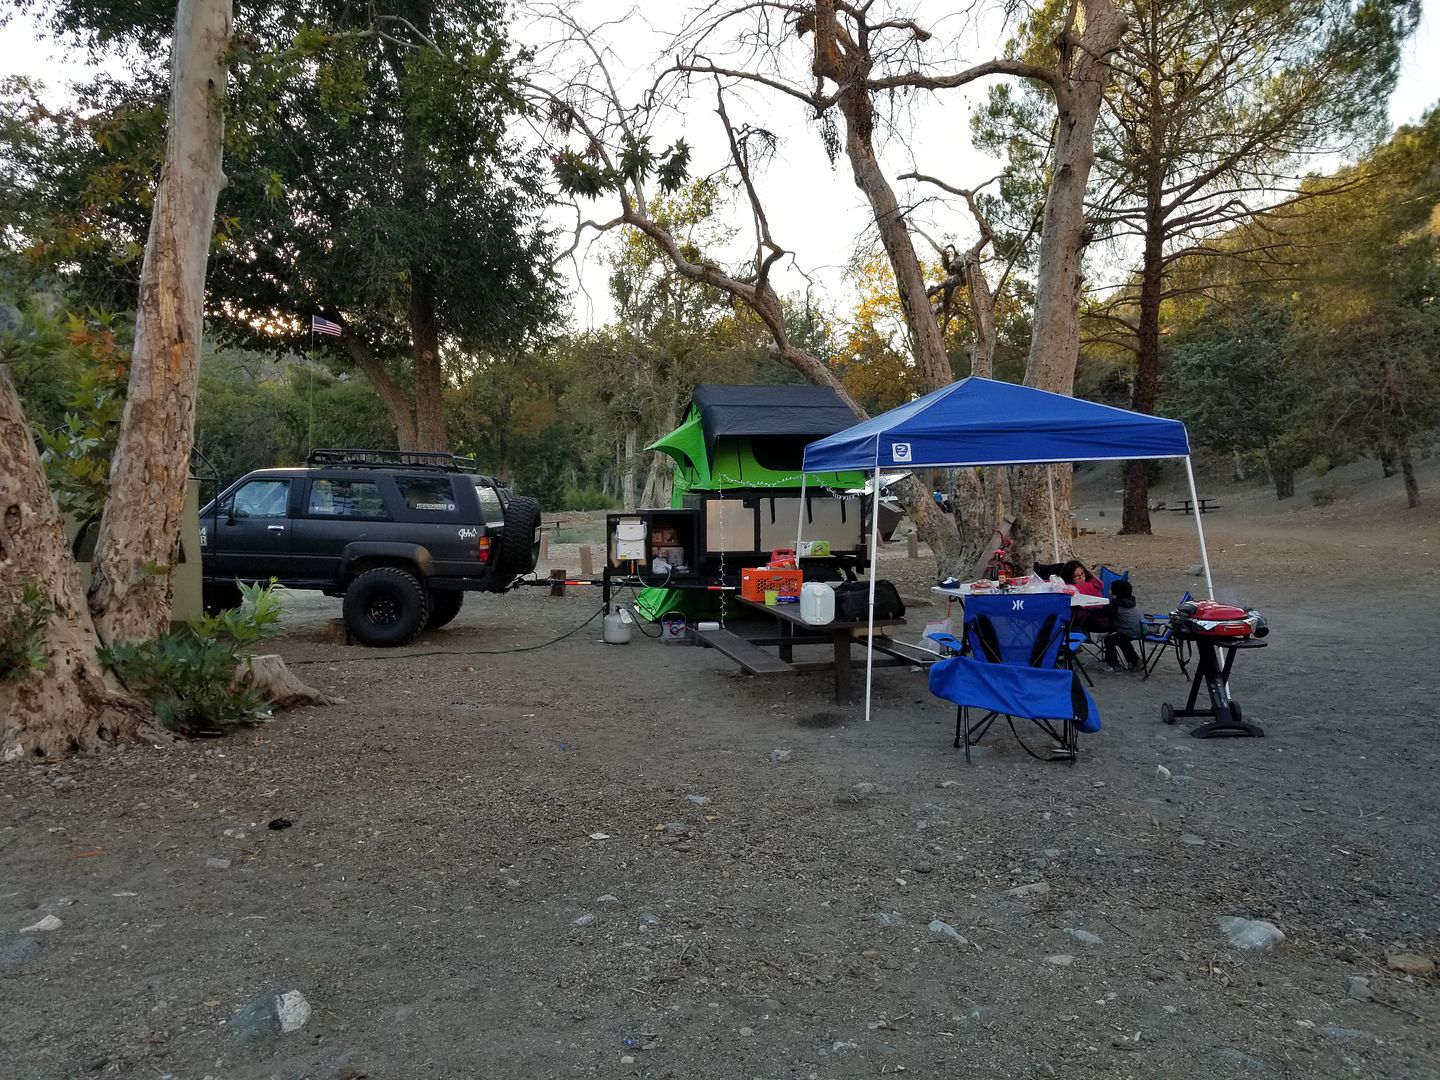
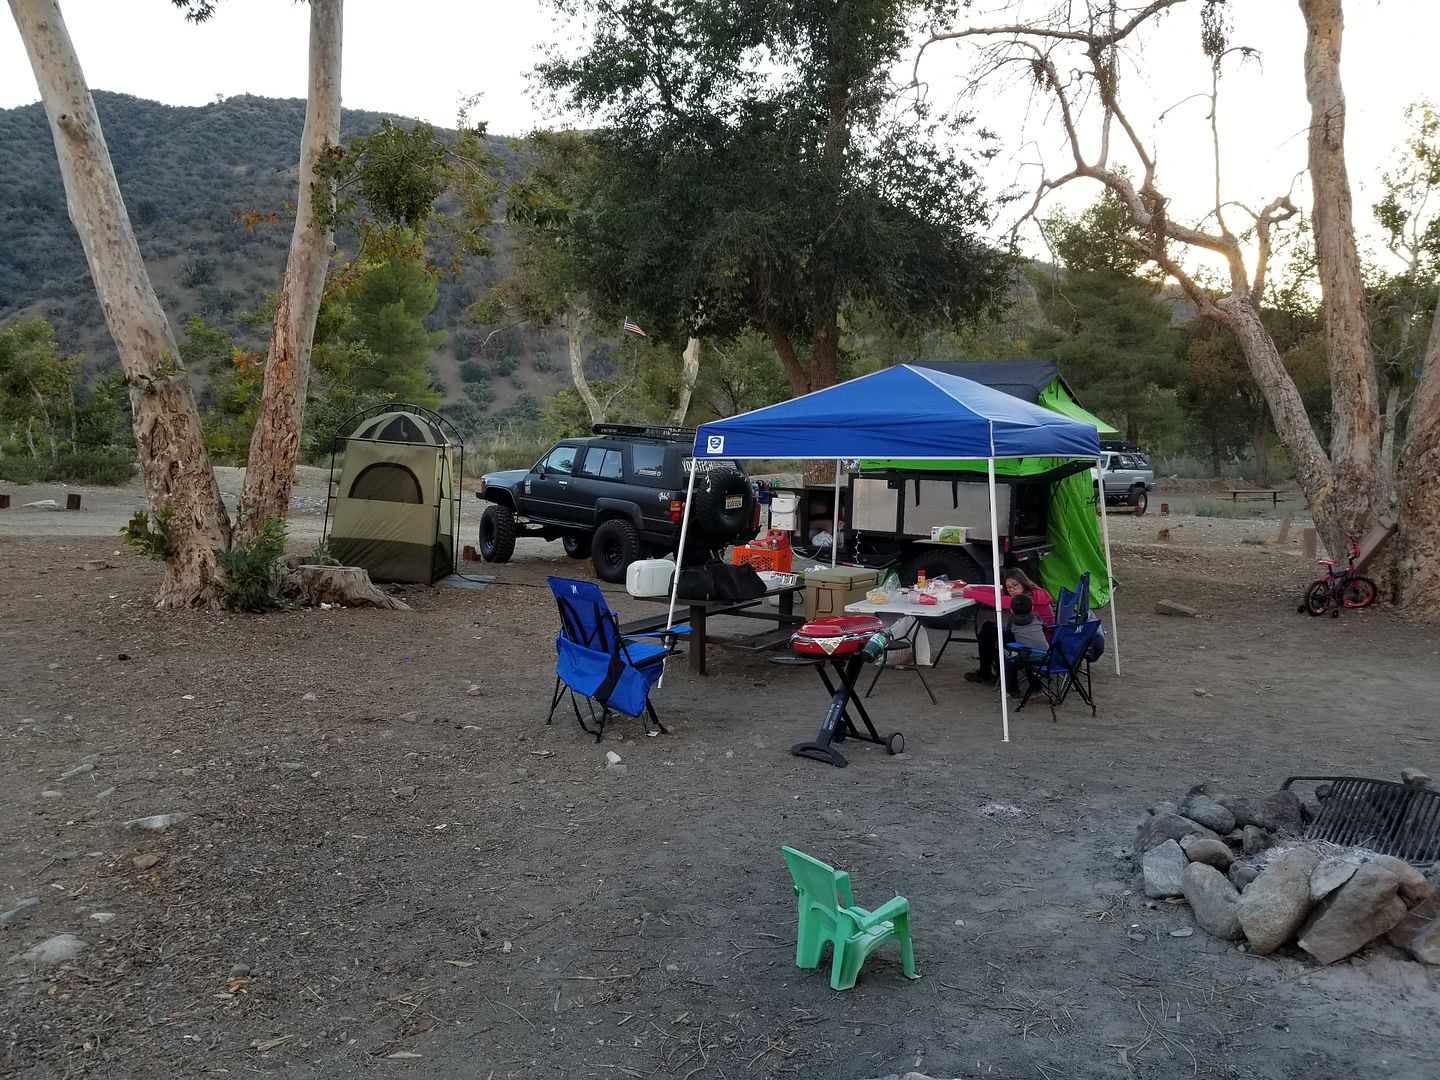
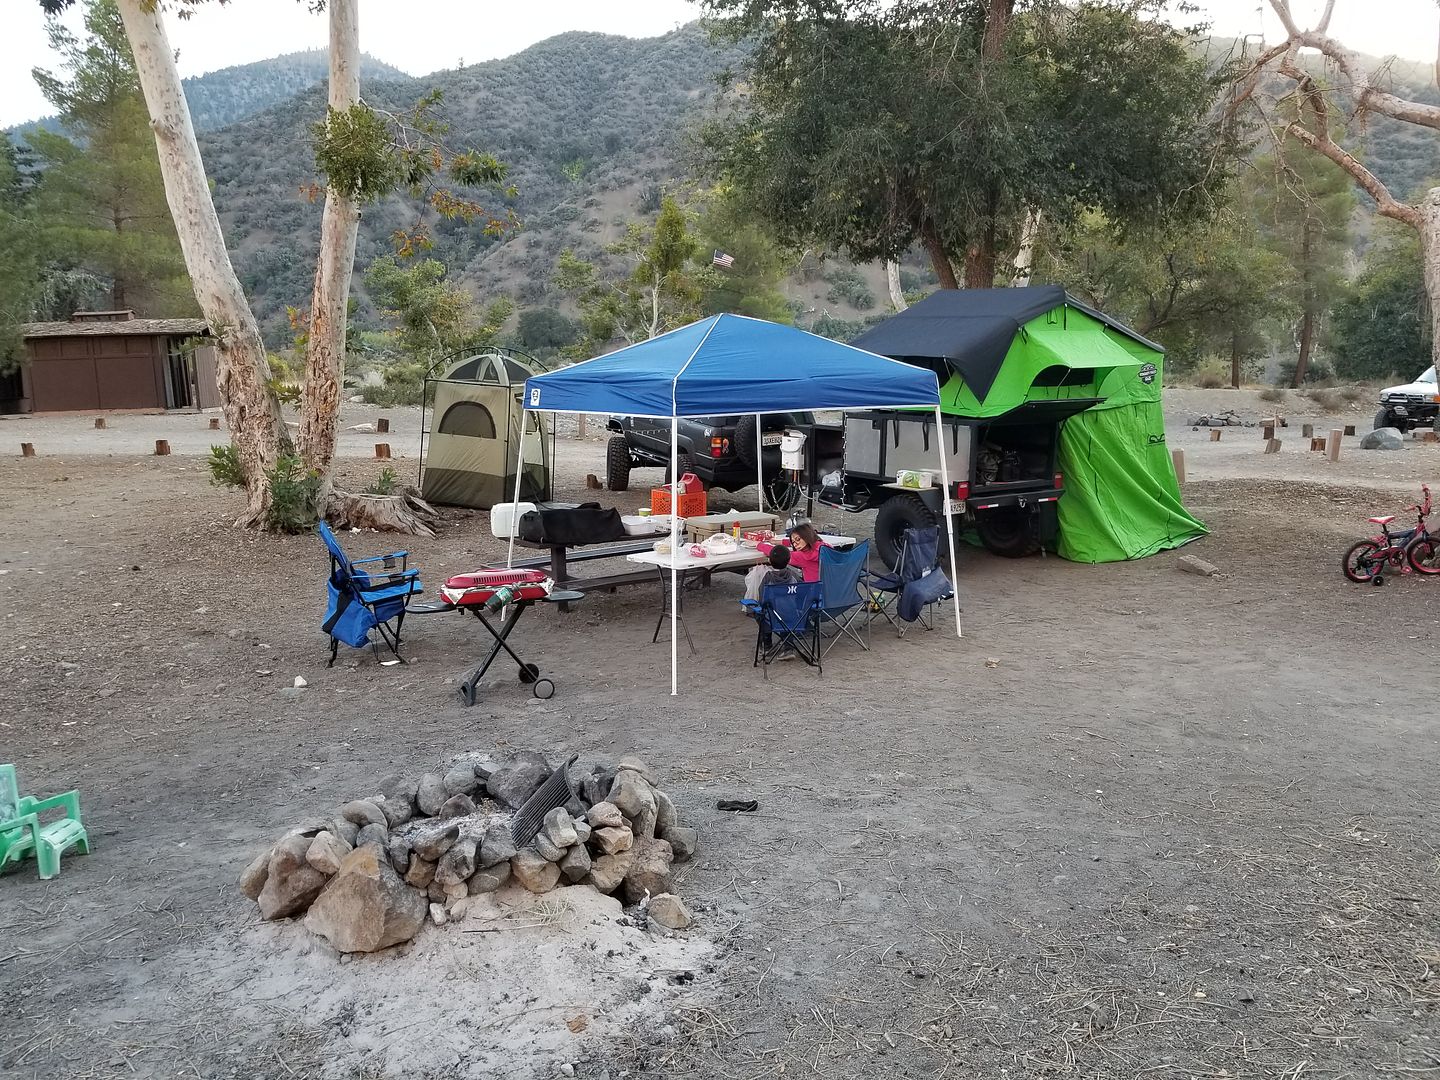
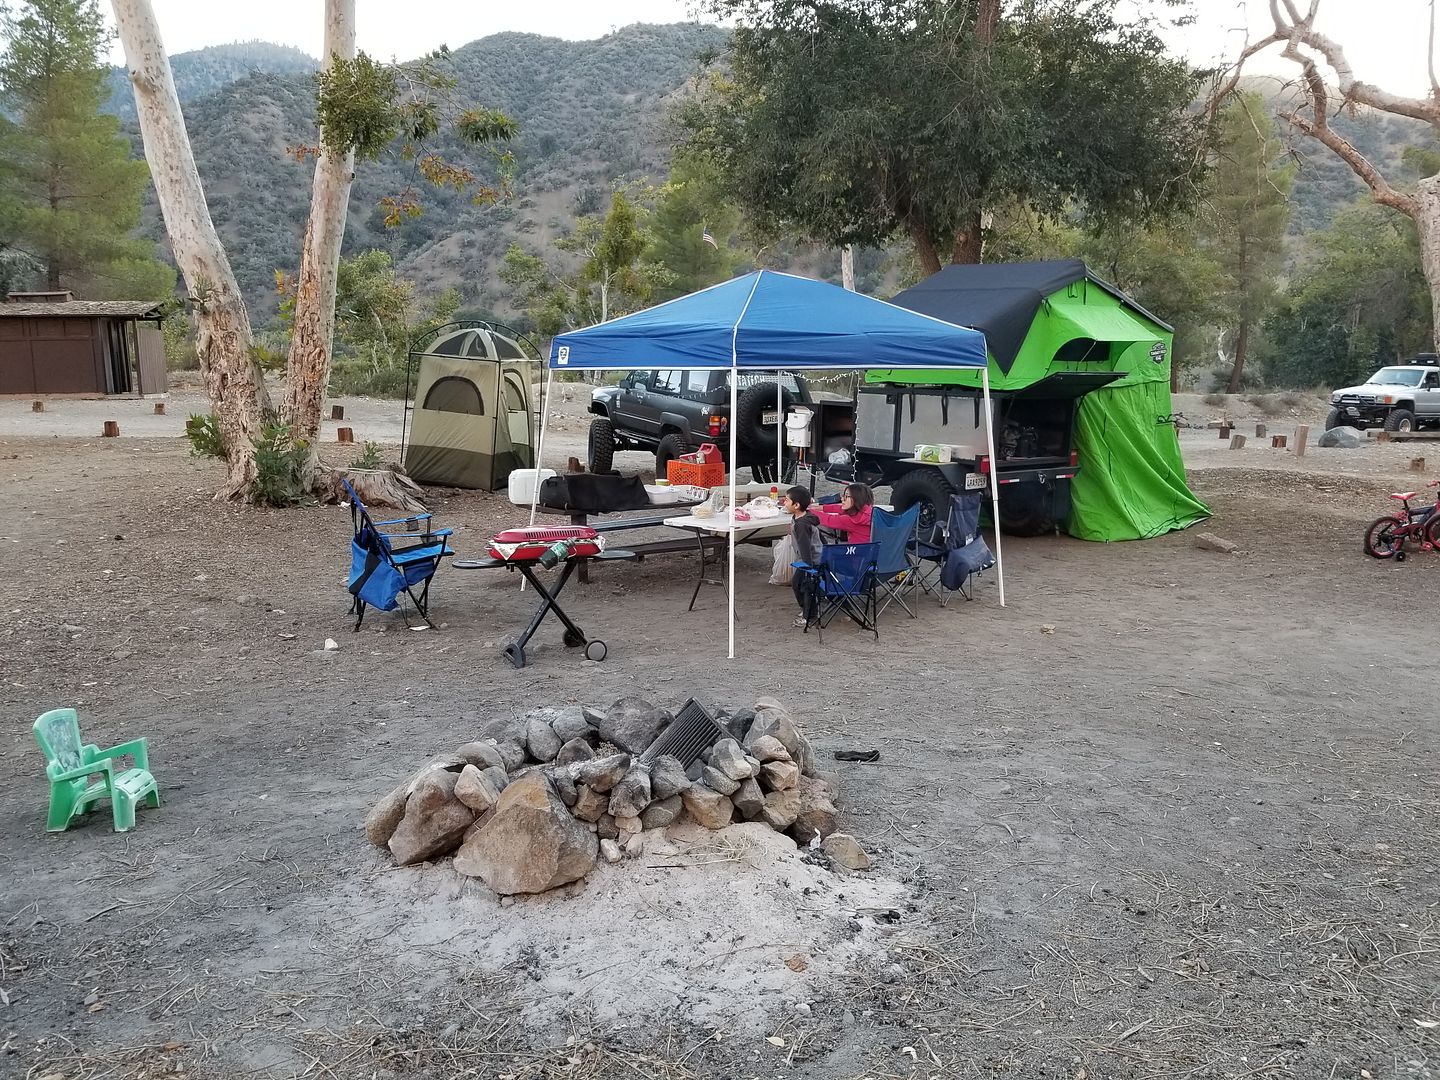
Mark (Chefyota4x4) and his lady arrived soon after we got there.*
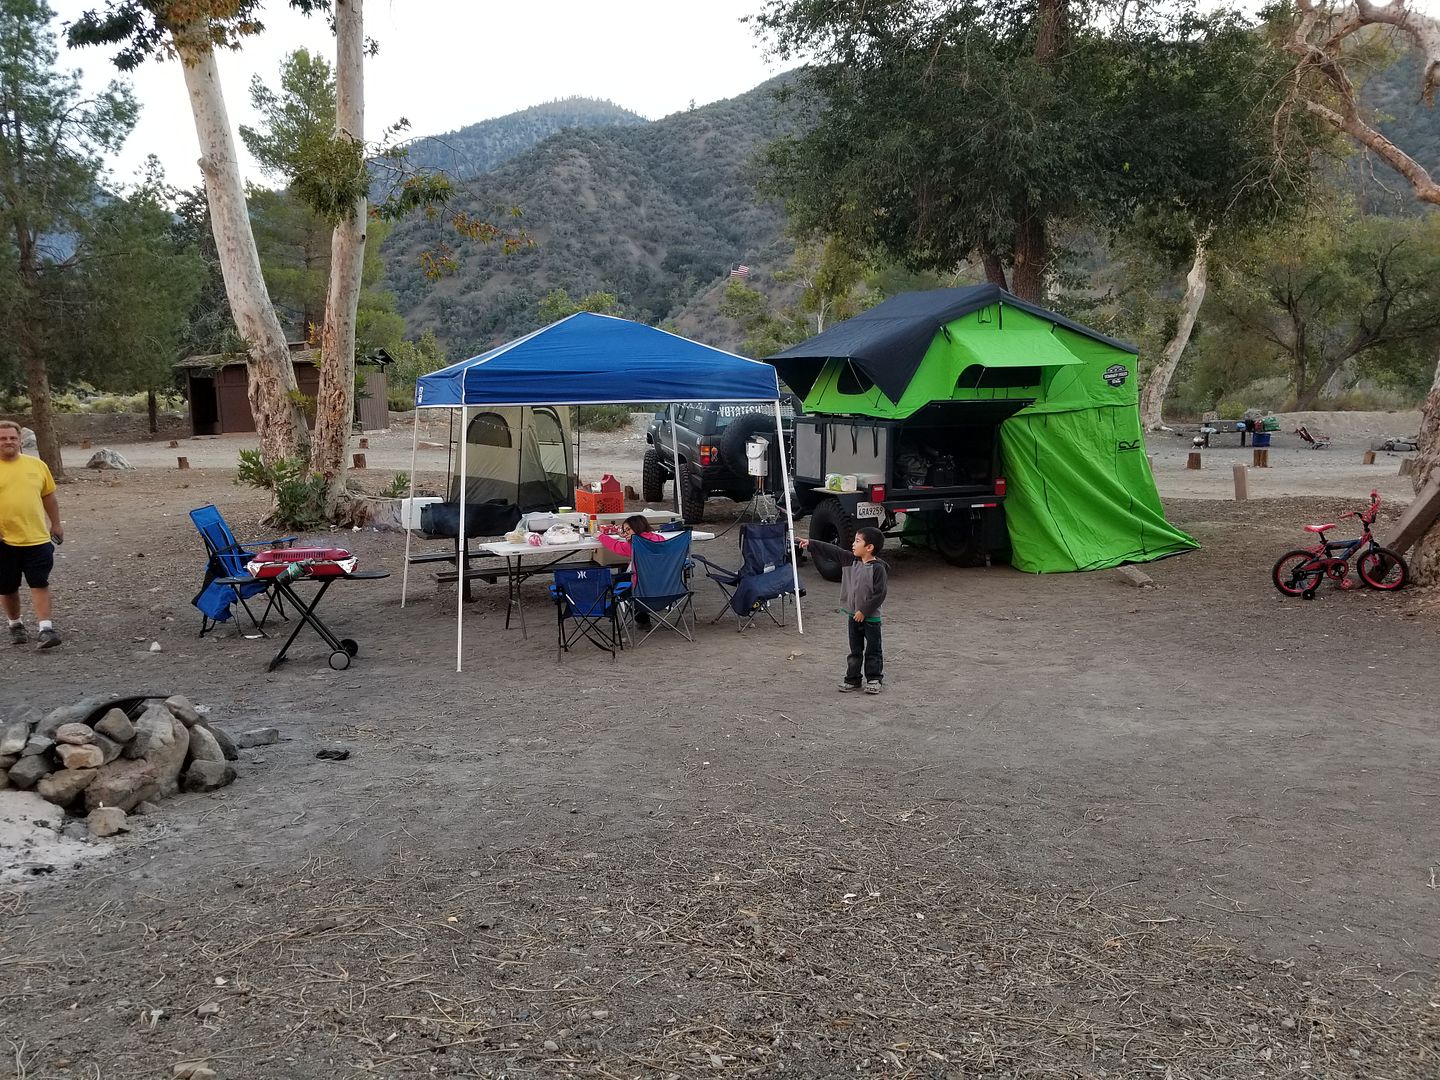
The pix of the tow rig with the trailer look great
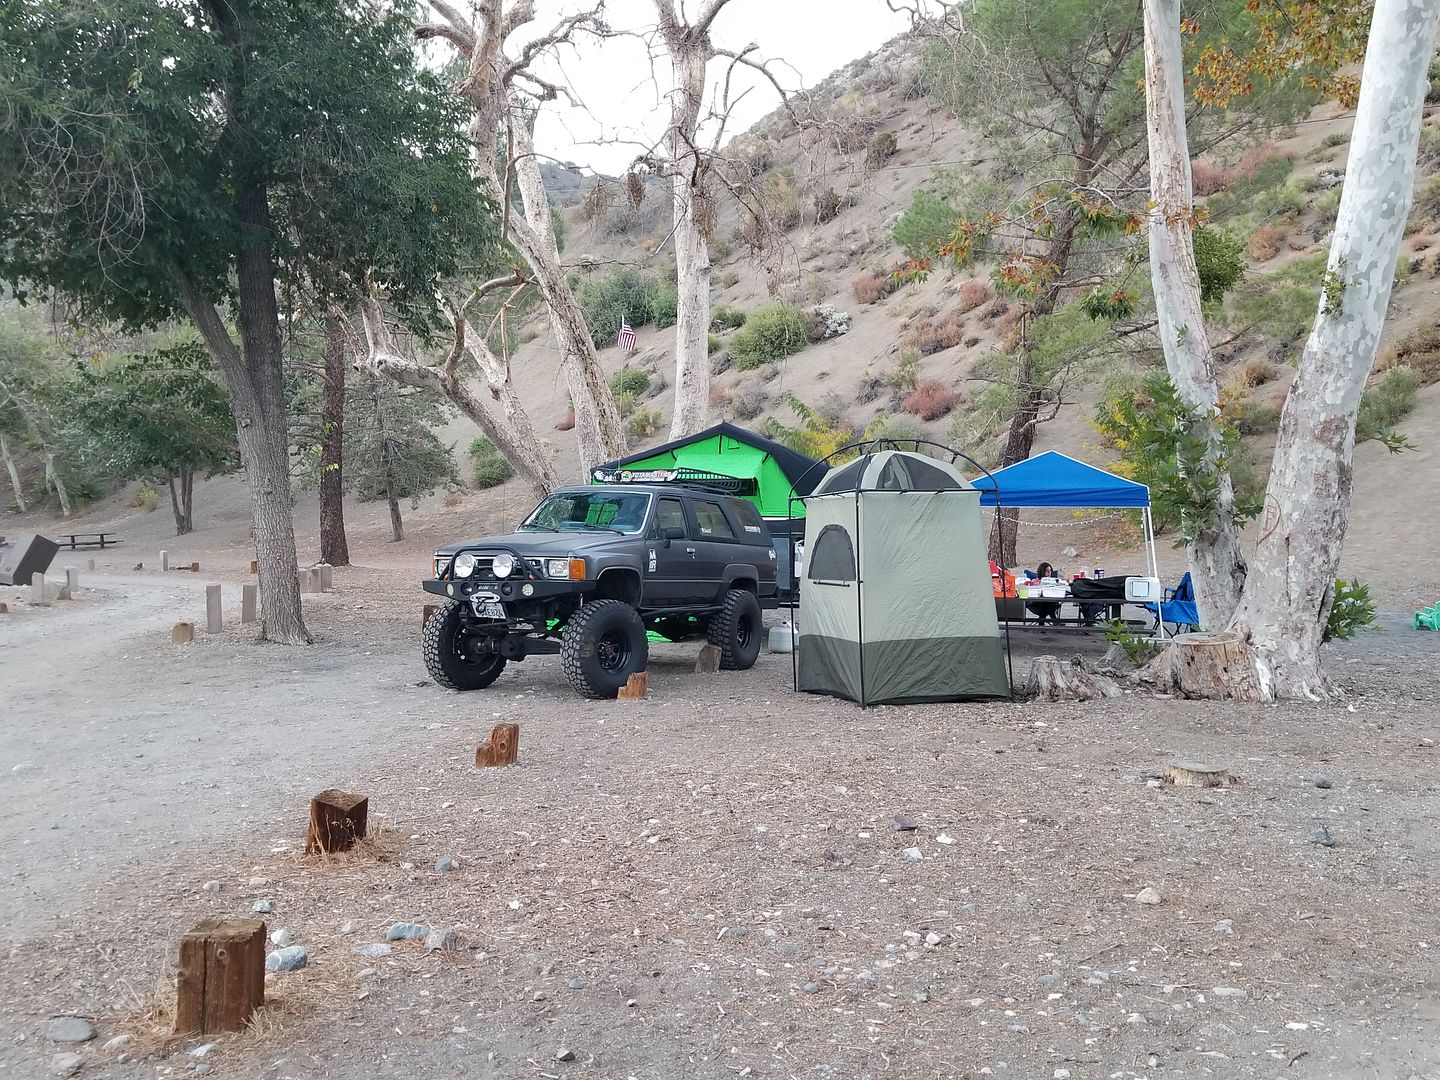
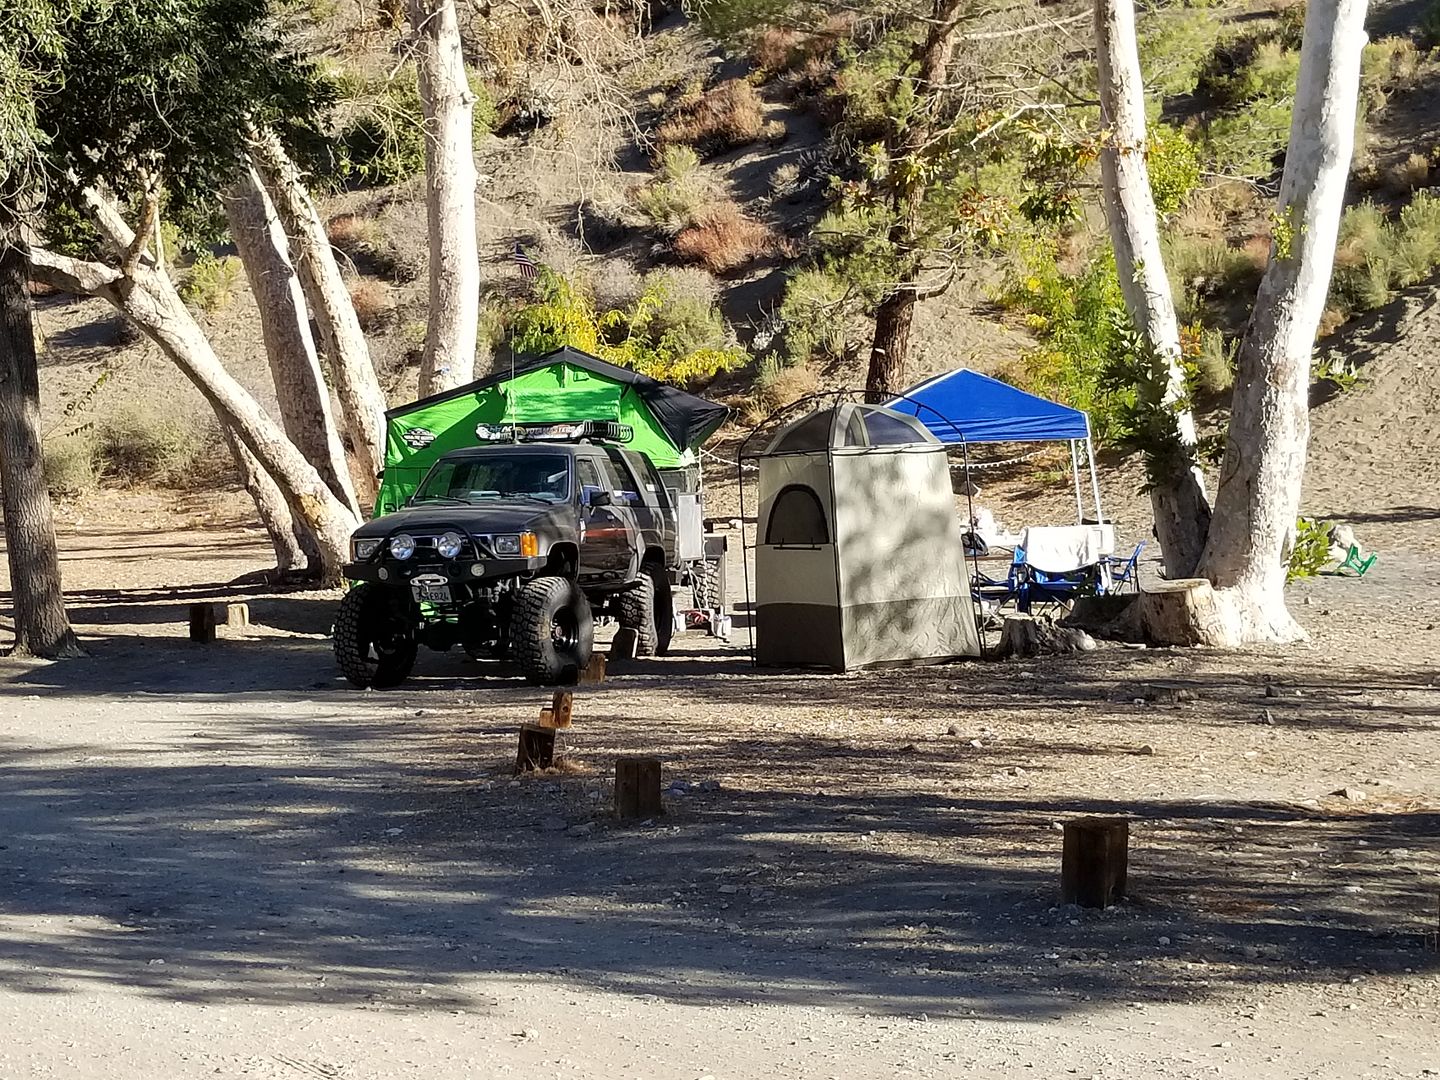
---------------------------------------------------------------------------------------------------------------------------------------------------------------------------------------------------
Since the last trip to Lake Elsinore we have taken a trip up to Angels crest national forest for a fun weekend trip of just dry camping with Chefyota4x4 and his girlfriend. This was back in Sepember 29th to* October 1, 2017.*
Here are the pix for that trip:
All packed and ready to go*

Pix of our campsite
We had a really great campsite. Literally in between a few trees. The other spots were in very open terrain some with maybe only 1 tree. This one was definitely the best.


Mark (Chefyota4x4) and his lady arrived soon after we got there.*


The pix of the tow rig with the trailer look great


---------------------------------------------------------------------------------------------------------------------------------------------------------------------------------------------------
Redeth005
Adventurer
This is actually the first trip i ever used my Propex heater with the trailer. The weather in the middle of the night pummeled on Saturday night. Luckily the heater worked like a charm. Out of everything on this trailer i was looking forward to testing out this weekend my Propex HS2000 forced air heater was the main thing i was excited about. It turned our chilly cvt tent into a toasty sauna. lol i had to mess with the thermostat quite a bit to find a comfortable temperature. I'm happy it works as good as it did and it is extremely battery efficient; The battery voltage only went from about 12.76v to 12.36v after an entire night of running off of just one of my two batteries. That's hella good! My 2nd battery went from about 12.80v to 12.40v after running exterior LED christmas lighting and running the water pump for 3 showers. That's not bad either. Once i have the solar panel/charge controller rigged up with the 7pole trailer (+) battery charge wire connected my battery bank should be more than efficient to be a self sustained solar/battery storage bank.*
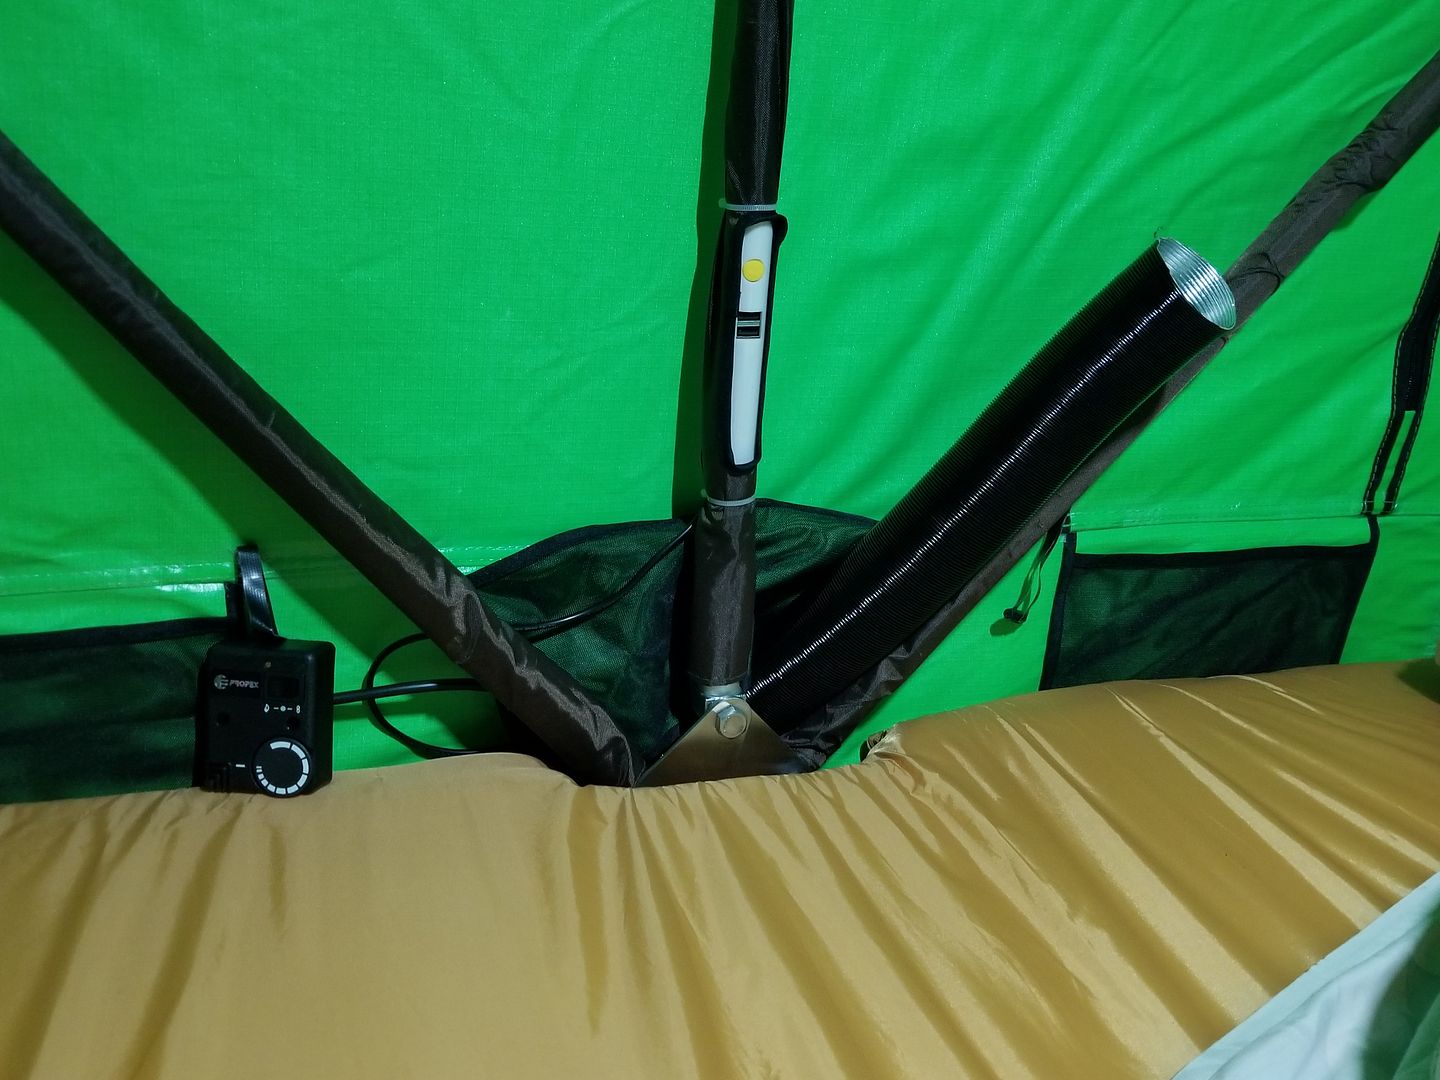
Here you can see how i routed the heater duct into the CVT tent through the foldable joint where the tent opens and closes. Also that black thing with the dial is the thermostat. I need to buy some more ducting because this one is only a hot air duct for blowing air in to the tent. The Thermostat can not fully work properly unless i route a air return leading back to the heater unit so the thermostat knows it has reached the desired temperature.
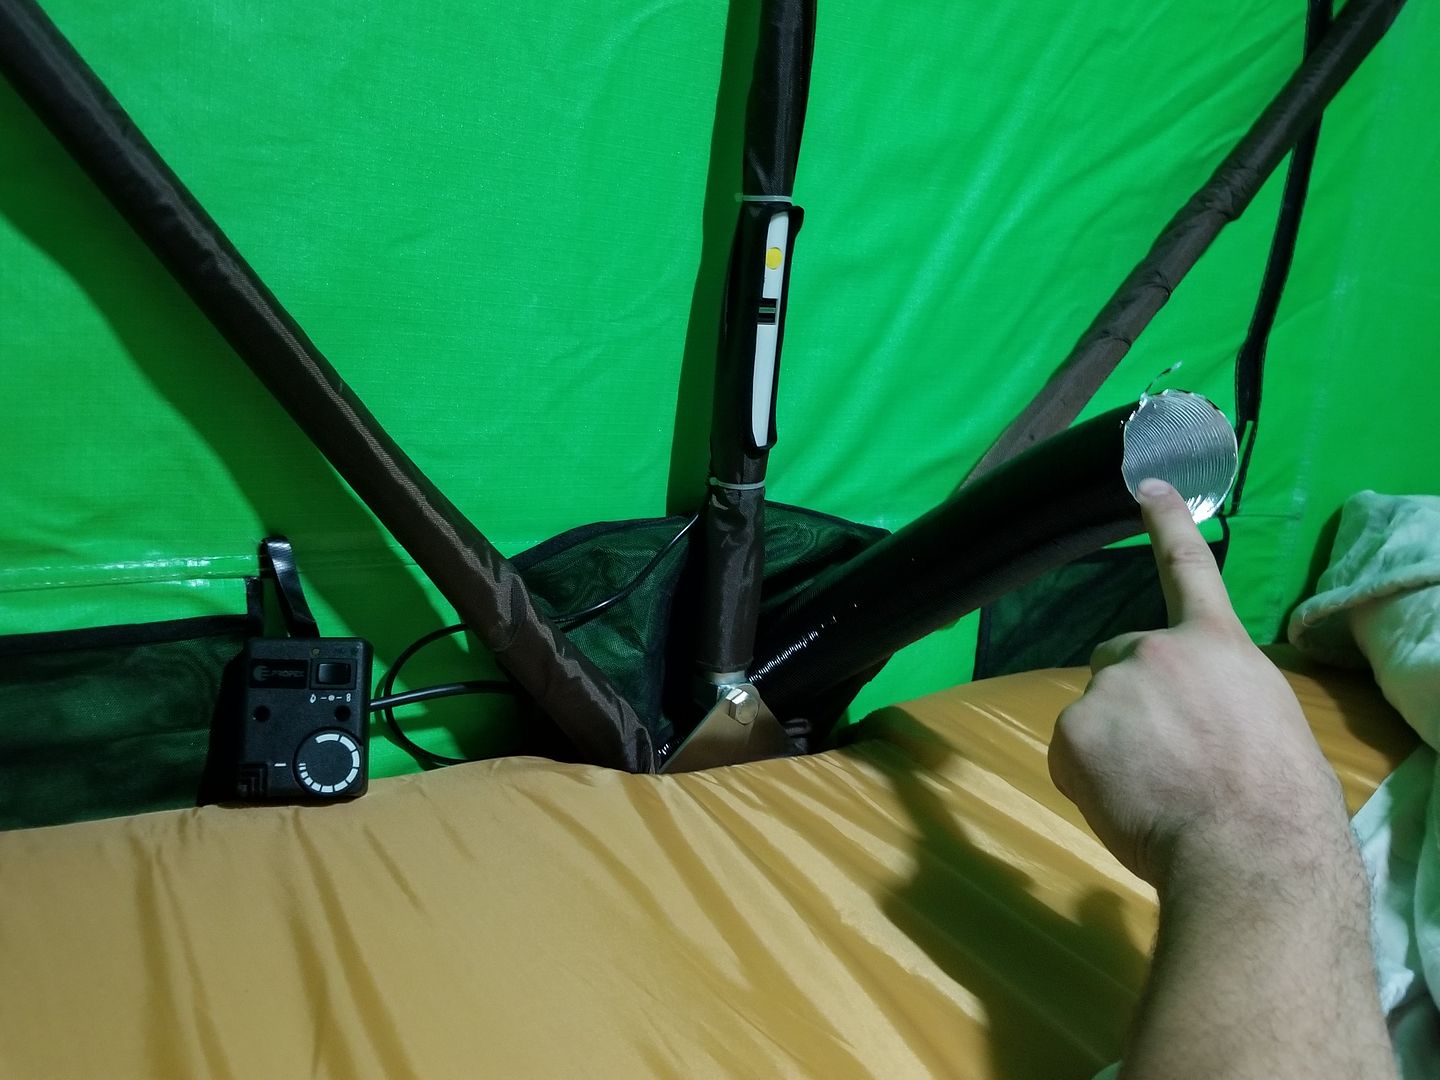
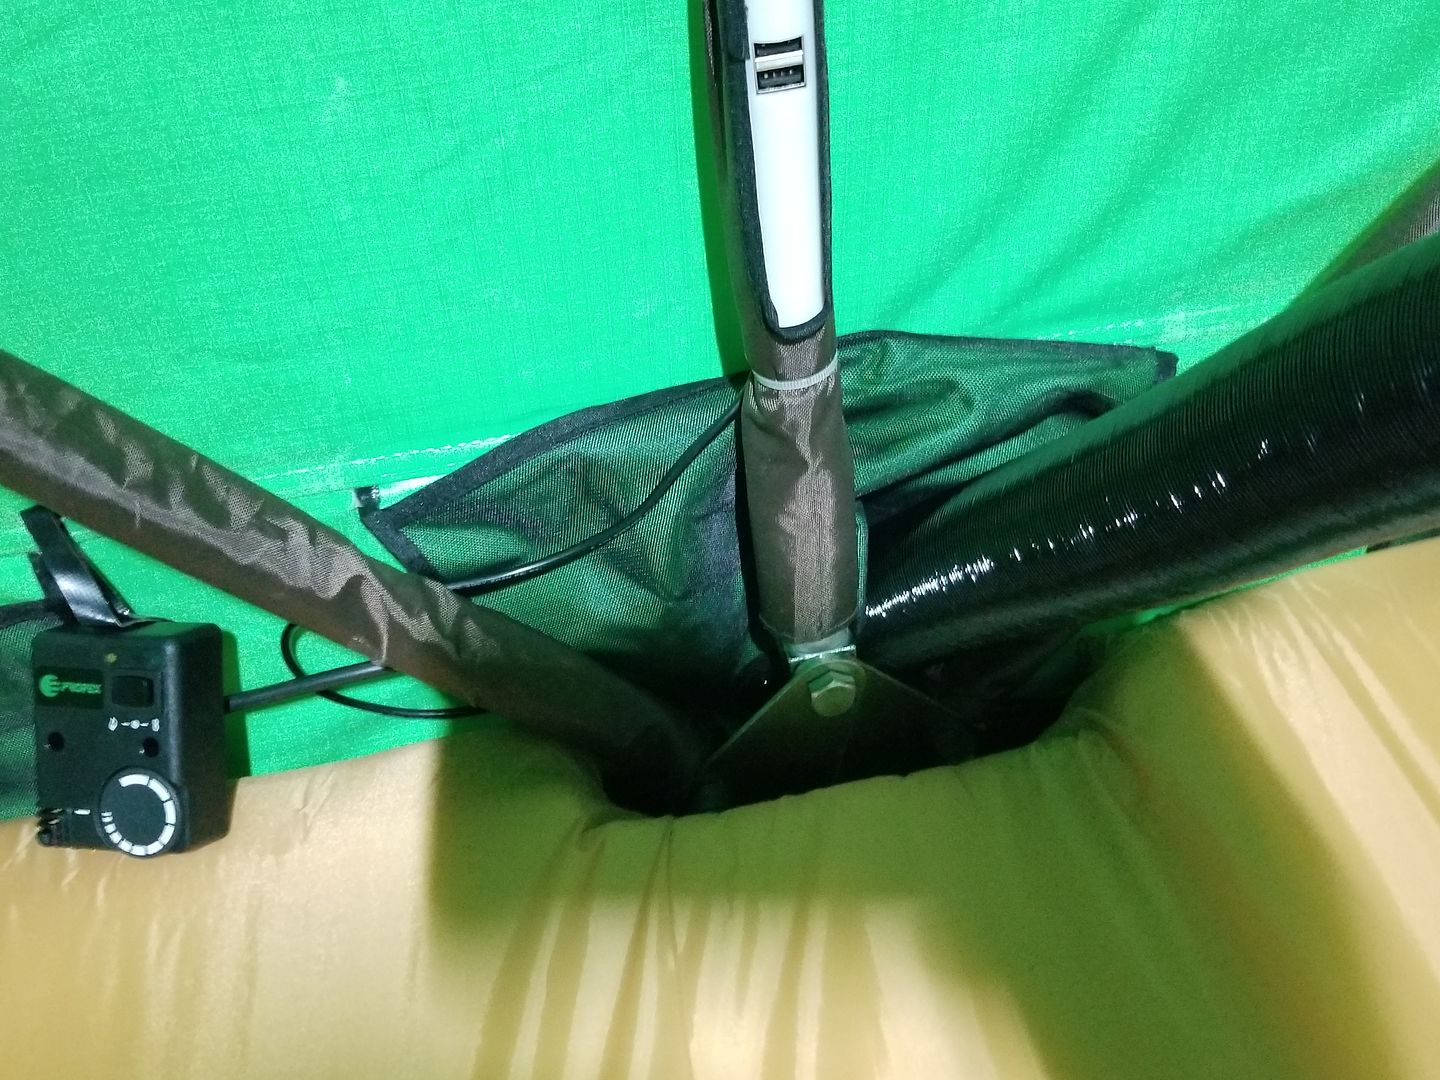
Here you can see that black duct routed into the tent from the bottom side of that window
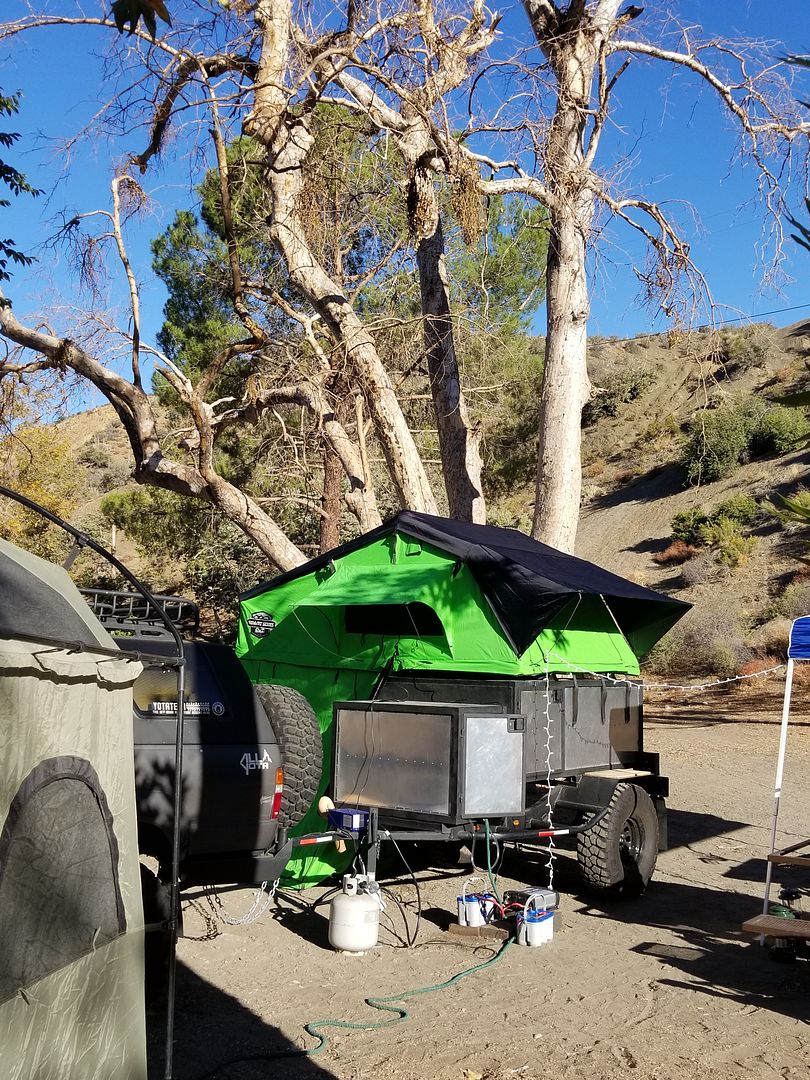
.....Also as you you can see i desperately need to add a neat battery storage and keep it all enclosed within the trailer. For this trip i just rested the propex heater on top the the trailer tongue but that is a very expensive unit to have out in the open just like that. Same with the dual blue top optima batteries. each is about 250 a piece.*
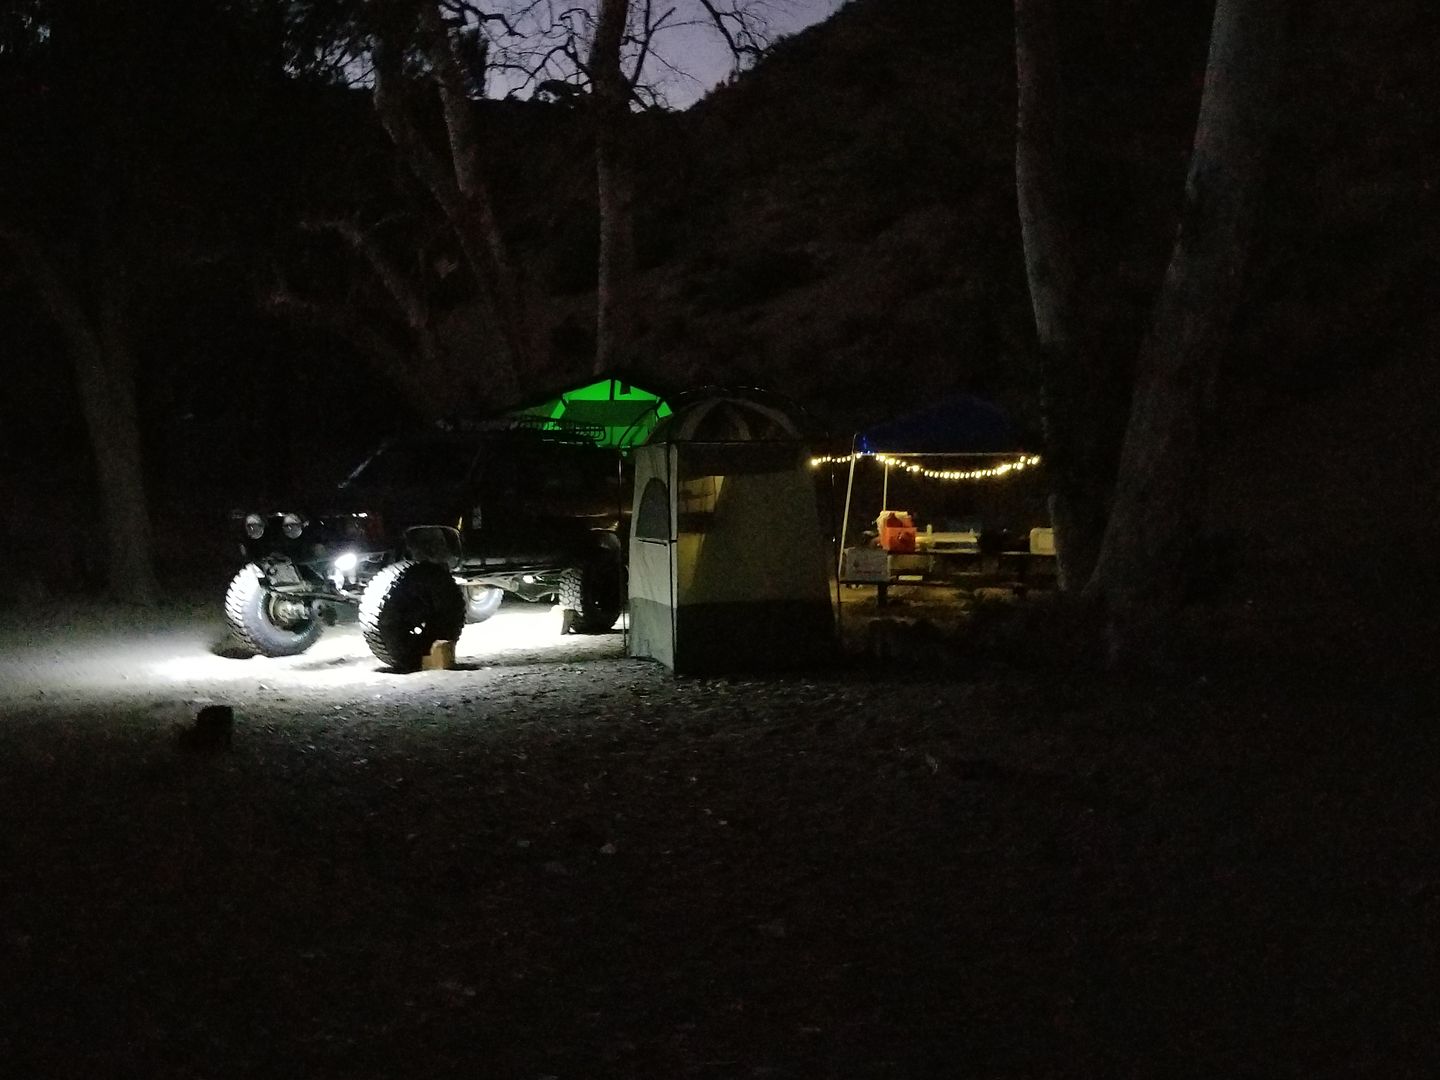
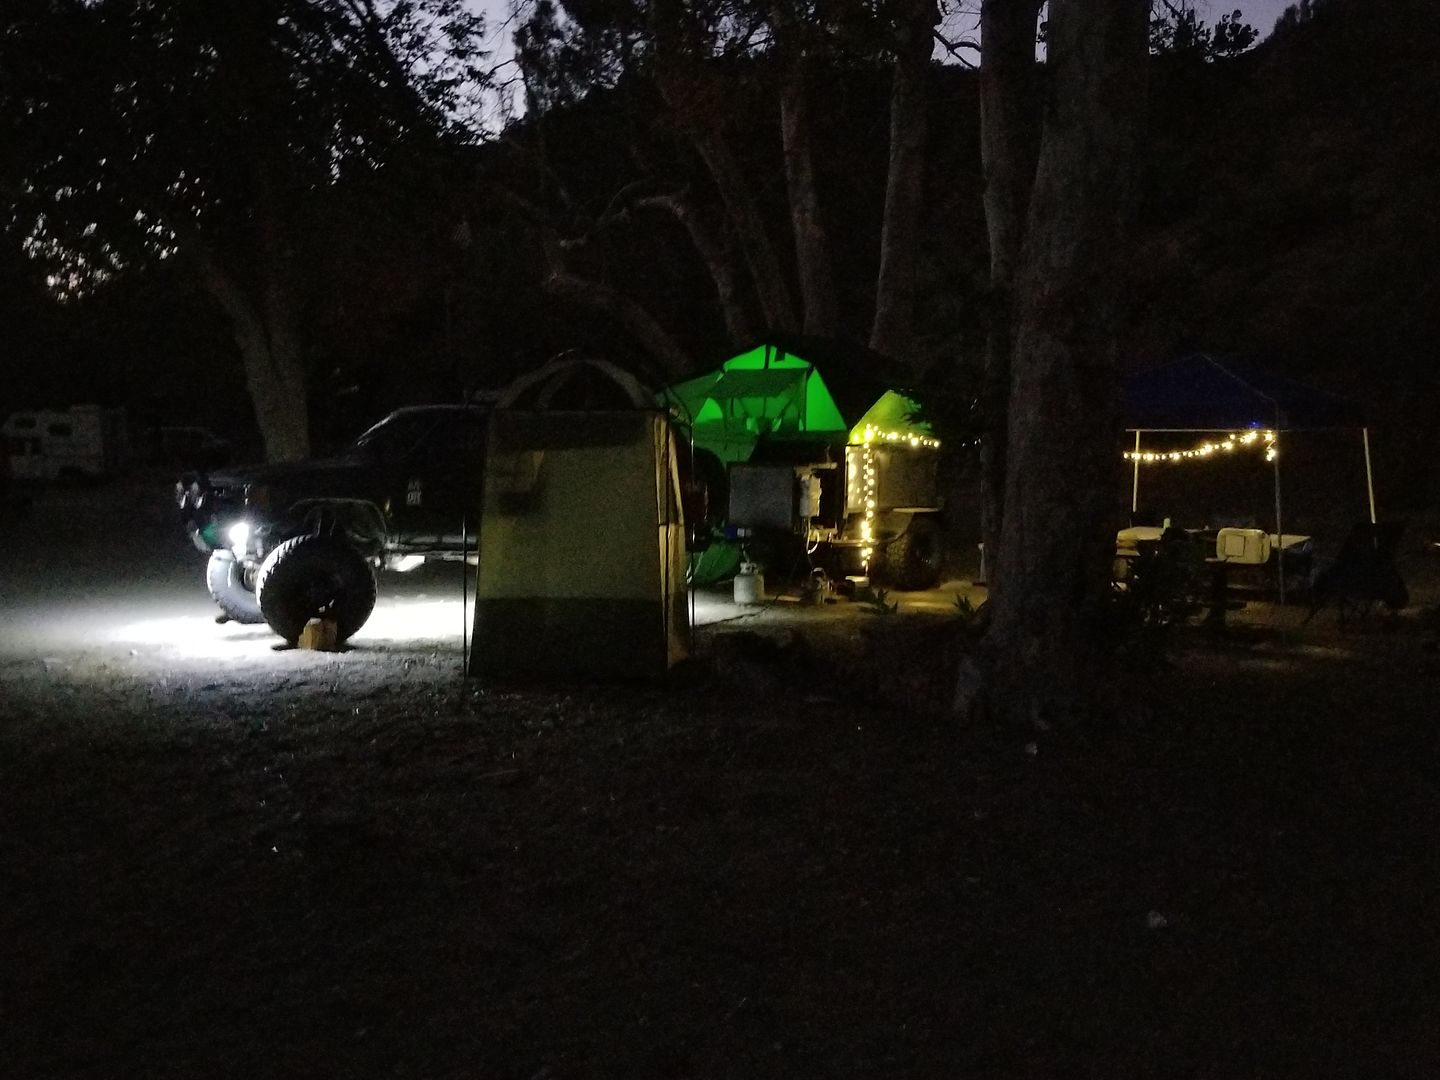
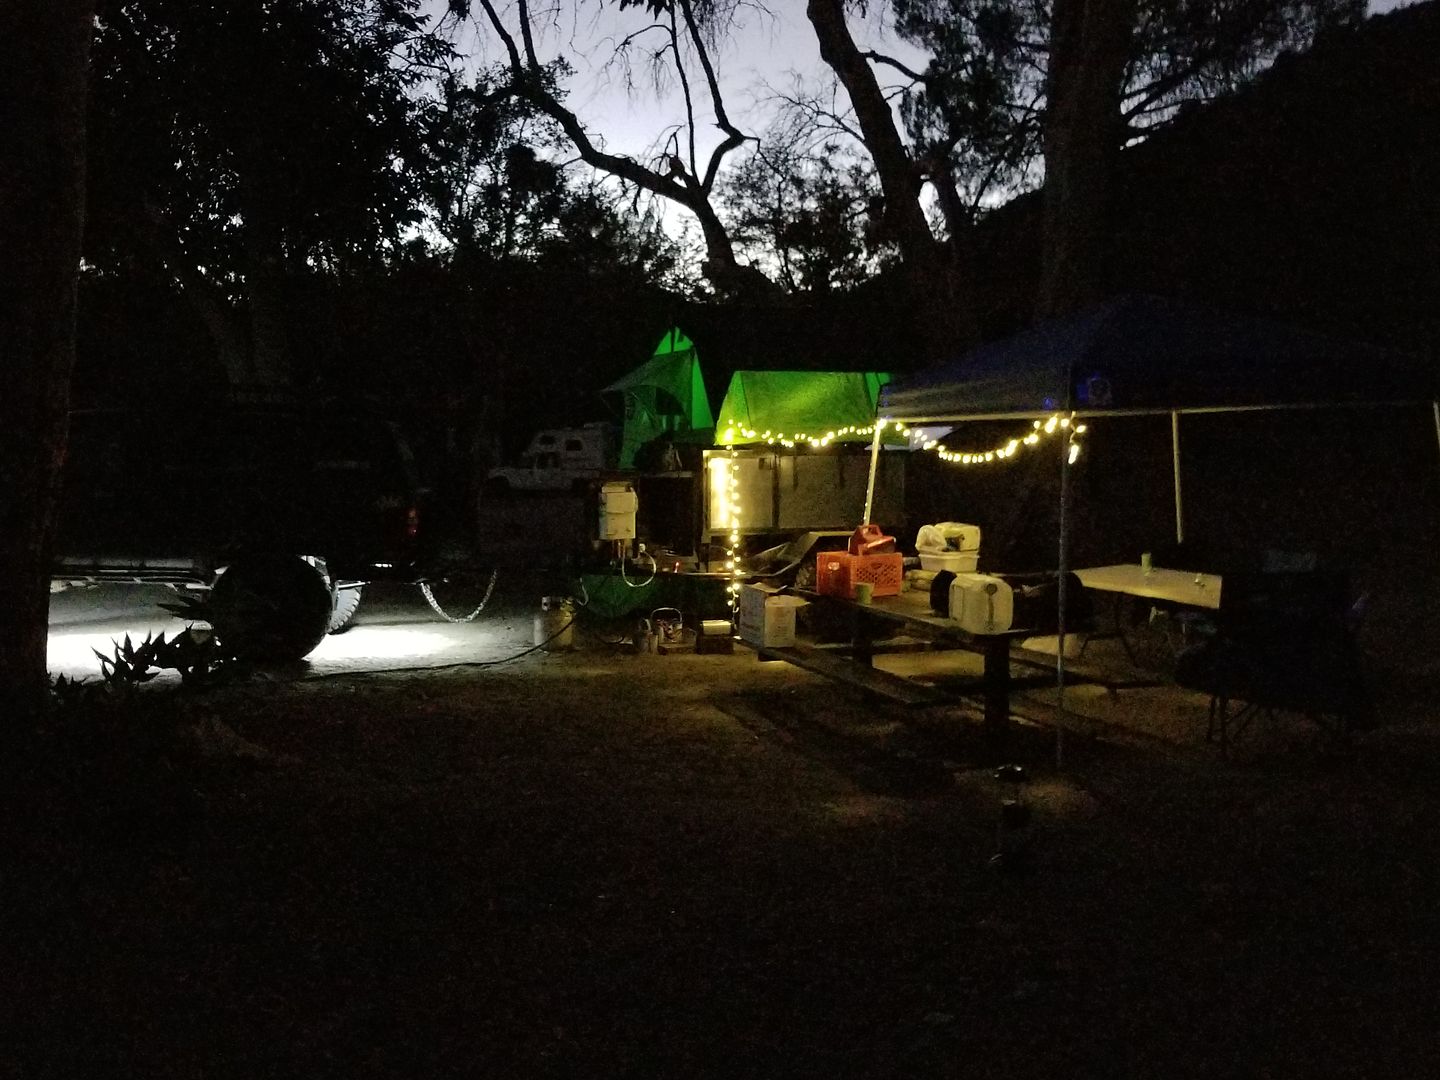
How 'bout them @all4offroad flex rock lights. I love how bright these 4 pairs are. I cant wait to install 4 more pairs to the exterior surrounding the trailer. You can clearly see how bright these lights are under the truck. I'm sure they will provide just enough light for the immediate campground surrounding my trailer. On a side note the interior LED light that comes inside of this Summit Series CVT tents is awesome. i love how it gets that green glow when you see it from the outside.*
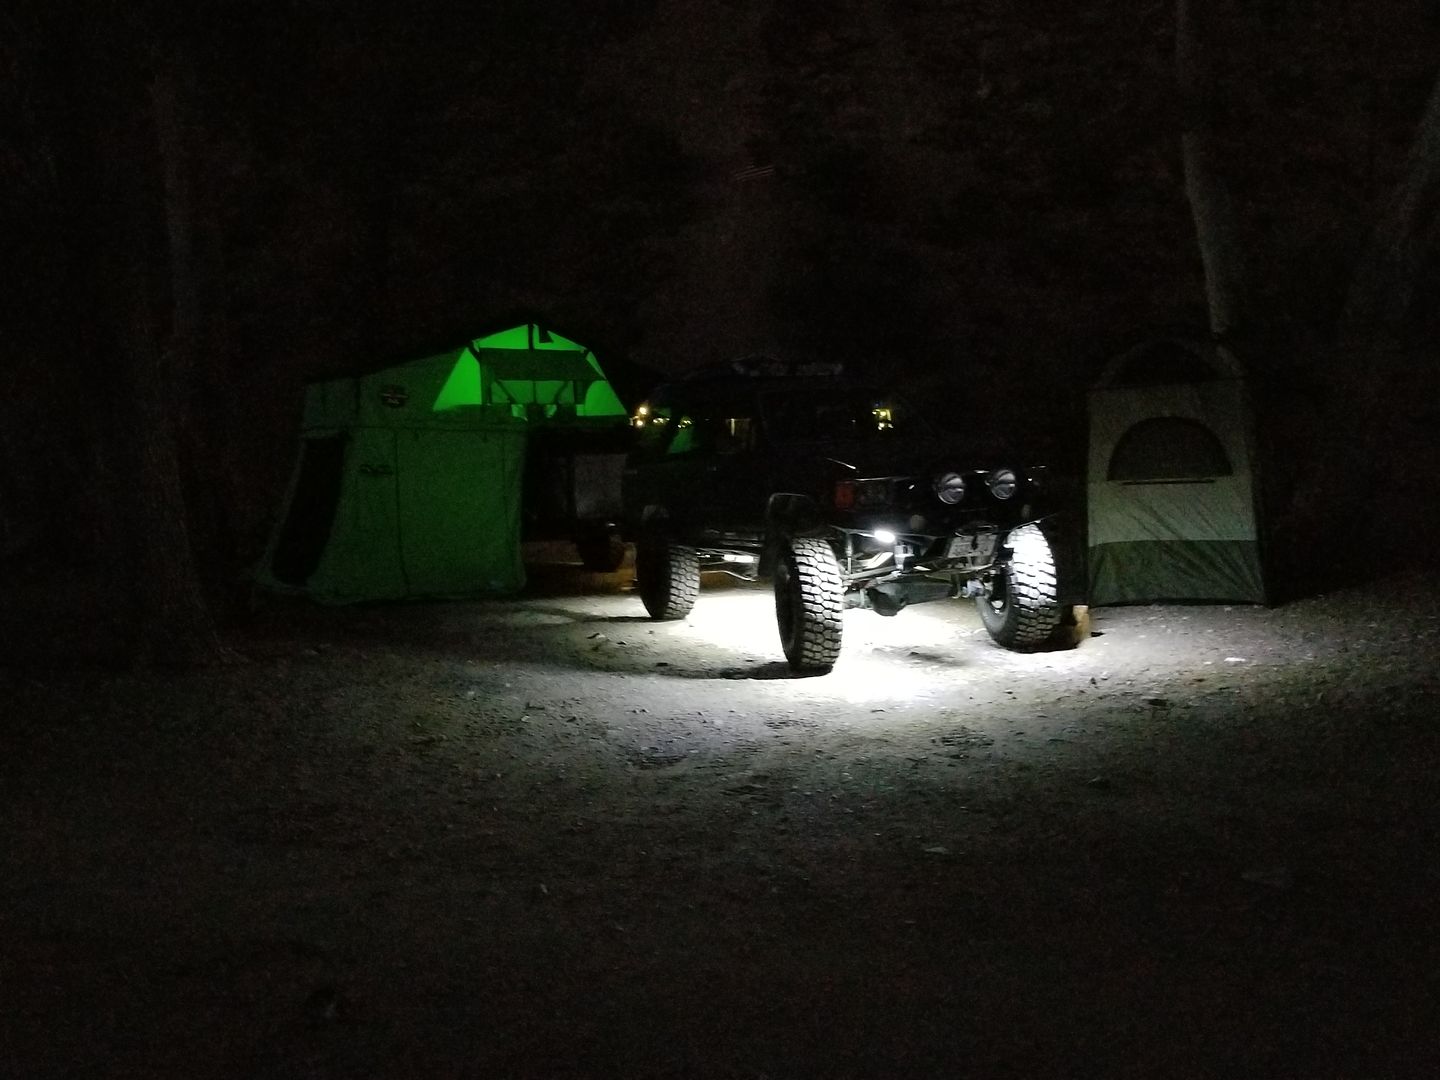
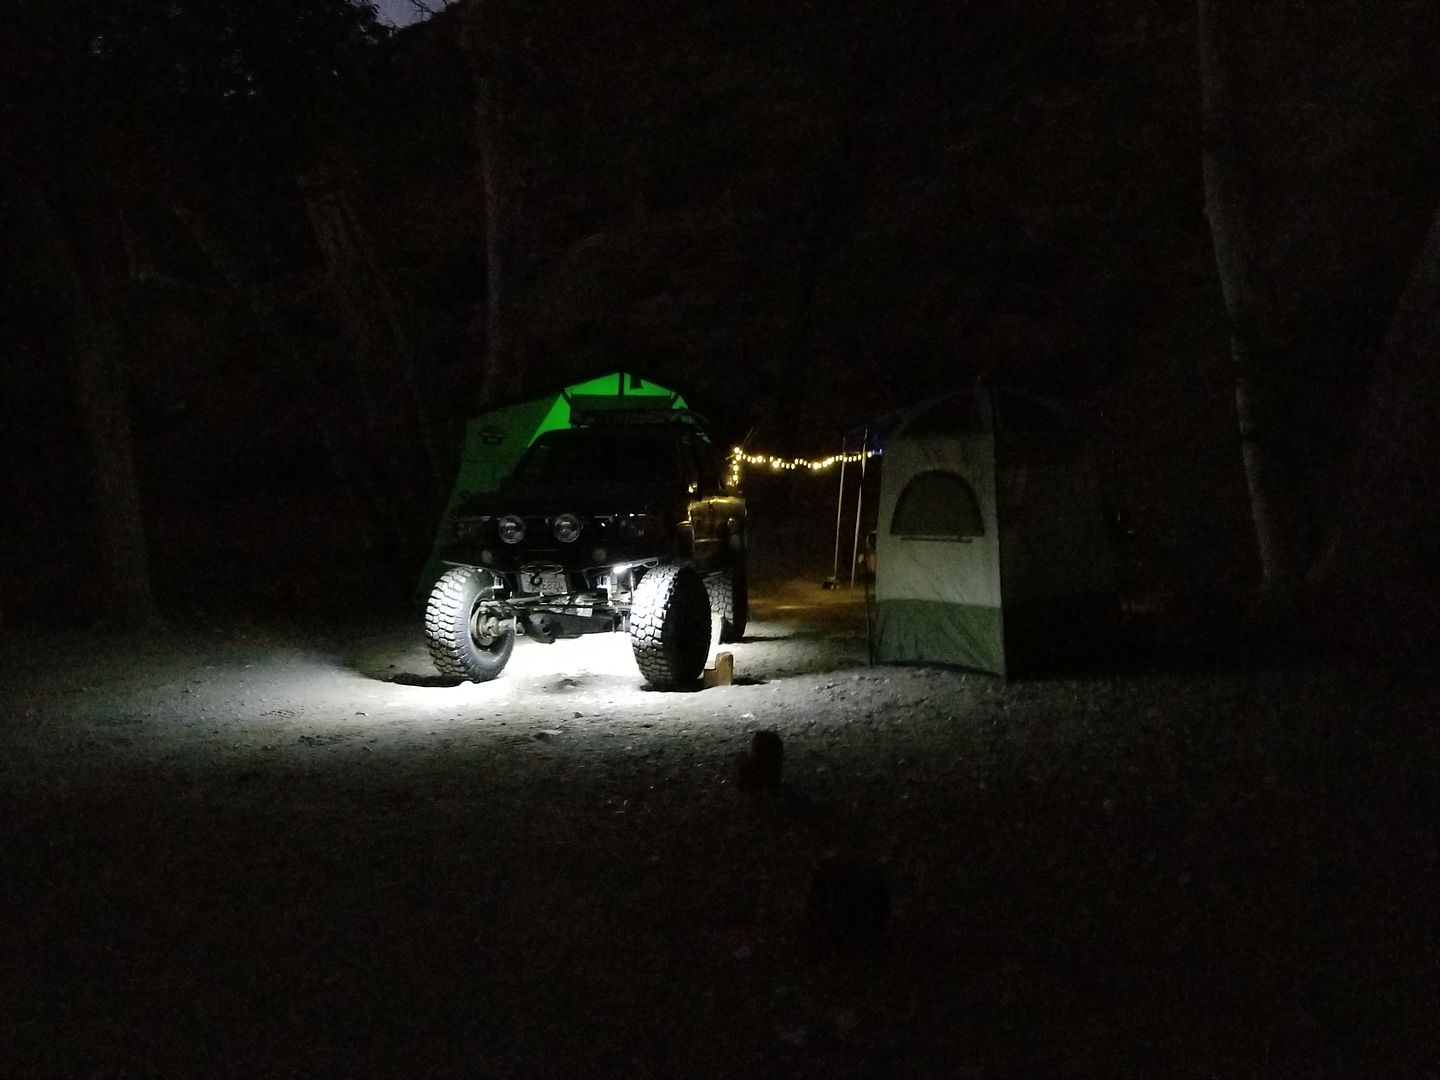
Either way if those All4OffRoad lights do not end up being enough light i always have these warm LED Christmas lights to use. And Since this trip i have bought another set of these same Christmas lights to add on to the camp lighting. By having a 2nd one i can daisy chain the lights to the portable shower/restroom for using it in the middle of the night
--------------------------------------------------------------------------------------------------------------------------------------------------------------------------------------------------
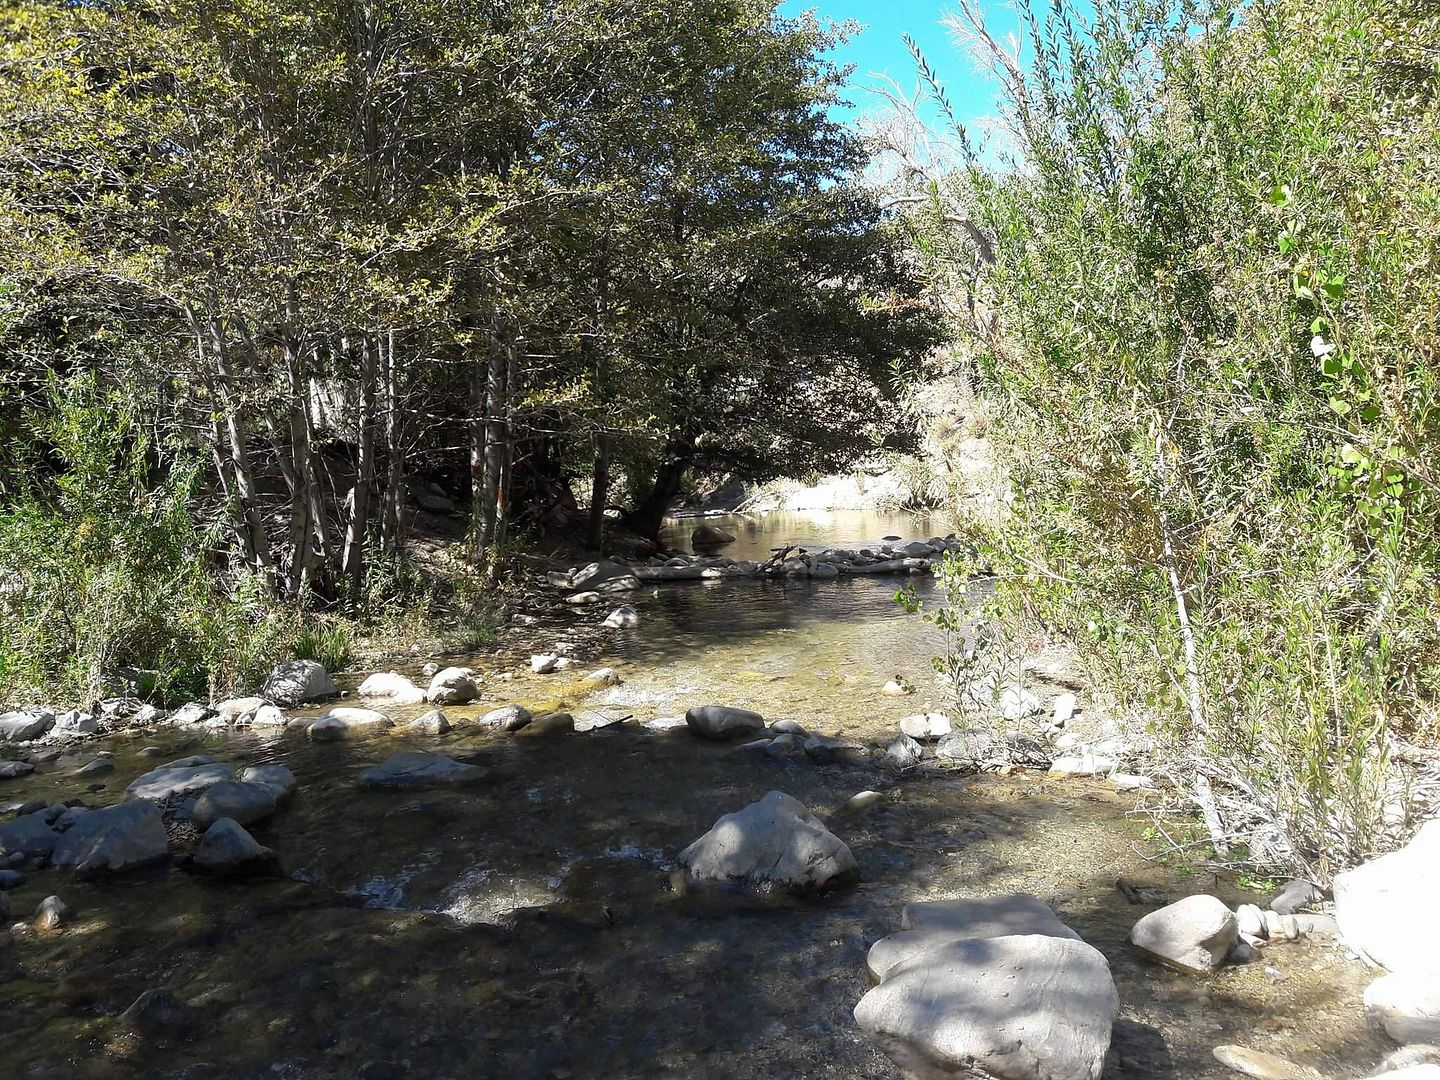
Playing in the ice cold creek






------------------------------------------------------------------------------------------------------------------------------------------------------------------------------------------------------------
Kicking it at Mark's camp spot*
​​​​​​​
Here you can see how i routed the heater duct into the CVT tent through the foldable joint where the tent opens and closes. Also that black thing with the dial is the thermostat. I need to buy some more ducting because this one is only a hot air duct for blowing air in to the tent. The Thermostat can not fully work properly unless i route a air return leading back to the heater unit so the thermostat knows it has reached the desired temperature.


Here you can see that black duct routed into the tent from the bottom side of that window

.....Also as you you can see i desperately need to add a neat battery storage and keep it all enclosed within the trailer. For this trip i just rested the propex heater on top the the trailer tongue but that is a very expensive unit to have out in the open just like that. Same with the dual blue top optima batteries. each is about 250 a piece.*
How 'bout them @all4offroad flex rock lights. I love how bright these 4 pairs are. I cant wait to install 4 more pairs to the exterior surrounding the trailer. You can clearly see how bright these lights are under the truck. I'm sure they will provide just enough light for the immediate campground surrounding my trailer. On a side note the interior LED light that comes inside of this Summit Series CVT tents is awesome. i love how it gets that green glow when you see it from the outside.*


Either way if those All4OffRoad lights do not end up being enough light i always have these warm LED Christmas lights to use. And Since this trip i have bought another set of these same Christmas lights to add on to the camp lighting. By having a 2nd one i can daisy chain the lights to the portable shower/restroom for using it in the middle of the night


--------------------------------------------------------------------------------------------------------------------------------------------------------------------------------------------------
Playing in the ice cold creek


------------------------------------------------------------------------------------------------------------------------------------------------------------------------------------------------------------
Kicking it at Mark's camp spot*


​​​​​​​
Redeth005
Adventurer
Time for trailer updates!!!
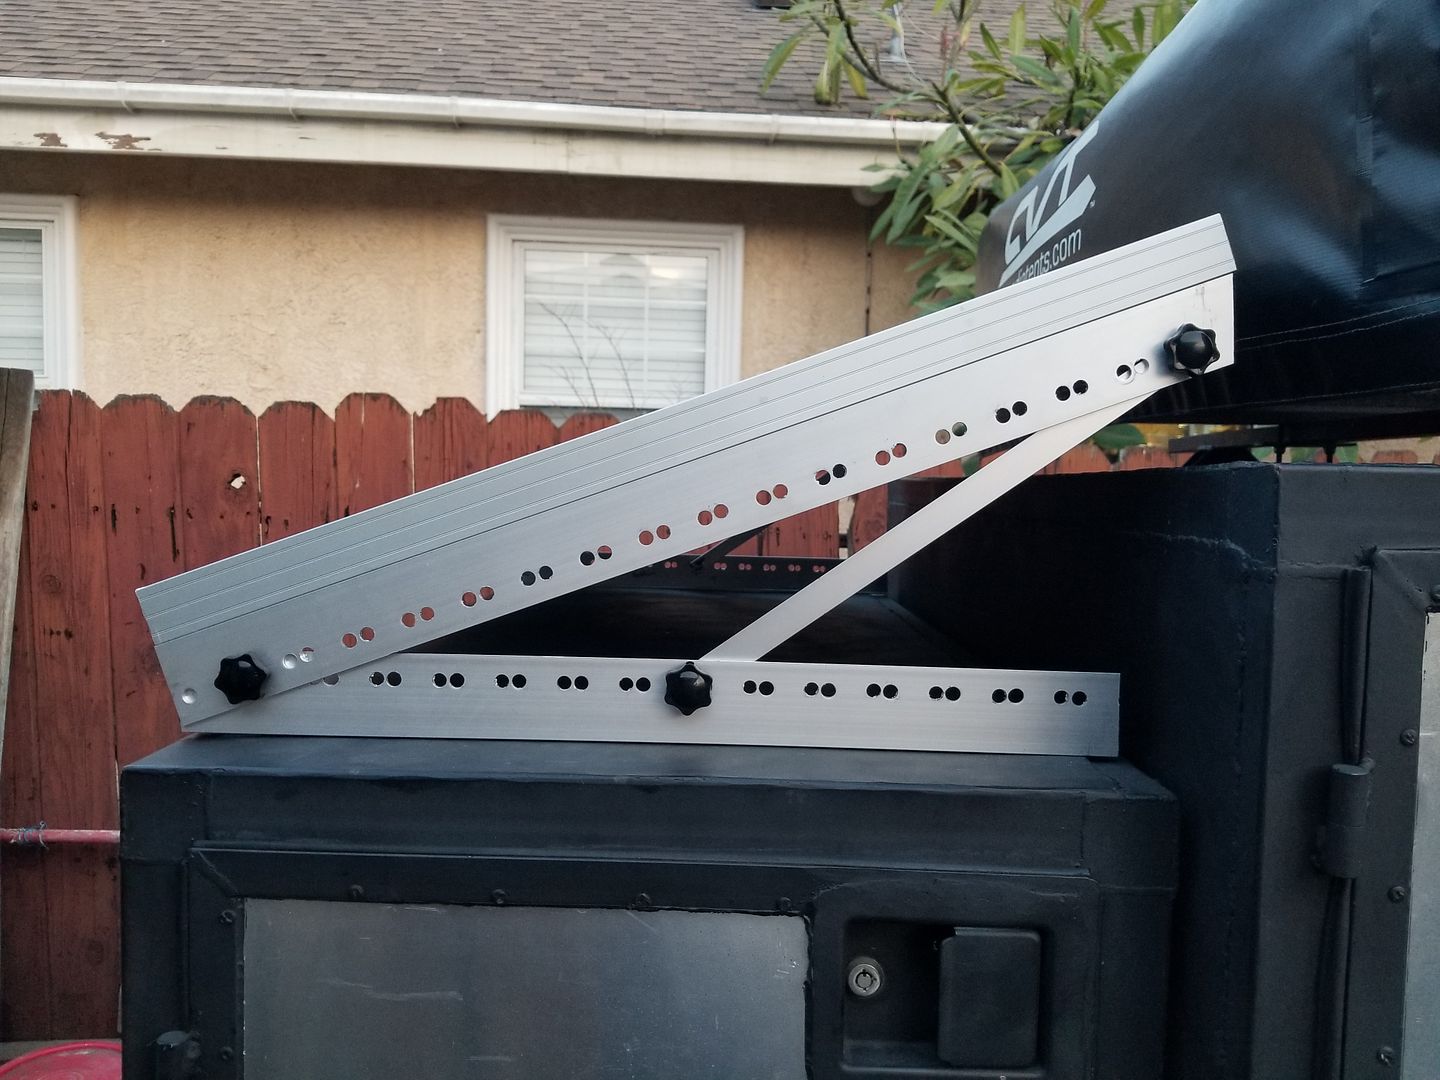
Well, lets get to it. For the solar panel mount I had to chop up the solar panel mount and add twice as many holes to each rail then what it came with for a larger variety of angles.*
Here is the solar panel mount after all the adjustments had been made to it.*
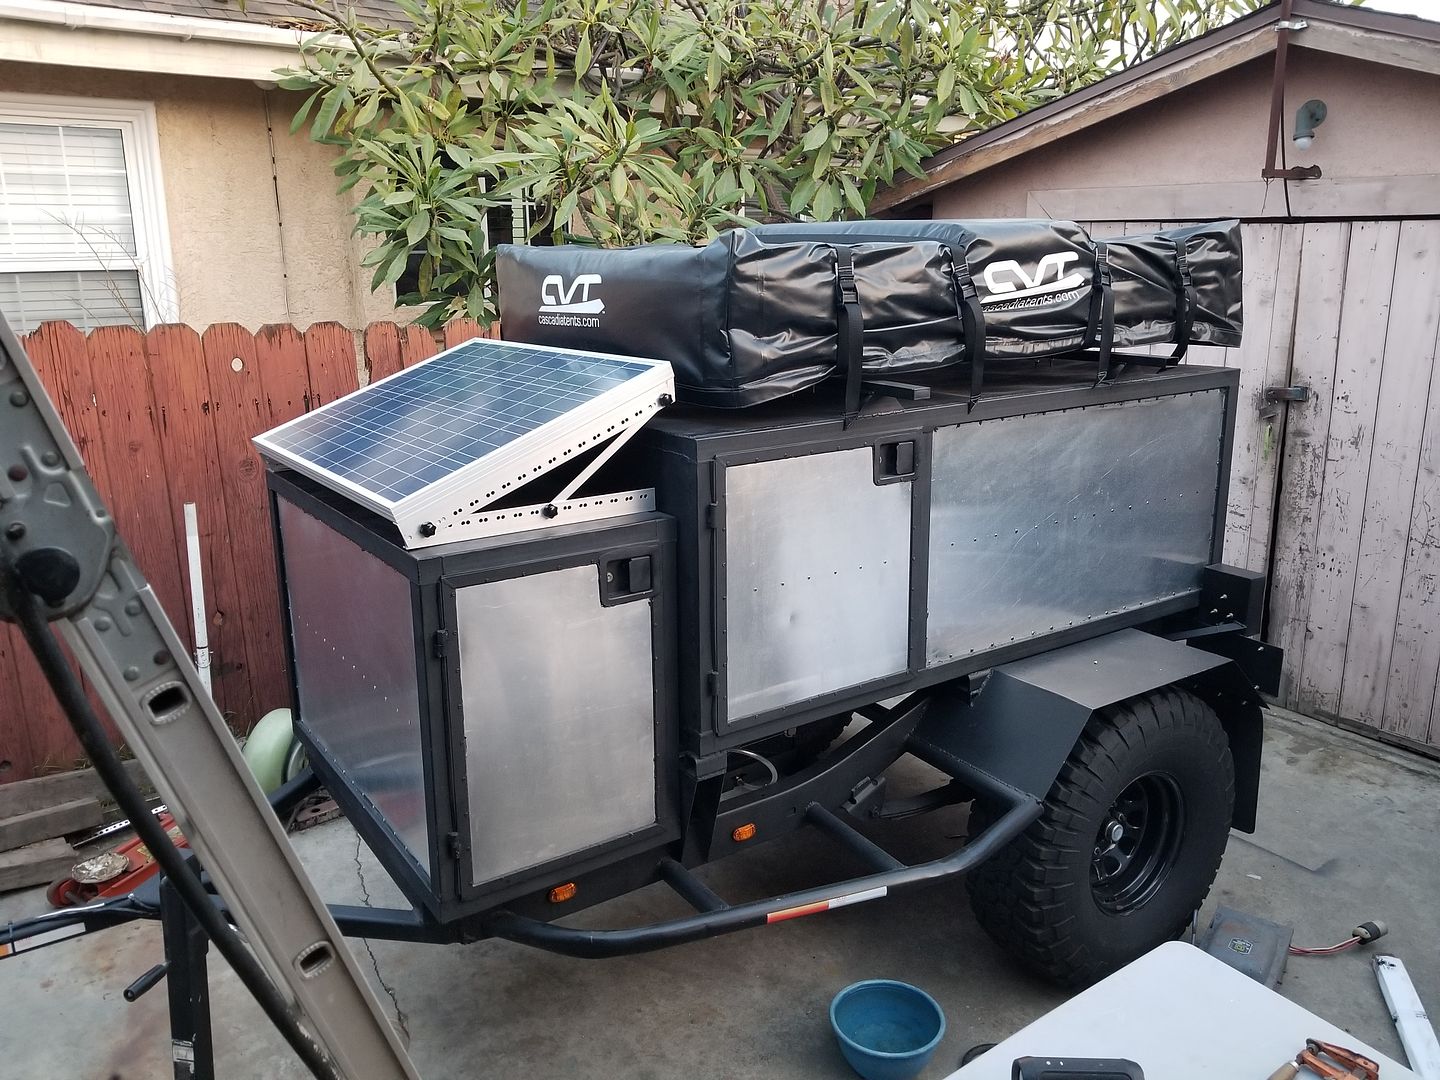
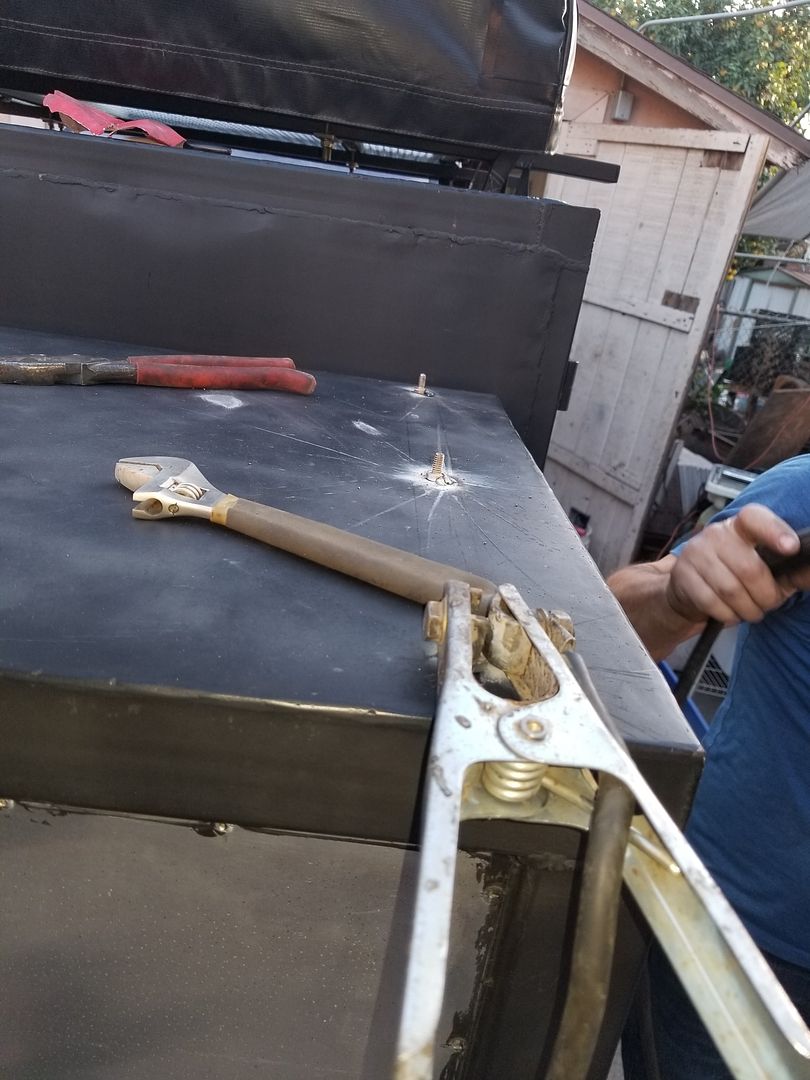
I welded 6 bolts to the top of the compartment. so i could mount the solar panel mount rails. Basically the same technique i used for the pull out slide for the ice chest in the rear compartment.*
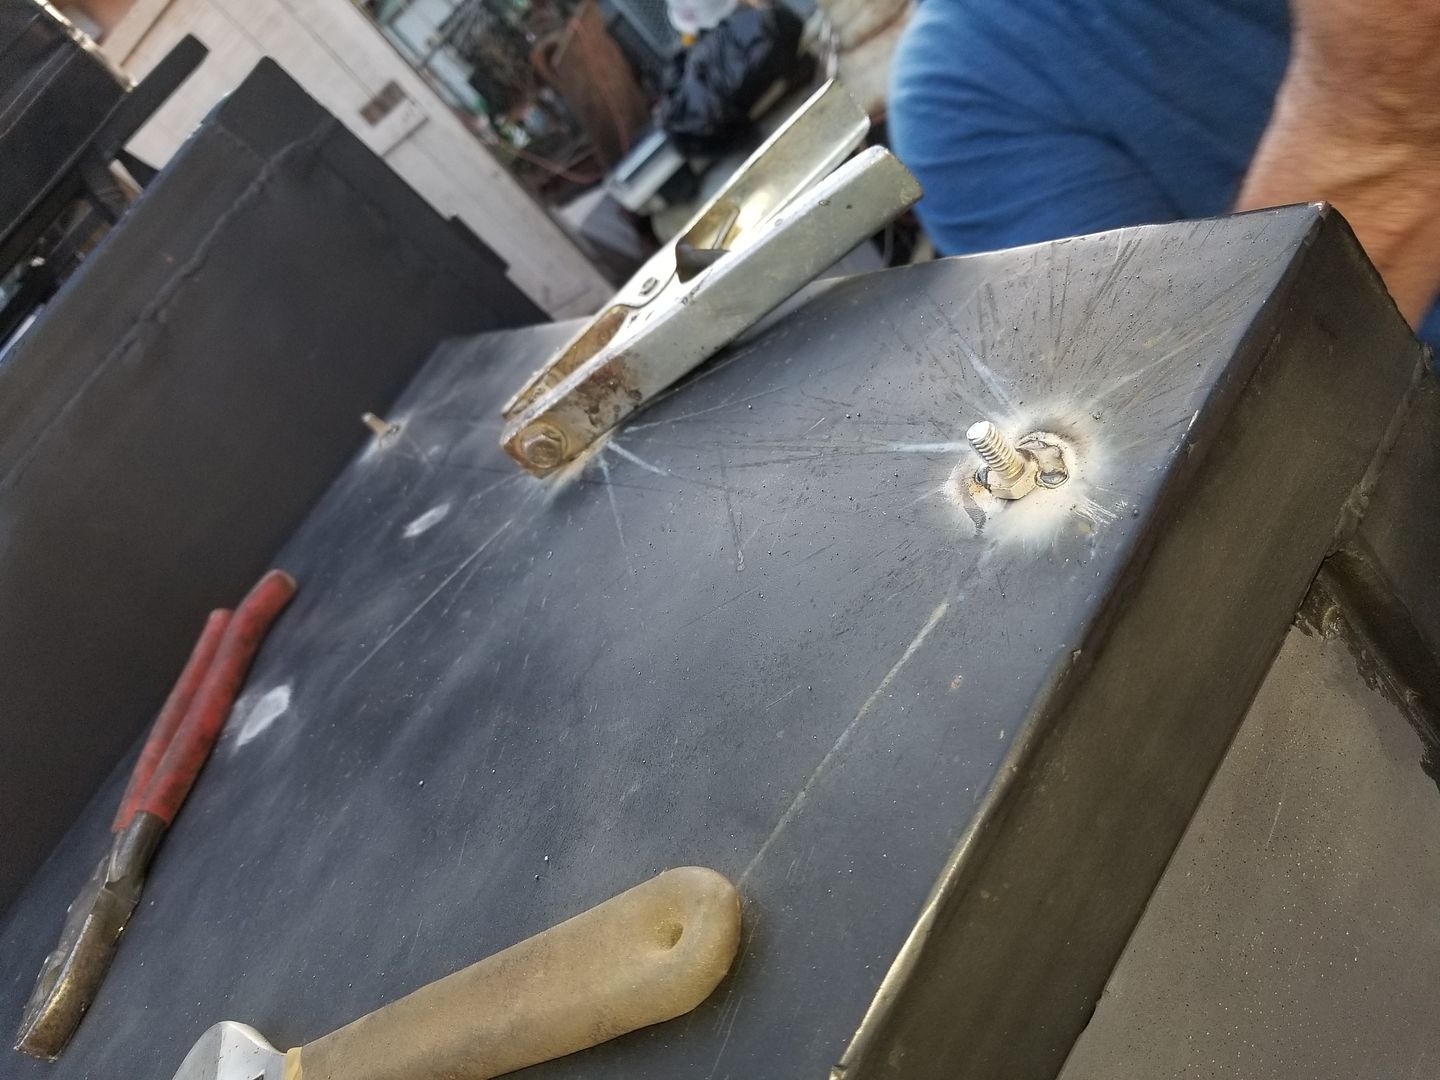
Primer
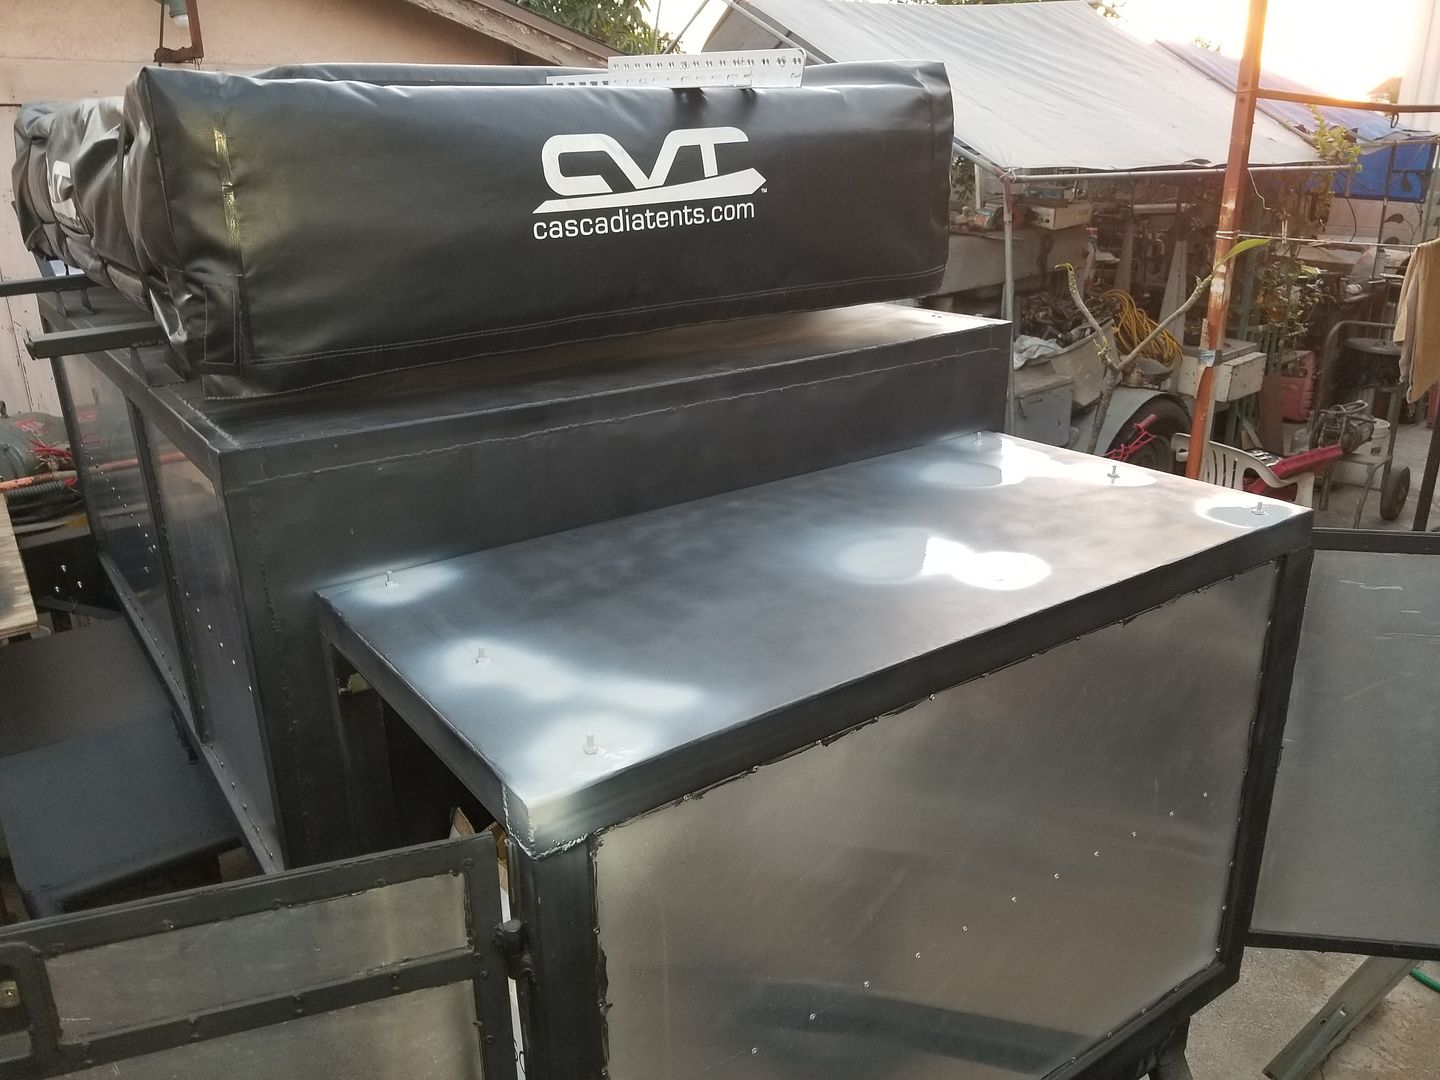
Nice heavy coat of flat black paint
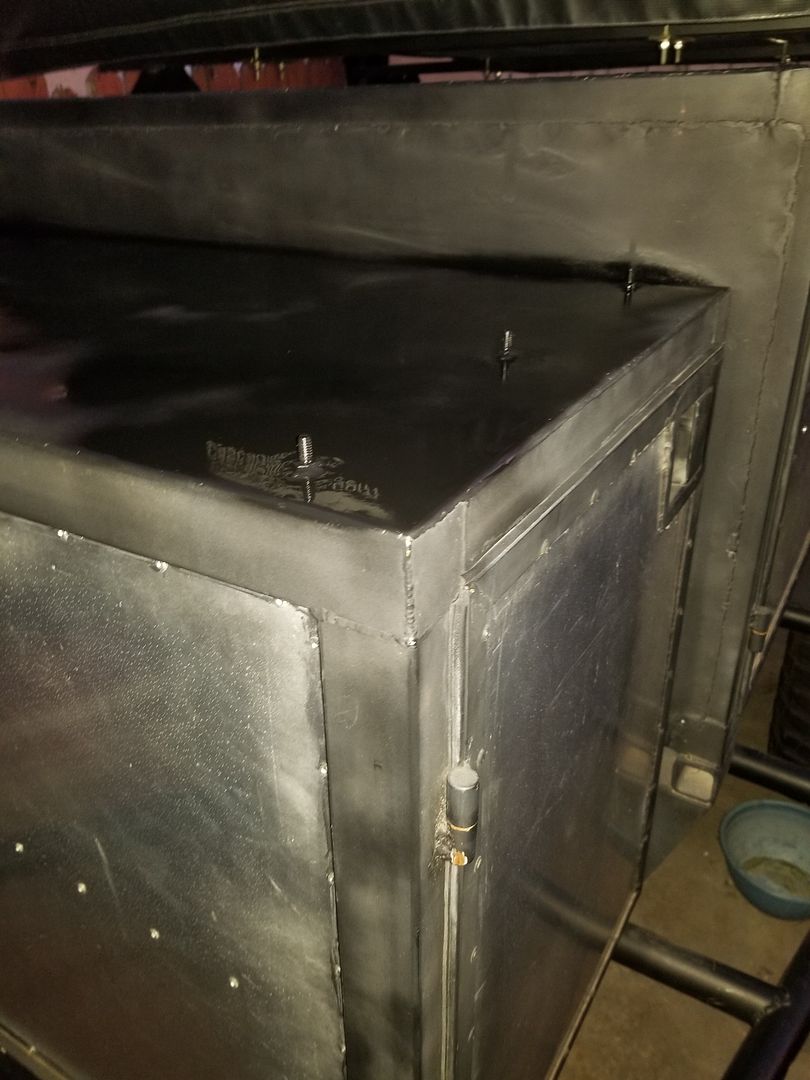
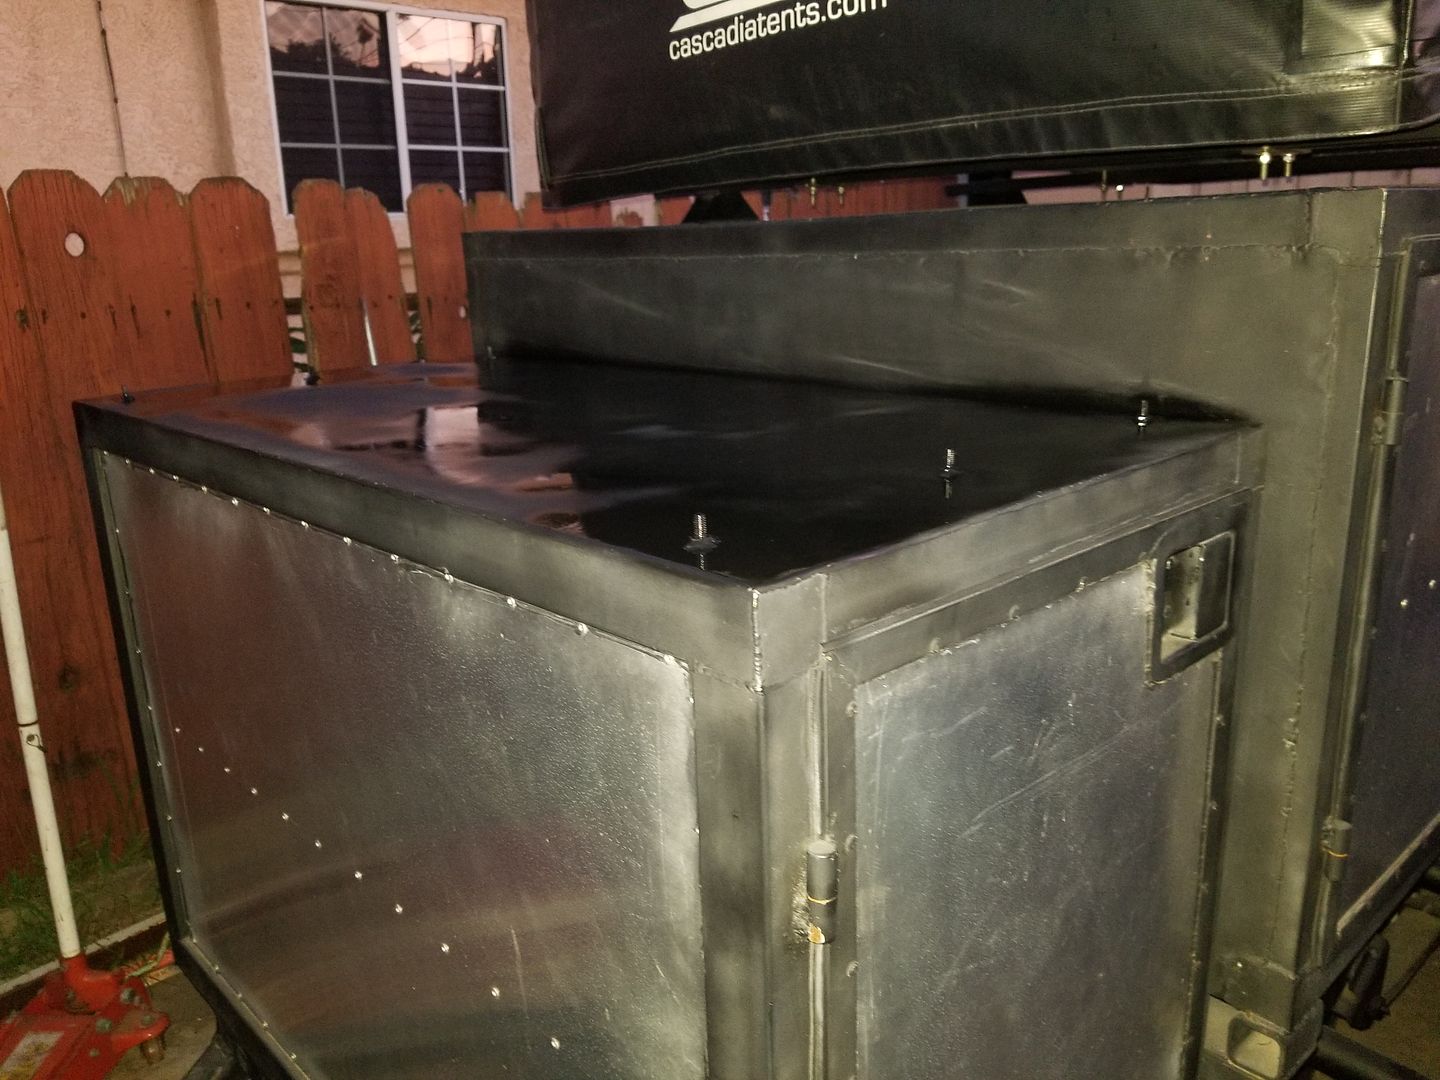
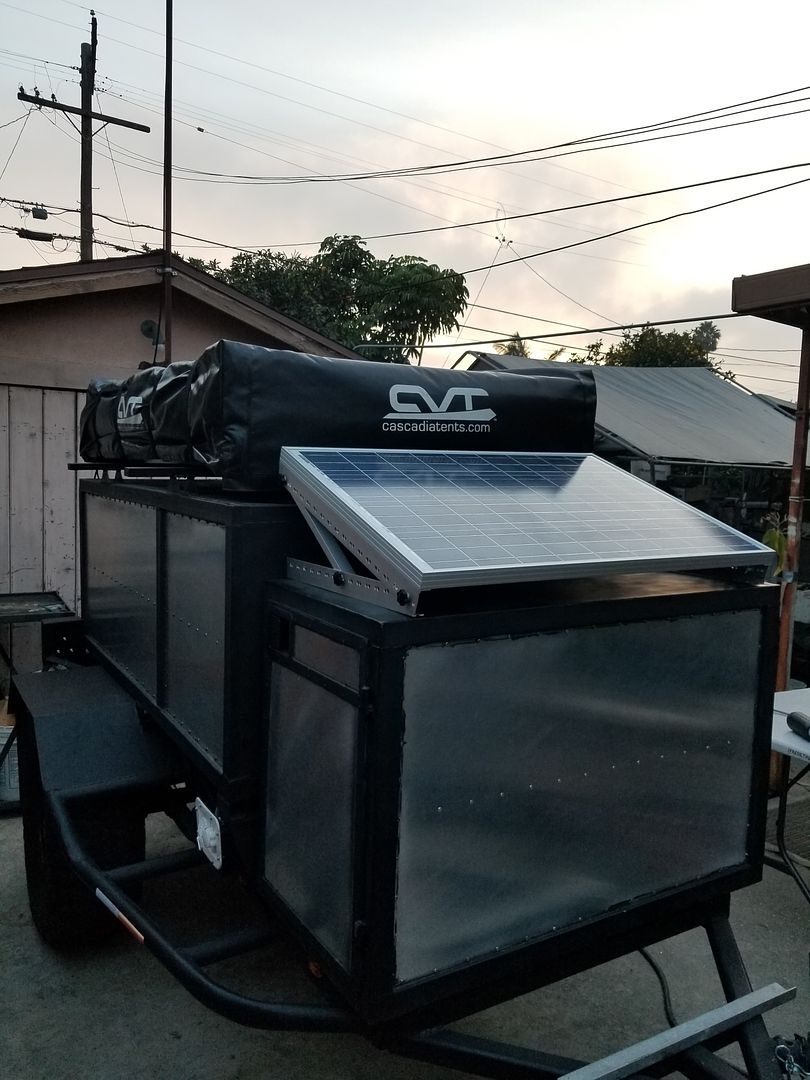
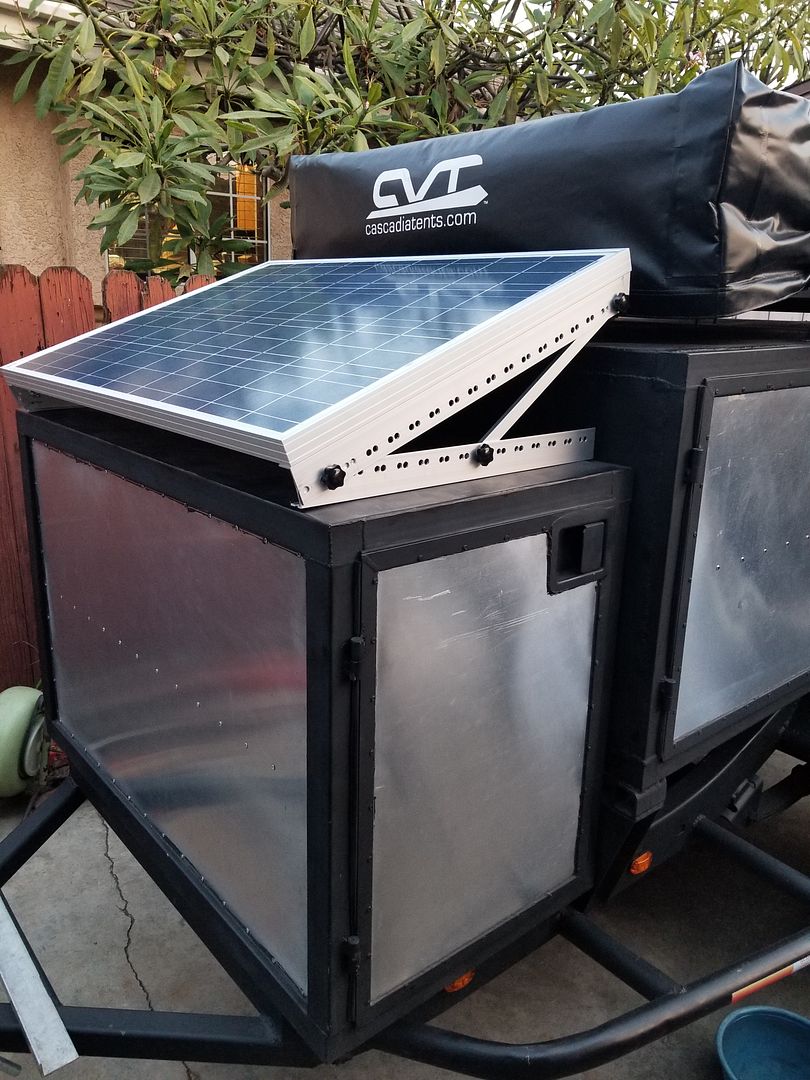
Here is how it looks when it's mounted.*
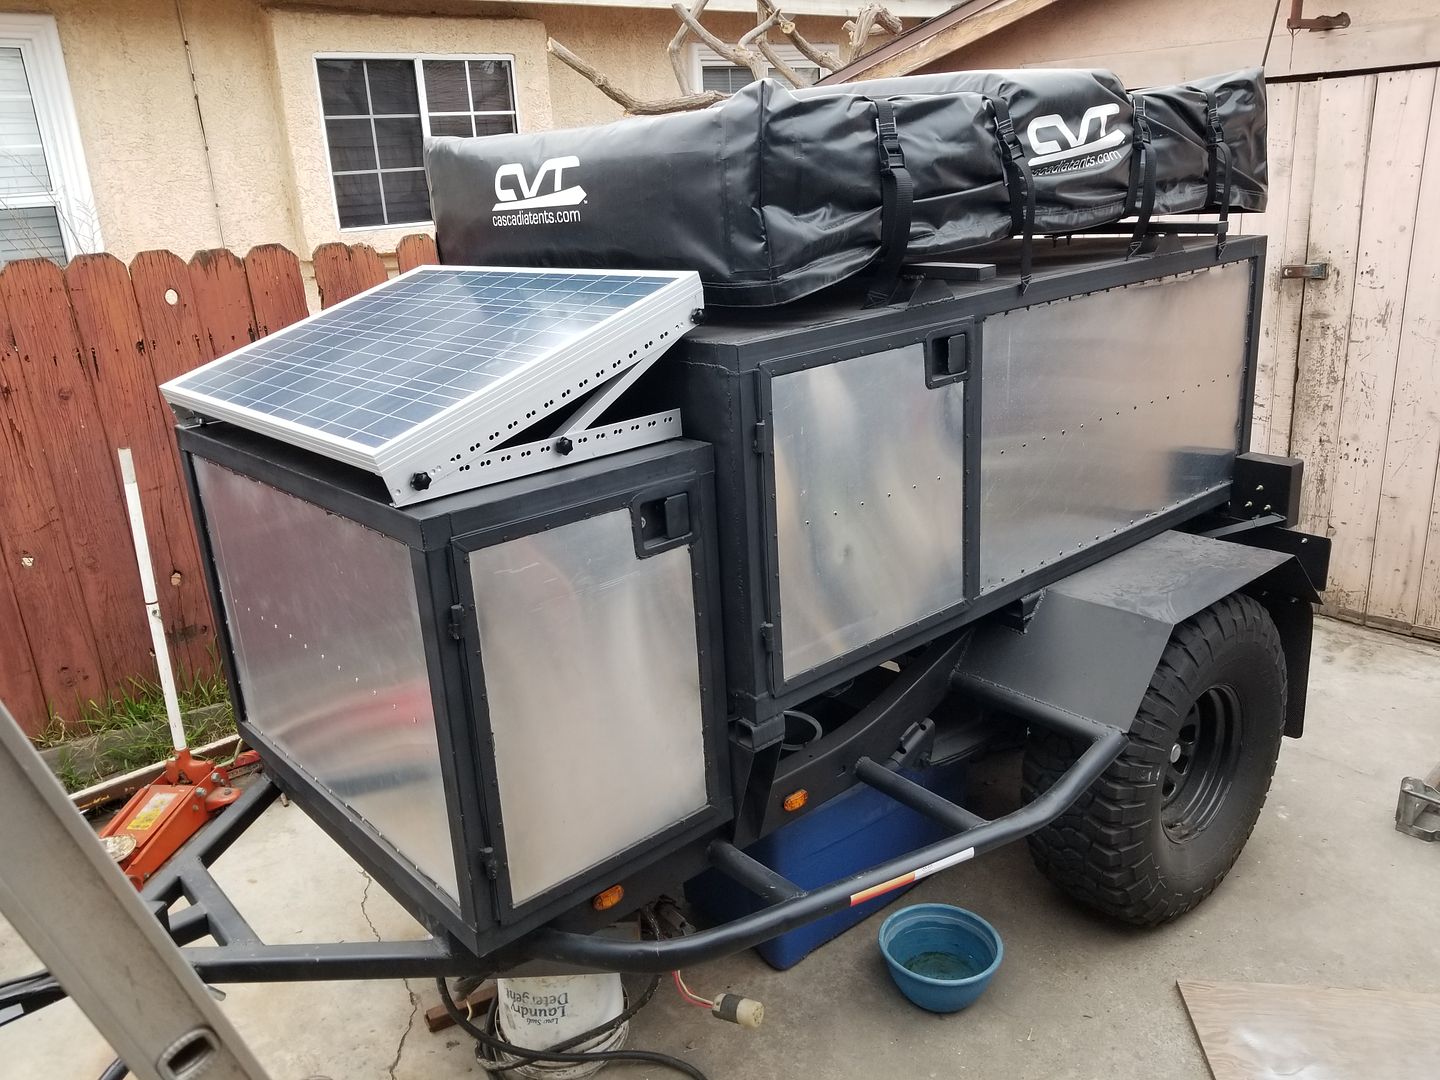
Well, lets get to it. For the solar panel mount I had to chop up the solar panel mount and add twice as many holes to each rail then what it came with for a larger variety of angles.*
Here is the solar panel mount after all the adjustments had been made to it.*


I welded 6 bolts to the top of the compartment. so i could mount the solar panel mount rails. Basically the same technique i used for the pull out slide for the ice chest in the rear compartment.*


Primer

Nice heavy coat of flat black paint


Here is how it looks when it's mounted.*

Redeth005
Adventurer
Now to install this waterproof cable gland to pass through the solar panel wires into the front cab to connect it to the future charge controller.
Directions say to drill a whole the diameter of the wire you plan to pass through. So that's what i did for these 2 wires.*
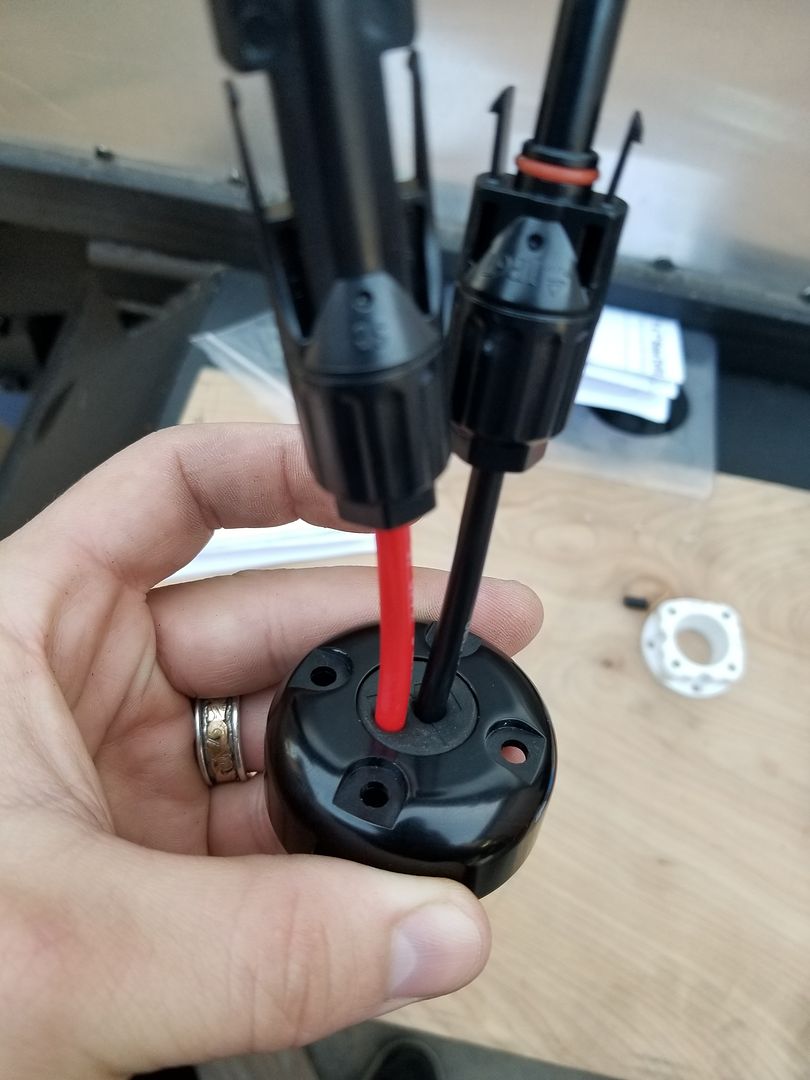
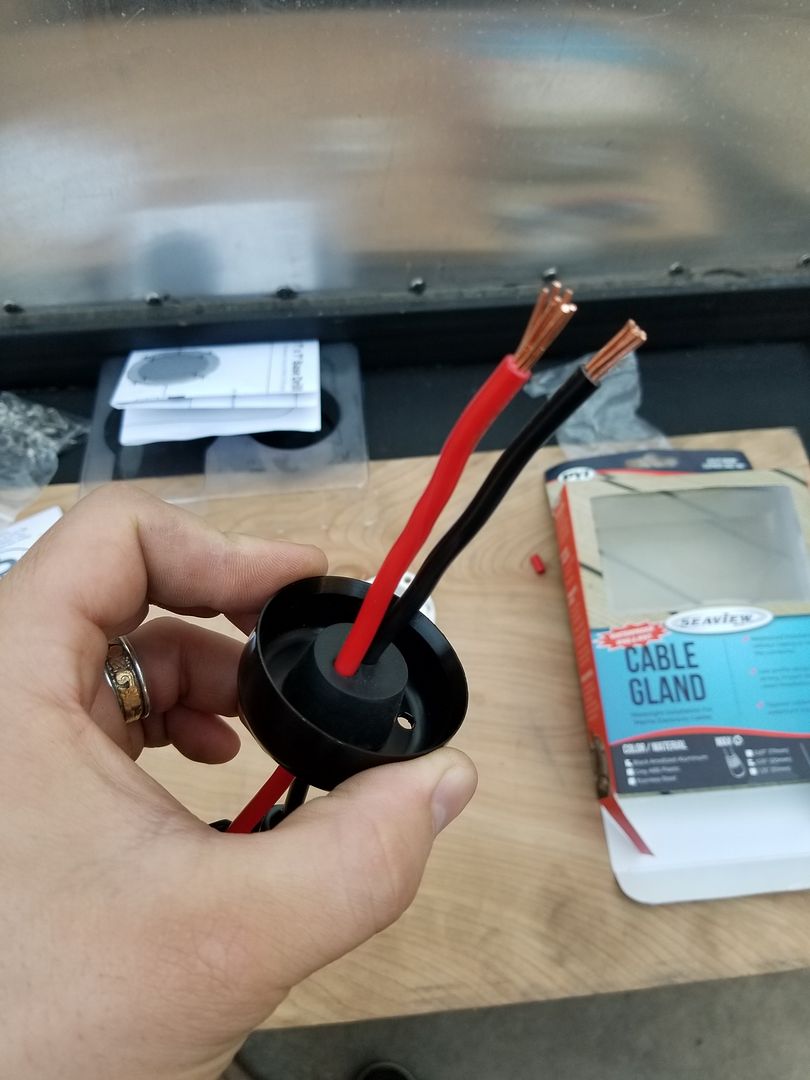
This cable gland comes with these sharp screws to secure it onto a boat. But we aren't using this application on a boat. I need to secure this to steel. So i bought these replacement bolts at home depot.
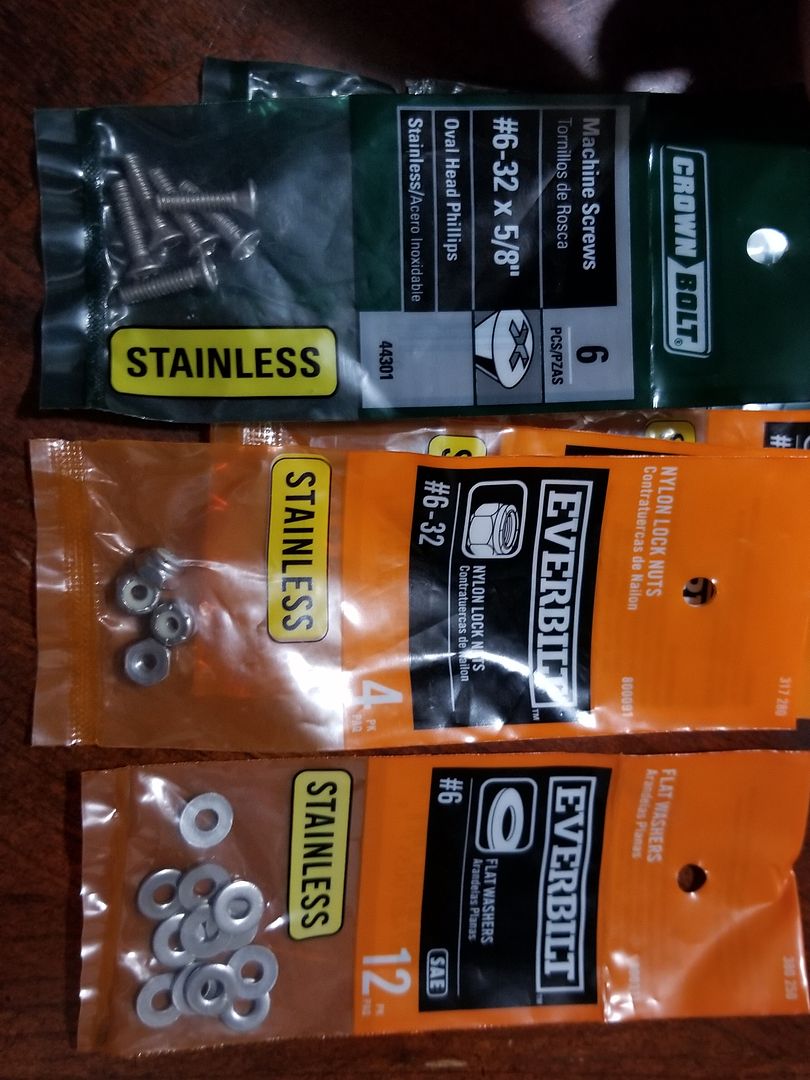
Same size #6 5/8ths inch long.* Machine tapered screw heads, with nylon lock nuts and washers. Everything stainless steel since it is gonna be exposed to the outdoors.*
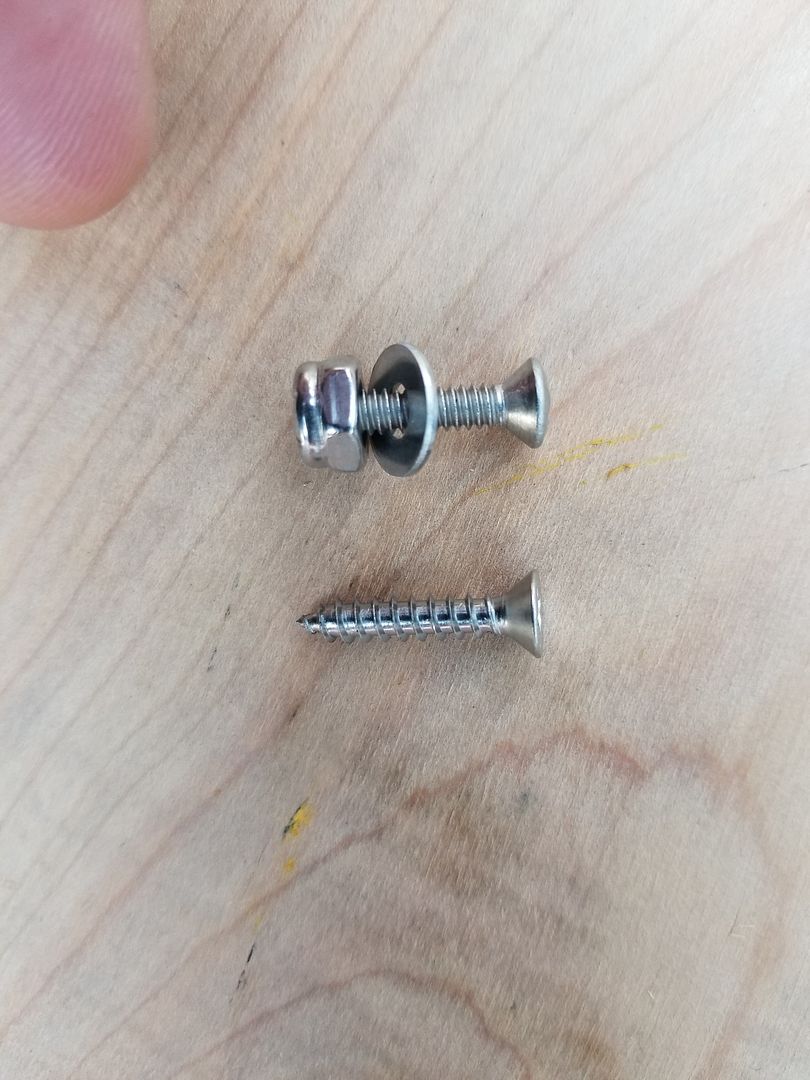
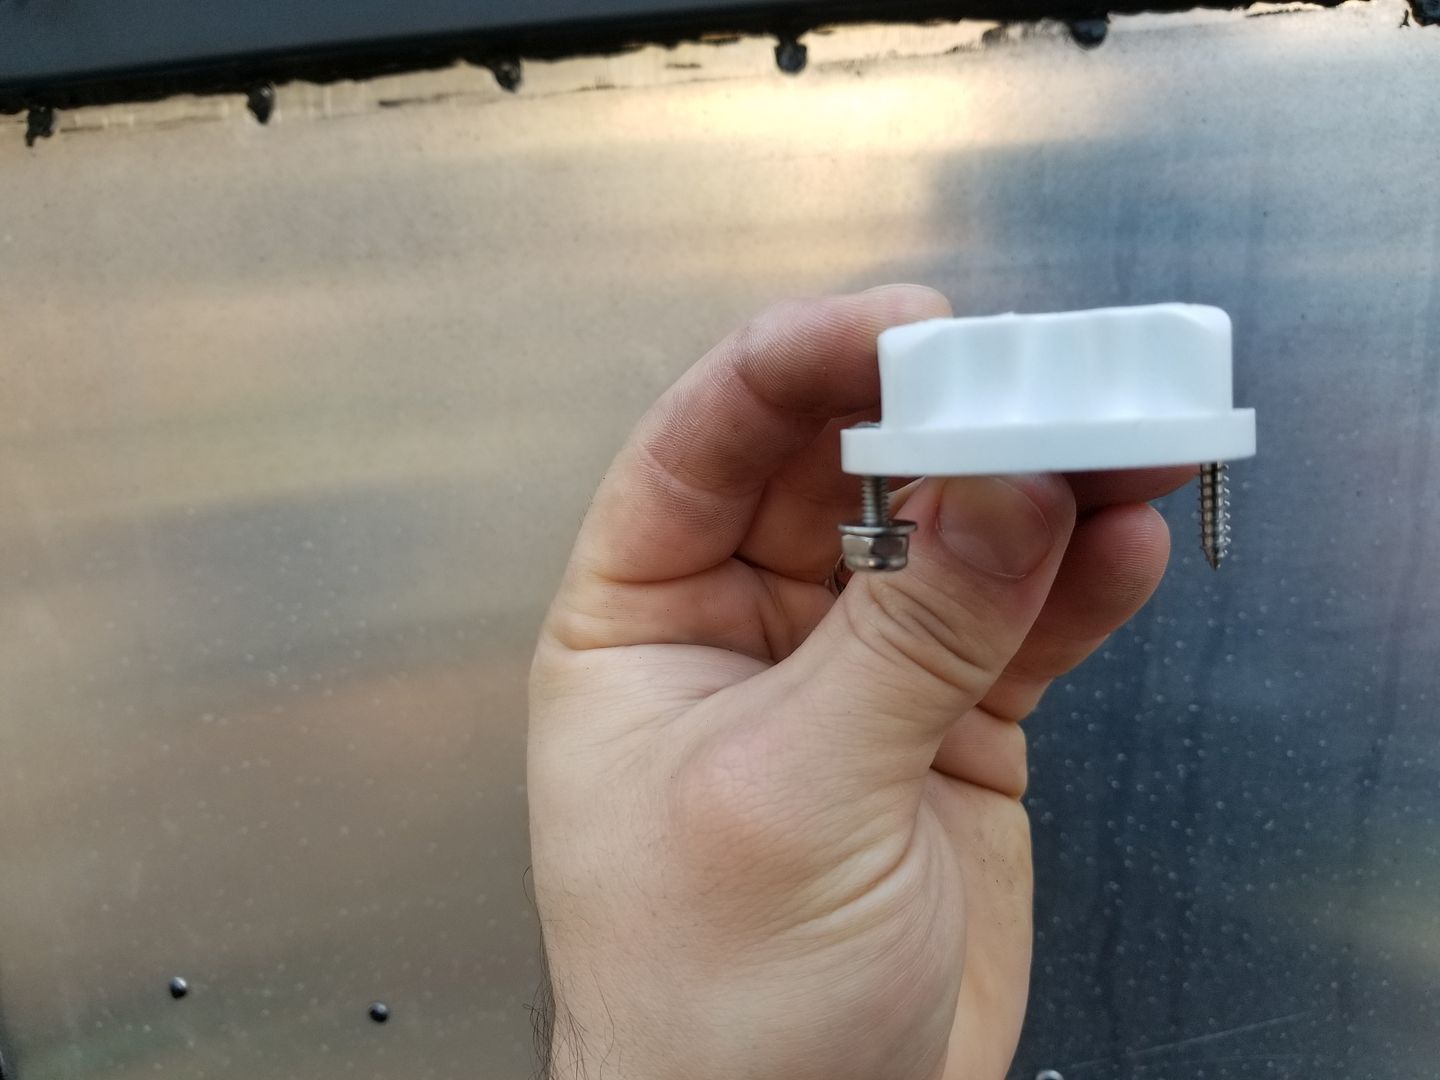
The ones it comes with vs the ones i bought*
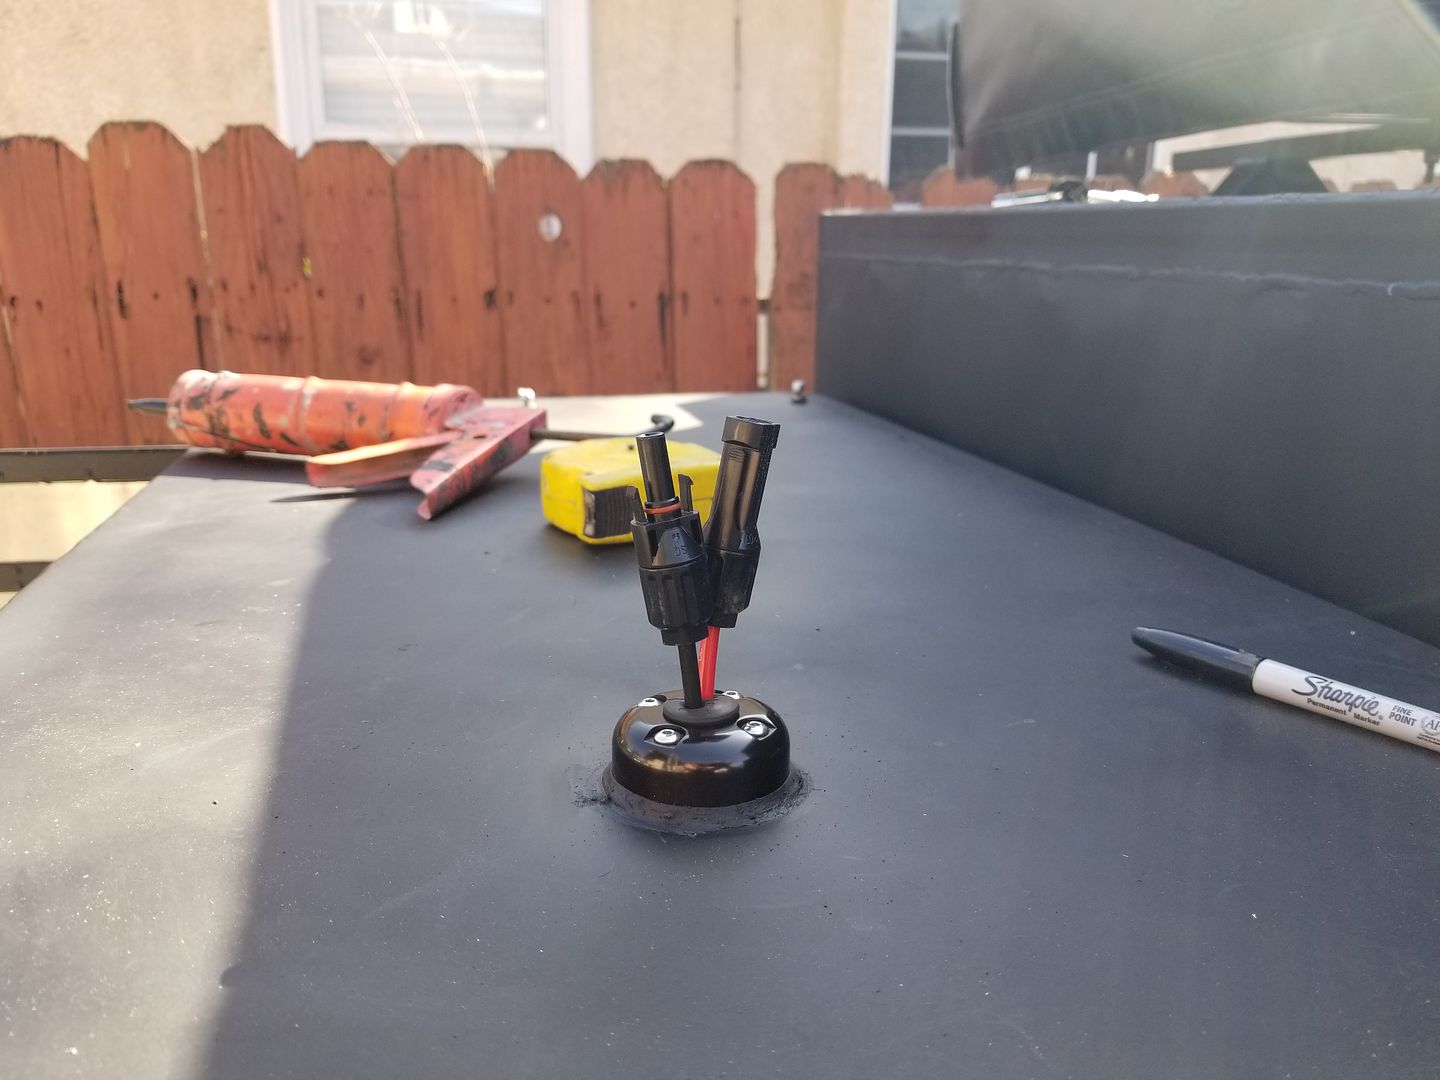
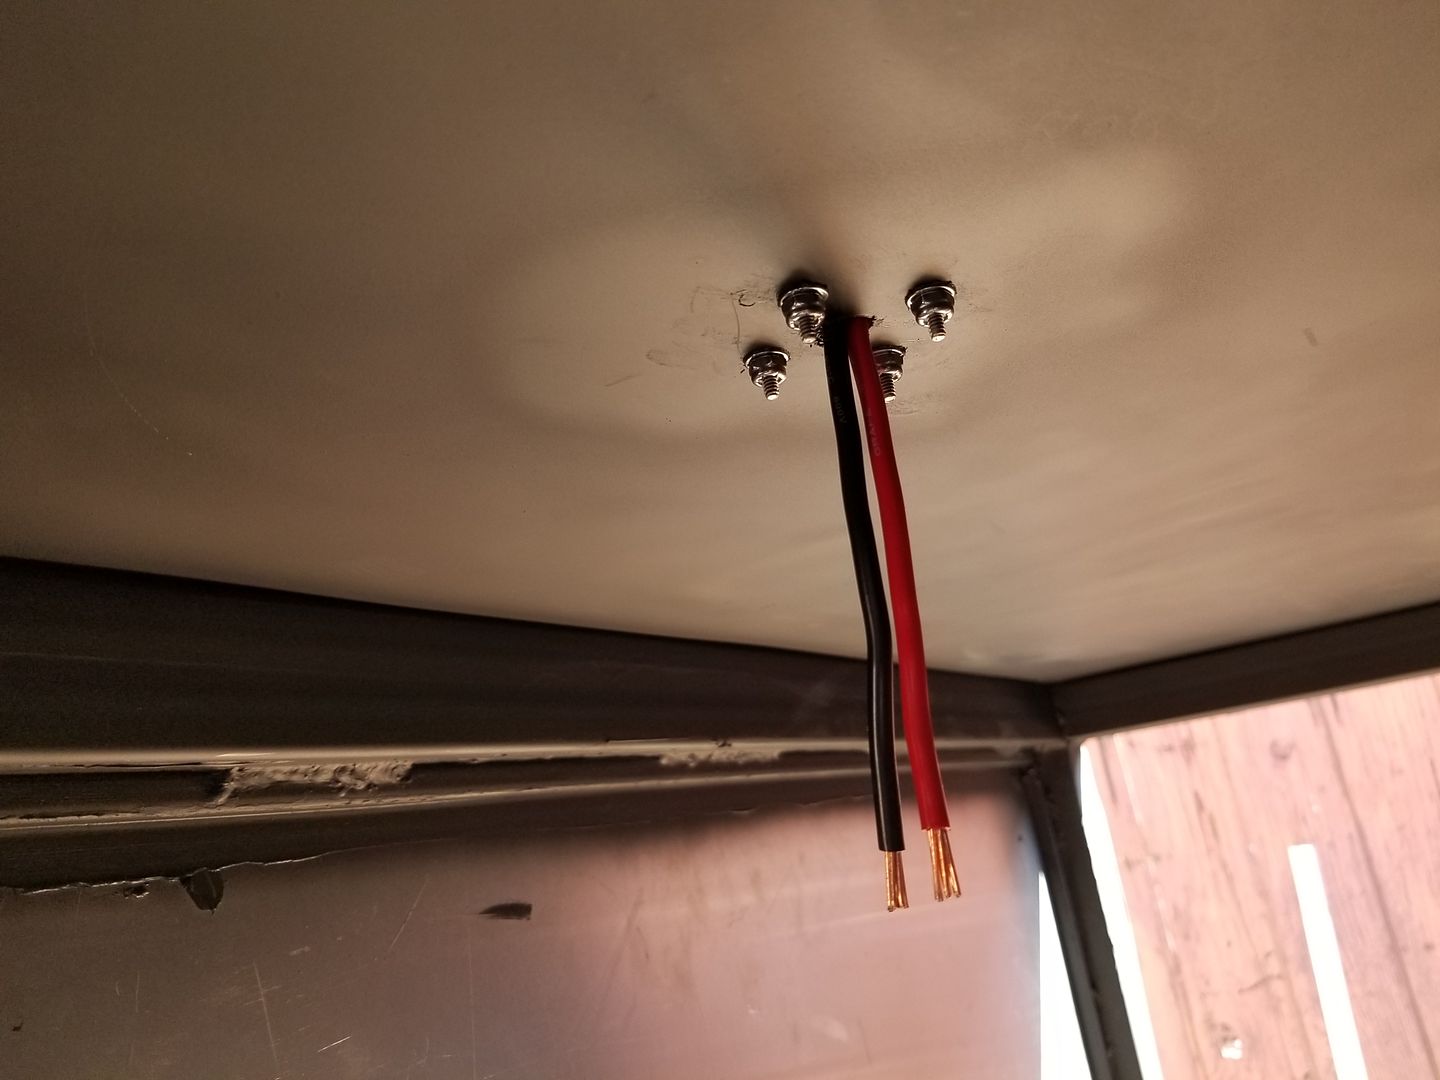
All mounted up. Used Silicone inside the holes that the wires pass through and on the inside surface of the tapered rubber plug. also on the rubber bushing that joins the cable gland to the steel roof.
Here is how it looks on the inside of the cab
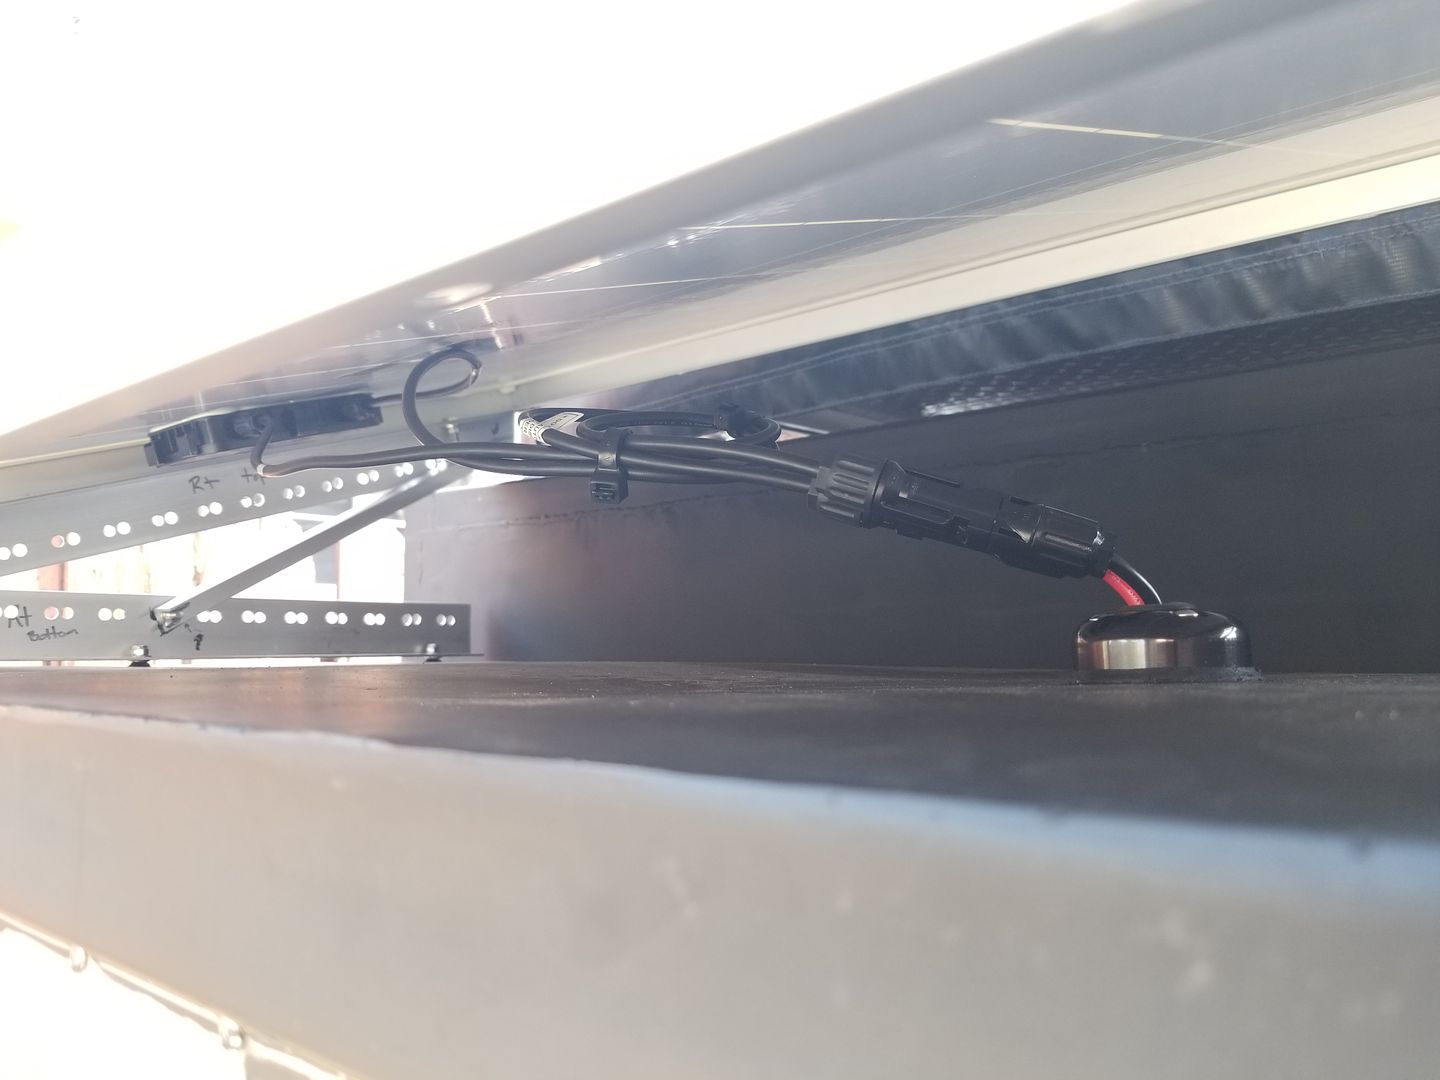
Solar panel mounted and hooked up

Directions say to drill a whole the diameter of the wire you plan to pass through. So that's what i did for these 2 wires.*


This cable gland comes with these sharp screws to secure it onto a boat. But we aren't using this application on a boat. I need to secure this to steel. So i bought these replacement bolts at home depot.
Same size #6 5/8ths inch long.* Machine tapered screw heads, with nylon lock nuts and washers. Everything stainless steel since it is gonna be exposed to the outdoors.*


The ones it comes with vs the ones i bought*

All mounted up. Used Silicone inside the holes that the wires pass through and on the inside surface of the tapered rubber plug. also on the rubber bushing that joins the cable gland to the steel roof.

Here is how it looks on the inside of the cab

Solar panel mounted and hooked up

Redeth005
Adventurer
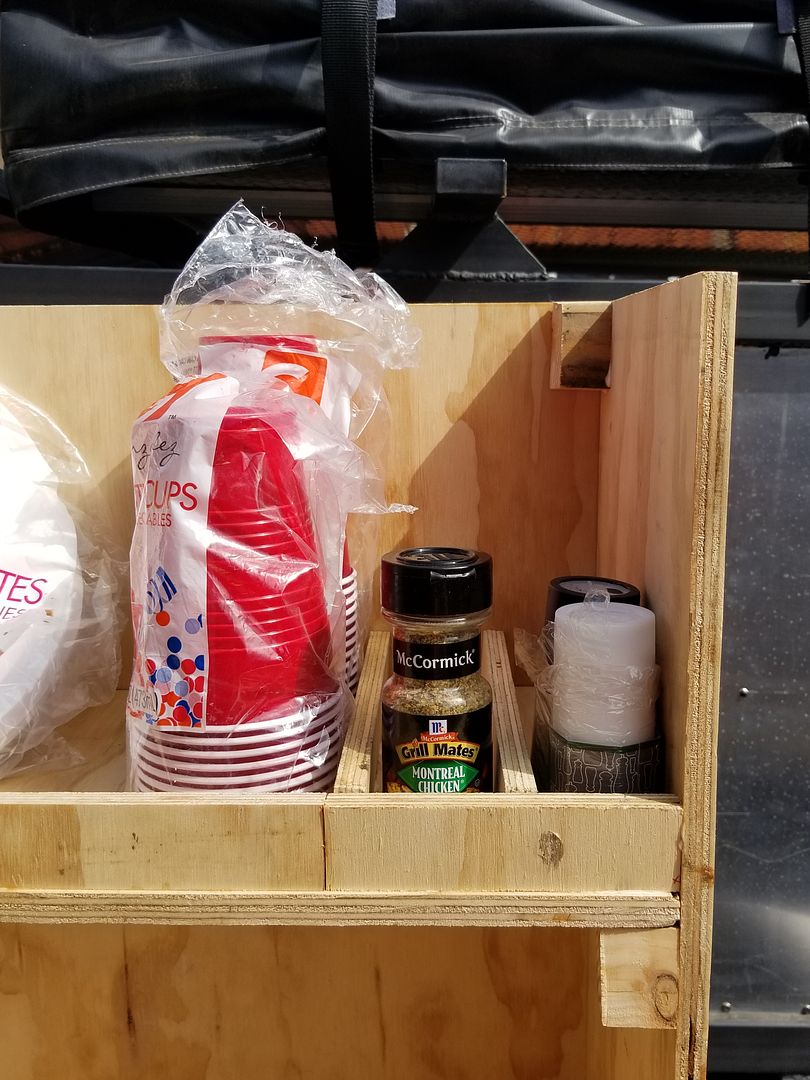
Finally got around to making the pantry/spice rack/utensils storage on the pull out drawer of my trailer. It doesn't look too bad considering it's my first woodworking project. It's solid and it will serve its purpose when we go camping. That's all i care. It is removable in case i wanna take it out but i doubt i'll ever need to do that. unless i gotta clean out the floor of the rear compartment.*
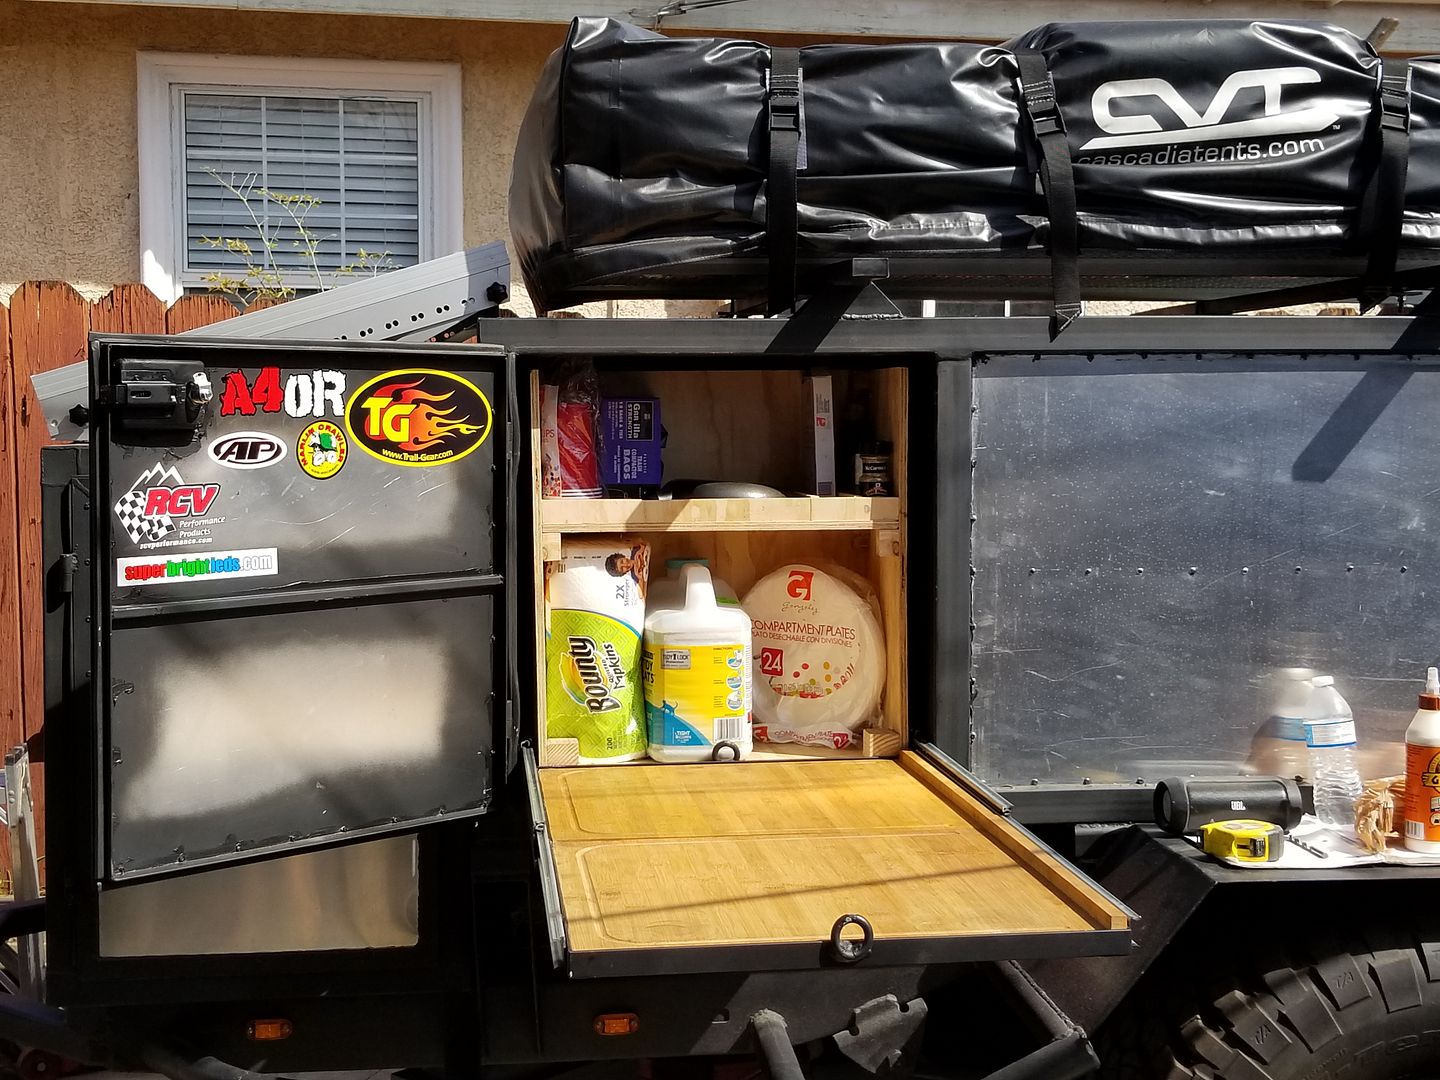
Gotta buy a few more pans and maybe 1 or 2 pots with lids. when i have that maybe ill add something to hold them upright without falling.
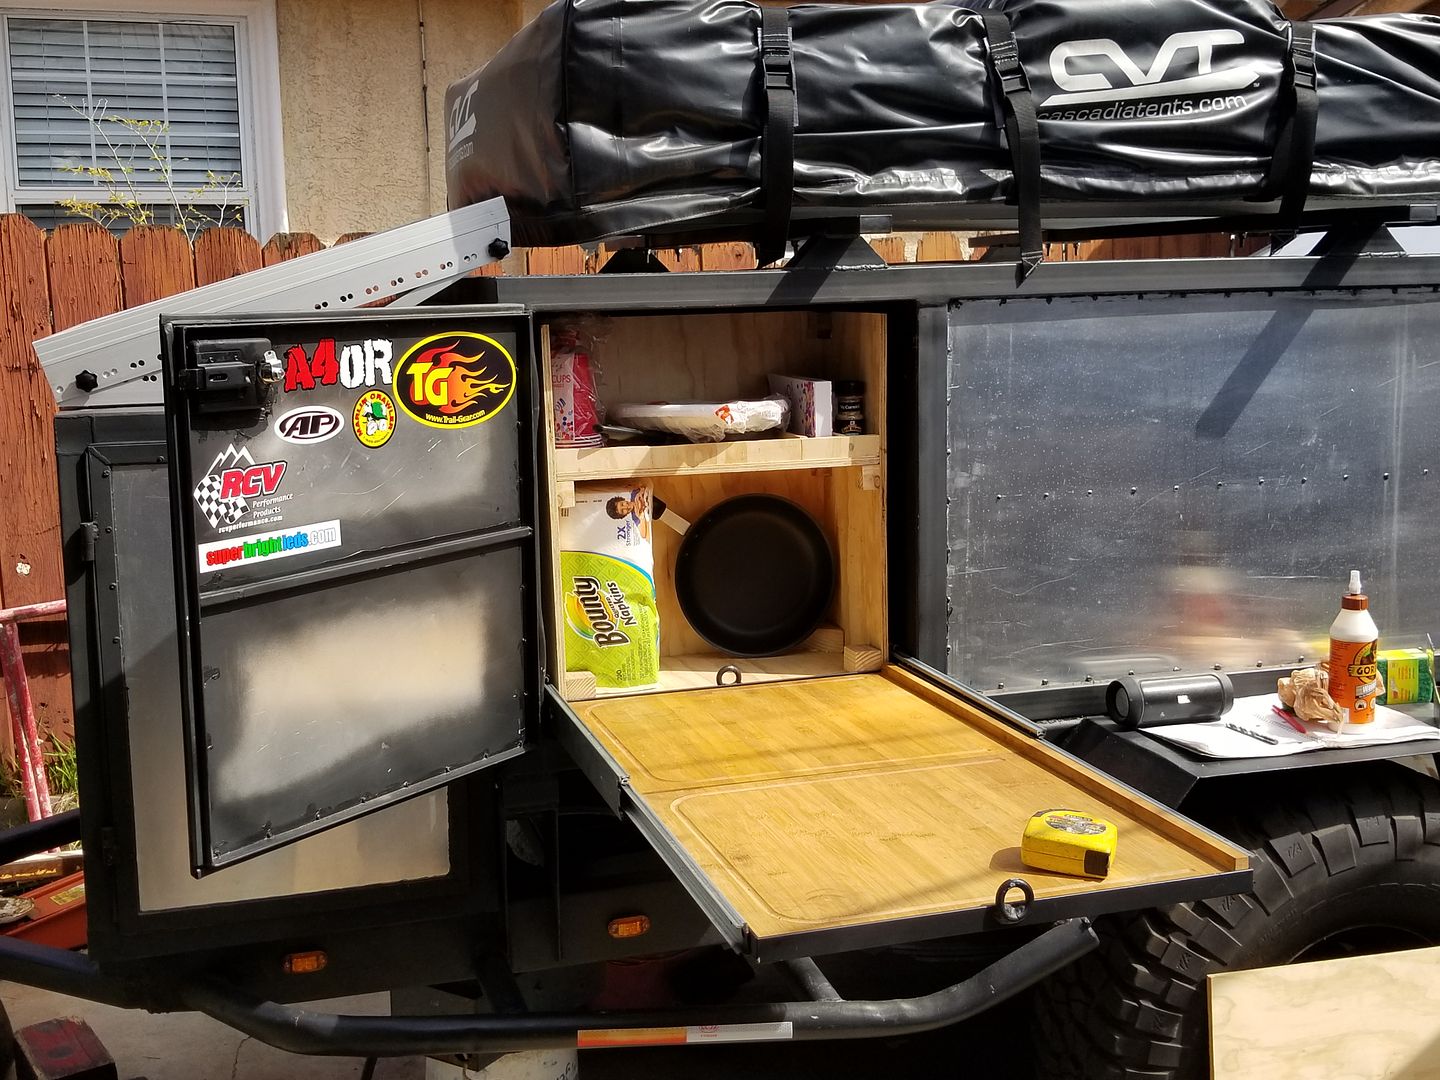
I gotta stock up on my spices now that i have a spot for them.*
​​​​​​​

Gotta buy a few more pans and maybe 1 or 2 pots with lids. when i have that maybe ill add something to hold them upright without falling.

I gotta stock up on my spices now that i have a spot for them.*
​​​​​​​

Redeth005
Adventurer
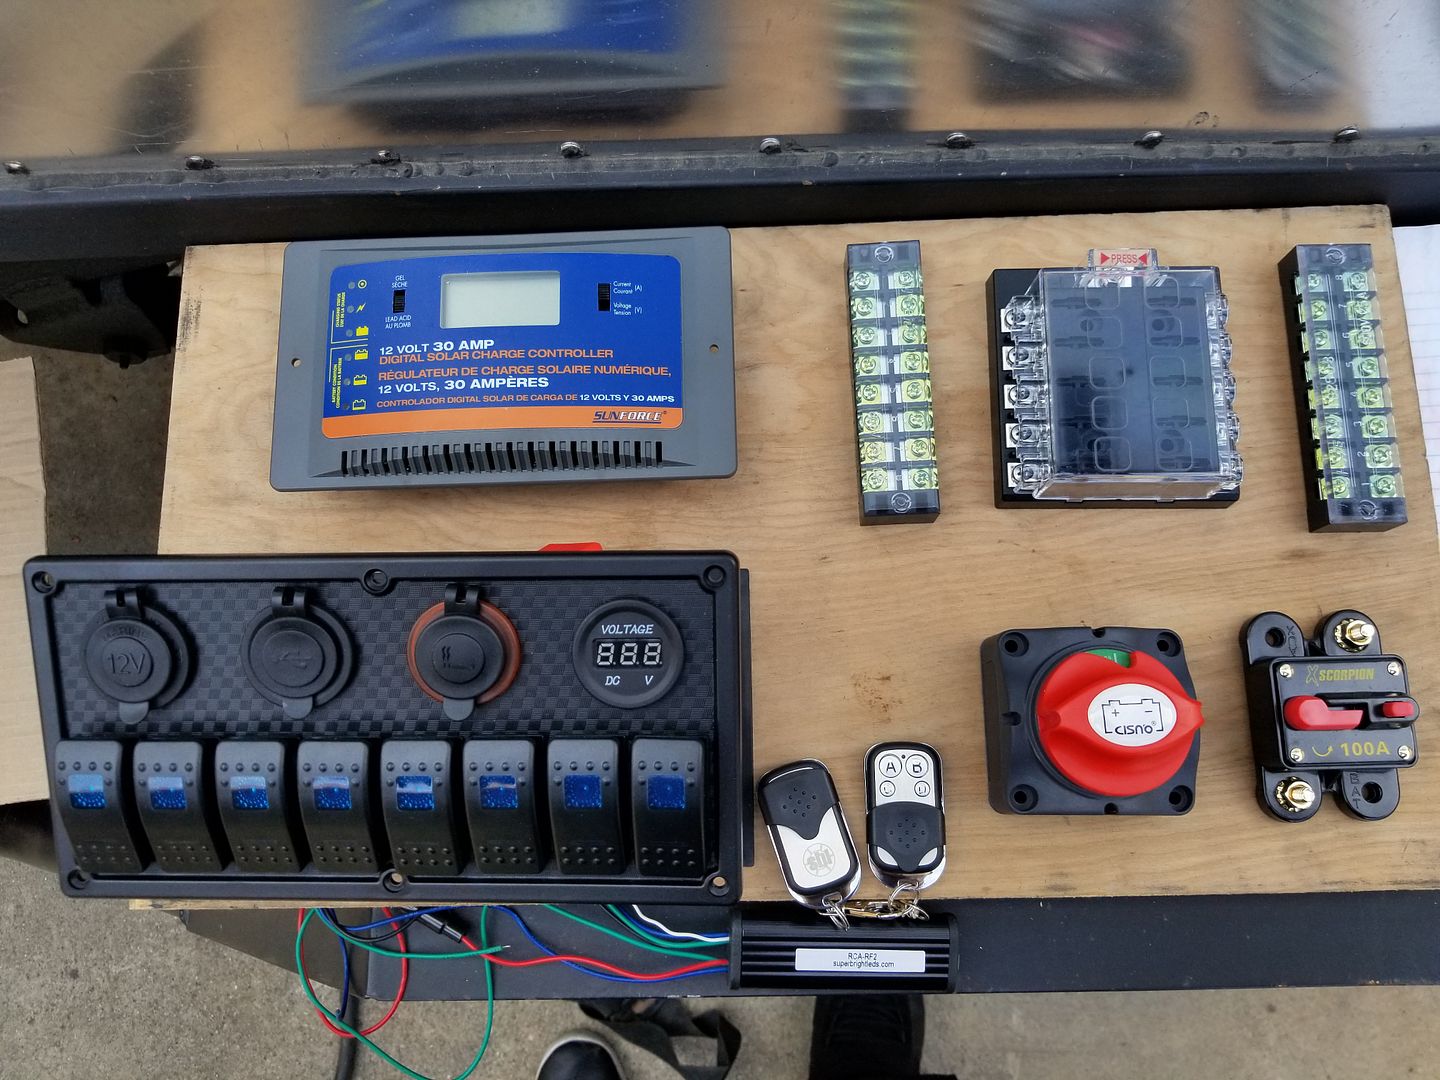
I got the last of my electrical parts shipped this weekend. Now it's time to figure out how to wire everything up. I gotta research what order to do this breaker, master on/off switch, and switch panel. I have 8 switches on there and I ordered 10 relays for each switch and ill have 2 left over.
I have my 100watt solar panel on the roof and wires for it are already routed into the cab. Also have a 12v wire coming from my 7 pole trailer harness as an AUX charging wire that i gotta*figure out how to integrate into all of this.
Here is a list of items that I'd like to wire up to this switch panel.*
1) 1GPM water pump
2) Propex HeatSource HS2000 forced air propane heater.*
3) Driver side LEDs ×3 (where the majority of my camp stuff sets up)
4) Passenger side LED ×1
5) Rear LEDs ×2
6) Front LED ×1
7) Rock lights (Undercarriage lighting) ×3*
8 ) Free for something i may want to add for future use.
And on top of all that I have a wireless relay with two keychain Remotes by*SuperBrightLEDs.com*that I'd like to hook all of those exterior lights up to as well. So we can turn on & off the lights from the inside of our Rooftop tent incase we hear something in our campsite in the middle of the night. But that may be overkill right there.
By the way feel free to share videos or diagrams showing how to properly wire this stuff up. That'll help me out a ton. Thanks!
-----------------------------------------------------------------------------------------------------------------------------------------------------------------------
All the electrical stuff. Plus that wireless relay with 2 remotes at the center bottom of the pic.
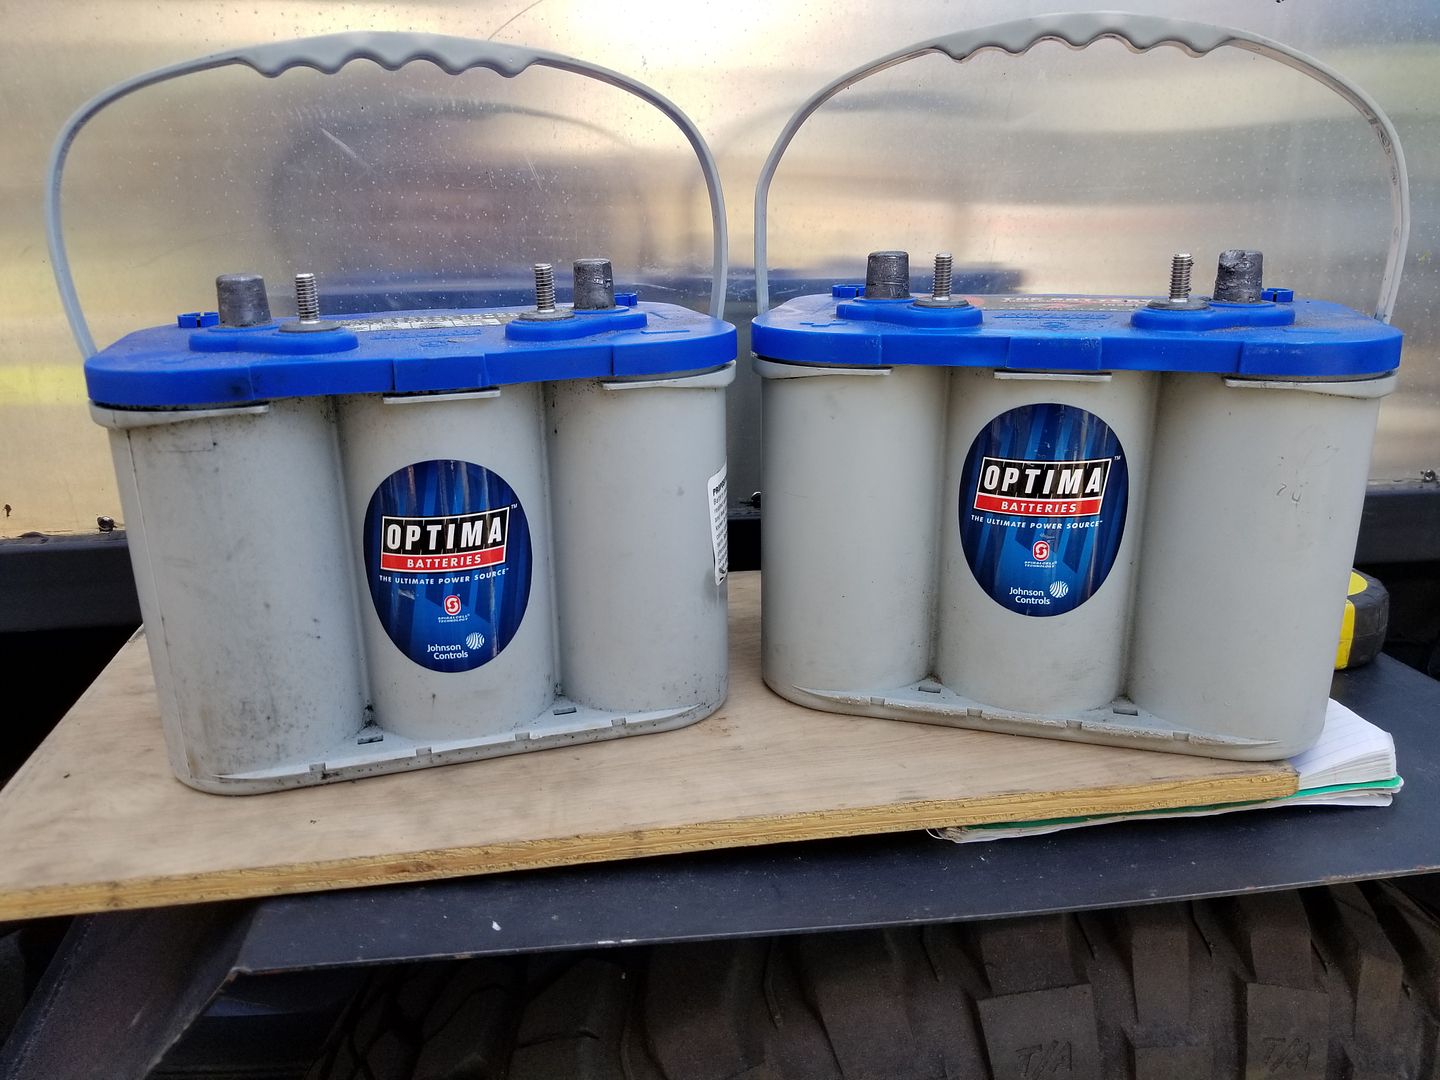
My battery bank
I've had this inverter for a few years now. I use it to run a small 3 gallon air compressor when i go offroad. I didnt wanna have to buy another one for the trailer so this is what i plan to use 3000 watt inverter. I believe it is 6000 peak watts. I may need to use a smaller inverter though. I have been told that the bigger the inverter the more power draw you have when you arent using it. Or something like you get less power draw for lets say charging a phone or using the outlet for a light when using a smaller inverter vs something huge like this one. We will see. I'm open to suggestions
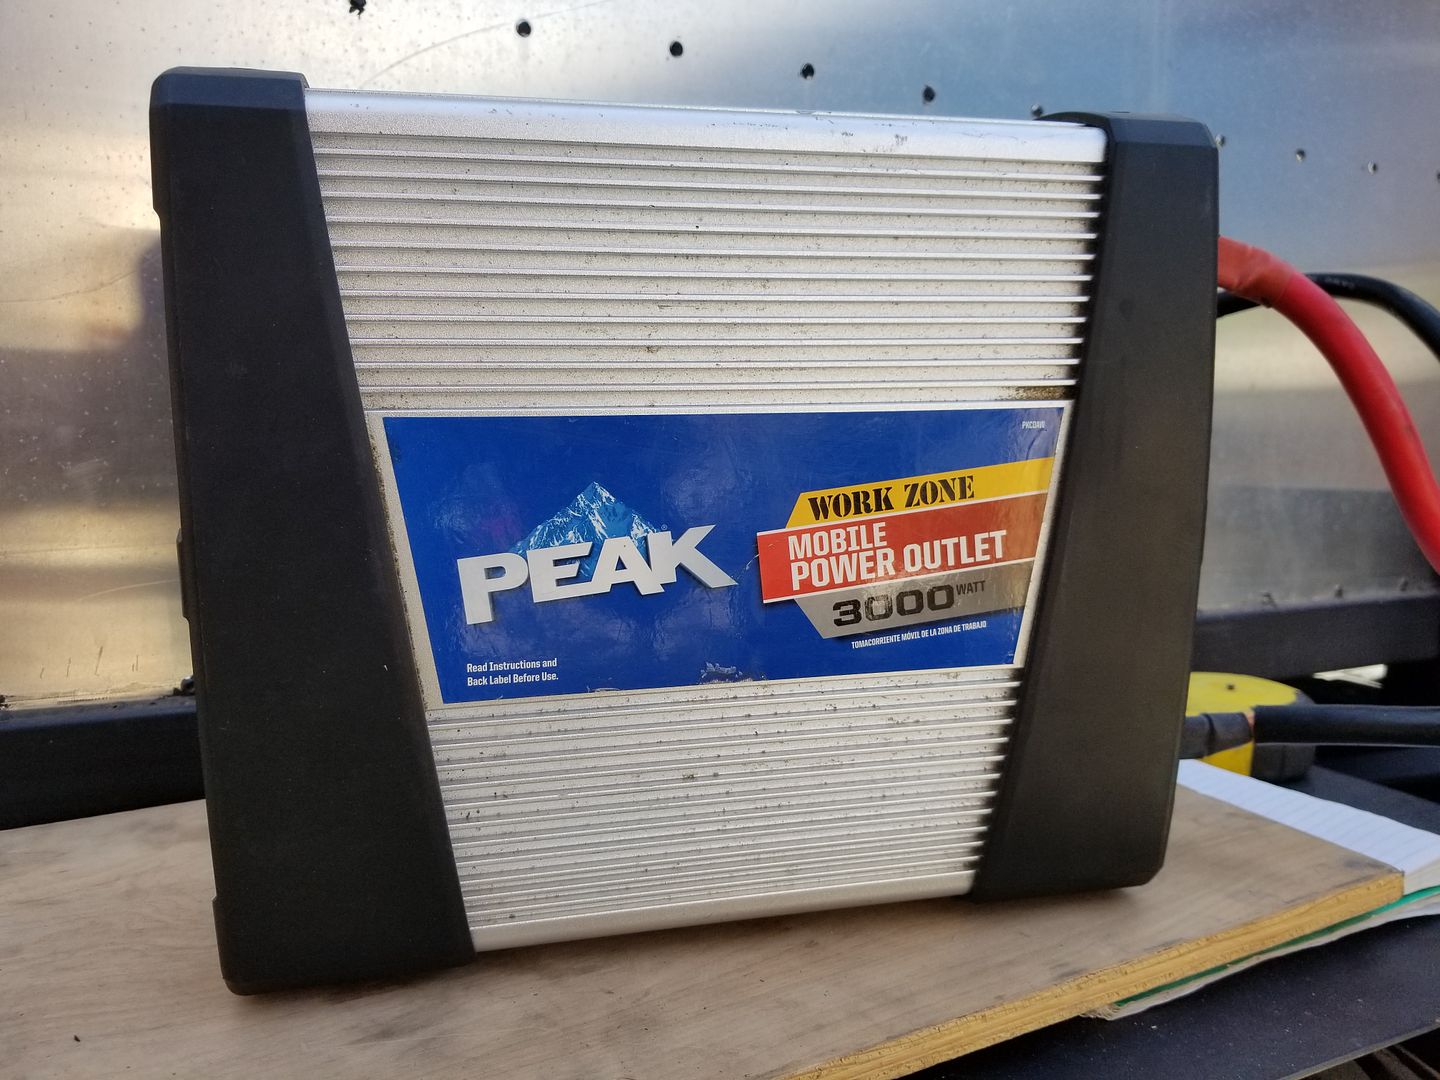
Cool thing about this one is that it has a remote on and off switch that can be mounted to my electrical panel too.*
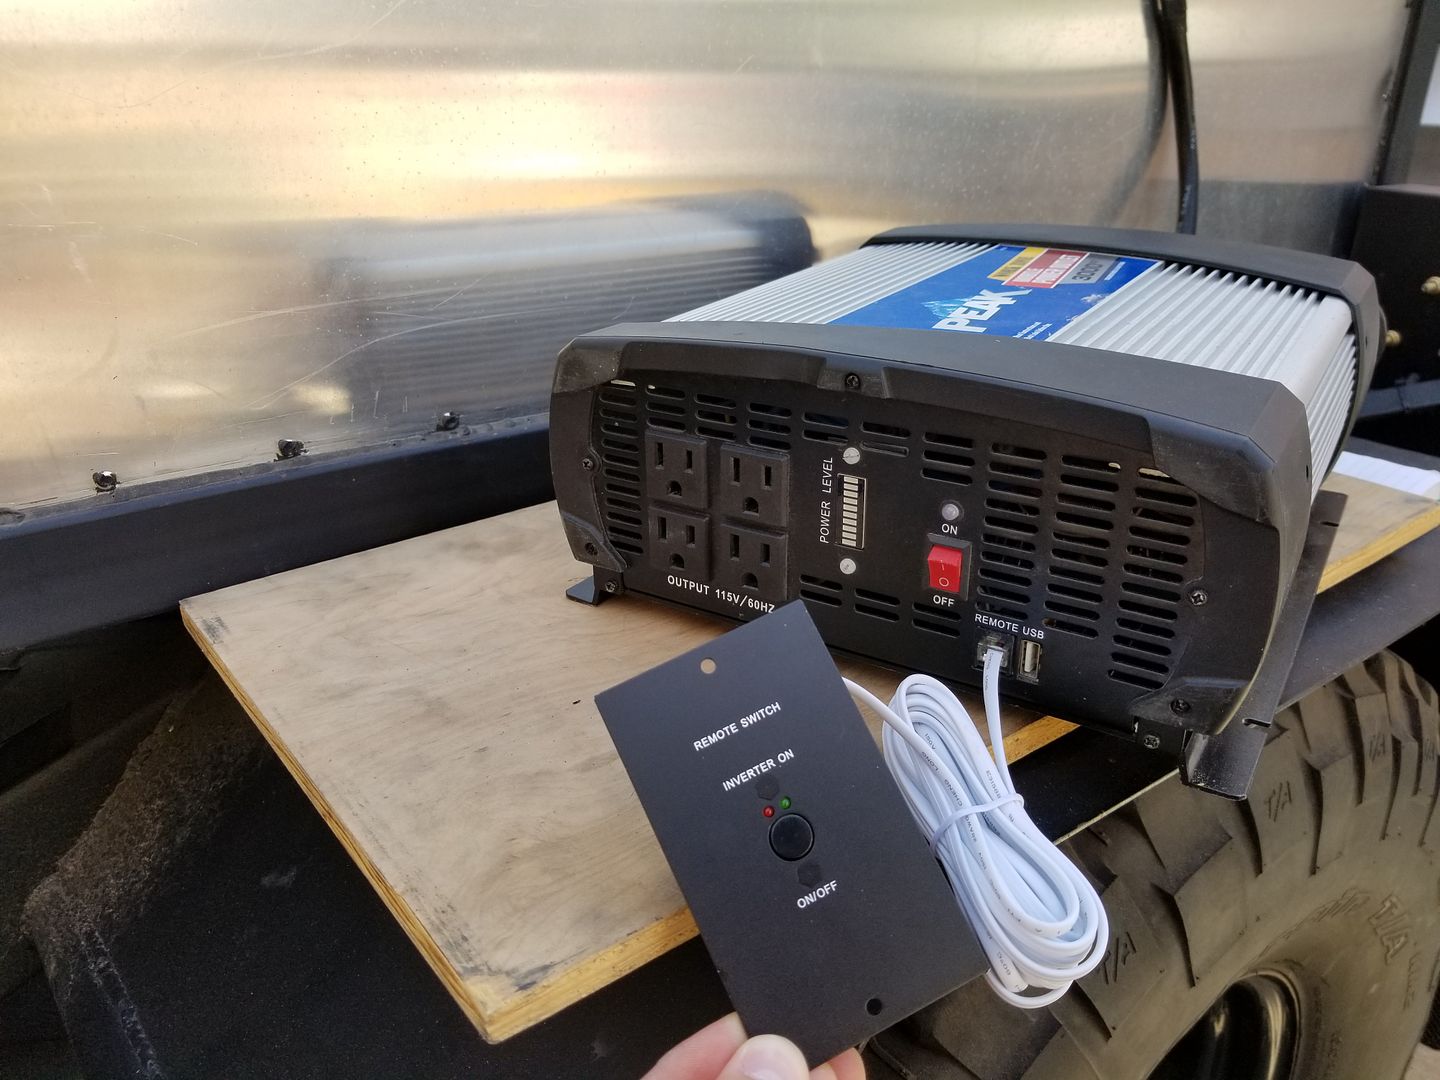
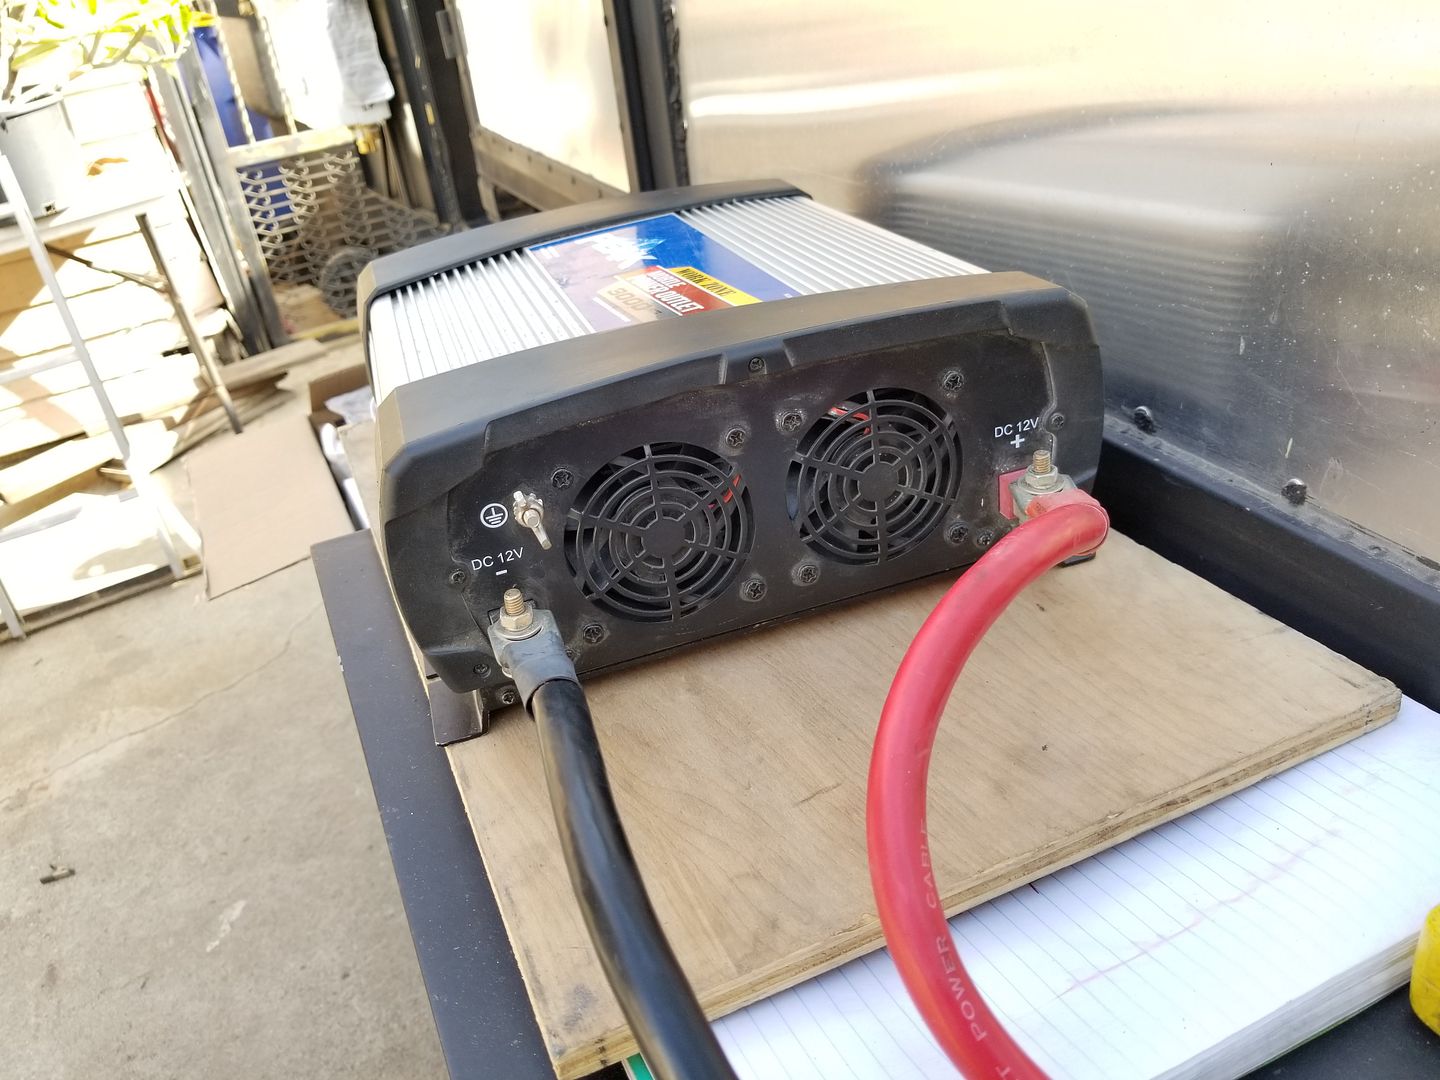
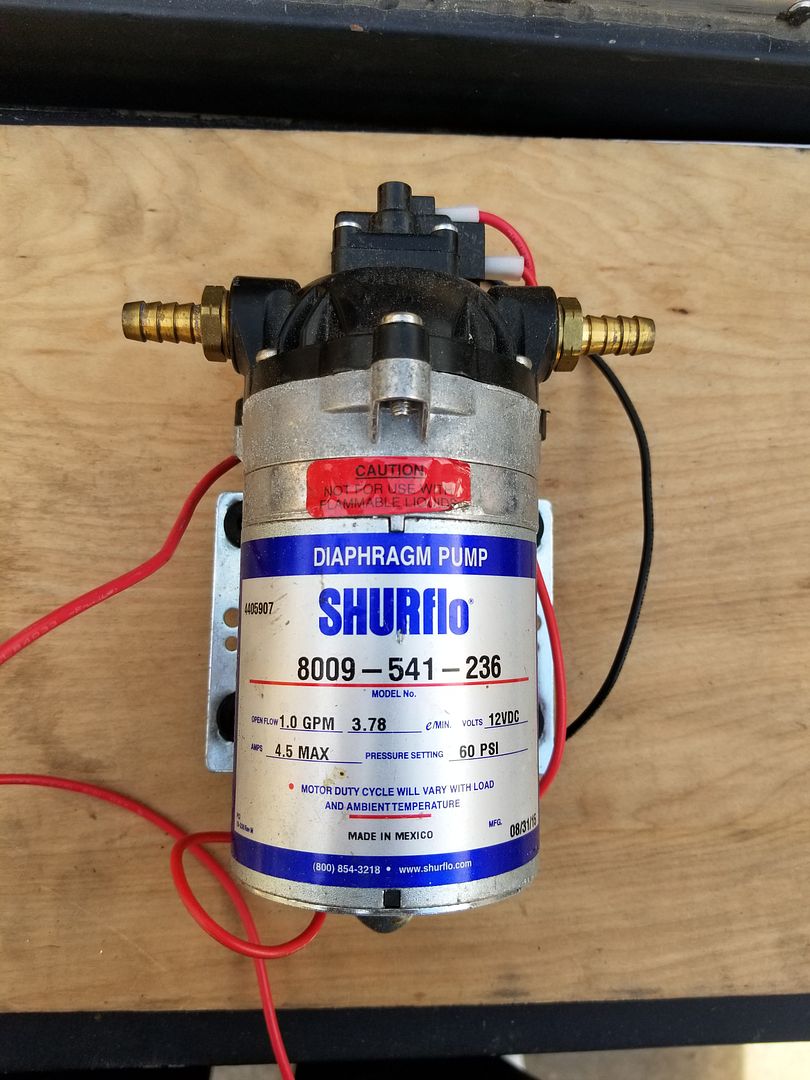
12v*1gpm water pump. Pumps at 60psi. Enough to have the correct water pressure to use with my EccoTemp water heater for my shower set up
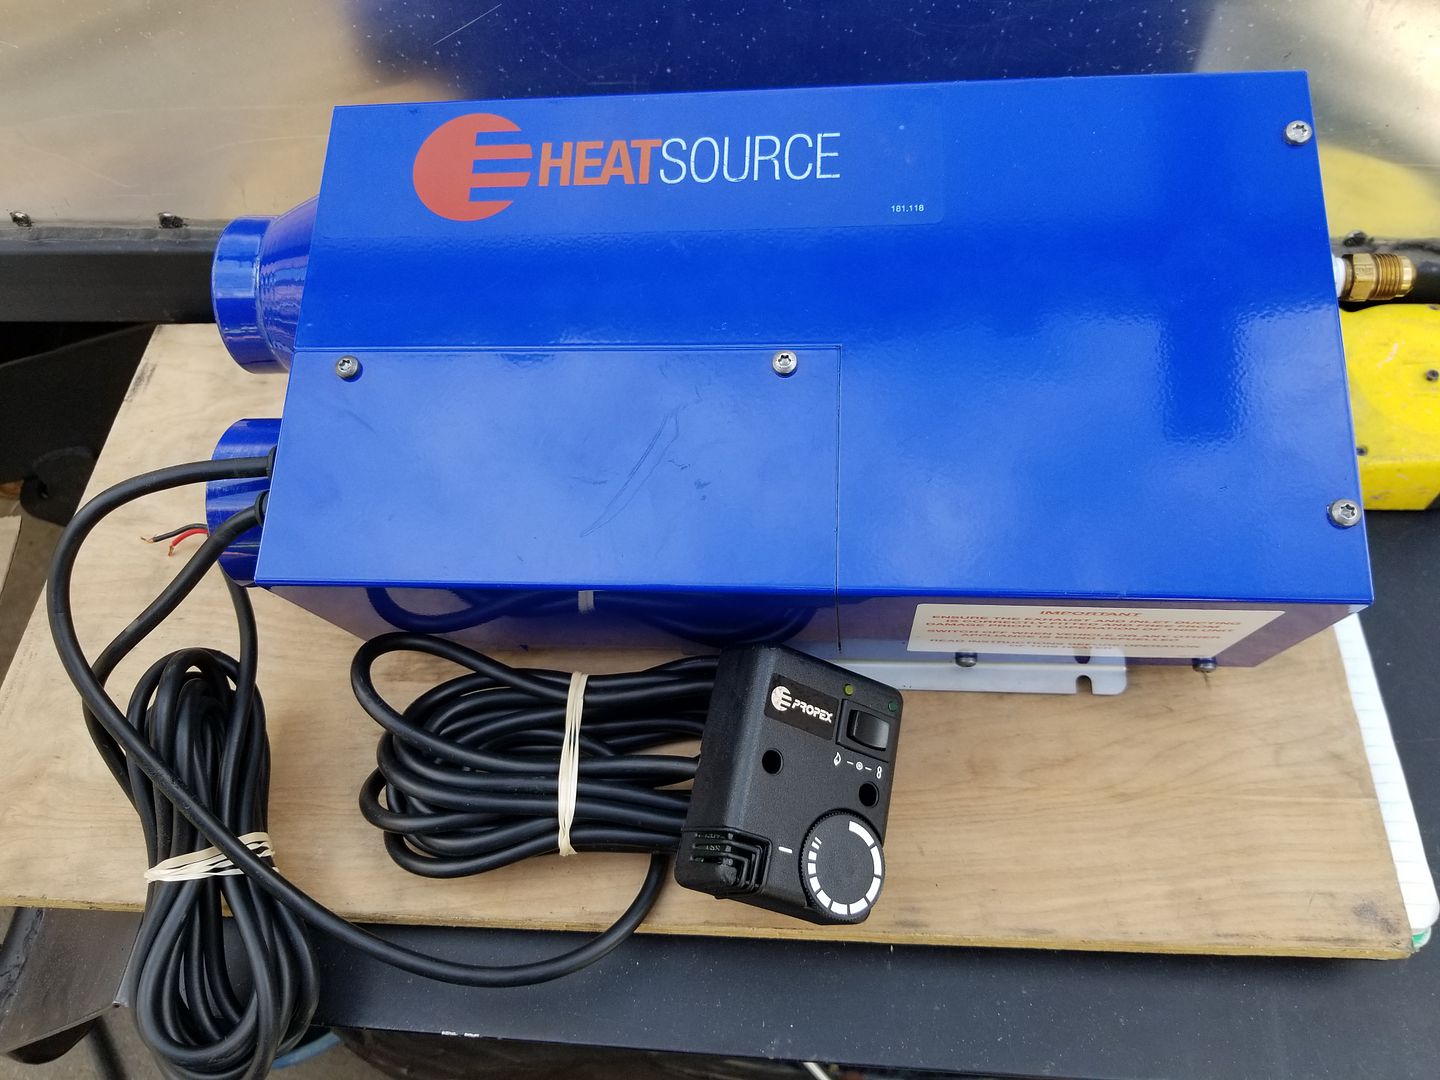
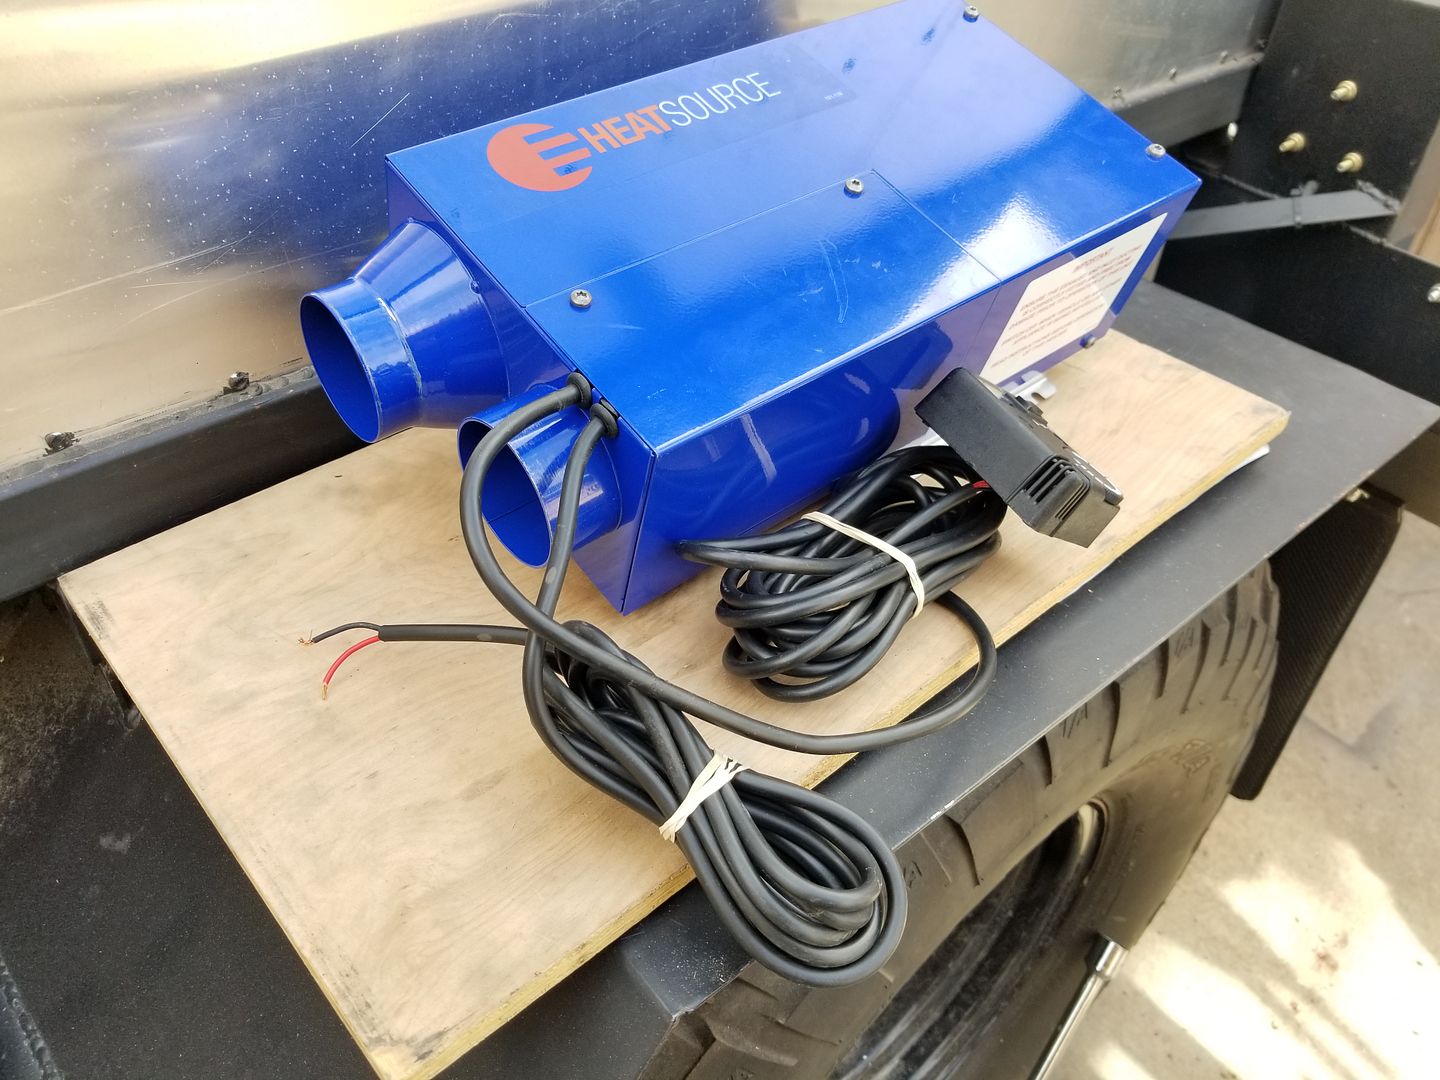
Propex Heatsource HS2000 force air propane heater. The black thing on the bottom is the thermostat.
Hot air out and return.
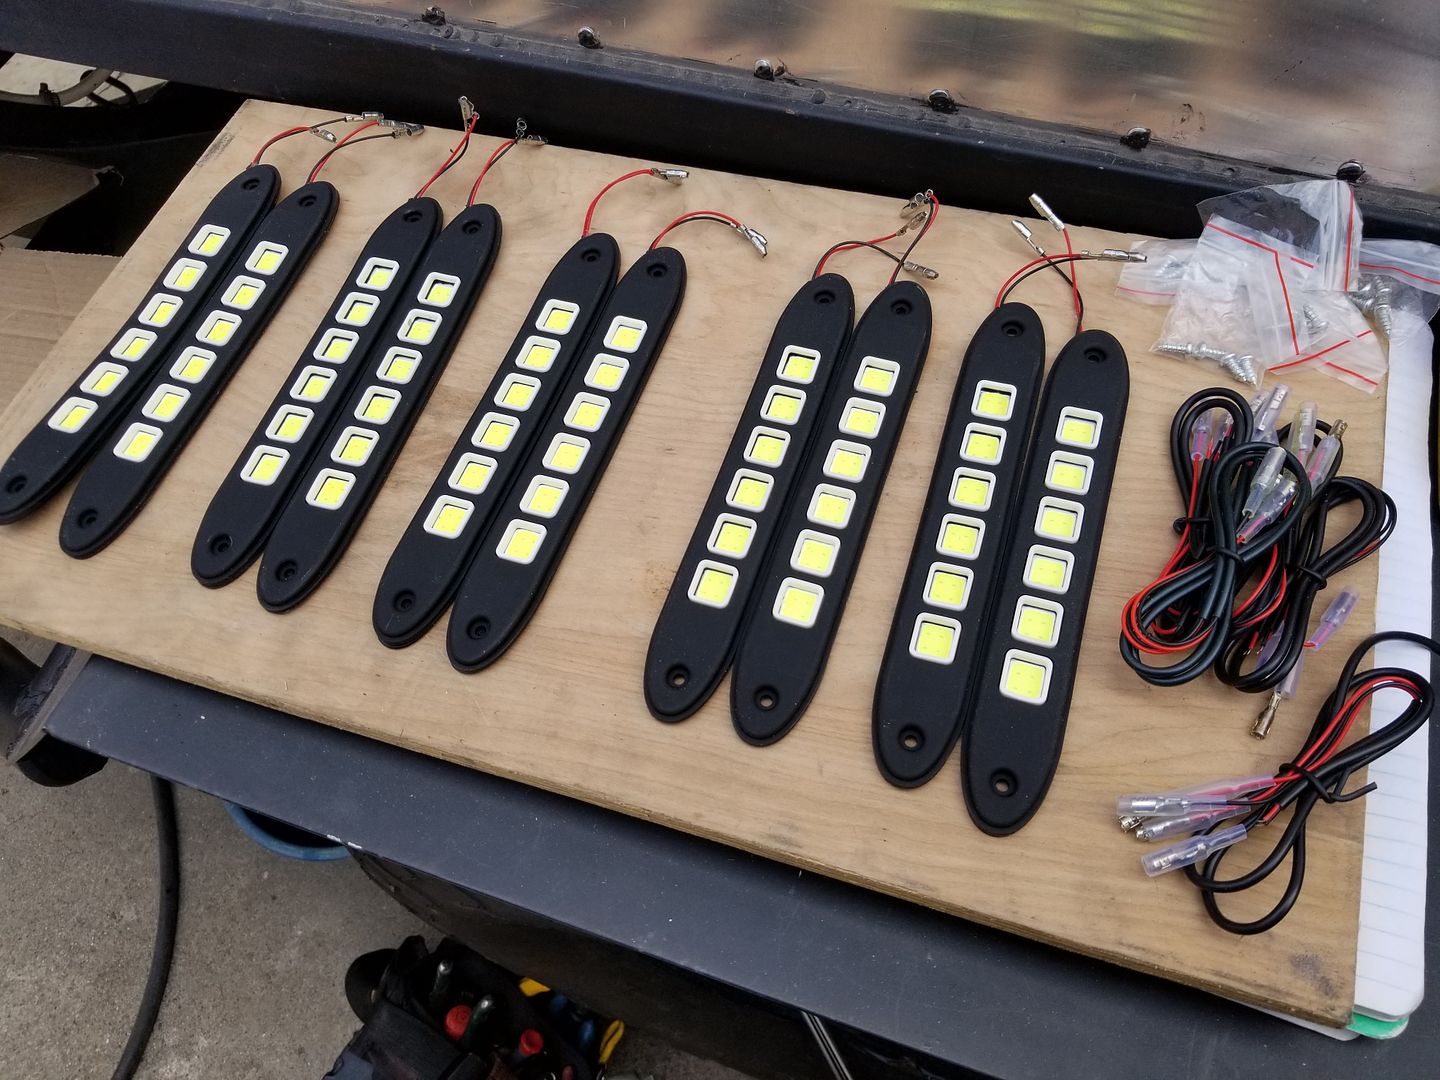
All4OffRoad LED rock lights that I'll be using for lighting the undercarriage and around the entire trailer.
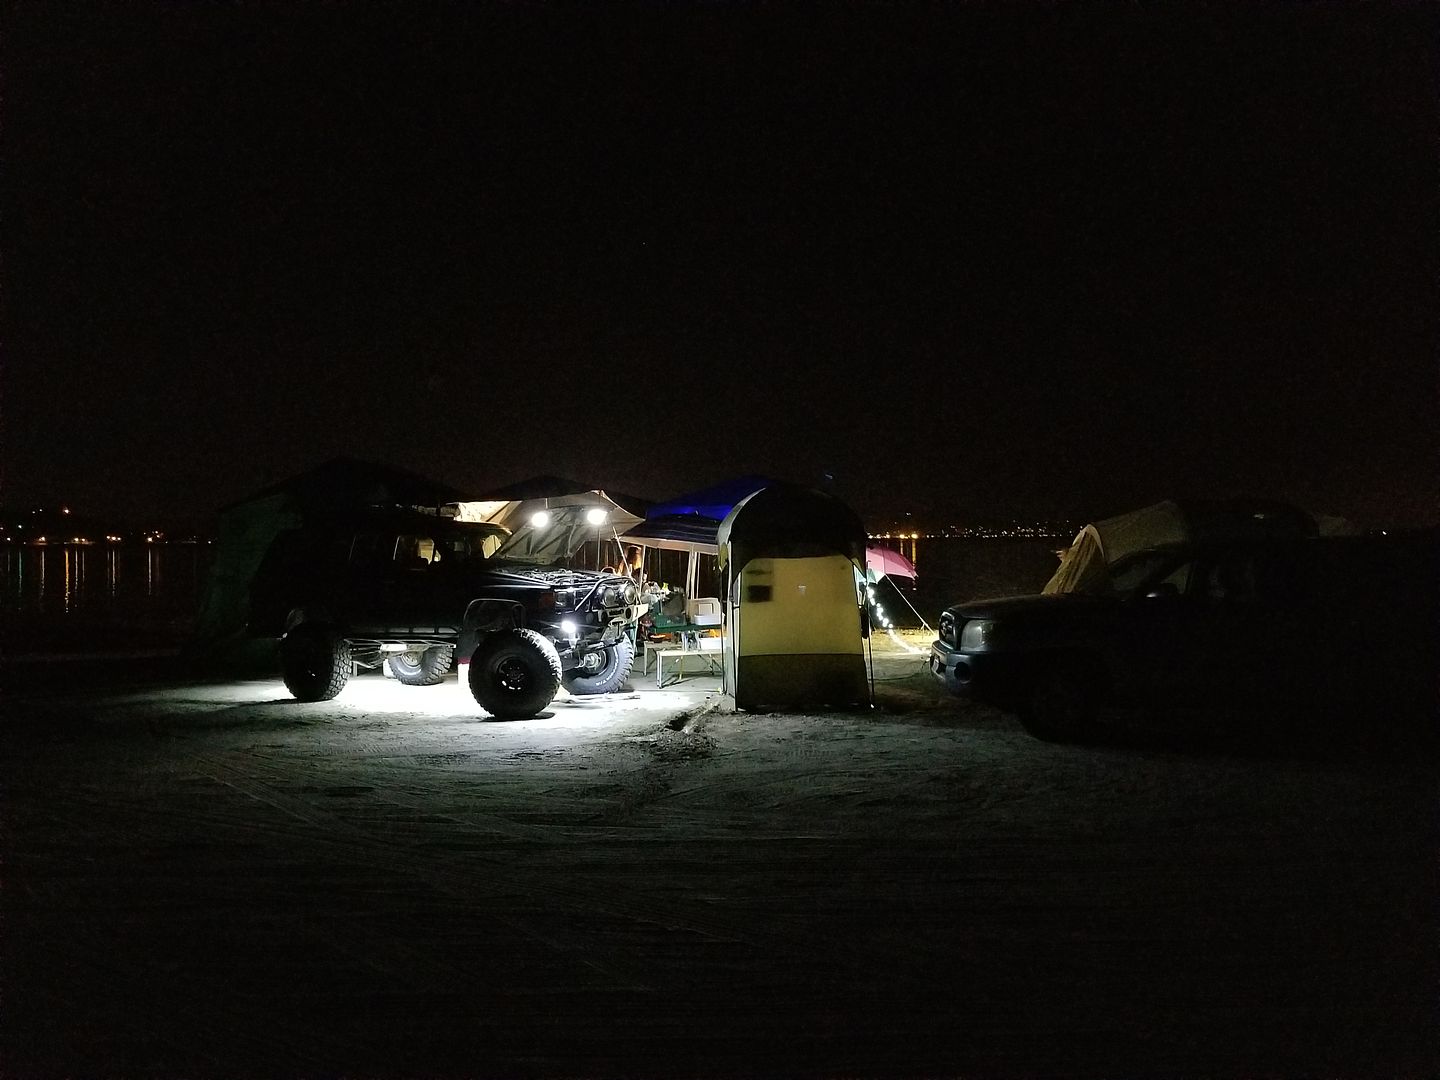
Just wanted to show how bright those LEDs are. I used those same lights underneath my truck. So this gives you an idea of how bright they are in the middle of the night
https://youtu.be/Wd96aghsXX0

And i also need to figure out a way to incorporate this*12v aux wire coming off the 7 pole trailer harness.*
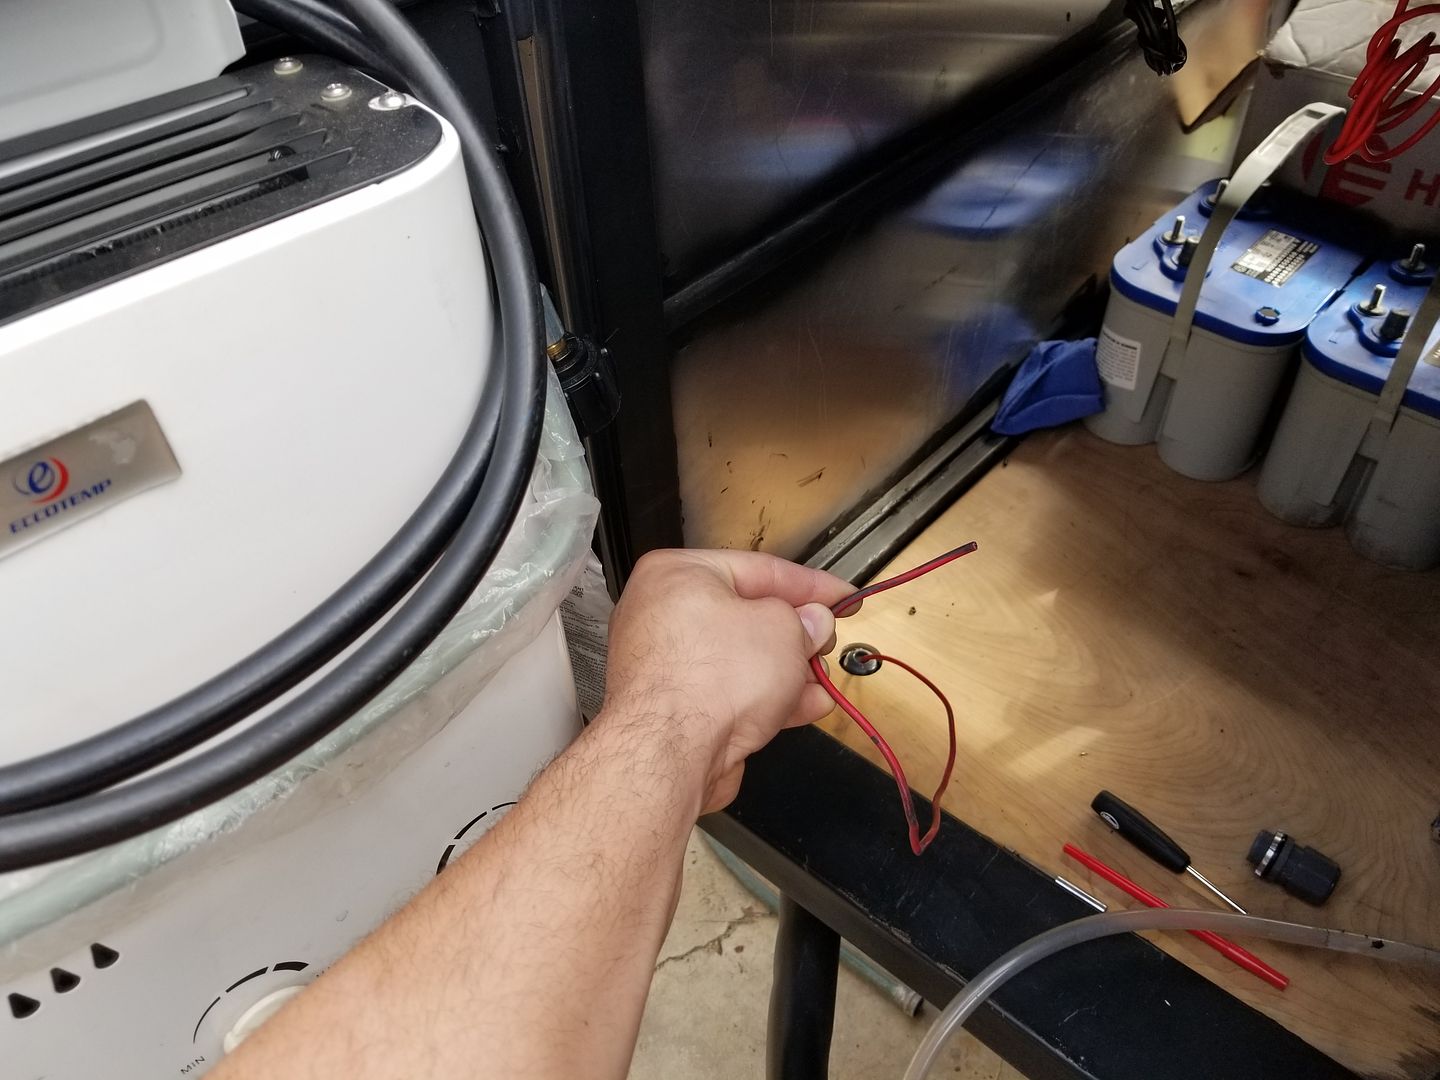
So rather then buy the SUPER NICE Cable gland like i used for the solar panel wires. I went this much cheaper one from Home depot. Only this one is for electrical conduit but it works just fine. The rubber piece inside tightens on the cable as you screw the head and still creates a water tight seal. Only difference is that i used a 1/2" one instead of this 3/4". I passed the 12v wire in front the bottom side of the cab since thats where all the 7pole harness wires are at. then i siliconed around the cable gland underneath and on the inside portion to add on to the water tight seal. This baby only costed me about 2 bucks.
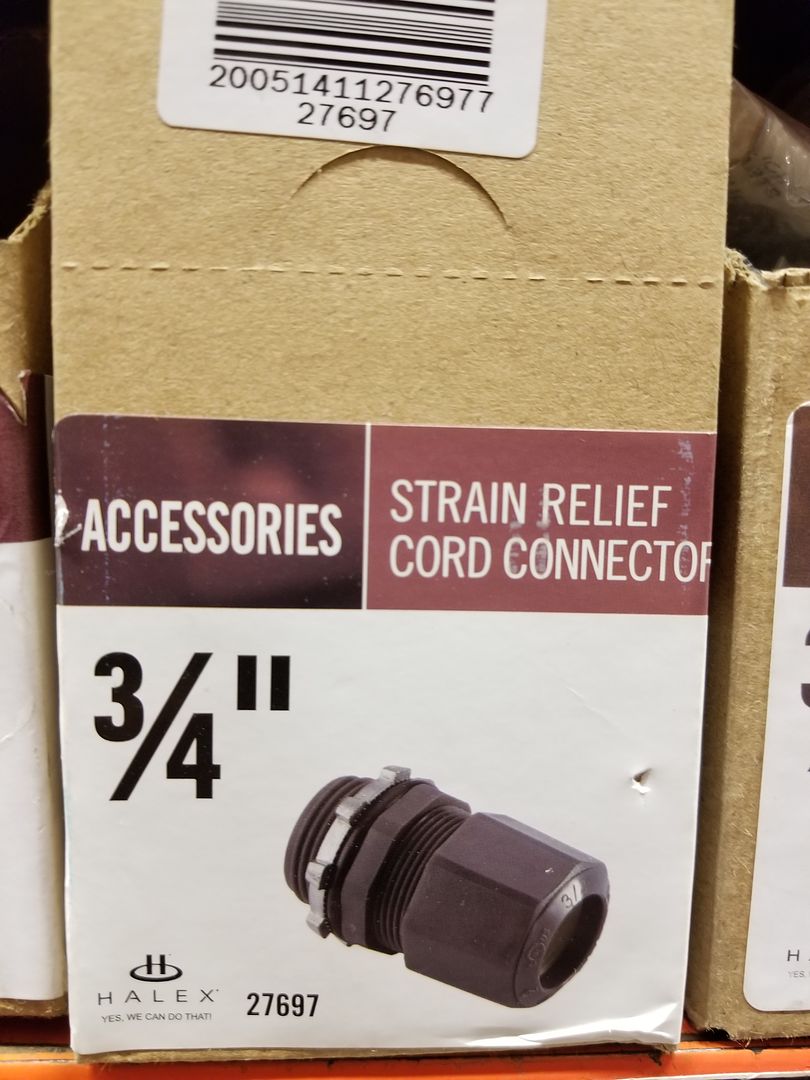
Here is a video of that gland taken apart.
https://youtu.be/7BoDFSt9Qco
and in prepping for all the interior electrical stuff i decided to add a couple of feet of wire to the solar panel wires tyo have it ready for when i hook everything up.*
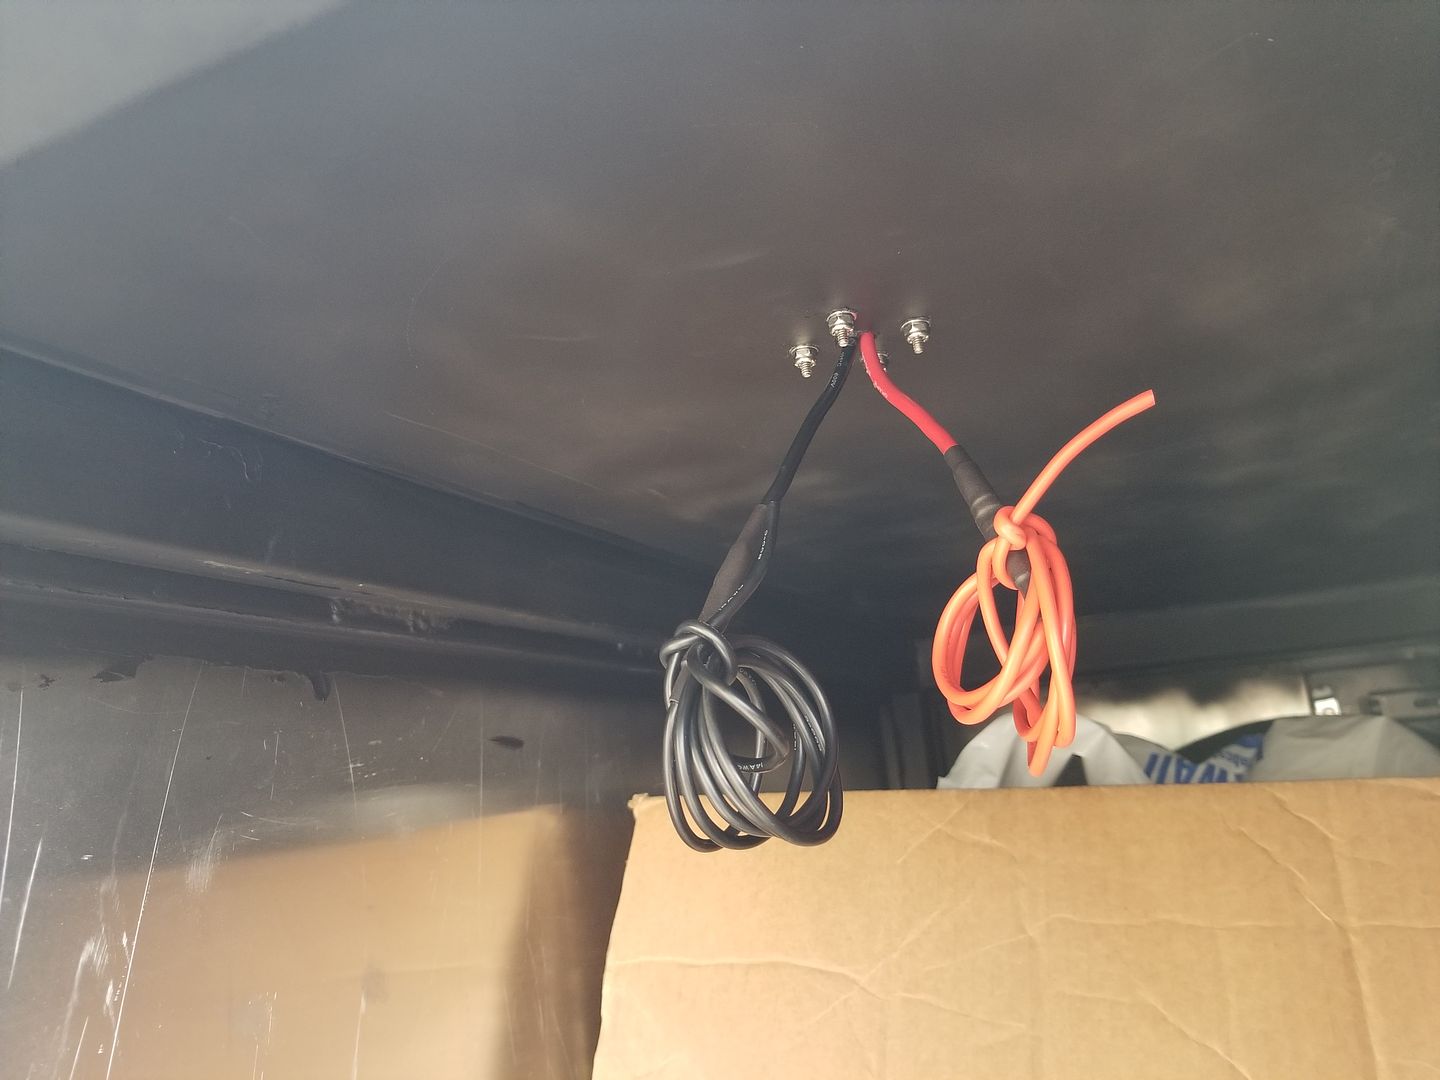
I have my 100watt solar panel on the roof and wires for it are already routed into the cab. Also have a 12v wire coming from my 7 pole trailer harness as an AUX charging wire that i gotta*figure out how to integrate into all of this.
Here is a list of items that I'd like to wire up to this switch panel.*
1) 1GPM water pump
2) Propex HeatSource HS2000 forced air propane heater.*
3) Driver side LEDs ×3 (where the majority of my camp stuff sets up)
4) Passenger side LED ×1
5) Rear LEDs ×2
6) Front LED ×1
7) Rock lights (Undercarriage lighting) ×3*
8 ) Free for something i may want to add for future use.
And on top of all that I have a wireless relay with two keychain Remotes by*SuperBrightLEDs.com*that I'd like to hook all of those exterior lights up to as well. So we can turn on & off the lights from the inside of our Rooftop tent incase we hear something in our campsite in the middle of the night. But that may be overkill right there.
By the way feel free to share videos or diagrams showing how to properly wire this stuff up. That'll help me out a ton. Thanks!
-----------------------------------------------------------------------------------------------------------------------------------------------------------------------
All the electrical stuff. Plus that wireless relay with 2 remotes at the center bottom of the pic.

My battery bank

I've had this inverter for a few years now. I use it to run a small 3 gallon air compressor when i go offroad. I didnt wanna have to buy another one for the trailer so this is what i plan to use 3000 watt inverter. I believe it is 6000 peak watts. I may need to use a smaller inverter though. I have been told that the bigger the inverter the more power draw you have when you arent using it. Or something like you get less power draw for lets say charging a phone or using the outlet for a light when using a smaller inverter vs something huge like this one. We will see. I'm open to suggestions

Cool thing about this one is that it has a remote on and off switch that can be mounted to my electrical panel too.*


12v*1gpm water pump. Pumps at 60psi. Enough to have the correct water pressure to use with my EccoTemp water heater for my shower set up

Propex Heatsource HS2000 force air propane heater. The black thing on the bottom is the thermostat.

Hot air out and return.

All4OffRoad LED rock lights that I'll be using for lighting the undercarriage and around the entire trailer.

Just wanted to show how bright those LEDs are. I used those same lights underneath my truck. So this gives you an idea of how bright they are in the middle of the night
https://youtu.be/Wd96aghsXX0


And i also need to figure out a way to incorporate this*12v aux wire coming off the 7 pole trailer harness.*

So rather then buy the SUPER NICE Cable gland like i used for the solar panel wires. I went this much cheaper one from Home depot. Only this one is for electrical conduit but it works just fine. The rubber piece inside tightens on the cable as you screw the head and still creates a water tight seal. Only difference is that i used a 1/2" one instead of this 3/4". I passed the 12v wire in front the bottom side of the cab since thats where all the 7pole harness wires are at. then i siliconed around the cable gland underneath and on the inside portion to add on to the water tight seal. This baby only costed me about 2 bucks.

Here is a video of that gland taken apart.
https://youtu.be/7BoDFSt9Qco
and in prepping for all the interior electrical stuff i decided to add a couple of feet of wire to the solar panel wires tyo have it ready for when i hook everything up.*

Last edited:
Redeth005
Adventurer
After what seems like 2 years I was finally able to get around to installing the Propex heater onto my trailer. I hard mounted it to the steel floor rather then onto the wood. Which called for machined screws and nylon lock washers to secure it into place. Here are all the pix i took.*
Gotta start with some measurements using the left side because the right side wasn't completely square.
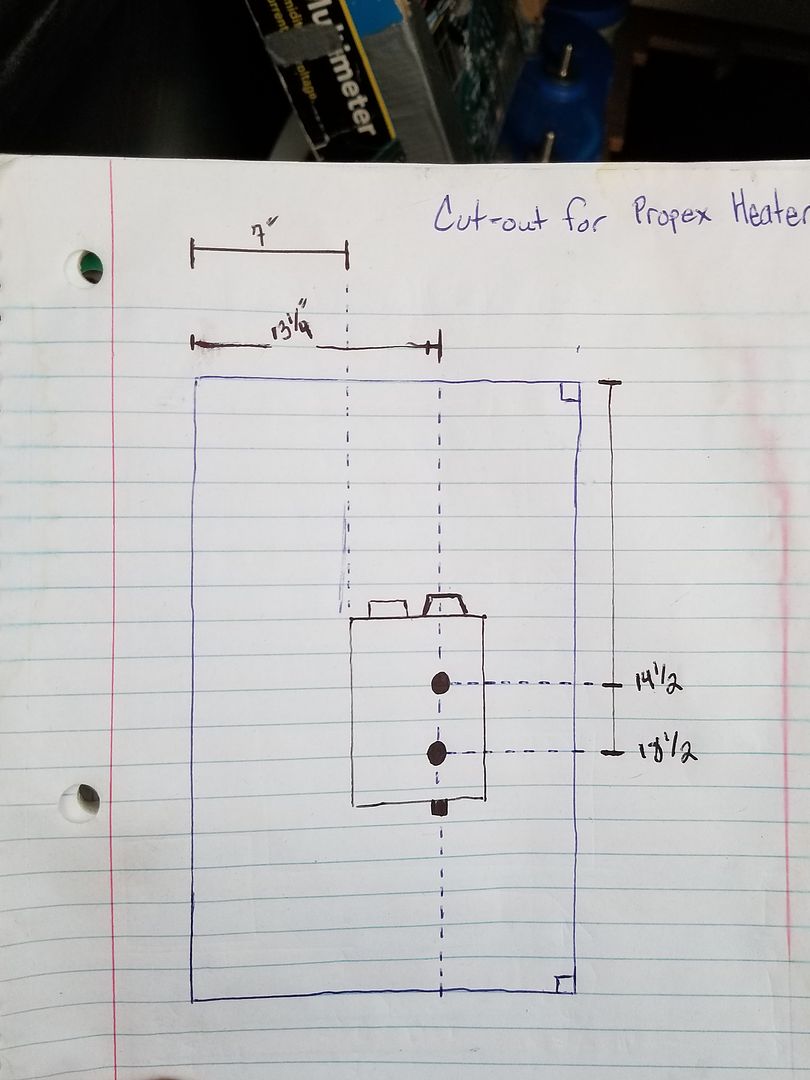
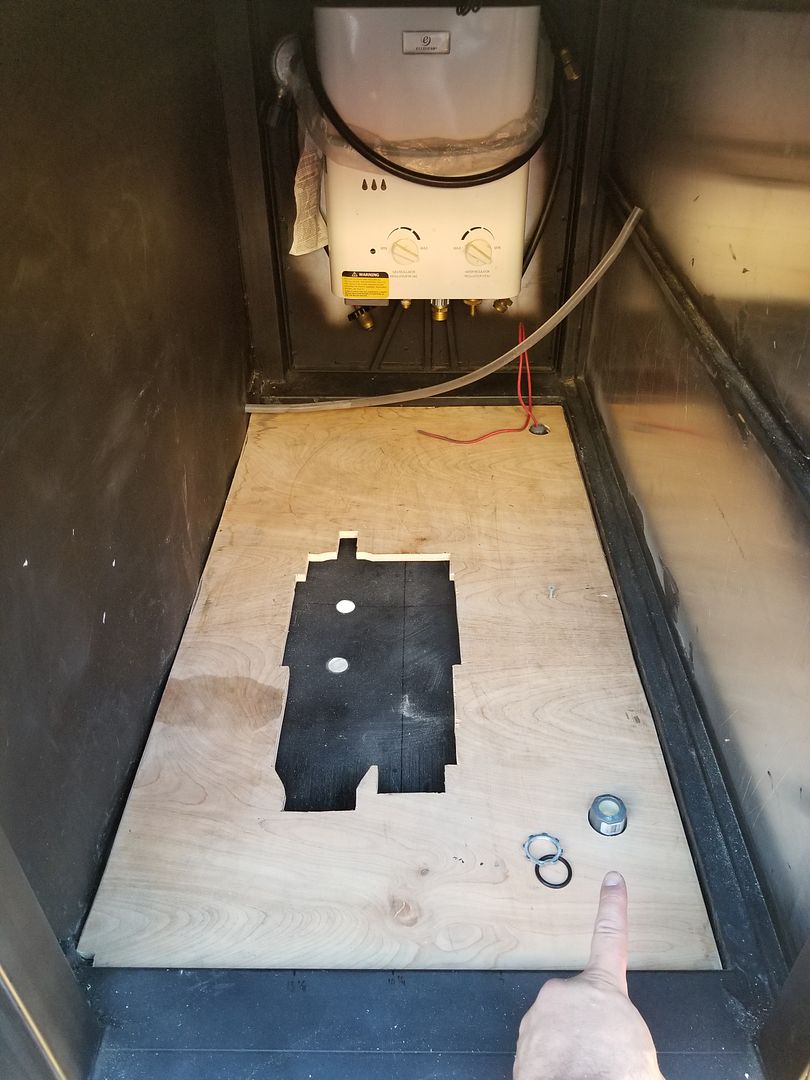
Drilled the holes completely through both the wood and the steel floor to make sure they mirror each other. Followed by making the cut out for the entire heater unit.
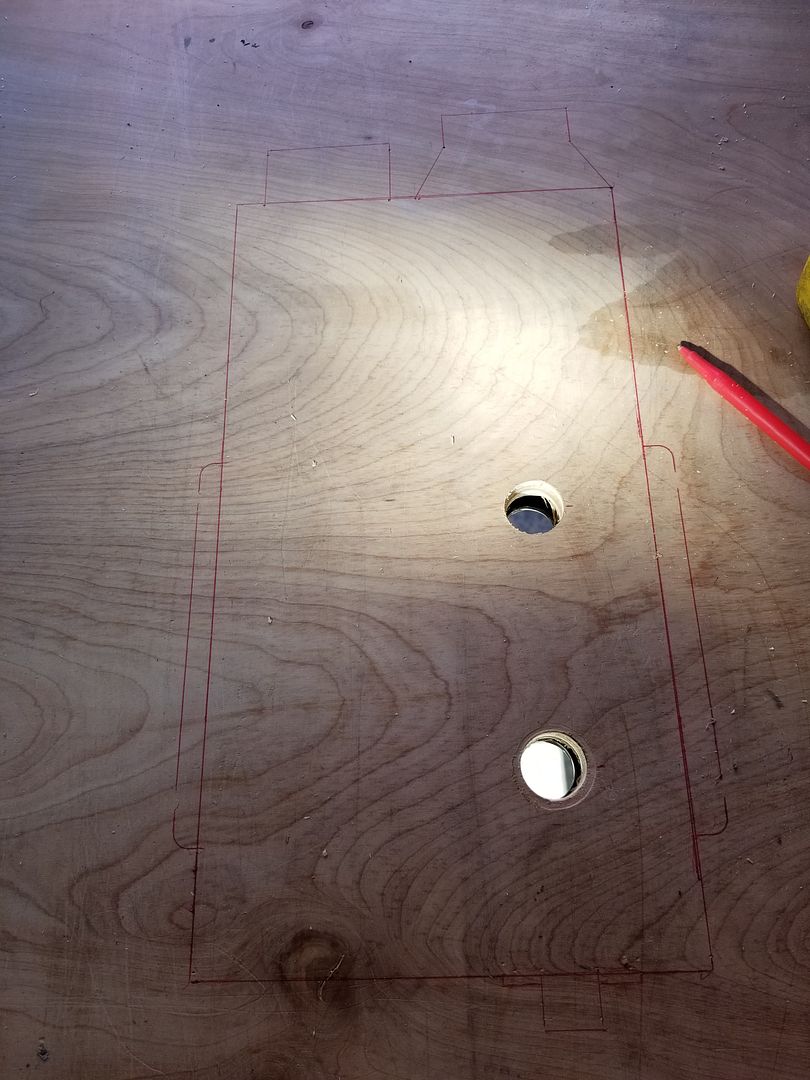
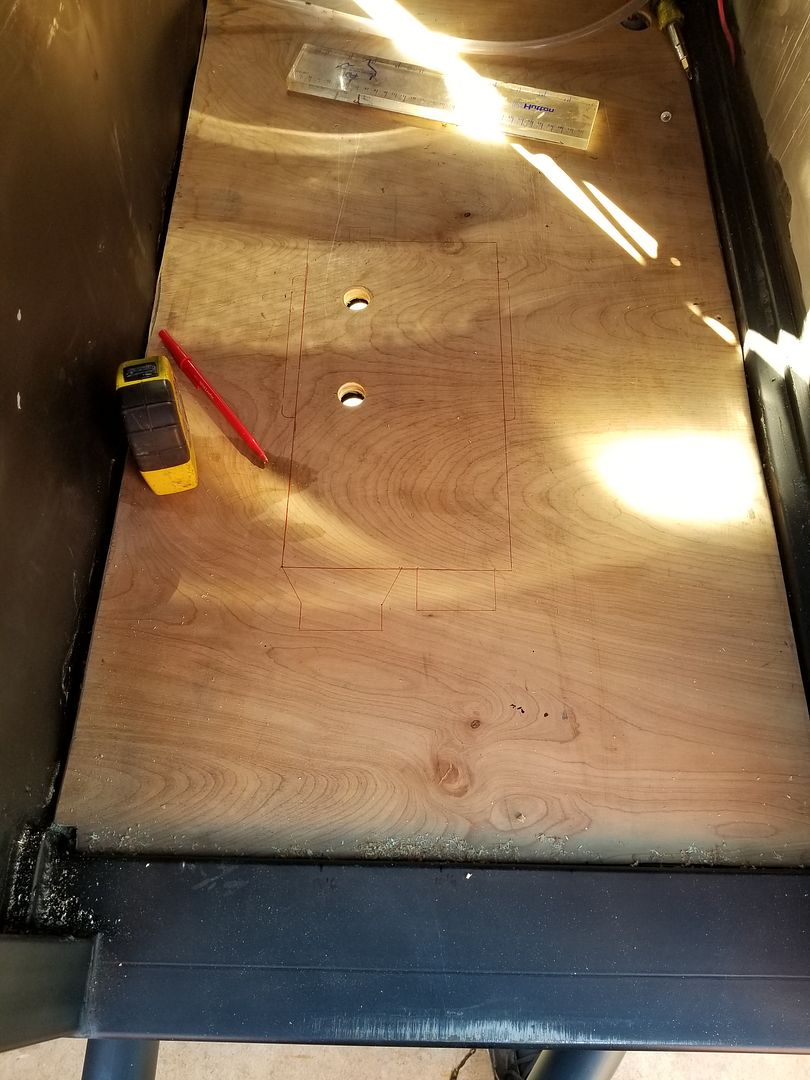
But cutting it this way i can remove the wood floor in case for some reason the front compartment springs up a leak. this way i can remove the future cabinet and the wood floor to clean it up.*
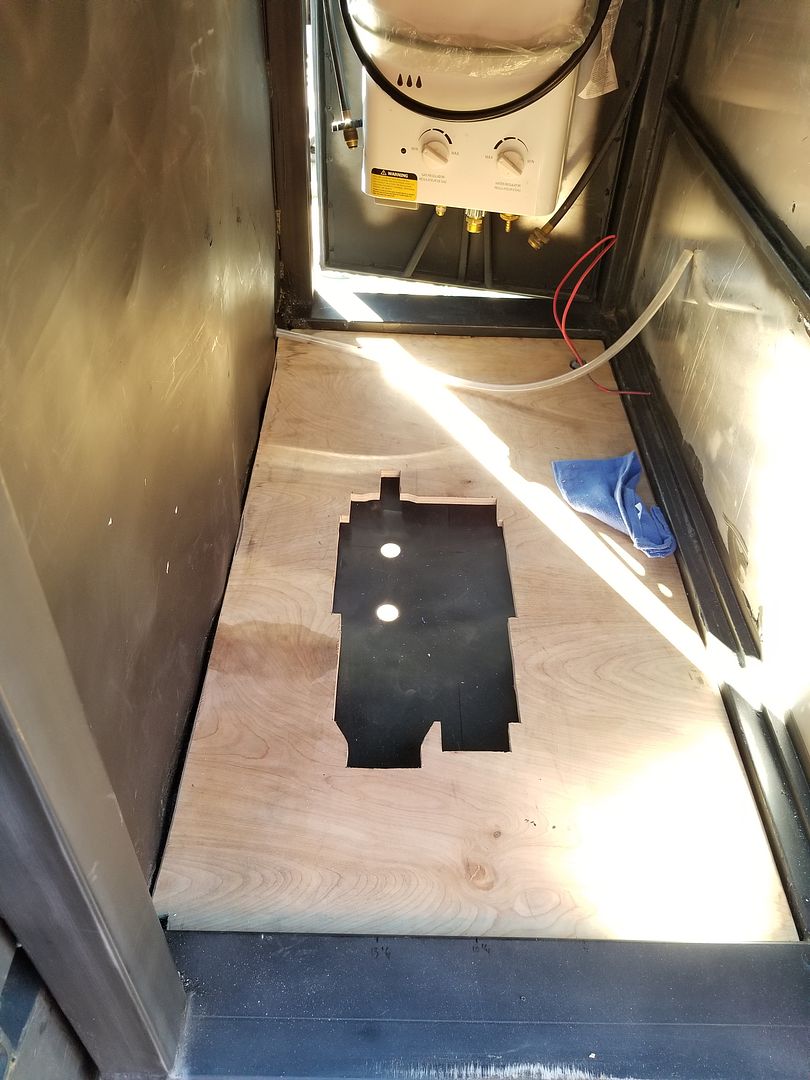
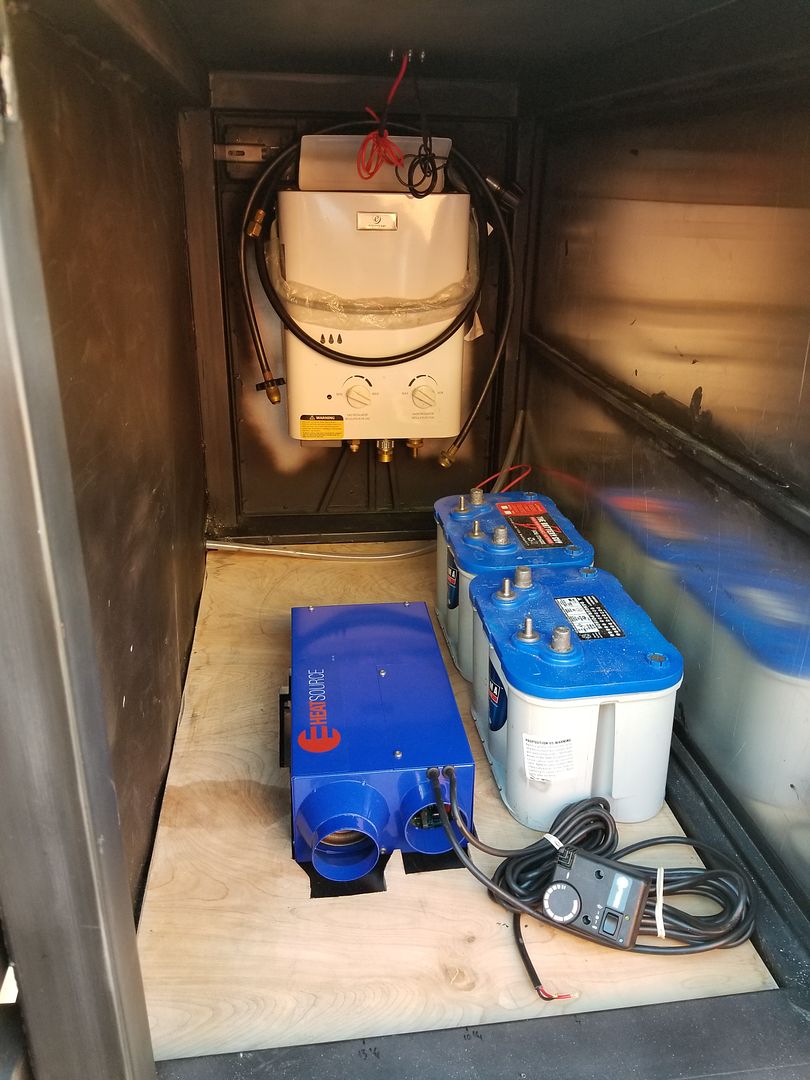
Perfect fit
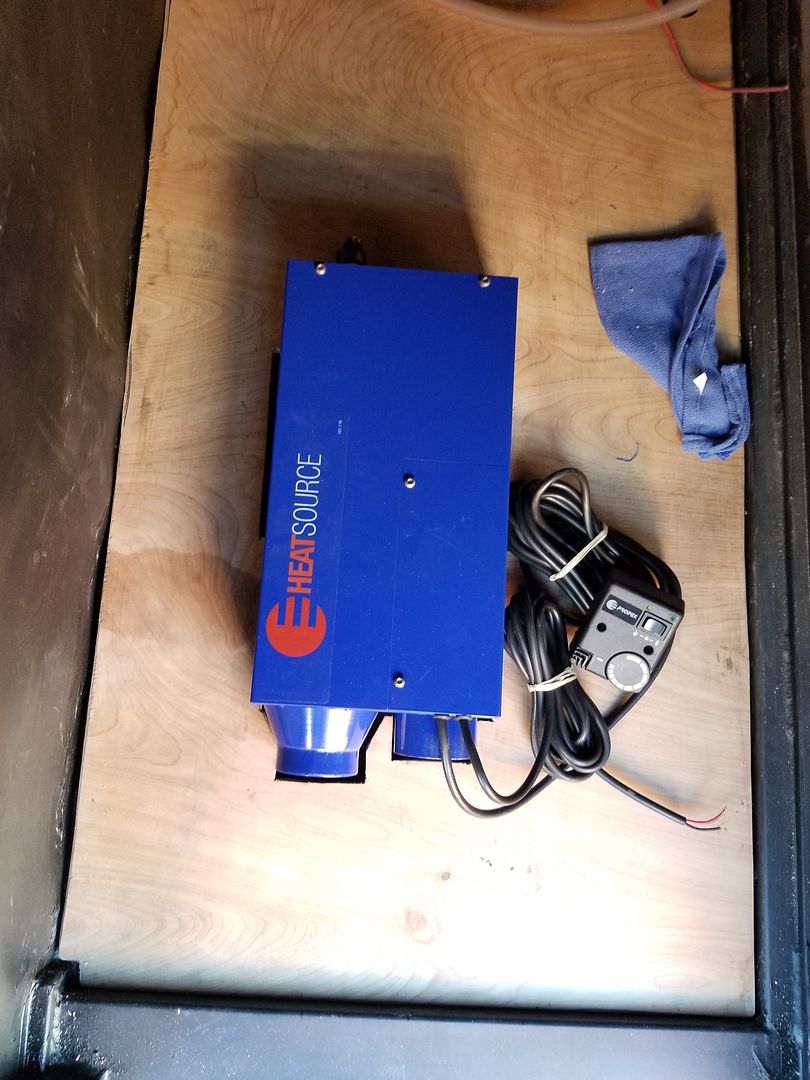
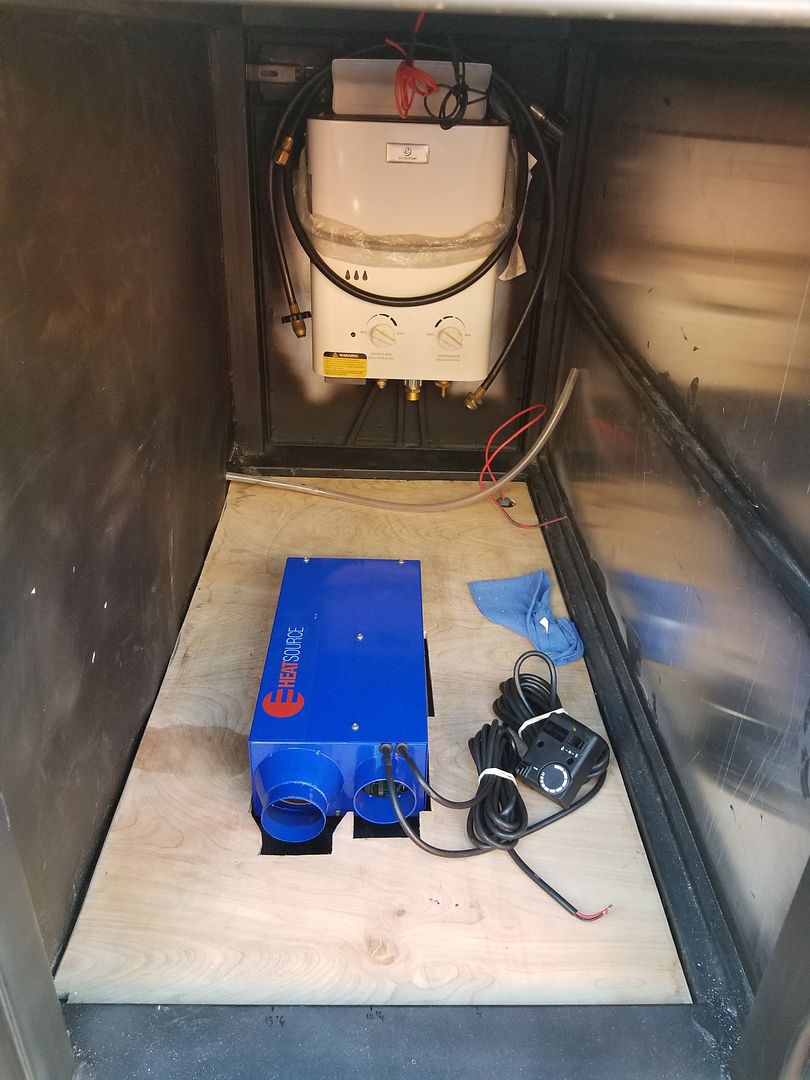
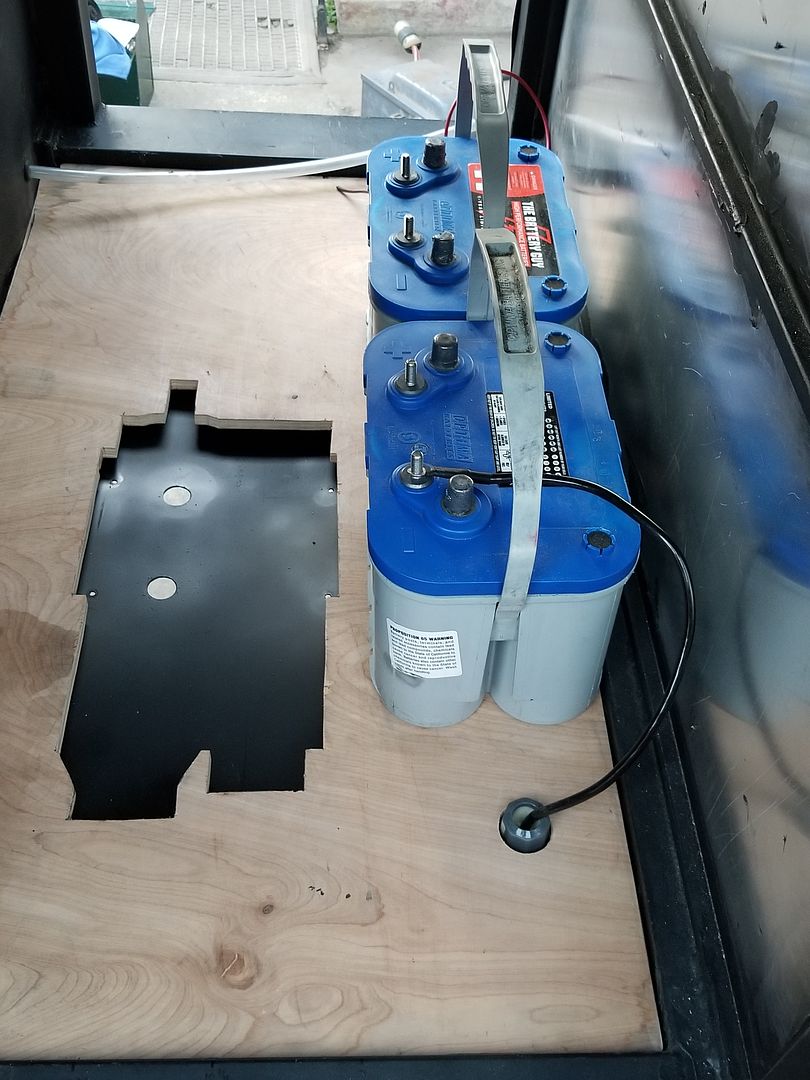
Both batteries will be mounted in this fashion to keep the weight even in the front.*
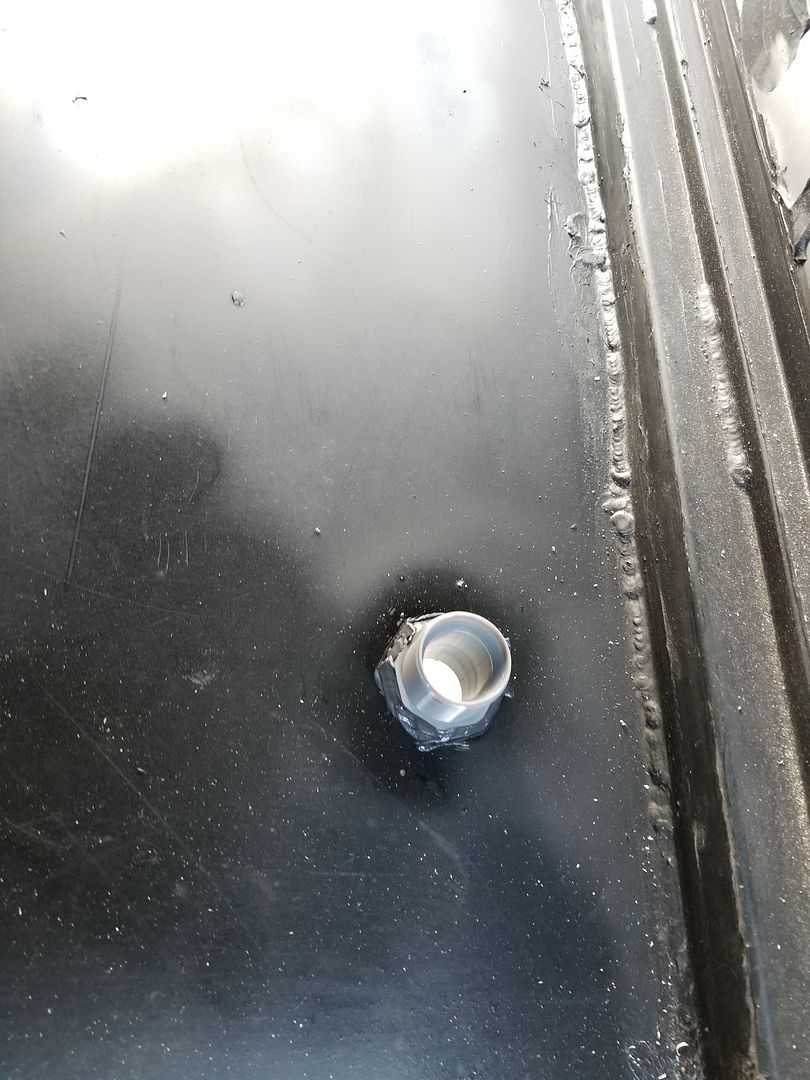
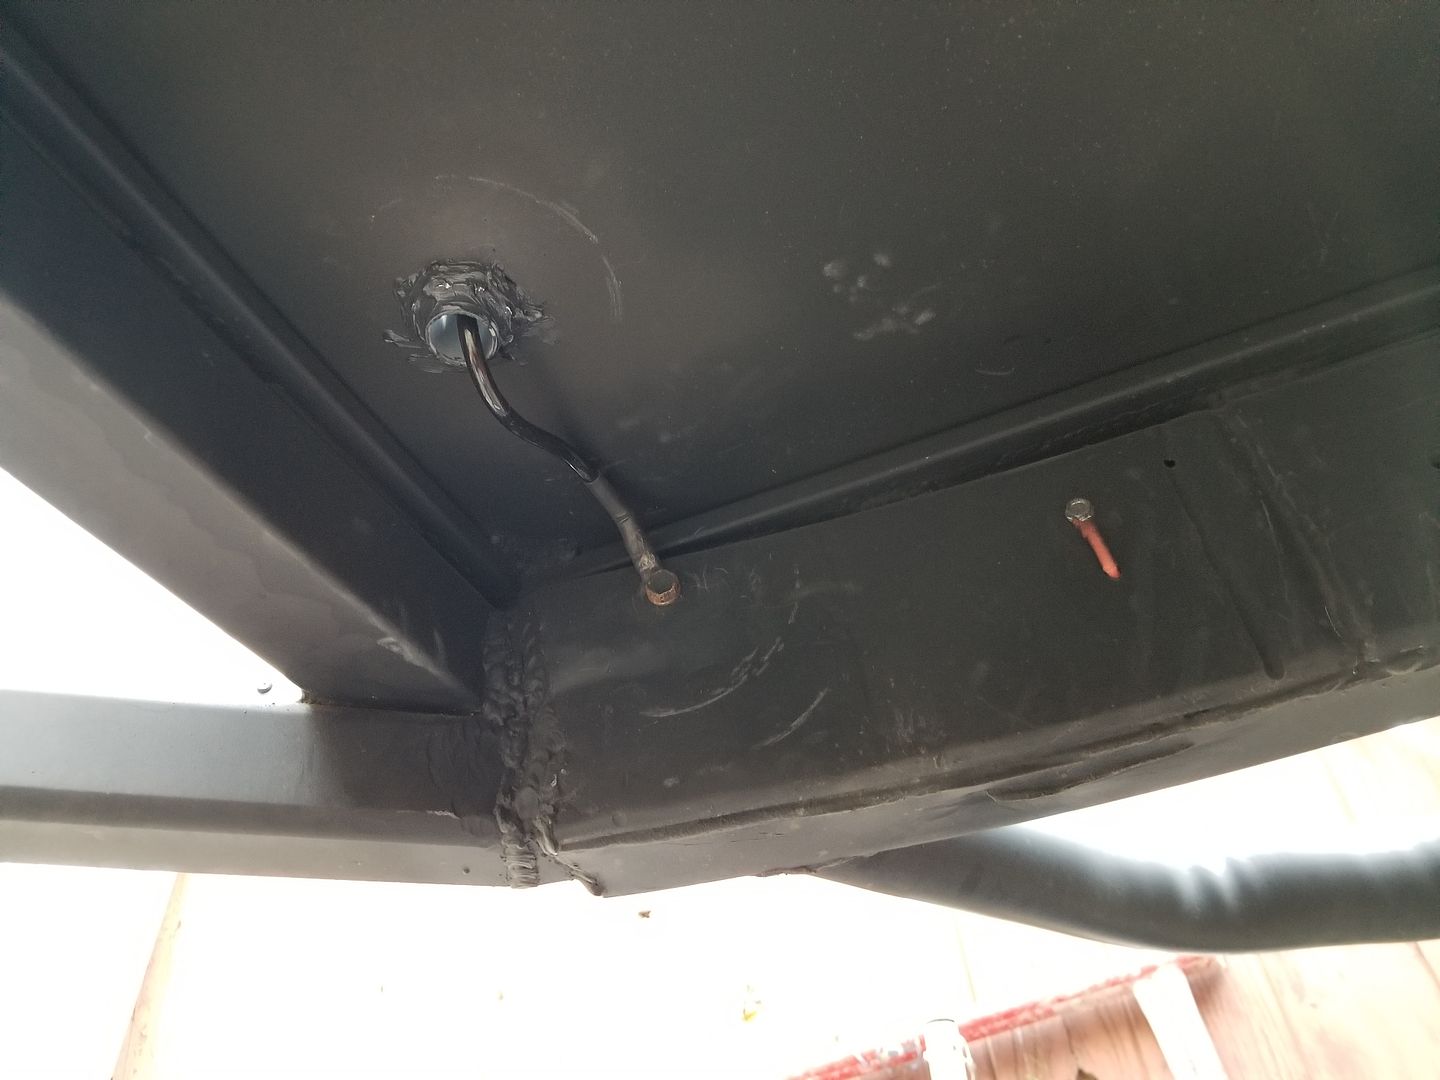
Then i went ahead and used a 3/4" strain relief cord connector on the opposite side that the 12v power inters the cab in. I went with a 3/4" so i could pass a decent size ground onto the actual chassis. And also because i plan to run more wire through that same port for rock lights (undercarriage lighting), and maybe run the rest of the exterior lighting through there too.*
Once installed i silicone around to as more water proofing to the install on both the inside of the cab and onto the bottom.*
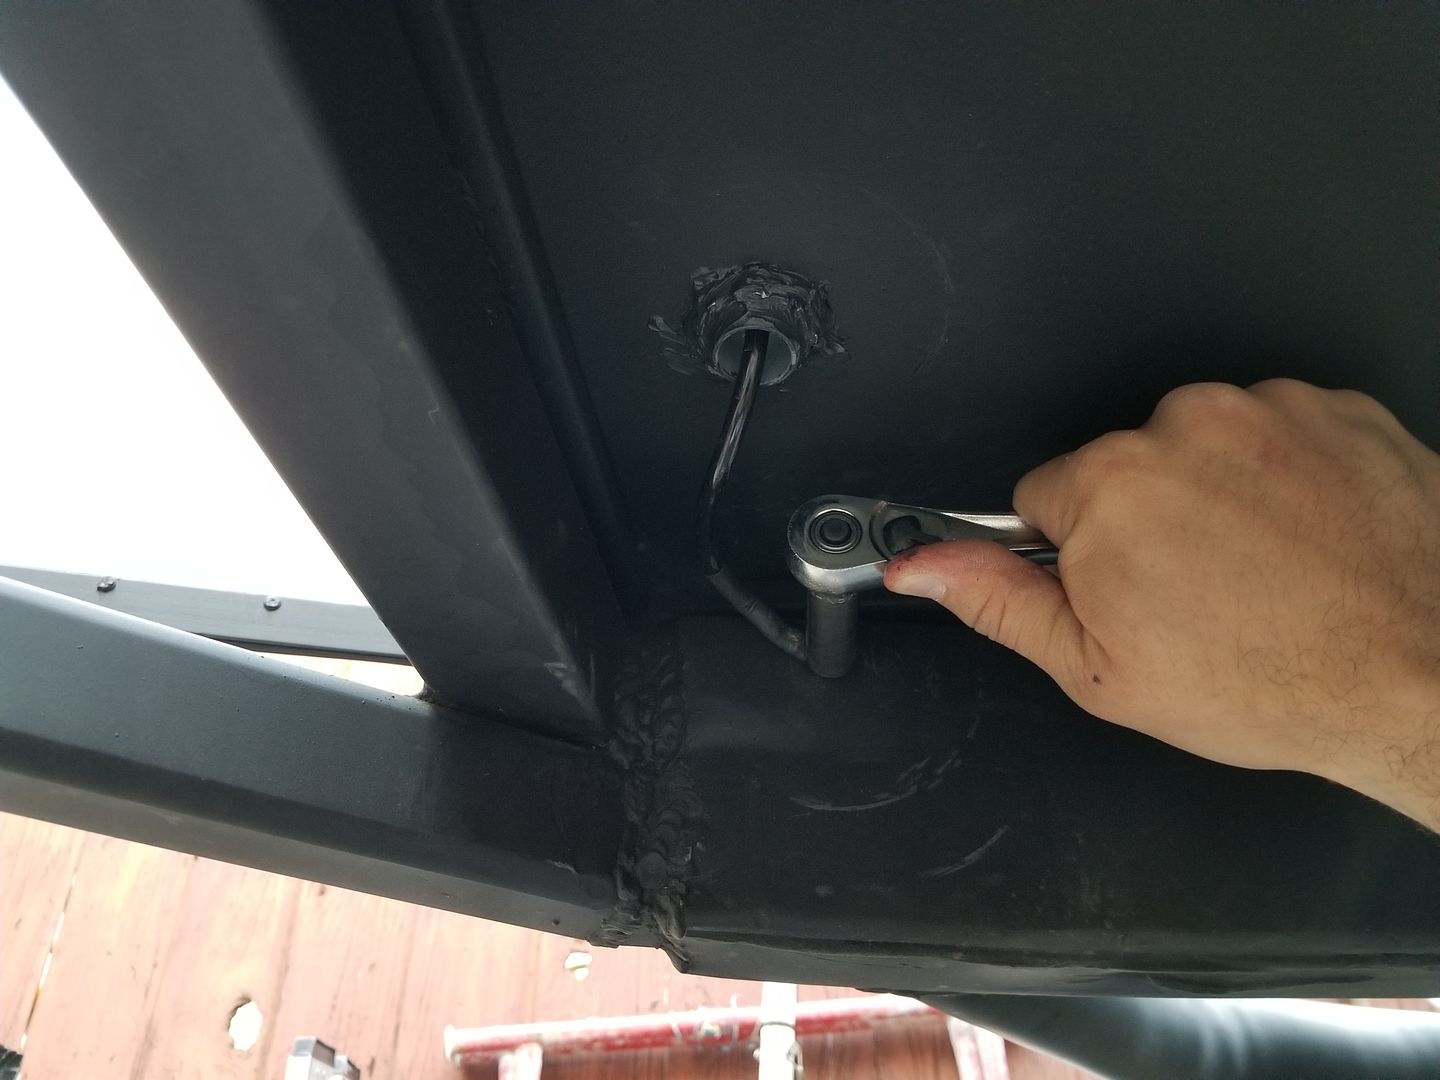
The good thing about choosing to use this 4Runner Chassis for the frame is that you have the stock bolt locations already tapped into the frame. Here is one of those spots conveniently located exactly where i needed it. This one is a 12mm bolt.
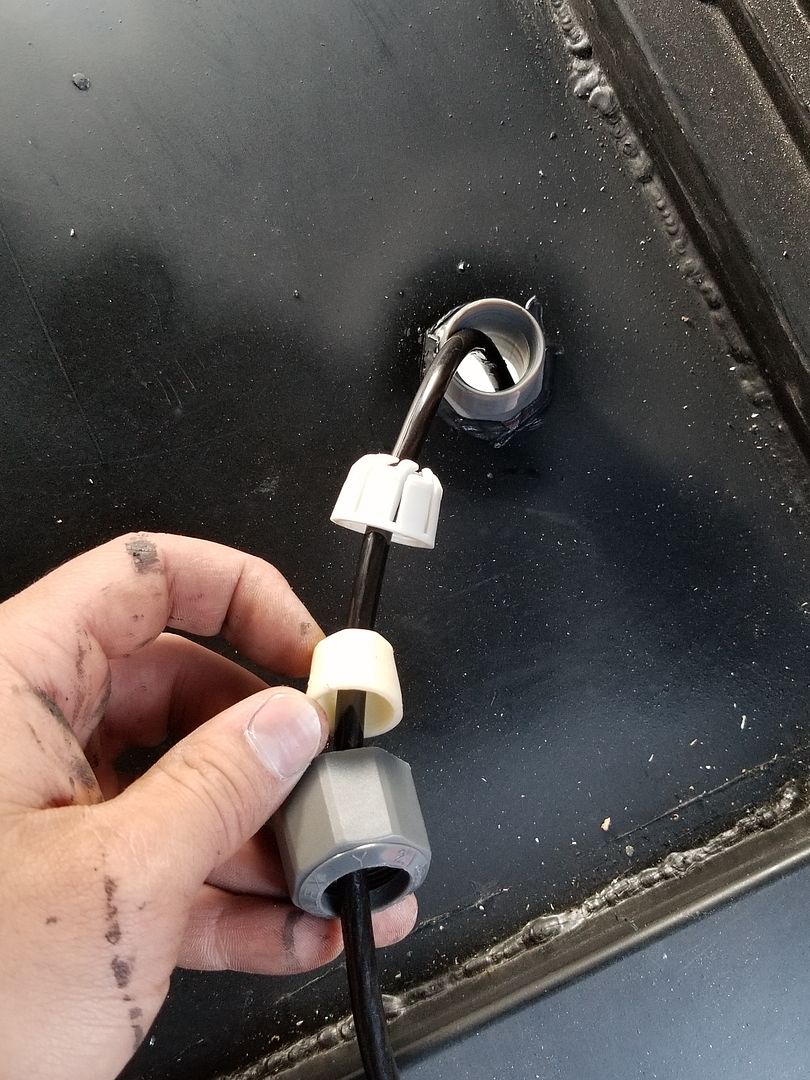
This is one thing that i really liked about these*strain relief cord connectors. Here is how they dismantle. AThe piece after that grey plastic nut is a rubber piece that hugs the wires you pass through, The 3rd piece literally twists and tightens on to the cable and makes a water tight seal when it puts pressure on the rubber part. You can tighten or loosen the grip but twisting the grey plastic nut.
 *
*
Here is a view of that connector once it is tightened on the ground cable. You can clearly see how it twists onto the cable to get a grip making it seal.
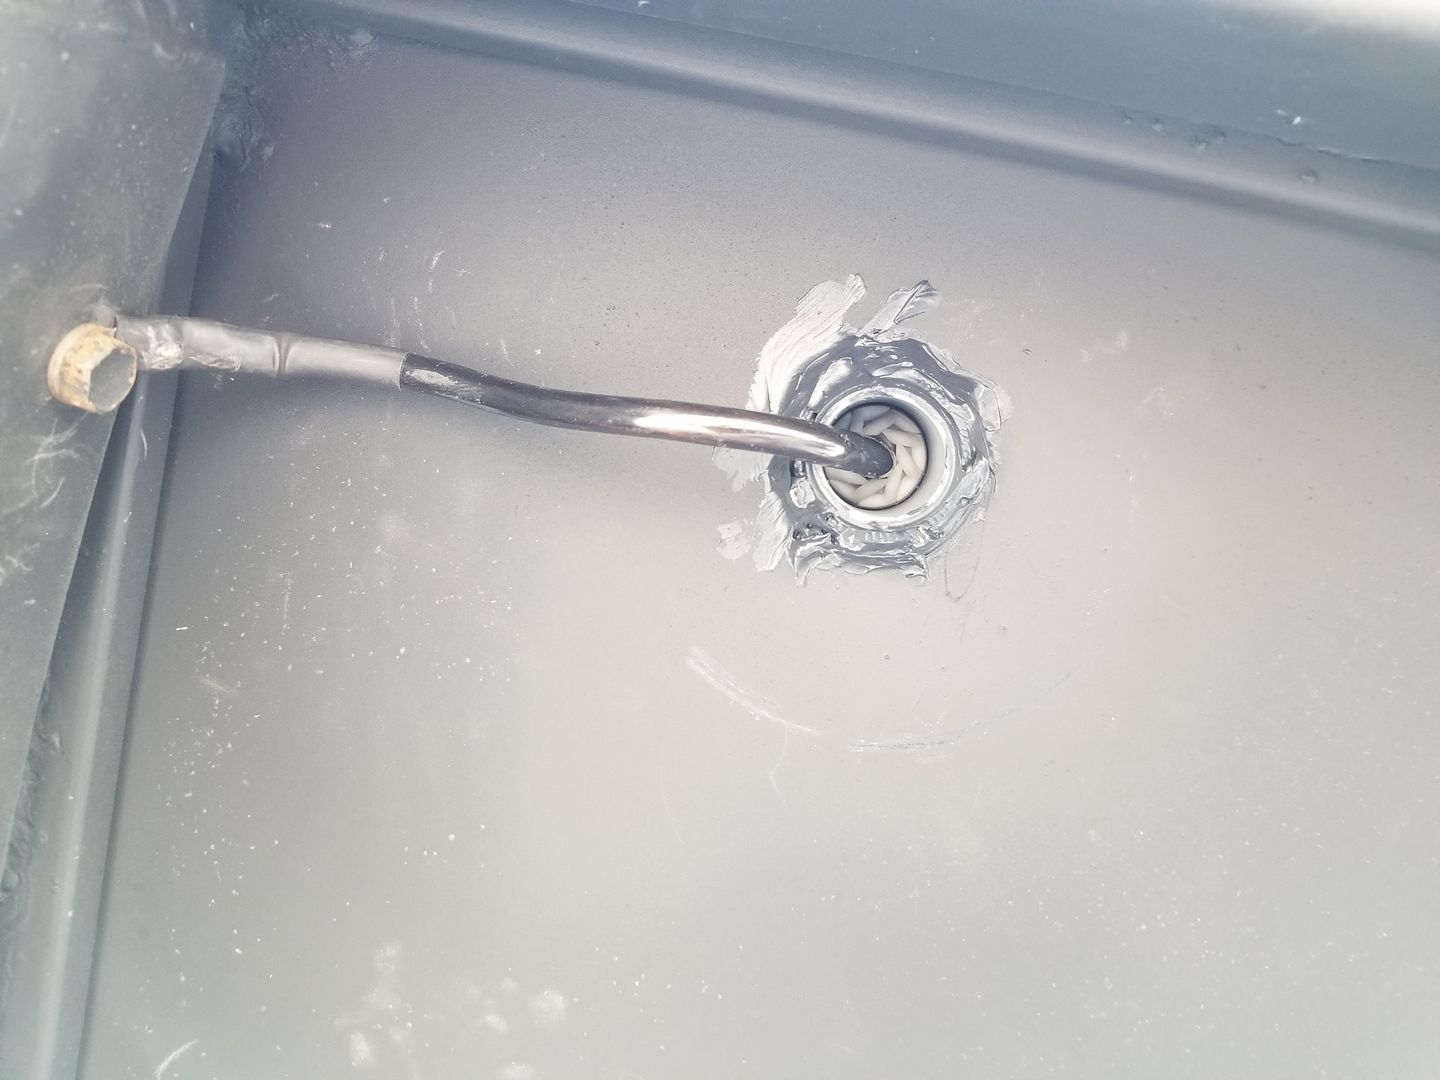
There it is. Ring terminal ready to install whenever i get the batteries mounted.*
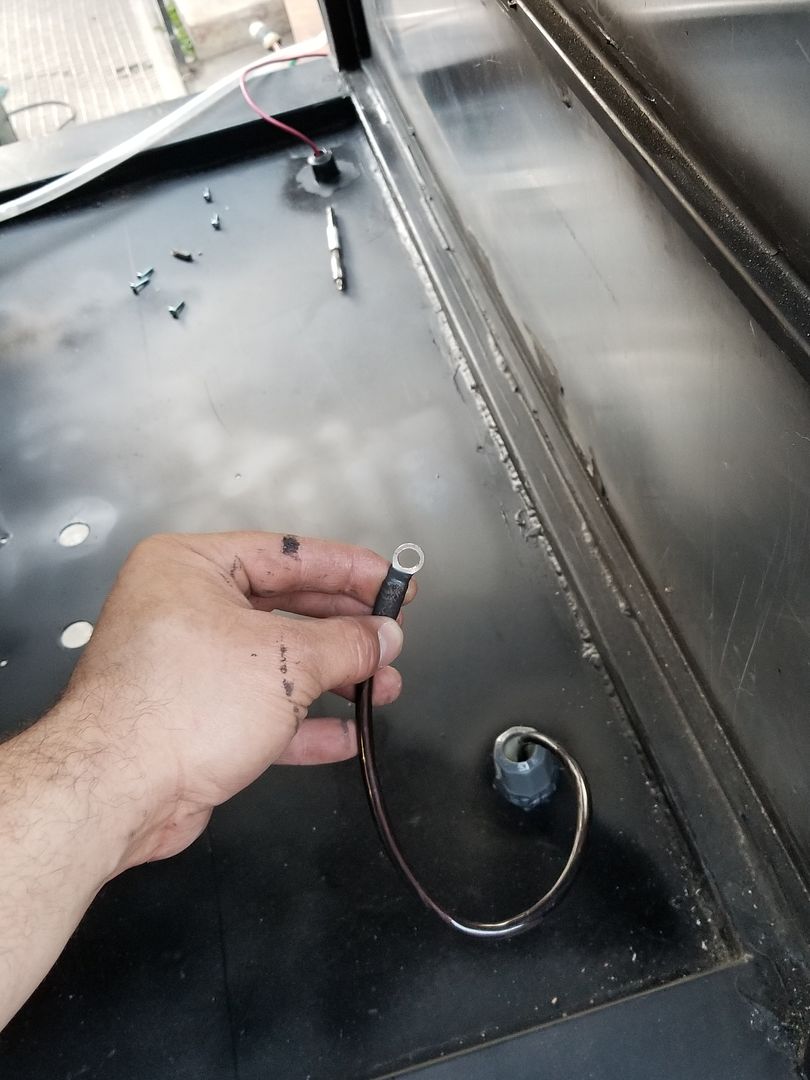
It'll look something like this.*
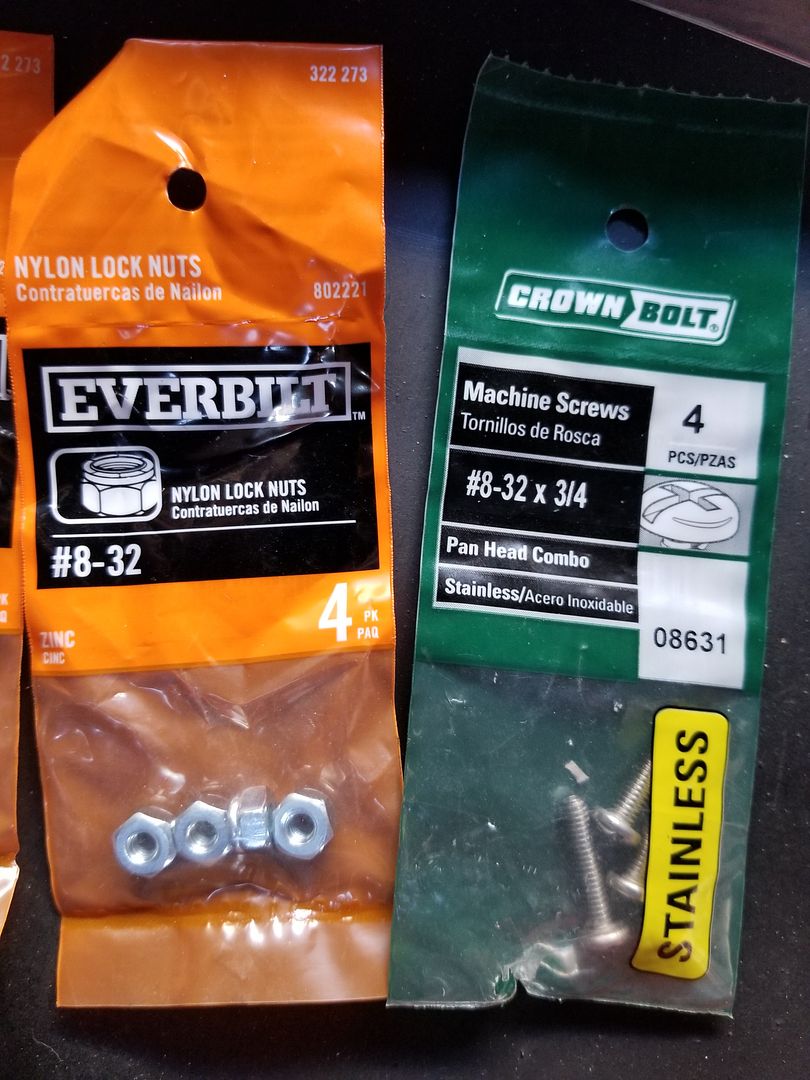
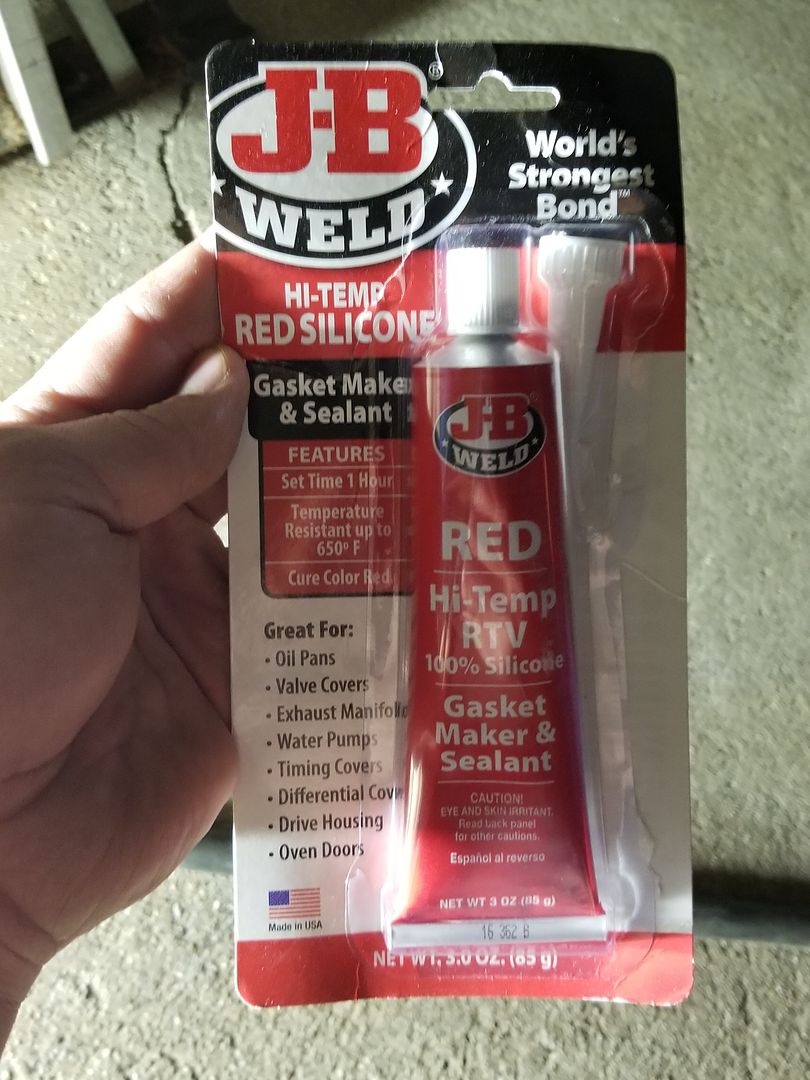
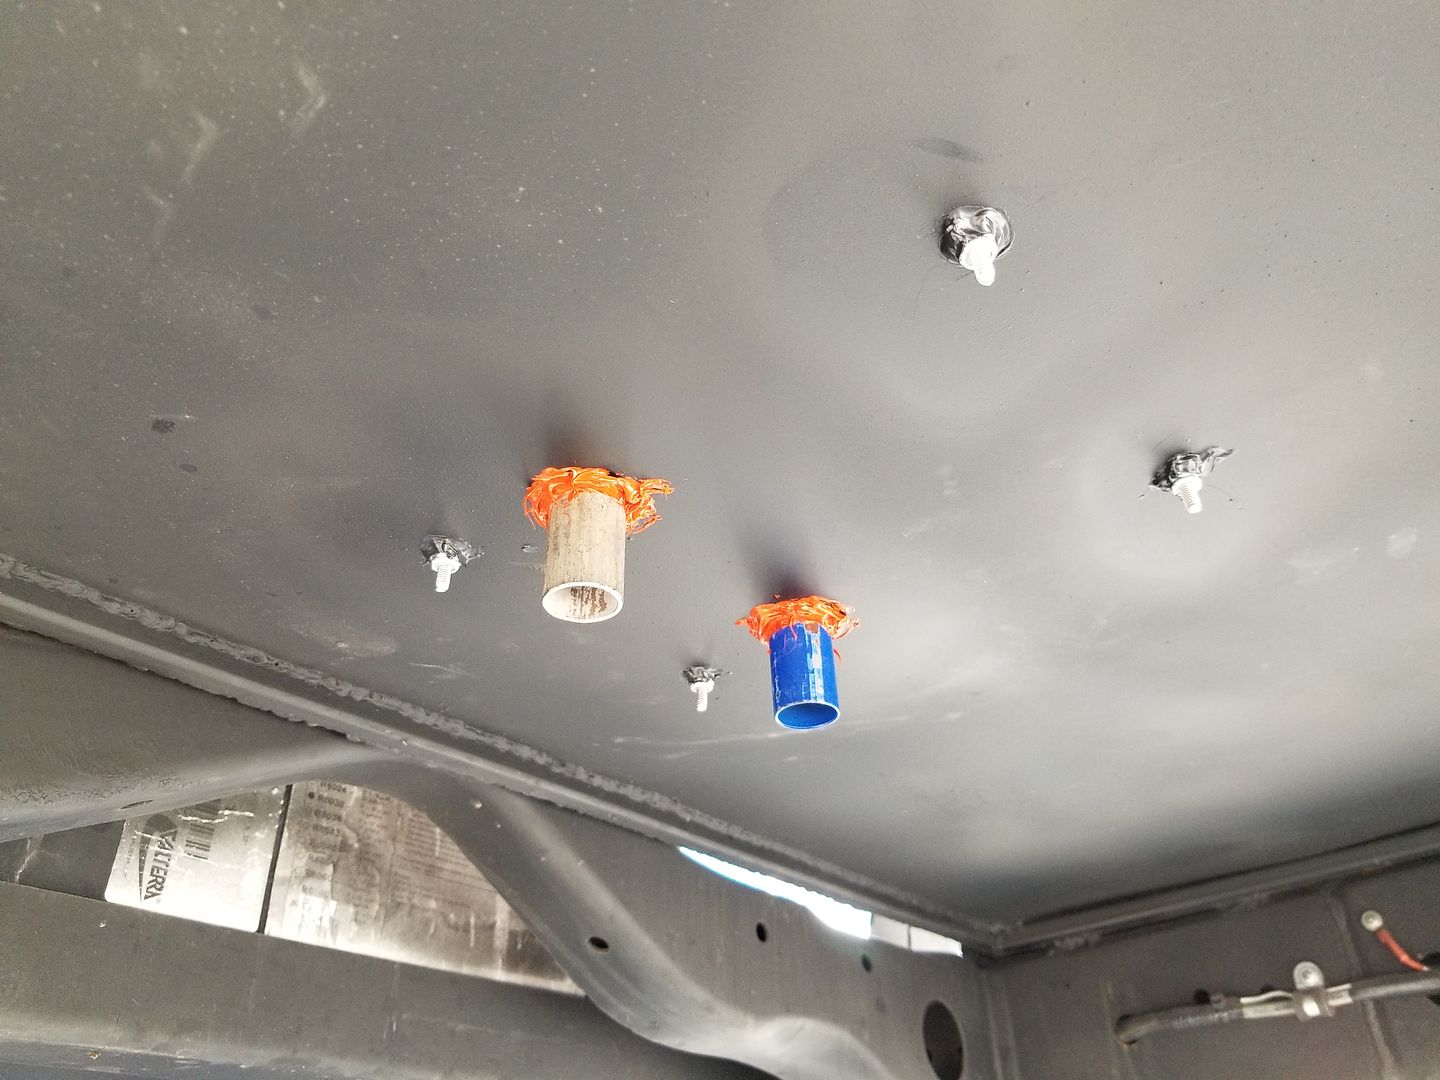
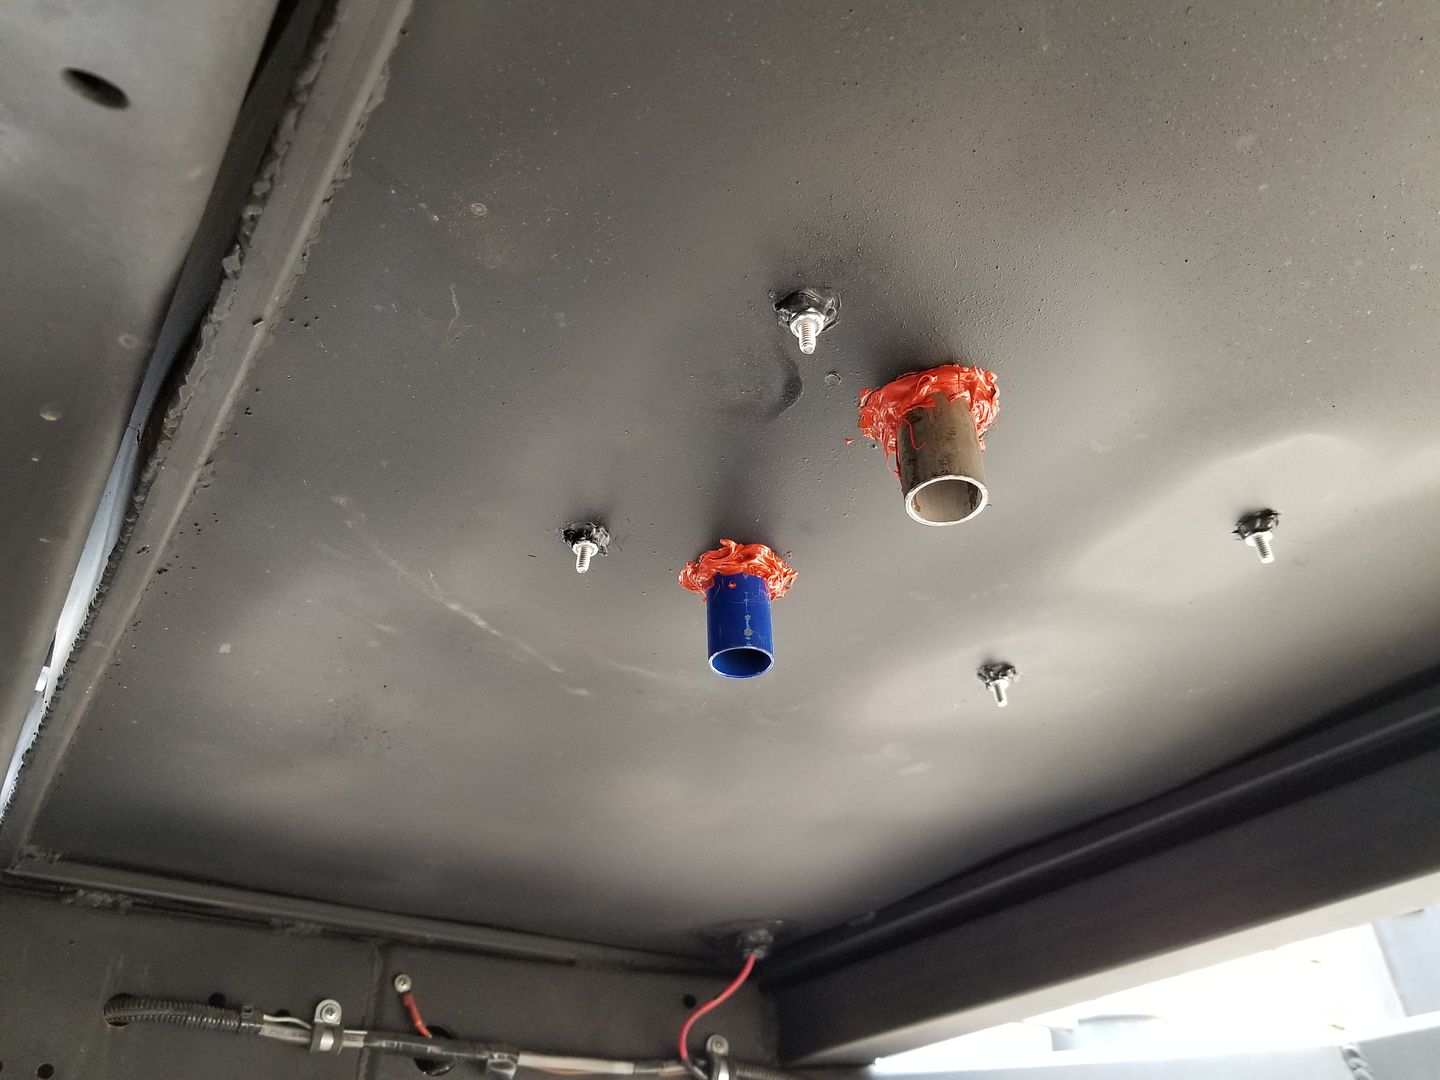
Next up i drilled the 4 holes to pass through the #8 machined screws on the floor. These will hold the heater in place. Also bought some High Temperature RTV sealant to place around the exhaust and air inlet hoses and also to waterproof from the outside. I also used regular silicone around the nylon washers.*
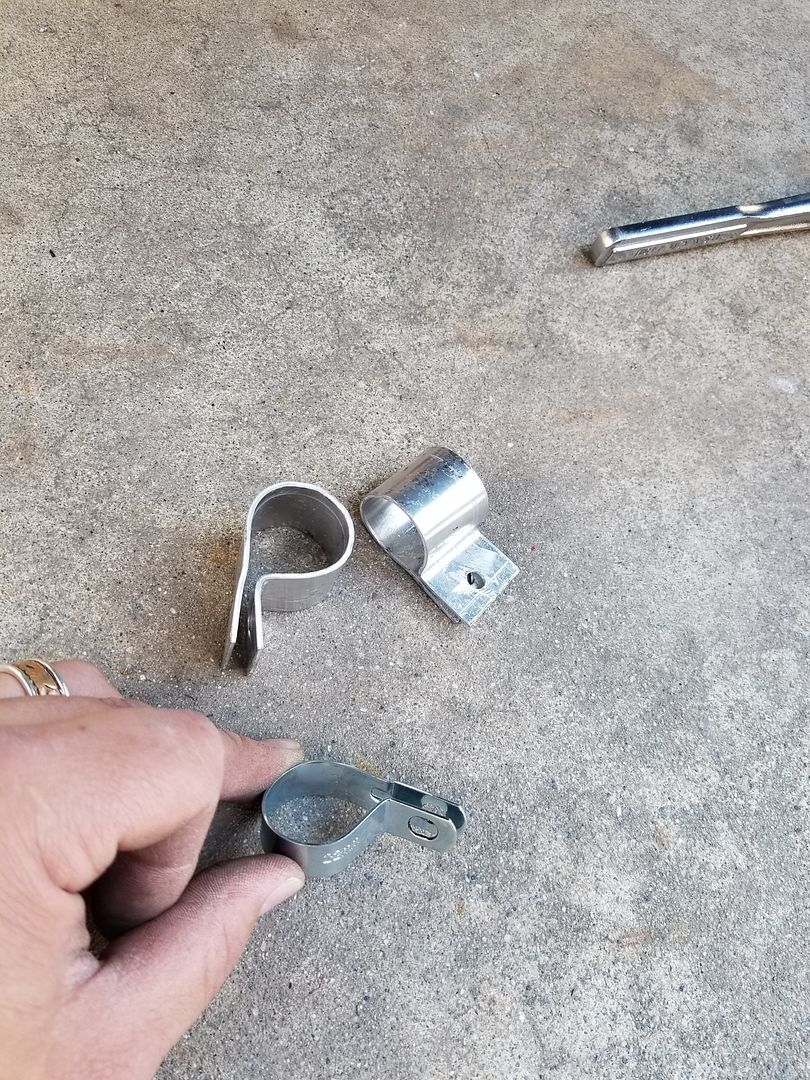
Once installed i would be able to put the exhaust and air inlet tubing and secure them in place. The kit only comes with 2*metal adel clamps. So rather then buy more at the hardware store i made some of my own using some aluminum scrap metal i had lying around. i actaully like mine better then the ones the kit came with. They are wider and i feel they hold the tube more secure.*
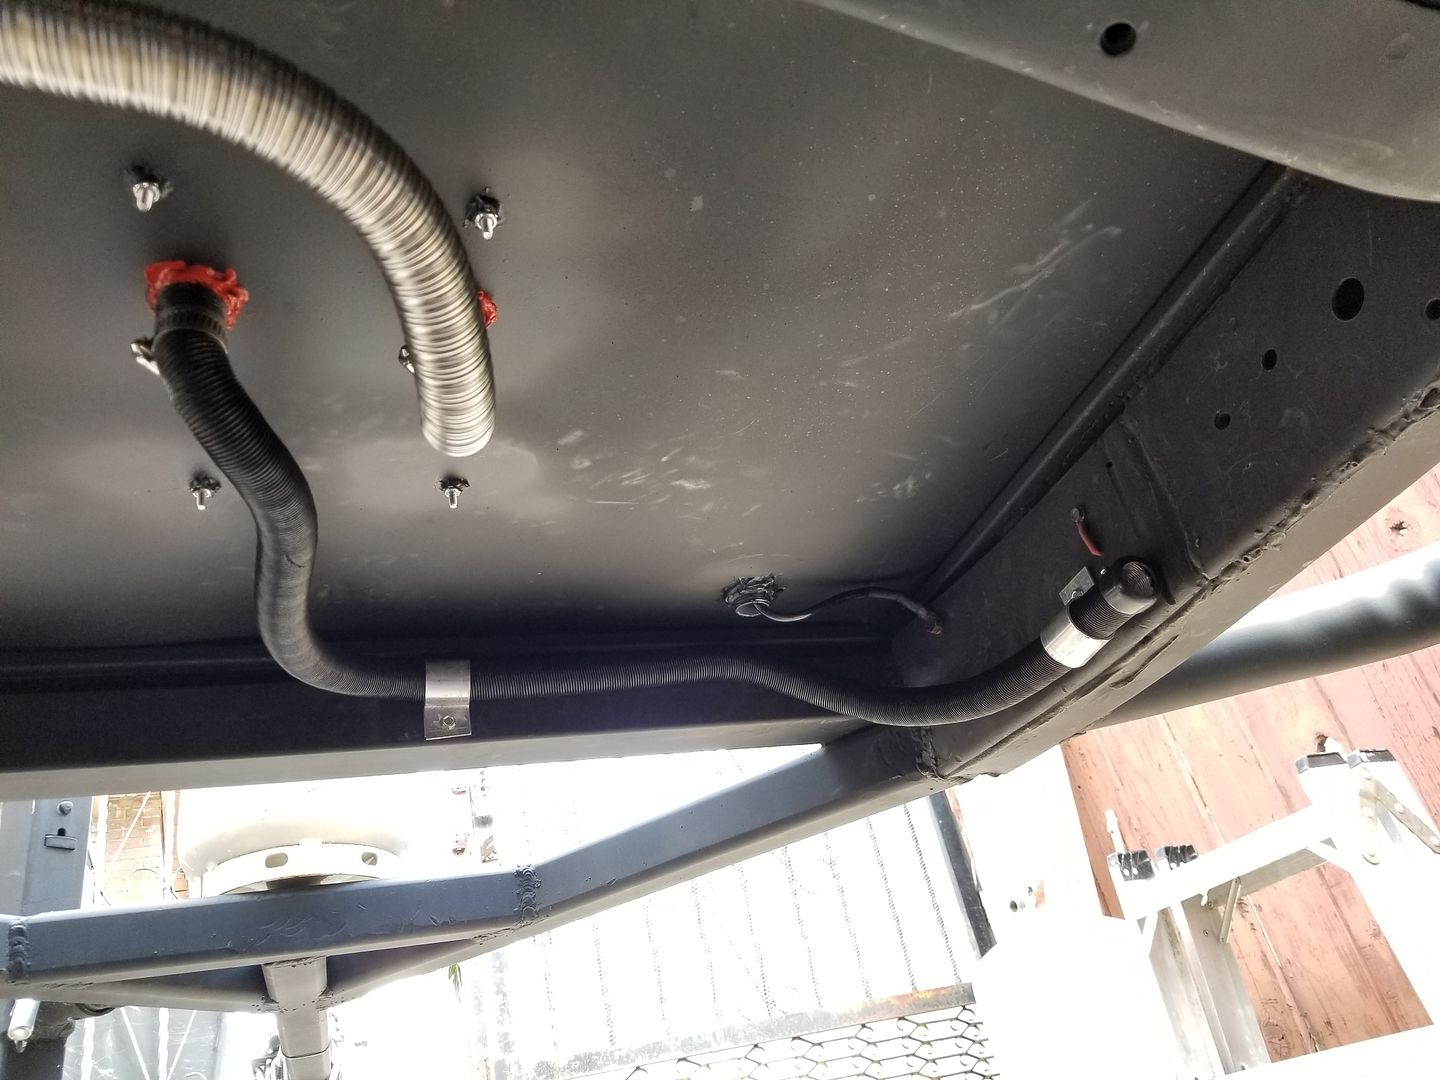
Tubing nicely routed. I ran the air inlet on the side that my CVT Tent annex is gonna be. And routed the exhaust on the opposite side. Just in case i have family sleeping in there. I dont want exhaust fumes getting into the tent. The stainless steel one is the exhaust. The black one is the air inlet.*
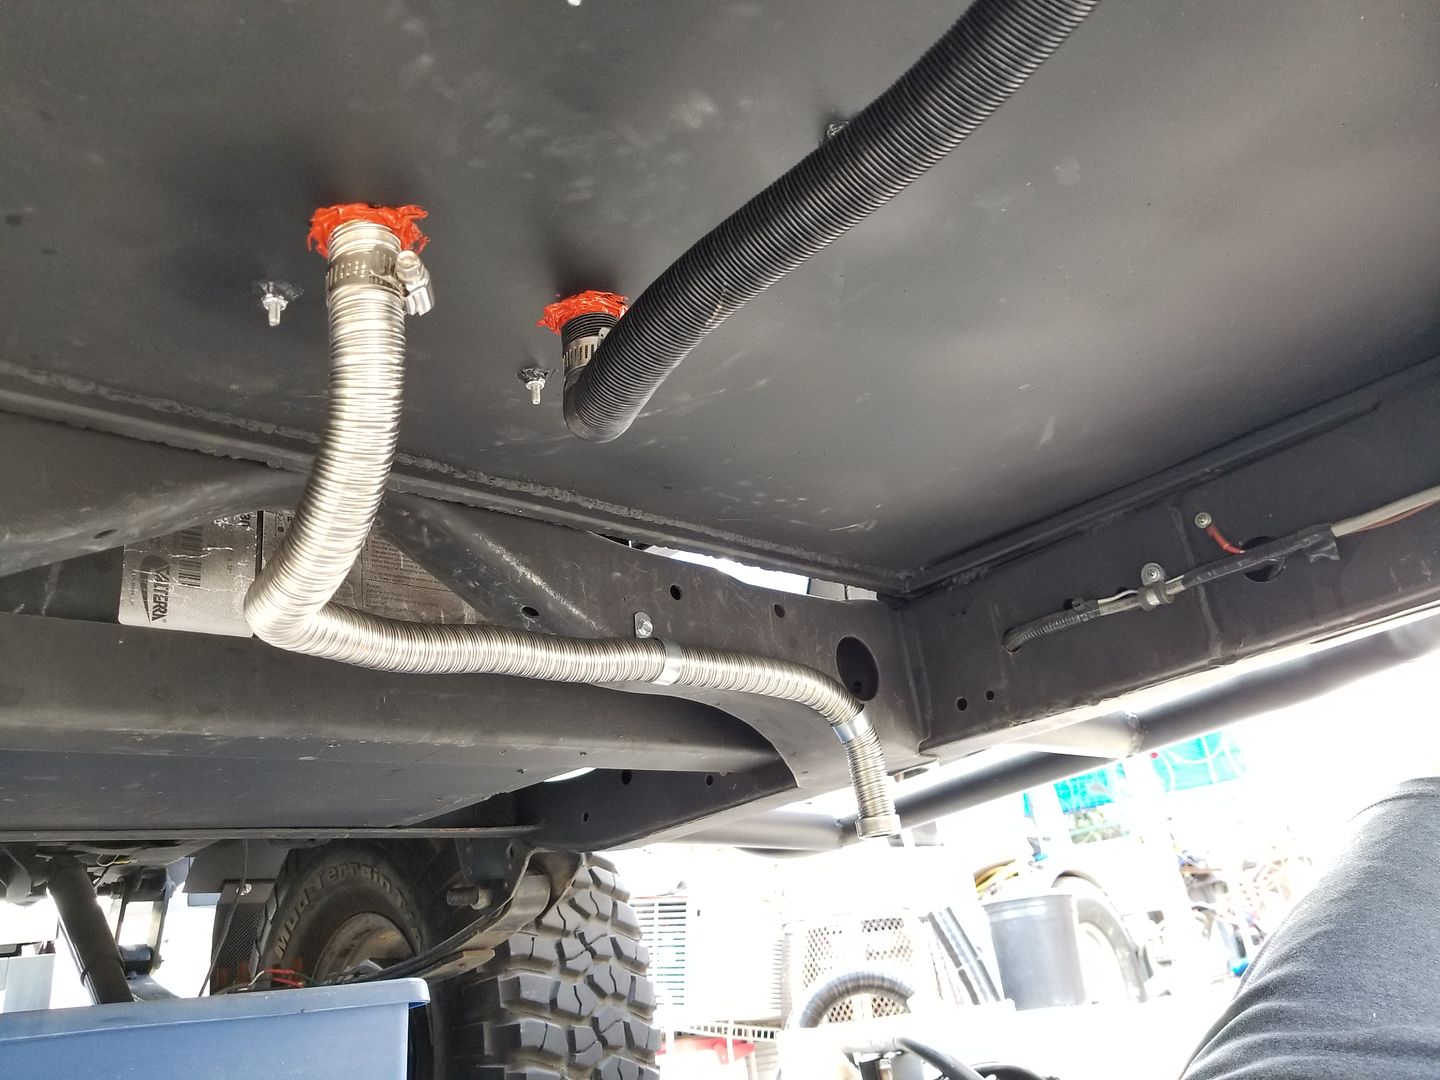
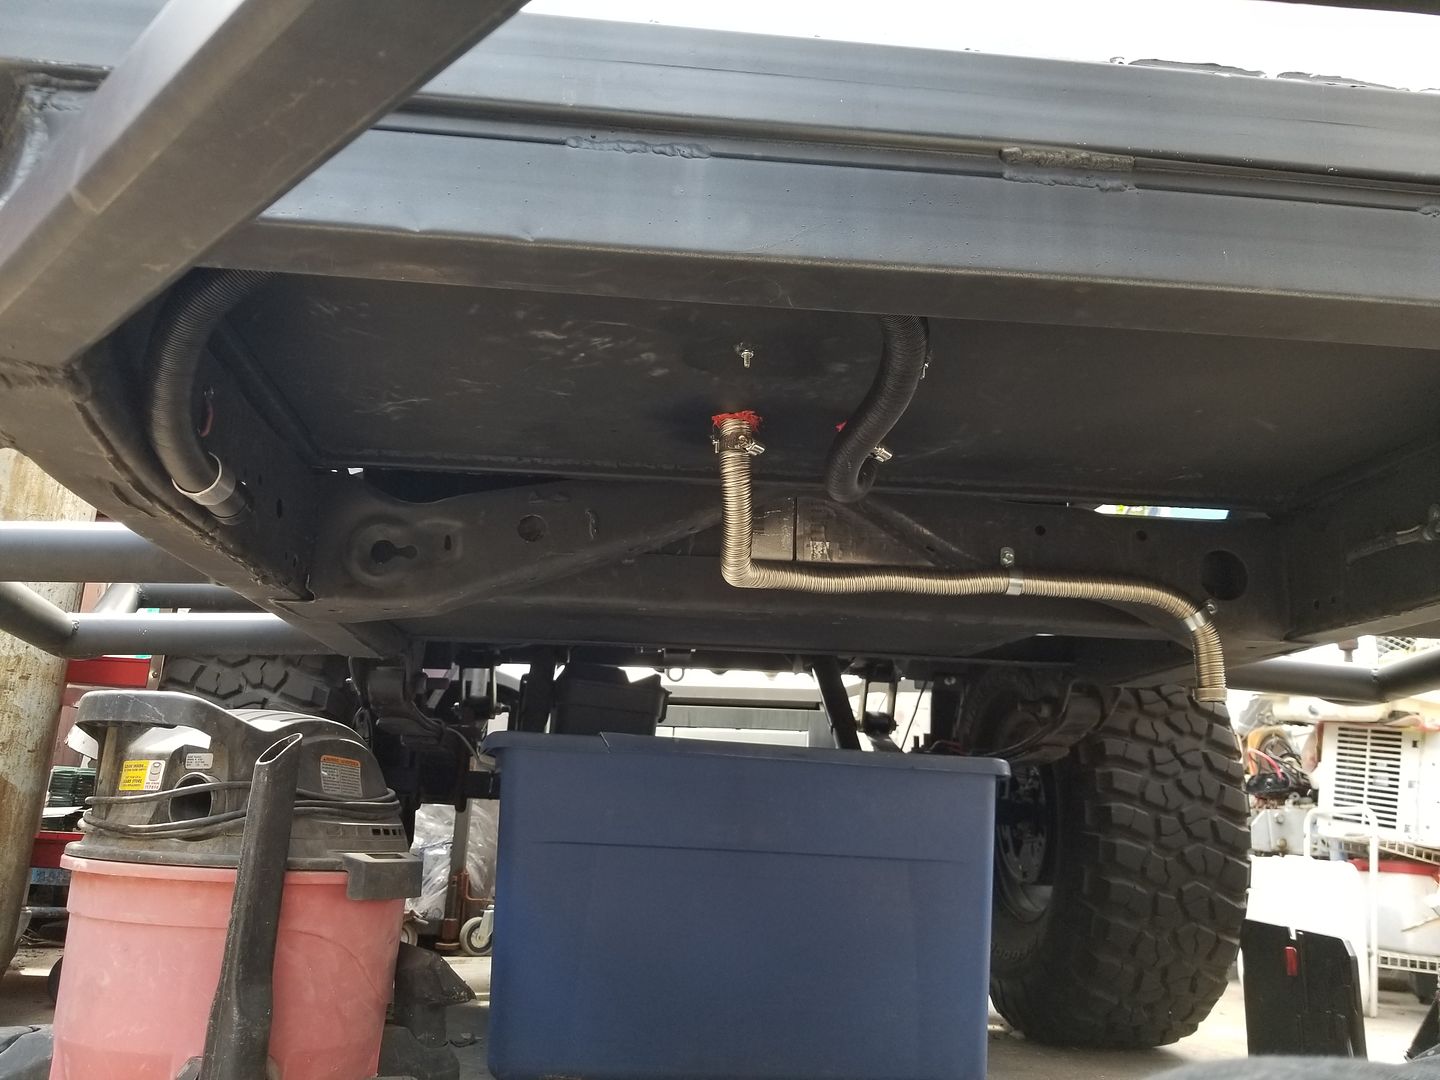
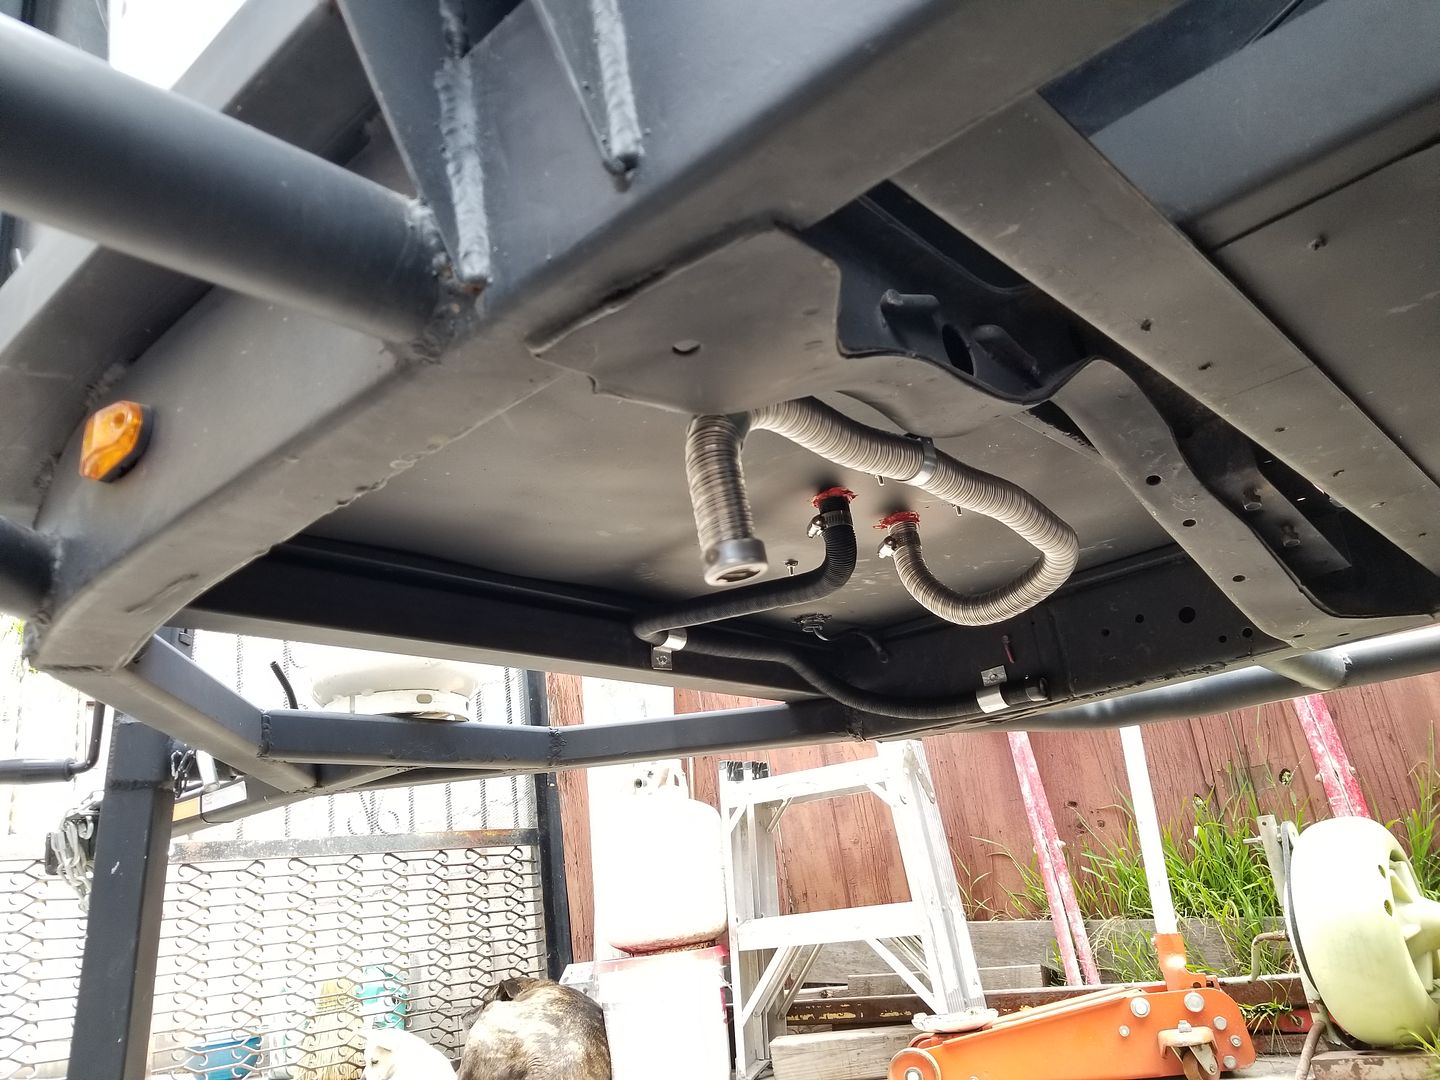
All In all this install came out really clean. I'm very satisfied with how neat i did this.*
Gotta start with some measurements using the left side because the right side wasn't completely square.

Drilled the holes completely through both the wood and the steel floor to make sure they mirror each other. Followed by making the cut out for the entire heater unit.


But cutting it this way i can remove the wood floor in case for some reason the front compartment springs up a leak. this way i can remove the future cabinet and the wood floor to clean it up.*

Perfect fit


Both batteries will be mounted in this fashion to keep the weight even in the front.*

Then i went ahead and used a 3/4" strain relief cord connector on the opposite side that the 12v power inters the cab in. I went with a 3/4" so i could pass a decent size ground onto the actual chassis. And also because i plan to run more wire through that same port for rock lights (undercarriage lighting), and maybe run the rest of the exterior lighting through there too.*

Once installed i silicone around to as more water proofing to the install on both the inside of the cab and onto the bottom.*

The good thing about choosing to use this 4Runner Chassis for the frame is that you have the stock bolt locations already tapped into the frame. Here is one of those spots conveniently located exactly where i needed it. This one is a 12mm bolt.


This is one thing that i really liked about these*strain relief cord connectors. Here is how they dismantle. AThe piece after that grey plastic nut is a rubber piece that hugs the wires you pass through, The 3rd piece literally twists and tightens on to the cable and makes a water tight seal when it puts pressure on the rubber part. You can tighten or loosen the grip but twisting the grey plastic nut.
 *
*Here is a view of that connector once it is tightened on the ground cable. You can clearly see how it twists onto the cable to get a grip making it seal.

There it is. Ring terminal ready to install whenever i get the batteries mounted.*

It'll look something like this.*

Next up i drilled the 4 holes to pass through the #8 machined screws on the floor. These will hold the heater in place. Also bought some High Temperature RTV sealant to place around the exhaust and air inlet hoses and also to waterproof from the outside. I also used regular silicone around the nylon washers.*


Once installed i would be able to put the exhaust and air inlet tubing and secure them in place. The kit only comes with 2*metal adel clamps. So rather then buy more at the hardware store i made some of my own using some aluminum scrap metal i had lying around. i actaully like mine better then the ones the kit came with. They are wider and i feel they hold the tube more secure.*

Tubing nicely routed. I ran the air inlet on the side that my CVT Tent annex is gonna be. And routed the exhaust on the opposite side. Just in case i have family sleeping in there. I dont want exhaust fumes getting into the tent. The stainless steel one is the exhaust. The black one is the air inlet.*


All In all this install came out really clean. I'm very satisfied with how neat i did this.*
Redeth005
Adventurer
I finally got my hands on a 5lb propane tank. This old dude was selling his tank, coleman tree, and an adaptor for a grill to use a propane tank instead of the small disposables. All for 55 bucks! And the tank was about half full. Not a bad deal for $55. It all works too! I've really been wanting to get a tree like this so i could add my propane coleman lantern on top. And since i plan to run my Propex heater and my heated shower off this tank as well having 3 ports on this tree will work out great, i wish it had 4 so i could run my grill off of it too. but oh well. Maybe I'll either buy a splitter or just use a separate 5lb or continue to use disposable tanks for the grill.
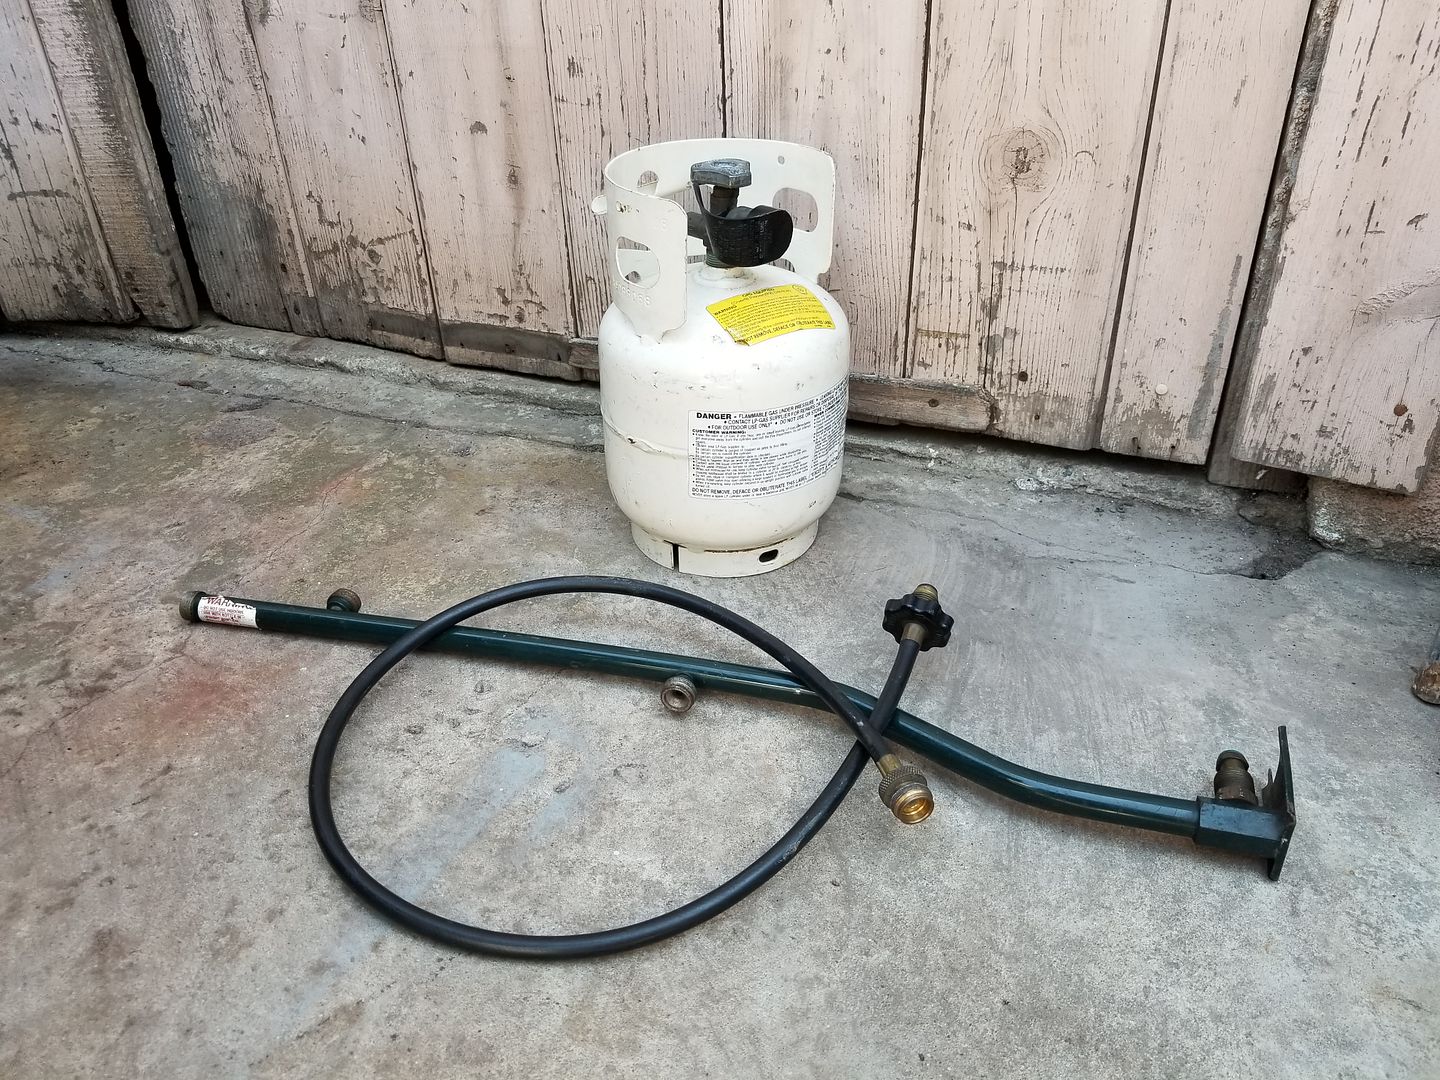
Also today i got around to doing 2 things to the trailer. Nothing major but any work is better then no work done.*
First I made the two (+) and (-) wires with ring terminals to run my 2 batteries parallel.
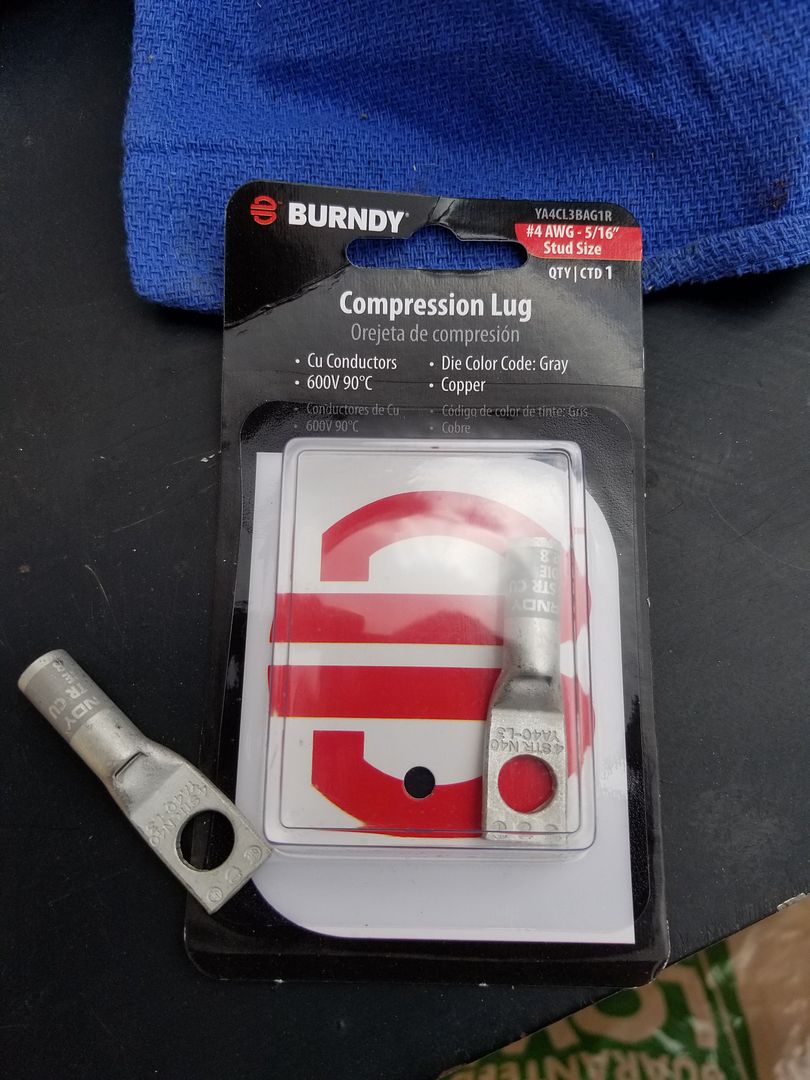
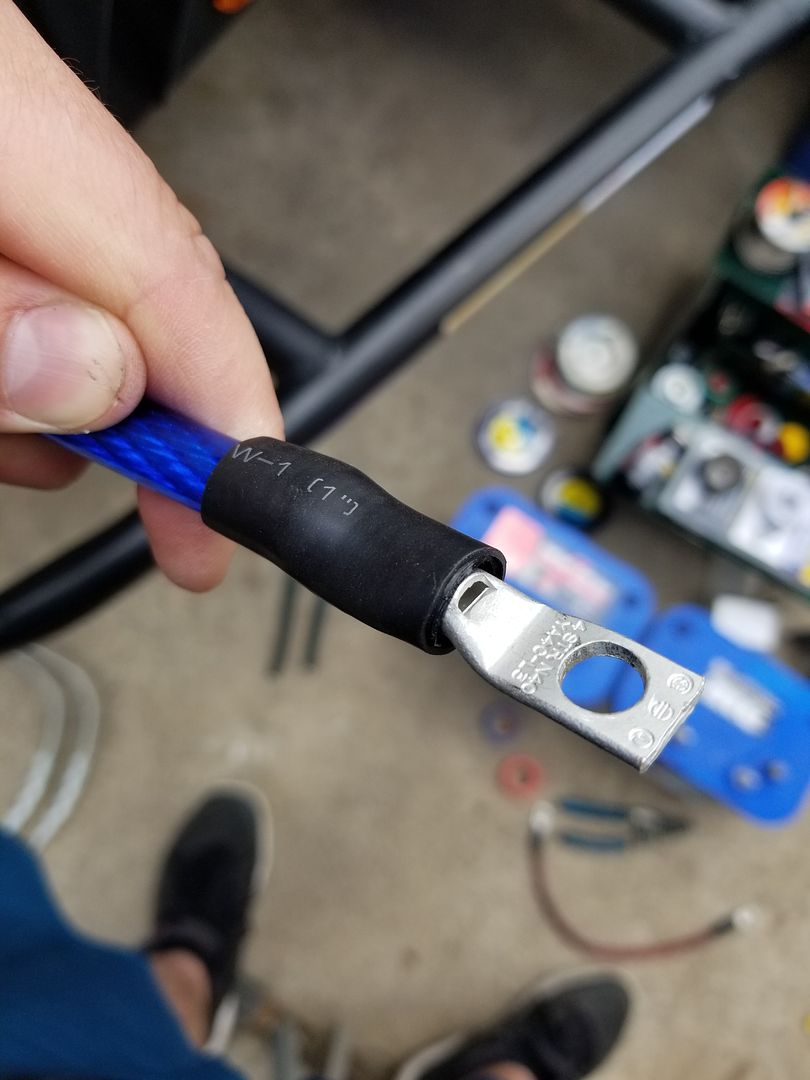
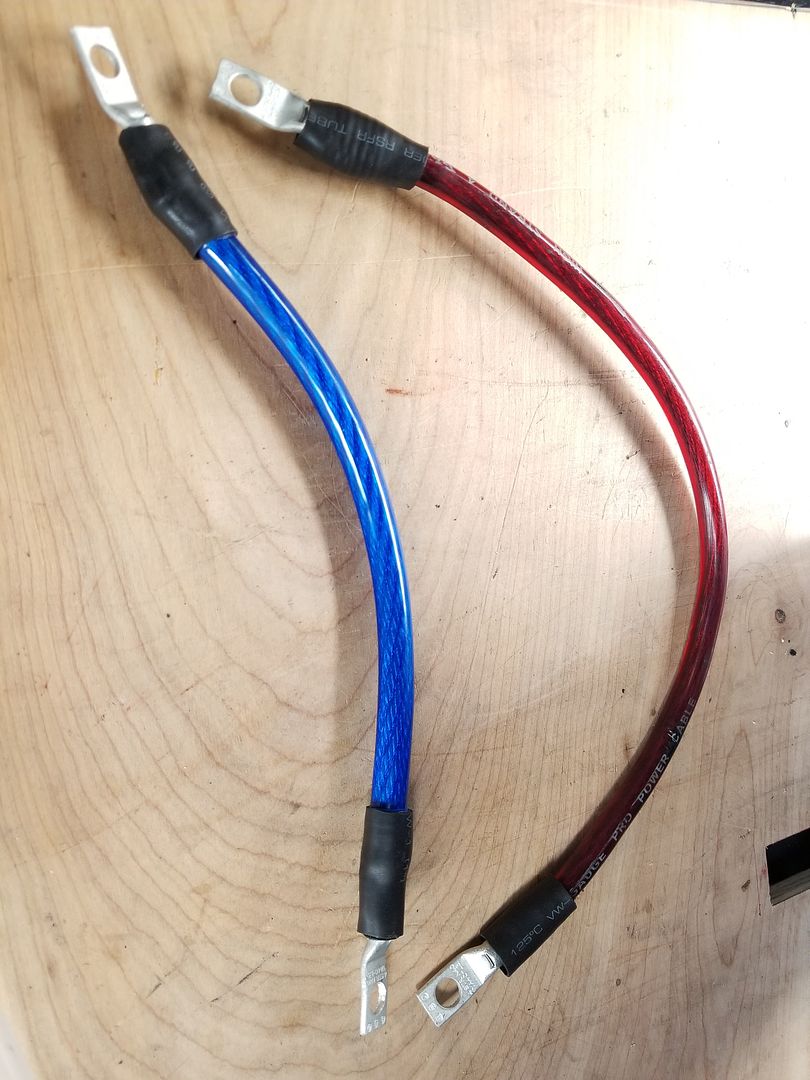
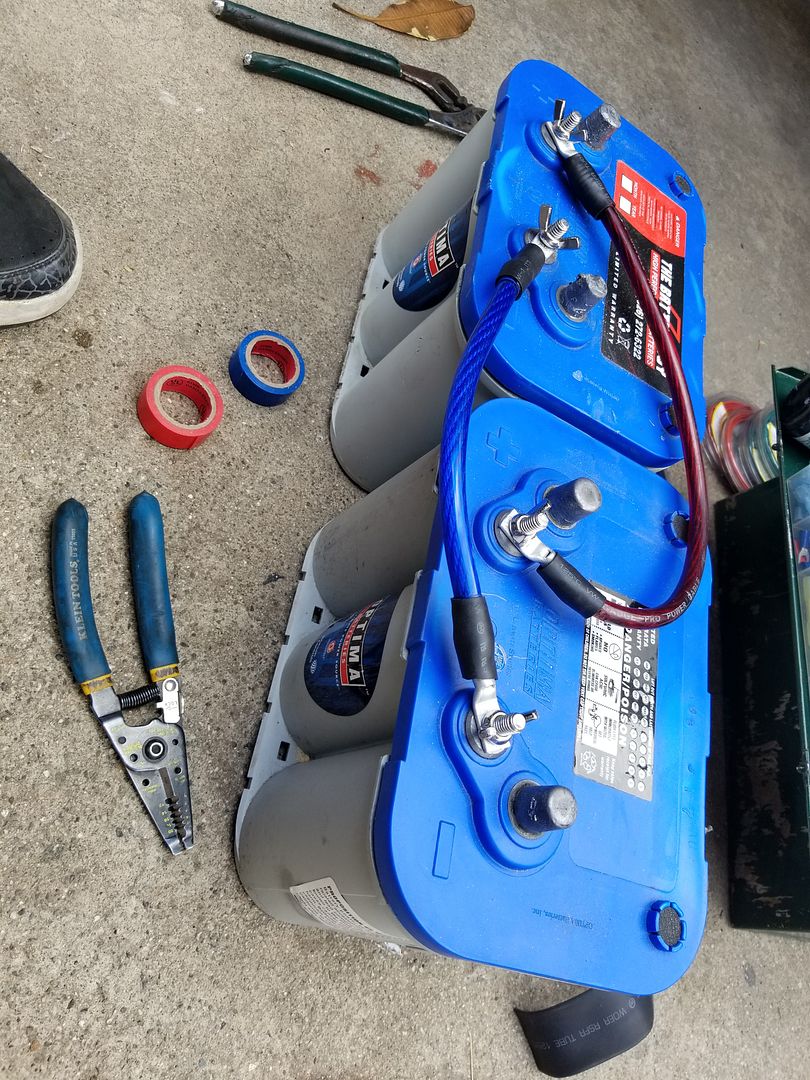
and incase youre wondering... This is the thread of those wing nuts that i used to secure the wire to the battery posts
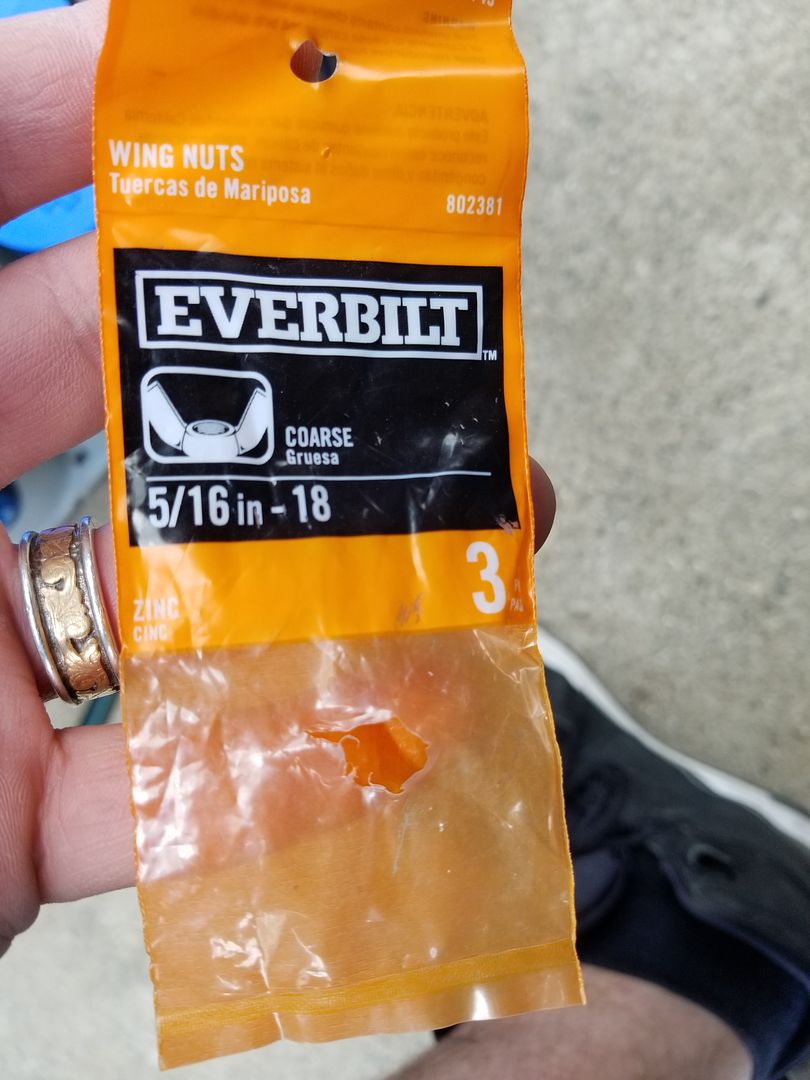
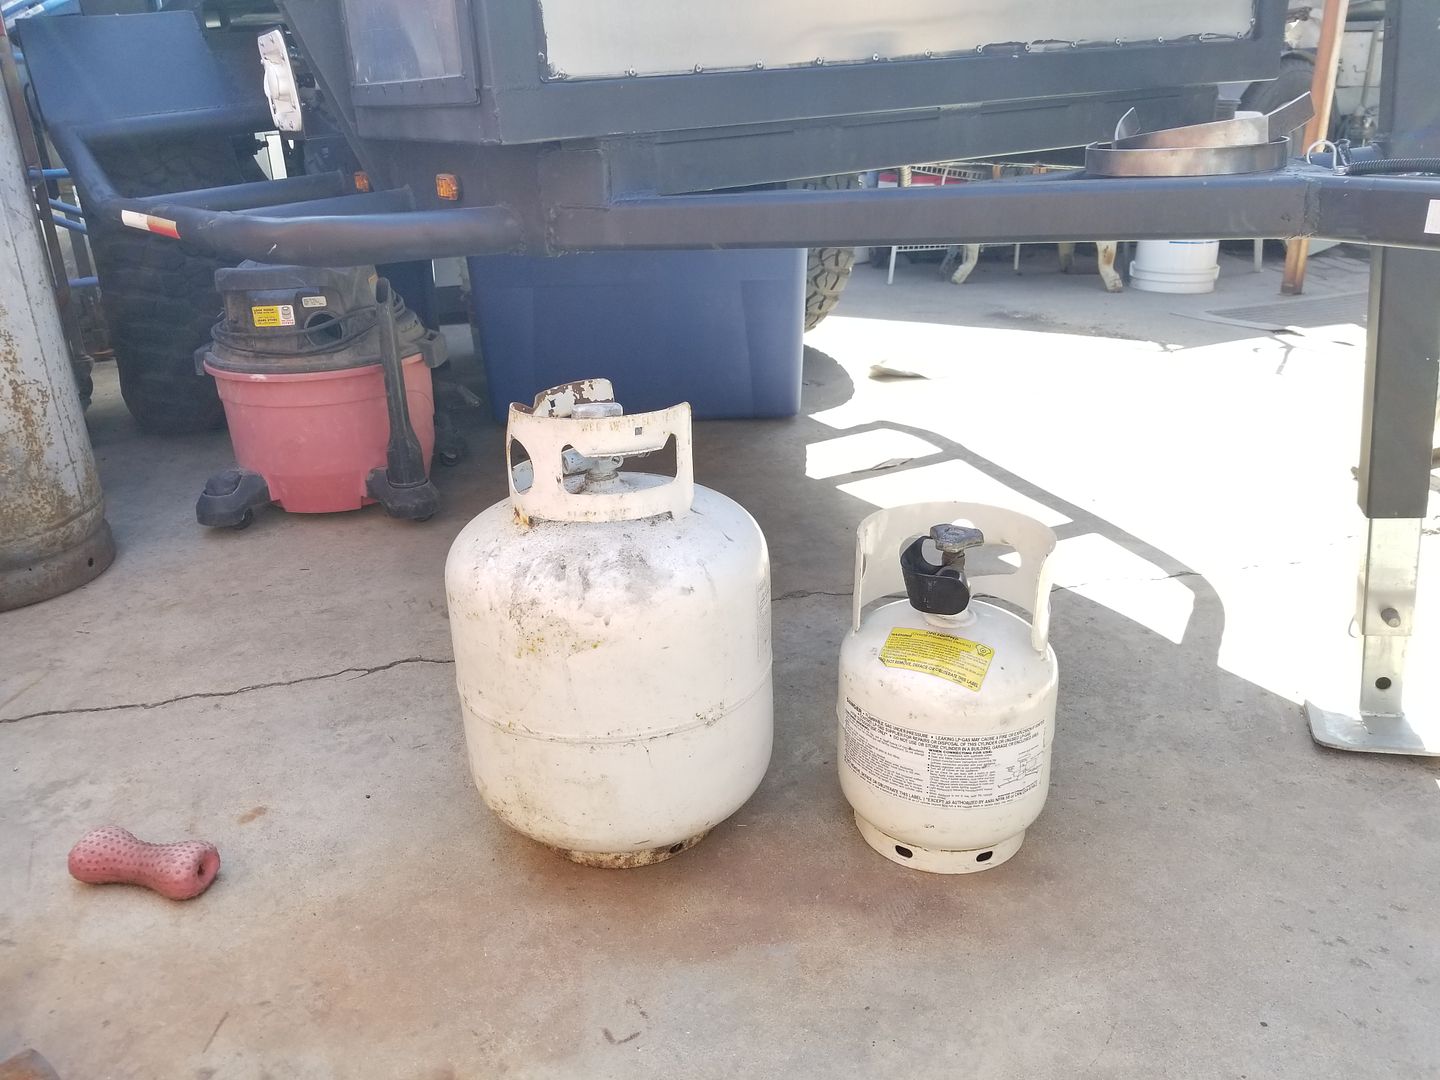
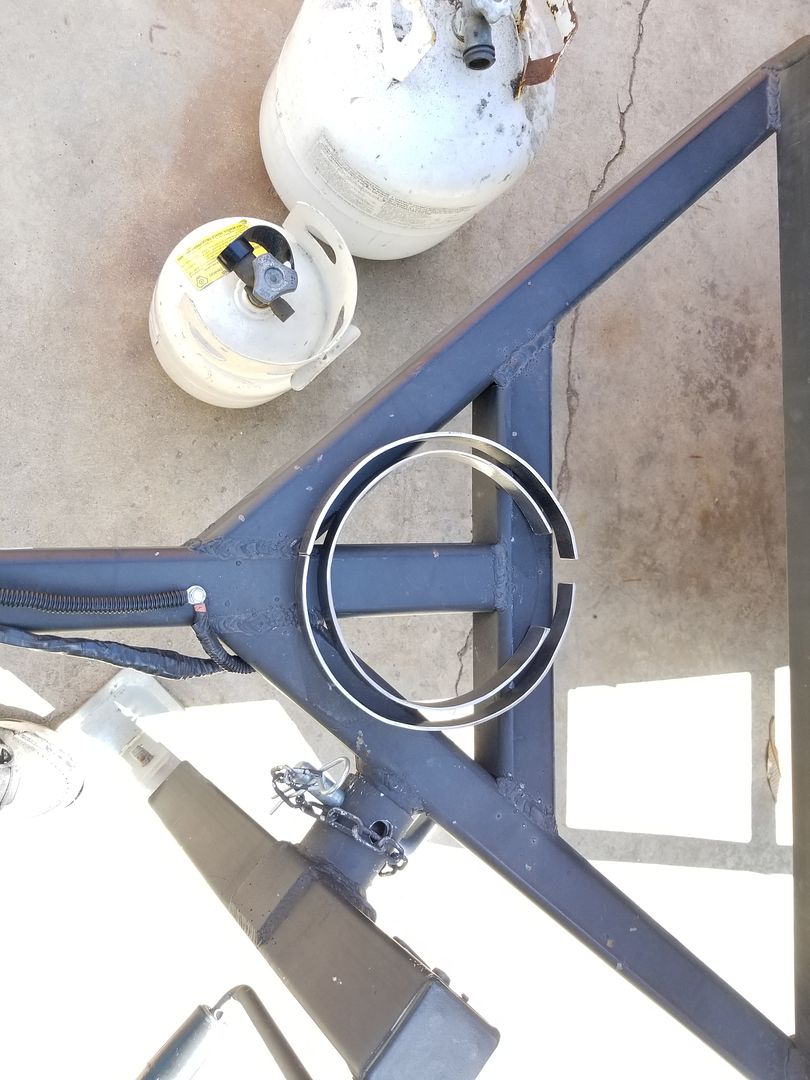
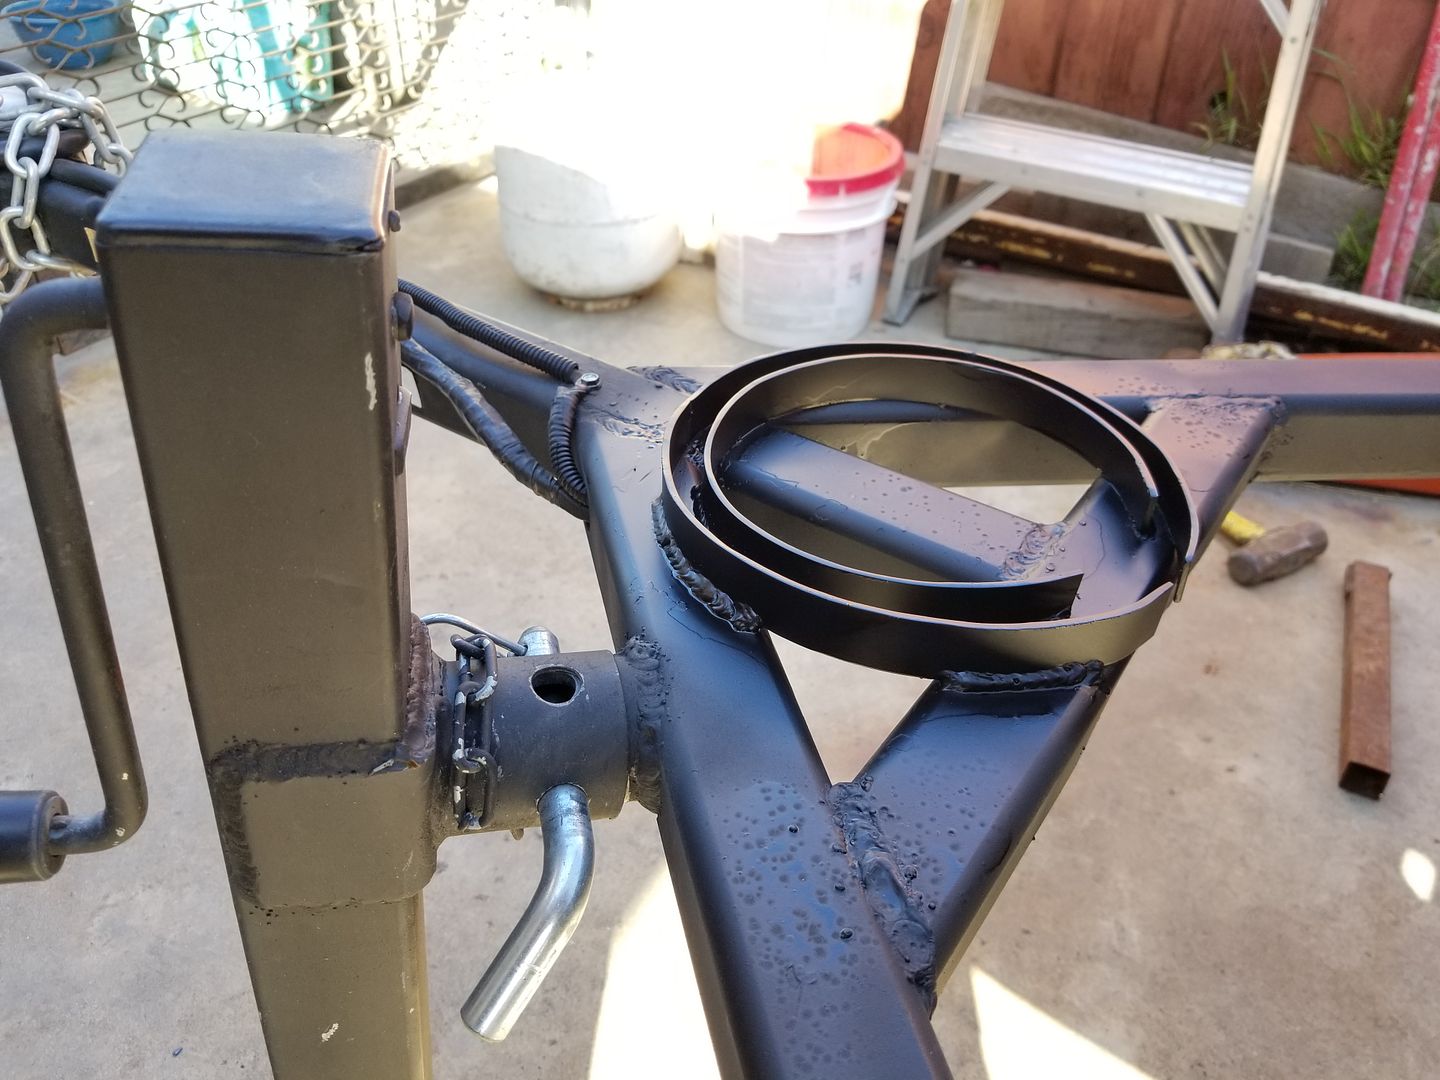
And i made some brackets to hold my 5lb and 20lb tanks on the tongue of my trailer. I can always use my small tank for a weekend trip. And if i decide i want to go on a week long trip or longer well i have the option of using a 20lb tank as well. Now i just need to figure out a way to secure the tanks in a locked position.
getting the position right
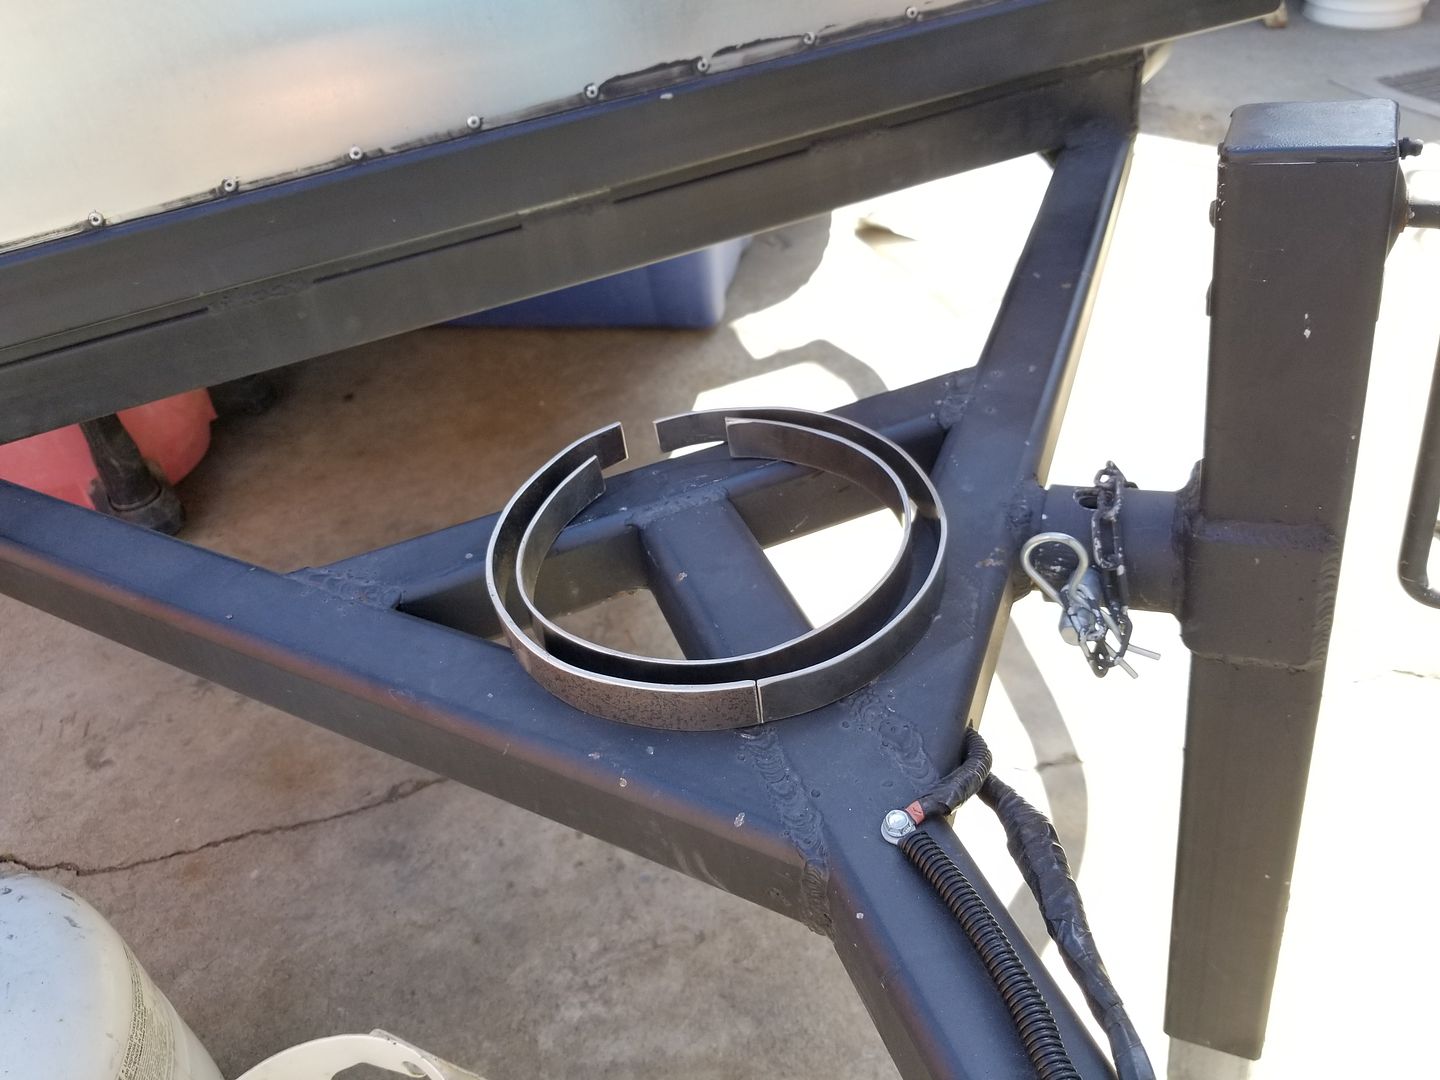
All welded into place
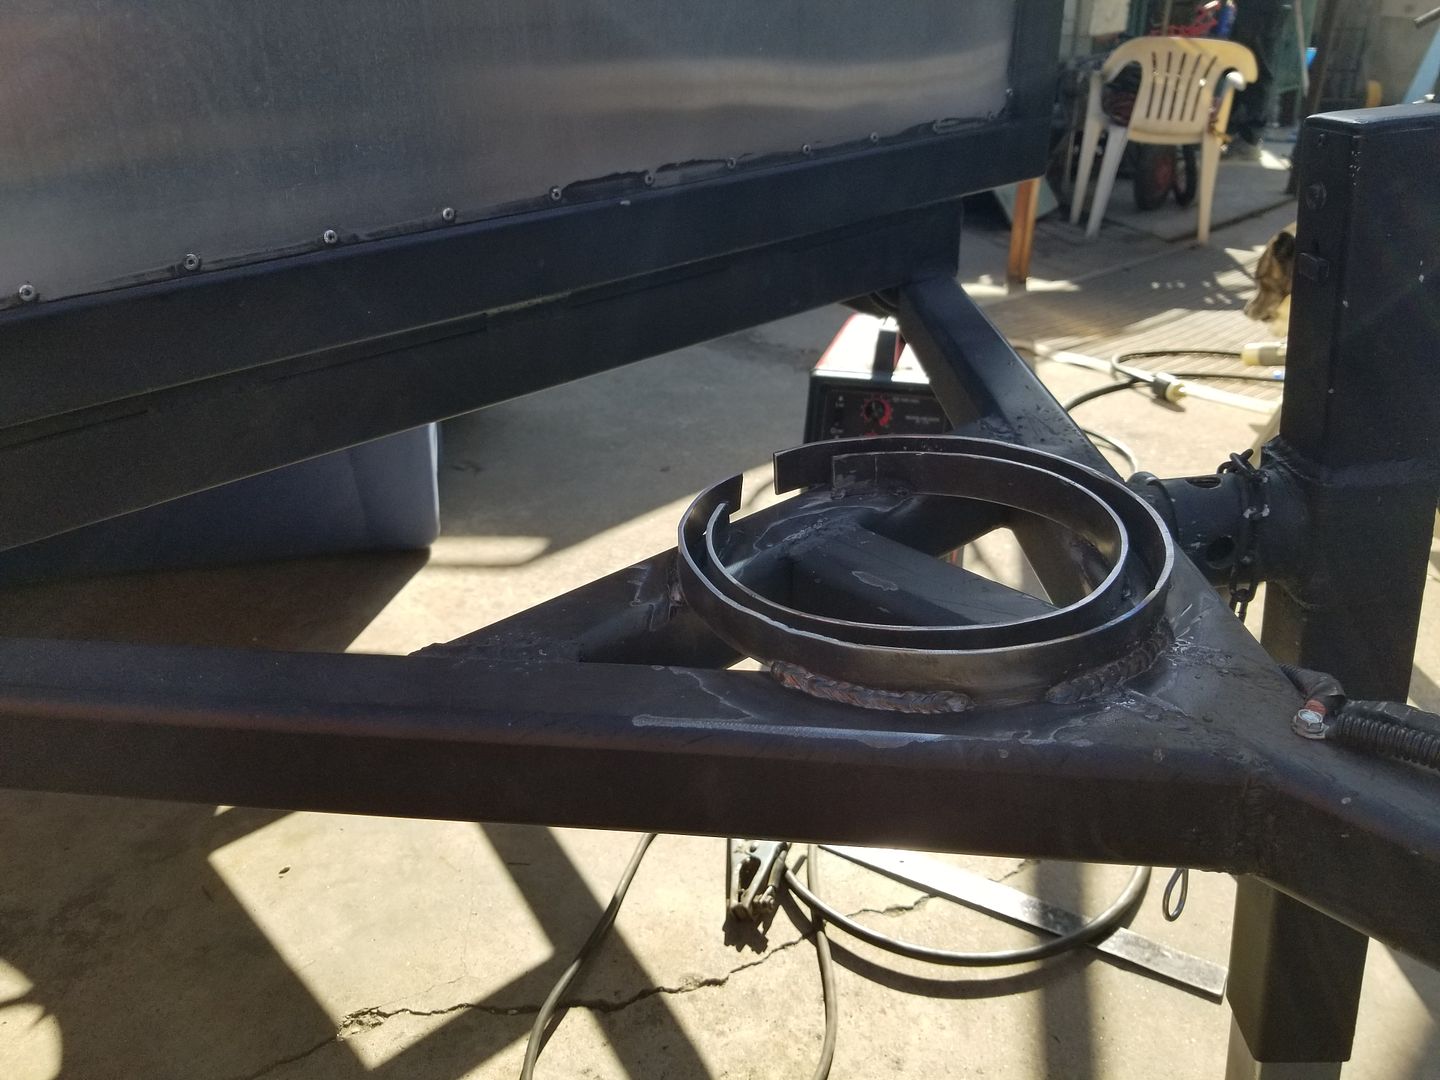
Final fitment before paint. I t was a bit tight on the large tank so i had to knock it open more to make it fit snug.
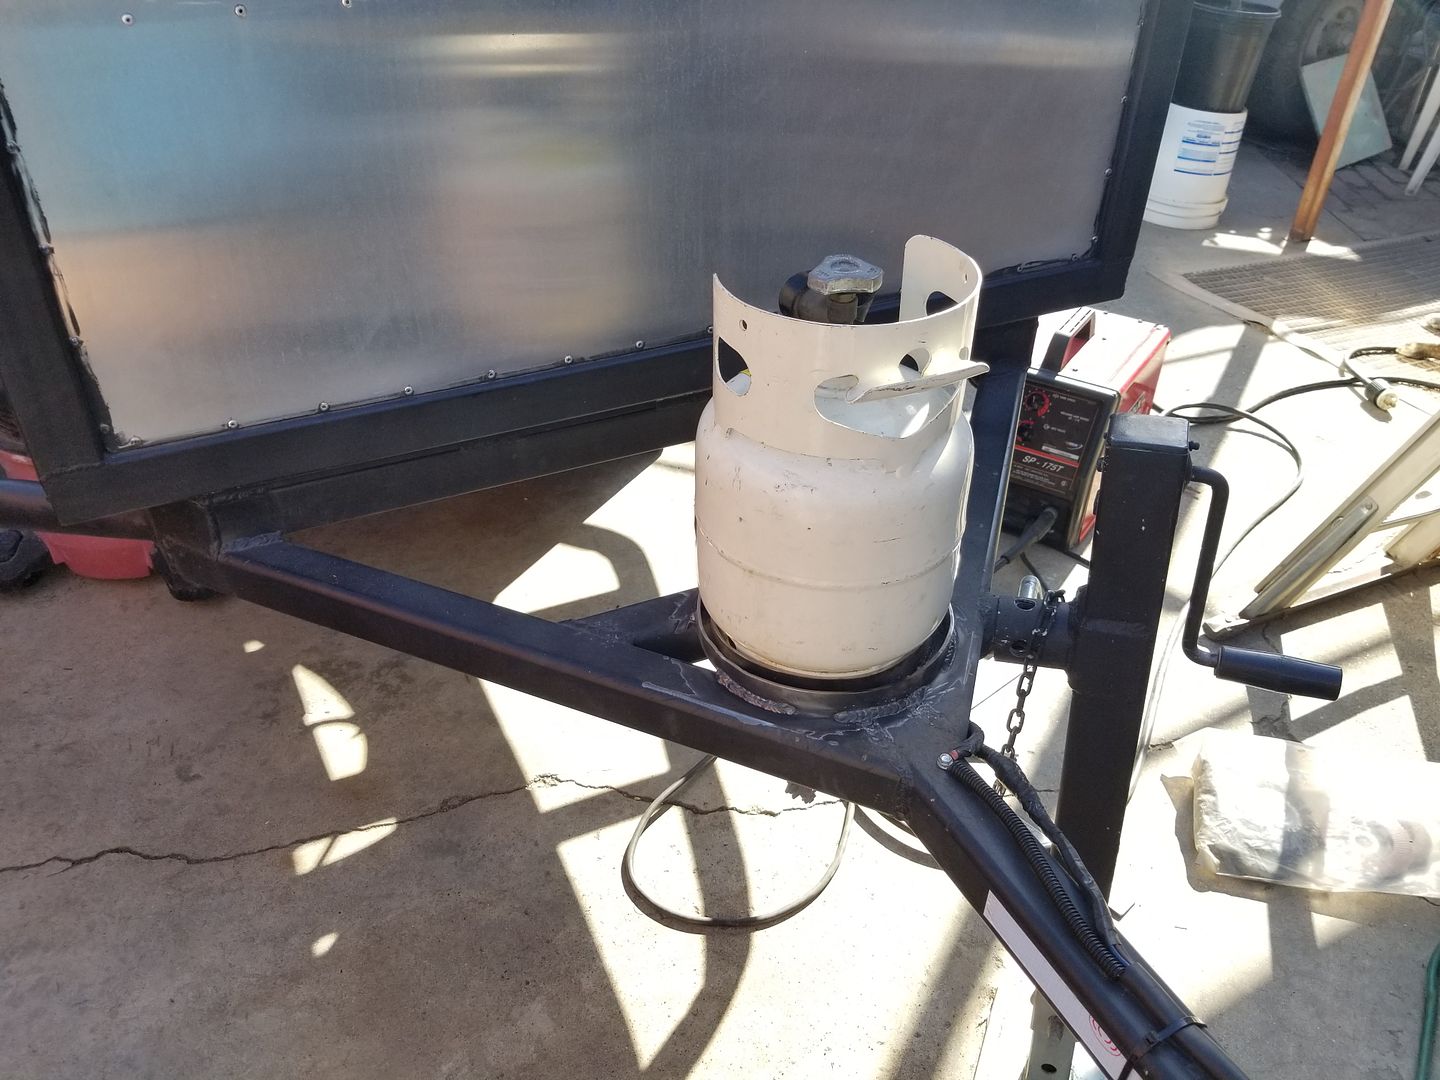
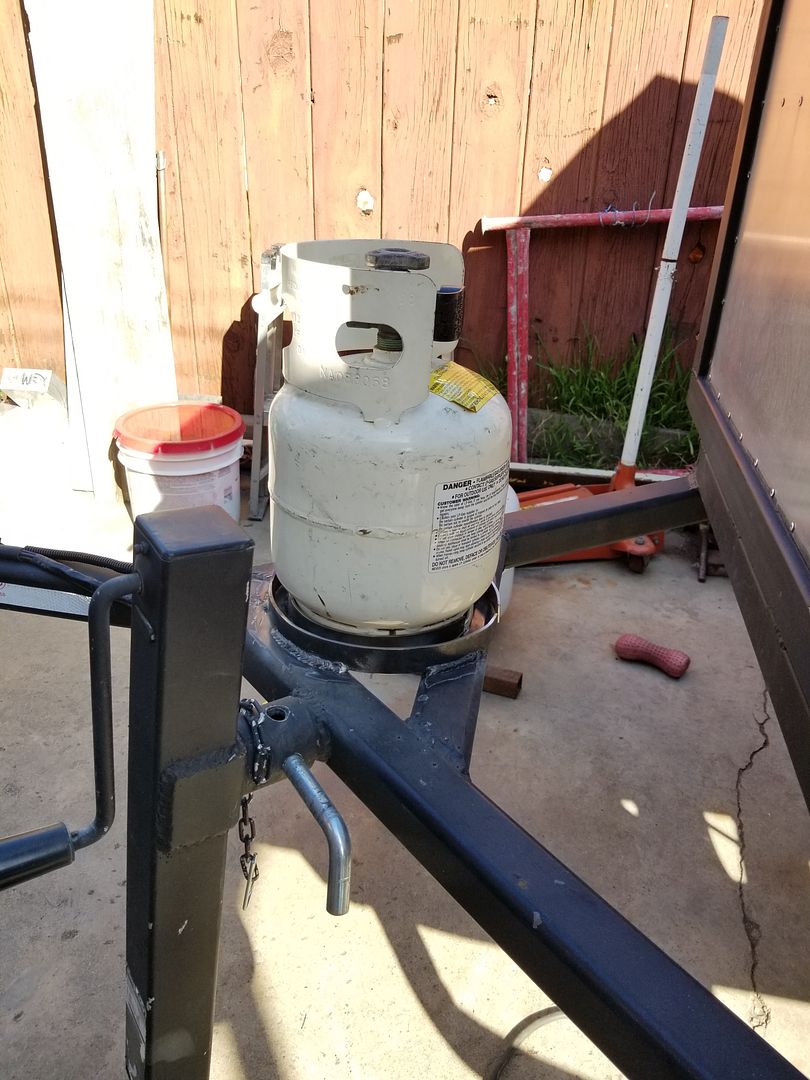
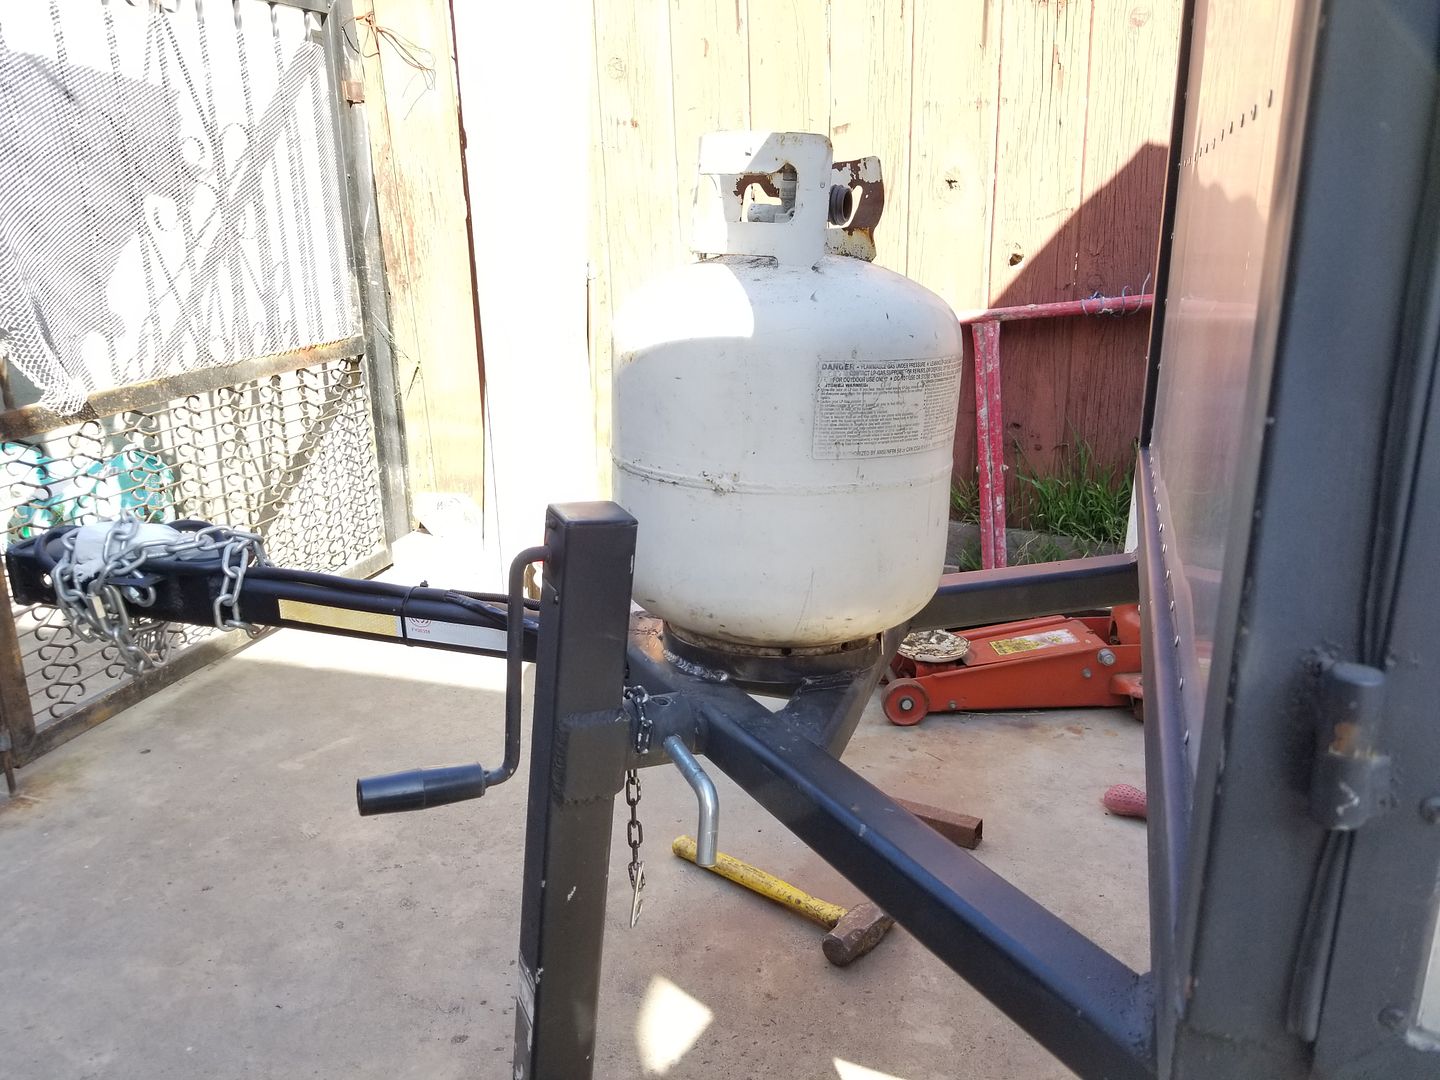
Now*I'll have to make an adjustable mount of some sort. maybe something that slides forward and back to compensate for going with a larger or smaller tank. and adjustable in height as well. I'll have to go to the drawing board and see what i can fab up.
 ​​​​​​​

Also today i got around to doing 2 things to the trailer. Nothing major but any work is better then no work done.*
First I made the two (+) and (-) wires with ring terminals to run my 2 batteries parallel.


and incase youre wondering... This is the thread of those wing nuts that i used to secure the wire to the battery posts

And i made some brackets to hold my 5lb and 20lb tanks on the tongue of my trailer. I can always use my small tank for a weekend trip. And if i decide i want to go on a week long trip or longer well i have the option of using a 20lb tank as well. Now i just need to figure out a way to secure the tanks in a locked position.

getting the position right


All welded into place

Final fitment before paint. I t was a bit tight on the large tank so i had to knock it open more to make it fit snug.


Now*I'll have to make an adjustable mount of some sort. maybe something that slides forward and back to compensate for going with a larger or smaller tank. and adjustable in height as well. I'll have to go to the drawing board and see what i can fab up.
 ​​​​​​​
Similar threads
- Replies
- 2
- Views
- 1K
- Replies
- 1
- Views
- 1K
- Replies
- 42
- Views
- 8K
- Replies
- 3
- Views
- 662
