Scott B.
SE Expedition Society
Sliders
The saga of my sliders. Well, yes and no. I had intended to install sliders as one of the very first mods to the truck. It didn't quite work out that way...
Shortly after taking delivery of the truck (and probably even before that), I spent countless hours reading on this forum and others about sliders. I learned of every manufacturer, of every style/design, of every everything. I perused all the information, compared one to the other against my intended use, all with the idea of finding the ultimate (for me) slider. Sure, we all do that, right?
After all that, I decided on the All-Pro HD Sliders. (At the time, they manufactured 3 levels of sliders - I don't think they do anymore.) I liked the frame mounting system, mounting to both the side and bottom of the frame rail. I also liked the appearance, and the weight of steel used in the construction. These met the approval of the engineer in me - not to say anything bad about any of the other designs.
I saved my pennies and ordered a set. When they showed up, they were not exactly what I ordered. More importantly, they did not have the proper business address on them, and the UPS guy almost did not deliver them. Additionally, the mounting hardware box looked like it had been through the ringer - I doubt that is how it left the manufacturer.
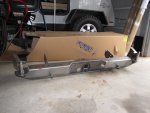
Here is a picture of the sliders, as delivered:
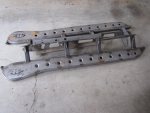
I did not order the fill plates, and was not sure I liked them. However, given the cost of shipping, I decided not to worry about it. I think I can learn to like them. (Spoiler alert - I did. I really like them, and they protect the truck paint too!)
As life happens, several months went by before I got around to do the initial fitment to the truck. I knew going into this that several holes needed to be drilled in the frame, so any excuse could be used to procrastinate that task.
I get the frame marked and drilled. I also determine that I can use 3 (1 on the driver's side, 2 on the passenger side) factory welded nuts on the frame. I have to modify a hole on the slider, but no big deal. I have to get some metric hardened bolts. I am starting to see that these are not exactly "just bolt right on"...
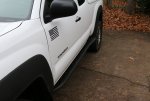
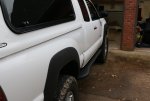
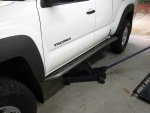
Here, you can see the slider held in its mounted position:
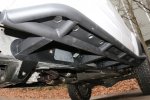
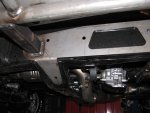
Here, you can see the mount to the frame, front to rear:
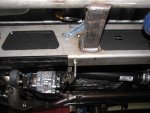
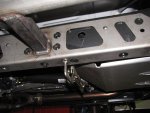
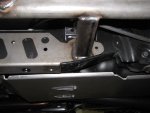
A couple more holes on the slider need slight adjustment. Again, no big deal. The big deal is how to bolt the front of the sliders to the frame. (The 3 holes in the first picture, above.) See, behind each hole in the slider is a huge opening in the frame - way too big for a nut and fender washer.
After thinking on this for a while (remember, months are passing) I came up with a simple solution. I welded nuts on backing plates. Simple, and I got to use my welder!
Here are the plates I made:

The large ones slide into the boxed section of frame, and the small ones slide into the transmission crossmember.
One more issue. Since I started this project, I replaced my exhaust system, which allowed me to mount my PelfreyBilt transfer case skid plate. Unfortunately, both the sliders and skid plate mount to the underside of the frame. This solution was easy. I cut a notch out of the under-frame part of the slider mount. Crisis averted.
There were still 2 questions I hadn't answered yet. One, how to prep the metal for finish, and two, how to finish the metal. I ruled out powder coating because it would be difficult to repair - I am sure these will get scratched. I went 'round and 'round between epoxy paint, frame coating, Line-X, and truck bed coating. I settled on Rustoleum Truck Bed Coating. Working backwards, I decided to prep the metal myself as opposed to having it blasted. Again, when repairing the finish, I will be doing it and not blasting it, so I figured it was not worth it. I really did not want to wire brush these things! I selected another Rustoleum product - Krud Kutter Metal Clean & Etch. I must say, I was pleasantly surprised! This product is great! It easily cleaned all the gunk off the metal - even light rust. And, it was fast!
Here is everything all cleaned up (drying in the sun):
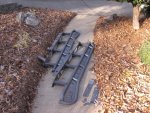
Temperature is in the low 60s - let's start painting! (Finally ) Two coats of Rustoleum self-etching primer in my outdoor spray booth...
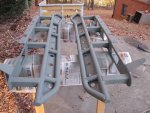
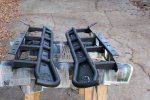
For the finish coat, I used Rustoleum gloss black on both sides of the frame mounting part, and Truck Bed Coating (TBC) on the rest. Since the TBC is textured, it will probably hold dirt. The gloss will clean easier, and not hold dirt between the mount and the frame (at least that's the idea).
So now I am playing a waiting game with the weather. I spray, and let it dry, and have to wait for warm enough temperatures to continue the process. It took about 2 weeks, but everything got painted - 2 coats:
The saga of my sliders. Well, yes and no. I had intended to install sliders as one of the very first mods to the truck. It didn't quite work out that way...
Shortly after taking delivery of the truck (and probably even before that), I spent countless hours reading on this forum and others about sliders. I learned of every manufacturer, of every style/design, of every everything. I perused all the information, compared one to the other against my intended use, all with the idea of finding the ultimate (for me) slider. Sure, we all do that, right?
After all that, I decided on the All-Pro HD Sliders. (At the time, they manufactured 3 levels of sliders - I don't think they do anymore.) I liked the frame mounting system, mounting to both the side and bottom of the frame rail. I also liked the appearance, and the weight of steel used in the construction. These met the approval of the engineer in me - not to say anything bad about any of the other designs.
I saved my pennies and ordered a set. When they showed up, they were not exactly what I ordered. More importantly, they did not have the proper business address on them, and the UPS guy almost did not deliver them. Additionally, the mounting hardware box looked like it had been through the ringer - I doubt that is how it left the manufacturer.
Here is a picture of the sliders, as delivered:

I did not order the fill plates, and was not sure I liked them. However, given the cost of shipping, I decided not to worry about it. I think I can learn to like them. (Spoiler alert - I did. I really like them, and they protect the truck paint too!)
As life happens, several months went by before I got around to do the initial fitment to the truck. I knew going into this that several holes needed to be drilled in the frame, so any excuse could be used to procrastinate that task.
I get the frame marked and drilled. I also determine that I can use 3 (1 on the driver's side, 2 on the passenger side) factory welded nuts on the frame. I have to modify a hole on the slider, but no big deal. I have to get some metric hardened bolts. I am starting to see that these are not exactly "just bolt right on"...
Here, you can see the slider held in its mounted position:

Here, you can see the mount to the frame, front to rear:


A couple more holes on the slider need slight adjustment. Again, no big deal. The big deal is how to bolt the front of the sliders to the frame. (The 3 holes in the first picture, above.) See, behind each hole in the slider is a huge opening in the frame - way too big for a nut and fender washer.
After thinking on this for a while (remember, months are passing) I came up with a simple solution. I welded nuts on backing plates. Simple, and I got to use my welder!
Here are the plates I made:

The large ones slide into the boxed section of frame, and the small ones slide into the transmission crossmember.
One more issue. Since I started this project, I replaced my exhaust system, which allowed me to mount my PelfreyBilt transfer case skid plate. Unfortunately, both the sliders and skid plate mount to the underside of the frame. This solution was easy. I cut a notch out of the under-frame part of the slider mount. Crisis averted.
There were still 2 questions I hadn't answered yet. One, how to prep the metal for finish, and two, how to finish the metal. I ruled out powder coating because it would be difficult to repair - I am sure these will get scratched. I went 'round and 'round between epoxy paint, frame coating, Line-X, and truck bed coating. I settled on Rustoleum Truck Bed Coating. Working backwards, I decided to prep the metal myself as opposed to having it blasted. Again, when repairing the finish, I will be doing it and not blasting it, so I figured it was not worth it. I really did not want to wire brush these things! I selected another Rustoleum product - Krud Kutter Metal Clean & Etch. I must say, I was pleasantly surprised! This product is great! It easily cleaned all the gunk off the metal - even light rust. And, it was fast!
Here is everything all cleaned up (drying in the sun):

Temperature is in the low 60s - let's start painting! (Finally

For the finish coat, I used Rustoleum gloss black on both sides of the frame mounting part, and Truck Bed Coating (TBC) on the rest. Since the TBC is textured, it will probably hold dirt. The gloss will clean easier, and not hold dirt between the mount and the frame (at least that's the idea).
So now I am playing a waiting game with the weather. I spray, and let it dry, and have to wait for warm enough temperatures to continue the process. It took about 2 weeks, but everything got painted - 2 coats:


