Se7en62's '97 Cherokee XJ "GROOT" Overland Build

Se7en62

Adventure Seeker
Alright, so my wife and I sold one of our other cars as we work towards becoming debt free. That said, the Jeep will become my DD before too long, while she drives our truck. That said, it's crunch time so I haven't been able to take pictures throughout different tasks.

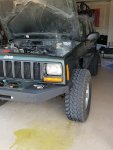
Installed the Rough Country Winch Bumper. - It took a bit of effort, as I had to heat the steering box bolts to extract them. Then I treated the front of the frame with Corroseal Rust Convertor. I don't know if you guys are familiar with the stuff, but it's $20 for a spray bottle, can be applied directly over rust, and it chemically converts Iron Oxide (rust) into stabilized Magnetite, then it dries in a paintable latex primer.- I'll remove the bumper from the unibody and coat the rails in Rust Bullet next week sometime, but I need to get the
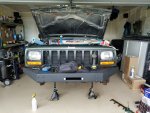
18955105_447059508988997_6063800033583683141_o (1).jpg

These are the high-beams after upgrading the headlight wiring harness. - This upgrade circumvents sending power to the light switch, routing it directly to the headlights. Other's have tested the output differential and found that the harness increases voltage to the lights by 1.5v-3.5v depending upon battery and alternator combinations. I haven't tested the voltage, but I can say that they are much brighter than before.
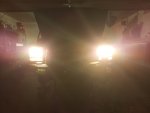
18920761_447599372268344_6066210775028307017_o.jpg

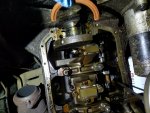
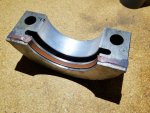
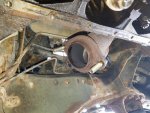
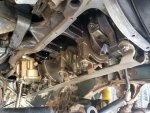
Next up is the Rear Main Seal replacement. - It was pretty straightforward since I already had the oil pan off: Pulled the lower bearing cap, removed and replaced the upper and lower seal halves, replaced the lower cap, and torqued to 80 in/lbs.
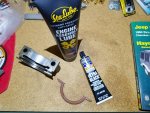
18922226_447956552232626_508749001526691933_n.jpg
18922124_447956588899289_8441332581208564268_n.jpg
18952609_447956565565958_7945413985360932153_n.jpg
18893198_447956635565951_874439492955736840_n.jpg

I scored a complete interior LED kit, sans the cargo dome LED's on ebay for $10. It was an easy install and only took about an hour, including installing LED's in the instrument cluster, HVAC controls, transfer case, map lights, foot wells, visors, and glove box. I'll order the correct LED's for the cargo area (561) and get them in shortly.
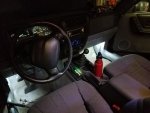
18920937_447637778931170_6699772029084464175_o.jpg

After the dust shields came in, I could finally replace the brakes. However, the 12-pt 12mm bolts that hold the hubs in are stuck pretty well and I even with plenty of heat and lubrication I was only able to get 2 out, before stripping the 3rd. I reinstalled the 2 and will leave the rest alone until I swap to a Dana 30 with 3.73's from a ZJ.
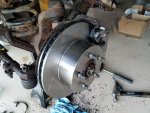
18953057_447956535565961_28490947339329677_n.jpg

Then, last night my brother came over and squared away the cargo area by installing anew rear seat, while I rebuilt the oil filter adapter and reinstalled the block girdle. Hopefully, tonight I'll be able to finish the oil pan and bleed the brakes. Then it should be ready to pull back out of the garage and take down to the muffler shop to have a new O2 sensor bung welded in and the cat-back exhaust buttoned up.

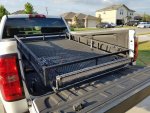
Quadratec had to backorder my Olympic Top Hat rack, so that is expected to come in later this month. I'm really hoping to have it installed with my RTT mounted before a big family camping trip in 2 weeks. - Fingers crossed.
 
Last edited:

Se7en62

Adventure Seeker
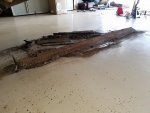
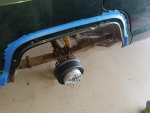
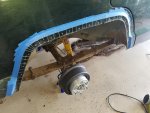
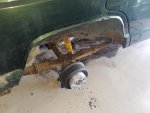
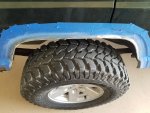
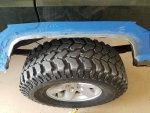
This morning, I put in a few more hours in garage. Since the rock panels were rusted, I cut them out all the way to the unibody. The plan is to replace them with a couple of 2x6 and/or 2/8 1/4"-wall rectangular tubing to form up some mini-boatside rock-sliders. Then I cut and tucked the rear fenders and started tucking the quarters.

All that's left of the factory rocker panels...
19059431_450085948686353_5453185121336965887_n.jpg

Taped...
18952659_450085975353017_533862900001618702_n.jpg

Radius Marked...
18952972_450085988686349_1610658060312196859_n.jpg

Cut and Tucked...
19059743_450086005353014_2905779644127128094_n.jpg

A little rust made itself known when I started hammering the tabs, so I filled it in with Corroseal to convert it into Magnetite and seal it with latex. I'll come back to it with some bondo and fill it before I Monsaline the exterior.
 
Last edited:
Se7en62

Adventure Seeker
Through happenstance, I met a new XJ pal here in TX. He bent a driveshaft while out at Hidden Falls and after a friend of his found my Craigslist ad for my spare winch bumper, he was able to get in touch with me and asked for assistance. I was already heading to the Wrench-A-Part, so while I was there I snagged him a driveshaft. He was able to limp his XJ to my place to get the driveshaft.

Turns out he now needs winch bumper and has offered to trade me for a Ford 8.8 w/ LSD and 3.73 gearing, along with the flange adapter. This upgrade will give me a much stronger rear end, disc brakes, a limited slip differential, and better gearing. To match the 8.8's rear gearing, I'll pick up a ZJ's D30 HP and stick that in up front, since it's cheaper than re-gearing.

I was planning on an 8.8, but further down the road. Now that it's coming a little earlier, I'll order new brake calipers, rotors, and pads, along with new OME HD leaf packs, and u-bolt perches and install them all together as one new unit with some new Grade 8 hardware.
 

JandDGreens

Adventurer
Nice to met new friends with like interests and the same platform. We learn how to fix all kinds of issues and it is always refreshing to have assistance on something that is new to you.
 

Se7en62

Adventure Seeker
This past 10 days has been really hectic, but long days at the office and long nights and weekends in the garage have paid off. I've been so busy I haven't been able to update this thread, but here goes the condensed version:

6/15/17 - Bought a custom roof rack from a local XJ guy. It's about 70" in length and 48" in width. I'm not sure if I should cut the upper rails off to flush-fit my RTT to it, or if I should just mount the RTT on top of the side rails and call it good. Any input?

19145860_452069618487986_4861977598662921820_n.jpg

19145750_452069631821318_6591779128873470075_n.jpg

6/16/17 - I started working on the rear fenders to stop and fill some rust that I found in the upper fender edges.

19224868_453598051668476_7458397723273147862_n.jpg

19225571_453598065001808_3939197532562216743_n.jpg

6/17/17 - After a week of fooling with lesser bits, I found some good info that said Cobalt bits would chew through the hardened manifold bolts I had previously broke off when removing the mid-pipe. I started with smaller bits and worked up to a 3/8" bit, then dropped in some Grade 8 hardware and a new seal (not pictured.)

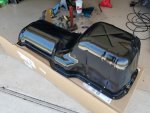
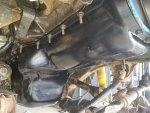
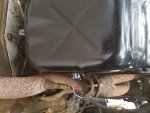
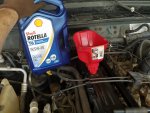
Now that the manifold was sorted, I could tackle the install of the new oil pan. I had held off, to give my drill and hands more clearance while I worked on the manifold bolts. I scrapped the bottom of the block clean, used the Fel-Pro seal holders, and replaced everything with a brand new pan. Then it got 6.2L of Rotella T6 and an FL1A. This allowed me to replace the mid-pipe and secure it with the Grade 8 nuts. (Not pictured, is the replacement of the seals within the 90° oil filter adapter. - It took a T60 and breaker bar, then the o-rings were an easy swap.)

19092947_453088171719464_3180527423265479634_o.jpg

19225896_453338068361141_1289379614850485025_n.jpg

19225879_453338088361139_1979273143416568816_n.jpg

19260472_453338105027804_2283603561283152915_n.jpg

19105914_453338141694467_134100785392774374_n.jpg

19366145_453338128361135_4994509224191146610_n.jpg
 
Last edited:
Se7en62

Adventure Seeker
6/17/17 - My wife and I hoped in the Jeep and took it for a quick spin around the block of our new neighborhood. We had a couple of funny looks, since it was straight-piped, but most of my neighbors have seen me working in the garage, so the funny looks were all followed by laughs and waves. I tried to keep it down, so we drove over to the side of the neighborhood where the houses are still being built to test out the transfer case in all gears. - Everything worked flawlessly. However, we quickly realized it needs some more fender trimming up front.

19149287_453341065027508_4890435241351695179_n.jpg

19260610_453341011694180_1988568024592546843_n.jpg

19225880_453341025027512_4766884321720762591_n.jpg
^^this is how far back I've cut the fender to now and so far there's no rubbing lock-to-lock^^

6/18/17 - It was a Sunday and the welding shop was closed, so I was stuck with a straight-pipe. I decided I'd finish painting the rear fenders...then the windshield wipers...and the cowl panel while I was at it. With the paint still drying, we jumped in the Jeep to go meet up with my parents and nephews who were camping near Lake Georgetown in their new camper for Father's Day. The exhaust was loud and the CEL for the missing downstream O2 sensor caused us to get 10mpg, but it was nice to finally run Torque Pro (app) while driving.

19225976_454096648285283_6769046631533256815_n.jpg

19225145_454096664951948_6686084328703892826_n.jpg

19260592_454096678285280_1010495805043268875_n.jpg

19225878_454096691618612_4686052246048147130_n.jpg

6/19/17 - Finally, it was Monday...again. I f__king hate Monday's. Regardless, it meant the muffler shop would be open and I could get one step closer to be legal, so I took a half-day off work and drove it down to their shop. The welder had it in and out in about 30 minutes, with my fresh Dynomax cat-back could be installed with a new O2 sensor. The Jeep sounds so clean, with just a slight rumble.

On the way back, the A/C started stumbling, intermittently blowing lukewarm air. I stopped by Autozone and picked up an 18oz can of A/C Pro R134a, but the compressor wouldn't click over since it was so hot outside and the system was so low on freon, so I decided I'd wait until nightfall to try getting a good reading again.

19243201_453075725054042_7373416762553446790_o.jpg

19225485_454108928284055_7047624502921003405_n.jpg

Last night, my brother came over to help mount the roof rack and A/C. We fixed the A/C and it took a all 18oz of freon to show 'low'. I'll probably check the pressure again and stick another small bottle in after a day or so. It was blowing ice cold though last night, so we took it around the block to make. We snapped this picture, then drove back to the house and threw the rack up on the roof. - I'll get a better picture with the roof rack today.

19223042_454263968268551_4697080770096254670_o.jpg
 
Last edited:
Se7en62

Adventure Seeker
she is looking great..:Wow1:

Thank, there's still that bit of rust in the door sill of the driver's side passenger door, but it'll get fixed when I weld in the new mini-boat-sides. I picked up a welder from a buddy, so I'm going to YouTube how to weld in the another week.

In the mean time, my brother and I mounted the roof rack and today I'm going to cut it to fit my RTT. Then I need to rebuild my lightbar with new sealant and wiring.
 

Se7en62

Adventure Seeker
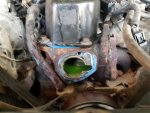
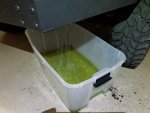
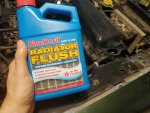
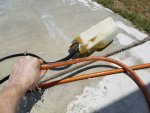
Two weeks ago (6/23/17), I started having an overheating issue. - I replaced the thermostat with a new 195° unit, drained and flushed the system, then filled it with BlueDevil coolant cleaner. For a "deep cleaning" the instructions called for it to be poured into the radiator, then topped off with water and ran for 6 hours over a period of a couple days. Something to remember, is that this flush system doesn't do much for your boiling point, as it's 90% water. With a boiling point of 211° at our altitude, it overheated quickly. After nursing it around for a couple days, I flushed the system again from both ends of the radiator, then buttoned everything back up and refilled with 50/50 and topped with a new radiator cap. After another day of overheating, I realized the radiator cap wasn't seating properly and needed replacement. The 2nd radiator cap worked like a charm and fixed my overheating issue, as long as the AC was off.

19397095_456266761401605_5333972415082974809_n.jpg

19399049_456266811401600_2972114971305982477_n.jpg19510365_458069561221325_5125049031620734809_n.jpg

19429714_458069427888005_328208315526916883_n.jpg

19665502_462362270792054_7895465721285218791_n.jpg

19748919_462362067458741_4861834476297611358_n.jpg

19702477_462362147458733_319912112605282838_n.jpg

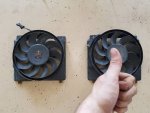
When the AC was turned on, the temps would climb up pretty quickly and it'd begin to overheat. After talking to my best bud (who's a Jeep mechanic for Pink Jeep in AZ), he had me testing the factory electric fan. - Sure enough, the fan was dead and wasn't kicking on at all. It never had before, so I didn't realize the engine was missing a certain sound when the AC was flicked on. A quick trip to the Wrench-a-Part had me fixed up with an identical fan from a '98. This has pretty much solved my overheating issue. I took it for a spin in the dirt to see what kind of load I could put on it. In 104° heat, with the hood closed, in 4-Lo at 5mph with the AC on, it never rose above 222.3°. Even wheeled through a little rock garden and it all held with no leaks or overheating.

19665213_462362180792063_7724889381849828095_n.jpg

19657423_462362337458714_946124140379224905_n.jpg
 
Last edited:
Se7en62

Adventure Seeker
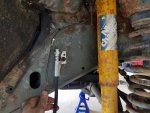
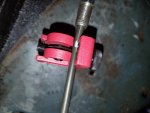
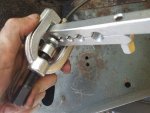
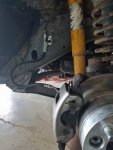
Then on 6/29/17, I lost all brake pressure when leaving work, but was able to nurse it to the auto parts store with the emergency brake. I pulled off into the Advanced Auto Part lot and found that my front right hydraulic hard line had ruptured right where it goes through the inner fender. I took a couple looks at things and figured what parts and tools I needed. $122 and two hours later, I was back in my garage with a bunch of work to do. I cut the old line out, then started to set about bending and fitting beginning with a 72" straight line with fittings on either end. Once I had it fitted, I had about 8" of extra line that needed cutting. I cut the line, added a new double-flare to the end and installed a new Chevy 1500 brake lines (which provides the XJ with 3" longer lines.) After everything was fitted, it was time to bleed.......or so I thought........Turns out the PO cracked a bleeder valve off the back drum. "Hey, no problem, I've got spare drum cylinders." Wrong...the backing plates are so rusted, it's impossible to remove the cylinders or even cut the out (as the grinder wouldn't fit.) The next best thing I could figure, was to cap off the rear brakes and run front brakes only until my new Ford 8.8 comes in with disc brakes. Only a couple weeks more weeks...

19510599_459520974409517_4503592823699384700_n.jpg

19554545_459521001076181_7444373244779650770_n.jpg

19601151_459521141076167_9007984057316523895_n.jpg

19510441_459521174409497_7827807817895229629_n.jpg

19510093_459521207742827_6315908680201886444_n.jpg

19598626_459521231076158_8809547776989748356_n.jpg

19510184_459521274409487_8051604127949245254_n.jpg

19510523_459521337742814_2006674187273050564_n.jpg

19510133_459521394409475_1769193547345927121_n.jpg
 
Last edited:
Se7en62

Adventure Seeker
Finally, it was time to mount the tent. - After careful consideration, I decided to cut the roof rack down to fit the RTT, rather than just throw the RTT up on the highest rails. I measured ten times and cut twice; the second cut was because one of the side-LED support bars I left, had to be cut 1/2" shorter than the other to clear one of the tent's erecting bars. All in all, I think it worked out well and my wife and I were able to hop in and go watch the 4th of July fireworks from the back of the Jeep up on a hill.

19665681_462378814123733_3221820952440950627_n.jpg

19657238_462361974125417_828540508627672543_n (1).jpg

Then my brother came over and helped me mount it up yesterday evening. It was a bit of a PITA since the base of my rack is expanded steel, so getting the bolt placement right was a chore. All it all, it's secure as can be, so we'll see how it does when I get home this evening and deploy it and hook up the lower annex for the first time.

19702382_462361904125424_686616515247990590_n.jpg
 
Last edited:
Se7en62

Adventure Seeker
Last week, my wife and I had some time in the evening to drive up the hill and test the RTT on it's new foundation. The new rack held it perfectly and didn't flex at all with the three of us in it.

19748353_462582100770071_1156872018219736603_n.jpg

We were running out of light, so we didn't install the annex portion of the tent. We'll do that this weekend and set it up in the front yard to make sure everything fits. One thing i already noticed when installing the window awning poles, was that the front of the roof rack is in the way of the front awning pole.

19756700_462582170770064_295897949186078540_n.jpg

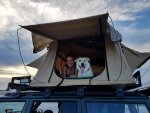
Beyza is a 10 month old Turkish Akbash, so she's about 90 lbs right now. By September she should be over 100 lbs, so picking her up into the tent is not going to be an option on the trail or in the backcountry, so she'll be sleeping inside the Jeep, or in the annex when it's deployed.

19701969_462582140770067_2815428789922889936_n.jpg

How do y'all store the annex portion of your tent? The annex for this Mt. Shasta Extended is really large, so I'm thinking a good compression sack might be best. Either that, or re-purpose the Trasharoo to stow the awning while in transit.

------------------------------------------------------------------------------------------------------------------------------------

EDIT TO ADD: I've since found that I can add another line of awning track and leave the annex attached while in transit. I'm going to work on this over the weekend to find the most efficient method of deploying and re-packing the RTT with the annex attached.

Video of CVT RTT being deployed after being stowed with annex attached:
 
Last edited:
Se7en62

Adventure Seeker
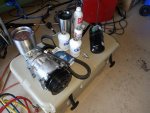
My wife and I took the Jeep up to Lake Georgetown for some hiking and on the way home the AC compressor locked up and caused the Jeep to begin to overheat. After letting it cool off for 15 minutes and water the dog, we finished driving home without issue [as long as the A/C was OFF.] I ordered the new compressor and dryer and let my buddy know when I'd need his assistance with his manifold gauges.

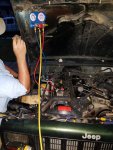
[7-14-17] Friday evening I swapped the compressor and belt, while Andy worked on replacing the dryer. It was a quick job, until we went to pull a vacuum and it didn't hold more than a few minutes.

20031935_468092900218991_127983559397370840_n.jpg

We cranked up the compressor and pressurized the system to see if we could detect where the system was leaking. It sounded like it was behind the firewall, so it had to be the evaporator coil. By this time, it was getting late and had minimal light, so Andy left and returned the next morning.

[7-15-17] Saturday morning,we spent four hours removing the dash to get to the A/C box.

20106308_468092920218989_2456406611310477151_n.jpg

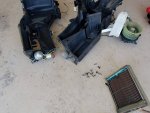
Once we got the A/C box out and opened, we discovered not only was the evaporator coil leaking, but the heater core had begun to leak as well. This left us with nothing else to do, but order the parts and go do what we had originally planned for Saturday.

20140004_468092980218983_2878166957604593763_n.jpg

Andy was able to source a couple new airbags for his rebuilt '01 XJ, as well as this Ford 8.8 with an LSD from '99 Ford Explorer.

19990253_468093003552314_1302593917286581771_n.jpg

Since I already have a buddy bringing me a Ford 8.8 w/ 3.73's and an LSD from Houston, I needed to find an axle with matching gears. It was my lucky day, because I found a low-mileage ZJ Grand Cherokee with a LP D30 w/ 3.73's, U-joint driveshaft yoke, AND U-Joint axle shafts. - This baby will bolt right in!

20139900_468093040218977_1338439311869516217_n.jpg

I also picked up a couple door sill trim pieces I needed and a mint steering wheel to replace my ragged wheel.

This evening we'll finish reinstalling the A/C box and dash, recharging the A/C system, and re-burping the coolant system. Tonight, I'll order new control arms and leaf springs and hopefully we'll be ready to bolt in the new axles in the next two weeks. - Pending my Ford 8.8 coming from Houston...

Otherwise, the next fabrication item on the list is boat-side rocker panels, so we'll be taking the XJ's out to Kerrville to fab them up in a much more well-equipped shop than my own.
 
Last edited:
unkamonkey

Explorer
AC units can be wonderful. My neighbors Excursion would need to be recharged every year. The rear AC system leaked and Ford didn't want to fix it. They didn't want to pull the headliner out.
We talked to people and they all were like that.
My '94 Mitso Fuso, AC still works fine. My old Volvo164. AC worked fine. I used to stuff a beer can under it to keep it cool on the road. I had an old 68 Volvo station wagon. AC worked great even if it was cooling an entire station wagon.
OK, the heat and AC in my '93 Chevy sucks.
 

Se7en62

Adventure Seeker
Yep, I've had issues with A/C systems in several Nissan trucks ('86 Hardbody, '00 Xterra, '04 Fronty) and most recently in my wife's Volvo ('12 XC60) about 2 years ago. This Jeep is 20 years old and was neglected pretty badly by it's PO. Since we are planning to take it nearly 3,000 miles across TX, NM, CO, and WY next month, I want to get this A/C system back to peak performance for both hot and cold climates. It'll also get tint for the windows to help maintain comfortable interior temperatures along the way since the trip will see temps from 105°F to below freezing.

Last night we spent another 4 hours reinstalling the new evaporator coil and heater core, along with the dashboard. We pulled a vacuum and left it overnight, so this evening I'll check that it held a vacuum for ~24 hours, then I'll refill it with freon and compressor oil. All in all, I'm on the downhill side of this task and looking forward to the next.
 

Forum statistics

Threads
188,022
Messages
2,901,291
Members
229,352
Latest member
Baartmanusa
Top