Retired Tanker
Explorer
I put a winch on my 05 Sequoia. I wasn’t interested in an off road bumper; I wanted a more customized look…a stealth look. Maybe I was inspired by all of those car customizers on Sunday morning, I don’t know.
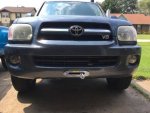
I will say that I really proud of the look. I think it’s a really clean install, looks really integrated, like it was meant to be. And it wasn’t easy.
If you want to follow in my footsteps, by all means give it a go! You need to have a good ½ drill, an angle grinder with cut off wheels, some 2x3” metal tubing, and a local store for the other metal parts (Lowe’s, Tractor Supply, etc.). And a welder that can weld at least 3/16 mild steel (1/4” would be better).
The problem:
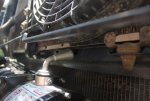
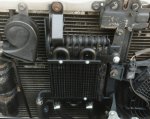
There’s not enough room to stuff a winch. There’s about 4 ½” between the rear of the bumper and the radiator. Most 12K winches are about 6x6x22, give or take. Also, there is a center support for the trans and AC coolers that intrudes into that space.
The solution:
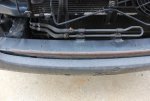
Delete the Styrofoam bumper pad and push the bumper 2” forward into that space using custom “spacer blocks.” Modify the center support by adding a bolt about 2” above the existing one and trimming it up. I actually mocked it up using perforated square tubing to see that the bumper cover would actually fit over it. After I convinced myself that the plan was sound, I got to work on the rest.
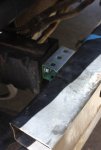
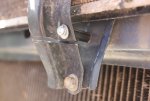
I replaced the perforated tube spacers with 2x3” mild steel. I used M10x1.25 flange bolts to mount them to the frame horns and to the bumper. I welded the bolt flanges to the spacers on the side facing the bumper to make assembly and disassembly easier. I used the stock nuts on them to fasten the bumper to the spacers. The trick here is a little geometry to make sure the holes are spaced properly because of the angle on the frame horn mounting plates. Or, you can bolt the spacers to the plates, then clamp the bumper to the front of them (centered of course) and mark the holes.
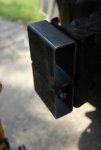
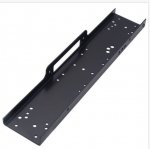
I built a custom mounting plate that bolts to the frame where the recovery points are. I used a 3/16 plate because that’s what I had. I added 3x7” plates to the edges to reach back to the recovery point bolts. I reinforced the edge welds with diamonds. This winter I’m going to pull it apart and use the existing plate as a template for a 1/4” replacement.
On the bumper, I cut off the stock mounts for the skid plate and steering fluid cooler. I added supports to the front of the winch plate again with flange bolts. I welded the brackets to the rear of the bumper, the flange nuts to the bottom of the winch plate.
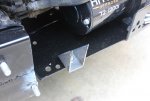
During a test fit I found that the spool clutch lever was hitting the AC condenser fan and AC lines. So, I clocked the clutch lever 1-hole to the front (about 1/10 of a turn). There are a number of youtube videos online that show how to do this.
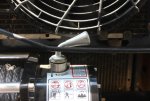
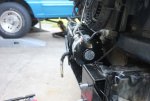
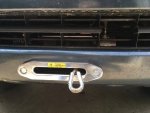
The bottom of the cable spool lines up perfectly with the channel in the back of the bumper (huge bonus!). So, I cut a hole in the front of the bumper using the hawse fairlead for a template. I found flange nuts to match the fairlead mounting bolts and welded them inside of the bumper channel.
I cut the little hooks off of the front of the skid plate, bolted it to the rear mounts, then marked, drilled, and bolted the front of the skid plate to the winch plate. However, I didn’t use the center hole, because it was right under the winch spool. And, yes; I welded the nuts to the winch plate. A better approach might be to use a length of 1” steel tube welded to the bottom of the winch plate, which would allow the use of the helper hooks. That might be something I add when I redo the winch plate this winter.
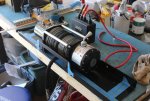
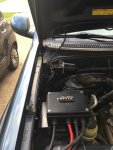
I mounted the control box in the engine compartment near the air cleaner. That meant making custom cables, and I used 2 AWG welding cable for the three that go to the winch. I think the stock cables are 4 AWG, so I might make 2 more for the power and ground cables this winter. To make the mount I just bent some 12 gauge metal sheeting. When I opened the control box to switch the cables, I realized that if I bolted the box to the plate, then I couldn’t screw the lid back on. So, I epoxied the mounting bolts into their recesses on the bottom of the box which would hold them long enough to get the nuts on them. I also stripped out the screws when putting the lid on. So I drilled through the lid and shove plastic expansion anchors into the bottom holes of the box. Next, I used stainless sheet metal screws to go through the lid and into the base of the control box into the anchors. Now if I need to get to the innerds of the control box, I don’t have to remove the mounting plate, etc.
While all of this seems pretty straightforward, there were some missteps and replanning that got me here. This whole operation took me several months because, well, life! I’ve got 6 grand kids and a lot going on. My point is, I didn’t write this as an instruction manual. I may have missed something important, not intentionally, of course. I did this knowing that I might need to revert the old girl back to stock as cheaply as possible. If so, all I need is a front bumper support and a bumper cover. Everything else just bolts off.
I could only post 10 pix, so if anyone needs a bit more detail, just let me know!
Tank

I will say that I really proud of the look. I think it’s a really clean install, looks really integrated, like it was meant to be. And it wasn’t easy.
If you want to follow in my footsteps, by all means give it a go! You need to have a good ½ drill, an angle grinder with cut off wheels, some 2x3” metal tubing, and a local store for the other metal parts (Lowe’s, Tractor Supply, etc.). And a welder that can weld at least 3/16 mild steel (1/4” would be better).
The problem:
There’s not enough room to stuff a winch. There’s about 4 ½” between the rear of the bumper and the radiator. Most 12K winches are about 6x6x22, give or take. Also, there is a center support for the trans and AC coolers that intrudes into that space.

The solution:
Delete the Styrofoam bumper pad and push the bumper 2” forward into that space using custom “spacer blocks.” Modify the center support by adding a bolt about 2” above the existing one and trimming it up. I actually mocked it up using perforated square tubing to see that the bumper cover would actually fit over it. After I convinced myself that the plan was sound, I got to work on the rest.


I replaced the perforated tube spacers with 2x3” mild steel. I used M10x1.25 flange bolts to mount them to the frame horns and to the bumper. I welded the bolt flanges to the spacers on the side facing the bumper to make assembly and disassembly easier. I used the stock nuts on them to fasten the bumper to the spacers. The trick here is a little geometry to make sure the holes are spaced properly because of the angle on the frame horn mounting plates. Or, you can bolt the spacers to the plates, then clamp the bumper to the front of them (centered of course) and mark the holes.

I built a custom mounting plate that bolts to the frame where the recovery points are. I used a 3/16 plate because that’s what I had. I added 3x7” plates to the edges to reach back to the recovery point bolts. I reinforced the edge welds with diamonds. This winter I’m going to pull it apart and use the existing plate as a template for a 1/4” replacement.
On the bumper, I cut off the stock mounts for the skid plate and steering fluid cooler. I added supports to the front of the winch plate again with flange bolts. I welded the brackets to the rear of the bumper, the flange nuts to the bottom of the winch plate.

During a test fit I found that the spool clutch lever was hitting the AC condenser fan and AC lines. So, I clocked the clutch lever 1-hole to the front (about 1/10 of a turn). There are a number of youtube videos online that show how to do this.


The bottom of the cable spool lines up perfectly with the channel in the back of the bumper (huge bonus!). So, I cut a hole in the front of the bumper using the hawse fairlead for a template. I found flange nuts to match the fairlead mounting bolts and welded them inside of the bumper channel.
I cut the little hooks off of the front of the skid plate, bolted it to the rear mounts, then marked, drilled, and bolted the front of the skid plate to the winch plate. However, I didn’t use the center hole, because it was right under the winch spool. And, yes; I welded the nuts to the winch plate. A better approach might be to use a length of 1” steel tube welded to the bottom of the winch plate, which would allow the use of the helper hooks. That might be something I add when I redo the winch plate this winter.
I mounted the control box in the engine compartment near the air cleaner. That meant making custom cables, and I used 2 AWG welding cable for the three that go to the winch. I think the stock cables are 4 AWG, so I might make 2 more for the power and ground cables this winter. To make the mount I just bent some 12 gauge metal sheeting. When I opened the control box to switch the cables, I realized that if I bolted the box to the plate, then I couldn’t screw the lid back on. So, I epoxied the mounting bolts into their recesses on the bottom of the box which would hold them long enough to get the nuts on them. I also stripped out the screws when putting the lid on. So I drilled through the lid and shove plastic expansion anchors into the bottom holes of the box. Next, I used stainless sheet metal screws to go through the lid and into the base of the control box into the anchors. Now if I need to get to the innerds of the control box, I don’t have to remove the mounting plate, etc.

While all of this seems pretty straightforward, there were some missteps and replanning that got me here. This whole operation took me several months because, well, life! I’ve got 6 grand kids and a lot going on. My point is, I didn’t write this as an instruction manual. I may have missed something important, not intentionally, of course. I did this knowing that I might need to revert the old girl back to stock as cheaply as possible. If so, all I need is a front bumper support and a bumper cover. Everything else just bolts off.
I could only post 10 pix, so if anyone needs a bit more detail, just let me know!
Tank
Attachments
Last edited:

