Steerable Trail Trailer

Curtis in Texas

Adventurer
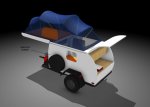
Being as how I like to go in some of the tightest places I designed a trailer I can sleep in and take it with me on the tightest trails. This one has a wireless electric ram remote control steering.

I'm about half done with it, so be patient in how fast I post the build up.

Ist, I had this small Isuzu pickup frame I wasn't using and had looked at that thing for years trying to figure out what to do with it. I cut the frame in half and built a pickup bed trailer for a friend out of the back half.

Then the wheels started turning so to speak. I'm not one of those inside the box builders.
So I may offend some of you. But here goes.

I got part of the design from JJBiggs's drawings he posted up several years.
Mine is full width and longer than in the drawings, but the concept is the same.
 

Attachments

  • TearDropConceptII-D.jpg
    TearDropConceptII-D.jpg
    48.4 KB · Views: 99
  • TearDropConceptII-C.jpg
    TearDropConceptII-C.jpg
    69.5 KB · Views: 94
Last edited:

Curtis in Texas

Adventurer
As I alluded to in the Title this one steers.
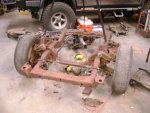
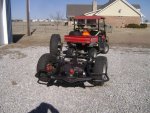
So here's the frame. It's an IFS torsion bar suspension and will be steered with a 1300 lb 12 volt ram.
Can crank up the torsion bars to raise the height and clearance.

I added the fuel tank to the rear of the frame complete with factory skid plate. Had the tank sealed for 26 gallons of potable water. Probably won't be drinking the water, but the sealant we used says I could. (It was a new, unused fuel tank)
 

Attachments

  • DSC02115.jpg
    DSC02115.jpg
    536.3 KB · Views: 108
  • DSC02211.jpg
    DSC02211.jpg
    596.1 KB · Views: 121

Curtis in Texas

Adventurer
Got the floor frame done a few months ago, before I got sick, and added three access doors to the steering compartment, battery storage and fuel tank access. (Sorry about the sideways picture!)

I looks like it's heavy, but it's build like furniture. with Dado's and Pocket screws.
The plywood is 3/8's and 1/8 inch to save weight. The sidewalls will be glassed in for strength later.

(I'm going to need to load up some more pictures on the Forum to continue the story. So stay tuned if you like it.)

Oh and for the record, I use to make my living building Camping Trailers for several Texas Trailer Companies.
It was years ago, but I never forgot the best trailer construction methods I was taught.

I'll probably skip a lot of the little details just so I can get this posted up faster. But it's got a lot of little things you won't see. Hopefully my spell checking can keep up!
 

Attachments

  • 20160816_123809.jpg
    20160816_123809.jpg
    561.5 KB · Views: 93
  • 20160819_144634.jpg
    20160819_144634.jpg
    523.9 KB · Views: 87

Coachgeo

Explorer
As usual anything Curtis does is more like Ridiculous Equipment than sick stuff. Curtis will get it :smiley_drive:

Glad to see you feeling better and in the shop Curtis. Looks awesome!!!
 

Nd4SpdSe

Adventurer, eh?
I do love this build. I had through about something along the lines for mine, but it was way too ambitous for a first project and I didn't seem it necessary for me, but would of been damn cool. Maybe if I ever do a 2.0 I'll be able to do it ;)

Subscribed :)
 

Curtis in Texas

Adventurer
As usual anything Curtis does is more like Ridiculous Equipment than sick stuff. Curtis will get it :smiley_drive:

Glad to see you feeling better and in the shop Curtis. Looks awesome!!!

Thanks George. It's taken a long time to get this going and it's slow. I work on it when I can and have the cash for the top shelf stuff. Trying hard not to post up the build so fast that I can't keep a pace where I have it finished as the post go up at regular intervals.

Such as the solar panels are here and working. And I'm wiring in the kitchen. But those pictures and write up are for down the road. I did get a lot of pictures loaded up on the Forums site last night. But there's tons more. Just explaining them will be a major task.

Happy Thanksgiving Ya'll.

And if any of you guys are ever in the DFW area and want a sneak peek at the current progress give me a hollar. Would love some visitors. I'm not far from the Texas Motor Speedway.
 

Curtis in Texas

Adventurer
The funniest part of this build is I am a metal fabricator more than I am a wood furniture builder.
But, I do know how.

I thought I'd try to explain the steering system under the trailer.
And hopefully the system will make more sense to you guys.
This is not a half baked idea I dreamed up one morning and decided to slap together.
This is a culmination of years of planning and testing.

Note that the suspension with it's stock shock absorbers, is the front frame half of a torsion bar sprung IFS Isuzu pickup with the steering box removed. I used a second idler arm in place of the steering box to keep the steering concentric. These vehicles come in left hand and right hand drive configuration from the Isuzu Factory, so the Idler arms are symmetrical. Pretty much a no brainer! The 12 volt steering ram will piggy back with the steering dampener shock in the final solution.

And it uses the same wheel bolt pattern as my Expedition Grade Isuzu Rodeo.

I am using a push/pull 12 volt electric ram. The one in the picture is a 440 lb ram, but I have a 1340 lb ram that will replace it later. The picture I'm showing you of the smaller capacity ram, was a proof of concept test, and it worked well under the bare frame. The steering is not designed to be capable of turning the loaded trailer while sitting parked on a paved parking lot. But, of course it will turn a lot easier while moving even at slow speeds or on dirt/ sandy surfaces. The ram speed is slow so it will be easy to control even at faster speeds.

The plan for the final stage of the steering will include a steering dampener (not shown in the POC picture) to help absorb some of the shock loads when in operation in the field.

There is a centering lock handle that when set will drop in and lock the steering in the straight ahead position as the steering passes it's location. I will have to raise the spring loaded handle, much like a parking brake handle, to unlock the steering. And there will be a micro switch that will only allow the steering ram power to be activated once the steering ram is in the unlock position.

Steering input will be controlled by a wireless remote winch control sending unit. So it will be one button for left turn ( winch in) and one button for right turn (winch out). (I'll relabel the buttons later)

And in case you are wondering how will I know how hard it's turning, short of getting out and looking, it will have a long push pull cable from the idler arm to the front of the trailer that will move a indicator arm mounted on the front outside wall of the trailer. That indicator will be visible in the rear view mirror of the tow vehicle. The indicator will be a lot like a large amp meter needle gauge.
With the needle straight up, steering will be straight ahead. Simple so I can actually use this trailer behind any of my vehicles without a lot of wiring hassles. Just take the remote, plug the trailer lights in and go.

The power switch to arm the steering will be behind a hatch in the front drivers side corner of the trailer.
This way an LED indicator bulb, visible next to the turn indicator gauge, will show when the system is activated.

The best part of this wireless remote concept is if I get into a sticky super tight trail and need to really concentrate on my driving I can hand the trailers remote control box to my spotter and let him direct me and control the trailers position.

The down side will be waiting for my fellow trail campers to clear the same tight spot with their trailer that I had just breezed through.

I hope this makes sense without boring you with too much information.
 

Attachments

  • 20160430_163432.jpg
    20160430_163432.jpg
    598.1 KB · Views: 86

Nd4SpdSe

Adventurer, eh?
I'm wondering if some of the old AWS systems could be implemented. I think Honda's was hydraulic, but in Mazda, it was electric and would center if there was a failure. Nissan also had used it. It kind of died in the 90's until GM brought it back for a bit in their trucks.
 

Curtis in Texas

Adventurer
Well, seeing as how sometimes I will want to crab and sometimes want to track, I don't see a need to get more complicated than it already is.

With the center latching handle down it will steer remotely to the center point and the latch will fall in place and shut off the power to the ram. Leave the steering handle pulled up and it will steer full left to full right and back again.
Pretty simple!

That AWS System was a mechanic nightmare. That's why they stopped offering it.
 
Last edited:

Curtis in Texas

Adventurer
Walls up!
The walls are 1/8th inch outdoor plywood and the floor is 3/8th. Not heavy and the main frame is yellow pine.
It sounds like it will be too light weight of wood and heavy enough grade. But since all the corners will be glued in with 3M 8114 bonding agent and the bottom side sprayed with bed liner the base will be super tough and layered in bonding agents and glassed in.

The walls will be covered in glass fabric and covered in resin much like a wooden canoe.

Shouldn't leak one bit.

The interesting part of the walls is they were made from 4' X 8' sheets. stood up on their sides. So with the top down and collapsed the inner wall height will be 4 feet high. The roof on the cap/ bed floor will be 5 inches above that in the folded position. But with a 4 inch foam mattress that space will be taken up real fast. But since this camper is not meant to be slept in folded up, that's a moot point. There will plenty of room with everything unfolded.

Frenching in the spare tire was a fun challenge. I took a strip of 1/8 " plywood and started pulling the ends together with some motorcycle tie down as I soaked the wood with a garden hose. As the wood got soft I kept cinching up the tie down until the tie downs ends could be wrapped all the way around the wood in a circle. Then I laid the spare tie on a 5 gallon bucket and kept on soaking the plywood until the ends touched with the tire in the middle. Then I left it in the sun for a few days until it dried. I could have been a good barrel maker.
I'll show all that tomorrow. Forgot to upload that picture.

Opps, got the pictures backwards in sequence. But you get the idea.
 

Attachments

  • 20160824_223203.jpg
    20160824_223203.jpg
    521.5 KB · Views: 67
  • 20160822_150940.jpg
    20160822_150940.jpg
    570.1 KB · Views: 65

Curtis in Texas

Adventurer
I wanted to French in the spare tire in the front corner to eliminate getting it drug off against a tree. Since this trailer is being made for tight spaces between trees or rocks.

And didn't want to build a swing out carrier on the rear because I didn't want to the added weight on the back of the trailer. According to my calculations the trailer was going to be a little tail heavy if I'm not careful.
Yea, I could have put it on the tongue, but I have other plans for that area. And my trucks spare might be hitting it in steep uphill breakovers. I've got a lot of stuff hanging off the back of my Rodeo.

The first picture shows how I determined where to cut the hole.
2nd picture shows the wall roughed in.
3rd the wall is in place and it will clear the spare tire when trimmed in.
4th picture shows the curved plywood inner wall in place that I told you about in the other post.
 

Attachments

  • 20160826_233801[1].jpg
    20160826_233801[1].jpg
    546.9 KB · Views: 63
  • 20160826_233812[1].jpg
    20160826_233812[1].jpg
    522.4 KB · Views: 60
  • 20160822_151006[1].jpg
    20160822_151006[1].jpg
    538.3 KB · Views: 60
  • 20161008_194453[1].jpg
    20161008_194453[1].jpg
    528.5 KB · Views: 60

Curtis in Texas

Adventurer
Well Dang It!
I had a big long write up done and tried to post it and it disappeared.

So here's a short version.

Ended up adding 1.5 inches of spacer to the spare tire mount to move the tire out closer to the outer wall.
You can see the tire insets in too far and one of the reasons I moved it out was so I could mount my solar battery behind the spare tire. The tire mount has a really nice lock system built in, so with that and the space behind it being large enough for my battery it was a no brainer.

And if you're paying attention you'll notice this shot shows the front framing and bracing in place, and the framing for the front inner closet. (Yea it's a little ahead of the story tell.)
Plus I put a taper in the front trailer corners for two reasons.
One to aid in the aerodynamics, and Secondly to give me just a hair more clearance before it hits the tow vehicle rear bumper. It's all heavy steel so it won't be pretty if it does.
 

Attachments

  • 20161009_163710[1].jpg
    20161009_163710[1].jpg
    576.3 KB · Views: 57

Forum statistics

Threads
188,184
Messages
2,903,515
Members
229,665
Latest member
SANelson
Top