SubSar's "03 Suburban Build

SubSar

Member
I looked at a lot of other builds trying to decide what I wanted to do with my rig and how far I wanted to take it. Suboverland was a big inspiration for the direction I took. I liked the look of their builds along with the function. Some of my future plans come straight from their designs and concepts. While I do like the rear side window cubbies they install, I like the technical look of the Molle panels I was seeing in a lot of 4-Runners better.

I looked all over the place online for someone that was building Molle panels to fit my rig. The best I could find was a rectangular fabric Molle panel, like for the back of a seat. I mounted one up on the driver side but the Molle pattern was on its side. I made it work for a while but the fabric was too loose and items strapped to it would bang on the window. Back to the drawing board, literally.

I started by tracing out the inside of each rear window on big sheets of paper. Since I have the rear A/C unit the passenger side and drivers side window are different. I trimmed out my tracings and used what ever I could find to make the correct rounded corners. I think I used a large soup can for the bottom front corners and maybe a soda can for the top front corners. Once I had the paper template fitting I measured it all out and transferred the outline in to AutoCad. From there I looked up the specs for Molle and looked over a few different hard panels that were for other trucks and Jeeps. I then drew the Molle into the outline with some slots and holes along the edges for mounting options. I sent the finalized AutoCad files to a couple of online places that say they will take your plans and CNC them into a selection of materials. All the prices were more than I was willing to spend. I reached out to a couple of friends that specialize in non-automotive stainless steel fabrication and just asked for a quote. The first questions I got were "What the heck is it and what's it for? I explained what they were and that they were for my search truck. Next thing I know both panels show up with a note to consider them a donation provided I promise to send the search team if they are ever lost. I can do that! Thanks to Juan, Don, Brendan and Marcos. Other than my time to trace out the windows and draw up the AutoCad files the panels did not cost me anything.

I used some stainless I had available to make up some brackets for the top. I dropped the headliner and mounted them straight to the steel roof framing. On the bottom I pulled the inner plastic trim off, mounted some standoffs that I could screw the bottom of the panels too. They are good and secure. I do not hear them rattling around at all going down the road. I did have to trim the drivers side at the bottom middle. I did not leave enough room to pull the cubby out to get at the jack and items I have shoved in that space. I went back and updated my files to account for it if I ever need to build another set.

Overall I am happy with the way they turned out. Just recently I did stumble across Orange Box Design & Fabrication's website (https://www.orangeboxxfabrication.com) that says they are building custom fit Molle panels, similar to what I did, for 2000-2006 Suburbans (along with a bunch of other vehicles). I do not know anything about Orange Box other than what is on their website. If I had to do it over again would I buy or would I build? If I didn't have some good friends I might not have had a choice. I don't have a CNC laser jet in my garage. Hmm maybe I should see if Orange Box is hiring?

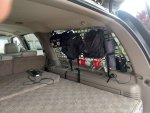
DS Molle 1.jpgPS Molle.jpg
 

Martinjmpr

Wiffleball Batter
Looks like a great build. Have you added a 2nd battery yet? Nice thing about the Suburban (and all GM vehicles of that era) is that there is already a dedicated spot for an aux battery. IMO the most difficult aspect of putting a 2nd battery in is finding a place to put the extra battery. The only bad news about that is that you're pretty much limited to a stock size battery, group 34 or 34/78 (34 and 78 are the same size, the difference is that the 34 has top terminals and the 78 has side terminals. I put a 34/78 on that had both. And BTW you can do that with the main battery, too, having top terminals makes it easier to add accessories to the battery.)
 
Speaking of a second battery, has anyone out there installed an Odyssey battery in the auxiliary spot? I can tell you that I haven't been able to use the same size battery that I have in the main battery position.
Thanks, Durwin
 

SubSar

Member
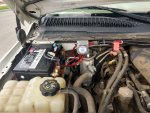
Martinjmpr, I did add the second battery. I found the auxiliary battery tray and hold down parts in another truck at the wreckers while I was looking for a set of skid plates. The skid plates I pulled off a Z71 Tahoe. The Suburban already had all the bolt holes so it was easy to bolt the skid plates on.

The aux battery tray is another easy install. Just unbolt the fender support bracket by the firewall on the passenger side, throw it away, and bolt in the donor battery tray. I just have a 78 in there now. Some day I'll change it to a a deep cycle. You do have to remove the curved bracket the goes from the lip on the cowl to the fender to fit the battery.
Aux Battery.jpg
I removed the plastic cover over the fuse box and found that there was an unused maxi fuse spot that was already wired to the main line off the alternator/main battery. I dropped a 100amp fuse on the posts and ran power over to the voltage sensitive relay (VSR)/smart isolator. When the VSR senses that the main voltage is less than 12.9V, like when the truck is off, it disconnects the aux battery from the main battery. When the voltage is above 13.4V, after I start the truck, the VSR closes and the aux battery will get charging power.
On the dashboard I installed a switch that is connected to a 100amp relay. When I flip the switch the relay closes and power from the aux battery is fed into a new fuse block I installed in the center console. From there I control the power to all my off road lights, radios, and USB charging ports. I'll get some pictures and walk through that system for my next post.
I thought about installing a manual battery cutoff switch that I could close and connect the aux back to the main battery if I ever needed to use the aux battery to start the truck. It was getting a little crowded and I always carry jumper cables anyway so I didn't bother. If my main battery dies on me I'll just break out the jumper cables and jump start off the aux battery.
 

SubSar

Member
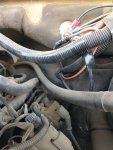
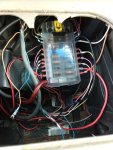
Continuing with the auxiliary electrical system. As I mentioned main power comes off the aux battery to a 100amp relay that I tied to a switch in the dashboard. I close the switch, the relay closes and sends power to the Blue Sea Systems, 12 circuit, fuse block under the cup holders in the center console. When I was looking around under the hood for a good place to get through the firewall and into the cabin I saw where some factory wiring went through in a cone shaped, rubber grommet. A little left and down was a circle in the firewall insulation and a stamped ring in the steel that looked about the same size. On one of my trips to the wreckers I found another truck that had grommets in both locations. I looked under the dashboard to see where the second one came in and it was above the gas pedal. So I pulled the grommet, drilled out the firewall in my truck and install the grommet for a new pass through for all my auxiliary wiring.
Firewall Pen.jpg
The new fuse block.
Aux Fusebox.jpg
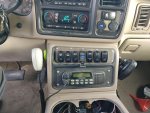
Off the new fuse block I pulled power for the Cobra 27 WX ST CB radio, the Motorola CDM1550LS+ 136-174 MHz ham radio, the USB charging ports, and the switches.
Full Dash.jpg
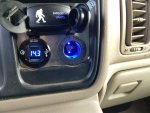
A couple of cell phone magnet holders hang the radio mics. They hang on just fine and I do not have to mess with trying to hit the clip just right when hanging them back up. You can see the switch that controls the aux main relay up by the shifter. I didn't think that one out too well. It works fine but the switch it right behind the shift lever when I put the truck in drive. I will probably move it at some point. The volt meter/USB charging ports in the center of the switches are connected to the aux electrical system so I can see the voltage on the aux battery. The upper volt meter/USB charging ports are on the relocated factory wiring and the main battery so I can monitor voltage on that battery. The 12V port is the relocated factory wiring with a new cigarette style plug-in installed.
Small Cubby 2.jpg
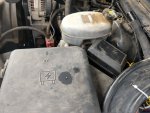
The switches are used to control relays in a new 6 relay box under the hood, mounted to the back of the factory fuse box cover, next to the master cylinder. You can't see it but the 100amp aux main relay is mounted under the curved bracket.
Relay Box.jpg
Flip a switch, close a relay and power comes off the aux battery to the selected lights. Right now I have the Bumper Light Bar, LED Light Bar (hood mounted), Spot Lights (ditch lights) and Rear Lights (rear bumper lights) hooked up. The Zombie Lights used to run the halo's on the old crappy headlights, the Work Lights are going to be mini light bars mounted around the roof for lighting up camp or work areas, and Sasquatch Lights I just had to have. Bigfoot is the mascot for our annual fundraiser. So that leaves me with two switches for future, undecided, add-ons.

I have my SureCell cell signal booster mounted to the Molle panel in the back and it plugs into the power outlet in the rear cargo area. The antenna cable for it runs out the vent under the rear, upper corner trim to the magnet mount on the roof.

The ham radio is using a Comet CA-2x4SRNMO antenna with the CA-SPR spring on an NMO mount. The cable runs up the driver side A pillar trim to the headliner, to the mount.

The CB radio is using a 48" Firestik II on a MK-DM18R dome roof mount with K-1A Quick Disconnect and SS-3H spring. With my SWR meter I was able to get it tuned just right. The antenna cable for the CB runs under the passenger side door sill trim of the front and rear doors and then up the C-pillar to the headliner.

The stainless steel plates that the switches and charging ports are mounted in I drew up the plans for and had a friend cut them on their mill.
 

SubSar

Member
Well, it has been a rough month for the SARburban. Back in January I replaced the Transfer Case, Transfer Case Shift Motor, and all the u-joints.

I went the cheap route with the shift motor. I found one with good reviews and a decent price on Amazon. That was a mistake. I got maybe 400 miles out of it and 3 or 3 shifts out of it before it left me stranded on the highway. I was on about a 500 mile round trip on I5 when I noticed that the 4wd buttons were lit up saying the transfer case was in neutral. I was clearly moving forward at 70 mph. Sure enough a few miles later the truck started act like it was in fact in neutral, RPMs would come up but no forward momentum. Once I drop down to a crawl it would seem to grab again and I could get a few miles before it dropped out again. I managed to limp off I5 and on to 152 before it completely lost all forward motion. With the transmission in park I was still able to roll the truck by hand confirming that the transfer case was in neutral. After unplugging the shift motor and reseating the connector, trying all the buttons and the process to get it out of neutral it was pretty clear the shift motor was not working. Called the wife with a list tools and a part number for the Dorman motor at Autozone ($320). 3 hours later she arrived with the tools and parts. You can in fact change the transfer case shift motor without dropping the front drive shaft. It is a tight fit and you need to rotate the front shaft to just the right position to get one of the bolts out. I basically comes out right through the u-joint. At first the new motor would not seat on the shift cam correctly. After getting frustrated for a while I grabbed the shift cam with my fingers and was able to rotate it just slightly and it clicked. Then the new motor seated correctly. Bolted everything back up and we were good to go. Following the owners manual process to get the transfer case out of neutral and into 2Hi worked. I could hear the transfer case shift. I did not finish the planned trip and we headed home with no more issues.

During the week I crawled under the truck and double check my bolts on the shift motor and checked the transfer case fluid level. I emailed the Amazon seller of the failed motor since it said it was life time guaranteed. After a few emails back and forth explaining how I diagnosed the motor was bad they sent me a new unit. I will hold on to it as a emergency spare.

6 days later we tried to make our trip again. I got about 100 miles from home before I broke down again. This time the suspension flexed as we crossed a small bridge on I5 and all of a sudden it was like driving on the rumble strips. This loud vibrating from under the truck. At first I thought I blew a tire. Still had forward motion so I jumped onto the shoulder and limped to the off ramp about a mile and a half up for Patterson. Got out and check the tires, all good. Took a look under the truck and $@#%. The u-joint at the rear differential had come apart. One of the caps was gone so the drive shaft was out of alignment. We crawled to the Autozone in Patterson. This time I had tools with me. Bought a new u-joint, dropped the drive shaft right there in the parking lot, removed the damaged u-joint, installed the new one and reinstalled the drive shaft. This time we continued on our trip and made it to Santa Rosa and back home with no more issues. Not sure what happened with the first u-joint. I suspect that either one of the clips was bad or I did not have it completely seated and it came out.

This weekend I will go through everything I can under the truck. Check the transfer case fluid again, check all the bolts on the transfer case and shift motor, check all the u-joints that they still have their clips, check all the shocks, tie rods, sway bar links and anything else that has been touched recently looking for loose or missing hardware. I do not want anymore highway or Autozone parking lot repairs for a while.
 
I looked at a lot of other builds trying to decide what I wanted to do with my rig and how far I wanted to take it. Suboverland was a big inspiration for the direction I took. I liked the look of their builds along with the function. Some of my future plans come straight from their designs and concepts. While I do like the rear side window cubbies they install, I like the technical look of the Molle panels I was seeing in a lot of 4-Runners better.

I looked all over the place online for someone that was building Molle panels to fit my rig. The best I could find was a rectangular fabric Molle panel, like for the back of a seat. I mounted one up on the driver side but the Molle pattern was on its side. I made it work for a while but the fabric was too loose and items strapped to it would bang on the window. Back to the drawing board, literally.

I started by tracing out the inside of each rear window on big sheets of paper. Since I have the rear A/C unit the passenger side and drivers side window are different. I trimmed out my tracings and used what ever I could find to make the correct rounded corners. I think I used a large soup can for the bottom front corners and maybe a soda can for the top front corners. Once I had the paper template fitting I measured it all out and transferred the outline in to AutoCad. From there I looked up the specs for Molle and looked over a few different hard panels that were for other trucks and Jeeps. I then drew the Molle into the outline with some slots and holes along the edges for mounting options. I sent the finalized AutoCad files to a couple of online places that say they will take your plans and CNC them into a selection of materials. All the prices were more than I was willing to spend. I reached out to a couple of friends that specialize in non-automotive stainless steel fabrication and just asked for a quote. The first questions I got were "What the heck is it and what's it for? I explained what they were and that they were for my search truck. Next thing I know both panels show up with a note to consider them a donation provided I promise to send the search team if they are ever lost. I can do that! Thanks to Juan, Don, Brendan and Marcos. Other than my time to trace out the windows and draw up the AutoCad files the panels did not cost me anything.

I used some stainless I had available to make up some brackets for the top. I dropped the headliner and mounted them straight to the steel roof framing. On the bottom I pulled the inner plastic trim off, mounted some standoffs that I could screw the bottom of the panels too. They are good and secure. I do not hear them rattling around at all going down the road. I did have to trim the drivers side at the bottom middle. I did not leave enough room to pull the cubby out to get at the jack and items I have shoved in that space. I went back and updated my files to account for it if I ever need to build another set.

Overall I am happy with the way they turned out. Just recently I did stumble across Orange Box Design & Fabrication's website (https://www.orangeboxxfabrication.com) that says they are building custom fit Molle panels, similar to what I did, for 2000-2006 Suburbans (along with a bunch of other vehicles). I do not know anything about Orange Box other than what is on their website. If I had to do it over again would I buy or would I build? If I didn't have some good friends I might not have had a choice. I don't have a CNC laser jet in my garage. Hmm maybe I should see if Orange Box is hiring?

View attachment 703894View attachment 703895
This is awesome! I would be interested in paying for your file and info. peter@baselineoverland.com. I’m planning on some half size for mine as I have 3rd row passengers.
 

SubSar

Member
Ok, so no breakdowns lately but now I'm throwing CEL codes. Three times with 3 different codes. P0101 - Mass or Volume Air Flow 'A' Circuit Range/Performance, P0443 -
Evaporative Emission Control System Purge Control Valve Circuit Malfunction, and P0455 - Evaporative Emission Control System Leak Detected Gross Leak.

Cleaned the MAP.
Checked the gas cap. It seemed tight but it is the original. Since the SARburban holds about a paychecks worth of gas I installed a MotoRad MGC791 locking fuel tank cap.
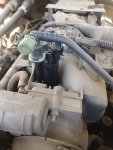
The Vapor Canister Purge Valve felt loose in the intake manifold. I pulled it an the gasket looks less than great. It's an $20 part so I went ahead and installed a new one.
IMG_20220610_162636090.jpg
I did the Vapor Canister Vent Valve about 2 years ago so I am pretty sure that is not the problem.

If it keeps throwing codes I will be breaking out the propane to search for a vacuum leak and/or building a smoke machine to look for the leak.
 

SubSar

Member
Well, did about a 200 mile round trip yesterday. From 250 above sea level to 7000 feet and back down with four starts and stops along the way. So far no CEL. I’ll take it.
 

Lykos

Super Trucker
I looked at a lot of other builds trying to decide what I wanted to do with my rig and how far I wanted to take it. Suboverland was a big inspiration for the direction I took. I liked the look of their builds along with the function. Some of my future plans come straight from their designs and concepts. While I do like the rear side window cubbies they install, I like the technical look of the Molle panels I was seeing in a lot of 4-Runners better.

I looked all over the place online for someone that was building Molle panels to fit my rig. The best I could find was a rectangular fabric Molle panel, like for the back of a seat. I mounted one up on the driver side but the Molle pattern was on its side. I made it work for a while but the fabric was too loose and items strapped to it would bang on the window. Back to the drawing board, literally.

I started by tracing out the inside of each rear window on big sheets of paper. Since I have the rear A/C unit the passenger side and drivers side window are different. I trimmed out my tracings and used what ever I could find to make the correct rounded corners. I think I used a large soup can for the bottom front corners and maybe a soda can for the top front corners. Once I had the paper template fitting I measured it all out and transferred the outline in to AutoCad. From there I looked up the specs for Molle and looked over a few different hard panels that were for other trucks and Jeeps. I then drew the Molle into the outline with some slots and holes along the edges for mounting options. I sent the finalized AutoCad files to a couple of online places that say they will take your plans and CNC them into a selection of materials. All the prices were more than I was willing to spend. I reached out to a couple of friends that specialize in non-automotive stainless steel fabrication and just asked for a quote. The first questions I got were "What the heck is it and what's it for? I explained what they were and that they were for my search truck. Next thing I know both panels show up with a note to consider them a donation provided I promise to send the search team if they are ever lost. I can do that! Thanks to Juan, Don, Brendan and Marcos. Other than my time to trace out the windows and draw up the AutoCad files the panels did not cost me anything.

I used some stainless I had available to make up some brackets for the top. I dropped the headliner and mounted them straight to the steel roof framing. On the bottom I pulled the inner plastic trim off, mounted some standoffs that I could screw the bottom of the panels too. They are good and secure. I do not hear them rattling around at all going down the road. I did have to trim the drivers side at the bottom middle. I did not leave enough room to pull the cubby out to get at the jack and items I have shoved in that space. I went back and updated my files to account for it if I ever need to build another set.

Overall I am happy with the way they turned out. Just recently I did stumble across Orange Box Design & Fabrication's website (https://www.orangeboxxfabrication.com) that says they are building custom fit Molle panels, similar to what I did, for 2000-2006 Suburbans (along with a bunch of other vehicles). I do not know anything about Orange Box other than what is on their website. If I had to do it over again would I buy or would I build? If I didn't have some good friends I might not have had a choice. I don't have a CNC laser jet in my garage. Hmm maybe I should see if Orange Box is hiring?

View attachment 703894View attachment 703895
I know this is a zombie thread but Darrell used my 03 Burb to develop and design those panels. How do you like them so far?
 

SubSar

Member
I know this is a zombie thread but Darrell used my 03 Burb to develop and design those panels. How do you like them so far?
It’s not a zombie thread. Just not much to report lately.

Anyway, the panels in my rig I designed and had custom cut. I like mine just fine. They look like they fit a little tighter to the windows than the others I have seen. I could to find any for GMT800 Suburbans so I designed my own. Since then I have seen the Orange Box is making some.

I can’t speak to Darrel’s panels.
 

Lykos

Super Trucker
It’s not a zombie thread. Just not much to report lately.

Anyway, the panels in my rig I designed and had custom cut. I like mine just fine. They look like they fit a little tighter to the windows than the others I have seen. I could to find any for GMT800 Suburbans so I designed my own. Since then I have seen the Orange Box is making some.

I can’t speak to Darrel’s panels.
Fair enough.
 

Forum statistics

Threads
188,027
Messages
2,901,344
Members
229,411
Latest member
IvaBru
Top