The Cactus Red mod thread.

angusdevil

Adventurer
I've got the 5100's on my truck now and they indeed are stiffer than stock. The good thing about them is that they travel well and your can really flog on them hard with good recovery. Don't get me wrong, they are no 2.65 or King 2.5 but for the price, its the best thing out there.
 

crawler#976

Expedition Leader
Not a mod per say, but after our snow day trip, I decided it was time to add a Pull Pal to the equipment list. We didn't get stuck, but traversing a 1/2 mile long snow field with no trees available got my attention.

Will at Sierra Expeditions had a good price on the RW 14000 and includes a free carry case for a limited time!
 

crawler#976

Expedition Leader
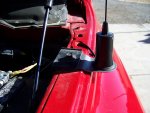
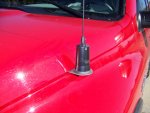
After many trips thru the brush and trees where the magnetic mount antenna got knocked off the roof, I decided to fix it permanently. I considered several options including hard mounting the antenna via a thru the roof NMO mount, but as tall as the Power Wagon is, I figured it would only be a matter of time before I either damaged the mount and bent the sheet metal. The second option was a fender/hood mount. I knew I’d loose some performance, but decided the benefits outweighed the decreased range and clarity.

Kyle has a similar setup on his Dodge 2500, so that got me searching for the mount. I found one in the Larsen catalog on page 192.

http://www.larsen-antennas.com/docfiles/ASB8/Mounts.pdf

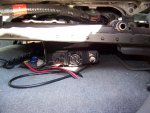
The Larsen TMB-34D is made for late model Dodge trucks. HRO (Ham Radio Outlet) had the mount in stock and also sent a NMO cable without the PL-259 connector attached. That allowed me to snake the cable thru a small hole thru the grommet, and conceal the cable under the door sill moulding. I routed it thru the same slit in the carpet I used for running power to the radio in the original install. After soldering on the PL-259 connector and attaching the new cable, the radio worked fine. I can still get out to Flagstaff OK (roughly 50 miles line of sight) with a little bacon sizzle. The ground plane is not optimal, but not having to stop and reattach the mag mount will be really nice.
 

Attachments

  • mounting location.JPG
    mounting location.JPG
    220.5 KB · Views: 131
  • cable thru grommet.JPG
    cable thru grommet.JPG
    271.9 KB · Views: 119
  • under seat.JPG
    under seat.JPG
    327.6 KB · Views: 139
  • hood mount.jpg
    hood mount.jpg
    220.4 KB · Views: 118

crawler#976

Expedition Leader
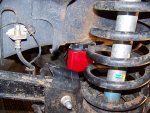
Stuck the KORE bumpstops in today.

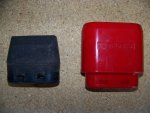
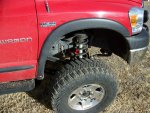
Very easy install - I litteraly popped the old stops out with a simple sideways push, then jacked up the truck and supported it on jack stands, and used a piece of 2x4 as a spacer and pushed the new ones in by jacking up the axle. Took about 15 minutes. I removed the passenger side tire for photo clarity in the "installed" photo, the took the truck out to my testing ditch to see how it looked.
 

Attachments

  • installed.JPG
    installed.JPG
    390.3 KB · Views: 88
  • on the bump stop.JPG
    on the bump stop.JPG
    306.9 KB · Views: 84
  • side by side.jpg
    side by side.jpg
    306.9 KB · Views: 81
  • droop view.JPG
    droop view.JPG
    429.7 KB · Views: 117

crawler#976

Expedition Leader
Power Wagon Locker bypass

After some initial confusion on my part, (covered in the post below) I finished the locker bypass today.

http://www.dodgetalk.com/forums/showthread.php?p=3436089&posted=1#post3436089

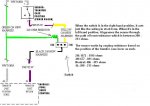
I used a SPDT On/On switch from Radio Shack and a 220 ohm 1/2 watt resistor w/ a 5% tolerance.

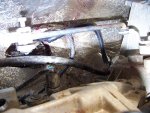
Since I didn't know exactly which wire did what, I spliced into the harness with two long wires, one green, one black, and ran them thru the t'case shifter boot.

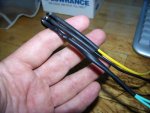
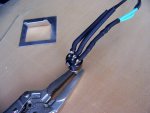
The wires are paired with the rear two going to the t'case position sensor, and the front two to the stock harness. The green wire is soldered to the stock white w/ green stripe on both ends, cut in the center, then the resistor was soldered between the center (see photo of the second harness I made for a friend). The other end of the resistor was then soldered to the left side of the switch.

The purple w/ yellow stripe wire was also cut and spliced with the black wire. It was also split and the end from the t'case sensor was soldered to the right side of the switch (yellow wire in the photo). The end going back to the stock harness was soldered to the center position (black wire in the photo).

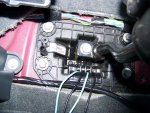
The t'case lever is held in place by a block with two T20 screws. The block offered 4 places to drill an 1/8” hole thru to run the wires into the cab. The holes allowed me to be certain of which wire was attached to what. The second harness has been color coded to make it easier to keep track of that.

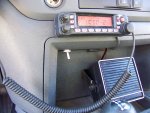
I decided to put the switch below my Yaesu FT-7900. It's accessible, but out of the way from being accidentally bumped.

The diagram is specific to the 2009 Power Wagon as far a color codes, the concept is identical for all model years.

With the mod complete I can now use the sway bar disconnect in 2H, 4H, 4L, the rear locker in 2H, and both lockers in 4H. The modification tricks the computer into thinking the truck is in 4L and the dash indicator shows that. The sway bar still reconnects at speeds above 18 MPH or so, just like normal.

Mark
 

Attachments

  • switch location.JPG
    switch location.JPG
    183.6 KB · Views: 93
  • wiring connection.JPG
    wiring connection.JPG
    183.4 KB · Views: 82
  • second harness.JPG
    second harness.JPG
    129 KB · Views: 74
  • soldered connections.JPG
    soldered connections.JPG
    139.9 KB · Views: 72
  • wiring thru t-case.jpg
    wiring thru t-case.jpg
    329.8 KB · Views: 92
  • locker bypass diagram.JPG
    locker bypass diagram.JPG
    45 KB · Views: 91
Last edited:

Cypher

Full Time Traveler
Wow tons of great mods since I last checked in. Nice work as always Mark! I am also considering the same HAM antenna mounting on my new Land Cruiser, but I have not yet convinced myself to do so. Your comments however have swayed me a little more in that direction since it does not sound like you have lost all that much performance. Thanks for the great posts!
 

crawler#976

Expedition Leader
Thanks!

Having the antenna off the roof is probably the most useful of the projects - I was, and so was my wife, tired of having to relocate the antenna every time it got knocked off.

I think I'll keep the mag mount in the truck if I need longer range comms for some reason. That's an easy swap over.

Mark
 

tremors834

Adventurer
Got the basic freq's in memory - FWD 2, 2M simplex, 8 local repeaters, and FR'S 1.1. Still have hours of input to do - I had over 150 frequencies and 5 memory channels in the old radio...

I'm new to ham radio. If I may ask, what do you mean by "FWD 2" and "FR'S 1.1" ??
BTW, read through the whole thread. Cactus Red looks great.
 

crawler#976

Expedition Leader
I'm new to ham radio. If I may ask, what do you mean by "FWD 2" and "FR'S 1.1" ??
BTW, read through the whole thread. Cactus Red looks great.

One of the groups (4wdtrips.net) I do trips with established a list of frequencies for overland travel. We use the same frequency list here as well. They are standard simplex freq's - we just chose to name them to make recalling them from the radio memory easier.

4WD 1 - 146.430
4WD 2 - 146.460
4WD 3 - 146.490
4WD 4 - 146.580
4WD 5 - 147.420
4WD 6 - 147.450
4WD 7 - 147.480
4WD 8 - 147.540
4WD 9 - 147.570

The Family Radio Service radios have multiple channels and privacy codes. So for trips I designate FRS 1.1 as the frequency. It's Channel 1, Privacy code 1

Thanks for reading thru the whole mess!

Mark
 

crawler#976

Expedition Leader
TIRE UPDATE:

After 12,000 miles on the MT/R Kevlars, it's time for an update.

Replaced two tires at 10,100 miles.

1. Cut a sidewall down to the cords (ironically right on the Kevlar logo). The cut did not penetrate the cords, in fact it appeared the rock turned off the cords and exited while taking a chunk out. No leaks, no problem. Replaced under road hazard.

2. 16 Penny nail thru sidewall. Replaced under road hazard.

Wear:

Quite frankly I'm disappointed in the wear. I rotate and balance every 2 to 3 thousand miles, and keep the truck in proper alignment. Even at that interval I'm experiencing severe cupping and balance problems. The tread tends to chunk and round with hard use - I realize that's what happens under the conditions I use the truck for, but I've already used up 5/32 of tread on the two original tires. I expect I'll need tires in another 12K or so, and at $300.00 plus a tire, that's a lot of money for a short term tire.

Off Highway Traction:

Awesome. They are better than the old style MT/R in all conditions; rock, sand, snow, mud, it's all good.

Will I get another set? Nope. I think I'll try a set of the BFG KM2's next time, or if gas cont. to rise, an aggresive AT like the Procomp Extreme AT with a 40K tread wear warranty.
 

crawler#976

Expedition Leader
After finding the front Bilstein 5100's made a big difference in how the truck did off road, it was time to swap out the stock rear shocks.

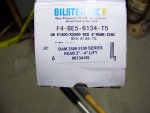
Bilstein PN F4-BE5-6134-T5

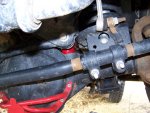
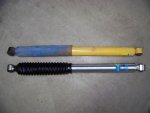
It comes up as a GM part, but DT Pro Fab has found they work exceptionally well for PW or other 2 to 4" lift applications. As you can see from the photo, they are slightly longer than the factory shocks. Compression is noticeably heavier than the stock shock. Install was easy - took less than 30 minutes start to finish.

I should have a report on them after this weekends trip to the Parker 425 - we'll be working on the course and will get to run a short section of dirt in and out of camp.
 

Attachments

  • part number.JPG
    part number.JPG
    106.3 KB · Views: 41
  • side by side.JPG
    side by side.JPG
    122.8 KB · Views: 49

crawler#976

Expedition Leader
Got 40 miles of very rough dirt roads on the new shocks yesterday - huge improvement over the ultra soft stock ones. the truck rides like a 3/4T - a lot firmer than before, but with complete control. No more rearend dancing around on the washboards.

__________________

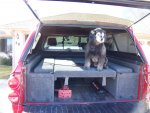
Thanks to BX's decision to upgrade to a 4WC, I had the opportunity to get his old (basicly brand new!) setup from the back of his Power Wagon. After a few very minor modifications it fit perfectly with my shell. I was able to store all the equipment I previously had in the tool box with the exception of the shovel and hi-hift jack. With a standard Hi-lift mount and a couple quick fist clamps those items will be secured to the inner walls of the wooden boxes. Even the monsterous 14000 lb rated PullPal fit into one of the wheelwell spaces.

With the platform built for sleeping, we're going to see if the SportZ 81000 SUV/Truck tent will fit around the camper and bed to provide us with weather tight and spacious camping.

http://www.sportzbynapier.com/product.html?product_num=46
 

Attachments

  • platform.jpg
    platform.jpg
    129.5 KB · Views: 296

crawler#976

Expedition Leader
After 13000 miles or so on the GoodYear MT/R Kevlars and many, many headaches with balance, out of roundness, and severe cupping problems, Discount Tire was very good to me and replaced them with BFG KM2's.

More to come on the KM2's! I'm looking forward to seeing how they perform.
 

Westy

Adventurer
After 13000 miles or so on the GoodYear MT/R Kevlars and many, many headaches with balance, out of roundness, and severe cupping problems, Discount Tire was very good to me and replaced them with BFG KM2's.

More to come on the KM2's! I'm looking forward to seeing how they perform.

Props to Discount, they have always treated me very well.

Mark, I look forward to hearing your personal comparison between the new MT/R and the KM2. In the next couple months I will be replacing my old style BFG Muds on the FJC and I have been debating between the MTR Kevlar, KM2 and BFG A/T.

Keep us posted on your initial findings and performance of the KM2.
 

Forum statistics

Threads
188,176
Messages
2,903,366
Members
229,665
Latest member
SANelson

Members online

Top