The Camel...a Low-Budget Pop-up Production

shahram

Adventurer
Let me make a confession: I'm cheap.

I'm also broke. But, even if I was filthy rich, I'd still be cheap. I'd be a millionaire in an '86 Hilux with no air conditioning. I buy generic toilet paper, sniff out the dented cans, and get all my camping gear off of Craigslist and the occasional clearance item at Target. Beyond that, I usually begrudgingly buy only the things I absolutely need.

However, as much of a skinflint as I am, I still have wants in addition to needs. And with an open-bed pickup truck, I wanted a little more security to protect the sleeping bag that I found on the side of the highway, or the garage sale camp stove, or my hand-me-down air compressor, from thieves who might strike while I'm in Taco Bell, raiding the dollar menu.

I also wanted a sheltered place to sleep off a few too many generic light beers--a higher-efficiency, sneaky-camping alternative to dragging my camp trailer behind my Land Cruiser--a way to avoid having to pay for a campground spot near the surf breaks. I decided on a camper shell, and started perusing Craigslist for the perfect desperate sucker who needed to offload one, and didn't care about money.

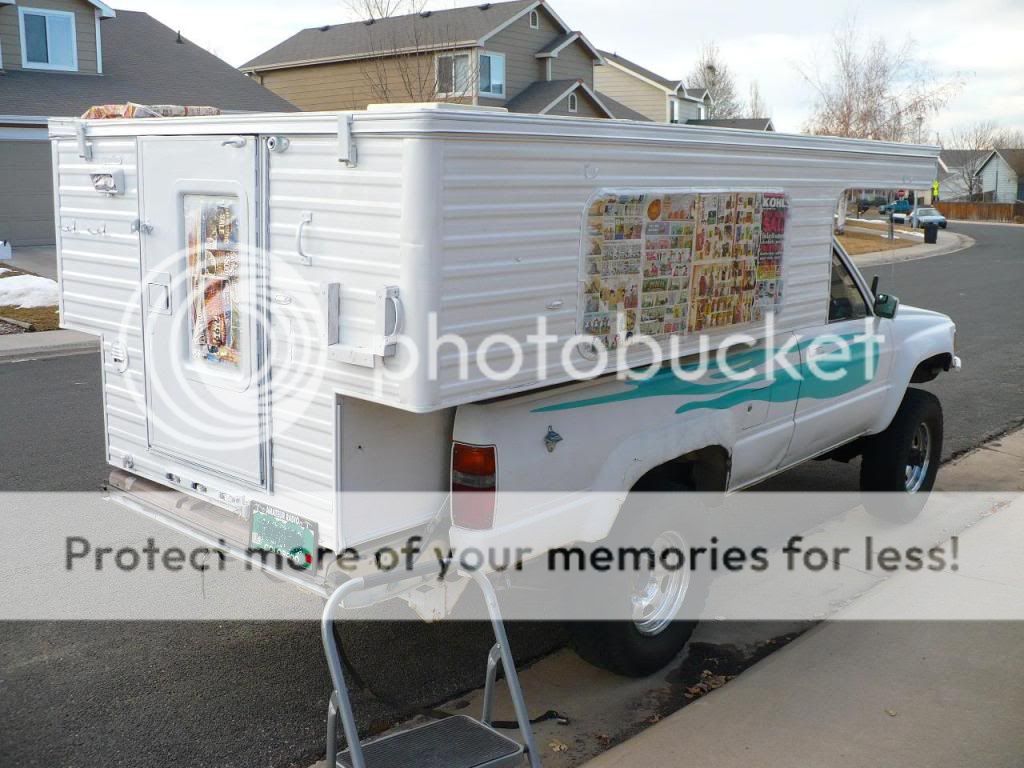
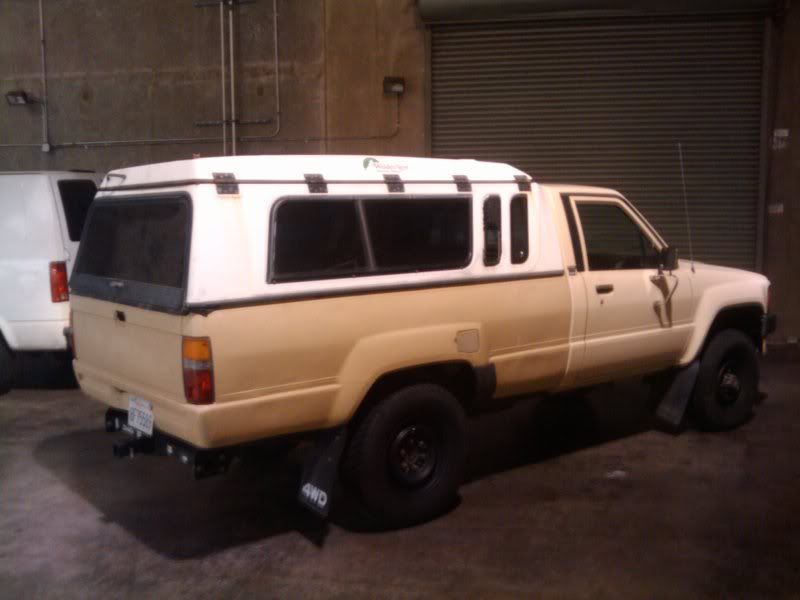
Because of my 1986 Hilux 4x4's long bed dimensions (88" long by 60" wide--not common), pickings were very slim. But there were a handful located around Southern California. Most that were in any sort of passable condition were over $400--my total budget for the project. And most were more than fifty miles away--too much gas money to just go and check out.

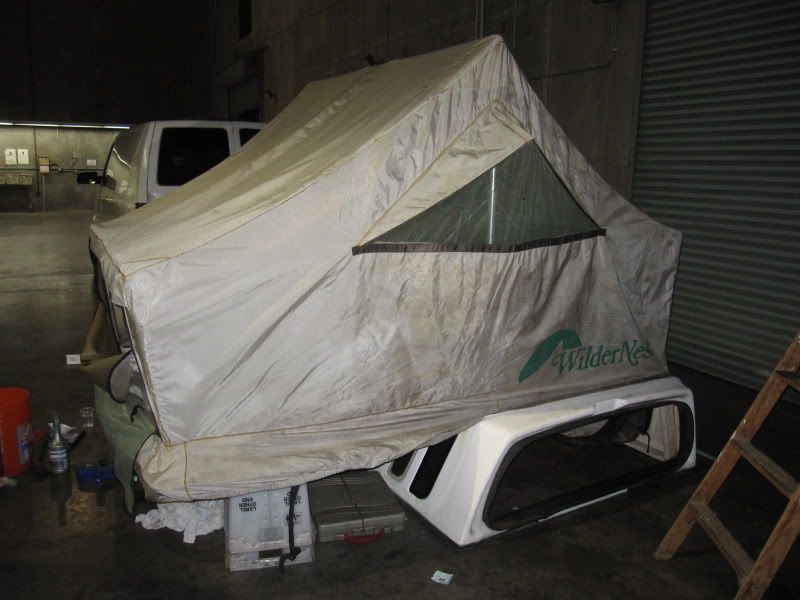
I happened to catch a Wildernest that a guy was selling in Venice Beach. I called and checked it out on a Sunday morning after a rain storm. He was a nice kid, but the camper needed work--leaks, smelly canvas, some mold issues--and his starting price was a bit over my budget. I passed. And lucky I did, as another guy down in Orange County was selling the same model for less money, and according to him, needed less work.

Here's where I should have remembered a lesson I learned at the strip club: SOME THINGS LOOK BETTER IN A CERTAIN LIGHT. Or, in this case, at night. The Wildernest was in passable shape; the shell itself was unmarred and solid, the seals appeared intact and felt supple. The hinges and latches were almost completely rust-free and moved smoothly. Poles and cables were in near-perfect condition.

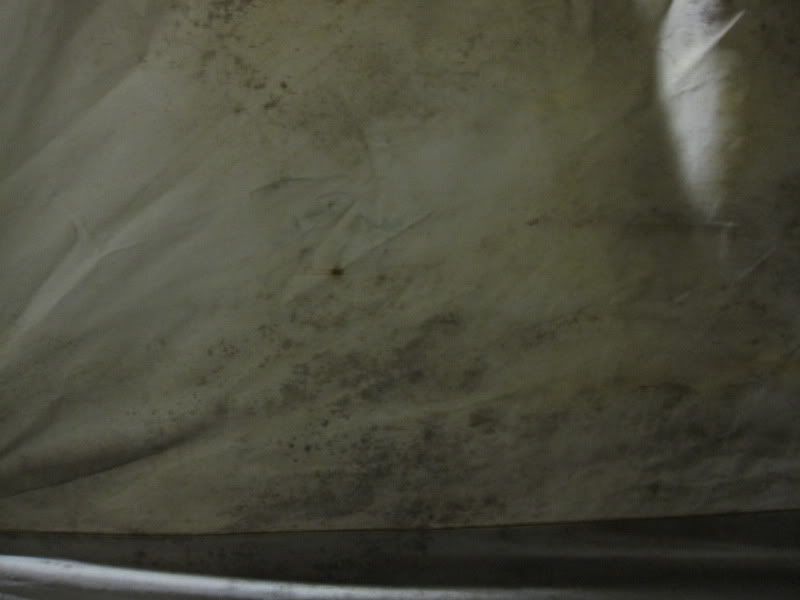
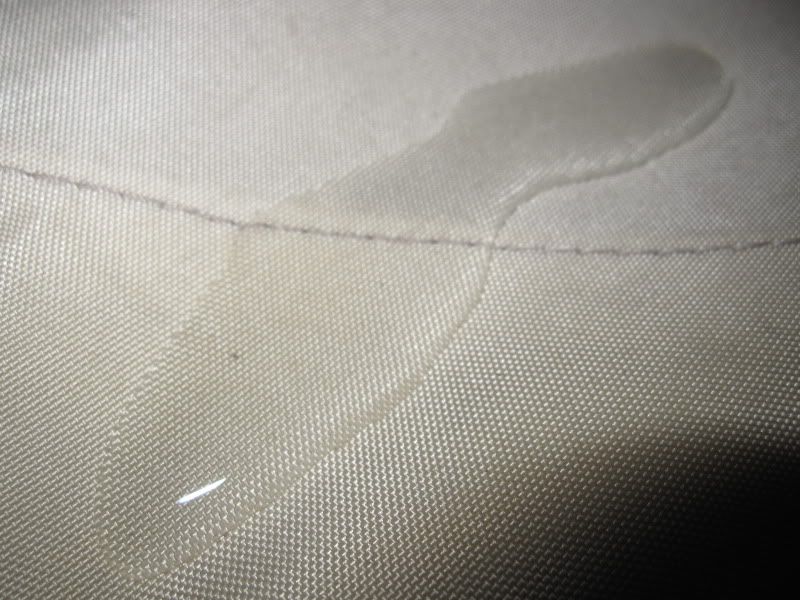
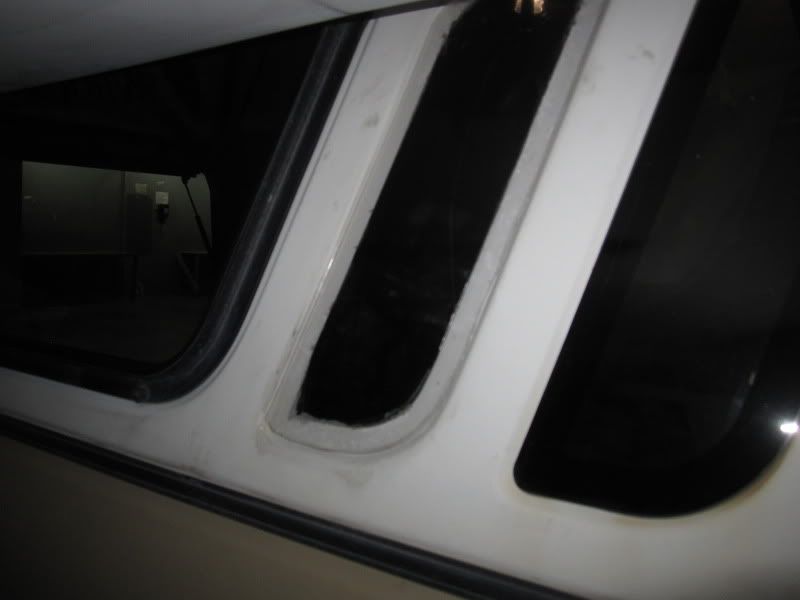
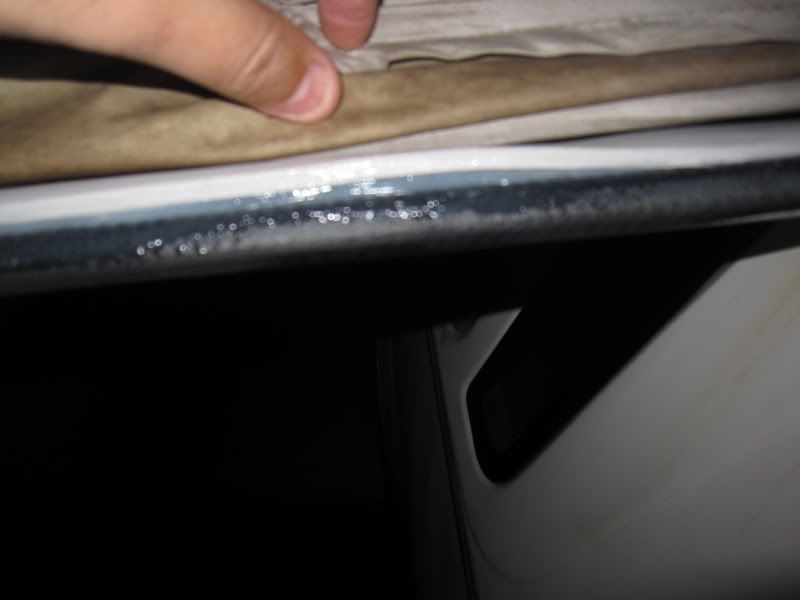
There was, however, one broken window--right-side, rear, smaller "Partridge Family" shaped one. The gas shocks that suspend the rear door were blown and oily. The canvas, while unripped and flexible, was rather moldy in two large spots, and smelly pretty much everywhere. I talked the price down to $250, figured if I had to sacrifice the canvas, I still had a platform to build a "Dormobile" style top, and knew I wasn't going to find anything as unusual as this for that price. So, we shook hands, he helped pry the $250 out of my fingers, we clamped the heavy SOB down to the bed, accidentally ripping the base rubber off the camper, and I was off.

One hour later, I had it in my warehouse, and began to assess my new project's needs in a less flattering, albeit more accurate, light. It wasn't pretty, but it just might work.
2011-02-28213951.jpg


The next day, I hit up a camping store and Home Depot for restoration supplies.

Camp store:
--Mirazyme (a mold-eating solution made specifically for tents), two bottles, 2 oz. each.
--Atsko Silicone Water Guard, for waterproofing the canvas after cleaning, 4 bottles, 12 oz. each.
Total: ~$50

Home Depot:
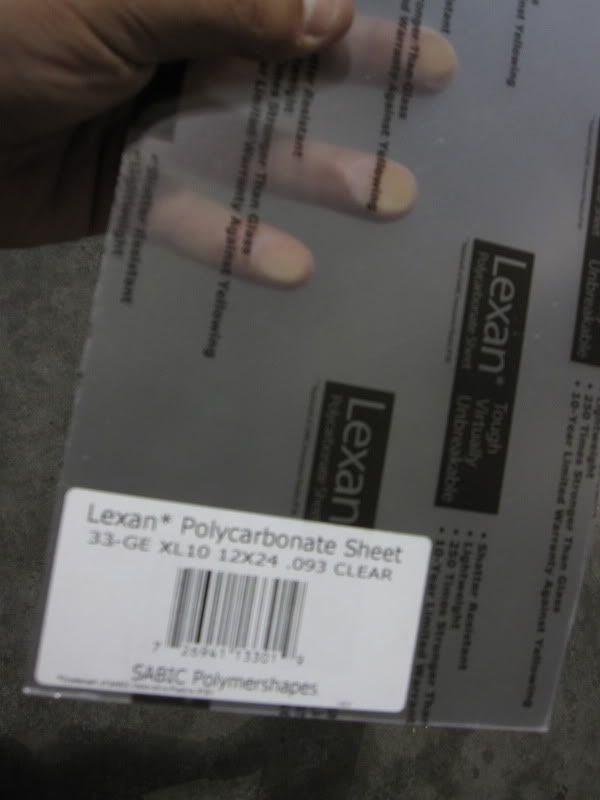
--Lexan, one sheet, 12"x24", for replacing the window.
--Lexan silicone, for sealing it in.
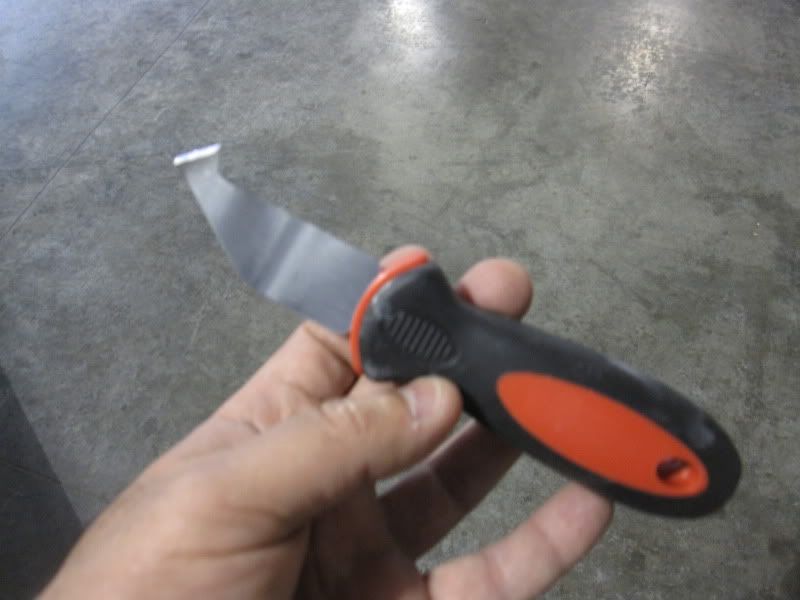
--Lexan Cutting Tool, for cutting the window shape out.
--Camper mounting tape
--Empty Spray Bottle (for spraying mirazyme mixture)
--Spray bottle of Simple Green
--Spray Bottle of Febreeze
--Razor blades
--Scouring Sponges
--Stiff bristle brush
--Rags
--Safety Glasses (for removing broken window seal)
--Rubber Gloves
--Painters Masks

Total: ~100

First up, replacing a broken window...for less than $20.

To Be Cont'd...
 

shahram

Adventurer
Part II

The broken window was shattered; urchin-like chunks and a fine glass dust rained down on everything underneath it. This was not safety glass, as the pieces were sharp and insidiously small. I donned safety glasses, put on a mask, and began removing the seal, and its attached shards, with a razor. As I pulled, tiny razor-sharp diamonds spat out at my face. If I had to do this over again, I would wear a mop suit, as glass found its way into my pockets, under my collar, and between my fingers. If you take one bit of advice away from this, please--glove up and cover up. I am, one week later, removing glass splinters from my fingers and neck.

Once the rubber was removed, I sanded the rest down with a 100-grit sandpaper sponge and went to work on shaping a replacement window.

Lexan advertises that its product is 250 times stronger than glass. I think that's an understatement. The stuff is amazing. They should make bank vaults and condoms for teenagers out of it.

IMG_4648.jpg


I placed the Lexan sheet over the remaining "good" window, and traced out, with a Sharpie marker, an imperfect but passable jig to fit in place. It wasn't pretty, but it just might work.

They sell a tool next to the Lexan glass sheets, a razor-sharp scorer that theoretically should cut through the Lexan sheet in a straight line, eventually. This might work for cutting a straight-edge piece of the plastic sheet, but did not work for carving out a Partridge Family icon. Basically, it was useless.

IMG_4649.jpg


I did find Lexan's Achilles Heel, however...apparently, it is no match for a pair of rusty, dull shears that I happened to find in a desk drawer.

IMG_4650.jpg


The old POS shears cut through the Lexan accurately, cleanly, and easily. Knowing this beforehand might have saved me a half hour of scoring and bending and cussing and kvetching. A quick sanding with a 100-grit sandpaper sponge removed the sharp spurs off the edges of the Lexan.

I slathered a layer of Lexan silicone around the edges of the window sill, and pressed my window in as best I could. It's certainly an inelegant solution, but it's functional. I will pick up a tinting kit from the auto parts store and see if that doesn't camouflage its homeliness and amateurish application.

IMG_4651.jpg


Next up....mold removal, deodorizing, and restoration of waterproofing...
 

shahram

Adventurer
Part III

Once the tent was popped up, the smell was pretty bad. A quick sniff-test of the mattress indicated that it was the main culprit. Turns out, open cell foam is basically a big sponge, and it soaks up all the moisture and bacteria and makes a little colony of smelly critters. Note to self: Open-cell foam mattresses are a bad idea. After its removal and placement in the bin, the smell inside the tent improved dramatically.

I am lucky to have a space where I could de-mount the camper and have a dry, clean place to work on it for the next week or two.
IMG_4653.jpg


IMG_4654.jpg


You can see two sections in the middle, as well as two corners, that are rather stained. This turned out to be a combination of mold and dirt.

The girl at the camp store recommended this product from Gear Aid (McNett), called MiraZyme. It is purported to remove odor and mildew, bacteria, etc. and is safe for use on water-resistant synthetics and impregnated canvas. In addition, it is apparently all natural.

l12674.png


I used a ratio of 1 oz. per quart of warm water in a spray bottle, double the recommended strength, due to the severity of the mold. Sprayed the tent down, inside and out, and left it to dry overnight.

The next day, I noticed a marked improvement in the appearance of the mold. It seemed to have subsided somewhat, even without scrubbing. I repeated the process again, and left the tent to dry overnight.

On the third day, I felt the moldy areas, and the mold was beginning to flake off as a dry powder. I made a ratio 4 oz. to 1 quart Simple Green, mixed with warm water in a spray bottle, and sprayed the tent down. I scrubbed it with a stiff brush. This was a mistake, as I should have used a scouring sponge or something with softer bristles. I wore a small hole in the tent just along one seam. Luckily I caught it, and quit using the brush altogether, opting instead for a dish sponge with scouring side. This, along with the Simple Green, proved effective in removing the bulk of the mold from the two most prominent growths. However, the mold had left stains which appeared to be almost tattooed into the fabric, so in the interest of salvaging what was left of the material, I rinsed it down and let it dry, stains and all.

Trust me, this is a VAST improvement!
IMG_4657.jpg


IMG_4656.jpg


I let the tent dry overnight, then went at it with a bottle of Febreeze. This imparted a fabric softener scent to the tent, which was already smelling pleasant. The Febreeze was sprayed on the poles as well, which had a cheesy odor to them that seemed impervious to Simple Green or Mirazyme, and it worked well. The shell and bed base were also washed down with Febreeze, and all was allowed to dry an additional 24 hours.

I had noticed that the previous owner had done a great job of sealing the seams of the tent, as every inch of the tent would get soaked, except the seams. I figured it was time to re-waterproof the tent.

My girl at the camp store recommended Atsko Silicone Water Guard. She said it was what she used, and she looked like the type who's spent many a rainy night in a tent, eating granola and humming Phish tunes, so I trusted her instinct. At ~$8 a bottle (as opposed to $4 for ScotchGard), it wasn't easy.

resize


She was right. I bought 4 bottles, and spent two on the roof alone, with another two for the sides and skirts of the tent. The stuff went on kind of thick, but soaked in quickly. I let it cure over the weekend, giving it 72-96 hours to bind up and get flexible. A test of the waterproofing, by making indentations along a seam, then pouring water directly into the depressions and letting it sit all day, proved to my satisfaction that the stuff is legit. Hopefully, it stands up to bending and UV and hot and cold and salt air and.....

IMG_4660.jpg


Next, I remove the old, busted up base layer foam, line the bed lip with mounting tape, then drill in and mount my new no-budget camper.

More tomorrow!

And stay tuned for my garage sale galley build, which promises even more cheapo jury-rigging, recycled lumber half-assery, and extreme haggling.
 
Last edited:

tanglefoot

ExPoseur
Excellent! I'm cheap as well and was originally looking at old Wildernests. I went with an old pop-up truck camper instead. It's amazing what soap & water, vinyl tiles, spray paint and Minwax will do! It's been fun to work on and camp in and it works pretty well on the '85 (mine was originally the same color as yours). I know what you mean about the cost of the products and pieces--I have to look the other way when I swipe the credit card.

More spray paint:
P1020251.jpg


Great work! I'm all about putting time and effort into well-used things to renew them. I'm looking forward to the galley build!

Eric
 
Last edited:

Rando

Explorer
From one wildernest owner to another, I would suggest putting a coat of this stuff on it at some point:
http://www.nikwax.com/en-gb/product...uctid=498&activityid=-1&itemid=-1&fabricid=-1

Works very well as a waterproofing agent (although it sounds like you have that under control) as well as helping to extend the life of the fabric another 25 years. I also replaced my mattress, a vast improvement in comfort, but not cheap - about $130 for H45 foam. DO you have the fiberglass rods for tensioning the ceiling? They make all the difference on a windy night!
 

shahram

Adventurer
From one wildernest owner to another, I would suggest putting a coat of this stuff on it at some point:
http://www.nikwax.com/en-gb/product...uctid=498&activityid=-1&itemid=-1&fabricid=-1

Works very well as a waterproofing agent (although it sounds like you have that under control) as well as helping to extend the life of the fabric another 25 years. I also replaced my mattress, a vast improvement in comfort, but not cheap - about $130 for H45 foam. DO you have the fiberglass rods for tensioning the ceiling? They make all the difference on a windy night!

If you mean the rods that fit into the windows, nope. I have two aluminum poles, but they appear to be aftermarket replacements, and not very good ones at that. I also have a couple pieces of lumber which the previous owner seemed to use as shims between the outer and central poles.

I'm working on a MacGuyver solution, as we speak...now, where did I put that chewing gum?
 

Scott Brady

Founder
My 1984 Toyota Pick-up is the only vehicle I have ever sold and still regret selling.

brueno_jpg.jpg

Check out those sweet chrome wheels :sombrero:
 

Rando

Explorer
The rods for the windows are easily made with some aluminium flat bar and a pin or bolt. I was thinking about the two (or four seeing this is a long bed) fiberglass bows that fit between the two outrigger bars and the central roof bar to tension the ceiling. They are not entirely necessary, but they make the tent pitch a lot more taught. If you look along the ridge bar you will see there are some holes drilled in it to accept the rods. You can see them in the photos here: http://wildernest.org/


If you mean the rods that fit into the windows, nope. I have two aluminum poles, but they appear to be aftermarket replacements, and not very good ones at that. I also have a couple pieces of lumber which the previous owner seemed to use as shims between the outer and central poles.

I'm working on a MacGuyver solution, as we speak...now, where did I put that chewing gum?
 

shahram

Adventurer
The rods for the windows are easily made with some aluminium flat bar and a pin or bolt. I was thinking about the two (or four seeing this is a long bed) fiberglass bows that fit between the two outrigger bars and the central roof bar to tension the ceiling. They are not entirely necessary, but they make the tent pitch a lot more taught. If you look along the ridge bar you will see there are some holes drilled in it to accept the rods. You can see them in the photos here: http://wildernest.org/

Ah, okay, now I see. Yes, I'll either do a flat bar, a dowel, or I'll cut down a shock-corded pole from a past tent.

Thanks for that link! I didn't know that existed!
 

SLO_F-250

Explorer
Shahram...

While I love drooling over the uber expensive dream setups, I really enjoy seeing the budget projects people do on here. Its always interesting what people come with with in their garage. You got a great start with the rig and camper. Keep up the good work and keep the pictures flowing! Looking forward to seeing the progress! :coffeedrink:
 

shahram

Adventurer
Part 3

Okay, time for an update...

Got the Wildernest mounted (what a hassle that was...holes not lining up, lots of pushing, pulling, straining, pinching, yelling "Ow! Ow! OW!"--I'm mentally transported to the back of a Toyota Corolla at Lookout Point, circa 1990), and replaced the shocks ($32 on ebay).

IMG_4807.jpg


Dropped by the Pep Boys to pick up a window tinting kit, to darken up my home-made Lexan window.. The cheapest one was a self-adhering kit for smaller windows ($5.99) which included a razor blade and a squeegee. Tint went on easily, but weird and uneven. Lucky I've got another two or three yards of the stuff for future tries.

IMG_4804.jpg


We had some seriously severe weather in Los Angeles over the weekend. In other words, it rained. Which gave me a chance to see if any parts of my Wildernest are leaky. Turns out, they are. Which ones, you ask? Pretty much all of them. The boot between the shell and cab leaked (which was to be expected, as I'd planned on siliconing the heck out of it). It went on pretty easy.

IMG_4798.jpg


But the bulb seal (between the roof and shell) also leaked, and I thought it might. The roof portion that clamps down on the shell has a space, when closed, through which one can see the inner canvas. The rubber seal that once was plump and gooey is now mostly flat and hard. Since I had a little leftover camper shell tape, I put a layer of it on the inside of the seal to bolster it with a little more girth. I then sealed the rim with silicone sealant. We'll see if that works.

IMG_4800.jpg


Next up...repairing some tears in the canvas, cheapo galley outfit, and maiden voyage/shakedown trip.
 

SLO_F-250

Explorer
Nice work! Keep it up. Looking forward to seeing ACTION SHOTS!! :bike_rider:

I hate to admit this, but my camper canvas had about a golf ball sized hole in it from a very nice little field mouse who made my camper his home for a while. Before my first trip, in a hurry and slapped a strip of duct tape on each side, and its held for over a year and 14+ trips! Even in the rain! :victory: Now that is a budget solution. Gotta love duct tape. How are you fixing yours? Got a patch kit?
 

Forum statistics

Threads
189,924
Messages
2,922,255
Members
233,083
Latest member
Off Road Vagabond
Top