You are using an out of date browser. It may not display this or other websites correctly.
You should upgrade or use an alternative browser.
You should upgrade or use an alternative browser.
The Camp 4x4 Bus - 1973 Suburban 8.1 Swap & Build
- Thread starter camp4x4
- Start date
hi aaronvogel
this filler neck, lefthandrear,is this for gas??? and where is the tank situated? i just put a modified propanetank in the spare wheel well.[fuel for generator]but i fitted the fillerneck next to the lh upper barndoor hinge.i never expected that much sheetmetal in that d-pillar.and also get the hose in kinkfree.
cheers urs
camp4x4
Adventurer
hi aaronvogel
this filler neck, lefthandrear,is this for gas??? and where is the tank situated? i just put a modified propanetank in the spare wheel well.[fuel for generator]but i fitted the fillerneck next to the lh upper barndoor hinge.i never expected that much sheetmetal in that d-pillar.and also get the hose in kinkfree.
cheers urs
My tank is centered in the frame just behind the rear axle, and yes, that's the fill cap in the last pic. I would imagine that area would have a ton of metal since it is supporting the barn doors and is the last roof support on the truck... Cool idea for using the spare tire area though!
camp4x4
Adventurer
Still so odd to see the truck I grew up with and learned how to drive back in '77. Glad to see process going forward again!
Glad to be making progress again. The lack of progress was starting to weigh on me. I'm pretty confident you'll be pleased with your family truck's second life!
camp4x4
Adventurer
Wrenchfest 2018 - The Wrenchening continued. Was too pooped to post anything the last couple days so I'm gonna take some time this morning to do so.
Tuesday we started by wrapping up the rear axle install. I have 1 extra leaf in the new spring pack, so I had to pick up a new bolt to use with the ORD 0-rate blocks I have in the rear. Then we popped the rear wheels on and got it sat down on its own four feet. It was AWESOME to see it sitting with the lift and 37's on. Really looking like the wheeler I plan it to be! Big motivation to wrap it up now!
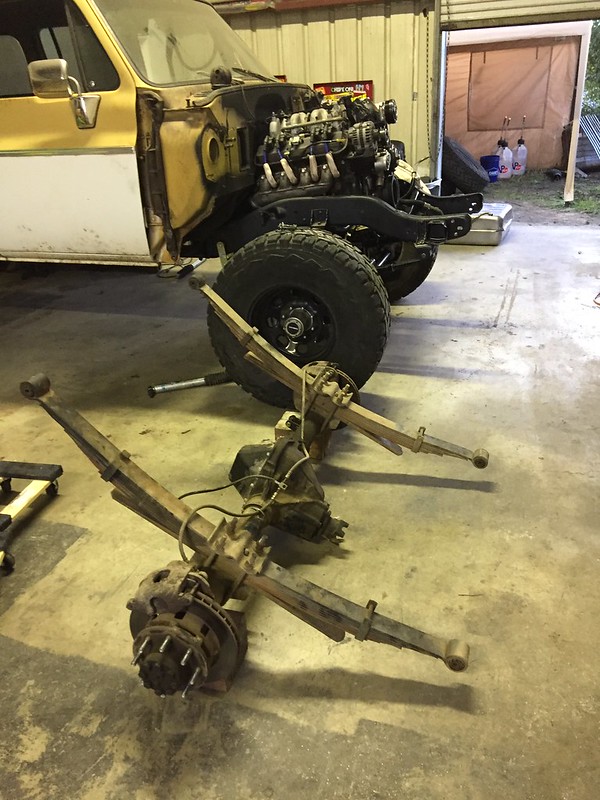
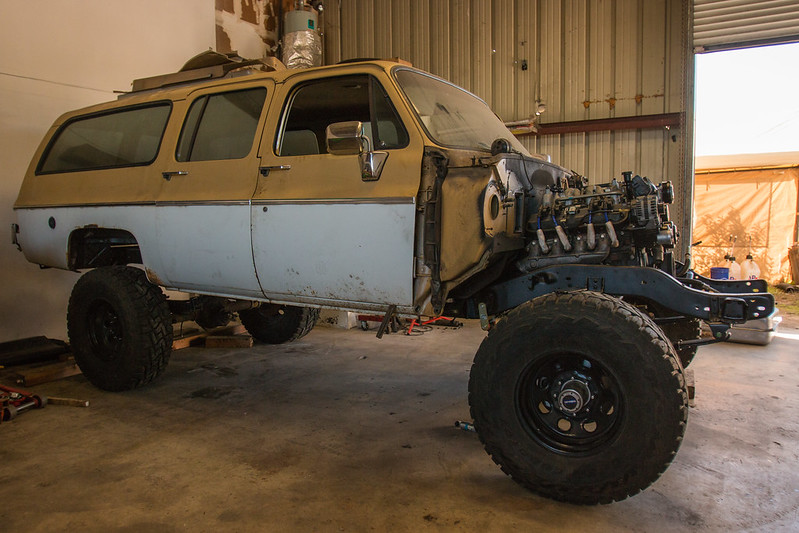
That went in very easily then the rest of the day was spent getting the engine, transmission and transfer case to come out. That always takes longer than expected and Tuesday was no different. Just finding and disconnecting everything that would hang it up took a fair amount of time. And of course we missed a few things along the way... But we did finally get them pulled. Removing the core support certainly helped the process move along.
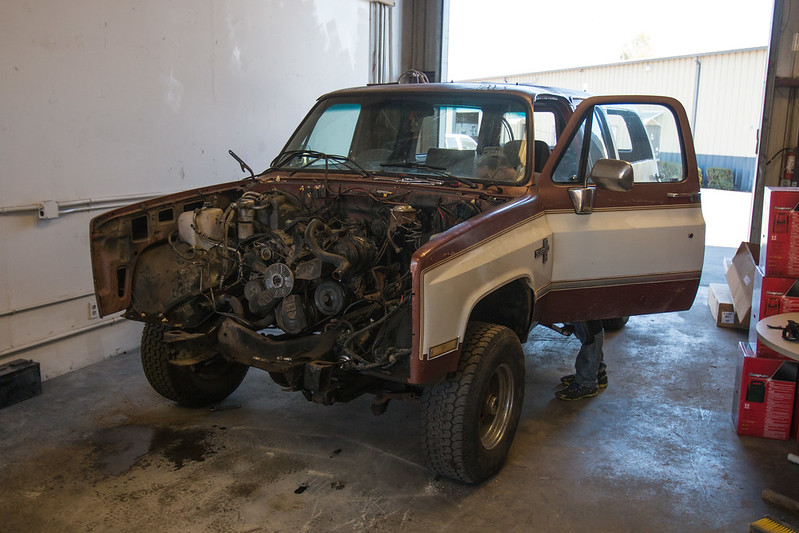
BTW, this is my dad. He's awesome. He's a car nut too. His personal preference is Citroen's. 2CV's, DS's, H-Vans... but he also used to buy FJ40's down in AZ, bring them back up to IL, do a little work on them and flip them. One of my first vehicles was an FJ55 he bought, restored and let me drive for a while after getting my license.. Loved that pig...

Wednesday - our last day - was spent taking off the last of the things I wanted from the '87: doors, seals, steering column, brake booster, etc. We also started getting into the '73. Doors came off, glass came out, the rest of the trim and headliner came out and we started prepping to cover the inside with Lizard Skin sound deadener. I finally made a decision about what I'll be doing with the floor rust holes too. The guy in the shop next door - Rich - showed me an epoxy from Smart called Small Panel Adhesive. I'm going to punch out any of the remaining loose rust, wire brush it to get the flakes off, treat it with Corroseal - which I used on the frame and underbody as well - then glue on pieces of the fresh patch panels I have. I'll be drilling a drain hole in the body mount brace to make sure any water that might happen to get in there can get out. I think this is the best compromise between fixing and ignoring. Eventually (2 years maybe), I'll want to get it into a body shop to clean it up, properly repair the rust and give it a solid paint job. In the mean time the strength is still there, so if I can stop the rust from progressing further and plug up the holes I'm happy.
Constructive Deconstruction
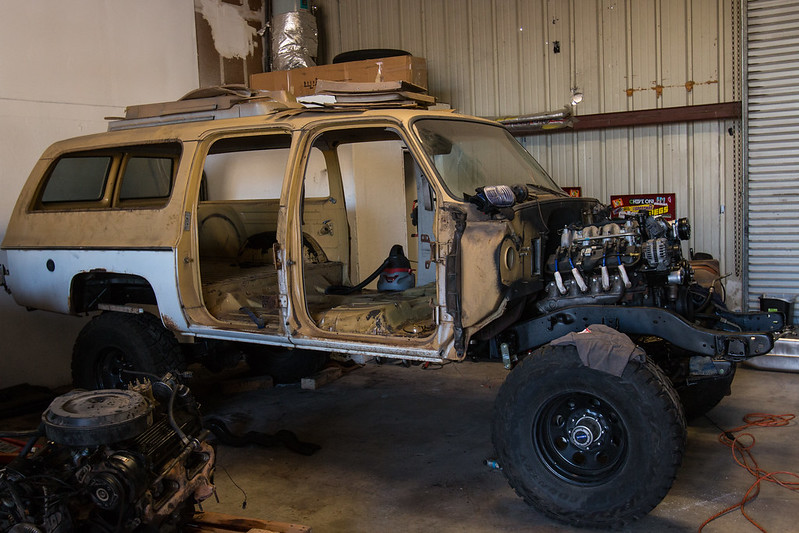
Today I'm back at work, but I'll be down there the next couple evenings and over the weekend keeping the momentum going. The carcass is getting picked up by a local guy who happened to drop by Rich's shop and saw what we were doing. No idea what his plans are for it. I'm a little sad to see it so far from what it was, but I'm more excited to get the '73 built and take that further than the '87 ever could have gone.
If you know anyone in the Bay Area that needs a 350 TBI core or a recently rebuilt TH400 for cheap lemme know. Craiglist ads are up already:
https://sfbay.craigslist.org/sby/pts/d/rebuilt-4wd-th400-and-stock/6488666461.html
https://sfbay.craigslist.org/sby/pts/d/chevy-350-tbi-engine-runs/6488656768.html
Tuesday we started by wrapping up the rear axle install. I have 1 extra leaf in the new spring pack, so I had to pick up a new bolt to use with the ORD 0-rate blocks I have in the rear. Then we popped the rear wheels on and got it sat down on its own four feet. It was AWESOME to see it sitting with the lift and 37's on. Really looking like the wheeler I plan it to be!


That went in very easily then the rest of the day was spent getting the engine, transmission and transfer case to come out. That always takes longer than expected and Tuesday was no different. Just finding and disconnecting everything that would hang it up took a fair amount of time. And of course we missed a few things along the way... But we did finally get them pulled. Removing the core support certainly helped the process move along.

BTW, this is my dad. He's awesome. He's a car nut too. His personal preference is Citroen's. 2CV's, DS's, H-Vans... but he also used to buy FJ40's down in AZ, bring them back up to IL, do a little work on them and flip them. One of my first vehicles was an FJ55 he bought, restored and let me drive for a while after getting my license.. Loved that pig...

Wednesday - our last day - was spent taking off the last of the things I wanted from the '87: doors, seals, steering column, brake booster, etc. We also started getting into the '73. Doors came off, glass came out, the rest of the trim and headliner came out and we started prepping to cover the inside with Lizard Skin sound deadener. I finally made a decision about what I'll be doing with the floor rust holes too. The guy in the shop next door - Rich - showed me an epoxy from Smart called Small Panel Adhesive. I'm going to punch out any of the remaining loose rust, wire brush it to get the flakes off, treat it with Corroseal - which I used on the frame and underbody as well - then glue on pieces of the fresh patch panels I have. I'll be drilling a drain hole in the body mount brace to make sure any water that might happen to get in there can get out. I think this is the best compromise between fixing and ignoring. Eventually (2 years maybe), I'll want to get it into a body shop to clean it up, properly repair the rust and give it a solid paint job. In the mean time the strength is still there, so if I can stop the rust from progressing further and plug up the holes I'm happy.
Constructive Deconstruction


Today I'm back at work, but I'll be down there the next couple evenings and over the weekend keeping the momentum going. The carcass is getting picked up by a local guy who happened to drop by Rich's shop and saw what we were doing. No idea what his plans are for it. I'm a little sad to see it so far from what it was, but I'm more excited to get the '73 built and take that further than the '87 ever could have gone.
If you know anyone in the Bay Area that needs a 350 TBI core or a recently rebuilt TH400 for cheap lemme know. Craiglist ads are up already:
https://sfbay.craigslist.org/sby/pts/d/rebuilt-4wd-th400-and-stock/6488666461.html
https://sfbay.craigslist.org/sby/pts/d/chevy-350-tbi-engine-runs/6488656768.html
Oilbrnr
Active member
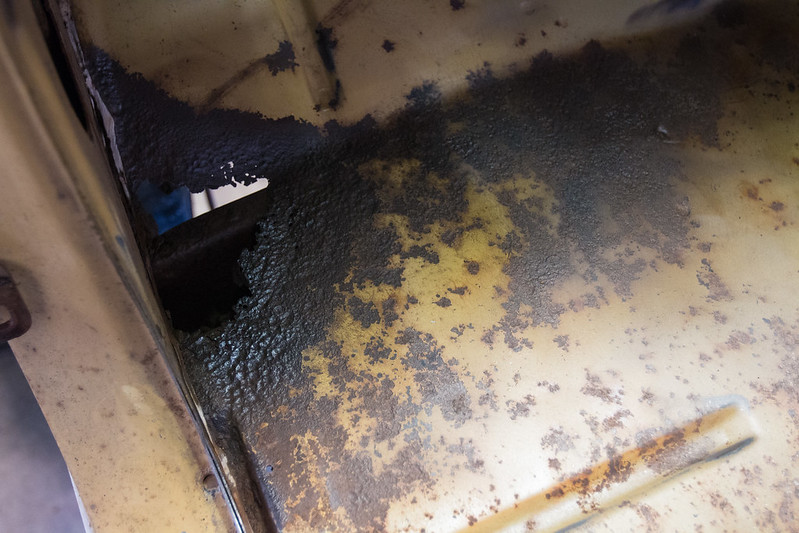
Wow, I'm shocked about the rust. That's the front DS right? It always pointed uphill in our driveway, think that it came from the windshield down the A-pillar? I suppose after that many years, it could have been from snow off boots/shoes and it just got held by the carpet and backing...
camp4x4
Adventurer
Wow, I'm shocked about the rust. That's the front DS right? It always pointed uphill in our driveway, think that it came from the windshield down the A-pillar? I suppose after that many years, it could have been from snow off boots/shoes and it just got held by the carpet and backing...
All of the above probably. I believe this is one of the most, if not THE most common area to rust on these trucks. This one is front DS, the front PS is pretty much the same. :-/
The spare tire pocket is also rusted through. I’m gonna look into making a straigh-across panel to replace the tub there since it unbolts pretty easily.
All in all nothing unmanageable.
camp4x4
Adventurer
Nice work and always better with help, much less pops!
I know its late but why not a body swap? It goes by chassis number anyway and its already been smogged for the transfer, right?
I may look into the fg panel stuff. I have a couple spots right above the doors.
Yeah, I considered a body swap, but two big factors that ultimately swayed me were timing and available shop space. Doing it this way let me keep using the '87 for trips last year while simultaneously getting work done on the '73. Doing a body swap would have meant that at some point both would be fully torn down for a fair amount of time and taken a fair amount of space while doing it. Space I don't really have.
Additionally, I believe there are some body mount differences between the early and later bodies. May not have been an issue... but may have been...
I also had the opportunity to fully seal and paint the frame, which would not have been an option doing a body swap.
Ultimately I'm happy I did it this way and would probably do it this way again.
camp4x4
Adventurer
Little more progress today and the last couple evenings. The floor has been stripped down with a wire brush, ready for the Corroseal, then the patch panels, then the Lizard Skin. I finally decided to do the patch panels with Smart Small Panel Adhesive. Apparently this stuff cures as hard as steel. This will dramatically simplify filling the holes in the floor, and if I do it thoroughly everything should be fairly well sealed up without requiring welding. Is it perfect? No. Will it last until when (if) I can get it repaired perfectly. Definitely.
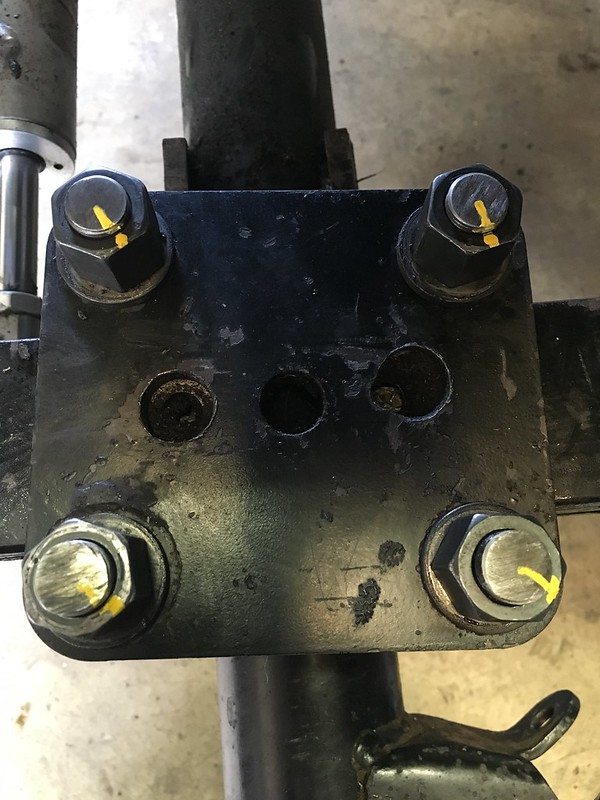
Got a bunch of things bolted on and a bunch of things torqued to spec after being just loosely bolted on. Picked up a fresh paint pen to mark everything that was torqued. Helps me keep track as well as helps me keep an eye on things down the road if anything loosens up.
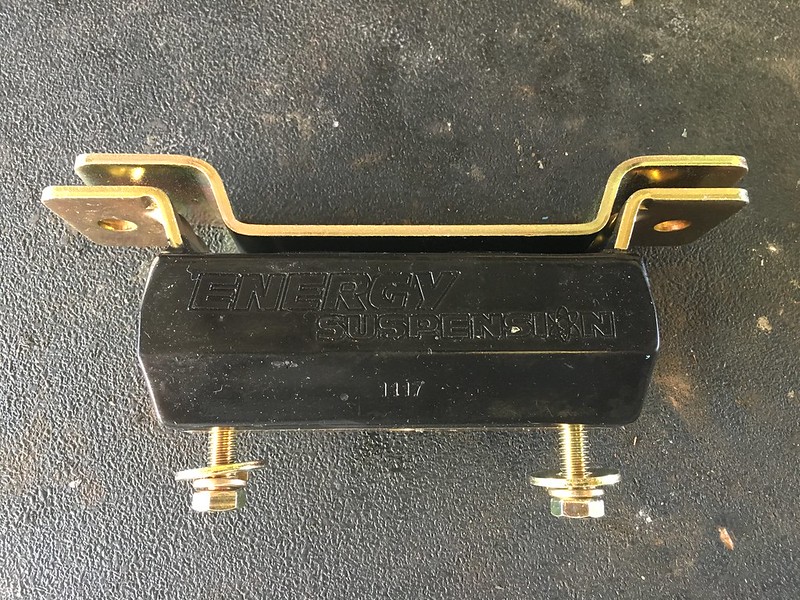
I also finally found the right Energy Suspension poly transmission mount bushing, and I found that the 87's transmission crossmember matches the 4L80E mount pattern. Unfortunately when I used the jack to press the crossmember up against the frame I found the mounting holes nearly match, but are far enough off there's no way to make it work. Unfortunately this leaves me in a tough position because I don't feel comfortable drilling the mounting holes so close to the old holes. I'm thinking I have two options: weld on an 1/8" bit of flat to reinforce the frame in that area, or I've been thinking about having a crossmember build; something like the ORD engine crossmember I have up front. Some 1/4" angle with gussets, couple W-bent DOM tubes and a bit of plate for the bushing mount... probably big money but would be trick. I'll probably do the simple fix.
In other news I took some measurements and I think I need to rethink the short 32-spline input shaft I'm using on the NP205. It seems I'll only have about 1.25" of engangement between the transmission output shaft and the transfer case input shaft right now. Which just doesn't seem like enough. There's definitely more output shaft available, so I think I'm going to have to pick up the long input shaft for the NP205 and swap that in. With the Northwest Fab Works figure-8 to circle six adapter taking up a little over .5" between the transfer case and the transmission mount I think it should be just right. :/ I've been less than impressed with the myriad of conflicting and incomplete info online about putting this transmission and this transfer case together.... The alternative appears to be swapping the transmission to transfer case adapter for one of the TH400 to NP205 ones that don't require the figure-8 to circle-6 adapter. These, however, have a taller "foot" which means I'd have to get a different transmission crossmember... FUUUUUUUU.... guess this is what you get when you mix and match.
Anyway... it'll be little by little the rest of the way.
Got a bunch of things bolted on and a bunch of things torqued to spec after being just loosely bolted on. Picked up a fresh paint pen to mark everything that was torqued. Helps me keep track as well as helps me keep an eye on things down the road if anything loosens up.

I also finally found the right Energy Suspension poly transmission mount bushing, and I found that the 87's transmission crossmember matches the 4L80E mount pattern. Unfortunately when I used the jack to press the crossmember up against the frame I found the mounting holes nearly match, but are far enough off there's no way to make it work. Unfortunately this leaves me in a tough position because I don't feel comfortable drilling the mounting holes so close to the old holes. I'm thinking I have two options: weld on an 1/8" bit of flat to reinforce the frame in that area, or I've been thinking about having a crossmember build; something like the ORD engine crossmember I have up front. Some 1/4" angle with gussets, couple W-bent DOM tubes and a bit of plate for the bushing mount... probably big money but would be trick. I'll probably do the simple fix.

In other news I took some measurements and I think I need to rethink the short 32-spline input shaft I'm using on the NP205. It seems I'll only have about 1.25" of engangement between the transmission output shaft and the transfer case input shaft right now. Which just doesn't seem like enough. There's definitely more output shaft available, so I think I'm going to have to pick up the long input shaft for the NP205 and swap that in. With the Northwest Fab Works figure-8 to circle six adapter taking up a little over .5" between the transfer case and the transmission mount I think it should be just right. :/ I've been less than impressed with the myriad of conflicting and incomplete info online about putting this transmission and this transfer case together.... The alternative appears to be swapping the transmission to transfer case adapter for one of the TH400 to NP205 ones that don't require the figure-8 to circle-6 adapter. These, however, have a taller "foot" which means I'd have to get a different transmission crossmember... FUUUUUUUU.... guess this is what you get when you mix and match.
Anyway... it'll be little by little the rest of the way.
Similar threads
- Replies
- 11
- Views
- 908
- Replies
- 5
- Views
- 408

