You are using an out of date browser. It may not display this or other websites correctly.
You should upgrade or use an alternative browser.
You should upgrade or use an alternative browser.
The Camp 4x4 Bus - 1973 Suburban 8.1 Swap & Build
- Thread starter camp4x4
- Start date
camp4x4
Adventurer
it would be really cool if you could get matching colors, but im OCD AF
It would be... but that's looking like a big "if" right now.
camp4x4
Adventurer
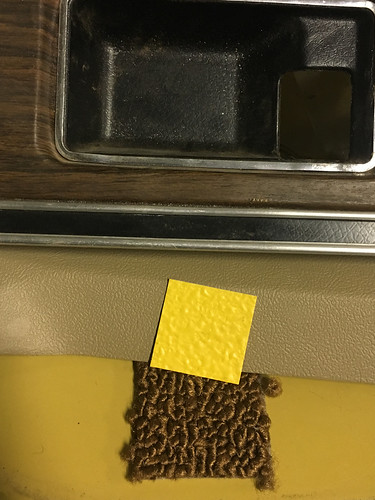
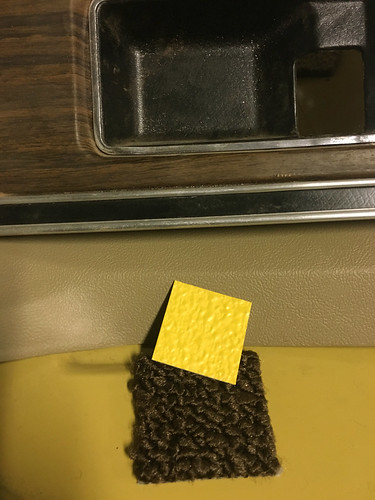
Well, the trigger has been pulled. I just ordered the dark brown carpet from StockInteriors.com. Ultimately I keep feeling the darker brown has a hue that is closer to the tan of the seats and trim, where as the lighter brown has a bit too much red.
This weekend I helped my buddy move his project car down to Paso Robles from here in SJC. That took much of Saturday, so no progress on the truck until Sunday. Fortunately Sunday was terrifically productive.
I got the '87's engine sold to a guy who needed it for his '89 Suburban project. So that's a bit more $ and a bit more room I have now!
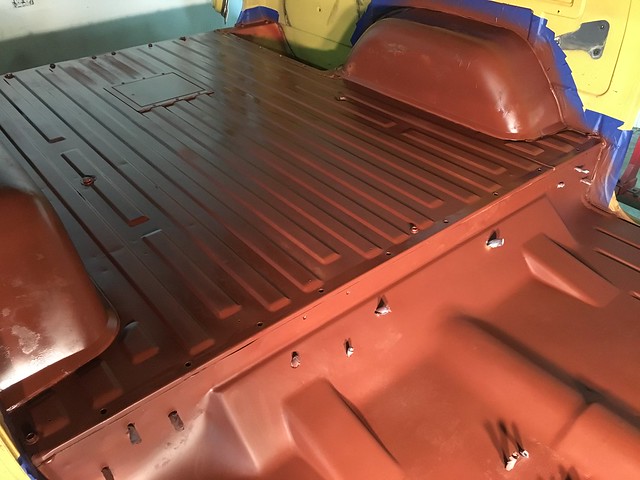
I started by cleaning up the floor patch panels. The passenger side needed a few pop rivets to hold down the front edge where it had lifted as it cured. I think I just didn't have it properly weighted on those areas, not that this was something inherent in using the product. I also found I'd cut the panel a little too far in one spot and left a sliver of hole open right at the kick panel, so I made another little piece and glued that in place, this time using pop rivets to hold it while it cured. This will all be covered over with carpet in the end, so all I care is that it is sealed well and strong, which they appear to be.
I did a little grinding too to smooth over some edges, then took the flappy paddle wheel quickly over the whole floor area in preparation for priming. But, before I got to painting I wanted to get the gas tank sender access panel installed. I've had to drop the gas tank on my old truck a couple times and it is a major ordeal. I also have fittings on the sender I'd like to have access to so I can install the tank now and connect the fittings later. This is a fairly common mod for square body off-roaders who have the center-mounted tanks. I'd ordered a 10"x10" metal access panel from Amazon since I didn't want to have to fab anything myself and I wanted a clean install. I've seen guys do this with just a piece of sheet metal screwed over the hole, but I feel like this is cleaner.

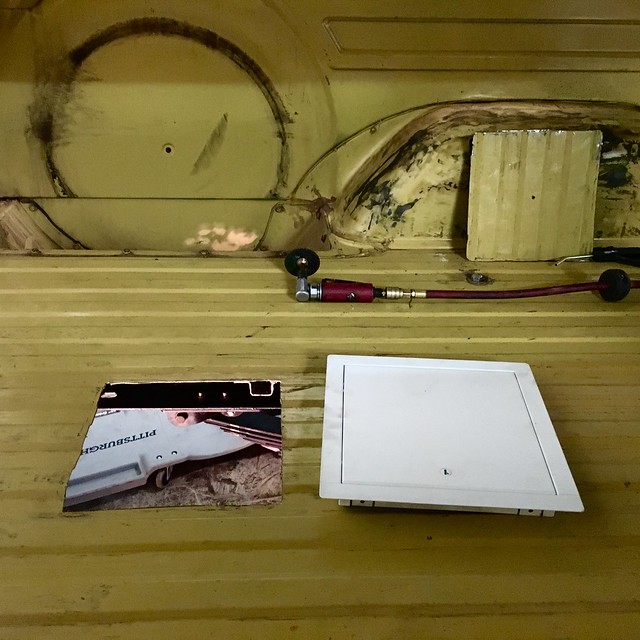
Anyway, I got the hole cut, nice and centered over the gas tank area. Then I swung by Lowes and bought some marine weather seal that was tall enough to reach above the raised area of the floor to fill in the lower areas. The lip of the access panel frame sits on top of the raised parts of the floor, so I ran grey RTV all the way around the lip. For the moment I used some very low-profile self-tapping screws to hold it in place and there'll will be a rubber floor mat covering the entire back, topped by my storage base, so I'm really not terribly concerned about having everything SUPER flush to the floor.
Once I got the access panel in I got to cleaning up the floor from all the paint and debris left from scuffing the floor and installing the panel. I also realized I didn't have as much primer left over from the previous painting as I thought. It was starting to get late by then so I used up what primer I had, got the shop cleaned up and headed home.
Today I'll be swinging by Home Depot to pick up a couple more cans of primer, then finishing the floor primer. Weds I'll be shooting the Lizard Skin sound deadener, and that'll be it for the floors! :wings: Then it'll be on to fabricating seat brackets, painting trim, waiting for the carpet to get here... still lots to do and that's just for the interior. Wiring will come after that, then finishing up the engine bay.
This weekend I helped my buddy move his project car down to Paso Robles from here in SJC. That took much of Saturday, so no progress on the truck until Sunday. Fortunately Sunday was terrifically productive.
I got the '87's engine sold to a guy who needed it for his '89 Suburban project. So that's a bit more $ and a bit more room I have now!
I started by cleaning up the floor patch panels. The passenger side needed a few pop rivets to hold down the front edge where it had lifted as it cured. I think I just didn't have it properly weighted on those areas, not that this was something inherent in using the product. I also found I'd cut the panel a little too far in one spot and left a sliver of hole open right at the kick panel, so I made another little piece and glued that in place, this time using pop rivets to hold it while it cured. This will all be covered over with carpet in the end, so all I care is that it is sealed well and strong, which they appear to be.
I did a little grinding too to smooth over some edges, then took the flappy paddle wheel quickly over the whole floor area in preparation for priming. But, before I got to painting I wanted to get the gas tank sender access panel installed. I've had to drop the gas tank on my old truck a couple times and it is a major ordeal. I also have fittings on the sender I'd like to have access to so I can install the tank now and connect the fittings later. This is a fairly common mod for square body off-roaders who have the center-mounted tanks. I'd ordered a 10"x10" metal access panel from Amazon since I didn't want to have to fab anything myself and I wanted a clean install. I've seen guys do this with just a piece of sheet metal screwed over the hole, but I feel like this is cleaner.


Anyway, I got the hole cut, nice and centered over the gas tank area. Then I swung by Lowes and bought some marine weather seal that was tall enough to reach above the raised area of the floor to fill in the lower areas. The lip of the access panel frame sits on top of the raised parts of the floor, so I ran grey RTV all the way around the lip. For the moment I used some very low-profile self-tapping screws to hold it in place and there'll will be a rubber floor mat covering the entire back, topped by my storage base, so I'm really not terribly concerned about having everything SUPER flush to the floor.
Once I got the access panel in I got to cleaning up the floor from all the paint and debris left from scuffing the floor and installing the panel. I also realized I didn't have as much primer left over from the previous painting as I thought. It was starting to get late by then so I used up what primer I had, got the shop cleaned up and headed home.
Today I'll be swinging by Home Depot to pick up a couple more cans of primer, then finishing the floor primer. Weds I'll be shooting the Lizard Skin sound deadener, and that'll be it for the floors! :wings: Then it'll be on to fabricating seat brackets, painting trim, waiting for the carpet to get here... still lots to do and that's just for the interior. Wiring will come after that, then finishing up the engine bay.
camp4x4
Adventurer
Just did Monstaliner in my truck. Be prepared for some serious fumes!
Thanks for the heads-up.. I've got a large bay door at either end of the shop. I'll be sure to have these open.
FBJR
Adventurer
You timing is perfect! I have been wanting to cut an access panel in mine but have not dropped the tank yet.
Can you tell me what the measurement is from the rear lip to your opening as I don't want to cut that support seen in your picture? Was 10x10 about right or can you go a little smaller?
Can you tell me what the measurement is from the rear lip to your opening as I don't want to cut that support seen in your picture? Was 10x10 about right or can you go a little smaller?
camp4x4
Adventurer
You timing is perfect! I have been wanting to cut an access panel in mine but have not dropped the tank yet.
Can you tell me what the measurement is from the rear lip to your opening as I don't want to cut that support seen in your picture? Was 10x10 about right or can you go a little smaller?
Yeah, I can take some measurements for you tonight. From what I've seen EVERYONE cuts the support. I think if you were to avoid it you'll end up having to reach under it to access the fittings, which is kind of against the point of the panel in the first place. I will say that it seems plenty strong even with the support piece cut.
I haven't put the gas tank up yet since I have to move my rear shackle hangers back 4" still (bought 56" springs when the '73 had 52" springs originally). So I can't say if it is the best size. I figured it is close while err'ing on the side of larger than needed.
FBJR
Adventurer
If I have to I have to, thx!
I will need to pull my tank for my shackle flip. I just got stock 3/4 replacement springs though. Right now my rear springs are flat. With that and the flip my 37s should fit easy.
For now I am just putting a new pump in for the TBI. Later it will be a lift pump for the cummins swap.
I will need to pull my tank for my shackle flip. I just got stock 3/4 replacement springs though. Right now my rear springs are flat. With that and the flip my 37s should fit easy.
For now I am just putting a new pump in for the TBI. Later it will be a lift pump for the cummins swap.
camp4x4
Adventurer
Hey FBJR,
Here's that measurement for you: my center-point measurement is: 23" from the lip of the cargo area floor in the back, and obviously centered on the floor side to side. The forward edge of the cut was at 28", the rearward edge was at 18". Since the edge of the brace was actually at the edge of the cut, and about 3" long, my guess (this isn't an exact measurement though) is that the brace starts at about 25" from the lip of the cargo area. That's only a couple inches from the center point of the tank.... so you can see why pretty much everyone cuts the thing.
Measurement From Here
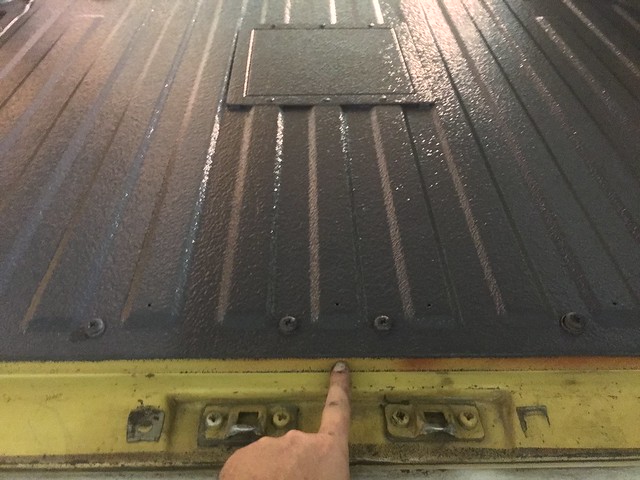
As you all can see, I got the Lizard Skin Sound Control sprayed on last night. Went well, though time consuming... I had a single 2gal bucket, which is supposed to cover 40-45sqft. Since the floor is roughly 50sqft I skimped a little on the cargo area - 2 moderate coats - and did a bit more on the passenger area - 3 moderate coats and a light coat. The cargo area will have a rubber floor mat, plus the cargo/drawer base on top of it so I don't see it being a large source of noise. I did a 3rd light coat on the rear wheel wells though since they won't have the rubber mat over them.
Overall I'm happy with it. I don't know if it would have been more tedious to apply traditional sound deadener material, but I'm confident that the carpet (which is coming on Tuesday) will sit over this incredibly well, so I'm very happy with my choice.
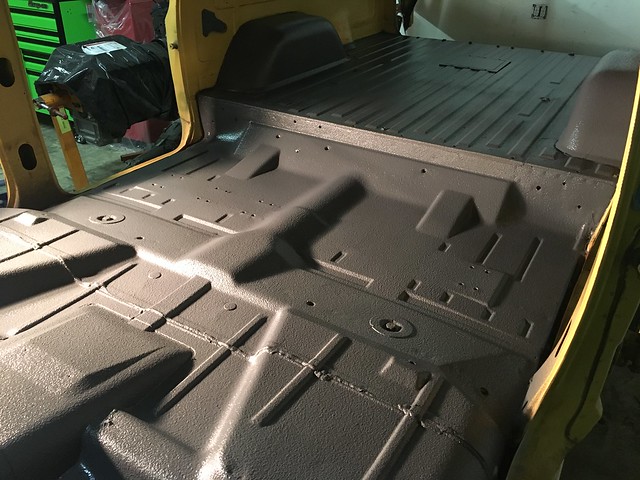
Never did post this pic of the floor after primer before the Lizard Skin. I scuffed up the floor pretty good with a flappy paddle and wire wheel, then cleaned it and primed. That cured for a couple days before I shot the Lizard Skin.
Here's that measurement for you: my center-point measurement is: 23" from the lip of the cargo area floor in the back, and obviously centered on the floor side to side. The forward edge of the cut was at 28", the rearward edge was at 18". Since the edge of the brace was actually at the edge of the cut, and about 3" long, my guess (this isn't an exact measurement though) is that the brace starts at about 25" from the lip of the cargo area. That's only a couple inches from the center point of the tank.... so you can see why pretty much everyone cuts the thing.
Measurement From Here

As you all can see, I got the Lizard Skin Sound Control sprayed on last night. Went well, though time consuming... I had a single 2gal bucket, which is supposed to cover 40-45sqft. Since the floor is roughly 50sqft I skimped a little on the cargo area - 2 moderate coats - and did a bit more on the passenger area - 3 moderate coats and a light coat. The cargo area will have a rubber floor mat, plus the cargo/drawer base on top of it so I don't see it being a large source of noise. I did a 3rd light coat on the rear wheel wells though since they won't have the rubber mat over them.
Overall I'm happy with it. I don't know if it would have been more tedious to apply traditional sound deadener material, but I'm confident that the carpet (which is coming on Tuesday) will sit over this incredibly well, so I'm very happy with my choice.

Never did post this pic of the floor after primer before the Lizard Skin. I scuffed up the floor pretty good with a flappy paddle and wire wheel, then cleaned it and primed. That cured for a couple days before I shot the Lizard Skin.

Last edited:
Kingsize24
Well-known member
Wow! Looking damn good. Please let us know how the lizard skin works for you.
camp4x4
Adventurer
Oh boy... new wrinkle...
As you can see in the above photos of the floor, there's some areas on the cargo area walls that are missing paint. Apparently GM put the rear seat latches on before they painted... odd. Since I'm not keeping the rear bench seats I removed the latches. Obviously those big grey patches look like crap, so I've been looking around for color-match spray paints. I'd seen them on Mighty Car Mods but the brand they used was only available in Australia. Finally today I found these guys: AutomotiveTouchup.com AND they have Adonis Yellow specifically listed!
So I've got a can of paint and a can of clear ordered up to arrive next week. At the very least this'll be great for touching up the interior paint.
But now I'm wondering if this would be workable for a 30-foot paint job on the whole truck to refresh the factory paint... I still LOVE the idea of a full bed-liner exterior, but the color mismatch is still a bit of a bummer. I'm gonna call around to see if any of the local paint shops can mix up the specific kind of tint Monstaliner says to use since I think it is a bit different than normal paint tint... But this factory color rattle can paint job idea has got me thinking....
marshal
Burrito Enthusiast
But now I'm wondering if this would be workable for a 30-foot paint job on the whole truck to refresh the factory paint... I still LOVE the idea of a full bed-liner exterior, but the color mismatch is still a bit of a bummer. I'm gonna call around to see if any of the local paint shops can mix up the specific kind of tint Monstaliner says to use since I think it is a bit different than normal paint tint... But this factory color rattle can paint job idea has got me thinking....
you seem handy enough with a HVLP gun, why not just get a gallon of paint mixed up and spray it yourself?
Similar threads
- Replies
- 0
- Views
- 357

