Women who understand tools.....haaaaa....nice.:coffeedrink:looking good! you should feel luckey to have a wife who is happy to help
You are using an out of date browser. It may not display this or other websites correctly.
You should upgrade or use an alternative browser.
You should upgrade or use an alternative browser.
The CrowsWing - Offroad Teardrop Trailer
- Thread starter jim65wagon
- Start date
Yellowkayak
Adventurer
Women with tools...you bet...mine came with her own tools (Craftman) and her own fishing equipment...boy did I get lucky. AND she can take a car apart and work on everything...sweet....yup anyone who lands a woman with her owns tools and knows how to use them...best woman on the planet. I forgot to mention.....she is a computer geek also!
JJ
JJ
TRegasaurus
Adventurer
Can it be? I once thought such women were myth, but you have actual photographic evidence.
Can it be? I once thought such women were myth, but you have actual photographic evidence.
photographic evidence!!!! LOL....thats a good one.:coffeedrink:
TheThom
Adventurer
Does a phone count? Mine can not even blow up an air mattress, which I guess leads to other problems, damn.
Did you mean for that to be super dirty? Cuz it was....
Sorry for my first ever post to be a questionable one.....I'm really not a sleezebag. I promise.
jim65wagon
Well-known member
Not only does she build trailers; she's built cabinets (when we restored our house in PA), our current chuckbox, she fishes, hikes and kayaks, and she still finds time to cook a mean catfish cake!
.
The day after Christmas was also productive....again, I had to work and she did most of the work along with a little help from our teenaged kids.
This first shot is of the jig used to cut the dadoes in the walls.

.
The second wall all trimmed up and dadoed out.
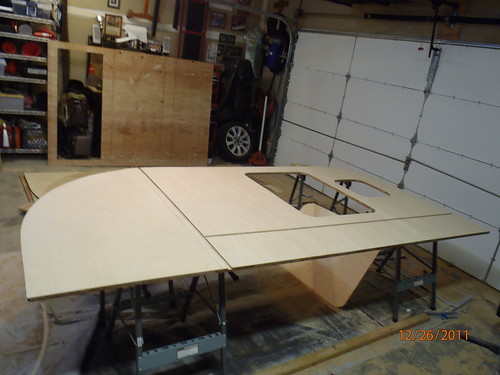
.
The next step is fenestration......to the uninformed that's cutting out "windows" in this case the windows are in the bulkhead and are for the electrical chase, wine cabinet, and plumbing access.....and of course a dado had to be cut too.

.
Setting things up to see how they look

.
The wall and the bulkhead. Looks much more trailer like now!
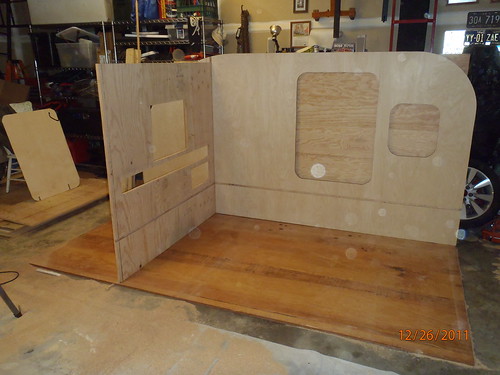
.
We also got the hatch in the bed floor cut out. This will provide easy access to the water tank and water pump.
Closed
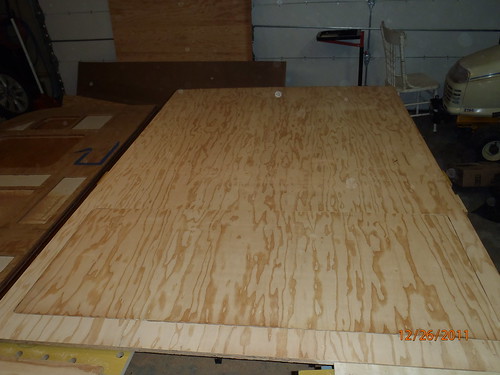
.....it took some extra fiddling with the router and belt sander, but the hatch door fits flush in the floor nicely.
.
Open
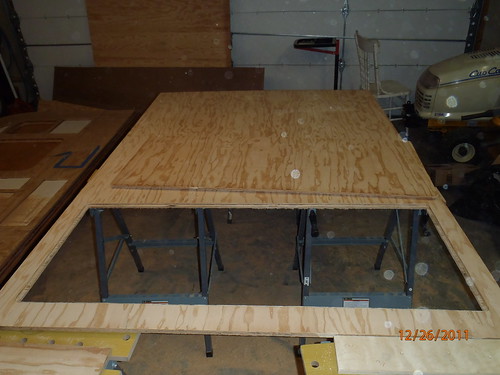
.
Last job of the night was to glue the Birch ply onto the bulkhead. This is a nice shot of me actually doing something besides photographing Beth working. I'm cleaning up the glue ooze that's dripping from under the paneling

.
Note: It takes a ton of clamps and many weighty things to keep the ply flat on the wall while the glue dries!
.
The day after Christmas was also productive....again, I had to work and she did most of the work along with a little help from our teenaged kids.
This first shot is of the jig used to cut the dadoes in the walls.

.
The second wall all trimmed up and dadoed out.

.
The next step is fenestration......to the uninformed that's cutting out "windows" in this case the windows are in the bulkhead and are for the electrical chase, wine cabinet, and plumbing access.....and of course a dado had to be cut too.

.
Setting things up to see how they look

.
The wall and the bulkhead. Looks much more trailer like now!

.
We also got the hatch in the bed floor cut out. This will provide easy access to the water tank and water pump.
Closed

.....it took some extra fiddling with the router and belt sander, but the hatch door fits flush in the floor nicely.
.
Open

.
Last job of the night was to glue the Birch ply onto the bulkhead. This is a nice shot of me actually doing something besides photographing Beth working. I'm cleaning up the glue ooze that's dripping from under the paneling

.
Note: It takes a ton of clamps and many weighty things to keep the ply flat on the wall while the glue dries!
Last edited:
Haggis
Appalachian Ridgerunner
And when she's operating a dozer it's like poetry in motion...Not only does she build trailers; she's built cabinets (when we restored our house in PA), our current chuckbox, she fishes, hikes and kayaks, and she still finds time to cook a mean catfish cake!
jim65wagon
Well-known member
We're back.......it seems like forever since I was able to post an update. A lot has happened in the last two weekends. I had several days off for New Years (making up for the Christmas holiday), and I actually got to work on the trailer. The walls, floor, storage dividers, and bulkhead all got several coats of polyurethane. The pictures can tell the story, as a written rendition is rather a boring read.
.
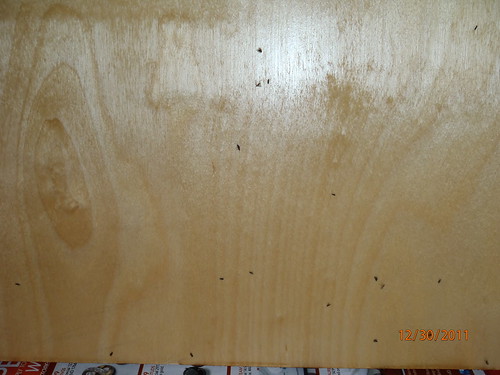
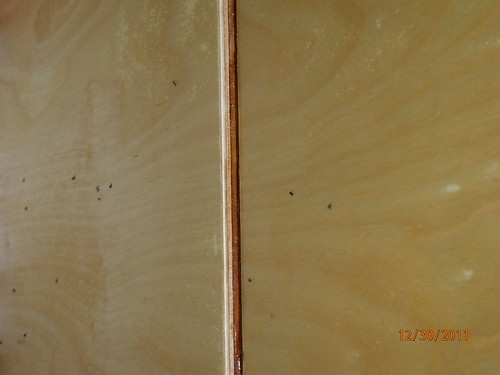
I spent the 29th and 30th sanding, and sanding and sanding. Then I had to lay out all the pieces and apply the polyurethane. I ran into some issues on the first coat. Now I know what you're thinking......"if you apply it too thickly, James, you'll get the runs and have to sand them away until smooth again"
I tell you right now, you're wrong, I didn't get the runs. I got flies.....well, gnats really. They seem to enjoy something in the poly so much, it's like a game to them.......you know the one where you wear a velcro suit, bounce off the trampoline and stick yourself to the wall? That's exactly what these darned gnats did.....except they couldn't get unstuck, and died and dried right in my fresh poly.
More sanding, gnats don't sand pretty, but some of them make nice looking natural "highlights" when you grind them smoothly enough.
.
pre-sanded gnats
.
.
The next coats went more smoothly, a good breeze outside kept the bugs at bay.
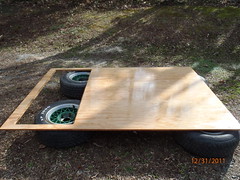
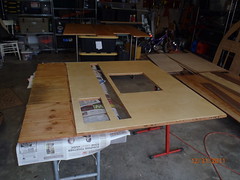
I poly.

.
They polied.
 ...
...
 ...
...
.
That's really all we managed to do for the New Year weekend, company came along and while I did do the final coats of poly it just would have seemed rude to ignore them and work on the trailer. We did the next best thing, we put them to work! We had several dead and/or dying trees that needed downed. Now I can fall a tree when there are no houses involved, but Beth's Dad is an expert at the felling business, and he can drop a tree right where he wants it.
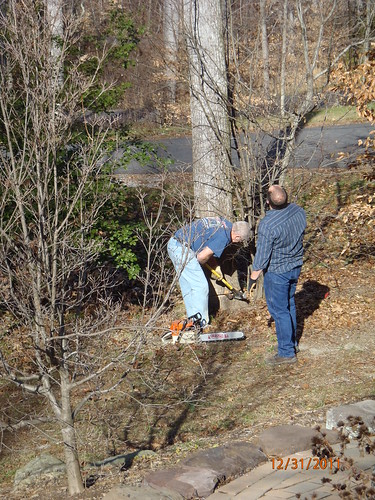
.
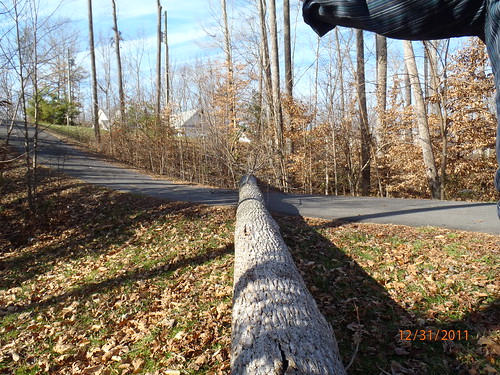
That's one weekend down....I'll be back with number two tomorrow.
Cheers and Happy New Year!
.
I spent the 29th and 30th sanding, and sanding and sanding. Then I had to lay out all the pieces and apply the polyurethane. I ran into some issues on the first coat. Now I know what you're thinking......"if you apply it too thickly, James, you'll get the runs and have to sand them away until smooth again"
I tell you right now, you're wrong, I didn't get the runs. I got flies.....well, gnats really. They seem to enjoy something in the poly so much, it's like a game to them.......you know the one where you wear a velcro suit, bounce off the trampoline and stick yourself to the wall? That's exactly what these darned gnats did.....except they couldn't get unstuck, and died and dried right in my fresh poly.
More sanding, gnats don't sand pretty, but some of them make nice looking natural "highlights" when you grind them smoothly enough.
.
pre-sanded gnats

.

.
The next coats went more smoothly, a good breeze outside kept the bugs at bay.
I poly.

.
They polied.


.
That's really all we managed to do for the New Year weekend, company came along and while I did do the final coats of poly it just would have seemed rude to ignore them and work on the trailer. We did the next best thing, we put them to work! We had several dead and/or dying trees that needed downed. Now I can fall a tree when there are no houses involved, but Beth's Dad is an expert at the felling business, and he can drop a tree right where he wants it.

.

That's one weekend down....I'll be back with number two tomorrow.
Cheers and Happy New Year!
Titanpat57
Expedition Leader
Damn you got a nice ash...
Nice progress....:ylsmoke:
Nice progress....:ylsmoke:
jim65wagon
Well-known member
The next weekend: We only had our usual Sunday, Monday off, put we put time in again!
.
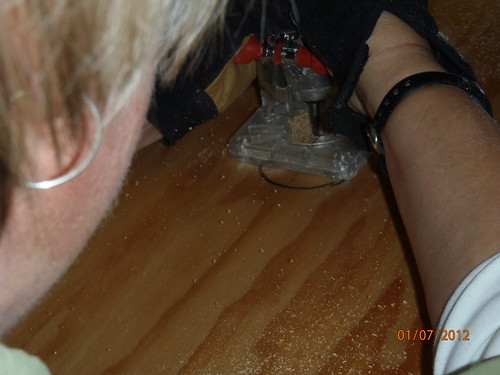
We began with the simple bit: Recess the handles for the water tank hatch. This was a breeze! Just take the handles out of the package, route out a small recess in the panel for the handle to flush mount, screw the thing down and voila!
.
.
Perfect! Well kindasorta....we actually recessed a bit too well!

.
The next step was providing the panels we had with some way to fasten to each other. This is where the Kreg Jig comes in really handy. It's portability makes it easy to move to the project, making perfect screw holes for ultra easy joinery.

.
This tool is well worth the price of admission and makes me feel like Will Smith.
Gettin Jiggy Wit It

My moves are so fly my head is a blur!
.
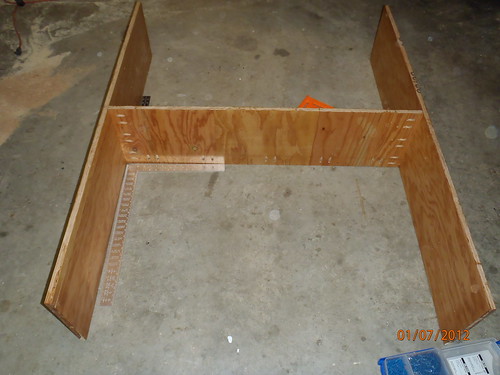
The first panels to piece together? The basement storage dividers:
.
Ignore the finger in the corner of the lens. This is the dividers on the subfloor

.
With the help of the kids, we manage to get (in order of appearance) the right hand wall, the bulkhead,the bed floor, and the lefthand wall. These went together with a few screws, just enough to keep it together.
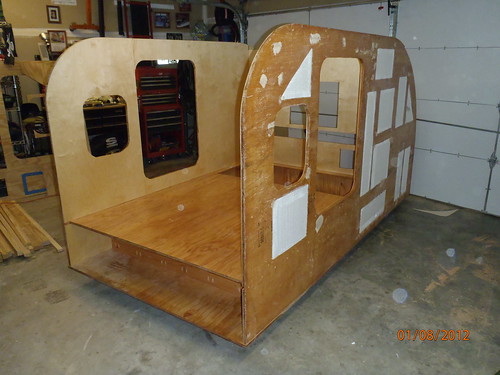
Even with only a few screws per side it was really sturdy and was just begging for a trial run!
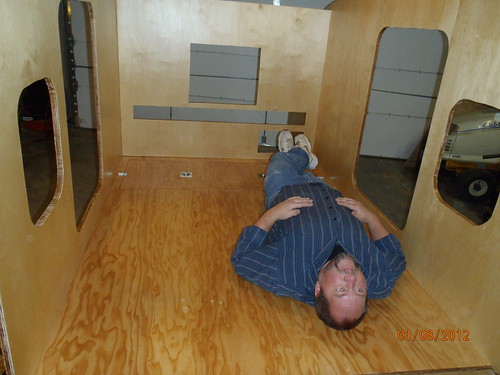
.
In the meantime we were discussing the potential uses of the trailer......if we left out the water tank we could do a, um, transportation business.
We could potentially smuggle: one fat American
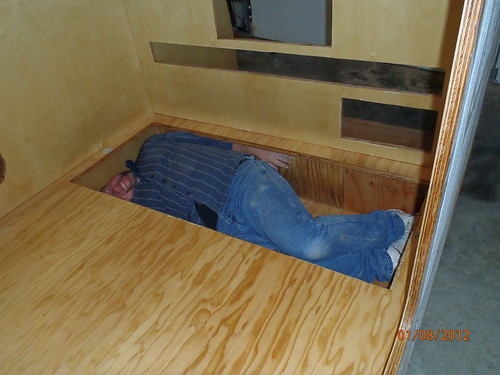
but an as yet to be determined number of peoples from, well, smaller races.
.
.
We began with the simple bit: Recess the handles for the water tank hatch. This was a breeze! Just take the handles out of the package, route out a small recess in the panel for the handle to flush mount, screw the thing down and voila!
.

.
Perfect! Well kindasorta....we actually recessed a bit too well!

.
The next step was providing the panels we had with some way to fasten to each other. This is where the Kreg Jig comes in really handy. It's portability makes it easy to move to the project, making perfect screw holes for ultra easy joinery.

.
This tool is well worth the price of admission and makes me feel like Will Smith.
Gettin Jiggy Wit It

My moves are so fly my head is a blur!
.
The first panels to piece together? The basement storage dividers:

.
Ignore the finger in the corner of the lens. This is the dividers on the subfloor

.
With the help of the kids, we manage to get (in order of appearance) the right hand wall, the bulkhead,the bed floor, and the lefthand wall. These went together with a few screws, just enough to keep it together.

Even with only a few screws per side it was really sturdy and was just begging for a trial run!

.
In the meantime we were discussing the potential uses of the trailer......if we left out the water tank we could do a, um, transportation business.
We could potentially smuggle: one fat American

but an as yet to be determined number of peoples from, well, smaller races.
.
VanIsle_Greg
I think I need a bigger truck!
Looking pretty kool...lots of room in there for um, stuff.
jim65wagon
Well-known member
With that pleasantry out of the way, we started on the framing for the forward bulkhead and the roof.
The design for the bulkhead on Sketchup looks like this:
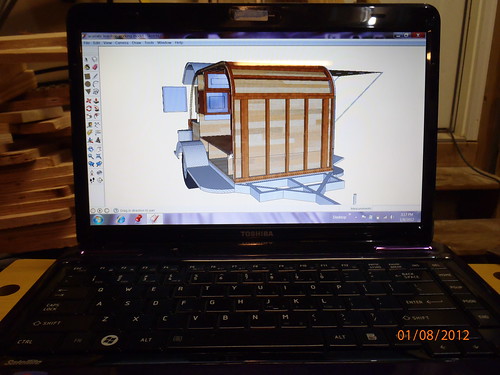
.
The bulkhead in real life:
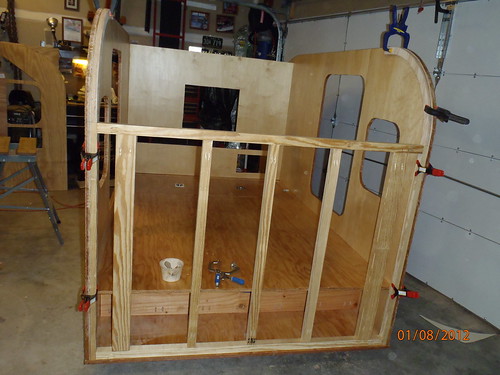
Pretty darned good I think!
.
With the bulkhead out of the way we move along to the roof. This gets a little tricky. Beth cut out the curved pieces, and we clamped the outer framerails to the walls. We cut a bunch of 1.5" spars to span across the walls, pocket-holed them with the Kreg Jig and carefully pieced together the roof frame. The design allows us to remove the whole roof frame (and the bulkhead) from the trailer. (more on that later)

.
We took the words "Sparring Partners" to a whole 'nother level!

Yeah, it seems like a lot of spars, but this is going to be a solidly built trailer. The teardrop people constantly talk of everyone overbuilding the trailers. We are doing just that!
.
The spars for the hatch hinge are two pieces of oak laminated together, and firmly placed with its own supporting spars. You can easily see the Kreg Jig pocket holes.

.
With the framework done, we took down the bulkhead and the roof, and glued and stapled the interior panelling to them.
The bulkhead gets a layer of 1/4" luan. It's going to be hidden behind a headboard, so it didn't have to be a more expensive piece of Birch. The gap is where the bed floor fits in between the bedroom and the basement storage.
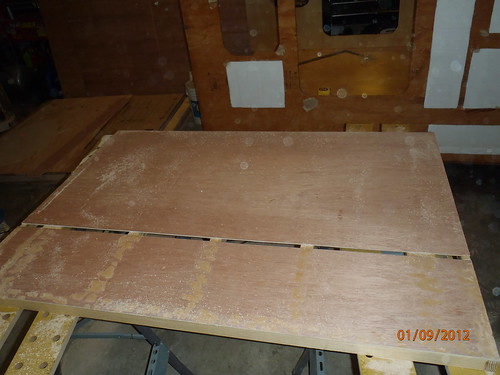
.
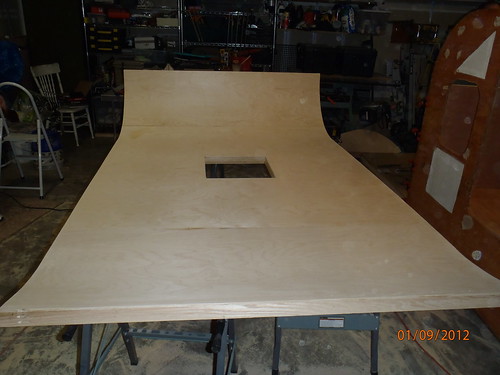
The roof was done in two layers of 1/8" Birch ply. Two layers were used just to make it easier to follow the curvature of the roofline. Yes, we know you can bend 1/4", but it is a bit trickier and a bit more work. It took a lot of Liguid Nails, clamps and staples.
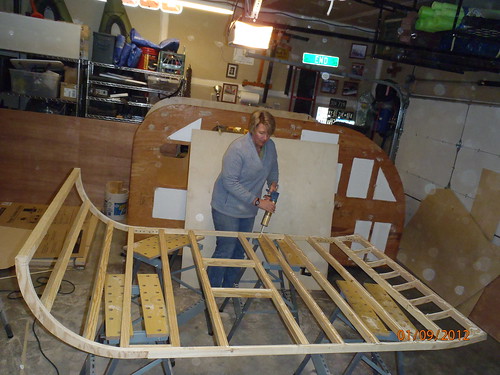
.
Here's our way to skin this cat
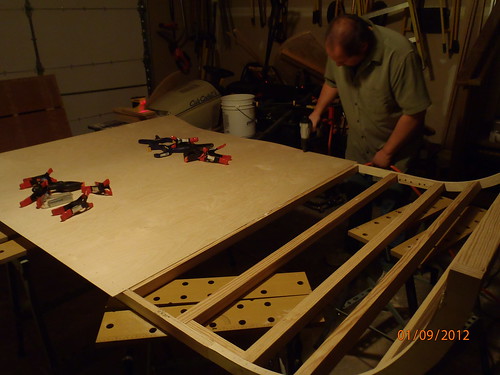
.
Here's the finished product, two layers of Birch, flush trimmed to follow the framework, and the hole in the middle is the opening for the MaxxAir Fan we have waiting for installation.
.
What you don't see: After the first layer was installed and trimmed, we started on the second layer. The Birch ply would overhang the edges of the frame by a few inches. I couldn't see where to place the staples accurately. Easy enough for the spars, we used a laser level sighting along the center of each spar and stapled away. We were initially doing the same thing for the edges, but in a fit of distraction, I was using my thumb as a "feel good" guide. Well, in some places, when you get close to the edge with a staple, it might just come though at an angle and poke out the side of the framerail.
The words are still plain in my head
"Be careful, you'll staple your thumb that way"
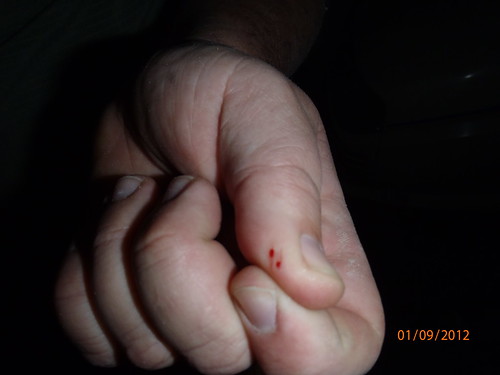
Yep, sure will
.
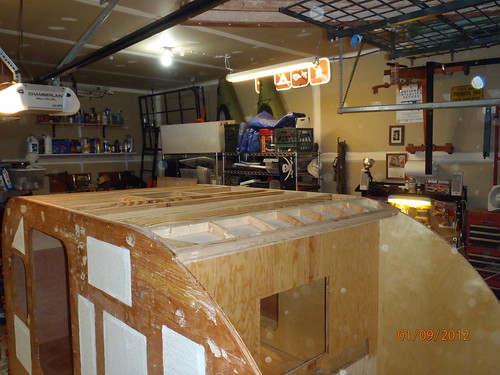
That minor injury taken care of, we called the kids for help and placed the bulkhead and roof back on the trailer. This is to keep the "set" in the roofline while the glue dries. The flat panels want to pull the curve out of the roofline, so this makes sure it will keep its curve memory.
.

.
The interior, in case you are wondering: the ceiling panels are not polyurethaned yet. They'll look more consistent after a coat or three....

.
and here's the full shot showing you how the thing sits today. Beauty, eh!

The design for the bulkhead on Sketchup looks like this:

.
The bulkhead in real life:

Pretty darned good I think!
.
With the bulkhead out of the way we move along to the roof. This gets a little tricky. Beth cut out the curved pieces, and we clamped the outer framerails to the walls. We cut a bunch of 1.5" spars to span across the walls, pocket-holed them with the Kreg Jig and carefully pieced together the roof frame. The design allows us to remove the whole roof frame (and the bulkhead) from the trailer. (more on that later)

.
We took the words "Sparring Partners" to a whole 'nother level!

Yeah, it seems like a lot of spars, but this is going to be a solidly built trailer. The teardrop people constantly talk of everyone overbuilding the trailers. We are doing just that!
.
The spars for the hatch hinge are two pieces of oak laminated together, and firmly placed with its own supporting spars. You can easily see the Kreg Jig pocket holes.

.
With the framework done, we took down the bulkhead and the roof, and glued and stapled the interior panelling to them.
The bulkhead gets a layer of 1/4" luan. It's going to be hidden behind a headboard, so it didn't have to be a more expensive piece of Birch. The gap is where the bed floor fits in between the bedroom and the basement storage.

.
The roof was done in two layers of 1/8" Birch ply. Two layers were used just to make it easier to follow the curvature of the roofline. Yes, we know you can bend 1/4", but it is a bit trickier and a bit more work. It took a lot of Liguid Nails, clamps and staples.

.
Here's our way to skin this cat

.
Here's the finished product, two layers of Birch, flush trimmed to follow the framework, and the hole in the middle is the opening for the MaxxAir Fan we have waiting for installation.

.
What you don't see: After the first layer was installed and trimmed, we started on the second layer. The Birch ply would overhang the edges of the frame by a few inches. I couldn't see where to place the staples accurately. Easy enough for the spars, we used a laser level sighting along the center of each spar and stapled away. We were initially doing the same thing for the edges, but in a fit of distraction, I was using my thumb as a "feel good" guide. Well, in some places, when you get close to the edge with a staple, it might just come though at an angle and poke out the side of the framerail.
The words are still plain in my head
"Be careful, you'll staple your thumb that way"

Yep, sure will
.
That minor injury taken care of, we called the kids for help and placed the bulkhead and roof back on the trailer. This is to keep the "set" in the roofline while the glue dries. The flat panels want to pull the curve out of the roofline, so this makes sure it will keep its curve memory.

.

.
The interior, in case you are wondering: the ceiling panels are not polyurethaned yet. They'll look more consistent after a coat or three....

.
and here's the full shot showing you how the thing sits today. Beauty, eh!

Similar threads
- Replies
- 2
- Views
- 656
- Replies
- 0
- Views
- 525
- Replies
- 0
- Views
- 1K
- Replies
- 8
- Views
- 2K
