The Dirt Sherpa Build

GCecchetto

Adventurer
Sorry I didn't get anymore photos uploaded for you all. It's been a race against the clock to get the Sherpa ready for this weeks trip. Leaving Thursday at 4:00AM, ye haw. Looking forward to posting some photos from the trip.

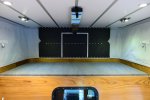
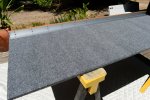
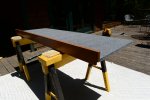
The remainder of the long weekend was applying the Interlux primer and topcoat on the deck of the cabover bed and slidout. Once I return I'll get that buttoned up and glue on the indoor/outdoor carpet that will finish it all off. Also got a temp solution finished to get the stairs back on the camper. For now they'll have to ride inside the camper and get attached once I've stopped for the day. Cleaning, cleaning, cleaning, no fun but nice to leave on a road trip in a clean rig.

Super impressed with the solar. It was still charging the battery the last time I looked at it at 8:30PM last night. This morning I checked it at 6:00AM and it was already charging again.
 

1stDeuce

Explorer
What happened to the stairs? I liked the tuck-under mount!! ??
And I've said it before, but as far as I'm concerned, Solar = Best. Mod. Ever. :)
Nice work on the "messy" wiring, BTW!! Makes my "neat" wiring look messy...
 

GCecchetto

Adventurer
Have a good trip, looking forward to your trip report. I have followed your build from the beginning.
Hope to run into you camping sometime and see your rig in person.

Thanks Bill! Hopefully we'll find ourselves in the same neck of the woods one day. Maybe next year's Overland Expo?
 

GCecchetto

Adventurer
What happened to the stairs? I liked the tuck-under mount!! ??
And I've said it before, but as far as I'm concerned, Solar = Best. Mod. Ever. :)
Nice work on the "messy" wiring, BTW!! Makes my "neat" wiring look messy...

Thanks. Stairs don't clear the new Fab-Fours bumper when they swing down and out of the stowed position. I'll have to Fab new mounts to move the stairs out a little to clear. Not sure that will be a good setup though since the stairs don't really want to be out any further, the gap is pretty big as it is. There's also no place to mount the license plate on the bumper, outside of the standard location, due to the angles so it might be best to not leave the stairs on while on the road. We'll see, maybe some great solution will come to me.
 

GCecchetto

Adventurer
Sorry for the delay in getting some photos up from last weeks trip, might get that done this weekend if I have the time to process the photos. I shoot everything RAW so I have to digitally process the images before I can upload them. For now my focus is on getting airbags installed to handle the additional load of the camper. I'll have to do some custom fab again to get something that doesn't limit travel. Took the rig out the other evening to get the suspension maxed out to varify how much travel I need in the airbag. Looks like 10" travel bags will work.

Here's a few images showing the rear travel. I could lift the drivers side rear tire of the ground by hand and the passenger side bump stop is buried into the stop on the frame, so this is all she's got.

20140604_191434.jpg 20140604_191449.jpg 20140604_191516.jpg
 

bill harr

Adventurer
Air bags are working for me as I do take the camper off and on. I only use the 4X4 once or twice a year and have not had a problem with travel. I have looked at the air bag cradles but have not added. You might want to take a look at them when you do your install. Looking forward to your trip report and pictures.

images.ashx
 

GCecchetto

Adventurer
Air bags are working for me as I do take the camper off and on. I only use the 4X4 once or twice a year and have not had a problem with travel. I have looked at the air bag cradles but have not added. You might want to take a look at them when you do your install. Looking forward to your trip report and pictures.

I have looked at these, but I think I have a plan worked out with longer travel airbags that should allow me to have them connected top and bottom.
 

GCecchetto

Adventurer
Here are a few photos to catch you all up on the current status of the build.

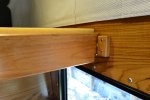
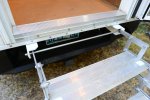
The temp stair solution. I have a stainless steel rod to re-fab this with so it doesn't rust as I think this temp solution will be in use for a while.
DSC_1272.jpg

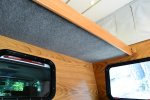
The indoor/outdoor carpet installed at the cabover.
DSC_1271.jpg

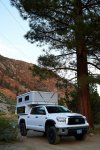
And finally, the finished slide out extension at the cabover.
DSC_1273.jpg DSC_1274.jpg DSC_1276.jpg DSC_1277.jpg
 

GCecchetto

Adventurer
Amazing work.. This build has provided me hours of inspiration to hone in my wood working skills
Thanks! Metal and fiberglass skills come in handy too. Of course, the most important skill is the ability to endlessly pour money out of your wallet to fund the build.
 

GCecchetto

Adventurer
Overdue Trip Update:

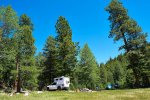
Camp along Lee Vining Creek.
DSC_1150May 30 2014Lee Vining Creek Camp copy.jpg

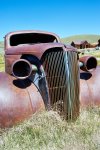
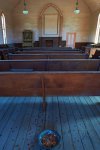
A couple of shots from Bodie.
DSC_1182May 31 2014Bodie Car copy.jpg DSC_1169May 31 2014Bodie Chapel copy.jpg

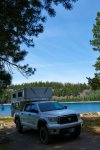
Camp at Crater Lake in the Lassen Volcanic National Forest.

DSC_1309Jun 14 2014Crater Lake CA Camp2 copy.jpg DSC_1284Jun 12 2014Crater Lake CA Camp copy.jpg

A few shots around the lake.

DSC_1293Jun 12 2014Crater Lake CA Tree copy.jpg DSC_1290Jun 12 2014Crater Lake CA Forest copy.jpg


Build status:

Had an additional inch of softer foam laminated on top of the foam at the cabover and bought a big rectangular flannel lined sleeping bag prior to the Crater lake trip. Finally a decent nights sleep. Currently building the door for the access holes into the bed of the truck. What a pain in the *****. I'll post photos when I get the chance. Also ordered the air bags for the suspension, they'll arrive Friday.
 

1stDeuce

Explorer
I'll be curious to see how your long travel airbags work out. I'm running the normal ones, and they work OK for road driving, but they are no good at all for offroad, and they are very stiff once aired up. I think some smaller dia bags with decent travel would be ideal! Unfortunately, I'm not sure where I'd package them on my truck...
 

Forum statistics

Threads
187,173
Messages
2,891,865
Members
227,883
Latest member
nepaltourism
Top