The Dirt Sherpa Build

GCecchetto

Adventurer
Excellent, thanks for the pics before you go. Angle and rivets; light and strong. Have a great trip and look forward to hearing about both your adventure and how the cabin works for you. All the best

Thanks, we'll have a blast for sure. I fastened the panels to the angle with stainless screws and nylock nuts so they can be removed easily.
 

worldherewecome

New member
Thanks for the clarification, I hadn't noticed that. Great idea. Nylock to stop them coming loose, its those details that make a quality build.
 

GCecchetto

Adventurer
Thanks for the clarification, I hadn't noticed that. Great idea. Nylock to stop them coming loose, its those details that make a quality build.

Yep, it's also smart to use clear anodized aluminum for angle brackets to keep from having all of you stuff in the compartments turn gray from the aluminum oxide.
 

GCecchetto

Adventurer
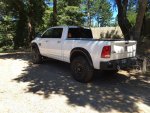
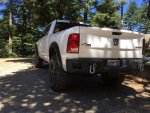
Well.......I'm back for my annual fire drill of last minute work on the truck and camper in prep for this years road trip. I really put myself in a hard spot this year due to having installed a Thuren Fabrication lift in the truck over the course of the year, and prep for my son's 18th birthday had me sidelined for several weeks prior to the crunch on the truck and camper. Two acres of yard to try to get under control before the party. The lift is setup to maximize travel and articulation, and it does, but the springs are too soft to carry the camper, so I have to get airbag helper springs installed before the camper can be loaded. I would have had to install airbags with the stock suspension as well since the ride height in the rear was already a little lower than I wanted, and the camper will only get heavier as it gets closer to completion. Anyway, the whole airbag install is custom because the truck now pulls 14" of travel in the rear, and I'm trying not to limit that. No airbag available, that will fit in the space I have can handle that much travel, so the airbags sit in Daystar cradles on the bottom.

Mods on the truck in the last year:

Thuren Fab lift
Hammerhead rear bumper with LED backup lights
AEV snorkel with cyclonic pre-cleaner
AEV Salta wheels with 37-12.50 R17 Cooper Discoverer ST MAXX tires
Bushwhacker pocket style fender flares

I was hoping to have the AEV nodular iron diff covers installed for this trip, but there just won't be time for that, we leave July 23rd. I'll take some better photos of the truck when I get a chance.
IMG_0907.jpg

IMG_0909.jpg

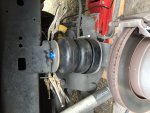
The airbag install is an epic pain in the ***. In addition to the cradle scenario to allow the axle to drop away from the airbags, I'm also installing a 3 gallon aluminum air tank in series with each airbag to increase the volume of air to allow the airbags to behave in a more linear fashion. Without the tanks, the spring rate of the airbags would increase sharply under compression and would severely limit travel and articulation. I'll post more photos when the final install happens. The mounts are being fabricated out of stainless steel and will hopefully be welded and off to the powder coater this afternoon if I can get away from work early enough.
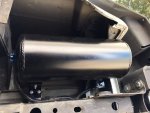
IMG_0919.jpg

IMG_0917.jpg

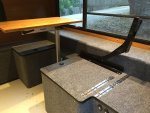
In the camper I'm working on finishing out the dinette. The same indoor/outdoor carpet I used on the aluminum storage compartments under the seating has been installed on the tub of the camper, and will also be used on the top side of the storage compartments the cushions sit on. The holes for the latches are drilled, the edges of the light ply have been routed for the vinyl edging, and I've applied the first coat of the marine paint to seal the ply prior to installing the carpet. Cushions are being dropped off at the upholsterer today and are being covered in a very cool mid century modern fabric I bought from Modern Fabrics. Not sure if I'll get the mattress cushions done before we leave or not.
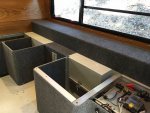
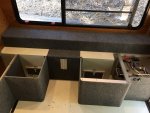
IMG_0924.jpg

IMG_0925.jpg

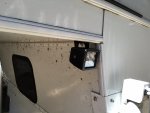
I've also finally installed the LED lights on the sides of the camper. Note last years bugs still on the camper:(

IMG_0920.jpg

More to come as I continue feeding my ulcer more stress in the next two weeks. It's that damn KTM 1190 Adv R that has kept me from doing anything on the camper.
 
Last edited:

Motafinga

Adventurer
Nice to see you're back at, I'm sure the next round of upgrades will be worth the effort once you get em sorted out!
 

GCecchetto

Adventurer
Thanks. The camper portion is pretty simple stuff, nothing to worry about, but I have concerns about the airbag install since I won't really have any shake down time, or time to make any adjustments. Mostly concerned about the cradle and the bags possibly spitting out of them under extreme articulation. I milled as much slope into the bottom of the cradles as I could to get the upper air bag mount and the cradle as close to parallel as possible, but they aren't completely parallel, so who knows what will happen.
 

GCecchetto

Adventurer
Okay, seat cushions are at the upholsterer, and the air bag brackets are at the powder coater. Also wired up the side floods, and primered the other side of the tops of the dinette storage cabinets.

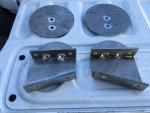
A couple of shots of the airbag brackets.

IMG_0926.jpg

IMG_0929.jpg
 

GCecchetto

Adventurer
Well.....A day of frustrating setbacks. Took my Ram in for an alignment since I just spent big bucks on new tires and wheels. Waited till my buddy who owns the tire shop, well used to own it....he just sold it and is just there long enough to train the new owner, to get back from vacation so I didn't have to worry about anything. With the new 37's on the truck he had to dump the air out of the tires to get the alignment targets on the rims, and then refill the tires. After finishing the alignment he explains to me that you have to remove the targets carefully when the tires have big beads like my Coopers to avoid damaging the rims. He pulls three off with no issues, then the new owner runs over to help and just jerks the fourth one off and puts a big chip in the finish of my brand new AEV Salta wheels. GRRRRR.

While waiting for my buddy to finish the alignment I get voicemail from the upholsterer saying my dinette cushions are done, and then an email from UPS saying my package has been delivered. Excellent...cushions and my add-a-step kit for my Glowsteps so they work with the height of my truck now. Alignment done, I roll over to the upholsterer..... and can't believe the $h!ty job they want $300 for. One cushion even had a torn seam. Leave the cushions with them, and head home to do some more paint work on my dinette storage unit covers. Walk in the door, my son has opened up the add-a-step package, and there it is....one brand new shinny 8" add-a-step. Only problem is my steps are 6".

On the bright side of things, I picked up the brackets for the airbags from the powder coater and have taken the day off tomorrow to install them.
 

GCecchetto

Adventurer
So, today was a day of ups and downs. Started with a down when I noticed that someone had door dinged my passenger side front door. They must have just flung their door into mine by the size of the dent. Fortunately. I have a great paintless dent removal guy. This happened to me just before last years trip as well. The day's high was getting the airbags installed. It seems that the system works well, took the truck out and flexed the suspension around and there was no sign of the bags wanting to squirt out of the cradles. Truck is empty, so I only have 8 psi in the bags. Hopefully the result will be the same with the hjiger pressure required when the camper is on. Camper gets loaded tomorrow, so we'll see. Unfortunately, the day finished with another low when, like a **************, spinning the lug nuts back on on the last wheel, I dropped the ratchet and put a big chip in the paint on my wheel. The AEV rims are awesome, but the paint chips if you look at it.

Got the holes drilled to mount the upper brackets. Have to pull them back off to paint the holes and install the airbags on the brackets.

IMG_0932.jpg

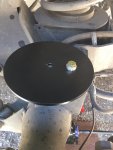
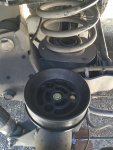
Here's the plate that supports the cradle. I milled the bottom of the cradle on a slope to get the cradle and upper mount as close to parallel as possible. This means the cradle has to be indexed to so it can't rotate. I milled a a 1/4" thick aluminum washer that fits snug in the rear hole of the cradle to prevent it from rotating.

IMG_0933.jpg

Here's the cradle bolted in place.

IMG_0934.jpg

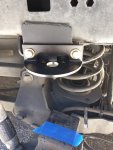
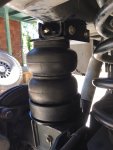
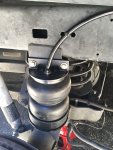
Here's the bag in place from the inside. Drilling the inside holes through the spring was no fun, but a long drill bit made it possible without removing the springs.

IMG_0935.jpg

And here is the finished install. I may reroute the air line after my trip. Don't like the way it looks, but wanted it up high out of harm's way, so I used a straight fitting at the bag end rather than a 90.

IMG_0937.jpg
 

GCecchetto

Adventurer
Sooo...., I'll post better photos when I have time to take some, this is still a full court press to be ready to leave next Saturday. Thought I would post a couple progress photos though.

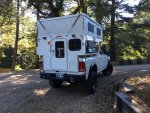
Camper is on. The attachment to the new rear bumper should hopefully solve the issue of the rear of the camper moving around in the bed. The stock bumper flexed a lot and would let the camper move around off road. The new bumper is much stiffer and the tiedowns are are angled to pull the camper into the bed. This thing's a beast, can't reach the roof latched anymore, have to open the doors and step up on the door sills, and the bumper in the rear. The airbags are working out better than I thought. I have 45 psi in them, and the travel seems the same as when they had 8 psi. Flexed the suspension around and everything seems to behave fine. A nice side benefit to having the airbags isolated, and so far outboard on the axle is that the truck stays very flat in the corners, but still ride really nice.

IMG_0939.jpg

IMG_0941.jpg

Here's a quick shot of the dinette. Need to pick up some new hardware to mount the other roll over hinge. Rushing to get all of this done has left me with a few things that aren't quite as nice as I would like them to be. Hopefully I'll stop obsessing about it, but It won't surprise me if I'm redoing some of this when I get back from my trip. The cushions are done for the second time, and I'm told I'll be happy with them this time. We'll see when i pick them up tomorrow.

IMG_0943.jpg

The one thing that bugs me the most is how the camper sits in the bed of the truck. I don't know why Dodge designed these trucks with the bed being deeper at the rear, and I really wish the bed rails were taller like the Tundra the camper was built for. Having almost 4" clear over the bed rails, and having it taper down 3/4" at to the rear just looks like ****. I really need to come up with some structurally sound way of lifting the rear of the camper 3/4" to even out the reveal, and then some useful way of using the space. Thought about carrying shovels, but there isn't quite enough room. Also thought about traction mats, this is the most likely use, but they aren't long enough to fill the gap, and a slide in type mount will be tricky. Sooner or later I'll figure out something.
 

Forum statistics

Threads
188,030
Messages
2,901,371
Members
229,411
Latest member
IvaBru
Top