The Double down AWD cargo build

Christian P.

Expedition Leader
Staff member
If your pictures are too large to upload, you can just resize them:


drsmonkey

Observer
I was using drive and a third party that assigned a static URL to photos so I could host my photos externally and embed them rather than hosting them here on Expo. I need to back through my old posts, find the right photos, down load them and upload them as it seems there are no good stable options out there that I would want to pay for.
 

drsmonkey

Observer
What follows will be based on old pics, my punchlist of repairs and my memory of the last 3-4 years. My build style on this has been to make some improvements or prototypes, go on a trip to test, then fix and build before the next trip. I have also replaced a lot of parts along the way because I am currently at 270k miles and things wear out. So this thread might make some big jumps and have some linearity problems until I get it caught up to the present.
 

drsmonkey

Observer
At this point in the build I had a baby on the way and sold my Tacoma, so I needed to get the van road worthy with a backseat fast. Before installing the seats I needed to get the wiring cleaned up and the floor and walls insulated so I wouldn't have to tear things out to fix everything.

First I finished the lift so I could move it.

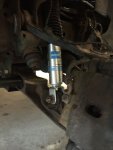
Front shocks in.

Front Shock.jpeg

New keys in.

New keys in.jpeg

I think I took that pic before adjusting ride height, but in the end I think that the new keys were not needed. Once I had it sitting where I wanted it the screws still had a ton of adjustment left. I used a 1"-3" lift key for chevy half ton pickups. I put a long post in the Fullsize AWD Info thread about everything I have figured out about lifting these vans over the last few years that anyone who is considering lifting one of these should read before purchasing parts. Most vans will have enough adjustment range to get as much lift as you can while staying within reasonable limits for the suspension design. Bottom line is don't buy new keys until you have tried adjusting the stock ones first. If you find that you need new keys to get the amount of lift you want you are likely going too high for the suspension system.

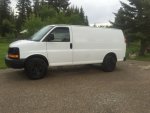
All back together with wheels painted and 235/80r16 duratracs installed.

Lift complete.jpg

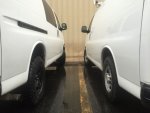
At the local hardware store on the way home from post-lift alignment there was an empty spot next to a stock height AWD van. Perfect opportunity for a comparison picture.

Compared to stock.jpg

If I'm remembering correctly the height from the ground to the fender well line measured at the wheel centerline was right around 36" on the rear and front.
The camber and toe-in was in spec, but the best caster they could get with the stock UCA's was below 1 degree.
 
Last edited:

drsmonkey

Observer
As I did the suspension I also replaced all of the drivetrain fluids. Since buying this van I have done a lot of replacing parts and maintenance on it. For the most part I plan to just note it without much detail here unless I ran into something that is unique to our vans or is not easily found on the internet.

My van had originally started it's life as a IBM server service vehicle carrying around a lot of money in parts. From the dealer it had been rewired so that the front and rear locks were completely independent. It also had a very nice (for the time) alarm installed, and full rear cage (windows and between front and back.) The second owner had installed trailer wiring (poorly) and a cell signal booster (3g only). I didn't need the alarm or want the headaches and possibly failure point, and 3g cell signal is a thing of the past so both got stripped.

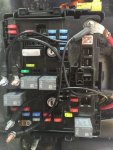
I also wanted get the locks back to OEM, so while I had the interior stripped down I cleaned up a lot of vehicle wiring and added a new trailer brake controller. I put in a Tekonsha P3 (best brake controller I have found, have one in all my tow rigs). I also added full 7-pin trailer wiring at this point. I used a Hopkins 4-flat plug-in wiring converter that I hid in the left rear pillar, tapped the reverse lights for the trailer, then added breakers for the trailer brake power and trailer battery power in the fuse panel under the drivers seat. All the wiring was run in the OE looms from the panel to the left rear pillar then down through the plastic cover at the bottom of the pillar. I swapped the reverse lights on the van to LED both to reduce draw when trailering my camping trailer, and to get more light.

I didn't take any pics of that process except for the wiring to the fuse panel. I typically try to always use red for !2v+, and only black for ground but I must have only had black 10g and 12g wire handy when I did this. I can't remember exactly what amperage the auto reset breakers were, and I haven't had to touch any of it since installation years ago and many miles of towing.

Trailer wiring.jpeg

My rear and side door panels were the black cargo style, and at work we were converting one of our Express 3500 passenger vans to a tool van for my finish carpenter, so I swapped door panels with that van and we put the window cages from mine onto the one at work.
 

drsmonkey

Observer
My van came with a hitch and a 7-pin under the back bumper. I don't like how most hitches decrease departure angle, and my trailer tongue height was about 6" higher than the receiver, even after the lift. Plus it seems like the wiring connection is always the first thing to hit and get destroyed. So with wiring done it was time to address the hitch.

Here it is as I bought it...
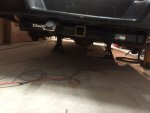
Low Hitch.jpeg

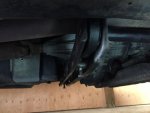
First I removed the hitch and ground off the welds that held the receiver cross-member to the frame brackets. I then flipped the brackets upside down and swapped sides and welded them back on. I was a little nervous to be welding on a hitch because everyone warns against it, but since the square tube passed through the bracket I could weld botch sides of the seam and the main direction of force was metal on metal, not on my welds, so I went ahead. I was sure to grind a good bevel in, then did a double pass to fill in. The welds turned out OK.
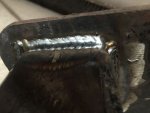
Hitch Weld.jpeg

I cut hole in the bumper, cleaned everything up, gave it a few passes with the rattle can, drilled a couple extra holes in the frame and bolted it all up.
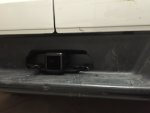
Bumper hitch.jpg

Tucked up nice and neat and at the perfect height for my trailer. I also relocated the 7-pin into the bumper where you can see a hole on the left below.
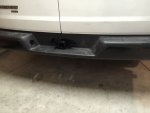
Hitch.jpeg

Somewhere around this time I also cleaned up the intake with the Seafoam treatment, cleaned the MAF, replaced the plugs and coils, air filter, etc. I went from van ecu reported average of 14.8mpg to 18.2mpg. These numbers are not actual with the change in tires and coming from the van, but show the relative economy gained just from some maintenance.
 

Forum statistics

Threads
186,211
Messages
2,883,417
Members
226,050
Latest member
Breezy78
Top