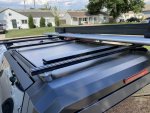
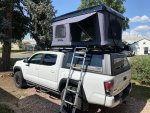
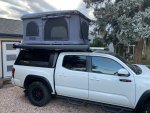
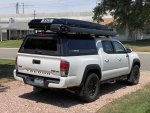
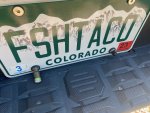
The FSHTACO... 2017 Tacoma Pro (RSi SmartCap, Baroud, Thule, Riversmith)

chrisdors

Member
Long time lurker... wanted to document my build-up thus far on our camping & fly fishing rig. I don't do much rock crawling or pound hard trails, just wanted a setup that gets the wife and myself out there in relative comfort.

The rig has recently changed quite a bit- but I'll start from the beginning (2019) in case it gives anyone ideas for their setup. Feel free to ask any questions or suggest what to do next.
57101065571__7CBD9DDE-814A-43BE-929A-FC341187D0EC.jpg

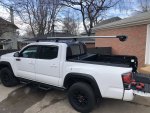
Soon after I picked up the truck (Feb 2019) I added Rhino Rack RTS rivet-in cab tracks and a GatorTrax MX tonneau cover... the initial goal was to get the fly rod holder mounted and supported without losing the ability to place large items in the bed of the truck as we were going to be moving in the near future and I knew I needed the whole bed.
UNADJUSTEDNONRAW_thumb_1f64.jpg

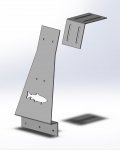
I came up with an adjustable bracket that mounts to factory rail inside bed and allows the rear of the Riversmith rod holder to be supported... rod holder has T-slots that run its length and was mounted to both cab crossbars up front. Took my drawings to a local fab shop and they made the bracket for me out of 10ga steel.

IMG_2305.jpg
HHsaWUlpSKa%VDp8PmWBAA.jpg

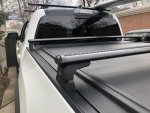
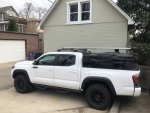
Next I wanted to get some crossbars installed for the rooftop tent over bed. Bolted Rhino Rack quick disconnect feet to the bedside top... crossbars are strong enough for the tent without worry. Did a bit of cutting and dremel work to get the crossbars to the exact length needed.
rp5jv1xBQ9eEf4BNkoj0zg.jpg
IMG_2388.jpg

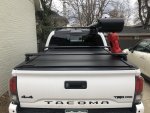
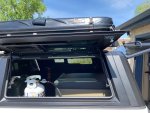
Rod holder powder coated and mounted... has some holes made to allow for a small spare gas can to mount. Ready for the RTT to go on.
IMG_2438.jpg

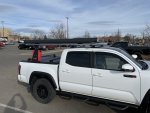
Managed to pickup a Yakima Skyrise 3 from REI on closeout. Nice basic RTT.
IMG_1298.jpg
jB48xjp0SRi4DKqVtWQCyQ.jpg

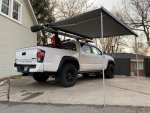
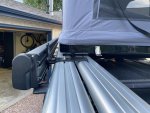
Found a Thule 8ft Hideaway awning on Craigslist... mounts using the T-slot channels on top of Riversmith rod holder.

More to come...
 
Last edited:

chrisdors

Member
Time to document a few more updates from mid 2019... this time focusing on a few needed lighting and electrical upgrades.

57951FA6-9767-4B0C-973C-F6607C3BD31E_1_201_a.jpg
IMG_7769.jpg

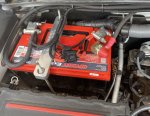
First thing I wanted to add was a second battery... I've been traumatized by a few dead batteries over the years and really appreciate the security of a dual setup while waaaay out there. Found an OffGrid Engineering dual battery kit on craigslist (amazingly) and couldn't pass up the deal. Came with an older AGM Die Hard, but I was able to recently squeeze in an Odyssey Group 65 without any issues. Also updated the starter battery to an Optima Red Top.

48A31B15-E8A8-4D15-97E1-FFC22A0BEA2C.jpg

Ran 8GA from aux battery to a Blue Sea Systems panel in bed of truck for future fridge connection.

IMG_1510.jpg

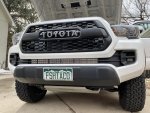
Added CaliRaised hidden 32" lightbar to front grill... all aux lighting runs off of 2nd battery.

IMG_1313.jpg
IMG_1315.jpg

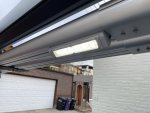
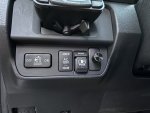
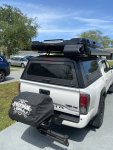
Located a pair of IP67 LED lights and mounted them to the underside of the Riversmith rod holder... these are connected to a dimmer knob on dash. These 2 lights illuminate the entire area under awning and light up our hitch mount grill quite well.

B1542B44-FBBE-41FB-9C32-2DC5EB1C59D6.jpg

Found a small bottle mount for a 5lb propane tank that we take with when camping for the grill... I would like to upgrade this eventually to something a bit more robust.

J3JcJquSTxqY4reWjyGvoA.jpg

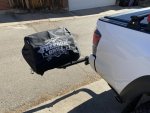
Freedom Grill FG-50 lets us grill up whatever we like when on the road and mounts securely out of the way on the hitch mount while on the road. Cast aluminum grill, so it won't rust out. These are long discontinued, but can occasionally be found on craigslist.

IMG_4034.jpg
IMG_4036.jpg

Thats how build version 1.0 wrapped up... We really loved this setup for 2 people, but it certainly gets cramped when packing for more than just us... no room to fit extra bags & boxes and it was time for more space.

Came across the RSI Smartcap EVO Sport and that is the direction we head next. Also adding a CVT Mt. St. Helens pop up hardshell tent and finally getting that fridge.
 
Last edited:
chrisdors

Member
Alrighty... FSHTACO 2.0 time. Changing to an RSi Smartcap & new CVT RTT... so much more room for activities.

Found an RSI Smartcap EVO Sport in stock locally at a dealer and took it home that day. Was a few hours to assemble and a couple beers to the neighbors to help lift it in place. Went smoothly, looks great, but the next step is to mount everything and keep proper cab/cap flex.

I was able to flip the rod holder upside down to allow for rear glass to open (works just fine this way according to Riversmith and just to be safe I added some extra foam padding inside the reel holder section).

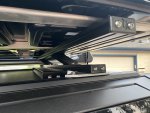
The rod holder and awning are going to be hard mounted to the front cab crossbars and will rest on pads on the rear cap. I will also follow a similar plan and have the tent only hard mounted to the rear cap and rest on rubber pads on the front cab. This should allow for cab/cap flex and everything will be secure and hopefully quiet while on road.

IMG_7793.jpeg
IMG_7844.jpeg

Cut down some 1x2 80/20 to serve as crossbars. Added rear rubber pads for rod holder to rest on.

IMG_7907 2.jpeg

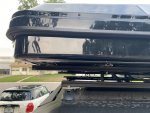
Used some 2" rooftop tent risers from upTOP Overland to help raise the CVT above the Riversmith rod holder. upTOP also sells nice looking 80/20 endplates to clean up the look. Tent floats above the rod holder now and allows for cab/cap flex as needed.

IMG_7906 2.jpeg

Cut a second set of 80/20 bars to allow for the tents metal outside frame to be properly supported.

IMG_7860.jpeg

Also mounted a T-Bracket from 23zero for the awning.

IMG_7838.jpg
IMG_7859.jpg
IMG_7878 2.jpeg
 
Last edited:
chrisdors

Member
Let there be light.... and cold beers.

IMG_8130.jpeg
IMG_8140.jpeg
IMG_8139.jpeg
IMG_8132.jpeg

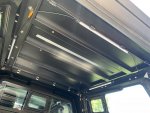
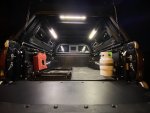
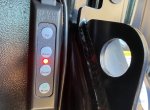
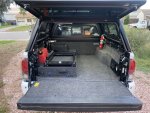
My local overland shop (Spirit of 1876) sold me a set of Hardkorr 3 color (white, warm white, orange) LED lights. These lights are magnetic and strong enough to easily stay in place on ceiling of the smartcap. Routed the wiring to the side panel and added control box to right side of bed.

IMG_8138.jpeg

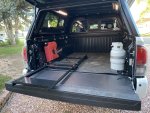
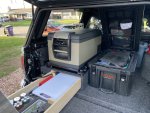
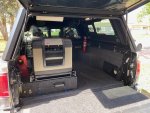
Installed the ARB fridge slide for our ARB Classic II 63 fridge. Also installed the locking spare gas can mount in the bed... thankfully we can still remove the spare gas container with fridge slide mounted in its ideal place.

IMG_8247.jpg

Getting out there. Happy to report no squeaking or creaking when on road... minimal wind noise and no whistles. Hoping it stays that way.
 
Last edited:
highwest

Well-known member
Hardkorr 3 color (white, warm white, orange) LED lights.
What are your thoughts on these lights? They look like a good option, but I wasn’t sold on their operation. Does the control seem adequate? Also, is that red LED always on?
 

chrisdors

Member
What are your thoughts on these lights? They look like a good option, but I wasn’t sold on their operation. Does the control seem adequate? Also, is that red LED always on?

Lots of dimming adjustment... and yes, the LED on the controller is very bright (red when off, green when on), but I'll just put a dab of paint on it to dim it down. I like that they are magnetic and it remembers the light mode you last had it on when turning on/off. Three 48cm lights is plenty in my opinion for the bed, likely 2 would be enough. I really dig the orange light at night, seems to truly keep the bugs away.
 
Last edited:
chrisdors

Member
tempImage18pBH4.jpg

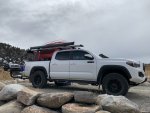
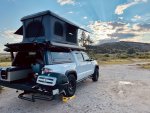
Well- the only constant is change. Couple updates to the rig... sadly our CVT St. Helens tent developed a large 18" crack down the back and center after 6 months. No idea how it happened, but certainly appeared to be some type of defect. Our local CVT dealer (www.spiritof1876.com) provided full support and credited me full retail back to use as I wish on a new RTT. While we were very happy with how CVT handled it, I just didn't trust the plastic shell design going forward. We went with the James Baroud Explorer... Fiberglass construction vs Chinese ABS plastic is no comparison IMO.
 
Last edited:
chrisdors

Member
IMG_2131.jpg
IMG_1214.jpeg
IMG_1215.jpeg
IMG_1216.jpeg
IMG_1240.jpeg
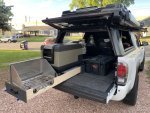
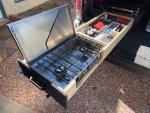
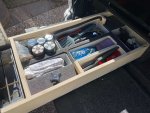
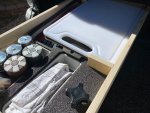
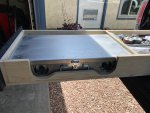
I decided to build a pull-out kitchen setup. Mounted the ARB fridge slide on top and utilized a pair of 54" drawer slides. Built the drawer out of baltic birch plywood sized to fit my 22" Cook Partner stove. Ran a quick connect propane line thru the drawer to allow for easy hookup. Have a threaded foot that I can use if needed to help stabilize the drawer at full extension on the tailgate... although it really doesn't seem to need it. Over-thinking the design a bit there.

Also built a switched ShurFlo faucet, 12v german pump and Scepter 5 gallon water jug combo, which I love the simplicity of. Have a quick connect 12v plug for the faucet next to the propane connection. Water jug fits left of the fridge and drawer slide on the tailgate when setup at camp. During transport I have a jerry can mount inside the cab to keep it upright and spill free (plus we can still reach in the side window and use the faucet to fill up water bottles as needed).

Still have access to driver side bed storage bin, and can easily remove the rotopax gas can even while fridge is in place. Also added a BedRug... so much easier on the knees when getting in and out, and frankly I just like the look.
 
Last edited:
chrisdors

Member
IMG_1239.jpeg
IMG_1236.jpeg
IMG_2127.jpg

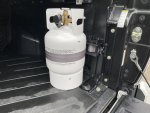
God Bless Johnny Cash... and bigger tanks of propane gas. Got rid of the 5lb and added an 11lb Worthington propane tank with a Powertank mount... hate the price of the tank mount, but its damn solid and worth it IMO. I mounted the PowerTank BKT-2286 bracket to the factory tacoma bed rail using an 80/20 10 series spacer cut to size.

One of the reasons we went with the 11lb is to also use our LavaBox (https://spiritof1876.com/products/lava-box-vol-can-no) to have open-fire ban approved fire at night when out in the mountains... highly recommend if fire bans bum you out.
 
Last edited:
chrisdors

Member
IMG_1234.jpeg

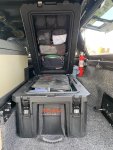
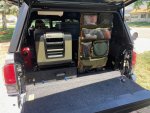
Added a ROAM 105L Rugged Case and a 23 Zero Utility Hanger working on the final camping organization stuff. Hoping to get out into the mountains and fish/camp a bit this weekend. Mounted the 23 Zero bag with SailRite Awning Track adhered inside the smartcap with 3M VHB tape***

*** Yeah- that didn't work... cap heats up in the sun and the VHB tape just loses its grab. Switching to a ROAM lid organizer for the 105L, on order.
 
Last edited:
chrisdors

Member
IMG_1403.jpg
IMG_1404.jpg
IMG_1405.jpg


Picked up a ROAM 105L rugged case lid organizer after realizing the 23Zero organizer was a bit in the way when at camp and the VHB tape wasn't doing the job once the cap would heat up. Now everything we need for camp is in one storage bin. Toss that in the truck and a couple chairs and were good to get out there.

The ROAM 105L lid organizer isn't huge, but fits more than I thought it would:
4 plates
4 HardKorr universal lights
2 headlamps
extra batteries
bug netting
garbage bags & ziplock bags
beer Koozies
charging cables


IMG_2116.jpeg

Also added Firestone Ride-Rite airbags to the truck... found a great 23PSI indicator to give me quick at-a-glance PSI info... been holding air perfectly for weeks and couldn't be happier. The fill valve is just to the right of it - both bags and the indicator are all connected via an X connection behind the plate.
 
Last edited:
Etoimos

Observer
This is a really nice build! We have a few things in common like the RSI SmartCap and Bedrug, but I'm running them on a RAM Power Wagon. I've got a couple of questions for you regarding the HardKorr lights.

First, do you think the three bars is enough light inside the SmartCap? I'm already thinking I want to put the 10" (25cm) bars inside the bins. What I'm not really sure of is if I should use two of the 19" (48cm) bars on either side of the SmartCap infront of the bins and a 39" (100cm) above the tailgate area, or just a third 19" there as well.

I was also wondering how you got power to the lights. I'm assuming all the lights are daisy chained into the dimmer switch and the switch is in turn connected to your battery system some how. Does the dimmer use a 12v cigarette light type plug or does it just terminate with two bare wires that can be connected to anything?
 

chrisdors

Member
This is a really nice build! We have a few things in common like the RSI SmartCap and Bedrug, but I'm running them on a RAM Power Wagon. I've got a couple of questions for you regarding the HardKorr lights.

First, do you think the three bars is enough light inside the SmartCap? I'm already thinking I want to put the 10" (25cm) bars inside the bins. What I'm not really sure of is if I should use two of the 19" (48cm) bars on either side of the SmartCap infront of the bins and a 39" (100cm) above the tailgate area, or just a third 19" there as well.

I was also wondering how you got power to the lights. I'm assuming all the lights are daisy chained into the dimmer switch and the switch is in turn connected to your battery system some how. Does the dimmer use a 12v cigarette light type plug or does it just terminate with two bare wires that can be connected to anything?

3 bars seem perfect for me- I don't want it crazy bright, but to be honest I keep the lights on low orange mode most of the time and that's plenty.

The lights all daisy chain together, and since they are magnetic its super easy to mount in the SmartCap. I hardwired the lights into the back of the BlueSea Systems power panel located on right side of the bed. Everything on the second battery (fridge, lights) is connected to the on/off master switch on the BlueSea panel.

Its been an awesome truck- listed for sale now here
 
Last edited:
Forum statistics

Threads
188,069
Messages
2,901,853
Members
229,418
Latest member
Sveda
Top