The Mountain Goat - An FJ140/2UZ-FE/Ute Build

locrwln

Expedition Leader
Good eye, that is indeed a 3-door, the GMC version. That one belongs to the landlord, it's a little rough but is indeed a cool truck. I used to have a '70 2WD Chevy that was lowered and used as a street cruiser. Still regret selling that truck, awesome parts hauler and cool to just cruise around in. I have the occasional temptation to build one as a fully outfitted overland rig. Plenty of room to sleep in them!

I thought so. I agree as almost all of them are cool. I started out in a '72 Cheyenne Super 2wd and yep, regret letting it go. Looking forward to the rest of the build.

Jack
 

Clintnz

Observer
The concept looks great!

A mate has recently built a doublecab ute out of a diesel 60, but still on the original running gear. I like the idea of 80 series suspension much better! I'll snap some pics for you the next time I see it.

Cheers
Clint
 
A mate has recently built a doublecab ute out of a diesel 60, but still on the original running gear. I like the idea of 80 series suspension much better! I'll snap some pics for you the next time I see it.

Pics please! Would love to see how he did the rear corners and finished the rear panel. I have a general plan for mine but it's great to see the work of those who have already been down this path and learned what worked and what didn't.
 
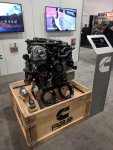
Spent most of last week out at SEMA canvassing the show for parts, suppliers, and inspiration. As usual it was a really fun few days but hard on the feet. A friend had on a fitbit and was logging 7-8 miles of walking each day during show hours. I spent quite a bit of time with the Cummins team at the show, gotta say it's tempting to throw one of these into the rig. I talked with Tor from TorFab a bit about his converted 62 and he's really happy with how it performs, especially with the tune he's got on it (he's over 200hp and 400 ft-lbs).

IMG_20181031_102556.jpg

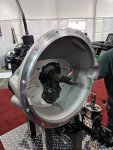
I'm signed up now in the Cummins Builders program and I'm about to start a customer build to put one into an FJ40. I've got one on order and I'm looking forward to getting my hands on the hardware and really working with this thing. I also spent some time with Chad from Quickdraw adapters, he's got a nice bellhousing setup to run the R2.8 with an H42/H55...

IMG_20181031_160829.jpg

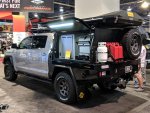
But for now, we move on with the plan as-is. Of course there's lots to see and build inspiration out there, one really valuable outcome was spending time with the guys from Exploration Outfitters who are importing the Patriot Camper trailers and Tray/Canopy systems from Australia. I climbed all over this rig for a while and the guys were super cool, offering to help with advice and guidance on the canopy box.

IMG_20181031_151303.jpg

I also met a guy from Australia who has a business focusing on transmission swaps. He and I talked to for a couple hours on a wide range of topics including 2UZ swaps, transmission options and solutions to some of the challenges. We've got more to discuss and do, but I think we can likely have a solution for the auto trans ECM in use with a manual trans. More to come on that as it develops.
 
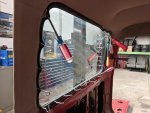
After SEMA I finished up removing the interior. Popping out the side windows is a challenge in finding enough screwdrivers, nails, whatever to slowly ease the gasket out of the frame...

IMG_20181103_121708.jpg

The headliner is quite nice in this truck so I took my time and tried to save it. Once the bobbing is complete I'm not yet sure how I'm going to finish the interior off so maybe this headliner can be used in some modified form, if not it may find it's way into another truck.

IMG_20181103_162926.jpg

While trying to remove the windshield I cracked it, not a big deal really since I planned on replacing it anyway. Just a reminder though how tough those windshields and gaskets are to remove. This one originally had the chrome lock strip but I'm going to black out the trim so none of it was saved or reused. Judicious use of the razor knife made quick work of getting the glass out.

IMG_20181103_171839.jpg

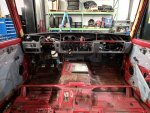
With the windshield out I started on the dash. The dash pad comes out really quick, it's the HVAC and other bits that take some time. I started pulling all this because I have a little bit of rust at the base of the passenger side A-pillar to address and will need to weld in that area.

IMG_20181104_123410.jpg

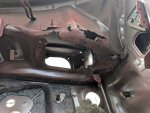
Unfortunately as I pulled the blower motor assembly I discovered a new challenge. Taking apart these old trucks always seems to yield some unexpected surprises and this one didn't let me off the hook too easily. This is going to take some careful work to patch this up...

IMG_20181104_144554.jpg

You're looking up at the passenger side air inlet which connects to the cowl. I've dealt with cowl rust in vintage Mustangs, but this will be my first go-round with a Land Cruiser. Let this be a lesson to all of you out there to keep your cowls free of leaves and debris and make sure those drains are clear. This is a tricky flange to repair due to the square interface with the air inlet and tough welding access. I'll probably end up cutting an access hole in the exterior cowl panel to get in and patch it all up with a section cut from another truck. I'm going to save that for later though and first tackle the bobbing of the rear.
 
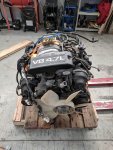
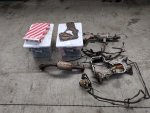
And just this week a fresh pallet of goodies arrived. This is a 2UZ from an 01 Tundra I got from another Cruiser fan on the Mud forums. He also provided the engine wiring harness, body harness, proper 100-series oil pan, and some other random odds and ends to go with it. This will make things a fair bit easier than having to go buy a truck and scrap it out myself.

IMG_20181106_131900.jpgIMG_20181106_131921.jpg

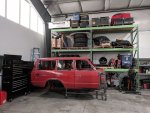
I finished up a body dolly to make it easy to move this thing around the shop and put her in the back corner for now while I work on customer projects.
IMG_20181104_153434.jpg

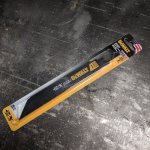
And while at the hardware store I picked up a fresh set of these. Things are about to get real... :D

IMG_20181104_160627 (2).jpg
 

Oshkosh-P

Observer
Awesome built and awesome threat! Since you could compare them quite directly: Are the HJ 80 Frame and axles really so much stronger compared to it's predecessor, that it is worth the swap or is just because of the spring setup?
 

battleaxe

Captain Obvious
Awesome built and awesome threat! Since you could compare them quite directly: Are the HJ 80 Frame and axles really so much stronger compared to it's predecessor, that it is worth the swap or is just because of the spring setup?

- Coil sprung vs leafs, arguably better
- Factory E Lockers on the 80 series
- 80 Series axles are a bit wider I think
- No gears easily available for the 60 series (I think you can only get/fit 4.11's), whereas you can get 4.88/5.29 on the 80 series.
 
Awesome built and awesome threat! Since you could compare them quite directly: Are the HJ 80 Frame and axles really so much stronger compared to it's predecessor, that it is worth the swap or is just because of the spring setup?

BattleAxe covered it pretty well. A couple more points though -

  • The coils are nice - the leaf spring perches and shackles on a 60 drag on a lot of stuff and have hung me up quite a few times. Steering is also a lot nicer on the coil setup.
  • E-lockers are only on some 80-series. The chassis I am using doesn't have them. I actually prefer ARB's though, I have seen too many guys trying to get E-lockers to engage on the trail and having trouble in the middle of a rock obstacle. Never had that problem with my ARB.
  • 80-series is +3" on track width front and rear and 5" longer wheelbase
  • The 80-series front axle is arguably weaker and has limited gear selection, but is a high pinion and with the coil spring setup is still desirable. Some contend the radius arm setup is not all that great when lifted and/or when needing flex. I've considered doing a three link but that decision can wait until later.
  • FZJ80 rear axles are full floater with disc brake and integral parking brake in the center of the rotor. Definitely an upgrade over the 60-series.
 
Back to the show...

If you're following on Instagram you already saw this, but this past weekend was a big one. On a quiet Sunday afternoon I went through with the cut job. I made a video to upload, because purportedly if it's not on Instagram it didn't happen...


Some people get intimidated by this but the cutting is the easy part. It's the fitting it all back together that gets tricky.

I've worked on it some this week but don't have a lot to show. There's a fair bit of sitting and pondering involved. This sort of build is a labor of love, it takes a lot of time staring at things before I make significant cuts and changes. If this were a customer job we'd have a real challenge doing it for any reasonable money. Of course, everything is 10x easier once you've done it once or twice. Maybe when the build is done I'll be ready to tackle it for someone else.

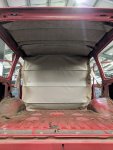
So after the cutting I'm left with a selection of body parts. Some of this goes to scrap, but most will be used to donate various pieces, curves, lines etc. to make the new rear wall blend as seamlessly as possible with the main cab. For now the only thing I really put in the trash pile was the roof section.

IMG_20181111_180108.jpg

With the cut job done, the first thing I did was start working on my donor roof section. This is going to be the replacement for where the original body was rusted above the rear hatch. I decided to remove the roof panel from the framework. This will give me much better access to the underlying structure where I need to graft it to the body. Drilling spot welds isn't glamorous work, but with a decent cutter it goes pretty quick (hint: buy a Rotobroach). Before removing the panel it looks like this:
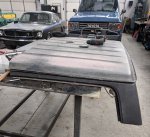
IMG_20181113_095704.jpg

And after drilling what seems like 100 spot welds out and coaxing it a little bit with small pry bars I'm left with this. (Can you tell the dog is used to a lot of fabrication noises? She sleeps through anything...)
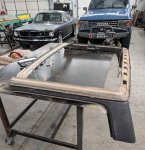
IMG_20181113_102022.jpg

With that done, I moved over to the main cab. The first thing I wanted to do was cut back some of the roof to give me access to the top of the C-pillars. Much like the replacement section above, I drilled the spot welds out in the rain gutters, but this time only 5 per side. I made a cut across the top and peeled off 12 inches or so of the original roof panel.
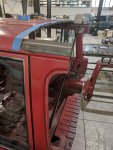
IMG_20181113_162500.jpg

Much like the sawzall cuts, this is only a rough first-pass. Once the main structural portions are on and fully welded I'll come back and trim this original roof and the replacement section I took off to match. That will be one of the last steps in the metal work though, there's much more to do to join the rest of this together.

This is where things start to get tricky. Joining the roof section with this c-pillar is where I've stopped for the moment. I'll trim back the upper roof rail some, but need to leave the main structure fairly intact as it holds the shoulder belt anchor and generally supports the rear roof. I may cut off some of the pinch weld to blend in the D-pillar, but I'm not certain yet. The moves come slower now, there is more pondering and brainstorming needed and the cuts get smaller as we go... :unsure:
 

toylandcruiser

Expedition Leader
- Coil sprung vs leafs, arguably better
- Factory E Lockers on the 80 series
- 80 Series axles are a bit wider I think
- No gears easily available for the 60 series (I think you can only get/fit 4.11's), whereas you can get 4.88/5.29 on the 80 series.

You can get 4.56 4.88 and 5.29 as well for a 60.
 

Forum statistics

Threads
188,178
Messages
2,903,430
Members
229,665
Latest member
SANelson

Members online

Top