The Rolling Restoration & Customization Of My 88' Range Rover Classic

rrclassicbt550

Farmer Jon
Status Update 9/9/21012

Well, it is finally street legal. My brother came and helped me get the turn signals and windscreen wipers wired and working, which took the majority of the day. The only real issue left is that I don't have hazard lights, because I do not have the wiring diagram for the AFU4209L push button hazard switch.
So to get the turn signals working we had to bypass the original Land Rover relay. The bypass is secure and works well but is only temporary to make the Rover street legal and usable again. Once I am able to find the wiring diagram for that hazard switch, my brother and I will sort it out properly.
I hope all of you know by now that I am not someone that does "shortcuts" and this is going to nag at me until I get it fixed properly, but I cannot really justify having it sit around just because it doesn't have hazard lights. I carry three reflective triangles and many flares, so if anything were to happen, those should be able to warn oncoming vehicles at a similar distance to what the hazards would be able to do anyway. Just to be extra cautious though, I will try not to take the Rover out after dark unless truly necessary.
If anyone has or could make me a diagram for the AFU4209L push button hazard switch I would be very grateful. Here is a link if you want to actually see the switch I am talking about http://www.paddockspares.com/catalogsearch/advanced/result/?sku=AFU4209L

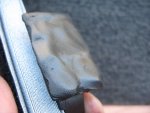
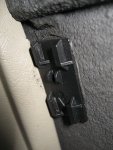
For now, I put the last pieces of trim in place, but I did leave the radio wiring harness hanging lose for the moment because I need to run the new power wire for it tomorrow. Since the dual battery system is next on my list I am going to take advantage of it and run the radio to the auxiliary battery instead of the main battery so that if for whatever reason the radio is left running I will still be able to start my Rover.

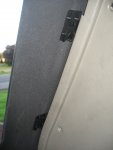
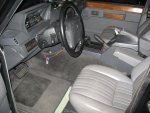
Here is a picture of the drivers side all back together (except the radio harness). Please excuse the mess, I took the picture before heading in for the night. I will be doing the cleaning and vacuuming tomorrow after running the radio wire.

Nevertheless, I think it came out well! It looks pretty close to "stock" in my opinion, even though it is anything but stock at this point. I hope you all like it, please let me know what you think now that steering column swap is 99.9% done.
IMG_0232.JPG
 
Last edited:

rrclassicbt550

Farmer Jon
Fitting in a couple small "To Do's" during the week....

At the moment I am still trying to choose which insurance company to go with for the Rover, but I will choose soon. Just have to talk to a couple more companies to see what they can do for me before I make a final decision. I expect to be logging many very happy miles in the Rover again within the next week.

In the mean time, I fit in a couple other To Do's that were on my list. While test driving the Rover a little more I did find two minor but very interesting (and annoying) faults. The first was a fairly good sized oil spot under the power steering box area. I was not to alarmed at first, (it is a Rover after all) but after about the third test drive I discovered why it was leaking so badly and why the steering was more difficult then normal. Apparently, two out of the the hydraulic lines running into the power steering box had rattled themselves lose. Not quite sure how they managed to do that, but with a few quick turns of my wrenches the problem was solved. Now, my steering is smooth again and my Rover doesn't mark its territory anymore! (Yes, I have checked the fluid levels...haha)

The second fault was by far the most annoying. As many of you may know part of the mods I am doing involve increasing the Rovers overall fuel range capabilities as close as I can get to 1000 (on-road) miles with the fuel in the tank and one 5 gallon jerry can, because this is such a tall order, I have doing my best to weigh each item (or amount of material used in the modifications) to help not only keep an eye on the total weight but also to eek the best MPG I can get out of my Rover. I know some of your heads may start or have started shaking at this point but while ordering parts and finding ways to achieve my goals...I picked up a K&N filter. I know...it is a controversial option because the factory paper style works great and does keep out more dust, BUT I have a Safari Snorkel off of a Disco 1 that I am going to install later on and will most likely have a purchase a pre-filter for that, so I figured that it might even things out a little to go with a K&N.

There were two problems I ran into upon the installation of the K&N though. The first, being that the idle went up to 1500RPM, which is not going to go over well at the emissions testing facility. The second and by far the MOST ANNOYING problem was a musical note/howling sound coming from the air intake while in gear and in the lower RPM's. It sounded like blowing over the top of a Coke bottle...only much MUCH louder! Needless to say...the factory paper filter is now back in place, there is no annoying howling sound, and it idles beautifully. Does anyone have any ideas why changing the filter would make it develop those two issues? Any recommendations on options for either being able to reinstall the K&N withOUT having issues or other options for increasing MPG?

EDIT 10/9/2012
After driving my Rover for a couple weeks I re-installed the K&N filter and for some unknown reason it doesnt make the loud noise anymore and idles beautifully. It seems to have fixed itself. :)

The motor will probably need to be fully rebuilt or swapped for something else in the next couple of years. So now is the time I am going to be testing to see if the 3.5 is going to be a viable option to reach my range capability goal. As it is now, I get 17-19 MPG out of it and the long range fuel tank I have which is awaiting install is 31 gallons I believe. So once I install that tank, account for the "last gallon" that doesn't ever get used, and the extra 5 gallon jerry can I would also be carrying on long trips...I should be able to get between 595-665 miles (in somewhat fair weather...on the road). Not sure, what the range will be off-road just yet, but I look forward to testing it out! :) Any recommendations for increasing the range will be greatly appreciated.

Edit 10/9/2012
I spoke too soon on the "17-19mpg"...that is the mpg I was able to get one year ago before I had to take the Rover out of action for a year and also before the new larger/wider tires, before the dual batteries, as well as before the not so wonderful 10% ethanol/oxygenated fuel seemingly became the only emissions legal gasoline option to be offered where I live. I rather naively assumed that the fuel mileage wouldn't be too different from what I was getting the last time I drove it, but I quickly re-learned the life-lesson for making assumptions about things.

My Rover has been doing a solid 12mpg so far for mixed around town and freeway driving. I put the K&N back in, did a service on the motor, check the tire psi, off-loaded any extra weight, and have driven like I was in a funeral procession...and it has still only been able to get 12.1mpg. I am achieving around 200miles between fill-ups with the stock tank and when I am paying for premium....it has been discouraging my views on the 3.5L Rover V8 pretty quickly.

If I did install the long range fuel tank, I would get less than 400 miles of range with the combination of the original 3.5L V8 and the 31 gallon long range fuel tank. When taking into account; this is with no gear in the vehicle, one passenger, and no hill or mountains to contend with...the results are lackluster to say the least and are results which I am not willing to deal with in the long-term.

An engine swap is jumping up through the ranks of my to do list very quickly...I am fairly certain I am going to buy a 6.2L Mil-Spec Diesel like the those used in the vehicles of RedRover, paradigm, and LtFuzz. I am going to look at a 6.2L Mil-Spec Diesel tomorrow....I will let you all know how it goes.
 
Last edited:
rrclassicbt550

Farmer Jon
One more small "To Do"...

Since I a little bit of time to spare this week I chose to do a quick modification to the Rover. There are many reasons the option of be able to sleep in my Rover while out on trips could be consider a good thing. Not that there is anything really wrong with tents or sleeping under the stars, its just that those two options have there place, as does sleeping in the vehicle. Because I live in an area that has a generous propensity for wind and rain...having the ability to not have to pitch a tent at night and in the rain might be nice sometimes.

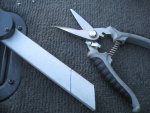
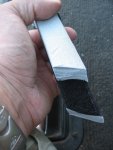
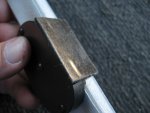
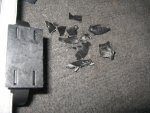
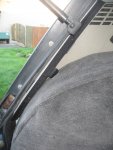
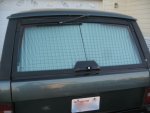
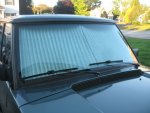
While thinking about ways to make window coverings for a little more privacy, I accidentally/luckily managed to sort out the windscreen and the rear hatch. I have had Eclipse Sunshades in my other vehicles for years and they have worked wonderfully. So when it came to the Rover I didn't hesitate to order another set to for its windscreen. However, as is the way with my parts stash...when I order a new part...an old part seems to magically appear. In looking through my parts stash, I found that I had hung on to another set of the Sunshades. Ordinarily this would be a mildly frustrating but it turned out to be a blessing in disguise. After giving it some thought, I figured out that if I trimmed them down and installed them in the back of the Rover, I could have both ends covered and would not then have to make some time of curtain/covering for the back window. Not to mention I would still maintain easy access to/through the back hatch because once the Velcro is separated the shades fold neatly out of the way.

I did find a couple of minor issues with my "inspired" plan though. The first being that double sided tape does not stick to LizardSkin for more then a day. This little hurdle was easily sorted out by the proper application of a little Sugru, which sticks very well to darn near anything including LizardSkin. The second issue was I had to attach a magnet to one side of the Sunshades (with Sugru) so they would hold tight up against the metal window frame and not sag down. Other than those two minor issues I would highly recommend this modification. Quick to install, quick to deploy, very effective when in place, and quick to conceal again.

IMG_7201.jpgIMG_7199.JPGIMG_0102.JPGIMG_0103.JPGIMG_0104.JPGIMG_0108.jpgIMG_7236.jpgIMG_7238.jpgIMG_7240.JPGIMG_7242.JPG
 

rrclassicbt550

Farmer Jon
if you are keeping your truck as a daily driver you might qualify to have it insured by hagerty.

http://m.hagerty.com/Collector-car-insurance/Auto-insurance-overview

OregonGX,

Thank you very much for the reply and the link, there was some really good information in there. Hagerty was actually my first choice for insurance companies until I thoroughly reviewed their coverage limitations and "fine print". I decided that they were not for me, partly because I want my Rover to be able to be used as a daily driver, also because I park it in the driveway, but mainly because if I insure it through them I won't be able to take it "off-road", which would kind of defeat the purpose of owning an "off-road" vehicle in my opinion.

Thank you for the the input though. That link definitely shed some light on the other questions I had about their coverage. When I get a classic car I will definitely use them as my insurer, but unfortunately where my Rover is concerned, I am going to have to keep searching.

Have a good one!
Jon
 

rrclassicbt550

Farmer Jon
Update 9/19/2012

Hello everyone,

Unfortunately, there are no pictures for this particular update. The Rover passed its final trip through emissions with flying colors and is now licensed, insured, and driving again. After spending three days solid looking at and calling insurance company after insurance company trying to find the right one to go with, as well as developing three major headaches brought on by reading countless contracts and too much "fine print". I ended up insuring it through my current insurance company and going for the biggest/most expensive coverage they offer. For now, I am stuck. Hopefully I will find the right insurance company soon.

It utterly amazes me how complicated shopping for an "agreed value" policy is. I want to retain the ability to use my Rover as a daily driver and be able to take it off-road. I want "$20,000" if the Rover becomes a total loss. I want the highest amount of coverage for my passengers, myself and those persons in the other vehicle....and I am willing to pay the high premium to get that coverage, but NONE of the countless insurance companies would do it. So the search continues...


This week has mainly been about spending my time enjoying actually driving the Rover again, doing some routine maintenance, and "ironing out the wrinkles" of minor things here and there. So nothing to spectacular going on at the moment worthy of posting. However, this weekend I am planning on installing the dual battery system. So I will post the pictures and write up, shortly thereafter. I am also going to take the "after" measurements and pictures of the rear seat swap, which I should be posting at the same time.

I am sorry I don't have much to post at the moment other than saying that I have put about 150 miles on the Rover so far and it seems to run better and better after each mile that roles under its tires.

I hope everyone else's Rovers are running as good if not even better!

Have a good one!
Jon
 
Last edited:
Snagger

Explorer
Congratulations on getting it back on the road, and comiseration over the hassle on insurance - I hope you make some headway soon.
 

rrclassicbt550

Farmer Jon
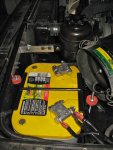
IBS Dual Battery System with Yellow Top Optimas

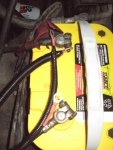
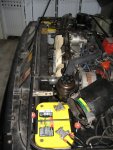
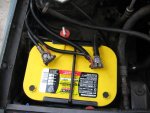
I installed the IBS Dual Battery System over the weekend and when all things are considered it is a pretty simple process. There isn't really anything too difficult except for possibly the fabrication of the brackets. However, as with many things, the process may be simple but it can take a fair amount of time to complete. It took me (working alone) about 12-13 hours when all was said and done which I would tend to think is quite high for an installation time, but keep in mind there was some trial & error involved and also the fact that I do tend gravitate toward the "perfectionist" side of things. I spent quite a few hours crimping, soldering, heat shrinking, sheathing, and running the wires to reduce any risks of chaffing or shorting.

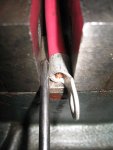
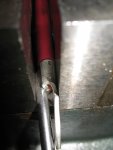
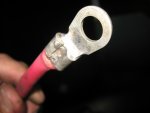
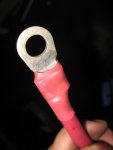
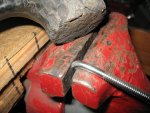
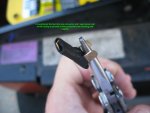
For the 4 gauge wires I did not have a crimping tool big enough to do the job properly. Instead, I used a screw driver and a vise to do the crimp. It is definitely not the ideal way of doing it but since I was going to solder the connectors anyway, I figured it would be alright. After I soldered the connectors, I used heat shrink tubing to protect against moisture and corrosion.

After getting all of the wires prepared and ready I sheathed them in "split loom" to help protect against abrasion.

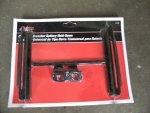
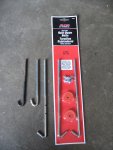
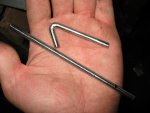
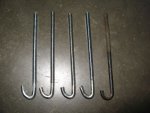
When I bought my Rover it didn't have a battery hold-down. I purchased two universal battery hold-downs and hold-down bolt kits. Unfortunately, the shortest bolts they had were far too long to work with out some modification. I cut them, re-bent them, and they worked perfectly.

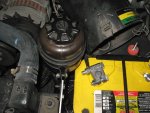
The next task was relocating the power steering fluid reservoir. I used some spare aluminum I had laying around. Making the new mount was fairly easy. I annealed the area of the aluminum I was going to bend, BEFORE I actually bent it, to help prevent possible cracking while bending. I then flipped over and bent the original p/s reservoir bracket. After drilling five holes it was ready to install.

With the air intake, p/s reservoir, 2nd battery, and all the other stuff in that area...it is an EXTREMELY tight fit, but it does all fit.

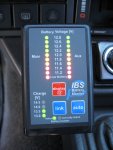
Then, check the display to make sure everything was working properly and celebrate a job well done with some...cold refreshments! ;)


IMG_0252.JPGIMG_0254.JPGIMG_0256.JPGIMG_0258.jpgIMG_0260.JPGIMG_0261.JPGIMG_0262.JPGIMG_0284.JPGIMG_0283.JPGIMG_0287.JPG
 
Last edited:
burn_e

Adventurer
Will you keep the air filter open? Might become a bit noisefull...

Beautyfull work otherwise - congrats to the build and the level of quality you pursuit.
 

rrclassicbt550

Farmer Jon
Will you keep the air filter open? Might become a bit noisefull...

Beautyfull work otherwise - congrats to the build and the level of quality you pursuit.

burn_e,

Thank you for the compliment Sir! :) How is your Rover running these days? Did things turn out well with that Terminal Post issue?

In answer to your question about the air filter. Yes, I am going to leave it open...for now. To be honest, I really cannot hear much of a noise difference with the filter being open, but that could be a result of the whole interior being MUCH quieter after installing the LizardSkin sound deadener. ;)

The main reason I am leaving the air filter open is because later on I am going to modify the air intake system when I install the Discovery 1 Safari Snorkel I have in the garage.
 

rrclassicbt550

Farmer Jon
Dual battery display install info...

The actual installation seemed like it was a bit overwhelming, but when I focused in on each specific component it made doing the wiring a lot easier.

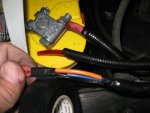
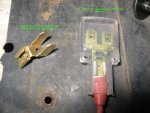
(As a small side note, I posted pictures of the 2 to 1 blade "style" terminal connector I changed out for a more compact and cleaner wiring set-up)

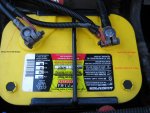
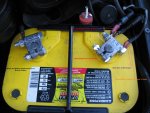
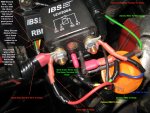
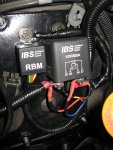
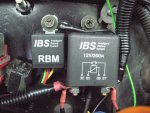
Here is the breakdown of how the wires hook up to each component. For example, there are 3 wires that attach to the main battery; one large (red) wire and two small (red & black) wires. So don't look at the WHOLE list, just look at each component in the list. Hopefully this helps! :)

IBS Display:
(Red) Wire To Main Battery Positive
(Black) Wire To Main Batter Negative
(Blue) Wire To Aux Battery Positive
(Green) Wire to Relay 86

Main Battery:
(Red) Positive 4 gauge Wire To Relay 87
(Red) Wire To IBS Display
(Black) Wire To IBS Display

Aux Battery:
(Red) Positive 4 gauge Wire To Relay 30
(Blue) Wire To IBS Display
(Black) Negative/Ground 4 gauge Wire To body & chassis

Relay Booster Module:
(Black) Wire To Ground
(Red) RBM To Relay 87
(Blue) RBM To Relay 30
(Yellow) RBM To Relay 85
(Green) RBM To Relay 86

IBS Relay:

30 Threaded Terminal:
(Red) Main Battery Positive 4 gauge Wire To Relay 30
(Blue) RBM To Relay 30

87 Threaded Terminal:
(Red) Aux Battery Positive 4 gauge Wire To Relay 87
(Red) RBM To Relay 87

86 Blade Terminal:
(Green) Wire to Relay 86
(Green) RBM To Relay 86

85 Blade Terminal:
(Yellow) RBM To Relay 85


IMG_0324.jpgIMG_0327.jpgIMG_0335.jpgIMG_0336.jpgIMG_03301.jpgIMG_0372.jpg
 

burn_e

Adventurer
burn_e,

Thank you for the compliment Sir! :) How is your Rover running these days? Did things turn out well with that Terminal Post issue?

In answer to your question about the air filter. Yes, I am going to leave it open...for now. To be honest, I really cannot hear much of a noise difference with the filter being open, but that could be a result of the whole interior being MUCH quieter after installing the LizardSkin sound deadener. ;)

The main reason I am leaving the air filter open is because later on I am going to modify the air intake system when I install the Discovery 1 Safari Snorkel I have in the garage.

Thanks for asking! I have replaced the terminal with soldered connection in a Kevlar coated tube. Works a charm.

Your sound deadening seems to work beautifully, because you should get a serious roar when you push the loud pedal more the half.

You have a lot of water were you are? Or why a snorkel?
 

rrclassicbt550

Farmer Jon
Thanks for asking! I have replaced the terminal with soldered connection in a Kevlar coated tube. Works a charm.

Your sound deadening seems to work beautifully, because you should get a serious roar when you push the loud pedal more the half.

You have a lot of water were you are? Or why a snorkel?


Hmm...thats an interesting way to replace the terminal. I would love to see it! Did you take any pictures when you were done?

Well...where I live we do have a lot of water but it is in the form of "rain", NOT deep water that needs to be crossed frequently. Deep water crossings are not something I would choose to do unless I REALLY had to. The location of the air intake is not the only part of the vehicle that would need to be "water-proofed" before attempting to make it through deep water successfully without abusing my Rover (or any vehicle for that matter). That being said...I will be "water-proofing" as much of my Rovers vital equipment as possible just incase I ever have to do a deep water crossing.

There are a many reasons I bought the snorkel. Possible water crossings is one of my reasons. Dust is the bigger reason though, I plan on going to places where dust is part of the daily routine and getting the air intake up as high as possible will help keep both the air filter cleaner and the engine breathing easier. Another reason I bought the snorkel is because I got it for practically nothing. If I remember correctly, the final price for it was something like $80 for the snorkel, the Disco 1 fender it was attached to, the rubber hose that attaches the snorkel to the air box, and I also got the Disco 1 air box with a K&N filter in it. So even though it cost me $80, I was able to get enough parts with the snorkel, to help even out the money that was spent by trading or selling them.

However, the ACTUAL reason I bought the snorkel was because I have wanted a vehicle with a "Snorkel" on it since I was a 10 year old kid. So all of the other "reasons" I listed above are what I used to justify the purchase to myself! ;) Honestly, not every modification I am doing to my Rover is necessary. Some of the modifications are because I have always wanted a vehicle with those modifications done to it. After all, I believe in every "mature" man is an inner "10 year old kid" who just wants to have a really cool toy to play with. I think that is part reason I smile every time I see my Rover! :D
 
Last edited:
Forum statistics

Threads
186,657
Messages
2,888,536
Members
226,767
Latest member
Alexk
Top