You are using an out of date browser. It may not display this or other websites correctly.
You should upgrade or use an alternative browser.
You should upgrade or use an alternative browser.
The Rolling Restoration & Customization Of My 88' Range Rover Classic
- Thread starter rrclassicbt550
- Start date
rrclassicbt550
Farmer Jon
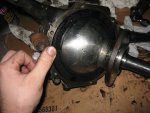
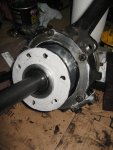
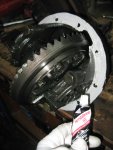
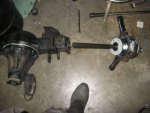
There were no hiccups with rebuilding and swapping all of the parts over from the 88' RRC front axle housing into the 96' disco front axle housing. However, the were and still are a few hiccups with the lift. The first issue was that somewhere along the way, one of the coil spacers from the Disco went missing. So I had to make one out of an old piece of aluminum I had from a previous project.
While I was making the coil spacer I discovered a little issue. Whoever manufactured the original coil spacer kit did not machine them they cut them with a band saw. They pretty much just cut them off on a band saw and drilled two holes, which is fine I suppose, but if you are going to make them yourself or buy some coil spacers, be aware of the term "blade drift". Blade drift is when the band saw blade moves to one side or the other during the time it is cutting through material. Meaning that you may get a coil spacer that is undersized, oversized, or not uniformly cut, as was the case with these you pictured. The fronts were cut undersized and were not uniformly cut, while the rears were oversized and not uniformly cut.
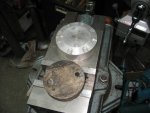
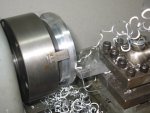
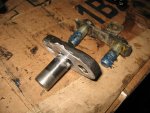
A picture while the the soon to be spacer is being cut down in the lathe.
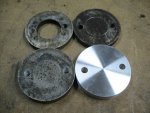
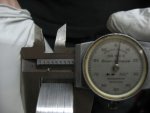
This is what I mean, the original spacer was supposed to be 3/4" (.750) but was cut oversized, so I matched the one I made to the originals measurement.
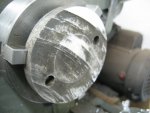
Before I machined out the center of one of the front spacers, I took a clean up pass to see if I could at least make them uniform, but they were way too uneven and it would have made them even more undersized so I just left them alone and machined out the center so the front shock could pass through.
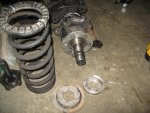
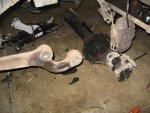
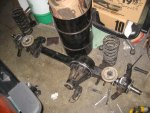
While I was making the coil spacer I discovered a little issue. Whoever manufactured the original coil spacer kit did not machine them they cut them with a band saw. They pretty much just cut them off on a band saw and drilled two holes, which is fine I suppose, but if you are going to make them yourself or buy some coil spacers, be aware of the term "blade drift". Blade drift is when the band saw blade moves to one side or the other during the time it is cutting through material. Meaning that you may get a coil spacer that is undersized, oversized, or not uniformly cut, as was the case with these you pictured. The fronts were cut undersized and were not uniformly cut, while the rears were oversized and not uniformly cut.


A picture while the the soon to be spacer is being cut down in the lathe.


This is what I mean, the original spacer was supposed to be 3/4" (.750) but was cut oversized, so I matched the one I made to the originals measurement.

Before I machined out the center of one of the front spacers, I took a clean up pass to see if I could at least make them uniform, but they were way too uneven and it would have made them even more undersized so I just left them alone and machined out the center so the front shock could pass through.


Last edited:
rrclassicbt550
Farmer Jon
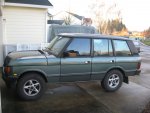
The before picture...

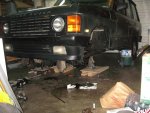
This is a picture of the Rover with only the front lifted. I ran out of time and ended up only being able to install the front lift and had to drive it this way for a couple weeks because my Rover is my daily driver. But when I got a little bit more time I put the lift in the back too.

The after picture...
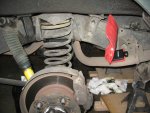
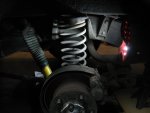
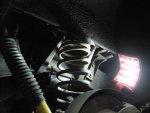
Here are a few pictures of the rear suspension before I took it out.
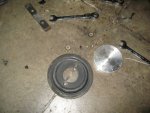
Freshly made coil spacer
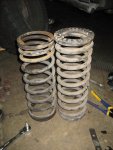
A comparison between the original spring and the heavy duty spring
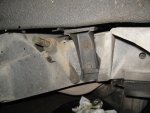
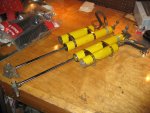
This is the other and current hiccup/issue. The long travel Bilstien shocks I got out of the Disco will not work with the original RRC shock mount. So I left the other non-long travel set in for now, while I work out how to get the long travel shocks installed.
Last edited:
rrclassicbt550
Farmer Jon
Auxiliary fuse box install...
As promised long ago, here is the the install of the auxiliary fuse box.
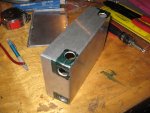
I started with an aluminum project box to house it. I drilled holes for the wires to pass through.
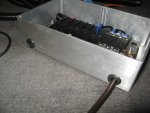
Then put rubber grommets in place to make sure there would be no chaffing of the wires that pass through.
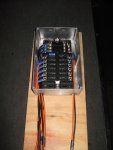
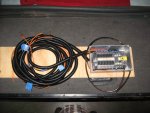
After that, I screwed the whole assembly to a board so it would stay in place while I figured out how I wanted the wires to be run into the fuse box. I measured out and pre-cut the wires before I put them into the vehicle because I figured it would be less of a hassle and less time consuming.
A word of advice in doing wiring this way....add 2 to 3 feet onto the wires length before cutting. It never fails that when routing the wires through the interior, the wires will end up being just little too short; by planning ahead with the extra length it leaves room for the ability to run wires properly.
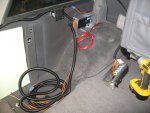
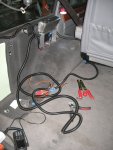
And upon installation I decided I did not like how I had originally run the wires so I chose to re-wire the fuse box so the wires could be run a little cleaner.
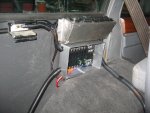
Here is the cleaner set-up. I am not completely happy with it at the moment because the seat switch wires had to be run over the wheel well which does not look clean and also because late last night I ran out of split-loom wire sheathing so the ground wire and positive wire aren't sheathed. For now I put it all back together. I will clean it all up more when I get some more split-loom this week.
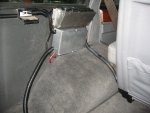
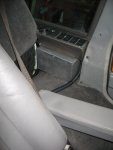
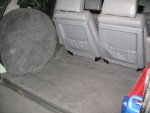
All in all, it looks like a pretty clean setup I think, even though there I still more to do. I still have to make the passenger side switch panel, the rear 12v outlet panels, re-run the seat switch control wires in a cleaner way, install the power inverter (still waiting on the mailman), and then tidy everything else up, but I am quite glad that nearly everything is up and working properly now! It seems kind of surreal that it is all finally coming together and progress is being made again!
As promised long ago, here is the the install of the auxiliary fuse box.

I started with an aluminum project box to house it. I drilled holes for the wires to pass through.

Then put rubber grommets in place to make sure there would be no chaffing of the wires that pass through.


After that, I screwed the whole assembly to a board so it would stay in place while I figured out how I wanted the wires to be run into the fuse box. I measured out and pre-cut the wires before I put them into the vehicle because I figured it would be less of a hassle and less time consuming.
A word of advice in doing wiring this way....add 2 to 3 feet onto the wires length before cutting. It never fails that when routing the wires through the interior, the wires will end up being just little too short; by planning ahead with the extra length it leaves room for the ability to run wires properly.


And upon installation I decided I did not like how I had originally run the wires so I chose to re-wire the fuse box so the wires could be run a little cleaner.

Here is the cleaner set-up. I am not completely happy with it at the moment because the seat switch wires had to be run over the wheel well which does not look clean and also because late last night I ran out of split-loom wire sheathing so the ground wire and positive wire aren't sheathed. For now I put it all back together. I will clean it all up more when I get some more split-loom this week.


All in all, it looks like a pretty clean setup I think, even though there I still more to do. I still have to make the passenger side switch panel, the rear 12v outlet panels, re-run the seat switch control wires in a cleaner way, install the power inverter (still waiting on the mailman), and then tidy everything else up, but I am quite glad that nearly everything is up and working properly now! It seems kind of surreal that it is all finally coming together and progress is being made again!
Snagger
Explorer
Have you used castor correcting bushes on the front suspension radius arms? It looks like you have re-used the original arms, which would be fine with the corrective bushes, but if the bushes are also standard, you may find the steering twitchy and unstable at speed.
The interior looks like a very tidy conversion. The standard interior of the 100" is its Achilles heel - it's just too cramped for tall adults.
The interior looks like a very tidy conversion. The standard interior of the 100" is its Achilles heel - it's just too cramped for tall adults.
rrclassicbt550
Farmer Jon
Have you used castor correcting bushes on the front suspension radius arms? It looks like you have re-used the original arms, which would be fine with the corrective bushes, but if the bushes are also standard, you may find the steering twitchy and unstable at speed.
The interior looks like a very tidy conversion. The standard interior of the 100" is its Achilles heel - it's just too cramped for tall adults.
Good eyes Sir, yes I have re-used the original arms. I am not currently using anything for castor correction at this time and as you mentioned, it is twitchy and does feel a bit unstable at speed.
I find myself hesitating a bit at the moment because I am not sure which option to go with, the castor corrected bushes or purchase new radius arms. It would definitely be cheaper to go with the bushes, but it just doesn't seem like the "right" thing to do. Purchasing new radius arms seems like it is the right thing to do but I am not really sure who makes a high-quality set of radius arms and judging by some of the prices I have seen, it is most definitely going to be the expensive option. If you or anyone wants to help shed a little light on a high-quality set of radius arms I would appreciate it.
Thanks! I still have a bit of tidying up to do but it does seem to be turning out better than I originally anticipated. I do agree with you though, the interior of the SWB Classics are a bit of a let down when it comes to the original rear seating arrangement. With this conversion I would be hard pressed to find a real downside (other than losing the ability to seat 5). More head room, more leg room, the ability to adjust the seating position, as well as the added benefit of having a headrest for each passengers comfort and safety. Seeing the way it is turning out kind of has me wondering what this conversion would be like in a LWB or a Discovery.
WOW, WOW, WOW!!!! You have done a great job with this resto/mod of your RR. Thank you very much for sharing with us! I look forward to future updates!
Thank you very much for the compliment! I am glad you and everyone else are enjoying what I am doing! I will do my best to post more this week. Some more parts came in over the weekend.
Snagger
Explorer
Caster corrected arms would be the better technical option, as corrective bushes are thin on one side and thus have less cushioning in that direction, but I haven't heard of any problems. New radius arms are much more expensive, but at least you shouldn't have to worry about thumpy bushes or their potential early failure. If you do go that route, QT Services are very good.
rrclassicbt550
Farmer Jon
Caster corrected arms would be the better technical option, as corrective bushes are thin on one side and thus have less cushioning in that direction, but I haven't heard of any problems. New radius arms are much more expensive, but at least you shouldn't have to worry about thumpy bushes or their potential early failure. If you do go that route, QT Services are very good.
Thank you very much for the advice! I hadn't thought about there being less cushion and possible premature wear. So I guess the decision is made. The QT Services radius arms look very nice, going to have to save up for a bit though to get them, they do look to be worth it though.
rrclassicbt550
Farmer Jon
I need some advice....
This week I have been tidying up the wiring in the back of the Rover and fine tuning the positions of all of the plugs and accessory mountings. In doing so, I have been mocking up all the extra equipment in the cargo area, one of which is the water system. The water system is coming along well, I know where I am going to mount it, but I want both the jerry can and the water filter/pump (the pelican case) to be securely mounted as well as easily removable for cleaning and servicing. I have been doing some research into different kinds of mounts for pelican cases and jerry cans but it seems like there is countless styles and versions out there. So I was hoping to get some advice for all of you about what you would use for mountings if you were in my position. Both the jerry can and the pelican case will have to come out more vertically than horizontally because of the drawer system that will be in there later on. What would you recommend for mountings?
Here are some pictures to help...
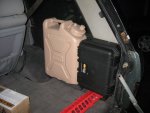
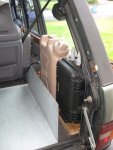
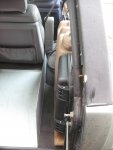
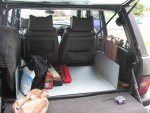


I think the easiest would be a ratchet strap tying the case and canister against the wall. All with a level foundation like the one you mocked up with wood.
Bit more elegant (but not necessary better) would be a metal brace like seen on the roof jerrycan holders.
Question: Did you try to lift the full (!) can in and out over that sidewall for the drawer system? Looks like alot of work to me. Maybe a swap of can and case eases the pain a bit. ;-)
Bit more elegant (but not necessary better) would be a metal brace like seen on the roof jerrycan holders.
Question: Did you try to lift the full (!) can in and out over that sidewall for the drawer system? Looks like alot of work to me. Maybe a swap of can and case eases the pain a bit. ;-)
rrclassicbt550
Farmer Jon
I think the easiest would be a ratchet strap tying the case and canister against the wall. All with a level foundation like the one you mocked up with wood.
Bit more elegant (but not necessary better) would be a metal brace like seen on the roof jerrycan holders.
Question: Did you try to lift the full (!) can in and out over that sidewall for the drawer system? Looks like alot of work to me. Maybe a swap of can and case eases the pain a bit. ;-)
Hello Berni,
True a metal brace is more elegant but I really like your idea of using a strap, its clean, simple, and much easier; I will more than likely go with that idea. Thanks
I understand what your saying about the location and I agree with you, I really wish I could swap them around. My original plan was to have the jerry can laying over on its side (instead of being in the vertical position) so it would be less in the way when using the sleeping platform (future modification). However, as sometimes happens with me, my memory seems to have been more than "just a little bit fuzzy" about the size of that space in relation to the size of the jerry can, so when I began the initial mock up, nothing fit...haha. Now I am figuring out "plan B". I have tried mocking them up many different ways and they either don't fit very well or make running the water lines impossible. The way in the pictures seems to be the only way they will fit in that area. I am still open to other suggestions though...
You hit on another good point about lifting the jerry can out of there. In my original "plan A" I had thought about making a jerry can holder that incorporated a lifting mechanism to lift it up equal to the top of the drawer system and then it could be slid out from there over the top of the drawer system, but I scrapped that idea and went to a fixed position holder when plan A ended up not working, but as you said they are fairly heavy, so going with a fixed position holder will be pretty frustrating in the long run. Hmm...I wonder if I might be able to modify my original jerry can holder idea to work, I will have to mock everything all up again tomorrow and measure it to see if it is possible. Thank you!
As for the Pelican Case mount, I am still unsure what to do. When the pump/filter system in that case is all finished, it will be an expensive and hard to duplicate item, which I would hate to lose if some terrible person should decide to break into my vehicle. I really like the idea of being able to take the whole thing out but I would also like to be able to use a padlock to lock it in place while it is in the vehicle. Any ideas on a mounting for the Pelican Case that can be secured with a lock but can then be removed when unlocked?
Had a bright moment! (Not happening to often LOL)
If you could incorporate a top loading jerry can holder you can drop the empty can in it and fill up with a hose or external source. The holder is bolted inside on the wall.
http://www.frontrunneroutfitters.com/images/products/506.jpg
As for the case: How cramped will it be inside when all is finished? Can you follow the route of the hotel mini safes which are bolted to something and the bolts are only accessable when the door is open. You bolt the case on the inner wall maybe with wingnuts and lock it with the padlock option of the case. Do you get my drift?
rrclassicbt550
Farmer Jon
Had a bright moment! (Not happening to often LOL)
If you could incorporate a top loading jerry can holder you can drop the empty can in it and fill up with a hose or external source. The holder is bolted inside on the wall.
http://www.frontrunneroutfitters.com/images/products/506.jpg
As for the case: How cramped will it be inside when all is finished? Can you follow the route of the hotel mini safes which are bolted to something and the bolts are only accessable when the door is open. You bolt the case on the inner wall maybe with wingnuts and lock it with the padlock option of the case. Do you get my drift?
Hmm...I see what your saying but I am not sure that particular holder will work because the seat belt retractor is directly above where the jerry can is going to be. Given its location I think it is going to need to have a lower front section so the jerry can be lifted and then tilted to get it out. I have a Safety Syphon that I could use to syphon the water into the jerry can when its place but I am not the most coordinated person, so I am a little worried I may spill water everywhere. I will have to give that filling process a try though. Thanks
I mocked up the stuff today and it looks like I may be able to modify my original design to make a jerry can holder with a lifting mechanism that fits. I am going to try making one to see if it works...if it doesn't work out though, I am going to go with a fixed holder like the one you suggested but a little lower profile for easier access.
In regards to the Peli Case, its an extremely tight fit with all the water systems equipment in there. I like the simplicity of attaching it with something like wing nuts but I don't think I will be able to have that kind of access when its all finished. The mount is going to have to connected and disconnected from the outside. The mini safe style attachment is a good idea but I don't think it will work for this particular application. I will keep it in mind for some of my other projects though. Do you have any other ideas that might work?
Thank you very much for you suggestions and ideas, I really appreciate your help!
Last edited:
rrclassicbt550
Farmer Jon
Possible mounting system?
While researching disconnectable mounts (for the Pelican Case), I came across these http://www.polyperformance.com/shop...-Release-Fire-Extinguisher-Mount-p-20655.html. The price is $65 each, which means they are pretty darned expensive considering I would need to buy 2 of them and then immediately have to modify them to fit my purposes. They look like they would be quick and easy mounting system but they also look like they shouldn't cost anything like $65 each. So I am hoping for some advice about these. Do any of you have any experience with these? Are they worth the price? Would it be better to buy 2 and modify them or see if I can make something similar for less?
Any thoughts or opinions would be greatly appreciated.
Similar threads
- Replies
- 4
- Views
- 653
- Replies
- 4
- Views
- 2K
- Replies
- 2
- Views
- 1K
- Replies
- 0
- Views
- 157

