You are using an out of date browser. It may not display this or other websites correctly.
You should upgrade or use an alternative browser.
You should upgrade or use an alternative browser.
The Rolling Restoration & Customization Of My 88' Range Rover Classic
- Thread starter rrclassicbt550
- Start date
headdamage
Observer
On the subject of cruise control; when Lamorna Garage helped me do the RHD to LHD and related work to my 200tdi Range Rover we used the complete cruise control system from a NAS RRC and fitted to the 200tdi. Works great, the only part that needed to be made was a bracket to hold the vacuum bellows actuator.
rrclassicbt550
Farmer Jon
Update on the brakes....
The Rover is finally back up and running. Honestly, it feels like it is now running better than it ever has during the time I have owned it and I am supremely happy to have it back on the road as my daily driver.
Like the title of this thread states, this is an ongoing process of customization as well as a rolling restoration. So, whenever I find myself working on something, I try my best to rebuild, replace, or restore it when time and finances allow. Having this frame of mind also means I use phrases like, "Since, I'm in there this far already, I might as well work on that too" or the other variation, "While I have it apart, I might as well, (rebuild, replace, restore) that too, because I don't want to have take all this back apart again later on".
With that being said, I will move on to more about the braking issue(s). Because I suspected a piston might be sticking in a caliper. I figured since I was already going to have it all apart, I would go ahead and rebuild or replace everything I could.
When I was buying parts, I found a set of remanufactured Lockheed rear calipers for $53 each, but remanufactured front calipers were cost prohibitive. Instead, I chose to buy two rebuild kits ($35 each) and do it myself, after all as Jeremy Clarkson has said on many occasions “How hard can it be?”. I also purchased Brembo factory replacement rotors and matched front and rear pads to finish out the list for this particular trip to the parts store. All in all, it wasn't too expensive and made a world of difference to the way the Rover drives and handles while braking.
When I did end up getting it all apart to inspect things further. It turned out there was more than just one piston in one caliper that was sticking, it was more like two or three piston in each of the front calipers were sticking to some degree. After I finished rebuilding the front calipers and replacing the rear calipers, it fixed the twitchy handling characteristics while both driving normally or under braking, and it also fixed the annoying occasional brake squeal issue, but it did not fix one issue...the brakes gradually building up pressure until they were locked up solidly...but more on that in a bit.
Here are some of the pictures I took along the way, as always if you have any questions just ask.
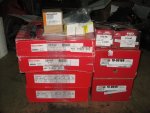
Nice stack of new parts...
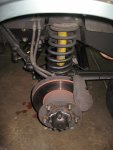
As you might be able to see by the spots of power steering fluid on the ground I will have another issue to address later on, the power steering box.
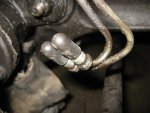
These little rubber boots worked fantastically, not one drop came out during the entire time I had the brake system all apart. They are just tube boots or thread boots and cost something like 4 for a $1.50 or something like that.
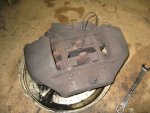
Notice here the wear sensor is still in place...
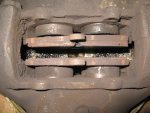
And here it is not, darn thing fell out when I was taking the retaining clips out. I am really not sure why my low pad warning light did not come on before this point. Also notice the super uneven pad wear. One surface is angled and the other surface is almost completely gone. This is the caliper that had three sticking pistons.
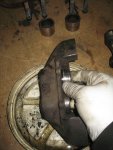
Firm grip and steady pressure was all I need to get the pistons out, but if they are stuck in there, an air nozzle or grease gun could be used to force the pistons out.
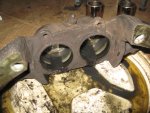
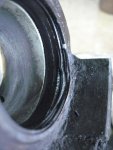
This is what the pitting on the side of a piston will do to the seals, and also why they will stick out and not go back in properly.
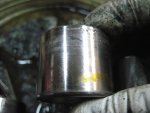
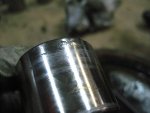
These pictures are of two of the pistons that had rust and chrome lifting. There was only one out of the eight in the front calipers that did not have rust pitting.
The Rover is finally back up and running. Honestly, it feels like it is now running better than it ever has during the time I have owned it and I am supremely happy to have it back on the road as my daily driver.
Like the title of this thread states, this is an ongoing process of customization as well as a rolling restoration. So, whenever I find myself working on something, I try my best to rebuild, replace, or restore it when time and finances allow. Having this frame of mind also means I use phrases like, "Since, I'm in there this far already, I might as well work on that too" or the other variation, "While I have it apart, I might as well, (rebuild, replace, restore) that too, because I don't want to have take all this back apart again later on".
With that being said, I will move on to more about the braking issue(s). Because I suspected a piston might be sticking in a caliper. I figured since I was already going to have it all apart, I would go ahead and rebuild or replace everything I could.
When I was buying parts, I found a set of remanufactured Lockheed rear calipers for $53 each, but remanufactured front calipers were cost prohibitive. Instead, I chose to buy two rebuild kits ($35 each) and do it myself, after all as Jeremy Clarkson has said on many occasions “How hard can it be?”. I also purchased Brembo factory replacement rotors and matched front and rear pads to finish out the list for this particular trip to the parts store. All in all, it wasn't too expensive and made a world of difference to the way the Rover drives and handles while braking.
When I did end up getting it all apart to inspect things further. It turned out there was more than just one piston in one caliper that was sticking, it was more like two or three piston in each of the front calipers were sticking to some degree. After I finished rebuilding the front calipers and replacing the rear calipers, it fixed the twitchy handling characteristics while both driving normally or under braking, and it also fixed the annoying occasional brake squeal issue, but it did not fix one issue...the brakes gradually building up pressure until they were locked up solidly...but more on that in a bit.
Here are some of the pictures I took along the way, as always if you have any questions just ask.

Nice stack of new parts...

As you might be able to see by the spots of power steering fluid on the ground I will have another issue to address later on, the power steering box.

These little rubber boots worked fantastically, not one drop came out during the entire time I had the brake system all apart. They are just tube boots or thread boots and cost something like 4 for a $1.50 or something like that.

Notice here the wear sensor is still in place...

And here it is not, darn thing fell out when I was taking the retaining clips out. I am really not sure why my low pad warning light did not come on before this point. Also notice the super uneven pad wear. One surface is angled and the other surface is almost completely gone. This is the caliper that had three sticking pistons.

Firm grip and steady pressure was all I need to get the pistons out, but if they are stuck in there, an air nozzle or grease gun could be used to force the pistons out.


This is what the pitting on the side of a piston will do to the seals, and also why they will stick out and not go back in properly.


These pictures are of two of the pistons that had rust and chrome lifting. There was only one out of the eight in the front calipers that did not have rust pitting.
Last edited:
rrclassicbt550
Farmer Jon
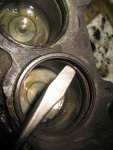
I used a screwdriver that had rounded edges so no accidental scrapes or gouges could happen.
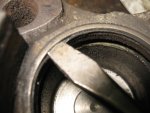
I slipped the screwdriver in between the old seal and the old retaining ring to reduce the likelihood of an accidental gouge.
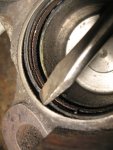
I then gently twisted the screwdriver to pop the old retaining ring out without bending it, which was helpful because had to re-use one later on.
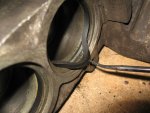
Having fine pointed scribes and inspection tools was a big help when trying to get the inner seal out.
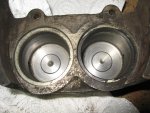
The left side clean, the right side up next.
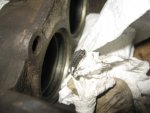
This is the amount of grime I cleaned out of the inner seal groove on the first pass.
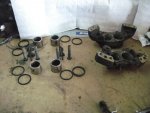
Old parts out and laid out to help aid the memory for reassembly
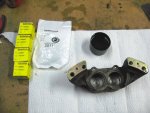
Here are the new parts, the part numbers should be visible if you enlarge the picture. Also, a small tip, I used a cap from an old can of spray paint to hold the new brake fluid needed to dip the seals and pistons in; it was cheap and easy to find.
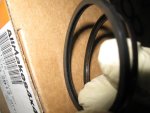
The first seal is more of a dust sweeper to clean the piston. It uses the retaining ring and is easy to tell from the inner seal because it has a groove in the middle.
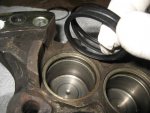
Here is the retaining ring and the two seals together to illustrate the difference between them.
Last edited:
rrclassicbt550
Farmer Jon
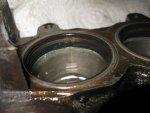
This what they look like when they are seated in and ready to go.
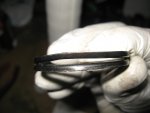
This is what a retaining ring will look like if you get even a little bit too aggressive with the hammer. Trust me it was very easy to make this mistake. It looked like it was seating in nicely, I then tapped a few more times, only to find out it was ever so slightly hanging up on to the edge. This is why it is a good idea to take care with the screwdriver while popping out the old retaining rings, because I had to re-use one because of that mistake.
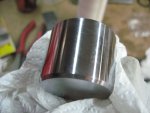
This is what a shiny new piston looks like, notice no rust pitting or chrome lifting.
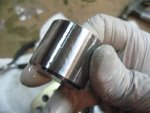
Lube it up with brake fluid
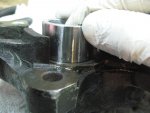
Then make sure it is aligned straight.
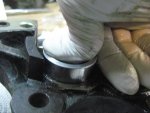
Then firmly but steadily press it into place. There is no need for a ton of force just keep it steady and firm. WARNING: WEAR SAFETY GLASSES, when pushing the pistons back in, it may force brake fluid to squirt out of the caliper (it is a hydraulic system after all) and that brake fluid could easily end up in your eye. I didn't feel anything hit my face but when I finished up and took my safety glasses off, I noticed a few droplets were on the lenses. So be careful.
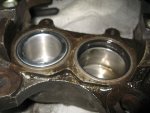
One in...
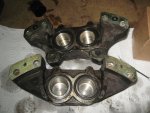
All in...
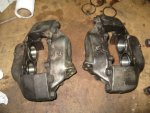
All reassembled and ready to go back on.
Last edited:
rrclassicbt550
Farmer Jon
Rotor Install...
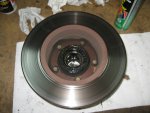
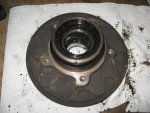
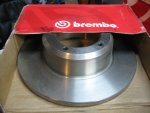
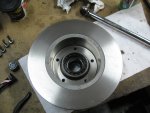

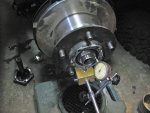
I used a magnet dial indicator to make sure I had the proper amount of movement in the wheel bearings. It may seem like a pain but it only takes an extra minute, it makes sure my work is within proper specs and will ease my mind while driving in the future.
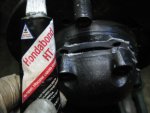
Hondabond High Temp, I swear by this stuff. I have used other high temp silicones but this is by far and away the best one in my opinion. I have never had anything leak after using this as the sealant.
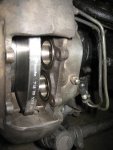
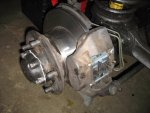
One of the front brakes all finished up with the rebuilt caliper, new rotor, new pads, and new retaining clips.
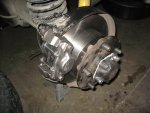
One of the rear brakes all finished up with the new caliper, rotor, pads, and retaining clips.


I used a magnet dial indicator to make sure I had the proper amount of movement in the wheel bearings. It may seem like a pain but it only takes an extra minute, it makes sure my work is within proper specs and will ease my mind while driving in the future.

Hondabond High Temp, I swear by this stuff. I have used other high temp silicones but this is by far and away the best one in my opinion. I have never had anything leak after using this as the sealant.


One of the front brakes all finished up with the rebuilt caliper, new rotor, new pads, and new retaining clips.

One of the rear brakes all finished up with the new caliper, rotor, pads, and retaining clips.
Last edited:
rrclassicbt550
Farmer Jon
Now, for the other issue, the brakes gradually increasing pressure until they are locked on and the brake pedal is rock solid.
After I rebuilt the calipers, replaced the rotors, and bled the brakes, it still locked all of the brakes on after a bit of driving. So, while looking into the issue further, and fallowing the advice of Mack73, I consulted the rave manual and found a picture of a spacer that goes between the brake servo and the firewall. Interesting thing is that my 88’ Rover never had one, the new brake servo didn’t come with one, and there was no spacer on the 96’ Discovery that I pulled the pedal assembly out of.
I did search for a while to find out where I could buy a spacer, but it didn’t take long to figure out that finding a spacer would be like a quest to find the last remaining Dodo. So I decided to make my own spacer. Thankfully I hadn’t gotten around to throwing out my old brake servo yet, which meant I could use it for creating a template. I then made spacer from the template with in one night and with very little fussing about. It worked out beautifully and when the spacer was done it went into place easily. I just unbolted the servo from the firewall, gently pulled the servo back and slipped the spacer in, then bolted it back up to the firewall. Problem Solved.
Now the Rover drives wonderfully, and I feel like I got a 20 hp boost without the brakes constantly being on. The other benefit is that with the pads no longer constantly dragging on the rotors and the spacer making the servo function properly, almost all of the twitchiness under hard braking has gone away (I still need to buy new radius arms though) and another benefit is my gas mileage has gone up to around 16mpg instead of 11-12mpg.
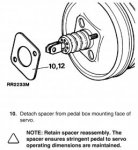
The mythical factory spacer...
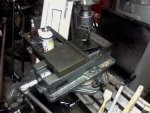
Using the milling machine with a boring attachment.
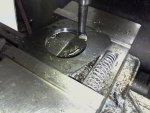
2.5" final diameter, just a clean up pass left to do.

One last check on the old brake servo to make sure it will fit the new servo properly.
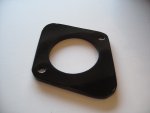
Picture for posterity...
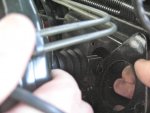
Then onto the new servo...
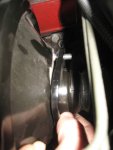
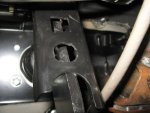
The pedal spacing before showing it contacting the pedal assembly and not being able travel fully.
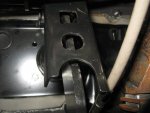
The pedal spacing after, it may only be a 1/4" but it was the difference between working properly and not working properly.
After I rebuilt the calipers, replaced the rotors, and bled the brakes, it still locked all of the brakes on after a bit of driving. So, while looking into the issue further, and fallowing the advice of Mack73, I consulted the rave manual and found a picture of a spacer that goes between the brake servo and the firewall. Interesting thing is that my 88’ Rover never had one, the new brake servo didn’t come with one, and there was no spacer on the 96’ Discovery that I pulled the pedal assembly out of.
I did search for a while to find out where I could buy a spacer, but it didn’t take long to figure out that finding a spacer would be like a quest to find the last remaining Dodo. So I decided to make my own spacer. Thankfully I hadn’t gotten around to throwing out my old brake servo yet, which meant I could use it for creating a template. I then made spacer from the template with in one night and with very little fussing about. It worked out beautifully and when the spacer was done it went into place easily. I just unbolted the servo from the firewall, gently pulled the servo back and slipped the spacer in, then bolted it back up to the firewall. Problem Solved.
Now the Rover drives wonderfully, and I feel like I got a 20 hp boost without the brakes constantly being on. The other benefit is that with the pads no longer constantly dragging on the rotors and the spacer making the servo function properly, almost all of the twitchiness under hard braking has gone away (I still need to buy new radius arms though) and another benefit is my gas mileage has gone up to around 16mpg instead of 11-12mpg.

The mythical factory spacer...

Using the milling machine with a boring attachment.

2.5" final diameter, just a clean up pass left to do.

One last check on the old brake servo to make sure it will fit the new servo properly.

Picture for posterity...

Then onto the new servo...


The pedal spacing before showing it contacting the pedal assembly and not being able travel fully.

The pedal spacing after, it may only be a 1/4" but it was the difference between working properly and not working properly.
Last edited:
rrclassicbt550
Farmer Jon
I had this issue an an old elcamino - The issue was the master cylinder rod where it connects to the pedal was out of adjustment - the brake pedal never allowed the MC to return fully, so each time you applied the brakes only 95% of the fluid returned. Basically as you use the brakes, they are slowly being applied little by little. When you let it sit- the fluid was allowed to bleed back into the MC.
I hope that makes sense - but it took me FOREVER to figure it out.
You Sir, saved me a ton of time! Thank you so much for your advice, that would have taken me FOREVER to figure out as well!
rrclassicbt550
Farmer Jon
On the subject of cruise control; when Lamorna Garage helped me do the RHD to LHD and related work to my 200tdi Range Rover we used the complete cruise control system from a NAS RRC and fitted to the 200tdi. Works great, the only part that needed to be made was a bracket to hold the vacuum bellows actuator.
Thanks for the advice! I will definitely keep that info tucked away in my notes for when I am able get to the engine swap. Do you have any pictures of your CC set-up?
You Sir, saved me a ton of time! Thank you so much for your advice, that would have taken me FOREVER to figure out as well!
You're welcome. I'm glad it solved your problem as well. :beer:
rrclassicbt550
Farmer Jon
Status Update...
The status update:
Well, things have been busy, very busy. I finished up my last final and graduated two weeks ago. Since then, I have been splitting my time between working and preparing for a month long vacation to celebrate graduating. I am heading to California and Nevada in the Rover for a good few weeks of driving, camping, hiking, mountain biking, and any other bit of fun I can fit in.
I have been doing what I could to get the Rover ready when time has allowed, but now it is down the final week before I have to leave. So, stick with me, there is going to be big stuff, small stuff, and other misc. stuff. I know I won’t get my whole “to do list” done, but I am going to give it one heck of a shot!
I will post some pictures and the write-ups of the “Done” stuff later on today (have to take a couple more pictures). For now, I am going to post the list and then get some sleep. Tomorrow is going to be a big day, I am starting the long range fuel tank install.
To Do List:
Neoprene insulation (started)
Radiant barrier (waiting on delivery)
Rear Shock mounts/install the long travel shocks
Trans and Transfer fluid changes and filter change
Oil change
Long-range fuel tank install (includes fabrication and a fuel pump rebuild)
New fuel filter
Cruise control (have to get it wired in so that it works with the later model steering wheel switches)
Horn (same thing as above)
Swap out driver side rear door lock actuator
Hope to get done list (but probably won't get done):
Any random stuff that ALWAYS seems to pop up before a deadline
Sway bar install
Water system
Install the smaller power inverter
New softer seat foam for the front two seats
Done List:
Fixed the slow lifting passenger side window motor
Swapped out extremely leaky power steering box for a much better one that doesn’t leak
Alternator swap/cluster f$#!/repair
Fixed the A/C system
Charged the A/C system
MedicalCowboy
Adventurer
You're doing great bud. I always enjoy your posts. Good luck with the "hope to get done list" lol
rrclassicbt550
Farmer Jon
Fixing the slow window
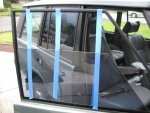
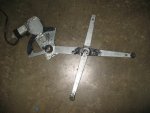
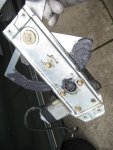
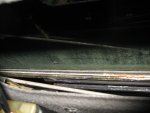
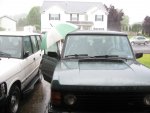
I know its not strictly something that "needed" to be done, but it has been annoying me for a while now so I fixed the slow lifting passenger side window. It turned into a bit more of a chore than I thought it would be, but I fixed in the end (it just took a little longer). I ended up changing out the window glass for a spare un-tinted window I had in my parts stash. Changing the rubber seal that surrounds the sits on top of the door/surrounds the base of the window. Overall, it needed an adjustment of the window frame, change of the window glass because the tinted window glass did not fitting properly, and the lubing up of the window channels/window lift motor pivot points.
I used the blue painters tape to hold up the window while I took the lift motor out. I would highly recommend only attaching the painters tape to the outside of the window, because the tape will pull off some of the tint when removing the tape. I didn't care because I was replacing the window anyway, not to mention I am going to have them re-tinted a bit later on down the road. When I got the lift motor out, I cleaned it, check to make sure it functioned properly, then lubed it up, and put it back in. And wouldn't you know, just as soon as I finish that task up and move on to doing the neoprene insulation, its starts pouring rain.


rrclassicbt550
Farmer Jon
rrclassicbt550
Farmer Jon
Power steering box..
Unfortunately I do not have the time to rebuild my power steering box so I had to get a used one. I still have my original box, which I will rebuild later on; for now, I will run the used one. Thankfully, the used one does not seem to leak at all, which is a nice change of pace. My old one went from not leaking at all, to going through a liter of ATF a month (if not more).
I am sorry I didn't take the more pictures for this install. I got a bit carried away with the tools and didn't think to pick up the camera. It is pretty straight forward though, the only issue was being careful to not spill ATF all of the driveway. When I rebuild the my old power steering box I will definitely remember to take pictures though.
I only have a picture of the newer one just after I finished installing it.
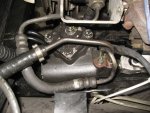
The drop of ATF next to the hose fitting is what dripped out of the hose as I was installing it, NOT from a leak. It has not put one new drop on the driveway....yet (it is a Rover after all).
Unfortunately I do not have the time to rebuild my power steering box so I had to get a used one. I still have my original box, which I will rebuild later on; for now, I will run the used one. Thankfully, the used one does not seem to leak at all, which is a nice change of pace. My old one went from not leaking at all, to going through a liter of ATF a month (if not more).
I am sorry I didn't take the more pictures for this install. I got a bit carried away with the tools and didn't think to pick up the camera. It is pretty straight forward though, the only issue was being careful to not spill ATF all of the driveway. When I rebuild the my old power steering box I will definitely remember to take pictures though.
I only have a picture of the newer one just after I finished installing it.

The drop of ATF next to the hose fitting is what dripped out of the hose as I was installing it, NOT from a leak. It has not put one new drop on the driveway....yet (it is a Rover after all).
Similar threads
- Replies
- 4
- Views
- 667
- Replies
- 4
- Views
- 2K
- Replies
- 2
- Views
- 1K
- Replies
- 0
- Views
- 159

