The Rolling Restoration & Customization Of My 88' Range Rover Classic

rrclassicbt550

Farmer Jon
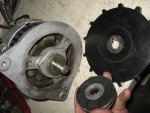
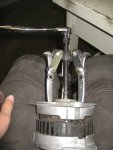
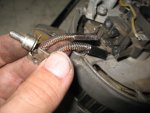
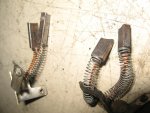
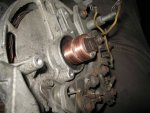
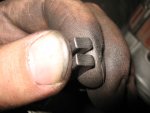
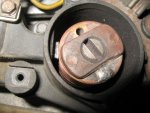
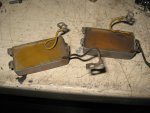
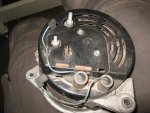
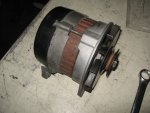
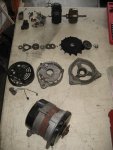
The cluster f$%! that became my temporary/current alternator....

You ever heard the statement "you win some and you lose some". Yeah, I lost on this one...at least initially. I came out alright in the end, but it took some doing get there.

So, the front bearing, and brushes have been going in my alternator and I figured I should replace it before the trip; however, I did not want to by a new one because I have been toying around with a couple ideas for other alternators to use when I put in the 6.2. I just need an alternator to last until I do the 6.2 swap.

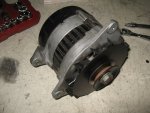
Long story short, I bought a used alternator for fairly cheap on ebay. When it arrived, I installed it and.....yup you guessed it...it was worse than the one I had just swapped it for, I mean this thing was so loud I could hear it inside the house. After "walking it off" for a bit, I came back with a clearer head. I pulled it back out and started inspecting the issue. It turned out, the used one had a bad rear bearing and armature.

Hindsight is always 20/20, and now I realize I could have done many other things rather than buy a used Lucas alternator off of ebay, but...well, just going to have to chalk it up to a life lesson. The bright side was and is that I learned something new; how to make one good alternator out of the two bad ones. I figured I had nothing to lose and one good alternator to gain. So I pulled them apart and that is how I found out that the front bearing and brushes were bad in mine and the back bearing and armature was bad in the other.

Here are the pictures :)
IMG_1224.JPGIMG_1242.JPGIMG_1243.JPGIMG_1244.JPGIMG_1226.jpgIMG_1231.JPGIMG_1249.JPGIMG_1251.JPGIMG_1252.JPGIMG_1253.JPG
 

rrclassicbt550

Farmer Jon
Fixing the A/C

The A/C hoses finally gave up on me about a month ago and all of the freon leaked out. Since, I am going to Cali and Nevada during July (with the girlfriend), I decided it should be a priority to get the A/C working again for reasons of comfort and preservation of a....good/peaceful vacation. I know I could deal with the lack of A/C, but I also know that I do not want to have to deal with or listen to an unhappy girlfriend for 4 weeks and 3000 miles.

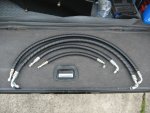
I priced out what it would cost to buy the hoses from various parts suppliers and it redefined the term "sticker shock" for me (I bought my Rover for less than those "replacement hoses" cost), so I chose to have hoses made instead. I found a shop locally that did a wonderful job for a reasonable price, and they had better options for protecting the hoses from damage or chaffing.

I won't bore you with more pictures of my dashboard all apart, because there are quite of few of those in this thread already. Instead, I will post pictures more focused on the A/C hose install.

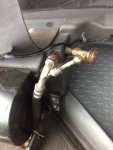
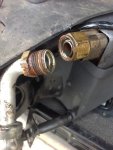
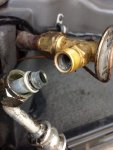
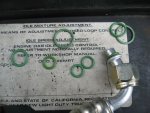
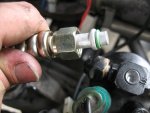
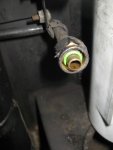
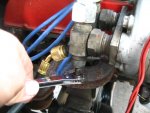
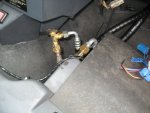
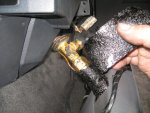
During the disassembly, only two hose connections gave me trouble; those were the connections to the evaporator coil inside the car. I got them off in the end, but they put up a good fight. They were corroded into position, which you may be able to see in the pictures.
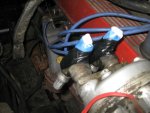
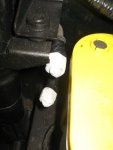
As my Rover is my daily driver I needed to keep driving it during the time I was having the hoses made, so I used the fingers from a latex work glove to protect the ports on the A/C pump as well as the ports on the condenser.

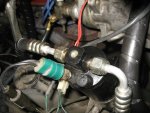
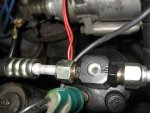
The new hoses are most definitely on the burly side. They should last a good long time and they were nice enough to give me replacement O-rings too.


IMG_1726.JPGIMG_1720.jpgIMG_1724.jpgIMG_1723.jpgIMG_1320.JPGIMG_1322.jpgIMG_1318.JPGIMG_1317.JPGIMG_1331.JPGIMG_1323.jpg
 

rrclassicbt550

Farmer Jon
IMG_1332.JPGIMG_1335.JPGIMG_1336.JPGIMG_1339.JPGIMG_1341.JPG
The new hoses went in easily and bolted right up, no fiddling around needed. So if you are thinking about replacing your hoses, you may want to check with your local shops. I paid well under half of what the parts distributors wanted, and I got better hoses withe extra protection.
IMG_1378.JPG
 

rrclassicbt550

Farmer Jon
I will post the write up for charging the system tomorrow, I am starting to nod off. Need to get to some sleep. I apologize if there were any typos or areas that didn't/don't make sense. If you have any questions please do feel free to ask.
 

rrclassicbt550

Farmer Jon
Charging the Air Conditioning system

When I bought my Rover the A/C didn't work. In previous posts (around the time I did the Lizard Skin and rebuilt the heater assembly) I took apart, cleaned, and checked my A/C system. Back then my A/C compressor was the source of the leak, so I bought a good used one as a replacement. After testing it to make sure it was indeed leak free, I installed it and had a leak free A/C system again.

The problem I then had to deal with was what to do about the refrigerant/freon to use. R-12 is no longer being produced and prices are very high when some can be found. So I asked around to see what other Land Rover owners were doing. The answer I continuously got was, "convert it to R-134a." As I had just invested time and money into getting the R-12 system ready to go, doing a conversion was not something I wanted to do.

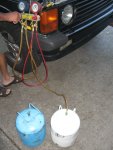
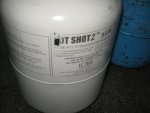
The thing is, there are a huge number of restaurants, office buildings, homes, vehicles, and many types of equipment that run on R-12. Meaning there is going to be replacement refrigerants out there. Here are two, Hotshot (blue tank) and Hotshot 2 (white tank). I used Hotshot the first time around. I didn't post the information about what refrigerant I used though, because I wanted to run the A/C system with the Hotshot in it for awhile to test it before I could genuinely say that I recommend it. Now having run it for awhile, I have to say that it performed beautifully and I would recommend it. I was very happy with the way it performed, that is until my hoses gave up and started leaking it out.

After replacing my hoses, I decided to try out Hotshot 2. It is another replacement for R-12 and it seems to work beautifully too. I will have to run it for awhile before I can recommend it for sure though. Driving through California and Nevada in July should be a pretty good test though.

Here are the pictures I took while charging the system...

IMG_1345.jpg
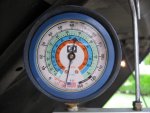
First thing to do was a vacuum check.
IMG_1344.JPG
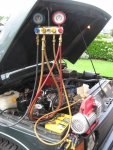
Hooked up the gauges, then opened the low side valve on the back of the A/C compressor. IMG_1347.JPG
Then pulled the vacuum, dropped immediately to 30 inches of mercury. Ran the vacuum for 15 minutes to make sure it was leak free and also to get any moisture out of the system. Then let it sit with the vacuum off for 15 minutes to make sure it held the vacuum pressure. Held pressure pefectly.
IMG_1355.JPG
Then time to begin charging the system.
IMG_1356.JPG
The refrigerant being used in the white tank is Hotshot 2. The blue tank is Hotshot, which is the refrigerant I used last time.
IMG_1352.JPG
During the time the system is being charged or if it is running low, bubbles will be visible in the sight glass on top of the filter drier.
IMG_1353.JPG
When fully charged it should be clear, like it is in the picture. It is an easy way to check to see if the system is low on refrigerant. If there are bubbles, then its low, meaning there is a leak. If it is clear, everything is good and the system is leak free.

Please remember that refrigerant is not like fuel or oil, it only circulates in the system, it will NOT be used up or diminish over time. As long as the system is leak free, it doesn't matter whether it has been in there for 5 days or 15 years, the same amount of refrigerant will be in the system as the day it was charged and it will still be usable. So for those people who say "oh it was just low", more likely than not, their system has a leak; unless it was not charged properly the last time the system was serviced.
 

rrclassicbt550

Farmer Jon
The status update on the Rover at the moment...

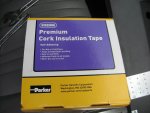
The current status on the Rover is...the insulation is almost done, the rear shock mounts have been modified so now the rear shocks are ready to go in, and the tank is putting up a pretty good fight. I will get it in, but I had to have the filler neck modified, custom fuel lines made, cut off the front tank mount from the frame, cut out a pretty good sized portion of the rear crossmember, and tomorrow I am going to be fabricating the new mounts. Oh and I had to cut out the support bars to my receiver hitch...I REALLY did not want to have to do that. I hope I can weld them back in at a different angle so that I can keep the ability to use my hitch, but it isn't looking good at the moment. If I can't make it work does anyone know if Hidden hitch or U-haul makes a low profile receiver hitch for the Classic?

Oh and the "hope to do list" has now become the "I had a dream list" haha. Oh well, just do that stuff when I get home.
 

Trenchfighter

New member
Good morning,

This is an amazing thread with some world class work, I started reading last night and am very impressed with the skill and especially the ingenuity!

I just picked up a 1995 RRC on trade, motor is supposed to be rebuilt, (but leaks oil like a sieve) has 4 bald tires, but has a good solid body...a rare find in Michigan indeed, but Ive wanted one forever and the price was good.

This is going to be the family adventure vehicle and tow rig for our four wheelers so I will be building it for that. Luckily for me I'm 5'8" so I can forgo the first big chunk of the modifications! My wallet is happy about that! As Ive learned from RedRover, LtFuzz and you, it seems like like the 6.2 is the way to go...so I will need to hit you up for some guidance when the time comes if your ok with it.

Thanks for the hard work in building this thread, I know it takes a lot of time out of working to take all the pictures and post all of the information in the threads....but this will be your Rover legacy! and it will be invaluable for people like me. So, thanks for all of the extra effort, it is greatly appreciated!

Trenchfighter
 

rrclassicbt550

Farmer Jon
Good morning,

This is an amazing thread with some world class work, I started reading last night and am very impressed with the skill and especially the ingenuity!

I just picked up a 1995 RRC on trade, motor is supposed to be rebuilt, (but leaks oil like a sieve) has 4 bald tires, but has a good solid body...a rare find in Michigan indeed, but Ive wanted one forever and the price was good.

This is going to be the family adventure vehicle and tow rig for our four wheelers so I will be building it for that. Luckily for me I'm 5'8" so I can forgo the first big chunk of the modifications! My wallet is happy about that! As Ive learned from RedRover, LtFuzz and you, it seems like like the 6.2 is the way to go...so I will need to hit you up for some guidance when the time comes if your ok with it.

Thanks for the hard work in building this thread, I know it takes a lot of time out of working to take all the pictures and post all of the information in the threads....but this will be your Rover legacy! and it will be invaluable for people like me. So, thanks for all of the extra effort, it is greatly appreciated!
Trenchfighter

Congratulations on getting the RRC! They are very nice vehicles out of the box, and there is a great deal of potential to make it a family adventure vehicle.

I am always taking as many photos as possible both for referencing back to for times when I find myself saying "how did that go on there again?" or "how was that bit wired?" and also for a kind of bench racing or pleasant look back at what has been done to the Rover. After awhile though, I built up a pretty good sized album (coming up on 4000 pictures), so I thought it would be nice to post some of them to provide a visual aid to those who prefer not to read my sometimes long and drawn out explanations. It is true that it does take extra time to post the information for everyone, but my hope is that it does help or at least entertain other like minded individuals, which makes it worthwhile in the end.

Feel free to ask for advice, although in the area of the 6.2 I doubt I am as knowledgable as RedRover or LtFuzz. I am still studying up on what to do, what not to do, what parts to get, and what needs to be fabricated.

Thank you very much for the kind word and encouragement, I really appreciate it. It helps keep the spirits lifted, especially after this last week.
 

rrclassicbt550

Farmer Jon
Status Update...

So I am not gonna pull any punches, or sugarcoat it. I knew the modifications were ambitions when I started preparing for this trip. I knew it was going to be a pass or a fail situation. Well, even though I called in the help of friends and put in many many MANY hours of work, the Rover is not done and will have to miss out another big adventure. The long range fuel tank was the main focus and the main problem of all this and it took quite a bit of work to make it fit in properly and mount it securely. It is now in and mounted, the fuel pump is rebuilt, it can even run and drive. However, in the 11th hour, the fuel filler that was modified to fit....ended up not fitting...and needs to be modified to work properly. Like all of the other countless issues experienced this week it is solvable, it is just going to take time. Unfortunately, I do not have the time left to fix it and then drive it down.

I have to be in southern California today and there is no possible way I could get down there in time and still be able to have my Rover with me. So as much as I hate to do it (and believe me I do), I am getting on a plane in a few hours and will have to take the girlfriends shiny new truck and listen to all of the comments about my "dirty old Rover" being a no show...again. I know the situation "is what it is" and I should move on but half the fun of the adventure was driving the Rover and having it be a big part of this adventure and now that it isn't coming, well, I am very disappointed. I sure hope all the bad luck I had this week will even itself out at some point. Next time, I am not going to do major or even moderate vehicular surgery so close to a trip deadline.

I did take a bunch of pictures but I don't have the time to do the write ups right now so I will have to do that when I get back from the trip. I am sorry everyone.
 

El Solis

Adventurer
Dude... No apologies! We all feel your pain. My rover has missed many a trip (and me with her) due to lack of time to get the job done right. You will have many more trips to come, she will be ready for you then. Just like a woman... Everything on her time schedule and her way or it's hell to pay :)
 

rrclassicbt550

Farmer Jon
Status Update...

I am back from a vacation that was so amazing; I really didn't want to come home. I suppose that is the mark of a good vacation though. I spent 5 and half weeks off of work and 3 weeks digging myself back out from under the mountain of work that piled up while I was gone; a fair enough trade off I guess. :)

I flew down to Southern California, then headed out to June Lake, Mammoth, Yosemite, Lake Tahoe, Virginia City, Reno, Carson Valley, and then back to So Cal. Spent a bunch of time hiking, did some mountain biking, did some kayaking, lots of driving, and had a ton of fun camping. Almost every day topped the previous one, and there are too many highlights to list and….a few low points that I don’t want to list, but all in all it was very nice to get away and have some fun making great memories.

A few things I learned:

When climb up to half-dome, if you have a hit & miss fear of heights, making the top can be hit or miss too. (I will make it next time dang it)

If you are making good time (otherwise known as riding very quickly) while mountain biking the Yosemite loop trail, bear bells on handle bars don’t work when traveling 20+mph. So beware of startling a bear that is sleeping in the brush 30 feet to the right of the trail. The girlfriend and I were very lucky the bear turned and ran away instead of continuing to run towards us (which it had started to do initially).

At some of the campgrounds in the Yosemite valley there are now filtered water stations for refilling drinking containers, so bringing in many gallons of water isn’t entirely necessary anymore. I would recommend bringing a good amount just to be safe, but we brought way, WAY, too much water considering they now have very tasty and cold drinking water on tap.

If you are ever in the Tahoe area, check out Vikingsholm and do some Kayaking in Emerald Bay.

Staying in a “haunted” hotel in Virginia City, really isn’t that bad, and you might just get a good nights sleep afterall.

Honestly, I could keep going but I will wrap it up by saying, each place I went deserved a vacation in and of itself and will need many more visits in the future.

Oh and surprisingly the girlfriend didn’t mention the Rover being a no show. I think the high level of disappointment was evident on my face.

I did miss having the Rover on the trip, but given that I have had quite a few issues getting everything to work properly since I have been back, I now realize that I did make a good choice to suck up my pride and wait to do it the right way the first time rather than cutting corners to fit the deadline. As many of you know, I am terrible at predicting time frames when it comes to doing something to my Rover, both because I always do things the hard way, and because I very much dislike sacrificing quality for lack of time.


Anyway, onto the Rover update:

I think I have finally got the tank in and done. I had a drain plug leak, fuel filler neck leak, and last but not least, a rather interesting fuel pump mounting flange leak. Persistence pays off in the end and I definitely fixed the first and second leaks, but I will find out if I fixed the third leak next time I fill up.

All said and done I have got 40+ hours of trial, error, fabrication, fixing, fitting, tweaking, and solid work just in this long range fuel tank modification alone. If I did it again, I could do it in probably half that amount of time. BUT would I do it again…not sure that I would. It was such a pain in the ***** I was having flashbacks of when I did the steering column modification.

Three small caveats:
One, now that I know how it goes in it would be much MUCH easier.
Two, if I had the body off of the chassis this modification would be even easier. Half of the battle is getting access for cutting and welding.
Third, the long range fuel tank I have is for a later model RRC not my 88’ RRC. If you have a later model RRC with the higher fuel filler door, the later style fuel pump, and have the fuel pump access door in the floor already, this modification may be more of a straightforward swap out.

If you have an earlier RRC like my 88’, have moderate fabrication skills AND you have the body off of the chassis, have at it. However, if you have moderate fabrication skills and you want to do this modification with the body in place, either don’t do it or have a spare vehicle to drive because this is definitely not a weekend job and you will not be at the “moderate” level by the end of it.

If you have the later model RRC, do your homework before doing this swap. It could be easy, it could be hard, not sure as I have the earlier RRC.

However, for any of you who want to do this swap and are a glutton for punishment, I would be happy to take measurements, give advice, and/or provide pictures for reference if you need them.
I have got something like 100 pictures to post about this tank swap but I will start posting those tomorrow because it is getting late and I have a long day ahead of me tomorrow. Sorry guys, but I will try to make it worth the extra days wait.
 

rrclassicbt550

Farmer Jon
Dude... No apologies! We all feel your pain. My rover has missed many a trip (and me with her) due to lack of time to get the job done right. You will have many more trips to come, she will be ready for you then. Just like a woman... Everything on her time schedule and her way or it's hell to pay :)

El Solis,

Thank you very much for the kind words, I really appreciate them. I suppose the upside is now I owe the Rover a trip to test out the modifications. :)
 

Forum statistics

Threads
186,717
Messages
2,889,262
Members
226,872
Latest member
Supreet.dhaliwal
Top