TheGillz Explo Off-Road Trailer via Geotracker90 Build!

GeoTracker90

Adventurer
5-31-08 Part 2

Part 2

DSCF4878.jpg

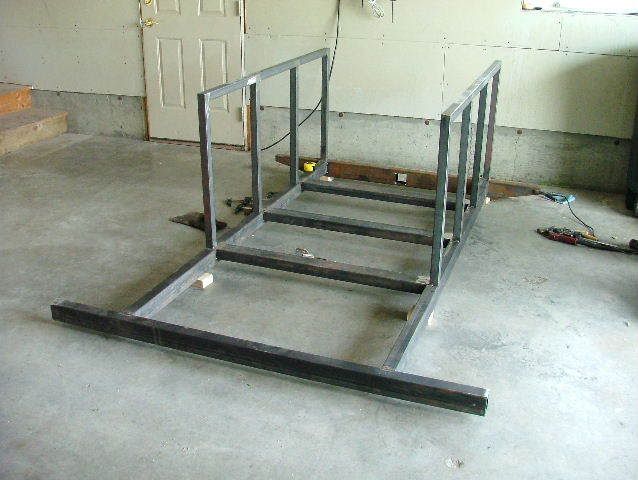
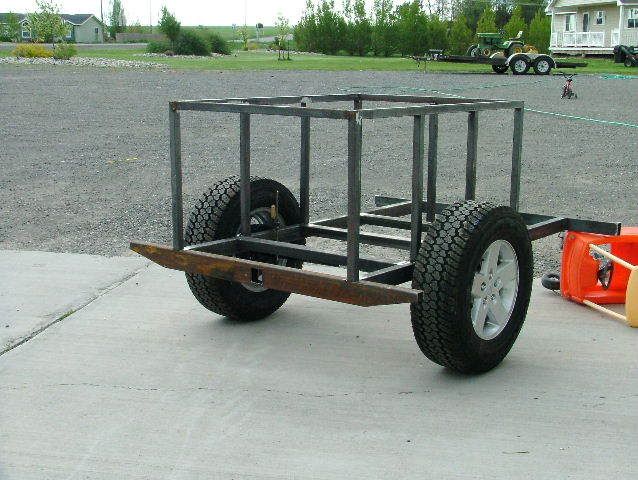
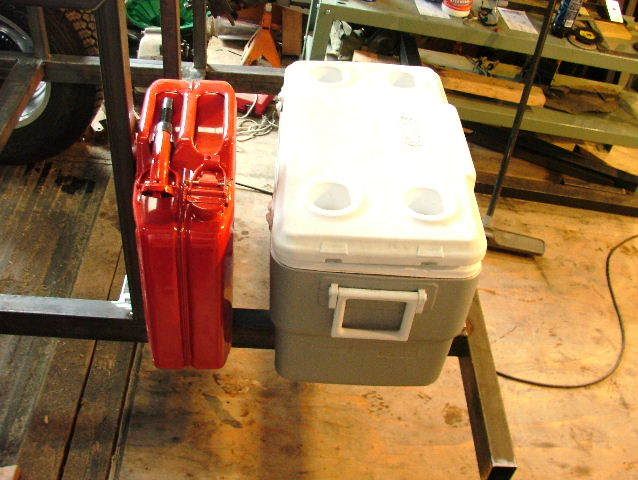
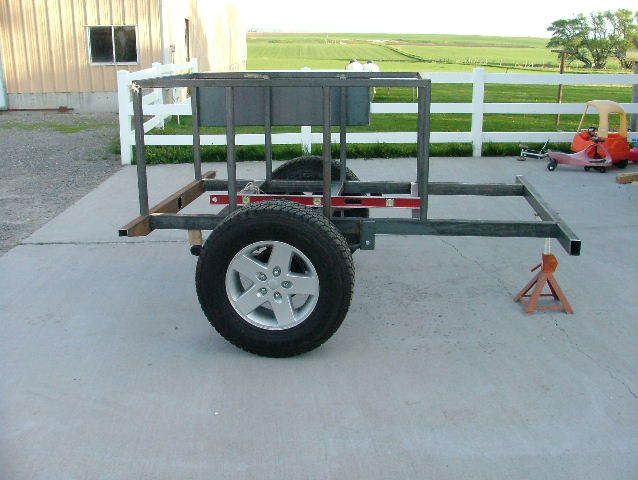
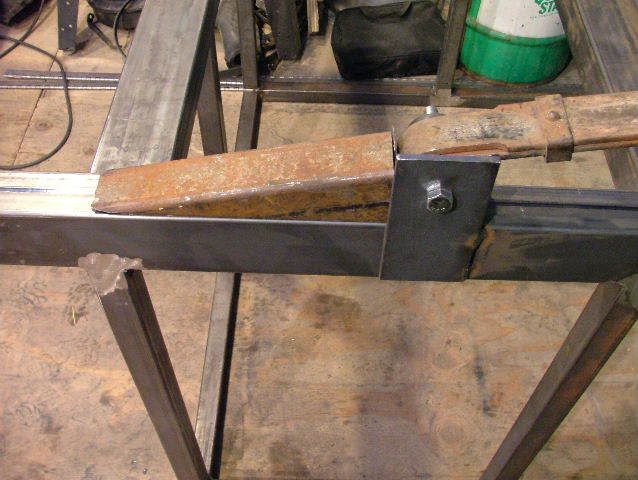
I started to slack for a little bit with the picture taking and got ahead of myself. The rear bumper, main frame rails, cross members, front main cross member and the pre-assembled main box side panel all got tacked into place before I could stop myself.

DSCF4880.jpg

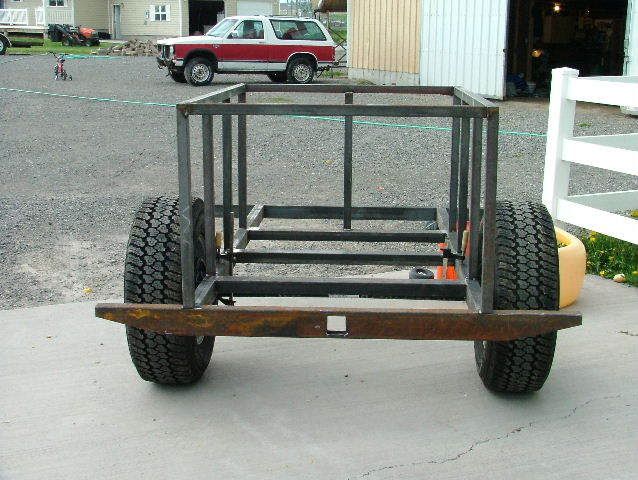
Second pre-assembled side panel tacked into place.

DSCF4881.jpg

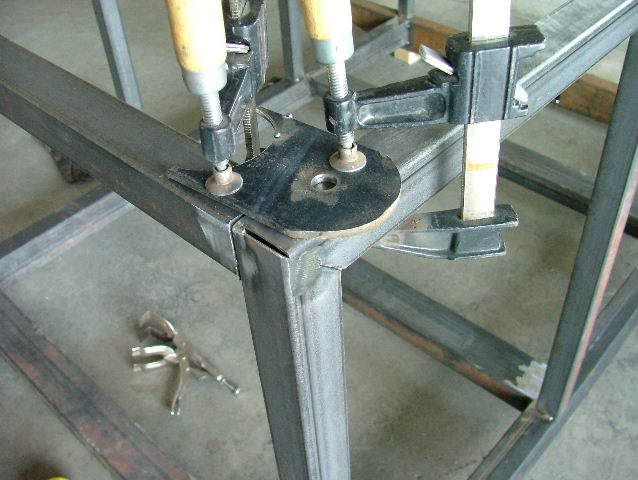
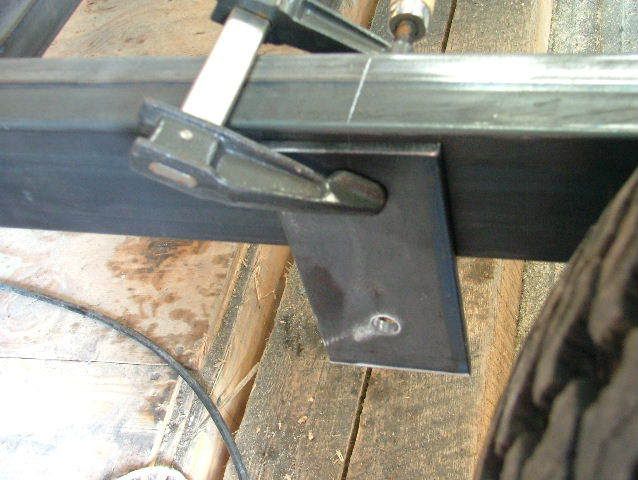
In order to have everything line up and keep it flush a little care needs to be taken. In my case it is as simple as a flat scrap of metal and a couple clamps.

DSCF4883.jpg

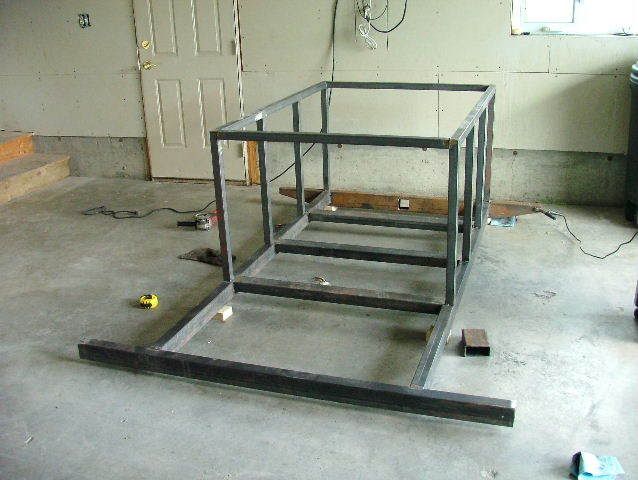
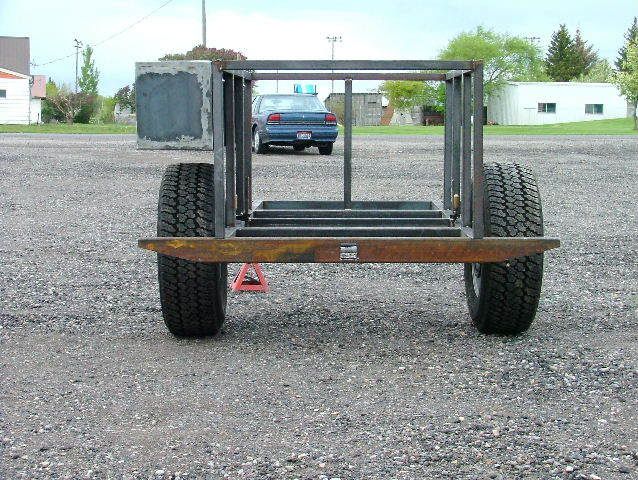
The front and rear upper main box cross bars are in place and keeping the two side panels tied together.

DSCF4884.jpg

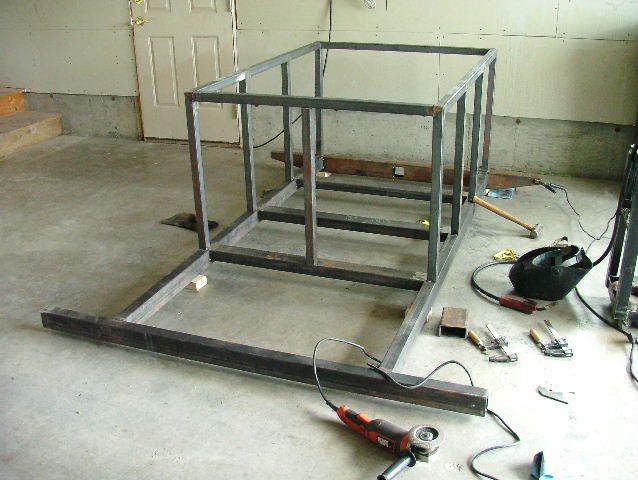
And for a little extra support for the front I added a verticle center support. Trust me, this thing is going to be beefy.

End of part 2

Mike
 
Last edited:

GeoTracker90

Adventurer
5-31-08 Part 3

Part 3

DSCF4885.jpg

Time to move it from the garage back out to the work shop. I used the garage for the initial welding because the cement floor is 1000 time flatter and truer than what the wood floor in my work area is.

DSCF4886.jpg

Shot from the rear to show the relationship between the rear bumper and the tires. Looks pretty good to me. I just slid the axle directly under the frame to roll it around on.

DSCF4887.jpg

I couldn't resist throwing the side box shell on there just to mock it up and see how it looks. All I can say is :jump: .

DSCF4888.jpg

Rear shot with the side box on. I should have measured this while I was out there but, I'm pretty sure that the width of the side box will bring the overall width at the top to within 1/4" - 1/2" of being the same as the rear bumper.

DSCF4889.jpg

Just another gratuitous shot of the side of the trailer with the side box shell. Just can't quite get enough.

DSCF4890.jpg

One last mock up. This is one of the Wedco jerry cans that will reside at the front of the trailer. If my measurements are correct we can fit three of these across the front and be in good shape. I used one of my coolers as a stand in for Clark's stainless steel Colman cooler. The plan is to place two Coolers in this orientation, side by side across the front of the trailer. If you look back at one of the first posts there is a computer rendering of the trailer. The two blue boxes in the front are the coolers. There will also be a spare tire hanging on the driver side of the trailer at the end of the centermost cooler.

I might have gotten some more done but I had to get my youngest helper back home and cleaned up. I think I wore him out today. While I was working on this I would assign him other chores to do. He also played with his cousins a bunch too. Needless to say we are a couple of tired boys! All in all I feel pretty good about what we accomplished in roughly six hours, give or take.

Mike
 
Last edited:

GeoTracker90

Adventurer
I went out to the work shop tonight and spent about another three hours working on the O.R.T. (Off-Road Trailer). Not a lot of progress to look at but I was able to go back and finish weld a lot of the joints that were just tack welded. I did get the front spring hangers, springs, and axle mocked up.

DSCF4898.jpg

This just shows how I lined up the spring hanger with the mark on the trailer frame.

DSCF4899.jpg

I wheeled the trailer out onto the driveway to take some measurements. After leveling out the trailer I measured 23" from the bottom of the frame to the cement driveway.

DSCF4900.jpg

The 23" measurement was with a 3-1/2" block placed between the rear spring and the trailer frame. I have a pretty cool idea for the rear shackle hanger, but you'll have to wait for the pictures.

DSCF4901.jpg

I was looking for a way to tie in the front spring hanger a little more when I saw the drops from tapering the rear bumper. I like it! The hanger will need trimmed a little no matter what so I might weld in the drops and continue the same angle across the spring hanger bracket.

Well that's it kids. The show's over for another day.

Mike
 

stomperxj

Explorer
Lookin good Mike... Trim the bottom corners of the spring hangers off though like this: \_/ or round them off... they will look better... :)
 

GeoTracker90

Adventurer
stomperxj said:
Lookin good Mike... Trim the bottom corners of the spring hangers off though like this: \_/ or round them off... they will look better... :)

...and softer on your skin too!!! :xxrotflma

Mike
 

ntsqd

Heretic Car Camper
stomperxj said:
Lookin good Mike... Trim the bottom corners of the spring hangers off though like this: \_/ or round them off... they will look better... :)
I would do the tops of the plates like that as well. Straight line welds across tubes promote cracks.

Anal that I am, I'd poke a holesaw thru the plates where they are 100% backed by the frame tube, and weld there too. :)
 

TheGillz

Explorer
GeoTracker90 said:
DSCF4901.jpg

I was looking for a way to tie in the front spring hanger a little more when I saw the drops from tapering the rear bumper. I like it! The hanger will need trimmed a little no matter what so I might weld in the drops and continue the same angle across the spring hanger bracket.

Well that's it kids. The show's over for another day.

Mike

I love this! Would make coming up to/off of an obsticle less stressful with dropping off the springs since they are slightly longer than the diameter of the tires. Nice.
 

IH8RDS

Explorer
Am I missing it? Where is the actual shackle that allows foward and aft movement? I always thought with springs you had to have a moveable shackle to allow the springs to flatten and flex.

sweet build by the way.
Scott
 

TheGillz

Explorer
IH8RDS said:
Am I missing it? Where is the actual shackle that allows foward and aft movement? I always thought with springs you had to have a moveable shackle to allow the springs to flatten and flex.

sweet build by the way.
Scott

I assume that is what he meant when he said
"The 23" measurement was with a 3-1/2" block placed between the rear spring and the trailer frame. I have a pretty cool idea for the rear shackle hanger, but you'll have to wait for the pictures."

Can't wait to see said "cool idea" because Mike has proven to be correct in his cool assesments. :D
 

GeoTracker90

Adventurer
ntsqd said:
I would do the tops of the plates like that as well. Straight line welds across tubes promote cracks.

Anal that I am, I'd poke a holesaw thru the plates where they are 100% backed by the frame tube, and weld there too. :)

You are correct about the straight line welds promoting cracks. I do think that this statement needs to be qualified relative to the forces and stresses that the weld joint will see though.

The straight line welds that are used to attach the cross members to the two main frame rails see a whole different force than the straight line welds would see if I welded up the spring hanger as is. They are both welded to the same tube in the same orientation, but one is going to crack eventually and one is not.

I'm just using the current plates to mock things up at the moment. There will be some changes as this progresses. For now I'm able to position the axle and wheel the frame and box around as I work on it.

Speaking of mocking up the axle I just re-ordered the U-bolts and tie plates for the axle today. The original company that we ordered them from sent the wrong ones. Darn. If I'm really lucky the new ones will arive before the weekend does.

Now I need to remember to call about shackle supplies some time tommorrow.

Can't wait for the weekend.

Mike

p.s. the idea about poking a hole saw through it and welding that is also a good idea. In fact it's so good that I was planning on doing just that even before it came up int this thread.
 

IH8RDS

Explorer
TheGillz said:
I assume that is what he meant when he said

Can't wait to see said "cool idea" because Mike has proven to be correct in his cool assesments. :D

My bad. I now see that this is the front spring hanger.

DSCF4901.jpg
 

ntsqd

Heretic Car Camper
GeoTracker90 said:
You are correct about the straight line welds promoting cracks. I do think that this statement needs to be qualified relative to the forces and stresses that the weld joint will see though.

The straight line welds that are used to attach the cross members to the two main frame rails see a whole different force than the straight line welds would see if I welded up the spring hanger as is. They are both welded to the same tube in the same orientation, but one is going to crack eventually and one is not.
Yes, the qualification that I should have mentioned is where there is a change in thickness this is a particular problem. Like where the hanger plates fit to the sides of the frame tube. A cross member attachment point is still a potential problem zone, but much less so.
p.s. the idea about poking a hole saw through it and welding that is also a good idea. In fact it's so good that I was planning on doing just that even before it came up int this thread.
Great Minds, and all of that. :)
 

Forum statistics

Threads
188,496
Messages
2,905,801
Members
230,501
Latest member
Sophia Lopez
Top