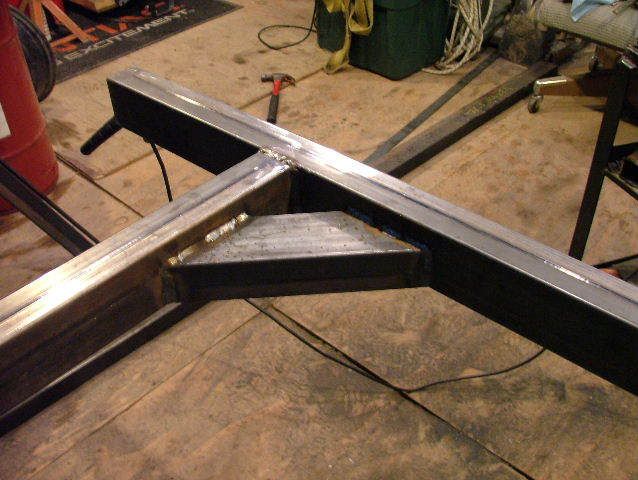
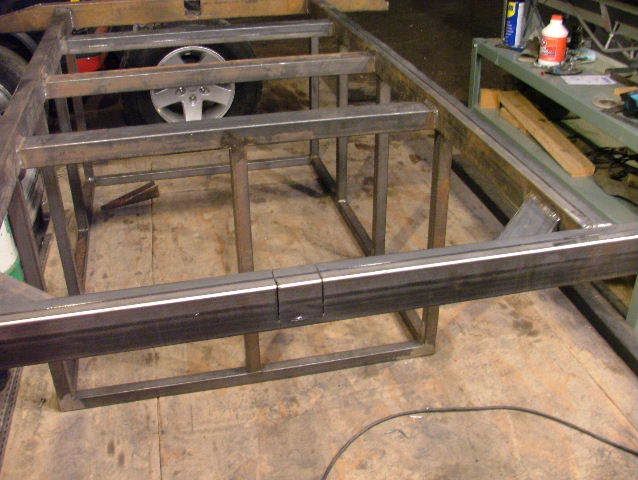
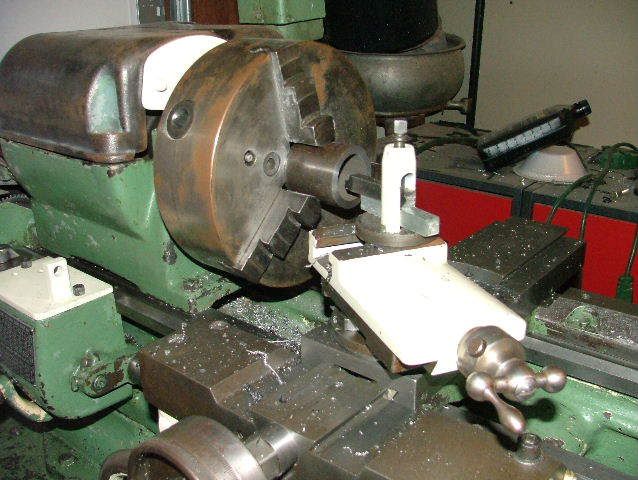
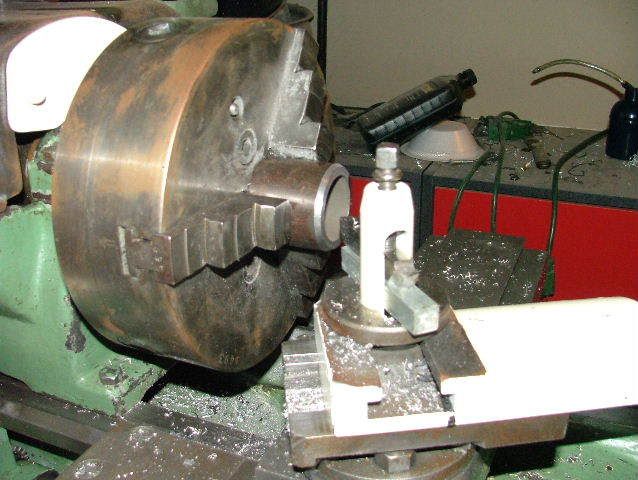
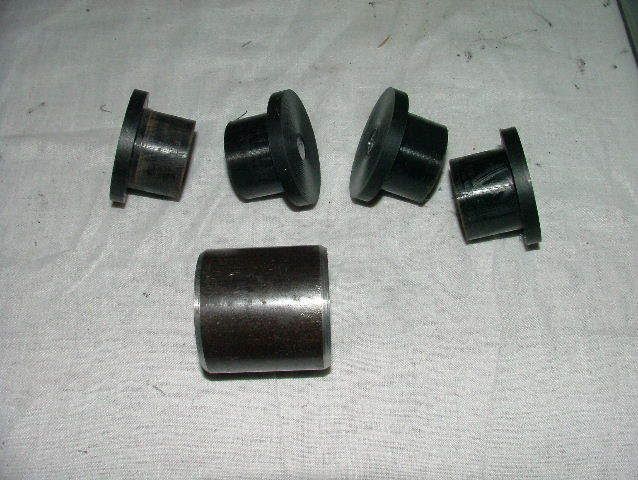
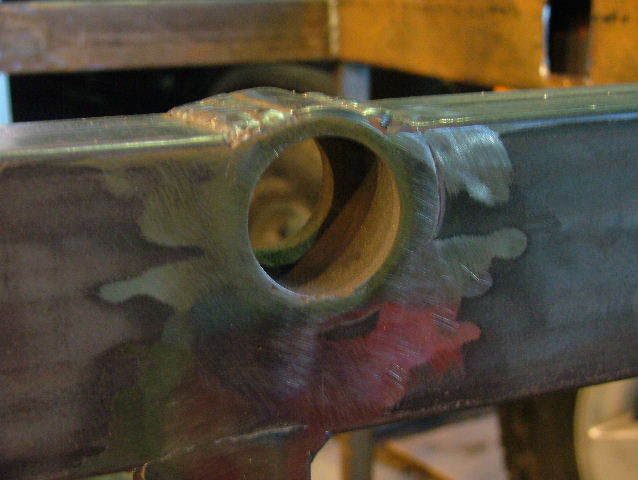
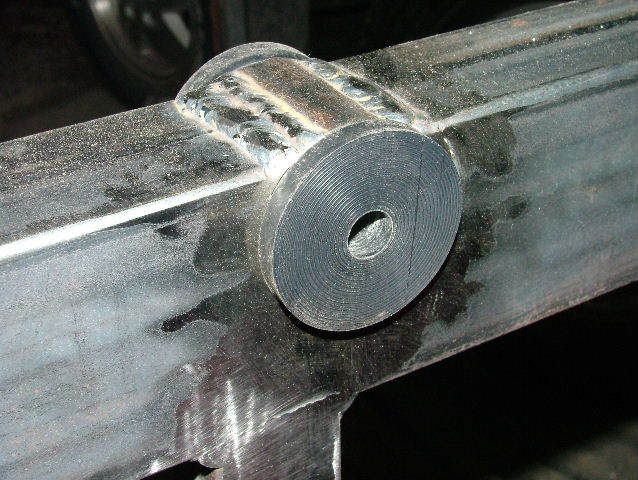
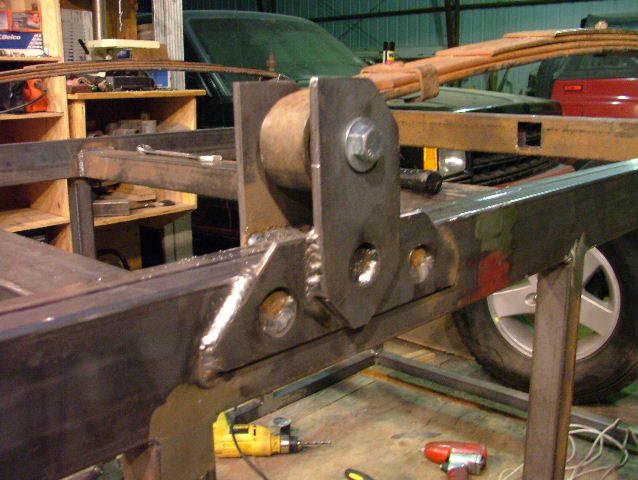
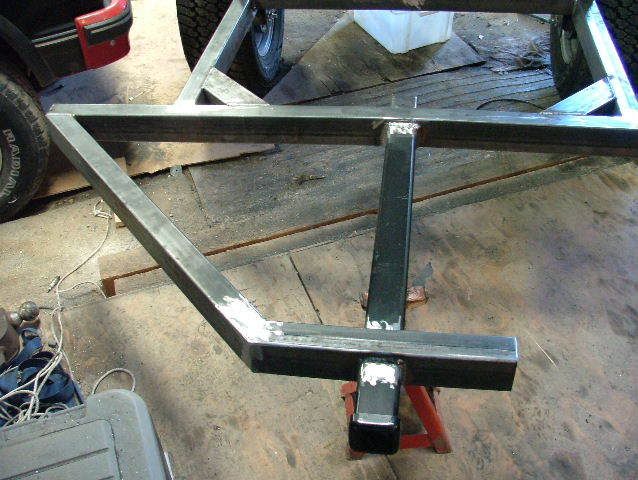
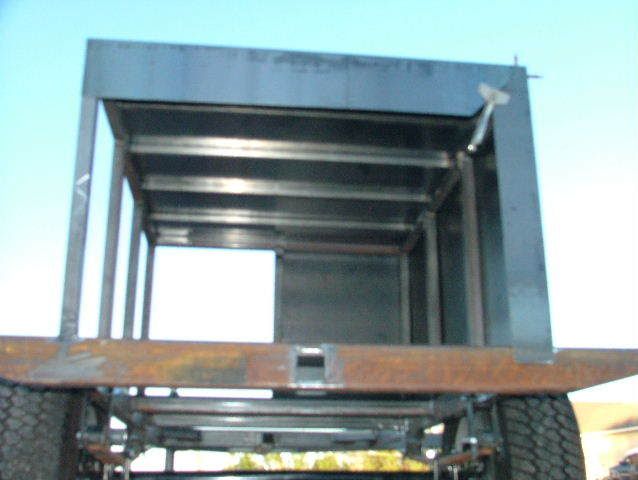
TheGillz Explo Off-Road Trailer via Geotracker90 Build!

opie

Explorer
GeoTracker90 said:
I went out to the work shop tonight and spent about another three hours working on the O.R.T. (Off-Road Trailer). Not a lot of progress to look at but I was able to go back and finish weld a lot of the joints that were just tack welded. I did get the front spring hangers, springs, and axle mocked up.

DSCF4898.jpg

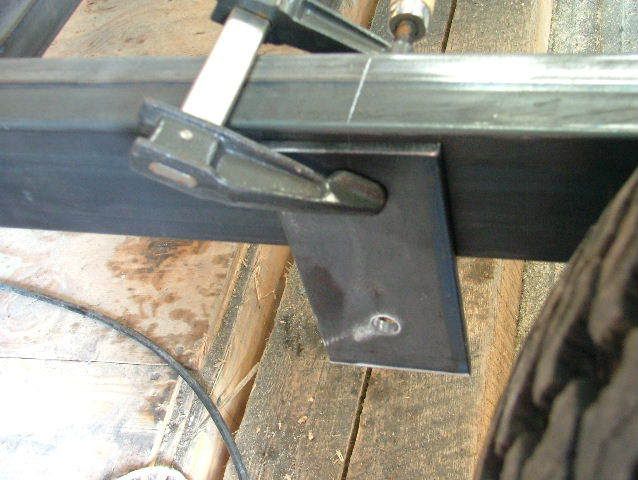
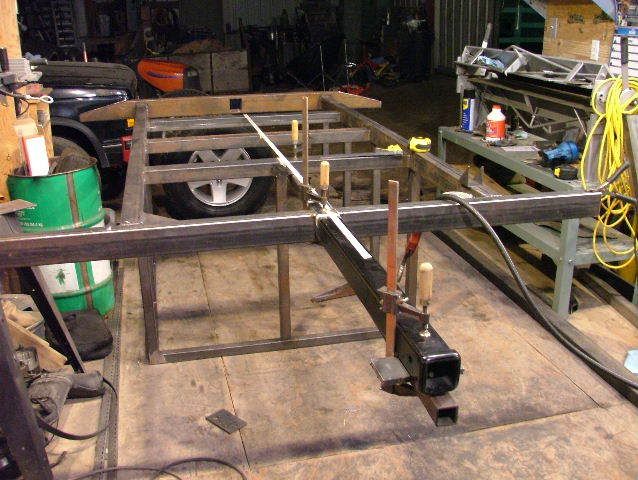
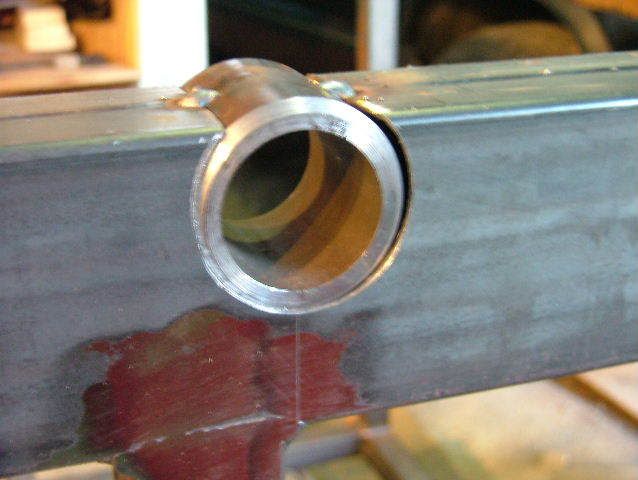
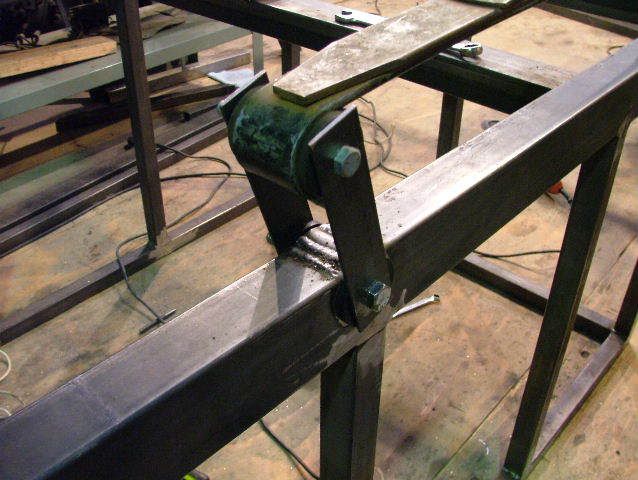
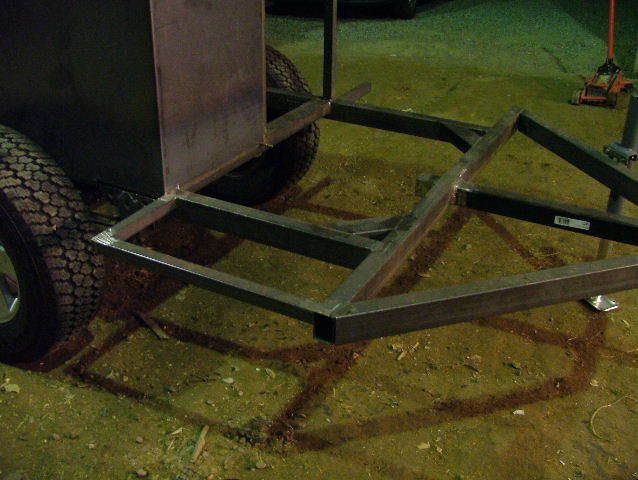
This just shows how I lined up the spring hanger with the mark on the trailer frame.

DSCF4899.jpg

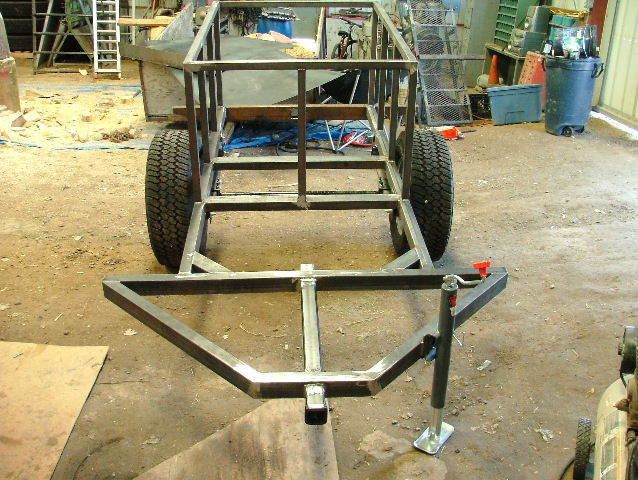
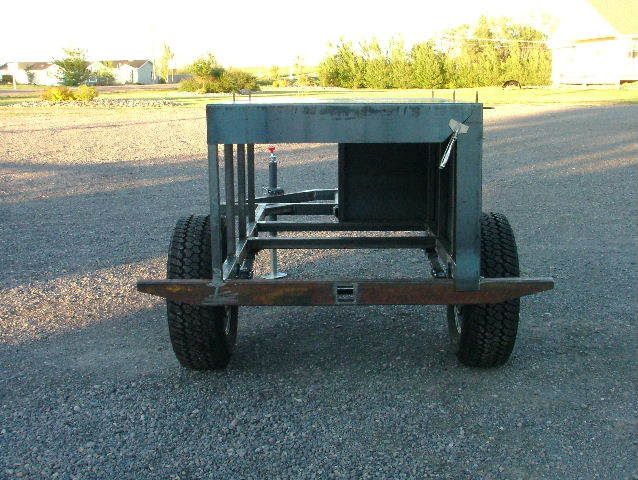
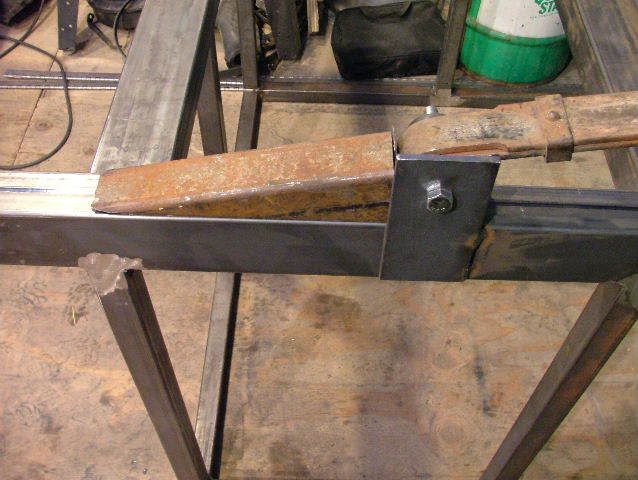
I wheeled the trailer out onto the driveway to take some measurements. After leveling out the trailer I measured 23" from the bottom of the frame to the cement driveway.

DSCF4900.jpg

The 23" measurement was with a 3-1/2" block placed between the rear spring and the trailer frame. I have a pretty cool idea for the rear shackle hanger, but you'll have to wait for the pictures.

DSCF4901.jpg

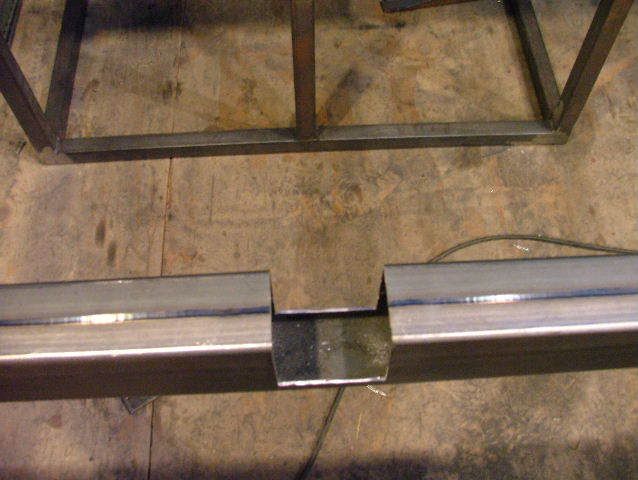
I was looking for a way to tie in the front spring hanger a little more when I saw the drops from tapering the rear bumper. I like it! The hanger will need trimmed a little no matter what so I might weld in the drops and continue the same angle across the spring hanger bracket.

Well that's it kids. The show's over for another day.

Mike

Looks awesome!!! Gives me some inspriation and ideas for when I build mine.

I built this last winter(the trailer, not the jeep)...Not an ORT, but it was my second one and my ORT will be my third.

attachment.php


I do have a question. Please dont take offense as it sounds like you have a clue as to what you are doing.

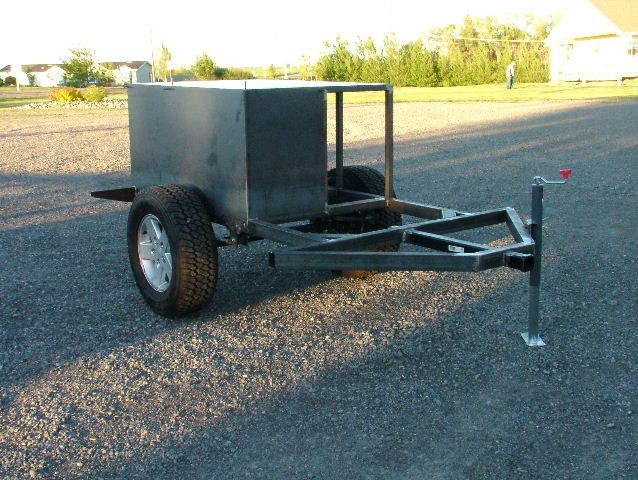
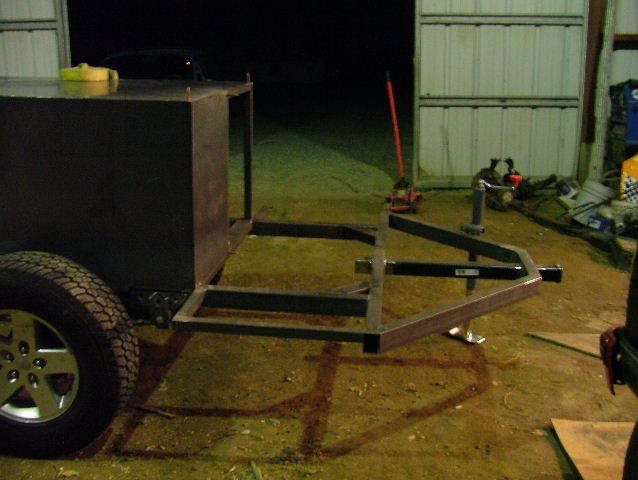
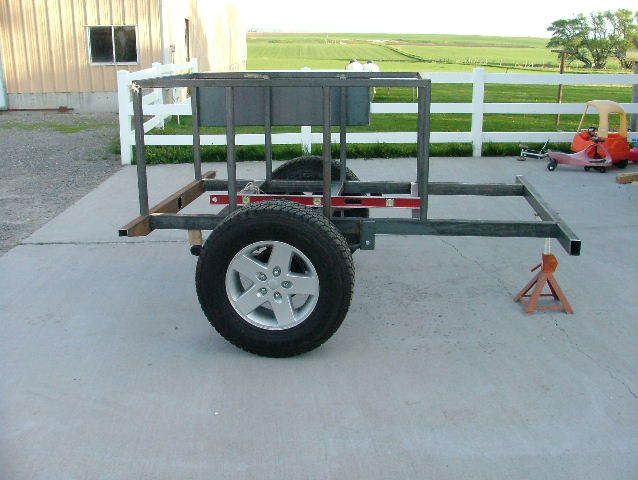
It looks as if there is going to be quite a bit of tounge weight with the axle placed where it is and the fuel cans and cooloers being placed where they are. Maybe its just the angle of the picture, but is the axle placed in the center of the storage box?

Sweet design though. Looks stout!
 

GeoTracker90

Adventurer
Update 6-8-08 Part 1

Well this weekend I made some more progress on Clark's trailer. I started by adding the reciever tube for the trailer tongue.

DSCF4965.jpg

This started with adding some bracing to the corners of the front frame cross member. This will do two things. First it will help with the transition of forces between the front cross member and the main frame rails. Second it will help hold the cross member's position when I...

DSCF4966.jpg


DSCF4967.jpg

...make the cut in the cross member to recieve the tongue.

DSCF4968.jpg

the center of the trailer side to side was measured and marked with tape to help with positioning the tongue. The Tongue was positioned and clamped into place. I then used another piece of tape to help line up all of the centerline marks to ensure the tongue was centered and followed that up with squaring the tongue to the front cross member.
 
Last edited:

GeoTracker90

Adventurer
Update 6-8-08 Part 2

Now for the suspension and how I mounted the spring hangers and shackles.

DSCF4971.jpg

For the shackle hangers I planned to pierce the frame and weld in a bushing shell, but first you have to have bushing shells to weld in. Back to the lathe to face the ends of the shells so that they are as close to being perfectly square as possible. They were also turned to an overall length of about 2.020" long. Just a hair wider than the steel tube frame rail.

DSCF4973.jpg

To promote the weldable area on the bushing shell the ends were chamfered at a 45* angle back 0.125" from the end of the shell. The 0.125" reflects the side wall thickness of the steel tube.

DSCF4974.jpg

And of course you are going to need to have some bushings for the shells that were just produced as well.

DSCF4976.jpg


DSCF4977.jpg

Nothing too exciting, just pierce the frame after precisely measuring the center location for the 2" hole saw. The cut was cleaned up and the bushing shell squared up in the hole. I know, the picture of the shell tacked inplace looks like it was off a little. Trust me it was fixed before the final welds were burned in. And of course the last picture shows just that, a bushing shell burned into place and the side welds smoothed to accept the bushings.

DSCF4978.jpg


DSCF4979.jpg

With the bushings in place things are starting to look good. Now what about the shackles? well, Saturday morning I went to Vernon Steel to get some material for the shackles and when the guy loaded me up I mentioned that the flat stock looked like 3/16" and not the 1/4" that I had asked and paid for. He said, "Nope, that's 1/4 inch stock there." Well I didn't feel like arguing about it and I didn't have my calipers in the truck so I left. When I got to the shop I measured it and sure enough it was 3/16". Guess who's getting a call on Monday? Well I used some 1/8" thick strap to mock the shackles up with. But how are the front of the springs mounted?

DSCF4980.jpg

In order to get the springs centered I had to add some side plates to the inside and out side of the frame. I then added the spring hangers and got most of the welding done. I still need to do some of the final welds on the front spring hangers and then it will be on to more of the tin work.

I was really hoping to get a lot further on it this weekend but two things conspired against me.

First, I picked up a Toyota 4Runner frame from one of the guys at work for another project. Well I thought it would be a good time to let the boys play with wrenches and air impact guns and sockets. They ended up needing a little more coaching that what I had thought, but they had a blast stripping the front IFS 4WD suspension components off of the frame.

Second, in helping them strip components off of the front of the Toyota frame I twisted my wrist. I was hitting the steering arm with full-force blows from a 3 lb sledge hammer trying to get a tie-rod end to pop when one of the hits took a glancing blow and violently twisted the hammer and consequently my wrist. Usually when I get a boo-boo I don't say anything and just keep on working, but this time I had to say, "GOSH DARN that didn't feel good!" Honestly, that's what I said.

Well the weekend is over and plans are being made for what will get done this coming week. The new U-bolts will be here in the morning and then I'll get the axle mounted and thsi critter flipped over.

Till next time....

Mike
 
Last edited:

TheGillz

Explorer
It is really cool to see you working on things that I wouldn't even think about in a build. Its funny how its consistantly more complex than I imagine. Well done and those shackles look great.

Sorry to hear about your wrist, I hope that its not too bad. I tweeked my thumb about a month ago "ice blocking" with my daughters and its still not right. Looking good.
 

stomperxj

Explorer
Nice work Mike. I really dig that shackle mount. The front hanger looks bulletproof too... Keep up the good work

:rockon:
 

GeoTracker90

Adventurer
Boy, some days if it weren't for bad luck there would be no luck at all!

I went out to the shop tonight bound and determined to get the finish welds done on the spring hangers. Well things started out good and I was able to finish one side and started on the second side. I had welded about 3 to 4 inches when the wire kept sticking in the welder nozzle. I figured I'd better check the wire feed mechanism to see if it was ok or if the feed tension had backed off. I pulled off the cover to check things out only to discover that I had ran out of wire. DARN!!! Well I should have a 2 lb spool kicking around as a back up just for this type of occasion. NOPE!!! Must have used it and forgot to replace it.

Ok, well the new U-bolts and tie plates arrived today so I thought I would mount the axle to the springs. Wrestle the trailer frame over top of the axle and center the springs. The U-bolts fit this time. Maybe things will make a turn for the better. Fit the new tie plates and... darn, the Sami springs are just wide enough that the U-bolts won't fit through the holes in the tie plate. I know how to fix that, just open up the holes a little with a bit bigger drill bit. Problem solved; the U-bolts now line up.

Now how about mocking up the diagonal braces that will run from the tongue to the outer edges of the front cross member. I've still got some masking tape that's just begging to be pressed into service again. "Hey that looks pretty good," I though. So, I snapped a picture to share, cleaned up the tools and headed for home. In preparing to post the one and only picture from tonight I went through and deleted the old pictures from the memory card before re-sizing tonights picture. I hit the delete button and in the same instant realized that I had selected one too many pictures. DOUBLE DARN!!!!!!

Oh, well. Better luck next time I suppose. Wish I could share some eye candy tonight though.

Mike
 

GeoTracker90

Adventurer
Update 6-14-08 Part 1

Well another weekend has passed and I accomplished quite a bit more work on the trailer.

DSCF5058.jpg

I started by tying in the tongue some more. This distributes the load better and also will serve as additional storage space if needed.

DSCF5059.jpg

With the other side tied-in I was able to position the trailer jack. In this position it tucks nicely along the tube without hanging out the end or interfering with the tongue.

DSCF5060.jpg

Now the sheet metal will be great on this trailer, but if you want to put anything on top of the trailer the sheet metal will need to be backed up by something. I used some 1" square tube on 12" centers. This made it plenty strong to support any reasonable load that Clark would want to put up there with out adding excessive amounts of weight.
 
Last edited:

GeoTracker90

Adventurer
Update 6-14-08 Part 2

I spent some quality time with the sheet metal brake and started working on some skins for this naked trailer.

DSCF5061.jpg

To try and keep the joint count and potential leak points down to a minimum, as well as making the best use of each sheet of 16 gauge metal, I bent the side piece to wrap around the front. This will place a seam along the front center support post.

DSCF5062.jpg

The "roof" piece of sheet metal was bent so that the back comes down and meets another portion of the side piece. The final opening for the tailgate will be trimmed out as soon as I have the other side bent up and installed.

DSCF5063.jpg


DSCF5064.jpg

A couple views from the rear, just to show how it is coming together. The last shot shows a pretty good idea of what the inside of the trailer will look like.

DSCF5066.jpg


DSCF5068.jpg

I then moved back up to the front to finish the front stoarge platform. I worked on finishing out the passenger side first. This is the side that will have two coolers to contend with. I placed the one extension bar on the driver's side but left it at that for the moment. The plan is to mount a spare tire on the driver's side so I'll figure that out before completing the bar like I did for the passenger side.

Stay tuned for more updates.

Mike

p.s. Clark I hope that you are liking what you are seeing. I think you're getting anxious for a trailer by the looks of your signature line.
 

TheGillz

Explorer
Well, I am getting anxious fore sure, but its mostly due to the freaking killer work that I am seeing on here. It is looking great! Looks like there is going to be plenty of room on the passenger rear for the propane tank, the moc ups are looking awesome. And the suspention looks great!

I really appreciate your skills. Well done and Happy Fathers day! What a present for me:wings:

Of course, can't wait for the next update. It looks like its really coming together now.
 

JIMBO

Expedition Leader
:26_7_2: It looks to me like you're doing a QUALITY job and it's goimg to really turn out SUPER--

--I notice you're using a "Harbor Freight"((HF) jack stand and they're pretty good, WHILE THE TRAILER IS (LIGHT)--

-I modified mine, by welding the HF pneumatic 10' tire/bearings/forks ($10 bucks), onto the bottom of the HF stand-makes the heavty trailer moving EASY, because the tire rotates 360 degrees, checkitout--


--

--This pic, shows it just leaning against the tongue!!


--:camping: --JIMBO
 

GeoTracker90

Adventurer
JIMBO said:
:26_7_2: It looks to me like you're doing a QUALITY job and it's goimg to really turn out SUPER--

--I notice you're using a "Harbor Freight"((HF) jack stand and they're pretty good, WHILE THE TRAILER IS (LIGHT)--

-I modified mine, by welding the HF pneumatic 10' tire/bearings/forks ($10 bucks), onto the bottom of the HF stand-makes the heavty trailer moving EASY, because the tire rotates 360 degrees, checkitout--


--

--This pic, shows it just leaning against the tongue!!


--:camping: --JIMBO

Jimbo thanks for the very kind words. This is a lot of fun to build and I'm sure that Clark will enjoy it after it is completed.

I want to clarify the origin of the jack. This is a pretty stout Bulldog brand jack, not a Harbor Freight sourced jack. If I remember correctly this particular one is rated for 5,000 lbs. Yes, this may be a little overkill on the weight rating, but it has the height range that we expected to need in this trailer project.

Your idea of adding a pneumatic wheel to the sand foot on the jack is tried and true. If Clark desires to have one then by all means it is some thing that is easily done.

On my personal trailers I prefer to use the sand foot and position the trailer as much as I can with the vehicle, eliminating about 95% of any hand positioning. If the trailer tongue is too heavy for one or two people to lift then I don’t want to try and hand position it and risk losing control, having it run into something or over me. (extreme bad case scenario) The sand foot will slide plenty well on most surfaces with the exception being items like lava rock, asphalt, and concrete.

Just my $0.02

Mike
 

ntsqd

Heretic Car Camper
FWIW the jack on the tongue of my TrailBlazer is set up such that pulling the coarse foot height adjusting pin will also allow the use of a pneumatic tire by pluging it into the bottom of the landing foot.

Given that my driveway is fairly flat, but constrained by house & fence, the tire is a great addition. I can back the trailer in close to where I want it, install the tire and uncouple. Then I can push the trailer to where and how I need it to be parked. I used to have a short section of chain handy to lay on the ground wrapped around the tire, but the driveway is flat enough, and the tire is usually low enough, that the trailer has no tendency to move on it's own. Even when bumped into, it still doesn't move much.

That said, the tire never goes on trips, it is only used on the driveway.
 

TheGillz

Explorer
Well I guess I can chime in here since it will be in my driveway. I have a back driveway that is pretty narrow. When the trailer is not in use it will be backed to the end and covered. I personally don't think there will be any need to move it around at home, given the two driveways. But you can bet if I do, this mod will be on the list. I think its a great idea.
 

ntsqd

Heretic Car Camper
Some pics for ref then, hope they might be a help.

IMG_0273-1.jpg


IMG_0274-1.jpg


IMG_0275-1.jpg

Larger pics in the same 'bucket folder.
 
Last edited:

Forum statistics

Threads
188,500
Messages
2,905,851
Members
230,501
Latest member
Sophia Lopez
Top