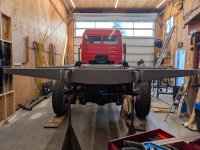
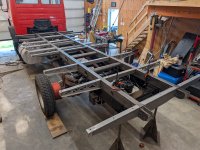
Unicorn on the Ocean - 1120AF Coming to Canada

whomisi

Member
My springs at the front of the rail on rail sub frame open 100mm .

The chassis pretty much divides the width of the cabin into three equal parts , soo 100 mm opening allows 100mm drop on the opposite side of the cabin.

It's firm, but has worked perctly for 80,000 km on some pretty rough roads through Latin America. Never had an issue.

I have followed vehicles with too much sway and it's awful.

Keep it tight, but incorporate adjustment

Neil
Thanks Neil, useful info. Yeah the 4 point pivoting style subframes, whilst I get their benefits, seem unfriendly for highway manners and not great for the frame unless you put them on a subframe above the rails. Limiting the sway seems sensible.

I see your truck still has a subframe on top of the chassis with your sub-sub-frame floating on top. That'll make the chassis a bit stiffer probably too. Nice and neat attachments, looks great.

Have you got any photos of your broader subframe? That's my next big project. What build style of habitation box have you got?

Steve
 

DiploStrat

Expedition Leader
Free comment: Don't hang your spare tire on the back. Extend the box and put the spare inside. Your overall length will be the same and you can avoid all the weight of reinforcing the back wall and mounting a winch or similar. Likewise bicycles, etc. - put 'em all inside. The extra panel length is cheap compared to the alternatives. Also much better theft and weather protection.
 

whomisi

Member
Free comment: Don't hang your spare tire on the back. Extend the box and put the spare inside. Your overall length will be the same and you can avoid all the weight of reinforcing the back wall and mounting a winch or similar. Likewise bicycles, etc. - put 'em all inside. The extra panel length is cheap compared to the alternatives. Also much better theft and weather protection.
Yes it's certainly a valid suggestion, I think you mentioned that a little while back. I plan to stick to a rear mounted wheel for the following reasons.
I am already maxing out the length of the body in terms of overhangs, and the logistics of getting a wheel in and out of a garage is much more than lifting it onto the back. The bed would have to be very high or I would need a false wall internally. Or laying the tire flat would be hugely challenging. Strapping it down securely would also be more of a challenge.
And whilst the vehicle length is the same, the sweep when turning is not as the wheel tucks in.
The fabrication and design of a rear mount is not a concern for me, and having that frame out the back also helps protect the soft fiberglass body.
But I do appreciate the input, and for some it may be a great option.
 

DiploStrat

Expedition Leader
Actually, internal mounting is much easier and lighter and length is length. Less weight and lower. (Actually, you want the spare up front, as the military do it, but that might interfere with a pass through.

But it is your truck and your money. I have a rear mount and know what I would do if doing it again.

Have a great build.
 

whomisi

Member
Actually, internal mounting is much easier and lighter and length is length. Less weight and lower. (Actually, you want the spare up front, as the military do it, but that might interfere with a pass through.

But it is your truck and your money. I have a rear mount and know what I would do if doing it again.

Have a great build.
I'd be interested to know the details of how you would do it again? How would you load/unload the wheel? Ours will be approximately 42" tall and 300lbs.

Yes unfortunately there isn't room between cab and box, it's too narrow and there's a lot going on there. Hydraulic tank for winch, pass through, probably ac outside unit and possibly a light tower.

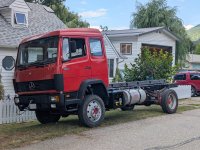
The truck as it was when purchased, empty, already had 4000kg on the front axle, with a limit of 4800kg if memory serves. And 4500 on the rear axle. So I need to be careful not to overload the front axle, especially with my increased wheelbase. So weight at the back is helpful in achieving this, though I want that weight at low as possible naturally.

A balancing game, if you will...
 

Christian

Adventurer
Big day! I took her for a spin around the block, so much fun. The air system is working as it should, even the ABS does it's thing. All the indicator lights are still functional and I am super happy it didn't snap in half.

While I was out and about, I thought I would test the chassis flex. I was picturing something around 6" of lift at the front of the subframe before a wheel gets picked up. Oh man was I wrong, it got to 10" and I ran out of ways to flex it any more. 25 degrees of flex front bumper to rear cross member, absolutely crazy. I had 28" combined of jacked up tyres.

Who else has tested their chassis flex?

I am thinking now that I will have to constrain it with my sprung type - rail on rail subframe. I don't think I can soak up the full flex, however much that is, without issues. It would be even more twist if the rear was loaded down with a box I imagine.

How much travel do others have on their front-most subframe hold down spring?

View attachment 850491
View attachment 850492
View attachment 850493
They do twist like a uncooked bratwurst!

There's someting in the design, that seem sort of counterproductive, hear me out:
There is a absolutely massive rear sway bar, and from your pictures it's obvious that it's really effective, the rear axle is all but perfectly parallel to the frame.
So the sway bar eliminates axle articulation in the longitudinal axis, which the frame then compensates for?

That makes no sense, and it's hard not to think that's a design error, or just way above my paygrade...

But I don't think the frames are meant to flex that much, they can, and they won't be damaged by it.
But I'm thinking whatever bed or structure you put on it, is supposed to limit that flex to some degree.

And with the frame reigned in, the actual suspension probably will flex in the longitudinal axis, hence the sway bar.

I have read the original Mercedes body builder manuals for several years and models, and nothing there give a really clear answer.


Btw. the LAF1113B I got could be spec'ed with or without swaybar. My firetruck had a watertank inside, and was spec'ed with it, but I just resently removed to let the suspension work, not the frame. I haven't tested it yet though.
 

whomisi

Member
They do twist like a uncooked bratwurst!

There's someting in the design, that seem sort of counterproductive, hear me out:
There is a absolutely massive rear sway bar, and from your pictures it's obvious that it's really effective, the rear axle is all but perfectly parallel to the frame.
So the sway bar eliminates axle articulation in the longitudinal axis, which the frame then compensates for?

That makes no sense, and it's hard not to think that's a design error, or just way above my paygrade...

But I don't think the frames are meant to flex that much, they can, and they won't be damaged by it.
But I'm thinking whatever bed or structure you put on it, is supposed to limit that flex to some degree.

And with the frame reigned in, the actual suspension probably will flex in the longitudinal axis, hence the sway bar.

I have read the original Mercedes body builder manuals for several years and models, and nothing there give a really clear answer.


Btw. the LAF1113B I got could be spec'ed with or without swaybar. My firetruck had a watertank inside, and was spec'ed with it, but I just resently removed to let the suspension work, not the frame. I haven't tested it yet though.
A perfect analogy! I'm absolutely in agreement with you. And figuring this stuff out was why I did the test.

The builders guide gives no options to forego a subframe on top of the chassis. Every suggestion they give, there's a subframe. So that would limit the flex to a degree, although many of those are open C channel sections so perhaps would only stiffen it up 50%?

Without any load on the back the rear suspension, capable to managing 20k lbs, is pretty much ignoring the load on it. So that floppy sausage twists instead. Plus the beef cake sway bar.

I don't remember where I saw it, I think the builders guide, but if the centre of gravity is less than 500mm above the frame then a sway bar is not required. I'm tempted to pull it, but I'll leave it for now so I don't put something in the way and then need to put it back later. I will calculate the COG first.

There was twist right at the back of my frame too, I don't have a photo showing it, but when the subframe is rigidly bolted to the back of the frame, that will prevent some rotation. I might leave myself the option of bolting the first tie down point rigid as well.

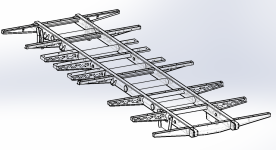
The issue is that by limiting frame torsion with a subframe, that can no longer be considered a torsion free subframe. So it needs to be stiff AF. Got to use some engineering to make sure it's both stiff as can be, and light as possible.

Have you got photos or a build thread on your machine?
 
Speaking of "enclosed garages", regardless of what goes in them, I'm a big fan of them.
Not sure what your hobbies/plans are. But I've seen a few rigs go with enclosed structures for Moto bikes, ski gear, etc... It makes a world of difference when living or doing extended trips. Not only is a security enhancement, it really does save your gear from road grime and corrosion.

I use to travel in a VW Westy for a bit with 2 bikes hanging out the back. The bikes were honestly nearly as valuable as the van itself... So I had to be more cognizant about parking and the bikes suffered horrible corrosion that had to be addressed quite a bit. Covering them with bags helps, but does not eliminate it.
 

DiploStrat

Expedition Leader
My current rig has the spare below the garage. As the spare is really heavy, this requires a heavy steel frame and a winch to lift it.

Put it at the bottom/front/side of the garage and use a ramp to lower. A simple hand/electric winch will handle lifting. Lay it on the floor and the tie down gets even easier. No weight on the back wall of the camper.
We keep our e-bikes inside the garage. Doing it over I would get rid of the rear slope, departure angle is already fine for a camper. Also makes the box simpler/stronger.

Scholars may debate the details, but I suspect that you will find that most people who actually own expo trucks will agree with my basic point.
 

Christian

Adventurer
A perfect analogy! I'm absolutely in agreement with you. And figuring this stuff out was why I did the test.

The builders guide gives no options to forego a subframe on top of the chassis. Every suggestion they give, there's a subframe. So that would limit the flex to a degree, although many of those are open C channel sections so perhaps would only stiffen it up 50%?

Without any load on the back the rear suspension, capable to managing 20k lbs, is pretty much ignoring the load on it. So that floppy sausage twists instead. Plus the beef cake sway bar.

I don't remember where I saw it, I think the builders guide, but if the centre of gravity is less than 500mm above the frame then a sway bar is not required. I'm tempted to pull it, but I'll leave it for now so I don't put something in the way and then need to put it back later. I will calculate the COG first.

There was twist right at the back of my frame too, I don't have a photo showing it, but when the subframe is rigidly bolted to the back of the frame, that will prevent some rotation. I might leave myself the option of bolting the first tie down point rigid as well.

The issue is that by limiting frame torsion with a subframe, that can no longer be considered a torsion free subframe. So it needs to be stiff AF. Got to use some engineering to make sure it's both stiff as can be, and light as possible.

Have you got photos or a build thread on your machine?

I just remembered I have a thread on it here! It just haven´t been updated in 4 years... D**n, has it really been that long?!?
A lot have happened since then, which took me away from the project for quite some time, new house, building a new shop etc., but I'm back on it now, and will update the thread.

 
Last edited:

whomisi

Member
Very slow and somewhat unsteady progress is being made. It's reaching a point where it's a little overwhelming, but after a few big decisions get made things will be better again.

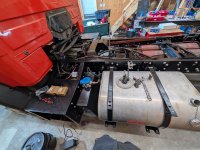
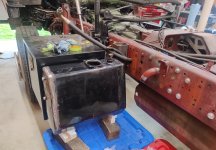
My dad had a suggestion for relocating the hydraulic tank so my box could be closer to the cab, It will sit between my battery box and the fuel tanks. I cut the cap off one end and welded it back together, reducing capacity from 60l to 40l, but I won't be running the hydraulics for long so I am not concerned about this. It also now sits just a little below the pump, but it is a short and very large suction line, plus it is within the range allowed by the pump manufacturer.
Screenshot_2024-10-12-09-44-12-13_6012fa4d4ddec268fc5c7112cbb265e7.jpg

1730224448792.png

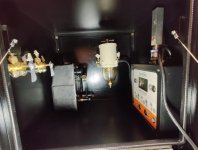
On the other side, I have been populating my secondary chassis box. I picked up an industrial tyre inflation/deflation device with four outlets. I converted it from 120v AC to 24v DC, and it has a big bright screen and nice buttons to set pressures. I am in the process of running hoses to each corner and I found some nice tubes to store them in, more to follow on that. There is also the fuel switchover valves, and the filter.
Screenshot_2024-10-12-09-44-32-13_6012fa4d4ddec268fc5c7112cbb265e7.jpg

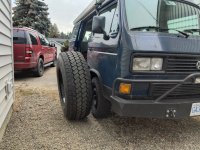
I also picked up an old but unused tyre to test fit on the truck. I might see if I can make it fit my T3....
Because I have the swiss model, the front wheel arch width was 2300mm, but with these tyres and ET110 rims I am 2380mm. I managed to extend the wheel arches by 40mm each side by drilling new holes without it looking ugly. This covers the wheel, only just.
IMG_20241025_131534.jpg


In terms of progress, my main issue is the cost of any locally available composite bodies. I am considering welding either an aluminium or exoskeleton cage, and buying simple panels to glue to the inside myself rather than using fiberglass corners. I may even import the panels from China myself. Does anyone have recommendations of a Chinese GRP/PU/GRP sandwich panel supplier?

Another question, I am worried about an aluminium outer frame for the box as it expands around 6mm more than fiberglass over the 18ft length from -30 to +40c. Weather we have every year. I don't know if the adhesive will like such huge expansion from the aluminium, but perhaps this isn't such a big deal? Has anyone had problems with aluminium and fiberglass bonded to each other? I see it done often enough, so I can't imagine it's an impossible problem to design around.

I'm also considering having a subframe and exoskeleton all in one out of steel, less expansion and easier for me to fabricate myself. Do the usual adhesives stick to a hot dipped galvanised surface? Or am I asking for trouble here...

Steve

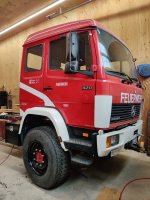
Looks so much better with the big tyre!
1730224633234.jpeg
 

whomisi

Member
Plodding along slowly wishing it was happening faster. Working on getting the chassis "ready" while procrastinating on the habitat decisions. But I think I'm getting close to deciding how I'm going to do that, on the basis that you work with what you know and what you can afford.

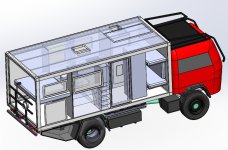
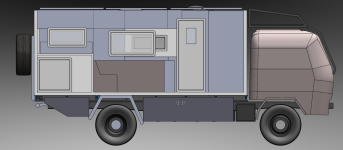
Layout wise I really like the Krug Project Rhino XL Family 200, seems to be a good fit for us, so we will take inspiration from there, minus the separate shower room.

Who runs a rear anti-roll (sway) bar? The frame links are a pretty stupid design, like a bowl for mud and water. I pulled them off, drilled some big ol holes in the bottom and will sand blast and re-paint them. This is about the only crusty spot on the chassis.
IMG_20241202_094627.jpg

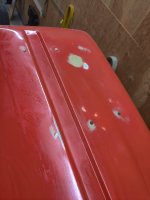
Did a bad job patching in the holes in the cab roof - I hate bodywork. I made little plates and bonded them in from the inside, I didn't feel like welding on the thin roof skin. Bit of filler and not enough patience but eventually they were good enough, especially for a roof.
IMG_20241207_154712.jpg

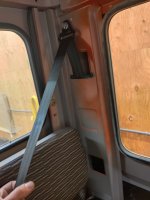
Fitted rear seat belts, really happy with how that came together. The middle two seats are just lap belts, but the outer seats I have fitted three point belts. The mechanism is inside the C pillar, and I will 3D print a trim ring to guide, protect and prettify the exit into the cab once I put the wall linings back in. They work really smoothly and fit over the shoulder very nicely. Bolted to serious plates installed behind the sheet metal, similar to the front factory belts.
IMG_20241213_205248.jpg

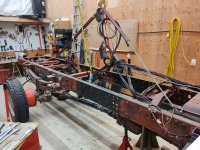
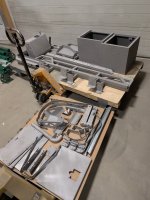
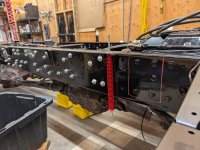
The chassis was torn back down ready to paint the extension and reinforcing sections. I didn't want to paint any of this until I had all the holes drilled etc, but now that the dry fit is completed, it's time to paint all this up and put it back together for real next time. Will be nice when I can start building the subframe on top of it.

IMG_20241215_162434.jpg
 

Forum statistics

Threads
188,259
Messages
2,904,632
Members
229,805
Latest member
Chonker LMTV
Top