Unimogadventures - Our build and travel thread

Mickldo

Adventurer
Hi Iain

Once again your build is looking great. I am getting more and more jealous every time I check it out.

Your outback trip looks like a great one too. My wife, daughter and I took our 100 series and our camper trailer and the wife's parents took their Nissan with us out to Lake Eyre in August. We did approx 5000km, of which 2500km were on dirt. Like you we had a ball and took thousands of photos. One day I'll trade the 4by and CT in on a larger truck based camper.
 

Iain_U1250

Explorer
A bit more progress - might not seem that much, but sure took a lot of thinking and planning.

DSC05134.jpg


Before I get into the details, we found this great little dish drip tray from IKEA - it clips onto what we will use as a towel rail, and since it is over the shower stall, it won't matter if the water drips down onto the floor. We can even use the shower head to rinse them off. The tray unclips for storage or travel or can fold flat when parked up

DSC05133.jpg

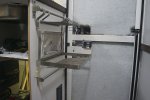
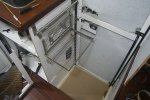
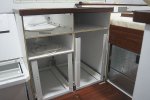
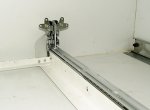
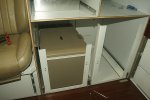
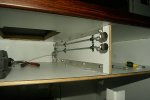
The main work these past few weekend was to install the fridge slides and the locking mechanism. We have a 60 litre fridge and a 38 litre freezer. They will weight quite a bit when full - between 60-80kg or so each. I had to come up with a way for locking them in to stop them sliding out whilst driving. This shows the slides in place - fridge is on the right, freezer on the left. There are draws above both the fridge and freezer for other stuff.

DSC05125.jpg

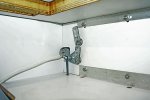
I found these slam shut latches on the internet - they are rated at 500kg each and usually used for car doors or similar. The photo shows the left and right latches for each fridge slide - The one the right has the fridge slide open, the other one has the freezer slide closed.

DSC05130.jpg

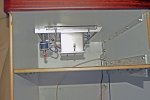
To open I have to push down on the latch to unlatch it- so I needed to make a mechanism to take a push rod that will be fitted on the front panel of the cabinet, and open the latch. I had to make something to turn the force through 90 degrees, and since I have a drawer on the right hand side about the fridge, and the stove goes in on the left hand side - the push rods all run on the left hand side. I made two bell cranks - and ran them on bearings through the dividing panel. The bearings are off an old roller blade - they work great and are sealed, so should last a while

DSC05139.jpg

The push-rod for the freeze has to be on the other side of the centre divide. A made a shaft, turned a thread on it and ground a flat section. The push rod connects to the lever on the other side of the dividing panel. The push rods are made out of 1/4" piano wire - to bend it I had to heat it up to glowing red. I flattened the ends with a hammer after heating it up, and used 6mm bolts with lock nuts - it is pretty strong. Even so I will have a stainless steel wire "safety trigger" - it will go into the the locker behind the seats and allow me to unlatch the lock on the freezer should something happen to the push-rods.

DSC05138.jpg

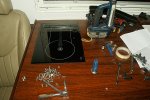
I had to make sure the stove fitted - this is what the the stove look like without it's cover - it sits on the freezer side. The two push rods are at the back, had to constantly check clearance to ensure everything works.


DSC05136.jpg


This is the freezer on the slide - we have an extension collar for it to add the extra bit of space. The slide are big enough to take other makes of fridge - like the ARB, Engel or Waco models.

DSC05148.jpg


Next was to make the push rods in the front, I used some nylon guides from a model air plane shop (same place I got the 1/4" wire from) with a fair amount of bending and measuring, I made the other pair of push rods. Now if you push the buttons, the fridge or freezer will pop out a bit, and you just slide the open. To close, just push them back till they latch. I have to get a couple of light springs to hold the push-rods in the fully closed position, so I can line up the buttons properly in the holders. On the front panel is on, I will adjust the buttons flush, and tighten up all the locknuts.

_DSC5152.jpg

With the mechanism installed, I could finally fit the diesel stove. The whole inside of the stove/fridge cabinet cabinet unbolts - so I can get access to the stove area. There are a fair amounts of bolts, but luckily this will not be something I will be doing on a regular basis. The section with the push-rods also unbolts, to give access to the front of the stove.


The stove installation was pretty straightforward - once I found all the parts - I managed to lose the fuel hose connector - but the local Webasto store gave me another one free of charge. There is an aluminium box around the stove - and that has to be fastened up to the bench top from underneath - I had to moe the aluminium box a bit further out than originally planned, so I could get the screws in around the back of the stove. The black pipe is the exhaust pipe - it is double skinned with the hot exhaust going up the inside of the outer pipe. It just touches the freezer - so I will probably make a stainless steel cover for it - to give it a bit more insulation. The stove sucks in air into the aluminium box and blows it out the outer pipe to help cool things down.


_DSC5156.jpg

After a few evenings of work, the stove is in. all I need to to is connect up the fuel system, plug in the power and the control panel. There will be a splash guard that goes around the stove, to protect the seat and people) from the heat and any grease. We probably won't use it that much in Australia, since the sun always shines here, but once we get to cooler climates we will most likely be cooking indoors. The owners of these stoves I've spoken too think they are great - the only problem being at high altitude, but there are fixes for that as well. I have to do a bit more routing of the wires - but sinc eI move the aluminium box over a bit, the hole for the exhaust pipe is now 15mm off - so I have to cut a new hole before I can install the shelves, but that can wait until I have all the wiring and sorted out.

We will have another kitchen out the rear of the truck - that will run on LPG gas. We are also looking at smaller kettles - there are 1000w 0.8L kettles that would work quite nicely, and if we really want to, our Nespresso machine only draws 1200w - all within range of the 1600W inverter. :)
 
Last edited:

smontic

Observer
Hi Iain I need your help. a friend of mine is going to transfer in Australia for a long time.
It's a motorcycle traveler, I can give your contact? So if it goes not far from you he can see your unimog :)
 

Iain_U1250

Explorer
Sorry for the lack of updates. I have been working on the truck - not as much as I used to. I've been spending as much time as I can with my wife, all the problems she has been having due to the cancer treatment makes me want to be with her more an more, just to make things easier for her.

She is on the mend, another session of re-constructive surgery tomorrow, and then only one more after that. I'm not sure things will ever get back to the way they were, she will be on the drugs for another 4 years. She sure tries hard to do the things like she used to, but the side effects of the drugs sometimes effect her a lot. Anyway, when it gets to the point that my fussing over her starts to irritate her, she chases me away to work on the truck.

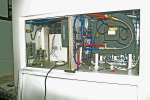
The work over the past two months has all been about plumbing and the electrics. I've installed the hot water heat exchanger, I had to made a frame to get it off the floor, so that all the pipework will fit, otherwise it would be too difficult to get to. Next was to run all the water lines. The system is fairly complex.

The supply system consist of:

Two water tanks
Two independent supply lines
Two pre-filters
Two water pumps
Filler system (common fill point but with each tank isolated)
Air breather system on each tank connected to the fill point, which can also be isolated.
_DSC5203.jpg

The 20 litre hot water tank is heated by the engine cooling system, and/or the Webasto diesel heater. The on-board cabin heater is also part of the system, with isolation valves on the heaters to block it off when it is not required. As the engine can heat the tank to over 88 degrees, I have to fit a tempering valve - that blends the very hot water from the tank with cold water to reduce the temperature down to 40-50 degrees so it doesn't burn you. Since the water in the tank gets very hot, it expands, so there is also a expansion valve to bleed the excess pressure. The hot water tank can also run off 240V, so it we are hooked up to a powered site for a few days, we can have hot water without having to run the engine or the diesel furnace. Not sure how many times we will actually go to a caravan park, we tend not to like going where there is other people, but the 240V heater was part of the standard package, so I might as well make it work.

The delivery system consists of::

2 shower heads ( hot and cold - one in the entrance way, the other in the boot - which doubles as the outside kitchen tap)
Sink ( hot and cold)
2 drinking water taps (connected to the Seagull IV filter - next to the sink, and another tap in the boot.
Outside hand washing tap ( front passenger side - cold only)

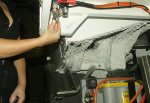
This shows the outside tap, can't see it unless you get under the truck, when the fuel tank is in, it will be hardly noticeable for outside unless you are really short. We can also switch it off from inside the truck. (I just noticed that I need to put the 'P" clips on those wires as well)
_DSC5225.jpg

There is a quite a lot of fittings required to get the rigid lines around the compartments, and I have to keep the pipes accessible, but also out of the way. I'm using the John West system of push fit fittings. The fittings can either be a simple push on fitting, but that would be a bit too easy. The best way of doing it is to use inserts on ends of each pipe that reduces the possibilities of leaks, then locking clips to hold the fittings in the full lock position to stop them from coming loose over rough roads. So each pipe has the extra fittings, means you do everything twice, making everything fit, then taking all the pipes off again to fit the inserts, as once they are in, you can't take them out if you need to trim the hose a bit.

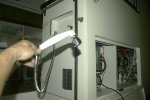
This is the outside/inside shower. This hose is long enough to work on the steps, on just outside the door. There will also be another much longer shower hose at the rear. The hose disappears into the hole, and fits inside a PVC tube in the compartment so it is not in the way, or can get tangled.
_DSC5207.jpg


Next in line is the waste water plumbing. The"grey water" from the shower goes into a special "P" trap to prevent it from splashing back up when going off road. The basin has a small 25" outlet, it also have a special "P-trap" but that so that smells don't come back up the pipe. I still have to design the grey water tank, and get it made. It also needs to have a means of heating it - as in winter, I don't want the tank to freeze up so we can't use the shower or basin. I will have a tube running through it, and have the return line from the diesel heating system run inside it.

I've been speaking to Robert van der Hoven, he has travelled extensively around the world in his truck, and is now building a new one. There are a lot of problems that happen with cold weather, the biggest problem being condensation. He said his truck would be soaking wet inside once it gets to 10-20 degrees below freezing. I'm hoping ours won't one of the key things is to get a good air flow going. I have a spare Donaldson sir filter, and will mount that underneath the the truck so that I can suck in air into the water compartment, the filter is just to limit the dust coming in ( and because it have it left over from another project so might as well use it.)

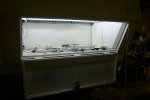
The rear compartment is quite big, so I decided to use some LED strip lights to light it up. The LED are hidden up in the frame work, but cast a really nice light, no shadows either. I fitted them in order to work on the boot area, nice to be able to see what you are doing for a change.
_DSC5199.jpg

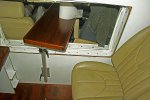
I have finally fitted the bellows as well. This took a long time to get sorted out as there are loads of bolts and screws and since I hurt my shoulder, drilling things vertically upwards is painful. I kept on putting it off, then eventually I felt guilty as my wife had made it, and was always asking how it worked, so I decided to fit it last week. It took a while, but it all in.
_DSC5214.jpg

It also works pretty well. I tried to articulate the truck using two high-lift jacks, I got the cab to move about 20cm relative to the camper box, sorry no photos, as when I had it all in position, I discovered the batteries in the camera were flat. The next thing I need Trish to make are the large "pillows" that go between the cab and the camper box. They help with the sealing of the crawl through from heat, noise and water. I won't take this long to fit them once she has made them.


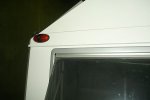
There are loads of other small things I've done that take a long time, one of them is fit the rear clearance lights, I decided to get the big Hella Duraled clearance lights. The wires run down inside the truck, through all the bulkheads and floors, and eventually to the compartment where the tail light wires will be.
_DSC5217.jpg

Just to prove I did both sides :)

_DSC5218.jpg

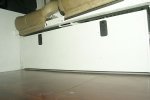
Loads of other small details as well in the inside, like fitting the compression locks for the drawer under the seat.
_DSC5216.jpg


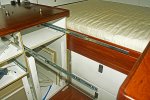
Then fitting the drawer runners for the Stove/Fridge cabinets. I've put the runner on the bottom of the cabinet, so that the load is shared by the base, as well as the screws. Now just need to persuade the cabinet maker to make some drawers ( and finish the rest of the stuff as well)
_DSC5215.jpg

I'll try to keep the updates coming quicker, I hope someone find this useful, and if anyone has any questions or comment, feel free to post them or contact me.
 

hdemetrious

Adventurer
Im sorry you and your wife are going through a difficult time. I wish her a healthy recovery. I really enjoy the work your doing and the project. Thanks for the documentation and best of luck.
 

Overland Hadley

on a journey
I am sorry to hear about your wife's troubles, I was not aware she had cancer. Sounds like you have your priorities in order. Please let her know she is in our thoughts, and we hope she continues to get better.

I hope you have lots of time to enjoy your camper project.

Best wishes.

-Nathanael
 

Iain_U1250

Explorer
May update.

I've done a bit of work over the last month, so time to post an update.

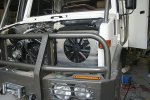
First off is the radiator. I finally decided to go with a 16" SPAL puller fan behind the radiator, and a low profile 16" SPAL pusher fan in front of the condenser. I made an aluminium adapter that fits inside the OEM shroud, and mounted the fan behind. It draws around 20A at full speed. I'm going to fit a speed controller to it, I've read good things about these http://www.dccontrol.com/constant_temperature_controllers.htm. I'll buy it soon, so if anyone has heard anything good are bad, please let me know soon. This shows the fan in place - just need to add the radiator and condenser.

DSC05257.jpg

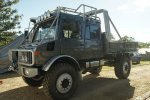
I went to visit a friend down the Gold Coast a few weeks ago, to look at how he mounted his a/c condenser - he has been building a U1750L DOKA for himself, but was persuaded to sell it to a guy in the US, so this Monster Mog will soon be on it's way across the Pacific. This mog is huge - the tyres are 395/85-R20 ( 46"), and whole truck is 3.3m tall to the roll bar, which is a bit higher than my Mog with the camper on the back.

DSC05360.jpg

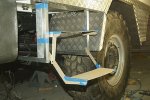
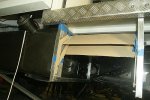
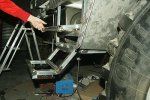
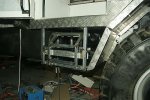
Most of the work over the past week has been on the auto steps for the camper. In order to qualify as an RV, you have to be able get out of the back with first having someone put up external stairs. So that means the steps have to fold down. I looked at all the various electric steps, and I don't think they will survive heavy off road use, so decided to build my own based on the Unimog ambulance body stairs.

First off was to make the system out of cardboard, it took a bit of time to figure out how to make the it fold up and away. I used quite a bit of cardboard to get it right. (and some help from a video of the Ambulance body steps and the repair manual showing how they work.)

DSC05372.jpg

They folder back up under the the truck, if I pull the top step, the lower step come up with it, nice things levers, with a bit of playing around, 100 degrees on rotation of the top step give me the 150 degrees of rotation of the bottom step.

DSC05375.jpg

Next was to make it out of steel. I thought about using flat plate ( and may still end up using it) but this version I made out of the 25mm tubing as it is lighter and should be stiffer.

DSC05380.jpg

The steps are roughly 260mm apart, so a bit better than the cab, and the offset should make it easier to get down. The door has a long grab handle, and I'll get another short one for the other side.
Still a bit of work to go to finish it - have to make up some proper sleeves for the hinge points, but if everything works as planned, all I will need is a double acting air cylinder with out 100mm of travel. It will push out the top step, ( I'll have a spring to make if fail safe by pulling it back up. Quite a bit of fitting and fiddling to go I'm sure.

DSC05378.jpg

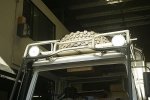
I also finally got around to fitting the roof lights. I've got four Hella 4000's with HID inserts. These are the two ultra wide spread beams, and I have two spotlights as well, but might change them for the the spread beams I currently have in the bumper.

DSC05240.jpg

In order to help keep the spotlights in place, I replaced the single and easily remove nut with three separate hex head screws. The outer two are 8mm and screw into a thread tapped into the support plate, and the other replaces the standard bolt. In order to steal them, they would have to dismantle the lights, and have two different size hex keys. At least they will have to work a bit to get them.

DSC05238.jpg

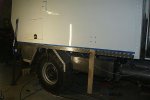
I also finished all the chequer plate "armour" around the bottom of the truck. The 4mm chequer plate should add a bit of extra protection to the sides, more from people in parking lots opening their door into the relatively soft aluminium skin. It has about a 6mm offset from the side of the truck, and might help a bit with keeping mud off the sides.

DSC05252.jpg


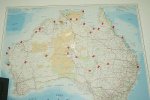
Finally, my wife an I have decided to take one last trip in the Land Rover when my contract runs out ( now mid/late August). We have planned a nice little trip across the top end of Australia, Cairns to Broome, then back through the middle. Not sure have long it will take - guessing around 6-8 weeks, we will not be in a hurry, just taking it easy. According to Google Maps, the trip is around 18,000km all up, but adding a few extra side tracks and general messing around, it will probably be closer to 20,000km.

We will start in Brisbane, and head up to a little town called Bowen, spend a few days on the beach then head up to Cairns, then across the Savannah Way to Katherine, then take a side trip up to Nhulenbuy on the Gove peninsular. Then head across to Mitchell Plain and Derby, then down to Broome.

DSC05383.jpg

After that we will head a bit further south to Shark Bay. It will be about 1 year since her first operation, and she will have had the last operation in late June. We expect her first full body scan and check-up will give her the "all clear" in July so we thought we would "disappear" for a while. It is also our 25 wedding anniversary in September, and we will be celebrating it on a beach in Western Australia, probably Denham or Monkey Mia, a place we stopped over for one day about 15 years ago, and were determined to come back to one day.

Then we head back, via Alice Springs and Uluru, then across the Simpson desert to Birdsville. Then we head down the Birdville track again, last time we did it during the floods, and the desert was in flower, now we will see what it normally looks like. Then back home via the Gawler ranger and Cameron's corner.

I was hoping the Mog would be ready for this trip, but since it is not, then we will just have to "rough it" in our Land Rover. Might have to upgrade the inverter so we can take our Nespresso machine though

When we get back, then I should be all clear to work on the truck until it is finished. Don't plan on taking on another job for a while, but if something comes up, I find it hard to turn down..
 

Victorian

Approved Vendor : Total Composites
Looking good! Just a note on your pneumatic stairs. As you mentioned the ambulance has the same system. It works quiet well, that is if you have pressure in your tanks! I have been working in the German army as a paramedic several years ago and have clocked many thousand miles on those unimogs. Always dreamed of owning one :) Anyhow, one thing that always bugged me was those stupid stairs... You park the mog for a day or two or use those stairs too often and bang your compressed air is gone and you have to climb up and down without them. Are you installing a separate airtank for them? Just wondering :)
 

Iain_U1250

Explorer
The stairs are mainly to get past a regulation rather than as the main way of getting into the back. I'll have a "normal" clip-on set for when we are parked up.

Regarding air supply, I have two electric ARB twin motor air compressors that will charge up the air system to enable a quicker get away, as back-up for the engine driven compressor and to enable me to use air tools when the engine is not running. I don't want to be idling for 10 minutes whist I change the tyre pressure, not particularly fond of Mogstink :)

Still working on the design, so I can get rid of the spring, and just have a double acting cylinder, so that it will stay in last position without any air, just thought it might be safer to have it fold back up, but then walking out expecting there to be a stair there and finding it's gone could be a bit unpleasant. Maybe if I have an indicator / audible alarm so that if I try to drive off with the stairs down, it beep. Could wire it to work with the clutch pedal switch so it doesn't go off when I'm just idling.
 

Mickldo

Adventurer
Hi Iain

It was great to finally meet you and your wife at the Brissy Camping show. I enjoyed checking out the All Terrain Warriors trucks with you and John. Sorry I had to leave before I could say goodbye but there was some pushy customers who wanted to look inside and then I had to leave.

Once again, your build is coming along great. It should be awesome once it is done.

Cheers
Mick
 

windhuk

New member
Hi Iain,
I`am from Namibia, Africa. Living in the capital Windhoek. I belive my country is simmelar to Australia.
I have an U1300L build as a camper all done by myself. We are driving mostly hier in Africa around.
I read you got two Facet pumps, one from tank to tank, I got the same. Now the second, can you please expain it to me how you build that one in. If you have a pump (Facet) between tank and feederpump, how dose the feederpump is getting the diesel? I would be verry happy, if yoe can, perhaps send a foto or a drawing. I belive it is a very good ideea to have a Facet there, because I have burnt ma hand some times.
Greetings vrom Namibia
Jochen
 

Iain_U1250

Explorer
HI Jochen, the fuel system has a Pollock valve which selects either the left or right tank. The Facet pump sucks the fuel out of the tank ( which ever one the Pollock valve has selected) and pumps it to the feeder pump (or Lift Pump). The feeder pump is then pressurised by the Facet pump, so it makes is easier to find leaks, and to get the the rest of the system. A low pressure Facet pump would be good enough, as you only need it when bleeding the air out the system, and most of the time it will be switched off, but I don't see any reason why you could not leave it on all the time. When the Facet pump is off, fuel flows straight through.

Using a Pollock valve, I can actually get rid of the second Facet pump to transfer fuel, as I can have two manual valves that direct the fuel back into the opposite tank using the priming facet pump. I have not built the fuel system yet, so can't provide any photos.

In my best Afrikaans.

My brandstof stelsel het n Pollock valve wat die linker or regter tenk kan selekteer. Die Facet pomp suig die brandstof van die tenk tot die voerpomp. Die voerpomp is dan onder druk van die Facet pomp, dit maak dit makliker om lekpleke te vind, of die lug uit te bloei.

Meeste van die tyd, die Facet pomp is afgeskakel, die brandstof sal vrylik floei deur die Facet Pomp waneer dit is afgeskakel.

Ek het nie my branstof stelel gebou nie. Ek het ongelukkig geen photos daarvan nie.
 

Forum statistics

Threads
188,381
Messages
2,903,934
Members
230,272
Latest member
RodneyKnighten
Top