Iain_U1250
Explorer
Dual alternator and aircon
Decided to finally sort out mounting the a/c compressor. All the other systems I have seen either had a substantial bracket to rotate the a/c compressor, or a tensioner pulley. I then had a brainwave - instead of figuring out how to move the a/c compressor to tension the belt, why not use the new alternator as an tensioner pulley - and then run dual belts for the a/c and the 120A alternator, and run the OEM alternator in the stock location.
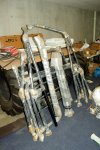
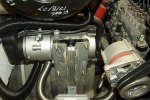
After a lot of cutting and grinding and a few attempts, I came up with this design ( Mk VI or VII)
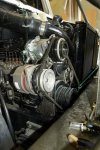
I have dual electric fans for the radiator and a/c condenser, and could always do with the extra power - 120A + 55A give me a bit of redundancy as well. Just have to do a bit of rewiring to get the power to the batteries. Next thing is to find some V-belts. I measure it up as a minimum of 1455mm and a maximum of 1495mm - I need something around the 13A1475- 13A1485 mark. Both seem common enough, just to got to get to a parts store next week. I'll run dual belts, as the a/c compressor and the alternator will have a load just about the maximum for one 1/2" belt, and because I can. The last thing will be the tensioner - probably just a bit of flat plate with a slot going from the a/c compressor to the alternator.

Decided to finally sort out mounting the a/c compressor. All the other systems I have seen either had a substantial bracket to rotate the a/c compressor, or a tensioner pulley. I then had a brainwave - instead of figuring out how to move the a/c compressor to tension the belt, why not use the new alternator as an tensioner pulley - and then run dual belts for the a/c and the 120A alternator, and run the OEM alternator in the stock location.
After a lot of cutting and grinding and a few attempts, I came up with this design ( Mk VI or VII)

I have dual electric fans for the radiator and a/c condenser, and could always do with the extra power - 120A + 55A give me a bit of redundancy as well. Just have to do a bit of rewiring to get the power to the batteries. Next thing is to find some V-belts. I measure it up as a minimum of 1455mm and a maximum of 1495mm - I need something around the 13A1475- 13A1485 mark. Both seem common enough, just to got to get to a parts store next week. I'll run dual belts, as the a/c compressor and the alternator will have a load just about the maximum for one 1/2" belt, and because I can. The last thing will be the tensioner - probably just a bit of flat plate with a slot going from the a/c compressor to the alternator.


