Unimogadventures - Our build and travel thread

Hilmar

New member
Hi Iain,

Definitely we have different housings.
Mine have the spare part no. engraved: A 418 331 00 05
May be you can find your no. as well, and then you can look in the EPC for what type of axle it was designed originally.
The gears are different as well because of the different housings. My upper gears are even different in the front and rear axle.
The bearings I changes to the most strongest for my housings:
upper inside A 010 981 35 01
upper outside A 001 981 77 01
lower inside A 008 981 71 01 or A 008 981 80 01 (interchangeable)
lower outside A 006 981 11 01 or A 006 981 12 01 (interchangeable)

Hilmar
 

Attachments

  • housing-no-1.jpg
    housing-no-1.jpg
    145.4 KB · Views: 168
  • housing-no-2.jpg
    housing-no-2.jpg
    163.6 KB · Views: 137

slowtwitch

Adventurer
Very cool. Can you talk about the cladding more? Just 'glue' to hold it on? What are you doing about the external seams? What thickness?

The boxing looks robust.....


-Mike
 

Hilmar

New member
Hi Mike,

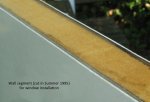
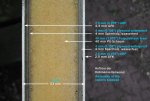
The design of the cabin's walls can be seen from the pictures.
The roof is 70 mm (2,756") thick and the floor 100 mm (3,937").
The corners of the cabin are designed with rabbets to ensure a permanent strong bond when agglutinated. On top of the corners are GRP-profiles. Apart from that, thereare no external seams.
The construction is similar to a thermal-insulating bodywork from refrigerated vehicles, as are the fittings and gaskets for the door and flaps.

To allow solid mounting of pieces of furniture or whatever in a really robust way inside the cabin, I used special expanding blind rivets (see pictures) for better pressure distribution in combination with aluminum profiles and special adhesive.

Hilmar
 

Attachments

  • spreizniet.jpg
    spreizniet.jpg
    23.1 KB · Views: 313
  • 20060705_Wandaufbau2_19.jpg
    20060705_Wandaufbau2_19.jpg
    85.3 KB · Views: 409
  • 20060705_Wandaufbau_23-copy2.jpg
    20060705_Wandaufbau_23-copy2.jpg
    120.2 KB · Views: 783

Victorian

Approved Vendor : Total Composites
At Unicat, we only used Sikkaflex to attach the cabinetry to the walls. Absolutely bombproof :sombrero:

To create the cut outs for windows, doors and hatches we found that the best tool available is made by Festool! Called the TS55: http://www.tracksaw.com/
 

Iain_U1250

Explorer
Just a few photos from the progress over the last few weeks - this is a repost of Benzworld.

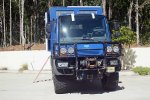
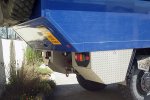
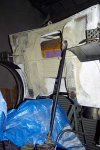
We had a visit from Charlie Aarons and his big blue Unicat - whilst not as big as Ron's GXV, it's still a big truck. Charlie was having a little problem getting it registered due to the overhang. In Australia, the max overhang is 60% of wheelbase. Charlie's was a bit longer, luckily he could take off the tool boxes and the spare wheel holder to bring it back to legal limits - he can put it on once the truck has been measured - and run the risk of getting a fine, but at least it would be registered.


Anyway, back to my truck. Progress has been slow, mainly because I have to do more planning than work - re-designing the air system and where to put all the different components.

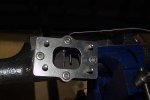
I've also been sizing a new turbo for the truck - a GT2860R. I've spoken to a few experts, and after a lot of email exchanges with then and maps from the Honeywell people who put this turbo forward. It's right in the "sweet spot" of the turbo, it should come on boost from just above idle, and run to the 2600rpm limit. It is quite a small turbo compared to the original KKK turbo, but it actually flows a lot more. The charts say it is good for over 300hp, so my target 180hp should be no problem. I have to get a T2-T3 adaptor, and make a new flange to connect the exhaust brake.


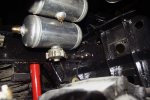
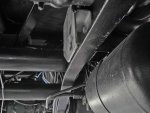
The twin aluminium secondary air tanks fit right up at the back - one tank is the "wet tank" which is the tank designed to trap the water and oil from the compressor. The second air tank is the purge tank - when the system is up to pressure, it purges the filter to make it last longer. Fabricating bracket sure takes a long time - cutting the steel, bending up connecting pieces and ensuring everything fits, the hoses can be fitted without major angles, all whist allowing for the flex of the body and utilising the exisitng bolts all along the chassis.

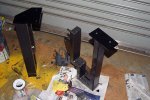
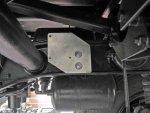
The brackets for the main air tanks are a "work of art" - they also support the filter/dryer and the four way valve. Each bracket takes quite a while to design, fabricate and paint up. They took a long time - and quite a few attempts to ensure the tanks, the drain valves and all the fittings on the tank, the 4 way valve and the air dryer all fitted, then to check that all the air lines can be fitted etc - and finally, they have to be able to flex with the chassis - so the air tanks don't at as struts - all that for two brackets.

I've finished painting the underside of the truck, and that's the last of the Unimog Orange paint gone.

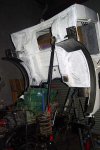
Finally I've made a number of brackets to hold the airlines in place securely - and when the tube clamps for the brake line are in place - the last of the major mechanical bits on the body will be completely. Before I run the plastic air lines, I will finish the welding of the various "sub floor" box frames and then start on the aluminium sheeting for the floor.

All going well I will be able to take the rear box off for hopefully the final time to finish the underside. Once the floor is finished, it will be time to start painting the underside - first with an etch primer, then a sealer / undercoat then finally a decent top coat. Then I'm going to look at some form of heavy duty liner underneath - something like this.U-Pol
 

Attachments

  • DSC00025.jpg
    DSC00025.jpg
    68.5 KB · Views: 418
  • DSC00006.jpg
    DSC00006.jpg
    66.5 KB · Views: 485
  • DSC00007.jpg
    DSC00007.jpg
    83.9 KB · Views: 521
  • DSC00029.jpg
    DSC00029.jpg
    56.7 KB · Views: 382
  • DSC00034.jpg
    DSC00034.jpg
    50.1 KB · Views: 379
  • DSC00047.jpg
    DSC00047.jpg
    58.6 KB · Views: 334
  • DSC00041.jpg
    DSC00041.jpg
    51.4 KB · Views: 354
  • DSC00015.jpg
    DSC00015.jpg
    37.6 KB · Views: 360
  • DSC00048.jpg
    DSC00048.jpg
    57 KB · Views: 308

Iain_U1250

Explorer
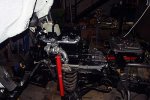
Here is the latest instalment of "Pimp my Mog" - I got all the shiny parts back from the coating place this week, and have assembled in all on the truck. The turbo, manifold, adaptor, exhaust brake and the dump pipe all all coated with a three layer ceramic coating that should help keep the heat down a bit. The dump pipe will be wrapped with "Thermotec" tape - the ceramic coating will prevent the tape from damaging the pipe. The rest of the exhaust will just be painted with normal exhaust paint.

The main part of the work this week has been be still the air lines. I have also modified and fitted up all the gear linkages and most of the air lines for the over drive.

The diff locks are independently operated via two heavy duty solenoids mounted on the safety post. I have plumbed it so that when the 4wd/diff lock knob is turned to the diff lock position, the air is supplied to the solenoids. I can switch them both on an off independently, and there are pressure switches on both lines so I will get a warning light when they are operating.

I have replaced all the fitting on the air system with the new push in connectors where ever possible. There are a few odd sizes on the Unimog that I could not find, so I replaced the old banjo and bolts with new ones. Basically everything on the air system is new, expect for a couple of banjos on the breather system, and they were still shiny and clean.

I have ordered the last of the tubing and fittings and soon will be able to charge up the system and see what leaks.

Anyway, not long before I start on the fuel system, and then the cooling system - maybe get the engine running again by Christmas.

I'm also starting on the floor panels - finally settled on a composite floor of an external aluminium skin, 6mm of structural foam topped with 6mm lightweight ply. The whole lot will be vacuum bagged together into the various sections that will make up the floor. The top will be protected with an extra epoxy layer, with a cloth membrane. The outer edge will have the foam routed out, and replaced with epoxy to create waterproof and hard edge. The aluminium side of the panels - the side that faces the outside world, will be sprayed with a three coat paint system, an etch primer, an epoxy primer/surfacer intermediate coat then a two pack top coat. Once the whole floor is glued into the frame, I will remove the camper box off the chassis and spray the whole of the underside with a white U-Pol Raptor skin.

The whole system should protect the box from corrosion and provide decent insulation. I've heard too many stories of the underside of camper boxes corroding away in a few years. That's the man problem of using a plywood base - the area around the support stays wet and the plywood breaks down holding more water and salts, then the steel corrodes.
 

Attachments

  • DSC00185.jpg
    DSC00185.jpg
    33.2 KB · Views: 254
  • DSC00199.jpg
    DSC00199.jpg
    28.6 KB · Views: 252
  • DSC00204.jpg
    DSC00204.jpg
    23.6 KB · Views: 215
  • DSC00211.jpg
    DSC00211.jpg
    38.1 KB · Views: 277
  • DSC00210.jpg
    DSC00210.jpg
    37.7 KB · Views: 270
  • DSC00191.jpg
    DSC00191.jpg
    20.1 KB · Views: 226
  • DSC00203.jpg
    DSC00203.jpg
    36.5 KB · Views: 228

Iain_U1250

Explorer
Thanks Hilmar - I planned on doing that - got some in the shed already. I'm changing the fitting on the fuel tank side as well - fitting a "Pollock" valve to swap between the two tanks, a course filter/water separator then twin CAV filters all before the OEM filter - I'm planning on going to places where the fuel may be suspect, so good filtration is a necessity.
 

Hilmar

New member

Attachments

  • Vorfilter_attachement_option_frame.gif
    Vorfilter_attachement_option_frame.gif
    30.3 KB · Views: 238
  • Halter01.jpg
    Halter01.jpg
    42.4 KB · Views: 215
  • Halter03.jpg
    Halter03.jpg
    42.1 KB · Views: 199
  • Filter_mounted.jpg
    Filter_mounted.jpg
    30.9 KB · Views: 233

Iain_U1250

Explorer
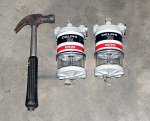
I have an electric "rattler pump" which I use for priming the system - just switch it on and open the bleed bolts - takes only a few seconds for the air to escape. Here is a photo of the CAV filters - pretty much the standard filter on most stationary engines, tractors and all Perkins diesels for years
 

Attachments

  • PICT2392.jpg
    PICT2392.jpg
    127.9 KB · Views: 145
Last edited:

ajbrewer

New member
Hello everyone. I'm a newbie in this forum. I've been following Moggers around de e-world in search for ideas and advice for a project.
Iain, can you post a picture of the box. I would love to see how you built it.

Cheers
 

whatcharterboat

Supporting Sponsor, Overland Certified OC0018
Hi Iain.

The last pics of the truck look great.

What's next? Have you got you floor in yet? Thought about what you are going to use there? Have you got the hardware (hinges, catches , etc ) for the bins , entry door etc? Make sure you rubber grommet all the holes in the frame, that is if you drill any for wiring too. I'm sure you've got it all covered. PM me if you get stuck .

All the best mate.
John.
 

Forum statistics

Threads
188,177
Messages
2,903,380
Members
229,665
Latest member
SANelson
Top