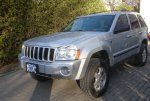
What did you do to your Expo Jeep today?

dan0

Adventurer
Washed the undercarriage...

pic88.jpg


Checked the condition of the gas tank skid...

pic89.jpg
 

Kosmo

Adventurer
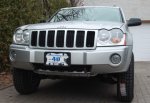
Installed OME 3" lift on WK

Pretty standard install. Suspension had been swapped out for Bilstein SRT street suspension a few years ago, so most bolts turned out easy. Inspected ball joints, CV cups, etc. Found a few things that will now be added onto the basic maintenance before expedition rollout.

This link was my main guide, as well as the youtube video, although he uses a spring compressor in the video to fit his rear springs in.

http://www.jeepforum.com/forum/f67/...05-jeep-grand-cherokee-limited-4-7-a-1073341/

Notched gas tank guard with reciprocating saw to allow rear driver's lower control arm to drop down for easy spring access.

Cleaned up rust with wire wheel, sprayed metal with either aluminum color, or black color paint to protect form oxidization. Took off rear callipers, cleaned up breaks, and used silicone lube on the calliper slider pins. Cleaned up aluminum wheel spindle with wire wheel and made it shiny and precious. Didn't bother clear coating it as I don't want to add the extra weight. :)

Oddly enough biggest problem I had was with lower bolt on rear shocks. Should have been an easy one, but I think previous install had given it full power with an impact wrench and the little 15 mm head bolts would have twisted off before coming out. The Bilsteins had lots of travel, but I want the OMEs in on all four corners. WIll likely use a cut off grinder to take the nut off the outside of the bracket and buy a nut and bolt combination for the shock bottoms if the penetrating oil has not worked any magic by week's end. One of the heads felt like it gave a little under the force of the breaker bar, so I will likely have to do that one anyway.

Once nice thing about doing this job was being able to inspect, remove and put anti seize on a lot of the major suspension bolts.

There was lots of travel, so I was able to drop the axle after taking the shock top bolts out. Disconnected the stabilizer bar and passenger side brake hose bracket and was able to slip OME springs in with no problems, just a bit of down pressure on the rotor from a neighbour, and turning the coil the right way so it would slip in without having to compress it.

Painted 17" wheels with Duplicolor Graphite and Clear Coat Matte. Five wheels took 3 cans of color and two cans of clear, with a bunch left over.

Tires have been ordered and will hopefully be put on next weekend. Went with Cooper Discoverer A/TW. LT235/80-R17. Will likely have to do the pinch mod in order to fit them in.

Good Pinch Mod explanation:

http://www.jeepforum.com/forum/f67/...05-jeep-grand-cherokee-limited-4-7-a-1073341/

Didn't photograph the hole thing as it is all pretty straight forward and well documented already on Jeep Forum.

Here are some before and after photos.

Was a pretty good weekend overall. Definitely need an 18 mm deep socket with half inch drive. Torque Wrench, breaker bar, spring compressor, and normal tools.
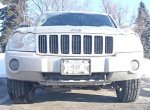
DSC_0080.jpgPost Lift Nose.jpgDSC_0079.jpgPost lift.jpg
 

dan0

Adventurer
Cleaning up my cousin's Jeep to sell. He bought a 2012 VW Gti two weeks ago. As things started to break on his Jeep he didn't fix them, just figured he'd hold out until he bought a newer car and the Jeep would end up going to the scrapyard. I took it to clean up and sell, to split the profit with my cousin. Money for me and more money for him.

Because of the IDGAF attitude, this is what the interior looked like.

pic91.jpg


And a bit better now, I will still do a final detail before I put it up for sale.

pic92.jpg


And what I found in and under the seats after he cleaned it out...

pic93.jpg


Fixed the hatch that wasn't opening. Unfortunately couldn't get it open using one of the techniques I saw pressing in specific areas outside, so I had to destroy the interior panel (I'm getting one free from someone I'm picking up some parts from) Saw a video too late about pulling it back from the top, oh well.

Next up is fixing the passenger window that won't open. Other windows open from the driver's side so it's not the d/s switch that sometimes goes bad. Going to look up wiring and tryin jumping the motor directly to check that. And also checking for any damaged wires in the harness to the door.
 

Kosmo

Adventurer
2007 WK CRD Fue Tank Armor Traps salt and debris

Hi: Dropped tank and armour. Inspected tank. Cleaned up tank corner that was rusting and painted with rust paint. Cleaned up inside of armour with wire wheel, painted with rust paint and enlarged drain holes.
See full post on Jeepforum.

http://www.jeepforum.com/forum/f67/rusted-out-crd-tank-3106977/index2.html
Post #29


This is definitely something you should do especially if you live in cold weather climates that use salt on the roads.

Fuel Tank 5 Bolt pattern.jpgFuel Tank 13 Driver's rear wheel tank corner.jpg

Also got my 235/80-R17s on.

Profile post tires.jpgFront New Tire view.jpg
 
Last edited:

lysol

Explorer
48 dollar tailgate table built with a 3/4" thick wooden chopping block from bed bath and beyond, a pair of lid supports from Home Depot and an 18" piano hingeView attachment 274918View attachment 274920
View attachment 274921

How many inches of clearance do you have between the left side of your fridge and the side of the springtail rack?

I have the driver's side springtail rack already installed and am looking for a storage solution that would give me a few inches of clearance between my fridge and the rack so that I can bolt a few electronic components to the rack itself.
 

Bob Freda

Adventurer
Put the RTT back on and tried my roof rack extension with the gas cans. I also hooked up my on board air system, but not in it's final location.

image.jpg

image.jpg

image.jpg

image.jpg

image.jpg
 

Forum statistics

Threads
186,649
Messages
2,888,456
Members
226,767
Latest member
Alexk
Top