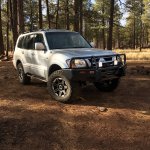
"Yoshi" - 2005 Limited Build & Adventure Thread

SONICMASD

Adventurer
WINCH INSTALL CONTINUED...

So there are 4 ways to solve this Synthetic Rope + Hawse Fairlead vs ARB Bumper situation:

1. Cut about 1/4"-1/2" of metal off the bottom of the ARB bumper opening. - Nothing wrong with this option and it's free, but just in case I wanted to switch to a different fairlead one day or sell the bumper, I didn't want any possible issues down the road.

2. Drill new hole for the hawse fairlead bolts just above the existing bottom holes. - I didn't want to do this for fear of compromising the strength of the bumper's bottom winch mount. There would only be like 1/4-1/2" of metal in the existing hole and the new one so that kind of worried me. Though, Mr. Pajero himself down in Oz choose this solution and I'm sure it worked out fine:

IMG_7937.PNG


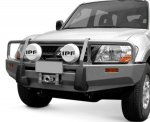
3. Get a Roller Fairlead instead, you can even get plastic rollers which are supposed to work better with synthetic rope than the traditional steel ones. This would cost around $60 but I don't like the look or functionality of how far out the roller fairleads stick out on this bumper. I'm not sure if I'm going to keep the rubber bumpers on the front but without them a roller fairlead would be the farthest point out there and I could see myself scraping it on rocks, then having to replace rollers every time whereas a hawse fairlead is skinnier and sits deeper in the bumper.
IMG_8138e.jpg

4. Buy an offset hawse fairlead that is shaped like a trapezoid to fix this issue with many ARB bumper models. - This is what I chose to do. Slee Offoad makes one for $90 + shipping, Custom Splice makes one for $90 + shipping, Chinese ebay specials are like $40 (but they're like 1/2 the thickness which might be too low profile and on an angled pull your rope might be rubbing on the sides of the opening in the bumper, and Factor 55 makes one for like $120 shipped. I decided to go with Factor 55, mostly because they have a video detailing what goes into making their offset Hawse Fairlead and also because it was the only one I could get delivered within 2 days via Amazon Prime and I really wanted this install to be over after having struggled so much with the ARB bumper mounts and now hitting this 3rd snag in the winch install.

Now, this snag isn't Smittybilt's fault obviously, it's an ARB bumper thing. BUUUUUT many Australian winch companies have taken note of this given how popular ARB bumpers are down there and supply universal hawse fairleads with their winches that can bolt up to almost any bumper the right way. I know ARBs are way less popular in the USA but they're still a major brand that has been around for decades and are the go to for most Japanese 4x4s - so it'd be nice to see US winch mfgs start to take this into account.

carbonfairlead.jpg


Snag #4. As mentioned previously, the offset hawse fairlead should be thicker to help push the synthetic rope out far enough so that it can't rub on the edges of the ARB bumper's opening during an angled pull. This is why Factor 55, Custom Splice, and Slee all make their ARB offset fairlead 1.5" thick. Well, a thicker fairlead means that the mounting bolts that come with the Smittybilt winch are now going to be too short to work for the bottom 2 mounts.

You would think this wouldn't be very hard to buy 2 new bolts but they just happen to be a really weird combination of specs that are very hard to find, especially in a small town.

If I remember correctly, the stock ones from Smittybilt are M10x1.25 x35mm 10.9 grade with Zinc Coating. I could find M10x1.25 with extended length to 40 or 45mm no problem but not in a hi tensile strength grade 10.9. Then I did find them in the right grade but only in bare steel with no rust proofing. Finally, after striking out at Ace and Home Depot, I went to Copperstate Nut & Bolt and they set me up with their only option which was to switch to SAE: 3/8x1 3/4" (I think those were the measurements but am going off memory from a few weeks ago) Grade 8 Zinc Plated and the corresponding square nuts, plus high strength flat and lock washers. Cost about $5.
 
Last edited:

SONICMASD

Adventurer
WINCH INSTALL CONTINUED...

Snag #5. As mentioned in Snag #2, the control box could not mount to the winch because of the feet forward mounting required by the ARB bumper so I needed to find a new place to mount the control box.

With the winch test fit inside the bumper it looked like the stock winch cables would just barely be long enough to allow the control box to sit on top of the bumper without having to buy longer cables.

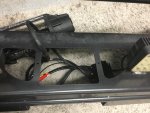
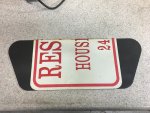
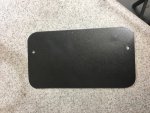
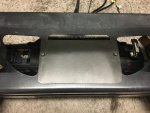
I decided to make a mounting plate to cover the big center hole in the bumper

IMG_8086.JPG


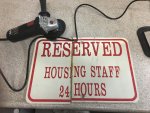
I started with an old road sign I had lying around and started chopping until I got it the size I wanted.
IMG_8081es.jpg


The ARB bumper mounting kit comes with a metal plate already sized to cover up these holes in the bumper if you're not running a winch and I could have just cut that up and it would have saved me some time but again, I didn't want to ruin something in case I decide to sell the bumper down the road one day. Also, the mounting kit is expensive so I didn't really want to ruin a component if I didn't have to and I had a piece of metal already to use so it wasn't much extra work.
IMG_8082es.jpg


I left about 1" on the back side of the hole in the bumper open so that the control box's cables could go down through there to the winch.
IMG_8087.JPG

Next, I took the OEM ARB cover plate into a few hardware stores to find as close of a matching paint color as I could and the best I found was Rustoleum's Metallic Midnight Black. It's darker than the ARB charcoal metallic bumper but not as dark as real black spray paint. It is however a really crappy / weak paint by the nature of being a spray paint with the metallic particles I think so I'm not sure if I'll use it to repaint my rock sliders one day. I might have to get custom paint made up or just paint everything else black and not care that the bumper doesn't match (cuz i don't really want to repaint the bumper). But I digress...I also painted the winch/fairlead mount bolt heads with this same color to camouflage them so that there wasn't these bright yellow bolts sticking out on the front of the vehicle.

IMG_8089es.jpg
 

SONICMASD

Adventurer
WINCH INSTALL CONTINUED...

Ok, so up until this point I'd solved a few snags but left a few in limbo. But now with the Fairlead, new Fairlead Bolts, and Control Box Mounting Plate done it was time to actually install the winch. Step 1 was clocking the winch as I identified would be necessary in Snag #2 and upon attempting to do this I discovered Snag #6.

Snag #6. After having just survived ARB's terrible instruction manual when installing the bumper mounts I was blindsided by an even worse set of instructions. By comparison, the Smittybilt literature that comes with their premium X20 Comp winch makes the set of ARB directions look like a something written by a Swiss Mathematician with Asperger's. The Smittybilt installation manual might be the worst I've ever seen, they would have been better farming it out to the Ikea instruction manual pictogram makers.

Where to begin, for starters several steps of the winch installation are completely missing, like never mentioned at all. Other steps are covered in great detail, there's like 3 pages dedicated to hooking up the 5 wires even though they're all color and letter coded with tags as to where they go. But then the sum total of how to spool your rope onto the drum for the first time consists of 2 sentences, the first one is just plain bad advice (you don't want to let synthetic rope drag across the ground on purpose as the dirt gets embedded in the rope fibers and over time as it rubs on the drum, other rope, and fairlead under massive tension it frays the rope. This is why they say to wash your synthetic rope if it gets dirt on it.)

And then the second sentence doesn't even apply to this situation of installing a new cable to a new winch that does not have any cable on it already. It's pretty hilarious looking back on it now but at the time it was super frustrating having to search for videos and other articles on how to do these things properly. Imagine if you just bought a new INSERT ANY ITEM and the directions boiled down to "Put it together like it was previously put together." Hahaha

IMG_7999es.jpg

Additionally, the Smittybilt Instruction Manual was clearly written by a Chinese person as it is riddled with spelling/grammar mistakes. So Smittybilt has been around for like 60 years, were one of the first to do the whole outsourcing of manufacturing in their industry, has an office and staff in California, but hasn't figured out yet that writing technical instructions in English would be better suited for their native English speaking employees? Brilliant.

But wait, there's more.

Just like ARB, there are zero Torque Specs in the 28 page manual. I had to call Smittybilt's USA tech support (which is actually manned by American humans it turns out) to get those numbers: 45 ft lbs if using grade 10.9 hardware, 50 ft lbs if using grade 12.9. There, you're welcome, I've already provided more useful installation instructions than the entire Smittybilt Instruction Manual.

Furthermore, the tables with all of the specs are not even for the same winch. The specs in the manual are a mix of information from the previous generation of Smittybilt winches or for the metal wire cable versions and they just never updated the specs or bothered to list them for this new generation or synthetic rope line versions.

And no, I didn't get the wrong manual accidentally included with my winch, the front cover has all new artwork for the X2O Comp series and is the same manual you can download on the Smittybilt website. It's like if you bought a brand new Gen4 Montero and inside the glove box the factory provided you with the owner's manual from a Gen3. Kinda sad too because the 2nd gen of the winch is sooo much better than the first so they're really misrepresenting their new product line in a bad way. For example, it says the weight of the winch is 99lbs but in reality it is 55lbs even with the rope, fairlead, all accessories, and control box included.

The devil's work:
IMG_7998.JPG


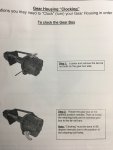
So anyways, I'm trying to clock the clutch 90 degrees using a booklet not even fit for government work and run into another issue: The clocking instructions have the new Gen2 X2O winch photo with a hex key in the correct location but the text instructions next to the photo are from the Gen1 winch and are 100% wrong. It says to remove the "two tie rod bolts" and then "rotate the gear box". This is impossible on this design. You can remove the 2 tie rod bolts (the tie rods are the two big bars that say "SMITTYBILT" in big letters in the photos below; they "tie" the left side of the winch to the right) and that will accomplish nothing in regards to the clutch because they're not even connected, the tie rods and the clutch are inches apart and do not share any bolts.

IMG_8001es.jpg


So if you run into this, here is what you do: you treat this winch exactly like a Warn Zeon.

1. Stand the winch up on it's end with the clutch side facing up.
2. Remove the hex bolts (there's like 7 of them I think) that go all the way around the clutch.
3. Lift the clutch assembly up 5mm and rotate to desired position (90 degree increments required).
4. Reinstall hex bolts

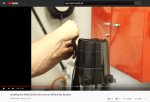
It might blow everyone's minds at Smittybilt to learn that Warn not only provides instructions that are product specific but also makes how to videos:
IMG_7903b.jpg

Ok, so I get the clutch clocked 90degrees, great. Then I decide to clock the motor side of the winch 90 degrees as well because the cables are just barely long enough to reach from on top of the bumper where I have to mount the control box to all the way under the winch motor. Again, I followed the directions and they may or may not be correct (no way for me to know) but after messing with it for like an hour I could not get the motor to come apart so it could be rotated. No matter how hard I pulled or prodded I couldn't get it to loosen up. I almost threw it back in the box, tempted to hit the "return or replace items" button on my Amazon's Order page but I decided to take a chill pill and move on with the install. Not so much for any reason other than I didn't' want to start back at square 1 given all the hours and delays thus far.
 
Last edited:

SONICMASD

Adventurer
WINCH INSTALL CONTINUED...

Ok, finally time to install the winch into the bumper. My biggest concern at this point was hoping the stock electric cables would be long enough to reach from control box to winch motor.

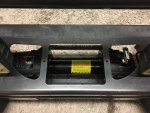
Winch bolted in place - torqued to spec + flat washers + lock washers + loctite blue threadlocker:
IMG_8098es.jpg

Custom SONICMASDFab ;-) Cover Plate installed:

IMG_8099es.jpg

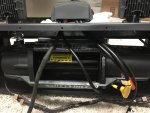
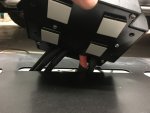
Snag #7: There are 4 wires from Control Box to the winch motor. 3 of them originate on the right side of the control box and 1 originates 2 inches to the left. However, Smittybilt made them all the same length even though they all go to the same area under the motor. This means that 3 of them get to travel together nice and neatly and the one of the left just baaaaaarely makes it to it's terminal and has to run the most direct route behind the winch drum. I can't really fault Smittybilt for this because the stock lengths of these cables are fine in the vast majority of install applications where the control box would be sitting much closer when attached to the actual winch body.

I sent Toasty some pics and asked for his advice and since the cable is on the outside of the winch drum and protective tie rods, and because I'm running synthetic, even a birdsnest that might poke out a bit from the drum probably couldn't hurt that one wire. I debated going to the auto parts store, getting a replacement 1/0 gauge wire, terminals, terminal crimper and making a longer one so it could run together with its buddies but said screw it and just decided to add an additional layer of heat shrink wrapping to it instead for added protection in case of unlikely abrasion.

IMG_8100es.jpg

Having come this far and being let down at every point, I went ahead and opened the control box, checked the tightness of all the bolts/connections in there before installing and also added dielectric grease to all terminal connections on the motor for additional waterproofing/ contact protection.

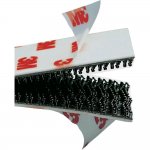
Now all that was left was to mount the control box to my fancy new mounting plate. After much deliberation I decided to use 3M Dual Lock. It's like the World's Strongest Man version of Velcro. An amazing product - instead of one side having little plastic hooks and one side having fuzzy loop material, Dual Lock has two sides that are the same, made up of thick mushroom like stems that lock together. It's 5x stronger than Velcro, each 1"x1" square can hold 10lbs so with 40lbs of DualLock, the control box ain't going no where accidentally but can be detached in seconds if I need to troubleshoot an issue in the future. It's kinda like Shin-Etsu grease, or a Fiberglass repair kit; one of those products that is kinda expensive but man is it a miracle product for certain situations.

dual lock.jpg


IMG_8102e.jpg

Ok, from here there weren't anymore snags that I can remember. With the help of a buddy, I got the ARB bumper with winch lifted up onto the new ARB mounts. I covered setting up the height/spacing of the bumper in a previous post. Running the negative and positive cables up to the battery was problem free and I pleasantly discovered while hooking up these cables that I actually had a better battery in Yoshi than I had thought (thanks Toasty!). I thought it had a bottom of the barrel Valuecraft Autozone battery, the 1 year life kind but was happy to discover it has the Duralast Gold 3 year, with 100 extra CCAs on it (750CCA) so I may not have to buy a new battery right away like I was planning. When the time comes, I'm going with a Group 31M AGM so I'm happy to delay this purchase.

All that was left to do was get the new synthetic rope installed:
IMG_8172es.jpg

ALL DONE! FINALLY! PRAISE JESUS!

IMG_8189es.jpg

IMG_8181es.jpg

IMG_8186es.jpg
 
Last edited:
SONICMASD

Adventurer
WINCH INSTALL CONTINUED...

MISC NOTES:


1. I've always wondered why so many built vehicles are sold with the winches still on them when guys are switching to a new project - I get it now. Even if I decided tomorrow to sell Yoshi and start a Land Cruiser or LR3 build, no way in hell would I go through the work of removing the bumper, uninstalling the winch, reinstalling the bumper, etc.

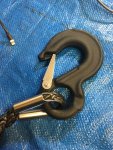
2. The stock hook the Smittybilt winch comes with is kinda cheesy. I don't doubt it's strong enough and that's the most important thing. But it's got a cheapy spring clasp on it, the hook's throat is kinda narrow so thicker tree strap ends may not fit through it, and it is a solid piece so no way to detach it from the syn rope without cutting it. I'll probably replace it soon but haven't decided with what yet.

IMG_7989es.jpg

3. Weight Calculations

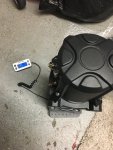
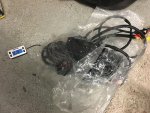
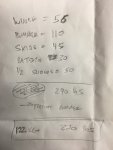
I was really amazed at how light the 12,000lb X2O Comp Winch is! The entire unit only weighs 55lbs (40lbs for the winch + 15lbs for the rope, hook, control box, wires, fairlead, etc.)

IMG_7992es.jpg

IMG_7993es.jpg


As you might recall, my front end has been sitting about an inch higher than the rear since I installed the Lovell's Lift. This is because I based which springs to go with on the projected final state of the vehicle so up until this point my front end was underweight for the rate of spring in there. The Lovell's EHD coils that I have on the front are constant rate and are designed for an additional 80 to 140kgs of weight on them for optimal performance. Adding this winch now puts me near the top end of that range and should not only bring the front end down a little to match the rear but will hopefully soften up the ride as well.

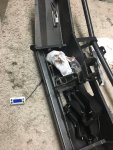
In case anyone was wondering, the ARB bumper with all components weighs about 112 lbs (there were a couple small brackets not included on the scale in this photo):

IMG_7994es.jpg

IMG_7997es.jpg

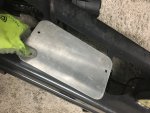
4. It turned out to be a good thing I couldn't get the motor to budge when trying to clock it. After installing the bumper with winch inside, I have better access to the electrical terminals from the bottom anyways. They might get a little bit more exposure to the elements and could possibly get struck on an obstacle or trail debris so I'll probably bend up the rest of that road sign and make a little mini skid plate to protect them.

5. Final Thoughts - So was it worth it? Would I do anything differently? Honestly, I'm just glad this part of the build is over. I definitely don't think I can recommend a Smittybilt Winch given all the extra work & frustration it caused out of sheer sloppiness from their product design team but at the same time, I guess I've already solved most of the potential pitfalls and documented them here for other Gen3 guys so maybe it's a really good way to go now because there shouldn't be any surprises for you.

I guess at the end of the day, I just want the winch to work. If it gives me 5 years of reliable service then I won't hold a grudge ;-)
 
Last edited:

offthepath

Adventurer
Great write up, thanks. I have an xrc 9500lb winch and hopefully the Arb bumper will be in this week. I'll be referring back to this frequently I'm guessing.
 

SONICMASD

Adventurer
I think you’ll have a much easier go of it. The XRC probably has an instruction manual that shows the proper clocking procedure for that winch.

Cable or Synthetic? Cuz if it’s cable then like half of my snags wouldn’t have existed.
 

SONICMASD

Adventurer
11/23/2019 - It's been about 2,000 miles since I installed the 4.90s, rear e-locker, and updated rear stub axle so I decided to change the front and rear diff fluid as a precautionary break-in procedure. This is standard practice when installing brand new gears, and is also required in the ARB Air Locker Manual; but I installed used 4.90s and there is no mention of a break-in period in the Harrop e-locker manual but I decided even before I had these upgrades installed that for just $40 extra and an hour of my time it was better to be safe than sorry.

I had Valvoline Full Synthetic 75W-90 put in the diffs for the initial break-in 2,000 miles (was hoping to do this at 1,500 but I'm a little late getting to it). Really, you could use almost any 75w-90 gear oil for the initial break-in since it's going to be in there for such a short amount of time but for some reason I thought it still better to play it safe and get Full Synthetic.

Now came time to purchase the real gear oil that would be in there for a long time and here's where things get exciting. During my research I stumbled onto a little known fact that was not only really interesting, but really important for our rigs. I had never heard of this before and almost no one has - not most diff or oil experts, not even Ken at GearInstalls or the legendary Toasty himself.

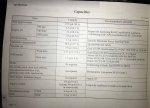
Let's start by looking in the owner's manual at the fluid requirements/specs:

FluidCapacities.jpg

So as you can see, any GL-5 oil with viscosity between 75 and 90 or a multi weight thereof is acceptable.

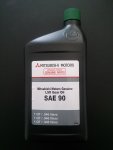
The Mitsubishi dealerships in AZ use Mitsu straight 90W gear oil but it has LSD additives in it and there isn't any way to know how aggressive the LSD additives are since Mitsu doesn't really give out any specs or even basic descriptions for their OEM fluids. If the additive package is too large/potent it can cause issues in some traction aides, again, I know ARB Air Lockers don't like heavy doses of LSD additives so I decided to err on the side of caution and not go with that fluid even though it is super cheap and would probably work just fine. It's what our Monteros came with fresh from the factory when new so if I didn't have the e-locker in the rear I wouldn't hesitate for a second to use it if looking for the best value but I do think there are probably better high performance oils out there if you're okay with spending multiples times more.

DiaqueenLSD.jpg


I put AMSOIL in Black Betty and never had any issues and decided to go with AMSOIL again for this rig. So if you head on over to the AMSOIL website and punch in your Gen3's info it will recommend 3 different product weights: 80W-90, 75W-90, and 75W-110. Interestingly, it only recommends their Severe Gear oil line for Gen3s which is even more premium than their regular gear oil that I used in Black Betty, but that's cool with me - I'm wanting the best protection possible for Yoshi's diffs.

But looking at my options, the 75W-110 caught my eye and made me wonder - Why would AMSOIL recommend a viscosity that is not recommended by the Mitsubishi Owner's Manual????

So I started digging through the interwebs and came across this gem of a statement on that Bob Is The Oil Guy forums:

IMG_7809.jpg


IMO, when a guy who has posted over 10,000 times on a forum where other guys meet to talk about...oil, you listen. Ok, so after looking into this more, I found other corroborating posts on Bobistheoilguy but no actual proof to confirm this SAE reclassification story.

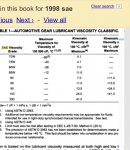
So I kept digging and yes, I can confirm that it is indeed true. I confirmed on the SAE website that they did issue a new set of oil classifications in 2005 that updated what had been in effect since 1998. But unfortunately, the tables themselves were behind a pay wall. So with more digging on the interwebs I finally found the two tables in question that lay everything out in black and white.

Here is the 1998 table of the SAE viscosity ranges:

IMG_7734.jpeg

And here is the table issued in 2005:


IMG_7735.jpeg


What does this all mean in English???

In 2005, SAE updated the oil viscosity classifications. They decided that 75W-90 was too broad of a range so they cut the range in half. The bottom half would remain being called 75W-90 but the top half would now be called 75W-110. The Montero's diffs were engineered and the manual written many years before this 2005 reclassification, meaning that what we call 75W-110 today would have been called 75W-90 when the Gen3 was made and is thus totally in spec and approved for use.

Awesome, so AMSOIL's three oil weight recommendations are all in spec for the Gen3, but which to choose? I eliminated the 80W-90 right off the bat since it's kind of a hard oil weight to find and there's not really any advantage to the decreased extreme cold weather protection other than it being $3 cheaper. So that left 75W-90 vs 75W-110. The 90 will flow a little better which will in theory give a little better mpgs and the thicker 110 will protect better under torque and higher temps. In my opinion, if your Montero is a daily driver highway machine that doesn't see a ton of dirt and rarely tows or hauls heavy loads - go with 75W-90. Yoshi is strictly a weekend warrior offroad machine and not my daily, and I tow an enclosed utility trailer every now and then but plan to tow a 3,500lb camper many thousands of miles all over the country on future family adventures with the vehicle packed with camping gear so I chose the heavier duty 75W-110. I think the deeper 4.90 gears will like this heavier weight as well.

Side note, if you're experiencing any gear wine, step up to 110 and see if that solves it.


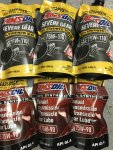
While I was at it, I also bought fluid for my Transfer Case since I have no record from previous owners on the last time that was changed. No research or viscosity debate needed there, they only offer 75W-90 in GL-4 for manual transaxles (same stuff I used in Black Betty several years ago):


IMG_7705.JPG


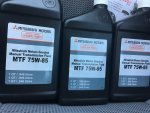
PS - The Mitsu dealers use 75W-85 for the Transfer Case and again, it's a great value at 1/3 the price, what our rigs came with new, and I used it on my last Gen3. Good stuff but I wanted oil from the USA's premium oil maker for Yoshi.

IMG_2859.JPG
 
Last edited:
SONICMASD

Adventurer
CONTD.

Enough Tech, here's the actual work: I drained the rear diff first and found that the 2,000 mile old Valvoline oil was much dirtier and there was way more metalic shavings on the drain plug than you would normally find after only 2,000 miles of use. I kind of expected this as the new components: locker, 4.90s, and stub axle, meshed together. I reached out to Ken at GearInstalls just as a precaution, sent him the photos and he too agreed - all looked totally normal and was a-ok.


IMG_7701.JPG


IMG_7703.JPG

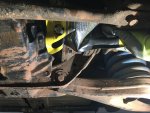
I think a lot of this gunk was from the one new stub axle, if you recall Ernest was only able to get one new stub axle seated in the diff after a lot of banging and the other new one got destroyed. We learned the hard way that although the Gen3 had a recall on stub axles and Mitsu made the circlips bigger, the Harrop e-locker must have been designed before this change (10/2005) and was machined to accept the smaller circlips.

IMG_7704.JPG

I tried out the AMSOIL Easy Pack packaging for the first time and although I was skeptical, I was actually really impressed. It really did make filling the diffs and tcase easier and faster by not having to use a pump and they can fit into some pretty tight spaces that a normal gear oil bottle would never fit.

IMG_7706.JPG

The Front Diff oil was waaaaay cleaner and there was pretty much nothing on the drain plug magnet. Again, as I expected from an open diff. The 3 quarts of new fluid were juuuuuust barely enough for the 2 diffs, I had like 2 table spoons left over so don't spill any or else you'll have to scrounge up another quart and ordering from Amsoil is not the easiest thing and shipping on one quart would make it a very expensive little bit of gear oil needed to finish your service...maybe just play it safe and buy 4 qts from the start. This is actually what I did years ago when I did the service on Black Betty's diffs and the only reason I didn't order 4 qts this time is because I knew if I needed a tiny bit more I could top off with the left over quart from that job that is still sitting on my garage shelf.

As for the Tcase, the fluid looked as expected, dirty but not horrible, probably like it was replaced by the dealer before they sold it to Toasty 40,000 miles ago. The capacity table calls for 3 qts but you'll never get that much out of it with a drain and fill, 2 qts is about it.

TORQUE SPECS

DIFFS - DRAIN BOLT: 47 FT LBS, FILL BOLT: 37 FT LBS
TCASE - DRAIN & FILL BOLT: 24 FT LBS

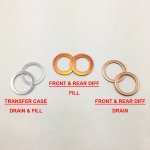
DRAIN & FILL BOLT CRUSH WASHERS


I forgot about ordering new crush washers when I did the diffs, then I had to wait for them to come in, then I forgot to order the ones for the tcase. Anyways, it was a bit of pain to get them and find the current part numbers and there's 3 different sizes and they're made of different metals from each other so I didn't want to use a generic washer kit, etc. So after finishing up this job I thought it would be helpful if there was an OEM kit that has all the crush washers needed for the job.
s-l1600.jpg
 
Last edited:
SONICMASD

Adventurer
Now, no gear oil post would be complete if I didn't nip this in the bud before the Redline Brigade arrives: Yes, I know Redline is also great stuff. Yes, it might even be better than AMSOIL. In the end, I chose not to use it for several reasons though as I didn't think it was the best fit for this rear diff application but I wouldn't hesitate to use Redline for other applications. It's certainly more convenient to get because it's available on Amazon, unlike AMSOIL.
 

SONICMASD

Adventurer
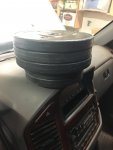
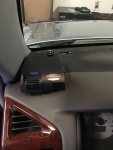
2/11/20: Car Phone Mount installed. I went with this Scosche brand mount because it comes with a flat plastic disc with adhesive on the back so you can affix it to textured dash materials but then easily remove it if not needed, or if you want to move it to the windshield. Also, I like that it has an arm so that the phone sits closer to you because the dash is pretty far away from the driver in the Montero, it's like the opposite of a modern Tacoma/4Runner which I find as roomy as a coffin.

Whenever I affix adhesive mounted things to cars, I clean the area with alcohol, then attach the product, and then whenever possible I place weight on it for 24 hours before using it. This overreaction comes from living in Phoenix for decades and having plenty of things fall off in the summer time.

IMG_8986.JPG


IMG_9002.JPG
 

SONICMASD

Adventurer
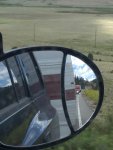
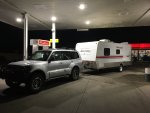
2/12/20: Ok, on to more important things than phone mounts. As I've talked about before, I've been struggling with the Montero's lack of power. It's the main reason I sold my beloved 98 and moved to a Gen3. I have many fond memories of an awesome vacation I took with my Gen2.5 - driving almost 3,000 miles inside of Colorado. But the one thing I really don't look back on fondly was managing to only go like 30mph over highway mountain passes with my foot on the floor in 2nd gear towing a very light vintage camper:


IMG_2601.JPG


IMG_2582.PNG

IMG_2613.JPG

IMG_8062.JPG

Yoshi's extra 15hp, lower mileage, and 5 speed transmission definitely help (both rigs have 4.90 gearing) but towing a small utility trailer up and down the I-17 to and from Phoenix occasionally has not been very reassuring that this rig will be able to tow a travel trailer that much better though the mountains of Colorado.

I've loaded this trailer up to the max, up to about 2,500lbs and even with it being much shorter/having less drag it made a massive difference going up the mountain. Sure, Yoshi could pull it but like I said, it left me worried as to what would happen with a much bigger and heavier camper.


IMG_8551.JPG

I've been looking at other vehicles for months, wondering if it would be worth switching vehicles again, for the 5th time in less than 5 years - but for the first time to an entirely different platform. Most of the contenders have V8s: LC 100 series (particularly the 2006-2007 which has 45more HP than previous years and is coupled with a 5-speed transmission), 1st Gen Sequoia, LR3, F-150, Tundra, and the LC 200 series.

Selling Yoshi, after soooo much work...and typing, is not a decision I could make lightly and the thing is, there is just no way that I can make that decision in the dark. The fact of the matter is, I'm pre-judging Yoshi, assuming he can't hack it but in reality I've never even tried to tow a camper with it. The problem is that while I did install a simple plug and play 4 pin trailer plug, any camper that I would buy would have a 7-pin connector with trailer brakes and I had no way to test this kind of camper. So even though this might be the last mod I do, and a total waste of money, I decided that I had to have a 7-pin connector installed so that I could settle this nagging question and doubt once and for all.

I purchased this Tekonsha Proportional Brake Controller on Amazon and made an appointment at Uhaul to have it installed. I spoke with the installer at length about how I wanted the components mounted and he was great, a total gearhead, and completely on board for what I wanted: nothing to snag on underneath the back bumper, clean wiring install, and putting the brake controller in a place that it was actually viewable and accessible. We came up with a plan and he executed it perfectly. Took him like 3 hours rather than the 1 hour it was quoted but they still only charged me for 1 hour and I really appreciated the meticulous attention to detail. 5 stars for Uhaul of Flagstaff on Huntington.

Getting work done! Feels good to have someone else knock something out rather than spending x5 as long myself, especially now in winter when the garage is just barely above freezing. Electrics are not my strong suit.

IMG_9022.JPG


Ok, here's what we came up with. Uhaul knocked it out of the park!

We went with their basic 4-pin to 7-pin connector but rather than having it simply plug into the existing 4-pin harness, the tech cut off the existing 4-pin ending and hardwired in the 7-pin because he said that overtime the easy way of just plugging in the two together just traps dirt and water in there and he has seen too many of the connections fail over time. And also it removes a lot of unnecessary wiring stuffed up behind the bumper.

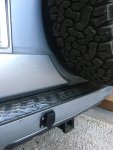
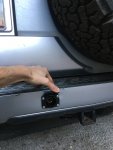
Not wanting the new plug to hang any lower than the hitch, and not being able to simply tuck it behind the hitch when not in use like the thing 4-pin plug, the only real option was to install it directly into the plastic bumper. This was another reason that I went with the basic 7-pin unit as opposed to the fancier one that has both a 7 and 4 pin input - because this one is much thinner and doesn't stick out as far. Don't mind the scratches on the bumper, those were already there. I particularly like how he thought of using rivets rather than just sheetmetal screws which would have no doubt loosened up over time.

IMG_9102.JPG

IMG_9103.JPG

We decided to put the brake controller on the dash, to the right of the steering wheel. Most people put it under the steering wheel by their knees, but because of where the hood release and fuel door release levers are on the Montero, the only place it could go on the knee panel would be in the center, directly under the steering wheel. This means that you can't really see the display screen of the controller without having to do some gymnastics and take your eyes off the road...most likely when your trailer is not behaving and needing to be braked as you try and find the controller. So this location allows me to not only see the display but also reach the controls easily with my left hand while watching the road. It is held in place by a previously recommended product, one of the greatest inventions of all time: 3M Dual Lock.

IMG_9104.JPG

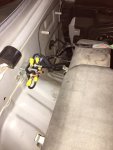
Lastly, we decided to place the 2 auto-resetting circuit breakers on the passenger side of the engine bay because I have a lot going on on the driver's side (more on that coming soon). He ran the wires from the trailer harness along the existing wire loom I already installed going from the rear e-locker and then the circuit breakers were mounted on the fender side wall leaving the main empty area in the corner free for a 2nd battery or air compressor should I want one in the future. And if I ever want to move the circuit breakers to the firewall (like if I get a snorkel, which I doubt I ever will because I'm not really a fan of them for the Gen3) then that is no problem too because that means moving them closer to the battery so I have plenty of wire as opposed to mounting them on the firewall and then needing to splice in more wire to move them farther away (we chatted about the install for a good while haha). The wires coming from the controller in the cab, exit the firewall through the existing main passenger side wire harness entry hole by making a tiny slit in the bottom of the rubber boot. He could have used the hole/grommet that the radio antenna runs through but was concerned this would cause interference/static with the radio.

IMG_9107.JPG
 
Last edited:
SONICMASD

Adventurer
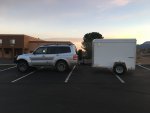
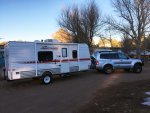
2/12/20 CONT'D: With the trailer brake controller and 7-pin input installed, I bugged my friend to let me borrow his camper and join me for this epic, do or die test. The camper is 21 feet long and weighs 3200lbs. This is one or two feet longer than the camper I'd buy and more importantly, about 400-600lbs heavier. So I figured that if I could tow this camper with a light load in the Montero at 5,000-7,000 feet in elevation then it would be comparable with towing a lighter camper but with more gear/weight in the Montero at higher altitude.

Additionally, there are 2 problems with Yoshi currently that reduce it's towing ability:

1. My front coil springs are oversprung/too heavy for the weight on them which pushes my front end up and my back end down, this is exacerbated once a trailer is hooked onto the back and reduces the vehicles stability, braking, pulling, and handling when towing.

2. My variable intake butterfly valves are removed so I'm missing a fair amount of low end torque. I estimate around 10%.


So again, if Yoshi can pass this test given the heavier camper AND these 2 mechanical problems then I don't need to switch platforms, this rig will be able to handle the Colorado family vacations.

What do I consider passing the test? Afterall, there wasn't really any doubt that it could pull the camper up Arizona's steepest highway grades, it could probably tow a load twice as heavy up the mountain, but the question is: at what speed? I decided before we set out that if Yoshi could maintain 40 mph in 3rd gear up the hardest grades then it would be a success. That would be 10mph faster, in a higher gear, towing a much bigger and heavier trailer than I did with my 98.

All hooked up and ready to go:

IMG_9030es.jpg

Shortly after this was taken, I lost indicators and hazard lights and lit up some dash warnings. We pulled over and I found that while dialing in the settings/testing the brake controller with the camper attached I blew the hazard light fuse in the engine bay. I think the voltage was too high for the plug and play connectors that utilize the existing harness behind the tail lights. I turned the brake controller's power down a little and didn't have any more problems but if it happens again I'll probably take it back to uhaul and have them make some adjustments/hardwire the 4 main wires.

We set out from Flagstaff which is at 7,000'; I mention elevation so much because I've found it to be one of the biggest factors that has affected the Montero's ability to tow. At 7,000' you're producing approx. 20% less power than at sea level so trailers that pulled great in Phoenix which is at around 1,000', pull like crap once up in Flagstaff. I towed the camper down the I-17, past Camp Verde, up the big and very long grade that goes up over the Verde Rim / Black Hills Mountain Range. This grade is a tough one and pretty much the only spot that the interstate widens to 3 lanes outside of Phoenix because it brings trucks down to a crawl. Then we turned around and did the journey back to Flagstaff, climbing up from 5,000' to 7,000, back up over the Verde Rim and then the Mogollon Rim. All told, it was 120 miles of towing some of the hardest sections of interstate in the USA and I can now say comfortably that Yoshi is a beast. The slowest I ever got was 47mph in 3rd gear @ 5,000RPM going south over the Verde Rim. Most of the time though, steep climbs could be done at around 50-55mph in 4th gear at around 4,000RPM.

I didn't track my fuel consumption accurately but estimate based off the fill up in Camp Verde then again upon my return in Flagstaff that it was around 10mpg, which is actually really respectable considering where this test took place (I've seen several reports that 200 series Land Cruisers get like 8mpg when towing with their big 5.7L V8).


IMG_9033.JPG


Once again, after many years, and this my 4th one, the Montero finds new ways to impress me. This test means that I'm sticking with Yoshi and can dismiss all notions of switching to a new platform. It also pushes me to fix the 2 problems that are taking away from my towing abilities (the front springs and butterfly delete). It also motivates me to spend more $ on this rig to increase performance - can you say pre-cat delete Australian Headers coupled with a high flow main cat and before and after dyno tests to boot? The future for this 2005 Gen3 is bright.
 
Last edited:
offthepath

Adventurer
Interesting. I'll be honest, when I started reading I did not expect the montero to do that well. How did it do on the flats, speed gear, etc?
 
Last edited:
SONICMASD

Adventurer
Interesting. I'll be honest, when I started reading I did not expect the montero to do that well. How did it do on the flats, speed gear, etc?

Yeah, I was pleasantly surprised. On the flats I just kept it at 65mph, even though I could have gone faster, in 4th gear at around 3,000RPM. I don't plan on ever using 5th gear when towing something this large unless it's a really long downhill.
 

Forum statistics

Threads
188,177
Messages
2,903,357
Members
229,665
Latest member
SANelson
Top