Zelix Homemade Trailer Build

Zelix

Adventurer
You might see if you can get 2x2x0.100 wall for the walls and other parts. In hind sight, I wish I had, to save a bit more weight.


Thanks for the input. That's pretty close to 1/8" .100 vs. .125

I'm not sure if my local supplier has that. I got a quote on Square Tube 2x2x1/8 @ $1.7/per foot. For ease of construction I'll just make the entire trailer out of it.

I've been practice welding on 1/8" thick angle steel. I'm kinda use to it at this point, can do a decent weld, and feel more confident with that thickness..

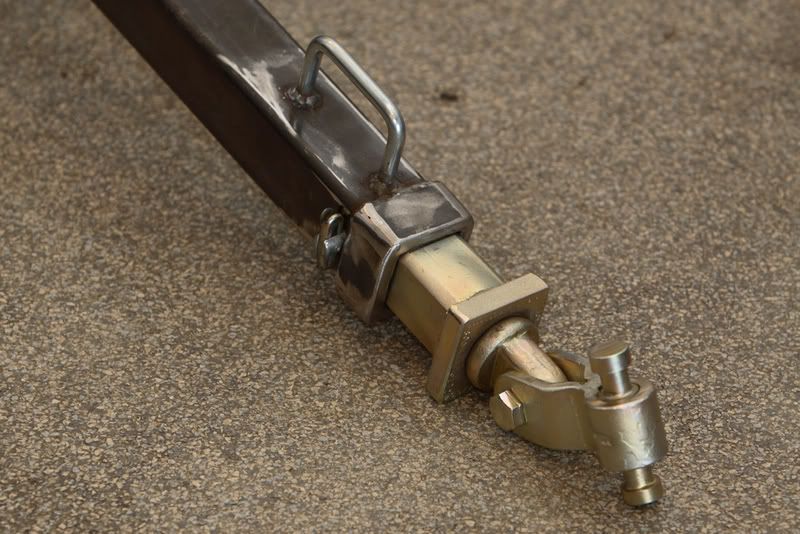
Just a thought, typical hitches are 2" so a 2.5" tube that's 3/16 wall thickness is just right to use as the tongue material. Or you can get it in 1/4" wall thickness. I used 3/16 and reinforced the end of it where the hitch goes into it.

I just read you wanting to use 2x3 for the frame and tongue and wasn't sure how you were going to use 2x3 for the tongue if you plan to slide a hitch into it. If you are planning on welding or solid mounting whatever hitch you use, then do what you like.

I'll stay out of it after this, but since you're planning on a trailer very similar in size to mine, 2x2 for the entire thing seems like serious overkill. Now for something larger like R_Lefebvre's trailer then I can see that making sense. Of course like I said before, it never hurts to overbuild something but 2x2 just seems like a lot to me.

Now back to keeping my mouth shut. :)

Please don't "keep your mouth shut". I appreciate any input You provide. I've shown my pal that's a structural engineer my ideas. He said "For what you are going to use it for the 2x2x1/8 will be more than enough". I hate to sound like a waffle master....but I'd rather get my mind right before I start buying steel. Changing up mid stream could get expensive.

It really depends on the end goal. 2x2 using a fairly thin wall (<0.09") might be just the ticket. There is no single correct answer, only what is right for you.

Be careful with selecting socket tubing, a 2.5" x .250" wall tube may or may not allow a typical slider to slip inside it. The tubing used in the sockets of socket receivers is specifically made for that application. It doesn't have an internal seam rib and the corner radii are slightly sharper than normal. Of course, they charge more for that stuff. Never hurts to try the std. tube, but take a sample of what you want to slide into it with you.

haven't thought of that. I was thinking of doing one of those reciever hitch cargo baskets. I'll keep that in mind.

Adam, no need to bow out of the conversation. We're just talking about what is the ideal direction to go, and if he's copying your design, then by all means... I think what you did is really good, as I said I'm a fan. Simple and easy to build. 1.5 square tubes for the sides is probably fine on a small trailer, you're not building a dump truck. ;) In my case, I have a total of only 6 uprights on a much larger, much taller trailer. I just recommend a 2x3 frame, as it's an easy upgrade with substantially more strength.

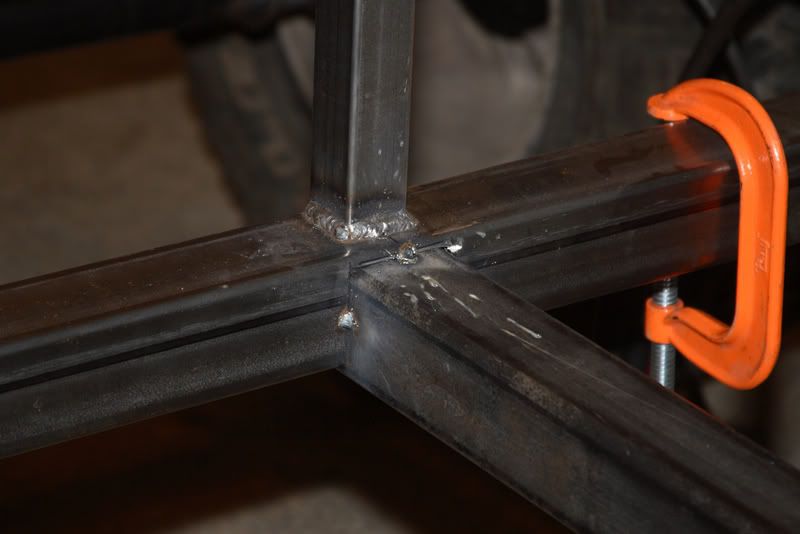
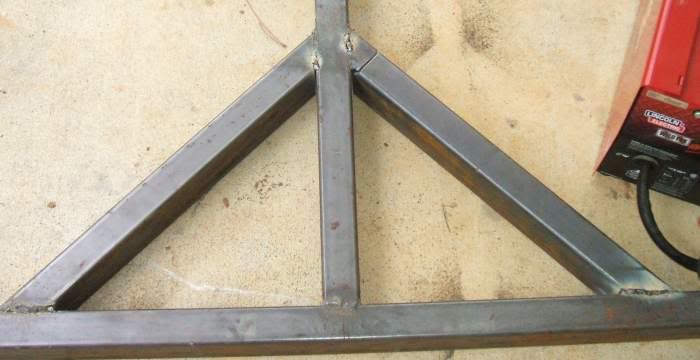
For the tongue, I am really happy with the way I did mine, and recommend it to everyone. You're right, you can't slide a 2x2 tube into a 2x3, but I wasn't sure if he was planning on that. When I suggested 2x3 for the tongue, I was mostly referring to the side branches. Then you can use a 2x2 or 2.5x2.5 for the central member, and bring them together like this:


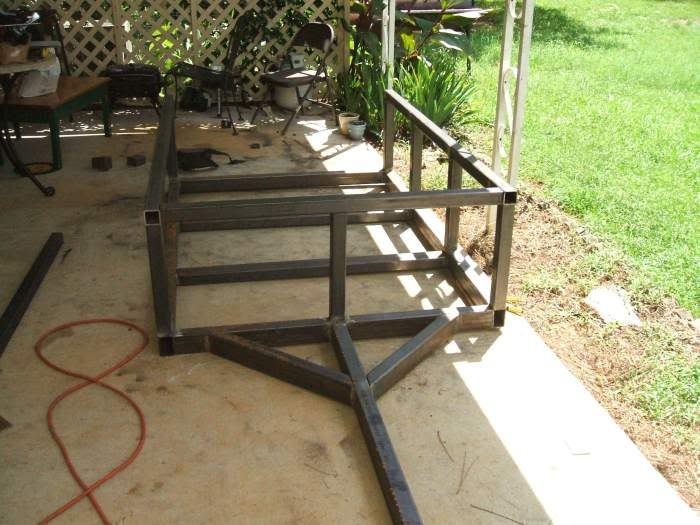
The joint was hard to do, but I really like it. Lots of weld to join them together, no stress concentrations... The only thing was, it was hard to cut, as I say, takes some fiddling. I didn't quite do it right and the gap at the back was way too large and I couldn't even weld it up (maybe could have with a MIG). This design needs to be backed up, the central member needs to be extended all the way back to the frame, or in my case I turned it into an A frame.


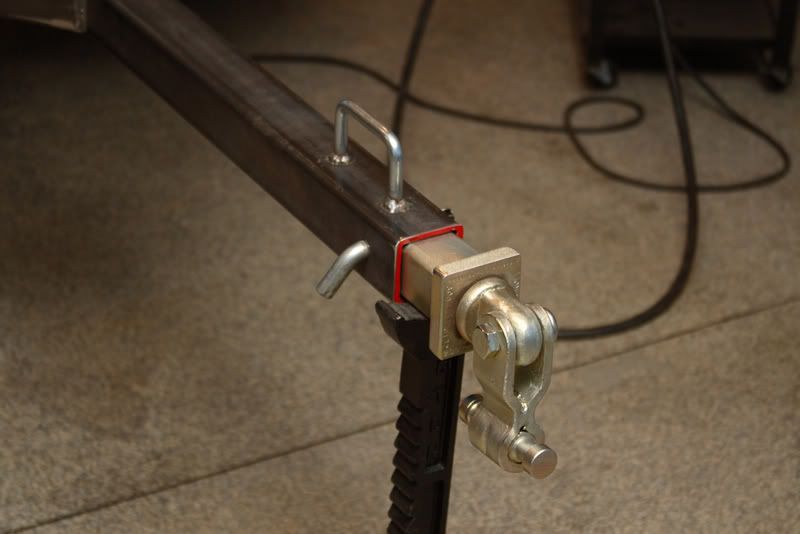
Now, as for the tube, I called the steel shop, and when I asked for 2.5x2.5x1/4 they asked "Are you building a hitch? We have a special tube, 0.234" with a ground inner seam so that a 2x2 will slide in". Perfect. It was expensive though. I think $75 for 3 feet. Anyway, that's what you want, and it sounds like it's common. I also bought a 1" piece of 3x3x1/4 which I put on the end for reinforcement. I recommend this strongly. It was hard work getting that on there too, which highlights the folly of trying to slide 2x2 into a regular 2.5x2.5.


WOW, that's some serious fab work. I'm not really up to that skill level. This is my first real welding project. I think I'll go with a simpler design for now until I get more confidence [projects under my belt] in my skills.

I haven't camped in a couple of decades. I have to get my camping equipment out and do a 'mock up' of the proposed size to see if it's going to suit my needs [As Box Rockets suggested THANKS!]

I do have a feeling that after we [me, my wife and daughter] get to camping... we'll want to get more 'into it'. At that time I might build a mother of all trailers.

Sorry to seem decisive. I just think it's best to hash it all out before going at it like a wild animal. :)

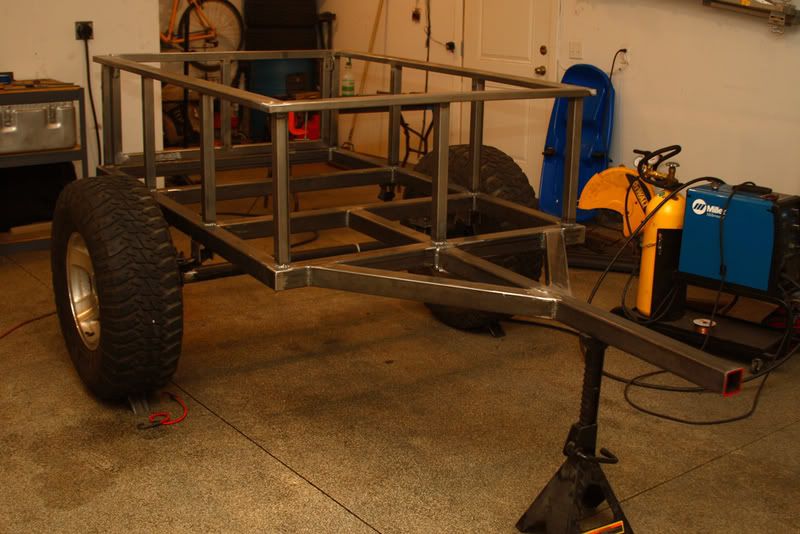
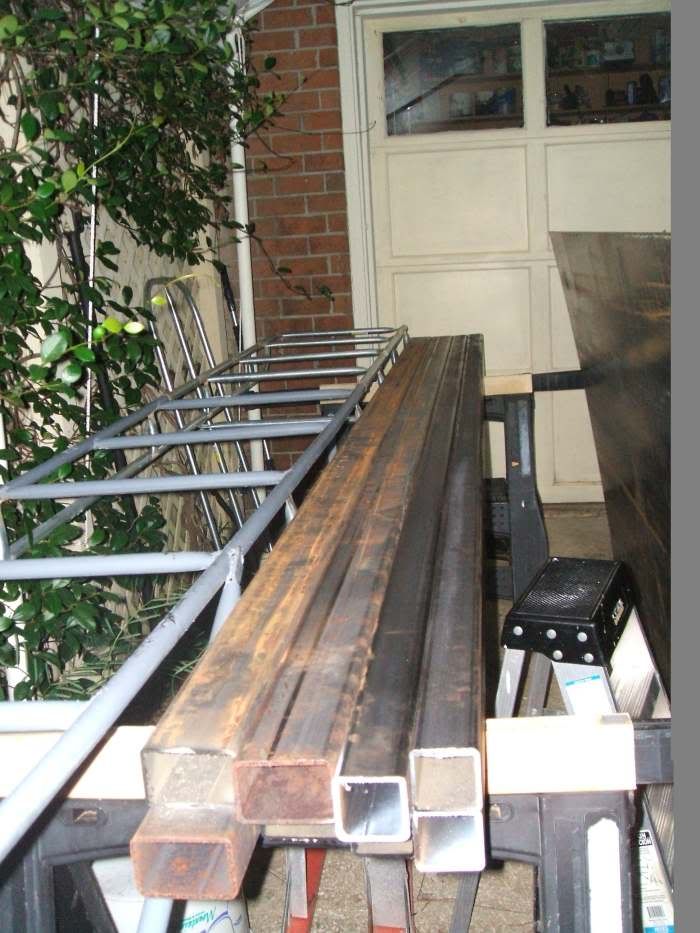
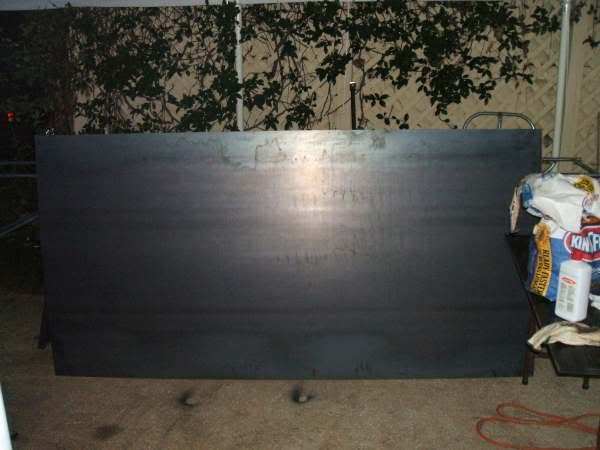
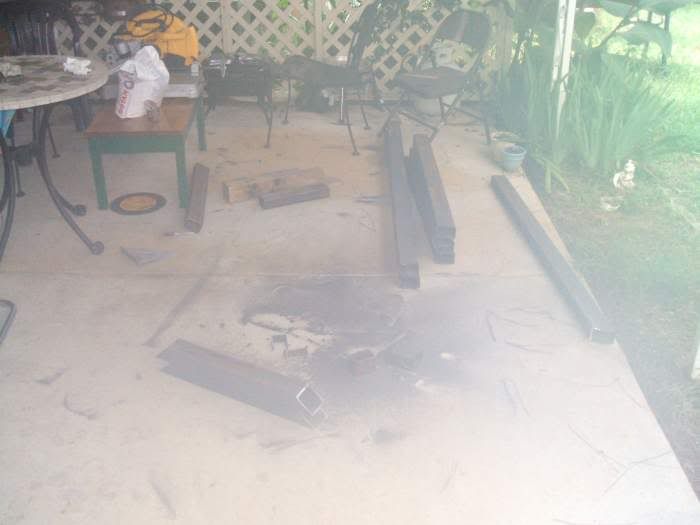
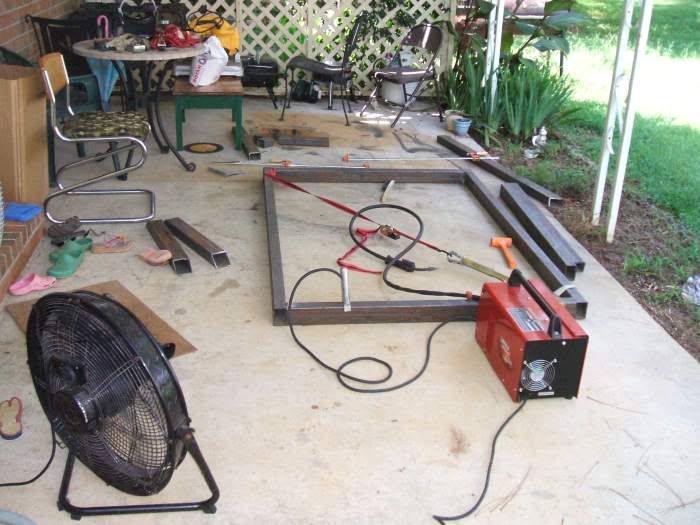
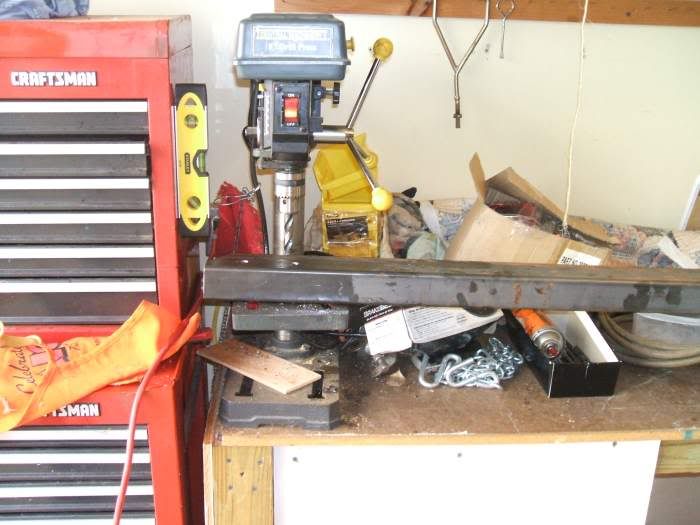
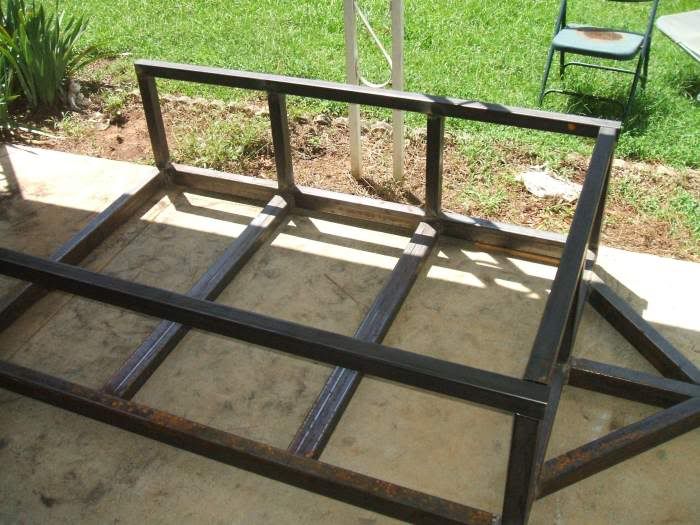
I'll try to get some shots of the trailer kit and the work area tonite.

Hopefully I'll make a trailer worthy of being in the same league as all the ones here. :bowdown:
 

Box Rocket

Well-known member
So really basic idea of how I handled mine....take it how you will.

Main frame material was 2.5" .120 wall. My tongue peice was 2.5" 3/16 wall. Triangulated peices on the tongue were the same .120 wall used on the frame. The tongue peice I used was a 4' section.

Here's a shot of the whole thing....
_MG_3291.jpg


For where the tongue attached to the frame, rather than just butt weld the tongue to front of the frame, I cut out the front and bottom surface of the frame and slid the tongue peice into that which allowed me to have much more weld surface all around the front and bottom of the frame.
_MG_3286.jpg


I added another peice of .120 wall between the front frame crossmember and the forward middle crossmember and then welded in a "spanner plate" (yeah I just came up with that term, I'm sure there's a correct term that I don't know) to further connect the tongue and the new peice between the crossmembers. You should be able to see that new peice and the "spanner plate" in this photo.
_MG_3396.jpg


I welded additional peices in between each crossmember so the tongue is indirectly extended all the way to the back of the trailer. The best case for this would be to use a longer peice of tongue material that runs the full length of the trailer, but I chose not to section the frame and just welded in sections of the tongue instead to help keep the center of the frame strong under the forces being exerted on the tongue from pulling or pushing.

Here is the 3/16 wall tongue prior to reinforcing the end of it.
_MG_3395.jpg


Here it is afterward. I didn't have a larger section of tubing to slide over the top so I used some 3/16 strap that I had lying around to reinforce the end of the tongue.
_MG_3420.jpg


Hope that helps.
 

Box Rocket

Well-known member
Adam, I like the "spanner plate" name, I have commonly seen them called gussets

"gussets" huh? what are these "gussets" that you speak of?
.
.
.
.
.
.
honestly it isn't really a gusset (at least in my view) since a gusset is typically used to brace a joint by adding material into the corner of the joint. What I did was merely adding a plate to overlap a seam on the same plane, or in other words "span" the seam and tie to toe peices together better. So I'm sticking with "spanner plate". :) Thanks for bustin my balls all the same.

Sorry for the hijack.
 

Zelix

Adventurer
Well I've been M.I.A. for a while. I finally got my duckies in a row.

I have a nice canopy set up and ready to get my trailer build kicked off.

Placed a steel order just a few minutes ago. It'll be here on Monday. :wings:

going with the 2x3x1/8 for the tongue and bot. perimeter. 2x2x1/8 uprights and top perimeter. 16 ga sheet for the walls and wood decking. I haven't decided the tailgate yet.


OT: I also purchased some boat plans. I'll be building a boat as soon as I finish up the trailer. :)
 

Zelix

Adventurer
Steel has arrived

I picked up the steel yesterday at lunchy. I took a couple of pictures this morning. I will start working on the trailer TONITE! :wings::wings:


Here's the tubing stacked up:
tubesteel.jpg


A picture of the 16 ga sheet metal.
16gasheetmetal.jpg
 

Zelix

Adventurer
Finally the build begins

I finally started making progress. Here's a serious of shots I took today. Comments and critiqs are welcome [please be nice if possible] heh.

Just finished cutting the tongue, and the base frames
1.jpg


So in this picture I had tacked the four corners. I noticed that it had moved on me. [was that my fault or just movement from welding?] So I put some love on it with a strap as you can see.
2.jpg


Ok so the basic frame is welded. I drilled the holes for the tongue hitch thingy. Thingy- a technical term. heh.
3.jpg


Here's a picture of the tongue. You can see my little welding machine in this picture.
4.jpg


Heres a picture of the cross members welded in place.
5.jpg


Note: I had difficulty with making decent 45 miter cuts with the 2X3X1/8. I'm hoping I'll fair better with the 2X2. I might just make squared off cuts and weld a end plate. It seems to be a judgment call at this point. I realize I'm not a master craftsman. In fact this is the biggest metal project I've ever worked on thus far.

Here's a picture of the butchered 45s...
6.jpg


Thanks for viewing. I hope to work on it more tomorrow. I am currently sipping on a cold beverage relaxing now.
 

'05TJLWBRUBY

Adventurer
Looks like you're making good progress so far. I must admit I'm kinda glad to see I'm not the only one who struggled with those darned 45's. I had a heck of a time fitting mine on my build so far. They're horrible! I'm using 2x4 rectangle, so there's an extra inch there to fight with too, man it's awful!

If you have any more to deal with, I don't know how you're doing it now, but what I do that works well, but is a little more work is using a angle finder/protractor thing that I can place on both sides of the 45 degree angle on the cut piece of tube. What I found was after cutting the tube with the chop saw, the top and bottom could be off as much as 3/16" in some instances for some reason. Not really sure how or why that is as I tried to make everything else as level and equal pressure as I could for each cut. That was the absolute worst one, and consequently the first one I cut-I got better with the more I cut, but they were all off by at least 1/8", which is several degrees. With the angle finder, I'd then use a flapper disc on a grinder to shave away the last tiny bit needed to get a good tight fit so they mated up decent. It was more work to do this this way, but my frame is joined at all 45's so it's sealed all internally if that makes sense, so it had to be exactly square. It was a real PITA to do this this way and took me I think 4 tries of tacking, then cutting apart and tacking back together to get exactly square, but I finally got it. Without the angle finder and grinding a little here and there, it never would have happened. The hard part is probably done for you, but you mentioned some 2x2, so it might help with that. I don't know-like you, I'm hoping that's easier. I'm not at that point yet with my build either... If there's a better way, I'd sure love to hear it, but so far that's what I found that's actually working for me. Maybe it will help you, I don't know.

What wall thickness is your 2x2? It looks a little thicker than .120 in the pics above.

Looks good so far!

Best of Luck,

Mike
 

Zelix

Adventurer
Looks like you're making good progress so far. I must admit I'm kinda glad to see I'm not the only one who struggled with those darned 45's. I had a heck of a time fitting mine on my build so far. They're horrible! I'm using 2x4 rectangle, so there's an extra inch there to fight with too, man it's awful!

If you have any more to deal with, I don't know how you're doing it now, but what I do that works well, but is a little more work is using a angle finder/protractor thing that I can place on both sides of the 45 degree angle on the cut piece of tube. What I found was after cutting the tube with the chop saw, the top and bottom could be off as much as 3/16" in some instances for some reason. Not really sure how or why that is as I tried to make everything else as level and equal pressure as I could for each cut. That was the absolute worst one, and consequently the first one I cut-I got better with the more I cut, but they were all off by at least 1/8", which is several degrees. With the angle finder, I'd then use a flapper disc on a grinder to shave away the last tiny bit needed to get a good tight fit so they mated up decent. It was more work to do this this way, but my frame is joined at all 45's so it's sealed all internally if that makes sense, so it had to be exactly square. It was a real PITA to do this this way and took me I think 4 tries of tacking, then cutting apart and tacking back together to get exactly square, but I finally got it. Without the angle finder and grinding a little here and there, it never would have happened. The hard part is probably done for you, but you mentioned some 2x2, so it might help with that. I don't know-like you, I'm hoping that's easier. I'm not at that point yet with my build either... If there's a better way, I'd sure love to hear it, but so far that's what I found that's actually working for me. Maybe it will help you, I don't know.

What wall thickness is your 2x2? It looks a little thicker than .120 in the pics above.

Looks good so far!

Best of Luck,

Mike

Thanks for the post Mike. I really have to confess the truth. I think the 45 problem is in fact my doings. I've never really ever fabricated anything metal before. I figured it'd be the same as wood [which I'm fairly confident working with]. It's kinda the same, but yet a whole different animal. I'll have to find out where I went wrong later on. It'd be nice to know in case I tackle another project... which I always seem to do.. :coffeedrink:

I've gained another level of respect for all the builders here. Anyway, I'm kinda proud of my accomplishments so far. Although my trailer isn't the complete meaning of perfection... it is My trailer. :)

All the tubing is 1/8 thick... Which in hind sight is overkill. I used it for two reasons. 1) I was afraid I'll be blowing through anything lighter when welding 2) I wanna be able to haul some sand/top soil/firewood if need. I think the trailer will handle anything I throw at it.


http://www.toolfetch.com/Category/Metal_Fabrication/Metal_Cut_Saws/Rage3.htm

These make 45's easy.

This is what I am using to build my trailer. Its a compound miter and my buddy has the circular saw version that I use to cut the sheet metal with. I've been very happy with it.

Man that's a sweet looking saw. I have borrowed this DeWalt Heavy-Duty 14 Inch Chop Saw from my father. It's a nice saw.. the limitation is: It can only do as well as the operator that's running it. heh.


for cutting the sheet metal I'm thinking of getting a blade for a circular saw. I think it'd work good enough. I'll let you know when I get to that phase.


So here's the trailer p0rn, pals.. heh


I've welded up most of the uprights. I also attached one of the top rails [far side] I couldn't stand the steel laying around so I "mocked up" how it's basically going to look.
7.jpg


Another picture:

8.jpg


That's were I left off yesterday. I feel like I've made some good headway... although I realize I have a lot left to do....

The short list of things left to do:
  • finsih welding the the uprights and cross pieces.
  • complete welds on the cross members.
  • complete welds on the 45 tongue braces
  • weld up cap plates
  • weld on the axle attach.
  • attach the axel
  • cut the sheet metal
  • weld the sheet metal
  • attach tires and measure fenders
  • attach fenders and wet of trailer hardware
  • prime and paint
  • put wood decking in
 

'05TJLWBRUBY

Adventurer
Boy, looking good! Sure be nice to get some days off to get back out and work on mine. Some good inspiration there to start on the main box. Exciting work!

Best of Luck,

Mike
 

Forum statistics

Threads
186,600
Messages
2,887,893
Members
226,715
Latest member
TurboStagecoach
Top