Zelix Homemade Trailer Build

Zelix

Adventurer
Looks aweful familiar. :sombrero: Coming along nicely sir.

Thanks! That's a tremendous compliment. As you know I modeled my trailer after yours. :sombrero:
I'm sure your trailer is made more precise and accurately constructed.You've got a serious classy trailer. I really love the lines on it.
pipe.gif


I've got a few things not 100% level. I kick myself in the butt every time I walk around it thinking... Why did I let that get out of whack?
doh.gif


Boy, looking good! Sure be nice to get some days off to get back out and work on mine. Some good inspiration there to start on the main box. Exciting work!

Best of Luck,

Mike


Thanks. I hit it pretty hard over the weekend. I'm taking a few days to regroup...then I'll go back at it.[Who am I kidding? I'll prolly cut up the tailgate pieces tonite.]

I'll have to revisit your trailer thread again today. :coffeedrink:


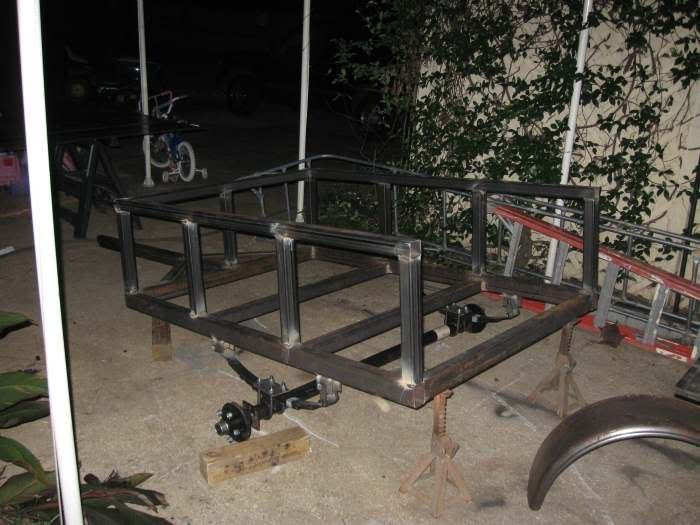
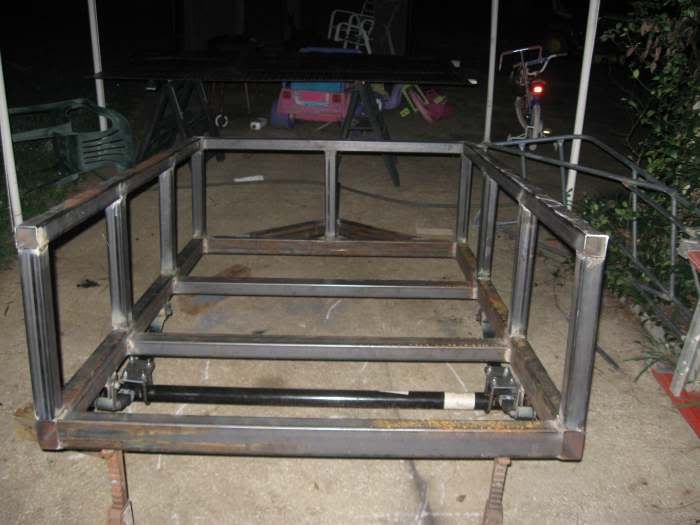
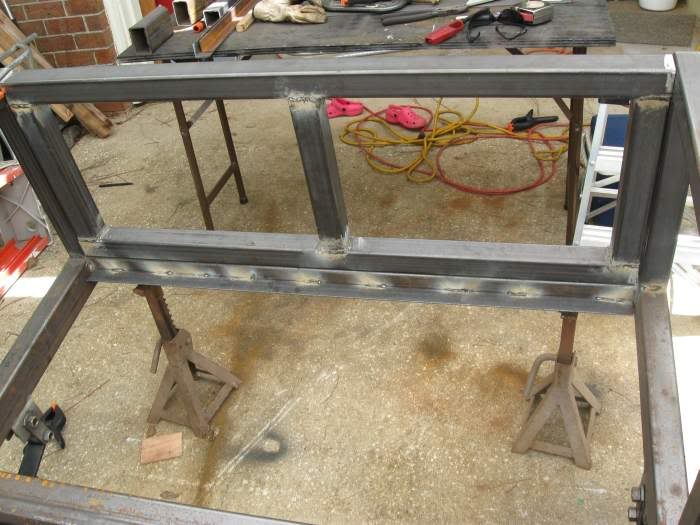
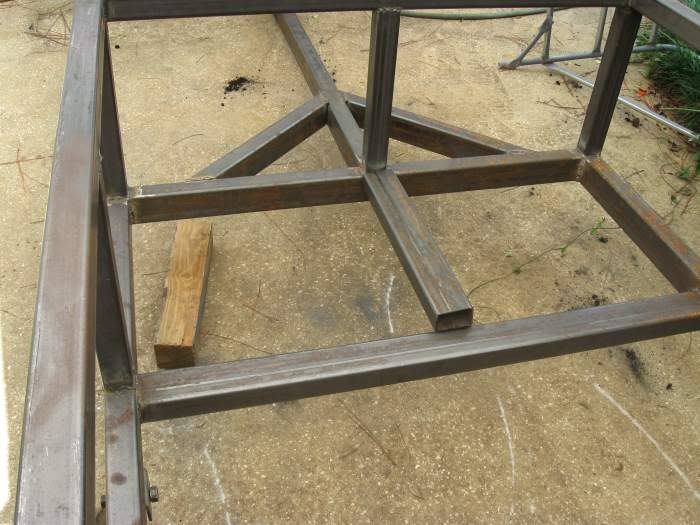
Here's the latest pictures of where I'm at:

couldn't resist slapping the axle on. I still have to tighten up the bolts...
9.jpg


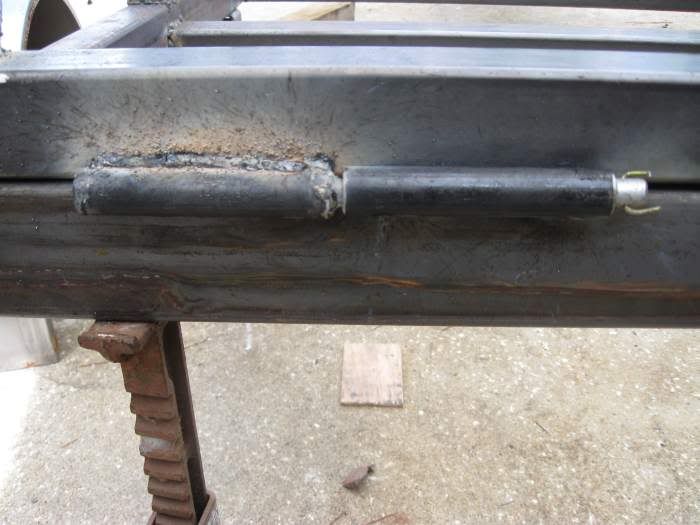
Here's another shot. I'll cut out the tailgate framing and weld that up next. Then I'll work on the hinges/latches and prolly a chain. I wanna be able to use the tailgate for a work surface.
10.jpg


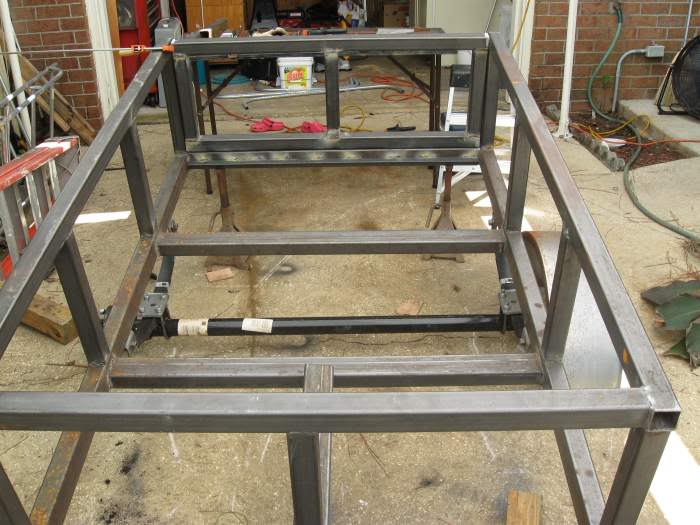
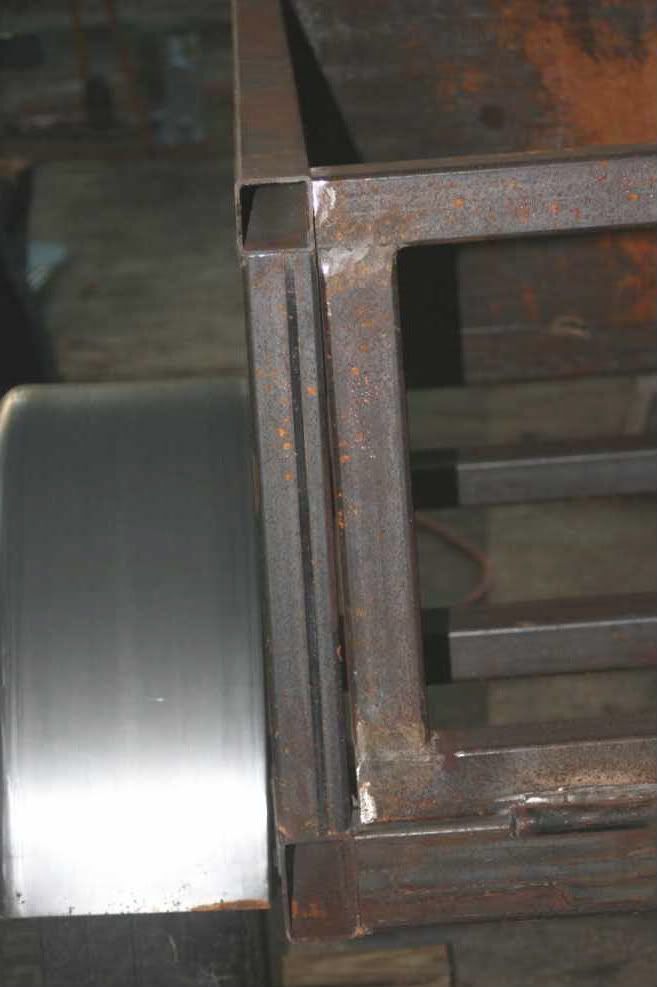
I still have cap plates to make. I'm considering making a hinged compartment out of the 6' long tubes. I considering fabbing up a tarp/awning/tent type thing to go over the trailer for camping... but first things first... gotta finish the trailer. ha

Z
 

Zelix

Adventurer
8-29-09 update

I managed to find a few hours to work on the trailer. I got the tailgate framed out. I made a couple of hinges and got it mounted to the trailer. I also cut a few pieced of metal to weld on later.


Here's looking back at the tail end of the trailer.
12.jpg


From the side. You can see the hinges are a bit overkill.. heh
13.jpg


welded a L2x2x1/8 ledge angle to catch the end of the wood flooring.
14.jpg


Support strut cut.... I still need to grind the end and weld it in place.
15.jpg


A close up of the hing... Please don't laugh too much at my welding [or lack thereof] skills.
civility.gif

16.jpg


So I'm kicking back now fixxin to grill out and have a drinky [or 12].. Have a great weekend everyone.
cheers.gif


Let me know what you think of the build so far. :)
 

Zelix

Adventurer
any progress?

Thanks for the post. I've been really bizzy lately helping my father with a room he's adding on to his house. I've gotten offtrack with my trailer project.

I bought (8) 2,000 capacity d-ring tie downs to weld on the sides. They look like this:
http://shop.easternmarine.com/index.cfm?fuseaction=catalog.prodInfo&productID=5357&categoryID=235


I have been looking for latches for the tailgate. I kinda like these. I was looking locally but might have to buy online.

http://shop.easternmarine.com/index.cfm?fuseaction=catalog.prodInfo&productID=8344&categoryID=303

I cut out the 16 ga metal for 2 sides last Sunday afternoon. It was a bit painful as I'm cutting them with a circular saw fitted with a metal cutting blade. It works good enough and relatively cheep. I have to cut one more side out then I'll be welding them up.

I borrowed 4 clamps from my father last night. I hope to get the sides all in place and tacked up tomorrow night. I'll take a few update picts then.

I found a salvage yard near here that supposedly has some rims that I can get cheep $15-20 a piece.

The idea is to get the rim/tires mounted so I can get the correct position for the fenders. Then I'll know where I can put the d-rings.

After that it's all a matter of grinding and tweeking so I can gear up to paint. The last thing will be cutting out the wood floor boards.
 

Zelix

Adventurer
9-26-09 update (w/picts)

Well here are a couple of pictures I took yesterday.

I found a salvage yard near here and was able to get 2 rims w/used tires for $50. I really wanted to see the wheel on so I put on one side. I'm liking it alot.

You can also see I put on one of the metal sides. I made a few errors with it because I got in a hurry and tried to cut it and put it on before I had the clamps. I have to go back and fix it now... sigh. It always pays to slow down and used the right tools.<kicking my own azz smiley> hehe

With that said... I'm pretty happy with the results so far. I really feel like this trailer is turning out ok. I know it's not up the standards of everyone else here's build.. but it's good enough for me.

9-25-09-a.jpg


9-25-09-b.jpg


9-25-09-c.jpg


Here's a list of what's left (that I can think of so far).
  • nut and bolt... tighten up all the axle bolts.
  • finish welding the frame + end caps
  • add a few braces
  • finish cutting and installing the metal sides
  • fenders-locate and intall
  • install all the hardware (latach and tiedowns)
  • figure out light locations and make brackets to hang them
  • prep and paint trailer
  • install wood floor
  • get registered
  • go for the 'shakedown' run.


Thanks for taking the time to read this... If you can, please give me some feedback. Especially if you see something that's missing.
 

Zelix

Adventurer
Update pictures of where I'm at so far. I've been busy with other projects so I haven't had a chance to work on the trailer too much. I hope to finish it up this month. It's basically a roller now....


I found out a mistake I made that requires fixxing.. although it looks like the tailgate is off.. the uprite is actually leaning in. I have to grind the welds and tweek it into shape. I didn't notice it until recently.. 2 steps forward... 1 step back. I'm still thinking of how to fix it... hopefully I'll manage.

10-15-09-2.jpg


Here's a pict looking thru the tailgate. You can see I have the sides tacked on. I still have to finish up a few welds overall.
10-15-09-3.jpg


the tire clearance is really tight. It rolls free and there is a gap. I didn't measure as It was getting late and dinner was on the table by the time this pict was taken.
10-15-09-5.jpg


I have got the fender laying up there... I have to think of where & how to mount them.

10-15-09-1.jpg


Here's a picture of the latches I'll use for the tailgate. There also a magnet square [I could've used that earlier..sigh] I bought.
10-15-09-7latches.jpg


I still have to finish the tailgate, I have some angles for the front to fasten the wood deck too. I have to figure out the fenders. grind and clean. then paint!

Thanks for checking out this thread.
 

R_Lefebvre

Expedition Leader
I don't know if that's a mistake as much as it is welding warpage, and it might happen again if you grind and reweld. I would try and stretch it out. Take a steel bar and a bottle jack and spread the sides. I had to make a number of such adjustements on mine.
 

Zelix

Adventurer
I don't know if that's a mistake as much as it is welding warpage, and it might happen again if you grind and reweld. I would try and stretch it out. Take a steel bar and a bottle jack and spread the sides. I had to make a number of such adjustements on mine.

Thanks for the reply. This is my first real steel fabrication project. I will try to do that.

I think I need to cut down the size of the fenders as well. They look frickin huge. I just checked Box Rocket's trailer thread. His fenders look smaller and fit better.
 

'05TJLWBRUBY

Adventurer
I don't know if that's a mistake as much as it is welding warpage, and it might happen again if you grind and reweld. I would try and stretch it out. Take a steel bar and a bottle jack and spread the sides. I had to make a number of such adjustements on mine.

x2-when I did that part on my build, the first time around, they were off by over 5/8" if I remember right. I had to cut them off and re-weld them 3-4 different times before finally getting it just right. No matter how much I measured and tacked them in, when I did the final burn-in, it pulled so much that it was off by a fair amount-equal on both sides, in board-like you see there. I ended up cutting a 4x4 to my exact inside measurement and using it as a brace inside, then using ratchet straps and pulling it over where I wanted it, but racking it over 5/8" to the far side so that when I welded it in place, it "sprung" back where it would finally come to rest. Was a bit of a PITA and took some trial and error to get just right, but I finally got it. With mine being 30" deep on the uprights, and 32" at the top rail, I was amazed at how much it pulled in on the open back with no cross brace up on top to keep it square. Made for some frustrating work there for a bit. Hang in there, you'll get it.

Best of luck,

Mike
 

Box Rocket

Well-known member
Thanks for the reply. This is my first real steel fabrication project. I will try to do that.

I think I need to cut down the size of the fenders as well. They look frickin huge. I just checked Box Rocket's trailer thread. His fenders look smaller and fit better.

I cut about 5" off both ends of my fenders.
 

R_Lefebvre

Expedition Leader
I also used wratchet straps in a few places to bend things into place. I even made use of a BFH in one place. And that's a good point, you have to know that you have to bend the piece PAST where you want it to be, because it will spring back to some extent. You just have to work it to get it right.

In your case, you might have trouble because both walls will flex out equally, and if the right side doesn't need to move, well, it will. One option in that case might be to jack the top of the left wall, and put the other end of the bar into the intersection of the frame with the right side. At an angle. But, you'll have to temporarily weld something to the left side wall to hold the jack from just slipping up.

And, I shouldn't have to remind anyone to be careful of flying steel when you do this stuff. But yeah, be careful. ;)
 

Zelix

Adventurer
x2-when I did that part on my build, the first time around, they were off by over 5/8" if I remember right. I had to cut them off and re-weld them 3-4 different times before finally getting it just right. No matter how much I measured and tacked them in, when I did the final burn-in, it pulled so much that it was off by a fair amount-equal on both sides, in board-like you see there. I ended up cutting a 4x4 to my exact inside measurement and using it as a brace inside, then using ratchet straps and pulling it over where I wanted it, but racking it over 5/8" to the far side so that when I welded it in place, it "sprung" back where it would finally come to rest. Was a bit of a PITA and took some trial and error to get just right, but I finally got it. With mine being 30" deep on the uprights, and 32" at the top rail, I was amazed at how much it pulled in on the open back with no cross brace up on top to keep it square. Made for some frustrating work there for a bit. Hang in there, you'll get it.

Best of luck,

Mike


Thanks for the reply and words of encouragement. As I've stated this is my first attempt at any of this... I thought "Man, could I really be this far off?" It's good to hear that others have fought this. At least I'm not alone in the wilderness. hahah


I cut about 5" off both ends of my fenders.

Thanks for the reply. I will probably do the same. I really like the look of your fenders... So yet again I'm copying you. hehe

I might even go for the CJ fender on the outside as well. :)


I also used wratchet straps in a few places to bend things into place. I even made use of a BFH in one place. And that's a good point, you have to know that you have to bend the piece PAST where you want it to be, because it will spring back to some extent. You just have to work it to get it right.

In your case, you might have trouble because both walls will flex out equally, and if the right side doesn't need to move, well, it will. One option in that case might be to jack the top of the left wall, and put the other end of the bar into the intersection of the frame with the right side. At an angle. But, you'll have to temporarily weld something to the left side wall to hold the jack from just slipping up.

And, I shouldn't have to remind anyone to be careful of flying steel when you do this stuff. But yeah, be careful. ;)


Thanks for the reply... I'll try to document what I do [right or wrong] for reference to future builders.

I'll prolly grind off the outside weld, jack it into place, strap it tight...then re-weld it. I'll let it cool down before loosing up anything. Wish me luck.


BTW: I ordered 1.25" spacers at lunch time. The tires are dangerously close to the trailer[approx. 1/8"~1/4" clearance]. Just to be safe and keep from destroying a tire.


Spidertrax 1.25" Wheel Spacer Kit
These 1.25" 5 on 4.5" 6061T6 aluminum spacers are an easy way of spacing out front and rear Jeep XJ, YJ, TJ, ZJ, and KJ axles. Each kit comes with 2 wheel spacers, 10 standard wheel studs (pre-installed), 10 lugnuts, and Loctite. The wheel spacers are anodized in dark blue, which is a double anodizing process for twice the corrosion resistance. In addition, each wheel spacer is wheel and hub centric for a perfect fit.
Proudly made in the USA.
http://www.quadratec.com/products/92807_001.htm


:sombrero:
 

R_Lefebvre

Expedition Leader
You might try instead of cutting and rewelding, just run another bead on the outside, that might be enough to pull it out. It's not that it wasn't aligned when you tacked it, it's that the weld bead contracts at is cools. Usually a structure will be warped in the direction of the last bead you made, all else being equal.

All this reminds me how funny it is that people think you can weld huge diff guards onto an axle without warping the housing.
 

Forum statistics

Threads
189,923
Messages
2,922,230
Members
233,083
Latest member
Off Road Vagabond
Top