Snorkel Installation
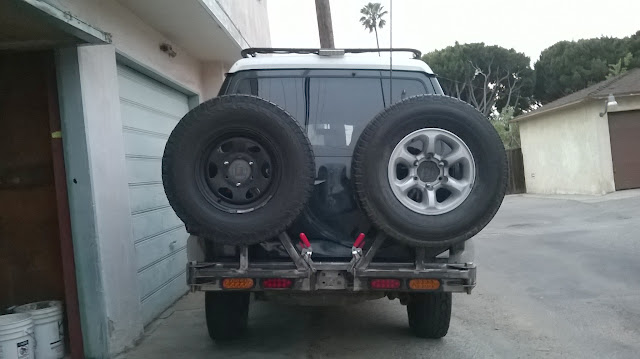
Decided to take a breather from the bumper build.
I had long been planning to use a Gen 3 snorkel for my rig, but a few weeks ago I came across a snorkel on eBay for a Gen 2.5, so I pulled the trigger. Chinese repro, yes, but beggars can't be choosers.
It arrived intact from Malaysia in about a week and mimics the AirTec body though with a Safari Snorkel intake head. The hardware is all stainless and good quality. I was very happy to find it even came with a snorkel to airbox adapter. The snorkel itself appeared well made, too.
**eBay link to snorkel here.


To the garage!
First I dropped the splash guard.

Next, I removed inner fender intake horn.


Virgin fender. Not for long, muahahaha!

The kit came with no template so I decided against using a hole saw lest I mis-drill. Using the snorkel adapter under the fender as a guide, I took it slow using the "Many Small Holes" technique.


Smoothed things out.

A good fit, whew!

The snorkel did not fit flush against the fender because it was interfering with the adapter, so I decided to shorten the adapter.

BAD MOVE, DO NOT DO THIS!!! CUT THE TAILPIECE ON THE SNORKEL, INSTEAD!!! The adapter is tapered and fits into the snorkel tailpiece (which is not tapered). After cutting the adapter, it would no longer fit into the tailpiece. I ended up having to first bevel, and then use a heat gut to soften the adapter, to make it fit. This trouble could have been avoided had I cut the tailpiece on the snorkel instead.
I made a stencil to lay out the mounting holes.


Test fit. The snorkel body didn't match the fender contours as precisely as I'd hoped, but close enough.

A-pillar bracket is a spitting image of the AirTec original.

Took the fender off for final assembly. Once tightened down the snorkel hugged the fender better.

Final result. Decent fit, not perfect, but pretty good.

Also installed these guys while I was messing with the fenders. Ordered them off eBay as well. They're from a Lancer. I'll wire them in in the future.
**eBay link to side marker lights here.


Before

After

Decided to take a breather from the bumper build.
I had long been planning to use a Gen 3 snorkel for my rig, but a few weeks ago I came across a snorkel on eBay for a Gen 2.5, so I pulled the trigger. Chinese repro, yes, but beggars can't be choosers.
It arrived intact from Malaysia in about a week and mimics the AirTec body though with a Safari Snorkel intake head. The hardware is all stainless and good quality. I was very happy to find it even came with a snorkel to airbox adapter. The snorkel itself appeared well made, too.
**eBay link to snorkel here.


To the garage!
First I dropped the splash guard.

Next, I removed inner fender intake horn.


Virgin fender. Not for long, muahahaha!

The kit came with no template so I decided against using a hole saw lest I mis-drill. Using the snorkel adapter under the fender as a guide, I took it slow using the "Many Small Holes" technique.


Smoothed things out.

A good fit, whew!

The snorkel did not fit flush against the fender because it was interfering with the adapter, so I decided to shorten the adapter.

BAD MOVE, DO NOT DO THIS!!! CUT THE TAILPIECE ON THE SNORKEL, INSTEAD!!! The adapter is tapered and fits into the snorkel tailpiece (which is not tapered). After cutting the adapter, it would no longer fit into the tailpiece. I ended up having to first bevel, and then use a heat gut to soften the adapter, to make it fit. This trouble could have been avoided had I cut the tailpiece on the snorkel instead.
I made a stencil to lay out the mounting holes.


Test fit. The snorkel body didn't match the fender contours as precisely as I'd hoped, but close enough.

A-pillar bracket is a spitting image of the AirTec original.

Took the fender off for final assembly. Once tightened down the snorkel hugged the fender better.

Final result. Decent fit, not perfect, but pretty good.

Also installed these guys while I was messing with the fenders. Ordered them off eBay as well. They're from a Lancer. I'll wire them in in the future.
**eBay link to side marker lights here.


Before

After

Last edited:


