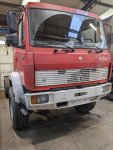
1120 AF Build in Norway

Iain_U1250

Explorer
So, it can be orientated however you like, the picture shows the input on the left and DC distribution on the right (fused but no fuses installed). The "power in" can also be modified with for fuses as a cheaper version of DC "distributor".

Yea, they are big actually, but they will end up saving volume when you account for the fuses, bus bars and shunt all combinedI think plus make things a bit more elegant.... We will see ?
It sure does look very elegant :)
 

Iain_U1250

Explorer
Mine is an organised ( mostly) mess, with three main power distribution boards with the big fuses, 9 x 6 spade fuse boxes with the little fuses, four 100A+ circuit breakers and two circuit breaker panels for the camper circuits. Its not very pretty, but you can't see much of it anyway. My theory has been to protect each wire with a fuse, starting with fuses on the battery terminals and as the power gets distributed, there are more fuses, and there is a lot of wires :) I counted that I had bought over 1000m of wire, and don't have much left.
 

Geo.Lander

Well-known member
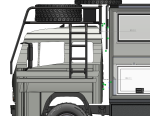
I was looking for some advice, what type of clearances do i need between the box and the cab?
The current clearance on the design is 132mm from box to back of cab. And approx. 80mm from the brush bars to the roof rack (this can be changed pretty easily)

So the question is, as the box sways what clearance rack and the brush bars is needed? Ideally id like to close this gap as much as possible..

image002.png
 

Sitec

Adventurer
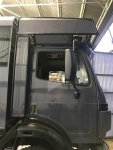
From memory ours is approx 150mm with the bar work at 60mm... I'l measure it this evening when home. When building the rack, I removed the rear springs from the cab and put temporary blocks in there to hold the cab level while I fabricated the roof rack and uprights. Now it's all fitted and the springs and shockers are back in, it sits a little higher, but I think once the roof rack has some additional weight in it, it'll come down a bit. Most of our movement is side to side and not fore and aft... I have provision for some rubber bump stops on the back of the rack (if needed). The cab is pulled down almost level in the attached pic, using the tilt ram. When I put the lever in neutral the cab lifts approx 10/15mm.


Final leg 34.jpg
 

Sitec

Adventurer
So, I did remember to measure it... The outer flaring/bar work to front of the Hab Box is 55mm, and between the cab and Hab Box is 200mm. I remember why I settled on 200mm now too... The front edges of the Hab Box would clear the front guards, and it gave me enough room for devising a crawl thru tunnel. Re the 55mm... I've had a few run's out on the road and there's minimal fore and aft movement, but plenty of side to side cab movement. So far so good.
 

billiebob

Well-known member
From memory ours is approx 150mm with the bar work at 60mm... I'l measure it this evening when home. When building the rack, I removed the rear springs from the cab and put temporary blocks in there to hold the cab level while I fabricated the roof rack and uprights. Now it's all fitted and the springs and shockers are back in, it sits a little higher, but I think once the roof rack has some additional weight in it, it'll come down a bit. Most of our movement is side to side and not fore and aft... I have provision for some rubber bump stops on the back of the rack (if needed). The cab is pulled down almost level in the attached pic, using the tilt ram. When I put the lever in neutral the cab lifts approx 10/15mm.


View attachment 703395
a thing of beauty, well done with the tube and steel filler panels
 

philcia

Member
Fantastic thread. I have learned so much. I arrived home after driving my 917 across Canada a few weeks ago. I hope to start taking off the old fire box in a few weeks. Then moving on to chassis prep and restoration.
 

Geo.Lander

Well-known member
So a rather long break from the forum with some rather large up and downs in the project which I wont go into at this stage (mainly related to budget and timeline). We have (finally) ordered the intermediate frame, toolboxes and GRP box which ill make anther post about as we made some changes to the specs of the foam and panels to be used. As well as some layout changes.

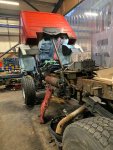
Progress thou is being made! Lots of mechanical work first as I opted for a pretty full on chassis tear down and full inspections and service. I am a little annoyed with myself for not undertaking this work myself. But until we have a property with workspace to finish the rest of the buildout that isn't a good option. Right now the cab and chassis is being stripped to get it ready for paint.

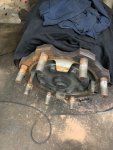
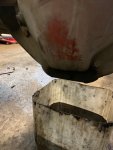
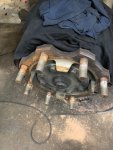
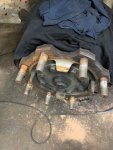
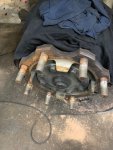
New wheel studs have been fitted as the old ones (below) are worn:
1646321860601.jpeg
Quite a few smaller jobs in the engine bay, rocker cover gasket, new injector seals, coolant lines, air compressor belts, the oil cooling pipes for the gearbox need to be replaced, plug PTO, New fuel filter with water tap will be fitted, and then we have to replace the gasket on the rear diff cover.
1646321272371.jpeg

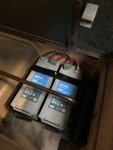
Batteries relocated to inside the cab to free up toolbox space:
1646321040209.jpeg

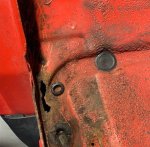
Also, there is a rust spot that needs to be welded:
1646321306533.jpeg
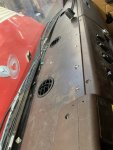
Inside the cab we have ordered some new panels but some (below) we cannot find, we will look into other options to clean this up, big departure from original or modern look isn't what we are after, retro is the game.
1646321708180.jpeg
 

Attachments

  • 1646320839762.jpeg
    1646320839762.jpeg
    778.6 KB · Views: 19
  • 1646321002000.jpeg
    1646321002000.jpeg
    863.6 KB · Views: 18
  • 1646321732761.jpeg
    1646321732761.jpeg
    863.6 KB · Views: 14
  • 1646321833988.jpeg
    1646321833988.jpeg
    863.6 KB · Views: 13

Geo.Lander

Well-known member
Fantastic thread. I have learned so much. I arrived home after driving my 917 across Canada a few weeks ago. I hope to start taking off the old fire box in a few weeks. Then moving on to chassis prep and restoration.

Congrats philcia!
Welcome to the mad house!
 

VerMonsterRV

Gotta Be Nuts
So a rather long break from the forum with some rather large up and downs in the project which I wont go into at this stage (mainly related to budget and timeline). We have (finally) ordered the intermediate frame, toolboxes and GRP box which ill make anther post about as we made some changes to the specs of the foam and panels to be used. As well as some layout changes.

Progress thou is being made! Lots of mechanical work first as I opted for a pretty full on chassis tear down and full inspections and service. I am a little annoyed with myself for not undertaking this work myself. But until we have a property with workspace to finish the rest of the buildout that isn't a good option. Right now the cab and chassis is being stripped to get it ready for paint.

New wheel studs have been fitted as the old ones (below) are worn:
View attachment 710203
Quite a few smaller jobs in the engine bay, rocker cover gasket, new injector seals, coolant lines, air compressor belts, the oil cooling pipes for the gearbox need to be replaced, plug PTO, New fuel filter with water tap will be fitted, and then we have to replace the gasket on the rear diff cover.
View attachment 710198

Batteries relocated to inside the cab to free up toolbox space:
View attachment 710197

Also, there is a rust spot that needs to be welded:
View attachment 710199
Inside the cab we have ordered some new panels but some (below) we cannot find, we will look into other options to clean this up, big departure from original or modern look isn't what we are after, retro is the game.
View attachment 710200
Good work, we filled the various holes in our dash with a polyester filler. Then sprayed it all with rattle can SEM brand rattle can paint. The black is a very good match to the Mercedes black. Maybe with your drums off you should give the wheel bearings a look (then you can tell me how to do it ;) ).We had a similar rust spot, I used some 3M panel adhesive with a bit of bent sheet metal and bonded it in place. Easy to DIY and the panel adhesive is crazy strong.
 

Forum statistics

Threads
188,391
Messages
2,906,554
Members
230,176
Latest member
Arcadia1415
Top