1st Gen 4runner Project: My COVID-19 Build

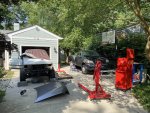
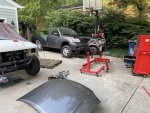
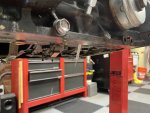
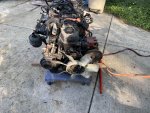
Tundra: Last week, I winched the Tundra out a few feet and started stripping it. I followed the repair manual by Toyota, removed the transmission first then the 5VZ. I don’t believe it ever saw tools outside of the factory or dealership as everything was Toyota and properly torqued. I can’t get over all the room for activities in that engine bay.
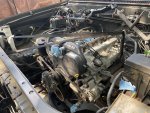
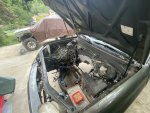
IMG_1812.jpg
IMG_1897.jpg
IMG_1814.jpg
IMG_1821.jpg


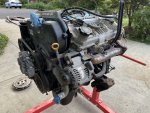
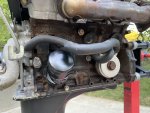
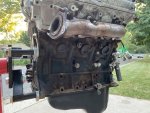
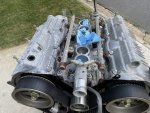
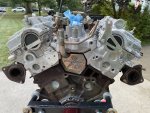
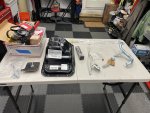
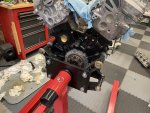
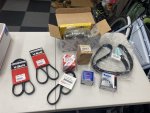
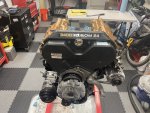
5VZ Engine: I mounted the 5VZ to an engine stand and cleaned it up with some purple power and simple green. Before I test fit it, I want the engine to be ready for full time install. So maintenance and modifications will be done first. I have a timing belt kit, water pump, spark plugs, wires, ignitors, valve cover gaskets, etc. as preventive maintenance and tune up. I also have the replacement oil pan, and new oil dipstick drill guide. I might replace the crank pulley with a “performance” one.

Directions beyond the factory Toyota repair manual:
Valve cover- https://www.4runners.com/threads/2001-4runner-swapping-out-valve-cover-gaskets-pictures.3158/
Timing belt-https://adventuretaco.com/step-by-s...r-3-4l-v6-5vzfe-also-4runner-tundra-and-t100/
http://www.4x4wire.com/toyota/maintenance/timing_belt/
Oil pan replacement- https://www.offroadsolutions.com/tech-info/3-4l-5vz-fe-oil-pan-conversion/
Dipstick relocation- https://www.offroadsolutions.com/tech-info/3-4l-5vz-fe-dipstick-drill-guide/

Ideally, I will have the engine serviced this week and ready for mockup this weekend. Since the 5VZ only has 43k original miles, I don’t think it is worth doing much more beyond the timing belt, valve cover gaskets and basic tune up. But I am open to recommendations if I am missing anything.

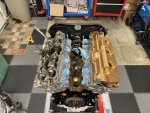
Engine pictures.
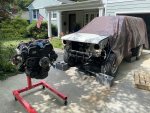
IMG_1825.jpgIMG_1861.jpgIMG_1887.jpgIMG_1888.jpgIMG_1891.jpg
IMG_1895.jpg

Plans: I’d really like to be in a position to have the truck painted early August and the engine/transmission/transfer case swapped by the end of August. I should have all the parts I need to complete the swap by the end of August. I have not made decisions/commitments to other parts like seats, suspension, rims/wheels, or rear end yet. I am narrowing my considerations and continue to watch the local classifieds for other fun parts.
 
Last edited:
I received a pallet of goodies! A R1FA, rust free clip, clutch hardline and manual transmission pedal assembly. I did drop the pallet on my foot after unloading it. Ouch! Steel toe boots from now on.

Hey Daniel.jpg

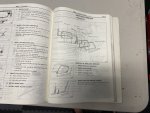
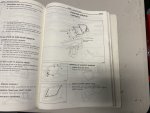
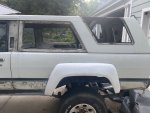
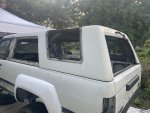
I also removed the hardtop windows. Followed the 4Runner service manual after letting the sun heat the adhesive for a bit.

IMG_2352.jpg
IMG_2353.jpgIMG_2348.jpgIMG_2350.jpgIMG_2351.jpg
 
5VZ-FE- With the engine on the stand, I washed it and moved into the garage to escape the DC heat. The 5VZ only needs a different oil pan for the swap but I elected to do some preventive maintenance.

Here’s a link to what google gives you when you search “5VZ “maintenance while on engine stand”- https://www.tacomaworld.com/threads/5vzfe-maintenance-while-on-an-engine-stand.573906/

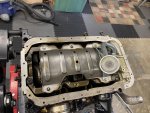
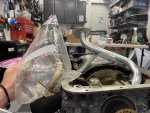
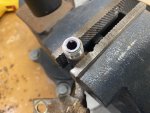
Oil pan: The Tundra’s pan would interfere with the 4Runner’s front end, so it needs to be swapped. I ordered the oil pan swap kit (mostly consists of Toyota parts) and dipstick guide from Off Road Solutions (ORS). It was a little nerve-wracking drilling into the block for the new dipstick but I followed the directions and only had a few small issues. One of the bolt heads of the dipstick guide broke so the bolt is now part of the engine block. Also, the ORS directions say the oil pan bolts should be torqued to 56 inf lb., but the Tundra factory service manual says 66 inf lb. like the sump hardware. I went with the 66 inf lb. but it probably doesn’t matter.

Here is a link to the ORS directions from their site: https://www.offroadsolutions.com/tech-info/3-4l-5vz-fe-oil-pan-conversion/

IMG_1950.jpgIMG_1993.jpgIMG_2208.jpgIMG_2205.jpg

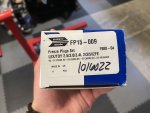
Freeze plugs: I also decided to replace the freeze plugs with some new 35 mm brass ones. Not really sure it needed to be done, but I did it anyway. What seemed simple, turned into breaking the knock sensor harness and one of the knock sensors. I was able to get a new harness and sensors so not the end of the world. I took my time and added a bit of Permatex sealant to the outer diameter of the plug and outside. The toughest plugs were in the valley of the engine.

IMG_2202.jpgIMG_2154.jpg

Timing belt: I took advantage of the easy access and replaced the original timing belt and water pump. I used the directions from the links in the previous post and the PDF I have of the factory service manual for the Tundra. Once I had the belt on and turned the engine two full rotations, I noticed the belt was two teeth forward on both cam pulleys and the crank pulley. All the pulleys were back at top dead center, just the belt was consistently two teeth forward from where it was installed. I kept thinking this meant the timing was off, so I took it apart and reinstalled it again and again, yielding the same results. I believe the length the timing belt makes contact with the pulleys does not equal the length of the belt it does not make contact with the pulleys. I could see this being a difficult/annoying task while the engine is installed.

IMG_2003.jpg

Valve covers: I replaced valve cover gaskets and painted the valve covers. I followed the directions from the link in the previous post and cross referenced it with the factory service manual, not too difficult.
IMG_2231.jpgIMG_2245.jpg

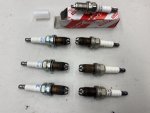
Tune up: I also decided to replace the spark plugs, wires, ignitor, LCE performance crank pulley, rear main seal, oil cooler lines, intake manifold gaskets and clean the air intake of built up carbon.

IMG_2277.jpg

Clean-up: While all the accessories where off I used a Dremel to clean up the accessories and painted the engine block with a high heat paint and clear coat. As I took hardware off, I treated rusty bits with distilled white vinegar and EvapoRust. Pretty amazed how well it worked.

Engine mounts: For the swap, I sourced 3.0 V6 3VZ engine block mounts. They are cast iron compared to the Tundra’s steel mounts. Although they bolt on to the engine, their mounting holes are thicker, thus requiring longer bolts. Quick trip the hardware store for some 7mm longer M10 x1.25 bolts. The angle of the 3VZ mounts is also more acute, so the 90° coolant drain fitting on the passenger side was removed. I also trimmed the top left AC compressor bracket mount hole by 7mm for the thicker block mounts. Torqued the block mounts to 32 ftf lb., engine insulator to 28 ftf lb., following the Tundra’s service manual.

I am hoping to add a supercharger and am constantly checking local classifieds for a used one but haven’t had any luck yet. I know URD sells them new, but I am not opposed to the adventure of rebuilding one myself while the vehicle is stationary. Either way, a supercharger will probably be the last thing I do so I can work out any “bugs” first.
 
Last edited:
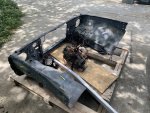
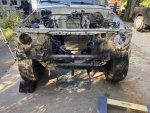
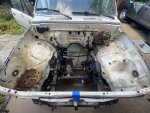
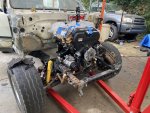
Mounting the 5VZ: Now that I have the 5VZ mostly back together, I am ready to mock fit and weld in the new frame mounts. I removed the 22RE this weekend. It came out without too much struggle, placed it on a dolly and posted it for sale locally. I scored a front clip to replace the rusted battery tray and damaged driver fender and radiator support. I removed the front clip today and will fit the 5VZ and weld the new engine mounts in tomorrow. I am thinking it will be worth it to mock the whole swap in the engine bay before paint so I can plug weld the old holes I will not be using before paint.

IMG_2304.jpgIMG_2313.jpgIMG_2338.jpgIMG_2342.jpg
IMG_2362.jpg
Next steps: I was planning to have it painted by MAACO since summer heat and humidity in the driveway aren’t great conditions to paint. Cooler temperatures and drier air aren't far off so think I will paint it myself. I still need to figure out a long travel kit. It would be nice to install the long travel now while the front clip is removed. After watching @Summit Cruisers Jr 's thread and reading about his experience with TNA's Blazeland WIY kit, it is out of the running. That leaves Total Chaos (TC), JD Fabrication or the DIY route. I have only heard good things about TC, but JD looks like a better deal/value. Both TC and JD recommend King shocks (TC quoted PR2508-COHRS I think). Still navigating the waters but like to have a plan in the next few days. Leaning towards TC tonight with King shocks but I am open to other options if anybody has experience/opinions.
 
Last edited:
good source for 5vz parts, https://www.tacomaworld.com/forums/1st-gen-tacoma-parts-marketplace-1995-2004.121/

also instead of the supercharger, https://www.cxracing.com/TRB-KIT-5VZFE-IC-KIT


Thanks @toastyjosh! Looks like i just missed a supercharger but i'll start checking that section more. I've still got more bits to track down.

I considered a turbo, but i am not sure how that would effect my swap or if i want to take on that project. Plus the supercharger was a dealer option for the 5VZ which i think is cool.
 
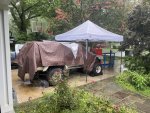
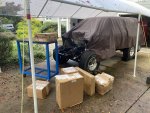
I set up a 10’x20’ carport canopy for the 4Runner since I am going to paint it myself outside. It’s cheap but has been useful for sheltering the truck from rain. I am hoping to be ready for paint in the next two weeks and paint when I get a weather window.

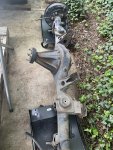
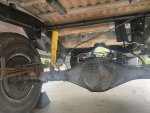
Axles and differentials: I finally scored a 4th gen 4Runner rear axle and differential from a 2003 with 223k miles to swap. It might be worth rebuilding the axle and re-gearing the diffs to 4.88. Ideally, I’d like to get front and rear ARB lockers when/if I re-gear. I am looking into what exactly is involved with re-gearing and installing lockers myself but that might be a job I’d rather have a professional do.IMG_2450.jpg

Long Travel: I went with a Total Chaos long travel arm kit. I also ordered a few other “accessories” like a shock hoop kit to weld to the frame for the for the front upper shock mounts. After researching IFS design and contemplating making my own arms, I decided to get something that is bolt/weld-on instead of taking on the adventure of fabricating my own. I am sure I will be happy with the TC kit.

Shocks and springs: I reached out to Ben at Filthy Motorsports for shocks. He recommended a few different King shocks. I will hopefully order shocks from Filthy this week based of his recommendations and have him valve them. I am considering the Chevy 63” rear leaf spring swap since I have only read good things about it. Ben recommended Alcan or Atlas for custom springs. Surprised that the quotes for custom springs is not much more than a spring swap kit and Chevy springs.

Brakes: I ordered some V6 front calipers, rotors, brake pads, 80-series master cylinder and booster. Unfortunately, my “new” rear axle did not come rotors or calipers, so I am on the hunt for those. I am excited to learn about brakes since it’s not something I have any experience with or know much about.

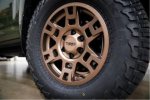
Wheels & Tires: The 4Runner is rollings on chrome aftermarket rims and old tires. I’ll probably go with BFG Ko2s in either a 33” or 35” if I am feeling wild. I haven’t picked a rim yet. I really like the Evo Corse “Dakarzero,” but at ~350$/rim I would worry about curb/rock rash. Method’s “316” look nice but I am not sure the appearance will age well. I also think the newer 17” TRD rims would look nice (P/N: PTR2035110F5).
PTR2035110F5_1.jpg

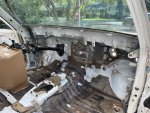
Insulation: I am going to insulate using heat and sound insulation from Lizard Skin. I plan to insulate the inside of the body tub, tailgate, inner doors and the roof of the cab first. It’s probably worth insulating the engine side of the firewall and underneath the transmission tunnel while both are exposed. I am considering insulating the hardtop too since I will likely reupholster/redo the original torn and stained headliners. I just pulled the tattered cab headliner today.

Next steps: I nearly have the interior and firewall completely stripped and the ready for insulation. Plan is to cut the clutch master cylinder hole, insulate the interior, weld in the new engine mounts, weld the front clip in and plug weld holes over the next week. There is still body work to do before I am paint ready, so I am prioritizing that. It’d like to order any axle and differential parts ASAP so I can install it before the long travel and rear axle swap.
IMG_2515.jpg
IMG_2530 2.jpg
IMG_2532.jpg
IMG_2520.jpg
 
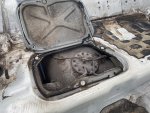
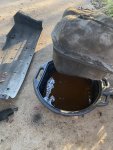
Fuel: At this point I decided it is probably worth pulling the gas tank. Glad I did, but not happy with the findings. Yikes!
IMG_2569.jpgIMG_2579.jpgIMG_2581.jpgIMG_2574.jpg

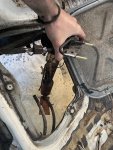
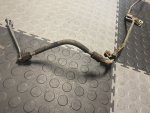
Tank hasn’t rusted through, but I am not sure how I would clean/repair it beyond just sanding the inside. Aftermarket gas tanks are available, but none seem to have a drain hole like the factory does and I doubt will last as long as OEM. I couldn’t unscrew the fuel outlet hose, so I cut the hose at the fuel pump bracket out of frustration. I then put the fuel line in a vice to unscrew and inspect the fuel line. Found rust lining the inside. Looks like I will have to make new fuel lines.
IMG_7478.jpgIMG_2618.jpg

I was also thinking it would be nice to add an auxiliary tank where the spare tire was mounted and utilize the spare tire brackets. I haven’t seen a “bolt-on” tank so I would either find something with dimensions I like or make my own. Would be nice to have ~10 gallons available at the flip of a switch. Since I am redoing the fuel system and suspension now, it is a good time to take on that project.

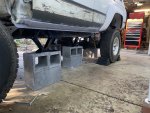
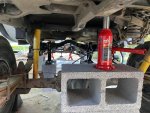
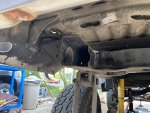
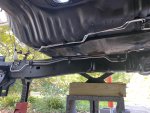
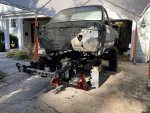
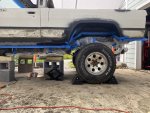
Lifting the body: I guess this technically makes it a frame off restoration now! To get the fuel hardline off, I lifted the body off the frame. I used four scissor jacks for the front and middle and a bottle jack in the rear. I also degreased and power washed the underbody and frame. Had no idea it was supposed to be white underneath. Should be ready to paint the frame, undercoat the body with lizard skin and POR-15 rubberized spray and replace the body mounts.
IMG_2590.jpg
IMG_2592.jpgIMG_2594.jpgIMG_2901.jpg

Leaf springs: I was leaning towards Alcan springs for the rear. They would mount just like factory and require no modification. I am now reconsidering the common Chevy 63” springs swap using either LROR or Sky’s kit with 3+1 Chevy 63” springs. The Chevy springs are longer and wider so they should disperse weight better while also offering more wheel travel. One downside is by moving the leaf spring rear mounts further back on the frame, the departure angle will be worse. Not sure how many degrees of difference but I don’t think it is much or at least enough to be a problem. It might affect rear bumper mounting when I order or fabricate one.

Next steps: I am going to replace the fuel line from the tank to the engine. Another new task, but I am sure I can manage! I need to see exactly what is involved with making new fuel and brake hard lines so I can order the necessary tools/materials since it has to be done before final installation of the body to the frame. I am also practicing my welding so hopefully welding in the new engine frame mounts, front shock towers and other fun stuff won’t be a problem functionally even if the welds aren’t the best looking.
 

arlindsay1992

New member
There is a bolt on auxiliary gas tank. No longer produced but you might find one used. North West Metal Products (NWMP) made auxiliary tanks for our trucks that go in the spare tire location. They even have a hole through the center for the spare tire winch chain so you can still stow the spare in the factory location, just lower by 4 - 5 inches. The tanks were designed to passively gravity feed into the main tank. I found one used but missing some of the fittings. I put together a transfer pump to pump the aux. tank into the main tank.


vintageracer

To Infinity and Beyond!
Here are pictures of what the 1st Gen 4Runner Northwest Metal Products auxiliary fuel tank mentioned above looks like. I purchased this one for my 1985 4Runner from an ad on the 1st Gen 4Runner Facebook page in Everett Washington and shipped it to TN. The gas filler cap mounts in the right rear wheel well. Paid $75.00 for the tank and $75.00 to ship it.


tank 1.jpgtank 3.jpgtank2.jpg
 
Last edited:
Thanks for sharing @arlindsay1992@gmail.com and @vintageracer ! I read about NWMP's aux gas tank on Yotatech but every photo was unavailable. Keeping the existing spare tire while adding an aux tank is very cool. Too bad they aren't available anymore so I'll be lucky to source one. I am looking at the 4x4labs rear swing out bumper kit so I am moving the spare anyway. I'll keep my eyes open though.

I measured the space underneath and I have ~35" between the frame rails and ~15" from tailgate to the rear passenger side upper shock mount. I will be relocating rear shocks regardless so I should have even more space. Ideally I can mount the tank closer to the center of the rear axle, to better distribute weight. I found this thread, where someone compiled a list of common tanks swapped at post 20. https://risingsun4x4club.org/xf/threads/a-few-notes-on-1st-gen-4runner-fuel-storage-options.24899/

I've got plenty of cardboard to mock fit with dimensions of a tank before sourcing. I think anything more than 15 gallons is probably overkill for an auxiliary tank. I noticed a Jeep YJ tank locally for sale that is 15 gallons and measures 30"x20"x16."

Other tank considerations-
1980-1983 Ford Bronco with 25 gallon capacity measuring 31.875"x22.25"x12.75"
1986-1996 Jeep Cherokee with 13.5 gallon capacity measuring 33.625"x20.75"x13"
1988-1987 S10 Blazer with 13.2 gallon capacity measuring 33"x22"x8.875"
1997-2002 S10 Blazer with 19 gallon capacity measuring 33"x22"x10.5"

Right now the S10 Blazer tanks are the most appealing, particularly the 13.2 gallon. Getting a tank that is properly baffled is a huge plus over making my own. I am sure I'll find more options after more searching.
 

arlindsay1992

New member
$75 would be a deal if you didn't have to pay shipping. I think I paid $200 for mine and I picked it up from RBX over on YotaTech. Still, we both made out like bandits compared to the original list price of $700+.
 

tennesseewj

Observer
Excellent rebuild. This will be a really nice 4Runner when you're done.

I cringed when I saw those cinder blocks under the jackstands, though. I have seen way, way too many of those shatter to trust them.

Sent from my Pixel 4 using Tapatalk
 
Excellent rebuild. This will be a really nice 4Runner when you're done.

I cringed when I saw those cinder blocks under the jackstands, though. I have seen way, way too many of those shatter to trust them.

Sent from my Pixel 4 using Tapatalk

Thanks, I’m not a fan of the cylinder blocks either. It did work for the few minutes it took to remove the hardlines. I’ll use timber or figure something else out when I paint and undercoat with the body off the frame.
 
After what has turned into a full-on disassembly and frame off restoration, I am nearing the point of reassembly.

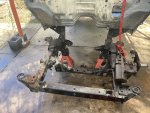
Engine mounts: Since the 4Runner came with the 22RE stock, the frame mounts need to be moved back a few inches. If my 4Runner originally came with the 3VZ V6, I would have been able to use the original mounts. I used frame mounts from Off-Road Solutions and followed the instructions closely. After measuring, measuring again and a few more times for fun, I tack welded them in and test fitted the 5VZ. Then checked engine fitment before fully welding them in.
IMG_2762.jpgIMG_2724 2.jpgIMG_2769.jpgIMG_2783.jpg

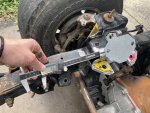
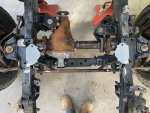
Front end: I ripped apart the front end and removed the front differential, axles, hubs, control arms etc. and took note of anything in need of replacing. Getting the front end apart was more difficult than anticipated. Some bits were seized and required heated persuasion.IMG_2812.jpg

Brake and fuel hardlines: The original brake and fuel hardlines had enough internal rust to bother me. I bent and flared new fuel, brake and charcoal canister hardlines using 3/8”, 3/16” and ¼” stainless steel tubing respectively. I used the original lines as templates for reference while bending the new lines. It took me a few tries (and some patience) but I made lines nearly identical to the originals and mounted them in the factory locations.
IMG_2971.jpg

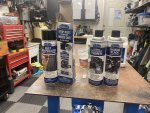
Frame and undercoating: While the body was separated from the frame, I arrested the little surface rust on the frame by wire wheeling then coating it with a rust encapsulator. I painted the frame using Eastwood’s frame paint. With the frame painted, I wrapped it in plastic and undercoated the body. I sprayed the transmission tunnel with Lizard Skin (sound then heat) before undercoating the rest of the body with a rubberized undercoating.
62389885311__54C7A872-8F43-4DB1-92A9-5E6F8F2C26E6.jpg62370694729__2224431E-0542-4A34-BE91-CA9322363E7C.jpgIMG_2984.jpgIMG_3034.jpg
 
Last edited:

Forum statistics

Threads
188,290
Messages
2,904,965
Members
229,961
Latest member
bdpkauai
Top