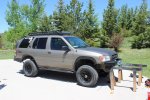
2001 R50 Pathfinder Build-up.

Weekender41

Ready to Learn
I hope all gets resolved and you get your other parts. I will pray to car gods for you :). There is nothing worse then getting half your stuff and not being able to start your work. Im getting a lot of inspiration from your build to keep going on mine.

Cheers
Thanks man, it's coming along to my liking. Yours will be a blast once you get everything good to go.

Investigation has started and Rough Country has already sent out another one this morning. Should be here tues or wed (mon being a holiday) So I'm glad about that. Ill just have to rock the ghetto look for a little while longer. On a side note... I have the day off today
and am considering going up into the mountains to check out the awesome approach angle the lack of front bumper gives me haha.
`
Cheers
 

Weekender41

Ready to Learn
Some more updates!

Alright, this is going to be another collection of photos ( with my new Canon T3i Rebel!!!! ) with some captions.
Here we go
`
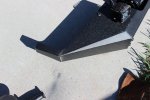
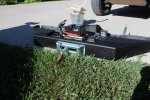
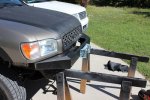
So I started putting together the bumper to see how it would fit and to get an idea of how it will look. Some time after this I cut the ends of the bumper off,
they are too narrow to fit and they also don't sit back far enough to look right. I cut those off and will just make my own ends for the bumper. You can see
how I considered using the hole on the top to place my lights. Later you will see that I move the bumper too far back for that to be possible.
IMG_0070 (1).jpg
IMG_0078 (1).jpg
`
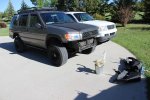
I liked the style so made sure the vehicle was cleared to get the bumper in place
IMG_0068 (1).jpg
`
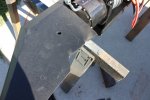
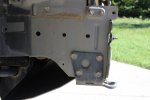
The fun part will be making the frame attachment plates. In this photo you can see how I will utilize the 7 bolt locations that are available (6 on the driver's side)
The bottom 4 are just using the same bolts and the top 2 are studs that hold the stock bumper on and the hole is for another bolt that I am still considering using.
IMG_0071 (1).jpg
`
After that, all that was left was to line it up to make sure I like how it sits. There are a few angles here.
IMG_0082 (1).jpg
IMG_0083 (1).jpg
IMG_0085 (1).jpg
`
Just like with the rear bumper, I made the mount templates out of foam board and transferred them to wood. I will get photos of them once they finish using them
transferring it to metal. The passenger side is a lot more simple because you don't have the large reservoir in the way like you do right underneath the driver side
headlight. This is causing me to rethink the mount but I will get that working tomorrow and have it transferred to metal as well, I want to get this mounted asap.
`
Because the bumper is pushed as far back as possible to not look too bulgy, the black grill portion will have to have a shape cut out so the winch can tuck up underneath it.
After I get the winch installed and working and the bumper in place where I like it I have two things to knock out:
First I have to extend the ends of the bumper to make it follow the lines of the vehicle, this will be very simple.
Lastly I will have a perforated steel plate made out of 1/8" plate and each hole will be made with a dimple die to strengthen the plate. I am not thinking it needs to be
very stout but will have one made from 1/8" and another out of 3/16" just in case. It is going to be shaped exactly like the front skid plate I have and will use the same
two bolts that the skid plate uses and will attach to the bumper frame mounts. It is hard to explain exactly but I have faith it will work out.
`
My goal is to have everything done by Tuesday since I have Monday and Tuesday off of work. The one thing I am going to be missing is the clevis/shackle/bow ring mount.
Those are a separate piece that bolts to the bumper and I will be purchasing those (without them I don't have a simple recovery point up front except the winch).
`
Cheers
 

Weekender41

Ready to Learn
Almost There!

So today I wired the winch up, tested it out and got the final changes to the bumper to fit it. All I needed was for the machine shop to cut the plate from the template... 8 hrs later and they say it will be done tomorrow. Dangit I could have spent 8 hrs and did it myself! Anyways so the vehicle is still just waiting for the mounting plates. Luckily I have tomorrow off as well so It should be done by then. Now for the pictures..
`
IMG_0112 (1).jpg
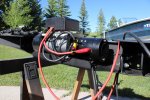
This is just showing all the cables wired to where they need to go. It is kind of a cluster, the diagram and example photo looked just as crappy as this so im not too sure how itll do over time. Ill probably end up covering them all with the wire protectors but that remains to be seen
`
IMG_0114 (1).jpg
This is to show how much of the grill I cut out in order to fit half the winch inside it.
`
IMG_0120 (1).jpg
This shows the part on the driver's side that needs to be cut to fit around the reservoir under the light. When mounted, that hole towards the front of the bumper is inline with the front grill. When Andrew on NPORA attached this bumper to his pathfinder, he used that front hole and the two I have cut out to mount the light bar over the winch so you can get an idea of how much farther back mine will be sitting.
`
IMG_0113 (1).jpg
She is just waiting for those darn mounts. Once they are here I will paint them, mount it all up and start extending the ends of the bumper to look nice and work on the front skid plate.
`
The whole installation process can be much simpler if you use the write-up on NPORA, however, the way I am doing it will be much stronger and sit further back about 6.5".
`
As for a bull bar on top of the bumper to cover the grill and lights, yes I will be making one and I have a kick-*** idea. It will weld on to the top of the bumper normally (instead of the stock one that bolts on) and I will add the hoops over the headlights but since the bumper is flush by the headlights (there is maybe 1/2" of bumper sticking out) I will have the hoop weld onto the front face of the bumper and extend up. Think of ....... ]/ ...... Where the bracket is the bumper face and the forward slash is how the hoop will extend off of it.
`
Cheers!
 

Weekender41

Ready to Learn
Sad Stuff

IMG_0115 (1).jpg
Son of a mother trucker! I dislike rocks, this is why. I went for a very short trail ride along the rocky trail in Vedauwoo and slipped down off a rock backwards because of rain/lack of experience/old tires/someone up top disliked my door/Im not sure, because of how I was angled I slid right into the large rock next to me when coming down.
I dislike this very much. It could be worse sure but dang this body was in GREAT shape! Well there is a same color pathfinder in town that is completely run down but their driver door is in perfect shape, Ill probably ask for their door and offer 100 bucks (I can swap them in about 30 mins). Hopefully it works out. I cant seem to find any in this color at a pick and pull yard.
`
Cheers
 

Weekender41

Ready to Learn
30 Hours later and I am still waiting on the mount. They say later today or tomorrow maybe... Jeez I wish I had a cutting torch so I didn't have to wait. This is frustrating... my only two days off and it has been a waiting game the whole time.
 

Forum statistics

Threads
186,876
Messages
2,888,955
Members
227,437
Latest member
Top Jimmy
Top