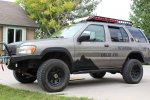
2001 R50 Pathfinder Build-up.

Weekender41

Ready to Learn
Started knocking the list down!

Okay so I had my Z16 brake kit to install (remember I got that the same time as the TJM Treds and the Jerry can?), I was knocking it out without fail.. or so I thought.
Thanks to Stioc for the reminder that xterra and frontiers have the same brake system we do so there should be a youtube video. And a big thanks to Allof75 for helping
me throughout the process. Everything was going well then there was two tiny little screws that hold this retaining washer in. Well when I opened it up those 2 screws were
already pretty stripped and were tight as all heck! That took some fun negotiating with a screw-driver and a mallet to force them out (do you guys know how hard it is to find
2 Phillips head machine screws with a 8/32 thread that are counter sunk, stainless steel and only 1/4" long at a store???) anyways bought 4 new ones and started after it again.
Everything else was going pretty well then I go to put the caliper back on with the new rotors and pads and the caliper is too skinny. I think to myself 'You have got to be
joking!' Turns out the pistons just were not pushed back all the way (quick question, is that bad if they don't go all the way out when the brake is off? I would think not that way
there is not a lag from when you apply the pedal to when it brakes but if anyone can verify?) So I got a clamp and pushed them back in and they fit nice. If you take out the
time that was excitingly spent finding those new screws and trying to get the old ones out, then take out the time spent trying to figure out why the caliper was too small...
The project didn't take too long. :) So now everything is put back together, brakes have much more bite to them with the same pedal feel to them and the brakes no longer
squeak. I call that a good check off the list.
`
IMG_0795 (1).jpg
`
The next on the list was to make the screen underneath my bumper small. The expanded metal I originally put there has very large holes and I'm sure that it wouldn't stop anything
except a large boulder (which it would be too flimsy for anyways). So I went out and purchased expanded metal but in a much smaller pattern. My original plan was to weld it on, then
I remembered how fast I blew through the first stuff so I just zip-tied it up for now. Looking to bolt it in eventually but I am done spending money for a good while. I like the way it
turned out and its not very noticeable.
`
IMG_0796 (1).jpg
`
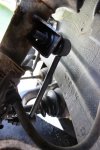
Last on the list was the replacement of my extremely annoying upper sway bar link. This was a total nightmare let me tell you. So first off the reason it was clanking around was because
the top nut would not tighten anymore so the link was loose and thus able to lift and drop causing a noise on every single bump. I though to myself 'oh I'm going to hit it with pb blaster
and when I wake up it should be good to loosen up and come right out. How wrong I was! The bolts on the top and bottom are held tight with a hex key (allen wrench) and the nut spins
tightening the link to the strut and sway bar. Well the spot for the hex key at the top was completely stripped to a circle! And of course the nut was on tighter than all heck. So I jumped to
do the bottom one, the hex key fit like a cheap charm and I put the wrench on it and started loosening it. Finally! It was tight but started loosening smooth; I was in luck! NOPE!! that lovely
smooth feeling was the wrench rounding the nut. HAHA...seriously!?! So at this point I was fed up, out came the grinder with a cut off wheel at first to cut through the bolts, the a grinding
wheel to get the pieces out. This took so much less time (just like cutting the bolts on the control arms...what a trend). Anyways so the new link went on all nice and now the front end is
more stiff..just when I though I had made it smooth... but no more noise so I don't even care. That sway bar will never again come off If I can help it.
`
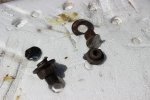
Here is the carnage. Honestly though it was pro cutting skills, the strut and sway bar were barely nicked :coffeedrink:
IMG_0800 (1).jpg
`
Voila!
`
IMG_0798 (1).jpg
`
Well now I am more content. I am waiting for the other CV axle to arrive and the rest of the bushings and will make another looong weekend out of those. I am hoping the popping noise myself
and Allof75 are experiencing is fixed with the CV replacement. Anyways that's all for now. Tonight I may try and cut the light hoop down slightly on the driver side (its maybe 1/8" off) and re-weld it.
`
Cheers
 
Last edited:

Weekender41

Ready to Learn
Look closely!

whaat.jpg
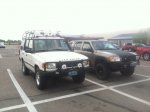
This picture was taken from my phone so sorry for the poor quality... First off, how cool is this Rover?? Anyways for my frontier buds out there.. Look in the background..
You see that awesome red Frontier.. With a giant chrome strip on the door window sill... And that flame??? A flame! Haha. LOVE IT!
`
Cheers! :friday:
 

Allof75

Pathfinder
Very nice upgrades, I was glad to be of help. :)

As far as the brakes, yes when installing new pads, it's normal to have to squeeze the calipers' pistons back, so no worries there.

Hope the replacement parts solve your woes, cheers!
 

wreckdiver1321

Overlander
View attachment 235324
This picture was taken from my phone so sorry for the poor quality... First off, how cool is this Rover?? Anyways for my frontier buds out there.. Look in the background..
You see that awesome red Frontier.. With a giant chrome strip on the door window sill... And that flame??? A flame! Haha. LOVE IT!
`
Cheers! :friday:

That IS an awesome Rover. Kind of makes me think about how awesome it would be to have one again. Then I remember how much work my old one was...

If you look two spots over from you, there's another red Frontier! A first gen, supercharged by the look of the wheels.

That second gen.... icky....
 

Shanfari

DhofarX.com
Your truck looks great! But I guess the cool grill might break the cool air flow to the engine bay? Had any trouble with engine heat lately?
 

Weekender41

Ready to Learn
Your truck looks great! But I guess the cool grill might break the cool air flow to the engine bay? Had any trouble with engine heat lately?

Hey! It has been a while! So far the engine temp has not been any different from last summer so hopefully that does not change. If it becomes a problem it would be easy to enlarge the holes or use a different material pattern.
 

Weekender41

Ready to Learn
Changed oil and filter, flushed and filled both diffs and added new plugs, changed transmission fluid and filter along with new bolts and gasket. Going to order some more replacement items as refresh is in progress.
'
Have a good one!
 

Weekender41

Ready to Learn
Definitely not Expo, but...

So I entered into a car show... with the Pathfinder :) I was in the Special Interest category.
IMG_0965 (1).jpg
Aaaand I won haha. Go figure.
`
Anyways, the Hellas I ended up ordering I decided to cancel the order... there are just too many options out there for me to settle on one right now. I have found quite a large collection
of Chinese distributor HID lights that are about half the price of the Hellas, I may go that route to try. Yesterday I made myself a new windshield washer reservoir so I could finally have
the sprayers operational. I just used a coolant reservoir bottle and dilled some holes, added some tubing to the pumps since they are gravity fed, and now it works. I had to add silicone
around the joints as there was a slight drip coming from one of them. I have placed an order for new lower front control arms. I called quite a few Nissan shops and parts people and the
popping they think is almost certainly the bushings inside the lower control arm. The new ones are made by DORMAN so hopefully they last a while, I guess Ill find out. The bushings I got
from 4x4parts for the control arms were not for my vehicle so I sent them back and got my money back. I think replacing the control arm will also be easier (turns out it was just barely more
money than a couple bushings from 4x4parts that uses a solid gold vehicle to deliver goods.. (they must, those prices are crazy).
`
Cheers
 
Last edited:

Weekender41

Ready to Learn
Washer Reservoir

So with the replacement of the front bumper to a much thinner version.. the 55 gallon washer fluid reservoir that comes stock with these pathfinders had to go. I went a while without my sprayers but with the approach of winter and the oncoming assault of slush that is sure to follow, I wanted to make sure they were back to working order. I originally considered looking for a reservoir that came off another Nissan, just a smaller tank. The price on all of those was just shy of ridiculous so I decided to make my own. O'Reilly's had a coolant reservoir bottle on the shelf for 7 bucks... I could make it work with some Jerry-rigging. After a trip to Lowe's I was set to begin. Basically the pumps are gravity fed which was good for me since that is the easiest way to build a replacement. All I did was connect a line from the bottle to the pump that controls the front sprayers and added a breather line. I had to silicone one of the joints as it was not sealing very well but now it seems to be leak free. I can always go back over it with silicone if it starts leaking again. The sprayer does not have a long continuous spray like it used to... the small tubing exiting the bottle can not keep up with the pump. That is not really a bad thing since it allows anough for the wipers to cycle through 4 times and then it peters out. I just let it catch up for about 3 seconds and I can go again. Ill make sure to carry around a water bottle filled with washer fluid since the drain on the tank is not at the complete bottom so there is not a large amount of useable liquid in the tank. I would guess maybe 20 oz. of fluid can be used. (I could always park downhill and could use most of the bottle.
`
Anyways here is a photo.
IMG_0991 (1).jpg
`
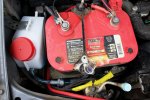
It is not pretty, but works well enough for me to be satisfied. the pump leading to the back is cut off and the line is capped. On the post holding down my battery you can see the breather tube for the contraption. The pump is at the lowest possible location inside the bay.
`
Cheers
 

Weekender41

Ready to Learn
Some changes! Finally

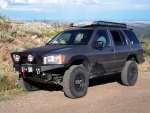
Alright so I have been out of state for a bit... finally back and have some changes. As the vehicle sits right now I have 3 more plans... Install rear locker, buy wheel spacers and bed-line the bottom portion of doors all the way back.
`
First thing I did when I got back was install the HID lights I had waiting for me. Let me tell you.. For the $109 bucks total I spent on these two its hard to complain! I knew they wouldn't throw light further than my headlights but that
is not the type of lighting I was looking for. I essentially wanted to match my headlight distance (which with the ZxE bulbs in them is pretty darn good) but I wanted to increase the width of the light so when I am going back roads the
drop-offs/ditches are lit. These HID accomplished that in a big way. I didn't bring my nice camera on the trip I took yesterday so I was unable to get night shots but will do that tonight. As far as the kit itself goes, I have only 2... not
complaints but things that could have been better. First was the wiring diagram and harness... Or I should say lack there-of. Literally there was a 6" black and a 6" red sticking out of the light and that was it. So I created one with a trip
to lowes and so far it seems to have worked out great. The second thing is the actual light housing... Its plastic. This worries me for when it gets really cold here! I would not want anything to crack. I will be looking at a way to strengthen
the plastic somehow (maybe bedline it??). But for $109 to my door these babies are nice!
`
Second thing was to order a set of tires. I had so many back and forths about which direction to go (you all know what I mean). I ended up getting the Cooper Discoverer AT3's (235/85R16 size). Yes they don't look as aggressive as I would
have liked but let me tell you. By far the best tire I have used. They sound like highway tires on the freeway and then switch to beast mode on the trail. They are aired to about 39 for city driving and I aired down to about 23 for the trail their
first time out to see how they handled it. Probably can go 17 no worries like I used to do. They never slipped, formed around the rocks well and grabbed the loose dirt hard. If these perform well in the upcoming snow then I will not buy a different
tire again. After having bfg at when I first purchased this pathfinder, to the discoverer m+s I upgraded to and now these AT3's... Coopertire definitely has my vote. I will probably end up with STT or ST Maxx for a summer tire and the AT3's as
a winter tire if they perform as well as everyone has been saying. These work for my environment in a great way.
`
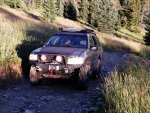
So here is a picture... (yes I took my brand new tires off-roading the day after they were installed)
DSCF5980.JPG
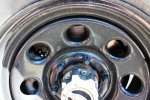
The tires have been aired down slightly in this picture but when full they fill the wheel well to the point I like. The spacers are going on the wheels because my track is now back to stock width and with the lift, added weight and skinnier tires I
would like to add some width back.
`
Cheers
 

Weekender41

Ready to Learn
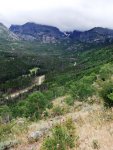
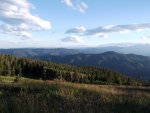
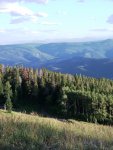
Stormy Mountain Pass.... Difficulty level is a 6

Just like the headed said I headed out for a trip. First was to go to Estes Park and do a little hike.. It was a quick 3 mile just for lunch.
`
DSCF5969.JPG
DSCF5971.JPG
Bottom picture was our view for lunch.
`
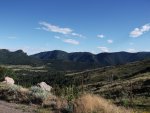
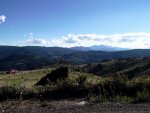
After that we headed out to Drake Colorado to start the better know trail in the area called Stormy Mountain Pass. Here is all the photos:
`
DSCF5977.jpg
DSCF5981.JPG
DSCF5983.jpg
DSCF5986.JPG
DSCF5988.JPG
DSCF5989.jpg
And I was trying the hood-popped thing to see if it helped my temp level because I now have two large lights in front of grill AND my new grill probably restricts more air...Temps weren't an issue.
DSCF5985.JPG
 

Forum statistics

Threads
186,871
Messages
2,888,902
Members
227,437
Latest member
Top Jimmy
Top