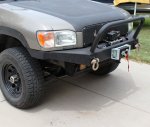
2001 R50 Pathfinder Build-up.

bushnut

Adventurer
Don't sweat the CV axle...though it does help if you've got a friend to help...you will need to unbolt the strut and the ball joint from the control arm, undo the clip that holds the brake line and be careful of the abs or speed sensor. I've done mine 3 times now ( only one original boot left) and really had no trouble just be creative in the bad words you use while doing it. OH! and don't forget to curse all automotive engineers. remember to use your torque wrench when you put it all back together.
as for the brakes I've got no comment yet as that's on my TO DO list as well. I did find a good video on youtube showing both rotor and brake pad replacement.
BTW I'm very envious of your truck.
Did you keep the templates of the brackets you made up to install the Jeep bumper?
IF you posted a drawing of them with measurements. I'm sure lots of guys would be most thankful.
 

Weekender41

Ready to Learn
Don't sweat the CV axle...though it does help if you've got a friend to help...you will need to unbolt the strut and the ball joint from the control arm, undo the clip that holds the brake line and be careful of the abs or speed sensor. I've done mine 3 times now ( only one original boot left) and really had no trouble just be creative in the bad words you use while doing it. OH! and don't forget to curse all automotive engineers. remember to use your torque wrench when you put it all back together.
as for the brakes I've got no comment yet as that's on my TO DO list as well. I did find a good video on youtube showing both rotor and brake pad replacement.
BTW I'm very envious of your truck.
Did you keep the templates of the brackets you made up to install the Jeep bumper?
IF you posted a drawing of them with measurements. I'm sure lots of guys would be most thankful.

Oh 3 times?? Wowzers lol. I will definitely be keeping those tips in mind while doing it. I have not found a video detailing the change but I'd assume its not that bad. I know I can ask Allof75 for help since he has the same kit I am going to.
Uhh yeah I do have my template still but If I was to post up a picture it would be very different and there would be two versions. There are some design changes that I will make if I ever bump the thickness up to 3/8". For example, my
mounts look basically like a pistol if you are looking at the side of the vehicle. The |''''' shape mine has means it has a weak point if I were to pull at a very downward angle... Think like getting stuck going over a steep hill and need to get
winched over the ridge. Now, I have helped that with the addition of the skid plat but just a little. If I were to do them over again (I have the metal sitting the the garage, just not wanting to spend the money to get it cut) I would give the
mount a triangle shape like |/. I would cut grooves into the main bumper so the entire front of the bumper had a nice / shape to it. The gets rid of any weak points (although much heavier) but also allows me to weld angle iron on the
backside of the mount to attach a bolt on skid-plate/splash guard. I have the new template made from wood just hanging out and will only change to it if my version 1.02 doesn't work out well. The triangle would be version 2.0 since it is
a very large change haha. I could post that template up right now but then you all could be running around with my design before I do haha.
`
I can message the template I have now If anyone is interested but since all these photos get on google images without us being able to stop it, I wouldn't want someone using the design without even reading the thread or visiting the forum.
That may sound weird to some but when I am fabricating something...even as simple as a mount... that is my time and effort put into it. I have no issues giving it to any forum member since many of you guys have guided me through this
whole build-up. But to give it away to anyone who google images the term "Pathfinder R50 Bumper Mount for XJ bumper", that would feel... IDK, just not for me. Im all for sharing and giving to those who I know, have helped me or vice versa,
but not just giving for no reason.
`
Ill get off my soapbox haha, thanks for the compliment though! If you ever need me to try and make a template for, I have this awesome foam stuff I get free at work that works amazingly well for this kind of stuff and am always looking to tinker
on a new project.
`
Cheers
 

marty1977

Adventurer
Kyle. Congrats!!! on the locker these things are awesome. I do have that on my long wish list but for now i have to do with my LSD.
 

Weekender41

Ready to Learn
Kyle. Congrats!!! on the locker these things are awesome. I do have that on my long wish list but for now i have to do with my LSD.

There were a couple places I had always wanted to go but had so much difficulty getting to with my open differentials, you have better traction control than I do right now. Im not sure how high the breaking strength of the lsd is but they work great in our work trucks!
I spent quite a while exploring with just the skids and rock sliders, that was a fun time to really dial in what the pathfinder could do and not worry about breaking anything. Now that my local trails are becoming monotonous, expanding my horizon takes me farther from
home and since I travel alone most of the time it is imperative that my vehicle becomes as reliably and self sufficient as possible.
 

Weekender41

Ready to Learn
Finished the end of one side..Input please

So I finished the end cap on one side of the bumper. There are some things I will do to tidy it up once the bumper comes off but I am trying to get as much done as I can before that. The next side will likely be done a little differently (same basic shape but using different shaped pieces)
so once I finish it up, that is if the temperature goes down a little, I will post up the photos and hopefully you guys can tell me which looks better. I challenge you guys to put on pants, boots, welding jacket and leather apron along with welding gloves in this 90 degree heat. I give mad
props to professional welders, I would die of heat exhaustion haha. Anyways on to some pictures.
`
IMG_0487 (1).jpg
`
It looks like Ill have to clean that overspray under the headlight...
IMG_0488 (1).jpg
`
That is where I am at as of right now, I got the fluids and filters all priced out and ill have to wait until I get paid again before making any other purchase. Ha. Anyways hope you guys like it!
`
Cheers
 

Weekender41

Ready to Learn
Side Number 2

Here is the driver's side. The supports under and above the end pieces don't look that noticeable in person but these photos make them look huge.
Oh and no, Im not missing a bolt on the bumper mount, there is no hole on that side.
IMG_0492 (1).jpg
`
IMG_0494 (1).jpg
Haha...blue! That's neat, it does that only under flash but the headlights just look white. The housing looks just white when they are on too. The flash must
get the best reflection.
`
Im not sure which I like best.. Hard to say. Personally I think they both could use some work but I think this looks better than not having end pieces at all.
`
Cheers
 

stioc

Expedition Leader
Nice work on the end caps. I too like the second one better but both sides look much better when finished. Oh and totally agree on welding in the heat but I'll take your welding challenge :) Check my thread in a bit ;) It was 90-91F when I was working on my latest project.
 

Weekender41

Ready to Learn
Nice work on the end caps. I too like the second one better but both sides look much better when finished. Oh and totally agree on welding in the heat but I'll take your welding challenge :) Check my thread in a bit ;) It was 90-91F when I was working on my latest project.

Checked it out and Im digging it! Are you able to weld in the garage? I would but the 370z in in there and a bunch of the body kit (seibon and veilside) are scattered around so I was outside. Take into account you west coasties are used to heat, lol today was one of the hottest days of the year. Anyways I cant wait to just be done with the fabrication and go back to bolt on stuff. I am slowly collecting my bolt on pile in my storage room.
'
Tomorrow I get the sway bar brackets taken care of for sure. That will finish my weekend up.
 

Allof75

Pathfinder
Looks good, those maintenance and other upgrades seem like you're heading in the right direction. :D

As for the brakes, they're a piece of cake, happy to help if you need details. Same goes for the sway bar bracket bushings. :)
 

Weekender41

Ready to Learn
Looks good, those maintenance and other upgrades seem like you're heading in the right direction. :D

As for the brakes, they're a piece of cake, happy to help if you need details. Same goes for the sway bar bracket bushings. :)

Do you have a step-by-step for the brakes? Sway bar is knocked off the list, that was too easy but brakes are a big thing I will want to take my time with. As for the maintenance, its time to give the ol girl a refresh. I am done with the fun stuff for a little bit until
she feels like new.
 

stioc

Expedition Leader
Yes I weld in the garage after I pull the cars out. I have epoxy paint on the garage floor so it's nice to easily sweep up the girding dust etc but I've also burned holes into the coating- but it's expected. What are you doing to the sway bar brackets? I must've missed it.

For brake rotors figure about 1.5-2hrs each side for the first time. The first one will be slightly longer. Watch the YouTube videos- Xterra, Frontier etc are the same setup.
 

Weekender41

Ready to Learn
Yes I weld in the garage after I pull the cars out. I have epoxy paint on the garage floor so it's nice to easily sweep up the girding dust etc but I've also burned holes into the coating- but it's expected. What are you doing to the sway bar brackets? I must've missed it.

For brake rotors figure about 1.5-2hrs each side for the first time. The first one will be slightly longer. Watch the YouTube videos- Xterra, Frontier etc are the same setup.

Oh, the sway bar brackets in the front came when I ordered 1 front sway bar bushing. I got a pack of new bolts (they don't fit but are shiny :) ) 2 sway bar bushings and both front brackets. I only paid for the one bushing so I was like...hmm well I guess someone was looking out for me. So I swapped them out. Very simple stuff. Thank you so much for the youtube heads up for the frontier change. 1AAuto had a great step by step.
 

Forum statistics

Threads
186,873
Messages
2,888,905
Members
227,437
Latest member
Top Jimmy
Top