2002 Sequoia Limited 4WD

Sal R.

Active member
MODIFICATION: Solo Motorsports Mid-Travel Kit, SPC Cams, Icon ET Coilovers, Limit Straps

GOAL:
Improve the IFS system and make it more resistant to key suspension and steering failure.

PURPOSE:
If you hang around the various first gen Sequoia/Tundra/Tacoma and 3rd gen 4Runner forums long enough, you find that the IFS-related components can be pretty scary when the fail. Notice I say "when."

Basically, maintenance is required for components like the lower ball joint, upper ball joint, inner and outer tierods. One cannot afford to ignore these key components.

If any one of the above components fail, you completely lose steering and suspension control. Imagine losing your front suspension or steering while driving 65mph on a highway.

IMG_20180314_104319.jpg

Because this is a single failure prone system, adding some redundancy and strength will go a long ways towards improving reliability.

Having addressed the drivetrain, transmission, steering, differentials and transfer case, the front suspension needed some love.

2018-05-27 16_27_56.jpg

MATERIALS:
Solo Motorsports (SM) Custom fabricated spindles
SM lower uniball joint conversion
SM double shear heim steering
SPC alignment cams PN:25445
OEM lower control arms
Pyrotect 6" limit straps with clevis hardware
Icon Extended Travel Coilover suspension with 700lb springs

DURATION: 8 hours

COST: $3800

HOW-TO:
There's an abundance of YouTube video for replacing the spindles, removing the lower control arms, removing the lower ball joint, etc. I won't go into the details here since there's a lot to cover. I will, however, add my notes and observations on how my installation differed from the what you will find on the net.

Before tearing into the system, preparation is key. Last thing you want is to be dead in the water because of an oops. Because I run a fairly "tucked" wheel spec, I needed to check clearances between the tire and spindle. If I needed spacers, I wanted to know beforehand so I can have it in-hand, in advance.

To do that, I laid my spare face down, placed a rotor in the wheel, and then set the spindle to mock up an installation.
2018-05-27 11_25_39.jpg

All clear. Time to get to work.

Here is my order of operation after vehicle is on jack stands and front wheels removed:
  1. Pop off axle nut cover, remove axle nut
  2. Remove brake caliper from spindle and all associated hardware and lines
  3. Disconnect ABS sensor (there's a connector at the frame)
  4. Unbolt (qty. 4) lower ball joint from spindle
  5. Unbolt upper ball joint
  6. Remove spindle with ABS sensor still installed
  7. Unbolt outer tierod from lower ball joint
  8. Remove inner + out tierod assembly together
  9. Remove alignment cams
  10. Remove lower control arm
2018-05-28 11_56_30.jpg

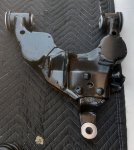
Considering I'm tearing down the whole front suspension, I opted to install new alignment cams and new lower control arms. The new lower control arms were a must because 1) my bushings are shot and 2) the control arm lower ball joint mount needed to be modified to accept the uniball, which I explain in detail later.

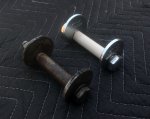
First, the SPC alignment cams. OEM vs. SPC.
2018-05-28 12_36_12.jpg

The SPC cams uses a delrin sleeve, as opposed to a metal one. Metal sleeves cause a lot of headaches when it seizes due to age, wear, and tear. Sometimes, they have to be cut out. Luckily for me, mine popped right out. Because I was replacing the inner and outer tierods with SM units, I did not have to move the steering rack out of the way to slide out the OEM cams or install the SPC cams. Without the tierods installed, there is no reason to move the steering rack.

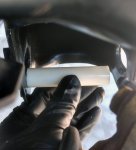
After the removal of the OEM cam, I found the the sleeve length was not the "right" length. Both sleeves are the same length, while the cam kit had a long and short cam bolt.

Front sleeve is short:
2018-05-28 12_01_51.jpg

Rear sleeve was too long so I cut it to fit.
2018-05-28 12_01_28.jpg

It fits.
2018-05-28 12_01_18.jpg

I still installed it. Hopefully, it does not pose a problem in the long run.

UPDATE:
Since the install, I have been dealing with some white-knuckle squirrelly steering, tracking, and stability issues. The car was not driveable above 40mph.

After a painful process of elimination, I traced it to the SPC alignment cams.

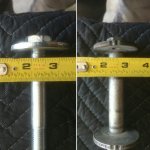
SPC vs OEM Cam Bolt Diameter:
IMG_20180609_173505.jpg

The SPC cams are thinner by 1/4" compared to OEM.

While the included Delrin sleeve makes up that difference inside the control arm bushing, the difference in diameter results in added play in the control arm under load where it mounts to the frame. This added play causes the control arm to shift while on the road and results in my suspension losing its alignment settings.

Fresh wear marks on the cam side and in the bushing side corroborated my theory.

Re-installing the OEM cams resolved the unstable steering issues completely.
 
Last edited:

Sal R.

Active member
MODIFICATION: Solo Motorsports Mid-Travel Kit, SPC Cams, Icon ET Coilovers, Limit Straps (continued)

Next up, is the Solo Motorsports (SM) mid-travel kit. It's a pretty beefy piece of hardware.

Features:
  • Boxed design
  • Integrated upper control arm slug upgraded to 5/8" hardware (a step up from 1/2")
  • Lower uniball conversion
  • Double shear heim steering (inner and outer), also uses 1/2" & 5/8" bolts
  • Uses OEM 4WD hubs
Fastener difference:
  • SM 1/2" vs. OEM 3/8" joint-knuckle mating bolts diameter
  • SM ball joint 5/8" bolt with a sleeve that tapers up to 3/4" vs. OEM 1/2" bolt diameter
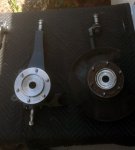
SM (with lower uniball attached) vs. OEM
2018-05-28 13_07_07.jpg

Inner/Outer Tierod vs. Hiem Steering Rod
2018-05-28 12_57_20.jpg

Modified lower control arm:
2018-05-28 12_34_58.jpg

The control arm is OEM with bushings already pre-installed. It may not be obvious, but this control arm is modified. The lower ball joint hole was bored out to accept the lower uniball sleeve and hardware. I had SM bore it for me. It is a high tolerance 5/8"-3/4" taper fit perpendicular to the mount surface. Considering the critical nature of this mount, it would be wise to get it done professionally. It's not a job that should be done by hand. The goal here is reliability, not cost.

Lower uniball joint with tapered sleeve mounted using 12-point fasteners:
2018-05-28 12_31_51.jpg

The SM lower uniball joint has a double shear heim joint steering mount compared the the OEM single shear mount.
IMG_20180530_192533.jpg

Similarly, the inner heim joint is also double shear:
2018-05-28 12_23_28.jpg

Because it's a heim joint, the bellows are no longer required. I'm considering finding an accordion boot that might fit to keep dirt and debris out of the rack and pinion. The inner heim joint bracket bolts in place. No modification is needed to mate it to the steering rack. I did add some green loctite, as advised, to ensure it doesn't come loose.

2018-05-28 17_41_49.jpg

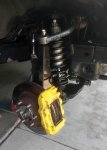
While I was in there, I took the liberty of installing limit straps. Because I no longer use a sway bar, the shock was the limiting component for downtravel. Can't have that. I set the length with a 1/4" before the shock fully extends. I followed a similar procedure to locate an appropriate mount for the strap as described for the rear straps. I used the, now empty, swaybar link mount as the lower mounting point.

All buttoned up:
2018-05-28 14_51_27.jpg

Wheel and tire clearance:
2018-05-28 17_43_02.jpg

I threw my rebuilt Icons in place of the Kings simply because of the extra travel. Plus, it has been re-valved for 700lb springs set with 1" of preload.

With the addition of the lower uniballs, the limiting component is actually the upper uniball cup. It hits the spindle.

Theoretically, I can get another 1-2" of wheel downtravel if the shock was longer by an 1 inch and another 1-2" of uptravel if I shorten the bumpstops and trim the fender, which I may explore one day.

A front swaybar is a must for this kit. Without it, you will experience some squirrelly tracking at speeds 60mph+. The added unsprung mass of the solo kit changes the dynamics of the suspension. Not to mention the double shear heim steering coupled with MTs will grab onto just about any road imperfections. The front swaybar will keep driveabilty predictable on-road.
 
Last edited:

Kpack

Adventurer
Wow, so jealous. I didn't know Solo made a kit for mid-travel. And I really like the heim steering rod. Everything about this kit looks far more stout than stock.
 

toyotech

Expedition Leader
Love to do the lower uniballs conversion. Need to come up with a bolt on solution using factory spindle.

Can your cv even handle another inch or two of droop?


Sent from my iPad using Tapatalk
 

Sal R.

Active member
Wow, so jealous. I didn't know Solo made a kit for mid-travel. And I really like the heim steering rod. Everything about this kit looks far more stout than stock.

No doubt about it. This kit addresses all the things that makes me nervous about being on the road.

Love to do the lower uniballs conversion. Need to come up with a bolt on solution using factory spindle.

Can your cv even handle another inch or two of droop?


Sent from my iPad using Tapatalk

I hear ya. This was a pricey upgrade, for sure. They're the only game in town for lower uniballs.

The CVs have the clearance, though the angles are extreme.

If it wasn't for the 7.5" diff, I'd probably have the Solo axles, as well.

Wish Front Range OR would release their 8" front diff upgrade already...
 

Kya

Adventurer
Nice install. I also went with the Solo Motorsports spindles, lower uniball, and heim steering. Good call on having Solo modify the LCA. After my original install I had issues with the lower uniball bolts repeatedly loosening up, and it was because the shop I had do the install incorrectly modified the lower ball joint hole. They were not precise or square to the top of the LCA. It was sketchy and caused a lot of issues. With the help of Solo and CODE 4x4 in Rifle, CO they were able to determine the issue and we installed new OEM LCA for an access cab Tundra that did not have the Toyota lower "big ball joint" that the Sequoia and Tundras DC have. Both shops were awesome and dedicated to trouble shooting the issue even though neither was a part of the original faulty install. Hopefully our experience will save others from a few of the headaches I went through. Overall it's a sweet upgrade.
 

Sal R.

Active member
Nice install. I also went with the Solo Motorsports spindles, lower uniball, and heim steering. Good call on having Solo modify the LCA. After my original install I had issues with the lower uniball bolts repeatedly loosening up, and it was because the shop I had do the install incorrectly modified the lower ball joint hole. They were not precise or square to the top of the LCA. It was sketchy and caused a lot of issues. With the help of Solo and CODE 4x4 in Rifle, CO they were able to determine the issue and we installed new OEM LCA for an access cab Tundra that did not have the Toyota lower "big ball joint" that the Sequoia and Tundras DC have. Both shops were awesome and dedicated to trouble shooting the issue even though neither was a part of the original faulty install. Hopefully our experience will save others from a few of the headaches I went through. Overall it's a sweet upgrade.

Awesome deal. Glad to see I'm not the only one with the kit.

Solo has been awesome to deal with and have been very supportive when I had questions.

Did you still have your swaybars installed?
 

Kya

Adventurer
Awesome deal. Glad to see I'm not the only one with the kit.

Solo has been awesome to deal with and have been very supportive when I had questions.

Did you still have your swaybars installed?

We carry a 4wheel camper in the truck about half the year so I’ve been debating for years about taking out the sway bar but then I saw your build thread with the info on the quick disconnects and decided to give them a try. They just arrived yesterday. Curious, why did you decide to go without the sway bar now?

Our daughter has one year left of high school then my wife and I plan to dirtbag around in the truck/camper full time since we’ll be empty nesters. I’ve been slowly getting the truck setup and the Solo spindle/steering kit was the overkill upgrade I wanted for all the same reasons you mentioned.
 

Sal R.

Active member
We carry a 4wheel camper in the truck about half the year so I’ve been debating for years about taking out the sway bar but then I saw your build thread with the info on the quick disconnects and decided to give them a try. They just arrived yesterday. Curious, why did you decide to go without the sway bar now?

Our daughter has one year left of high school then my wife and I plan to dirtbag around in the truck/camper full time since we’ll be empty nesters. I’ve been slowly getting the truck setup and the Solo spindle/steering kit was the overkill upgrade I wanted for all the same reasons you mentioned.

This past winter, I disco'd while it was snowing/raining and forgot to pack up one side of front/rear links. It didn't change my ride characteristics much so I took it all out rather than replace the lost components.

With the added unsprung mass of the Solo kit, the front doesn't seem to rebound/compress the same way so I get more sway than I used to.

My swaybars were mistakenly taken for trash and was picked up by my landscaper so I'm trying to source a new swaybar to see if it helps.
 
Last edited:
  • Like
Reactions: Kya

Forum statistics

Threads
188,005
Messages
2,901,027
Members
229,355
Latest member
BDM66
Top