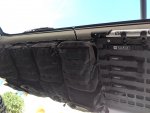
2002 Sequoia Limited 4WD

calicamper

Expedition Leader
Yeah new Explorer/ Aviator is near identical in first gen Sequoia size but with mini van 8 inches of clearance. Which is just enough clearance to get into snow trouble in the Sierras. And pitiful in Utah when you see a cool trail the stock Sequoia would easily do.

Stuff is either to fat/wide for city life or too small for road tripin these days. Or has gone AWD mini van with regular doors
 

Sal R.

Active member
MODIFICATION: Rearview Mirror Camera

GOAL:

Increase visibility and situational awareness.

PURPOSE:
I didn't really "need" this mod, but it came up on my Amazon "Today's Deal" and I couldn't resist. The spare tire and cans really do hamper my visibility, not that it was great to begin with on the Sequoia.

I figured an extra rear facing camera wouldn't be so bad to compliment my HU rear camera.

DURATION: 1 Hour

MATERIALS:
TOGUARD 5" Backup Camera

COST: $40

HOW-TO:
Installation is about as simple as it can get.
  1. Mount mirror
  2. Mount camera
  3. Plug in mirror to cigarette lighter
  4. Plug in camera to mirror
  5. Tap red wire to positive lead that activates on reverse
  6. Route wires
  7. Gravy
Initial test setup of the gear took no more 20mins, which included routing the wires through the headliner.

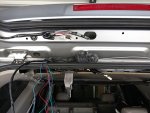
For my install, it took the longest trying to route the camera wire through this rubber conduit where the hatch meets the body. Man I hate having to go through this conduit:
8.jpg

Once past this step, it was easy.

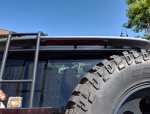
I opted to mount the camera on the spoiler centerline.
IMG_20190824_143753-89-91.jpg

I initially wanted to mount the camera on the passenger side over the tire where I have the largest blindspot. However, the wiring conduit for the brake light is on the driver's side and there was just enough length on the camera pig tail for the disconnect to reach the spoiler side conduit from the spoiler centerline. I did not want to cut a large enough hole for access in the spoiler brake light. It just increases risk of water intrusion.

I could have routed the wiring all connected starting from the camera mount and fish the wire through the spoiler, down through the hatch conduit, then forward, but I did not like that idea. If the camera were to fail and needed replacement, I'd have to undo the entire routing installation since there is no access to the camera connector inside the spoiler.

This way, if the camera needed replacement, all I'd need to do is unbolt the spoiler, disconnect the camera, remove the brake light, remove and replace. You couldn't do that if the connection was buried inside the spoiler.

Also, I had a mini-usb hardwire kit left over from another project that worked, so I opted to use that integrated into my electrical framework.

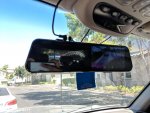
All put together and working:
IMG_20190824_143849-88.jpg

For the reverse 12v, I tapped the reverse light on the driver's side.

The view is good. However, reading further, the rear cam is not IR and only has FOV of 120deg. Meaning the view relies on external light sources for a decent picture and its view is not as wide as the front camera.

Nighttime view:
IMG_20190824_195037-90.jpg

Overall, I like it. Can't really rely on it when backing up from a key on startup since it takes about 20sec to boot up and switch views, but that's why I have the HU as my main.

It makes lane changes safer for me and makes squeezing into tight spaces (e.g. parallel parking) manageable without a million point turn.

The bonus of this mod is that the mirror has a parking monitor mode that doesn't rely on a constant 12v. The added "security" is nice to have.
 
Last edited:

Sal R.

Active member
MODIFICATION: Adjustable Table

GOAL:

Level out the table when camped.

PURPOSE:
As I'm getting ready to head out again, it's got me thinking about all the things I wish I had since my last trip. This one is about my integrated table.

When the car is level, the table is level. However, when at camp, the car can only be so level and I hated that my eggs ran down together on one side of the pan ?.

So, I needed some adjustability regarding the table.

DURATION: 30min

MATERIALS:

Misc "L" brackets
Adjustable table legs

COST: $0

HOW-TO:
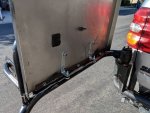
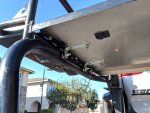
I had some of the left over brackets from the awning and table legs from my cargo box install. I figured that could allow the kind of adjustability I needed.

The table is aluminium and I can't weld aluminum, so bolt on, it is.
IMG_20190828_170324-92.jpg

I can extend/retract the legs as needed to level out the table.
IMG_20190828_170353-93.jpg

I didn't do cables because I love the fact the table can prop itself up without it. Just looks cleaner, IMO.

On a side note, I really need to refinish my bumpers...?
 
Last edited:

Sal R.

Active member
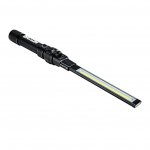
Not a "mod," per se, but I picked up these Harbor Freight LED lights for ~$21 with their coupons while on sale. They are very useful for a myriad of reasons.

63958_W4_1-94.jpg

I had them on-hand when working on the car. It features a magnetic base and rechargeable via USB.

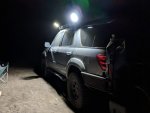
FB_IMG_1567564688326-95.jpg

"Mounted" on the body and instant camp lights. The two on one side easily illuminated 300 sq-ft.

Good for me since I don't really have a real good reason to add dedicated alley lights. I've had these for awhile and I wish I thought of this sooner.
 
Last edited:

calicamper

Expedition Leader
Ha! You did it. God that hatch boot is a umm pain in the ******** to fish through!!!
I almost did the wing like that. But opted for the center inside trim piece inside the rear window. My tire gate hasn’t been used on the Sequoia given I run stock sized rubber. But that camera is great!!!!

Lake Tahoe trip last weekend with 5 in the Sequoia and my 4x6 trailer loaded with 9 bikes and gear for 9. Second car came up a few hours behind us. Great weekend!
On the trip home I had a Toyota corrolla switch lanes from my lane to one over to the right which was slowing up splitting off to downtown Sacramento. Course as I was just about even with her she decided to get back in my lane going about 20mph slower than me and in my space!
Wheew!!! I haven’t heard my new BFG Advantage Sports howl like that before! Jammed on the brakes, on the horn about the same time she realized that was a very bad idea and cut back to the right. I would have missed her either way but wow the tires really howled on that hard brake doing 60mph. Never lost traction no abs.
About as close as you want to ever get to punting a corrolla into the state capital. LoL
 

calicamper

Expedition Leader
Oh btw Aviator/Explorer was a massive disappointment. Super cramped interior its a big heavy sport wagon now with cramped cockpit style seating design.
Drove a Yukon Denali and Expedition Platinum last week. The Expedition shames the Yukon in Seating configurations and technology in a massive way. Probably going that route for the Sequoia replacement. There is nothing!!!! Remotely close to the 1st gen Sequoia made today. Mid sized SUVs simply don’t exist anymore.

Its either midsized garbage AWD wagons with 2nd row captains chairs or wicked powerful full sized beasts with proper SUV things like 2spd transfer cases and real 2nd row bench seats.
 

Sal R.

Active member
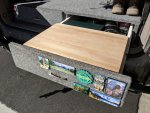
With the installation of the new, longer drawers, I can finally add the integrated cutting board for food prep.

IMG_20190907_163238-97.jpg

The longer drawers really opened up the flexibility on how I can organize my tools and kitchen.

The cutting board is kept in place using some "L" aluminium rails.

The devil is in the details.
 
Last edited:

chowwwww

Observer
Not a "mod," per se, but I picked up these Harbor Freight LED lights for ~$21 with their coupons while on sale. They are very useful for a myriad of reasons.

View attachment 536570

I had them on-hand when working on the car. It features a magnetic base and rechargeable via USB.

View attachment 536571

"Mounted" on the body and instant camp lights. The two on one side easily illuminated 300 sq-ft.

Good for me since I don't really have a real good reason to add dedicated alley lights. I've had these for awhile and I wish I thought of this sooner.

Those are great! I bought some lights to mount on the back of my truck for cooking purposes, but may just get these instead. no wiring needed.
 

Sal R.

Active member
Those are great! I bought some lights to mount on the back of my truck for cooking purposes, but may just get these instead. no wiring needed.

Yup. I found them useful for cooking and prep, as well. Just have to be careful not to close the hatch on them ?.

Very versatile pieces of light.
 

Sal R.

Active member
MODIFICATION: Secondary Rear Hatch Release

GOAL:

Open the hatch from inside of the car.

PURPOSE:
My Sequoia still had the plastic handle. Do a quick search and you'd see that I was pushing my luck regarding this notorious failure in design. Thankfully, after 7 years of ownership, it hadn't snapped. But I could definitely feel the resistance increasing when opening the rear hatch. I figured preventive maintenance would be a good thing since it would be incredibly painful trying to fix the rear hatch handle with my storage box and hatch MOLLE panel in the way.

Additionally, figured this was a good time to stamp out another nuisance mod: Add a secondary latch release pull cable that would allow me to open the hatch from the inside. ? Super great when camping out in the Sequoia.

DURATION: 2 Hours

MATERIALS:
Latch
Handle

COST: $110

HOW-TO:
There's lots of details and how-to's to remove and replace the handle and latch. This section will cover the modifications I made to accept a repurposed pull cable and how it's routed into the interior.

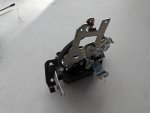
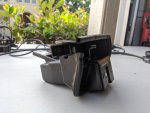
First I modified the latch assembly and added notches to the actuating arm and cable retainer:
IMG_20191115_094149-103.jpg

IMG_20191115_094155-104.jpg

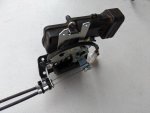
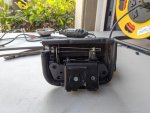
Cables loaded. I bent a 90deg bend on the ball side of the old cable to ensure it stays in place once loaded into the assembly. Also, added zip ties to keep the cables from sliding off the retainer for any reason.
IMG_20191115_094738-105.jpg

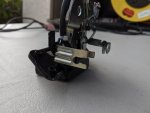
The housing notched to accept the extra cable.
IMG_20191115_100545-106.jpg

Fully loaded and reassbled.
IMG_20191115_100942-107.jpg

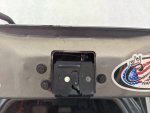
Just a visual of the extra cable as seen through latch opening.
IMG_20191115_102104-108.jpg

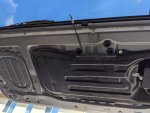
The repurposed cable was routed under the glass in the open/down position and up in front of the motor.
IMG_20191115_102601-109.jpg

All buttoned up.
MVIMG_20191115_123342-110.jpg

Works like a charm. I'll add a "T" handle when I find one that works.

Installation note: The lock actuator is super sensitive about the extra cable loaded onto the arm. If its pulled taught, the extra cable will prevent locking/unlocking of the hatch.
 
Last edited:

nmhaarmann

New member
MODIFICATION: Adjustable Table

GOAL:

Level out the table when camped.

PURPOSE:
As I'm getting ready to head out again, it's got me thinking about all the things I wish I had since my last trip. This one is about my integrated table.

When the car is level, the table is level. However, when at camp, the car can only be so level and I hated that my eggs ran down together on one side of the pan ?.

So, I needed some adjustability regarding the table.

DURATION: 30min

MATERIALS:

Misc "L" brackets
Adjustable table legs

COST: $0

HOW-TO:
I had some of the left over brackets from the awning and table legs from my cargo box install. I figured that could allow the kind of adjustability I needed.

The table is aluminium and I can't weld aluminum, so bolt on, it is.
View attachment 535508

I can extend/retract the legs as needed to level out the table.
View attachment 535510

I didn't do cables because I love the fact the table can prop itself up without it. Just looks cleaner, IMO.

On a side note, I really need to refinish my bumpers...?
Like the look of this!
 

Forum statistics

Threads
188,341
Messages
2,905,789
Members
229,959
Latest member
bdpkauai
Top