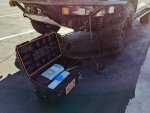
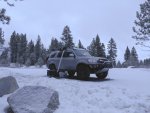
2002 Sequoia Limited 4WD

Kpack

Adventurer
MODIFICATION: Secondary Rear Hatch Release

GOAL:

Open the hatch from inside of the car.

PURPOSE:
My Sequoia still had the plastic handle. Do a quick search and you'd see that I was pushing my luck regarding this notorious failure in design. Thankfully, after 7 years of ownership, it hadn't snapped. But I could definitely feel the resistance increasing when opening the rear hatch. I figured preventive maintenance would be a good thing since it would be incredibly painful trying to fix the rear hatch handle with my storage box and hatch MOLLE panel in the way.

Additionally, figured this was a good time to stamp out another nuisance mod: Add a secondary latch release pull cable that would allow me to open the hatch from the inside. ? Super great when camping out in the Sequoia.

DURATION: 2 Hours

MATERIALS:
Latch
Handle

COST: $110

HOW-TO:
There's lots of details and how-to's to remove and replace the handle and latch. This section will cover the modifications I made to accept a repurposed pull cable and how it's routed into the interior.

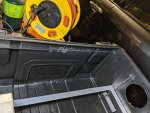
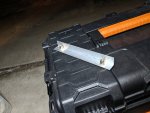
First I modified the latch assembly and added notches to the actuating arm and cable retainer:
View attachment 550758

View attachment 550756

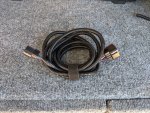
Cables loaded. I bent a 90deg bend on the ball side of the old cable to ensure it stays in place once loaded into the assembly. Also, added zip ties to keep the cables from sliding off the retainer for any reason.
View attachment 550757

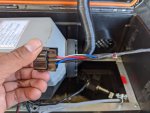
The housing notched to accept the extra cable.
View attachment 550750

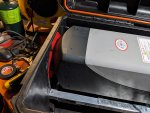
Fully loaded and reassbled.
View attachment 550751

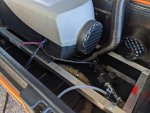
Just a visual of the extra cable as seen through latch opening.
View attachment 550752

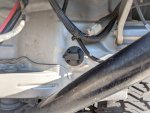
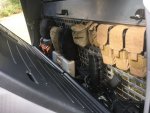
The repurposed cable was routed under the glass in the closed/down position and up in front of the motor.
View attachment 550754

All buttoned up.
View attachment 550755

Works like a charm. I'll add a "T" handle when I find one that works.

Installation note: The lock actuator is super sensitive about the extra cable loaded onto the arm. If its pulled taught, the extra cable will prevent locking/unlocking of the hatch.
That looks like a great solution. Very clean and functional. I wonder if that cable will rattle a bunch on rough roads though....nothing a little padding couldn't fix I'm sure.

On a side note, I'm super jealous of the incredibly useful Molle panels you can install in a Sequoia. I have nowhere to put anything like that in my Tundra.
 

Sal R.

Active member
TECH: Goodyear Wrangler MTR vs Cooper STT Pro

If 32.6" are 33s, then 34.7" are 35s.

Wrangler MTRs 295/70R18.

FB_IMG_1574091932616-113.jpg

The MTRs are narrower by 1/2" than the STT Pros (sidewall to sidewall 12.5" vs 12").
The MTRs are taller by 1/2" than the STT Pros ( 34.25" vs 34.7" @28psi weight off wheels).
The MTRs are quieter than the STT Pros by two volume level at full tread (12 vs 10).
The MTRs starting tread is 19/32" and STT Pro starting tread is 21/32".
Picked up some mileage with the MTR on the route to/from Mammoth.
- Up: (13.9 vs 13.2)
- Down (15.8 vs 14.1)

I got 56k out of the STT Pros with 32% tread left.

Because the MTRs are taller, I do get rub at full lock moderately stuffed.
FB_IMG_1574091950829-114.jpg

Man, I do not look forward to tubbing the wheel wells again.

This time, I think I'm going to the extra 26.2 miles and max out the negative caster and trim the fenders too so I can remove my 1/2" bumpstop spacers.

I don't want to do this stupid job again.
 
Last edited:

Sal R.

Active member
That looks like a great solution. Very clean and functional. I wonder if that cable will rattle a bunch on rough roads though....nothing a little padding couldn't fix I'm sure.

On a side note, I'm super jealous of the incredibly useful Molle panels you can install in a Sequoia. I have nowhere to put anything like that in my Tundra.

Thanks!

Didn't rattle much when I was out in the desert this weekend trying out the MTRs. I don't think the cable will be too much of an issue.

For a MOLLE panel, what about on the back cab wall?

Kinda like this:
4c6cb6c2f165f76bff7ce0ca91ca1b48.jpg

Maybe @toyotech could add this to his gear portfolio? ???

I've also seen bedside options on tacos that look pretty good.
 
Last edited:

Kpack

Adventurer
Thanks!

Didn't rattle much when I was out in the desert this weekend trying out the MTRs. I don't think the cable will be too much of an issue.

For a MOLLE panel, what about on the back cab wall?

Kinda like this:
View attachment 551417

Maybe @toyotech could add this to his gear portfolio? ???

I've also seen bedside options on tacos that look pretty good.
I've looked into that for the 1st gen Tundra, but we don't have the room behind the rear seats that the Tacoma guys do. On the DC the whole rear window slides down, and the mechanism takes up a lot of room.

I honestly think the best option would be similar to the OG Fab overhead panel: https://ogfab.com/products/og-overhead-molle-panel-2gen-tundra-crewmax. On the DC, the two rear grab handles could be removed (similar to the 2nd gen Tundra), the panel mounted there, and the handles replaced with paracord ones. The plan would be to mount several tear-away Molle pouches, each containing a specific type of gear.

Toyotech, you think this could make it in your line-up?
 

smokeysevin

Re-redoing things the third time
This time, I think I'm going to the extra 26.2 miles and max out the negative caster and trim the fenders too so I can remove my 1/2" bumpstop spacers.


I have never cared for how my Tundra rode without lots of caster, the steering was really slow to center if it did at all and it sort of hunted on crowned roads.

Sean
 

Sal R.

Active member
I have never cared for how my Tundra rode without lots of caster, the steering was really slow to center if it did at all and it sort of hunted on crowned roads.

Sean

Agreed.

At 3.1, it was especially annoying on roads frequented by Semis where there noticeable tire indentations on the road due to heavy and frequent usage. It just grabbed onto every imperfection it could find.

I've found 2.1-2.3 is just about right.
 

Kpack

Adventurer
Agreed.

At 3.1, it was especially annoying on roads frequented by Semis where there noticeable tire indentations on the road due to heavy and frequent usage. It just grabbed onto every imperfection it could find.

I've found 2.1-2.3 is just about right.
Wait, so are you saying that more caster made it worse? I thought more caster was supposed to make the front end more stable and make it return to center easier? I'm getting mine aligned today and I was going to have them aim for ~ +3.0 caster.
 

Sal R.

Active member
Wait, so are you saying that more caster made it worse? I thought more caster was supposed to make the front end more stable and make it return to center easier? I'm getting mine aligned today and I was going to have them aim for ~ +3.0 caster.

When I still had OEM spindles, LBJs, and tie rods, 3deg caster was fine. In fact, I preferred 2.6-3.1deg of caster. It felt more stable. Can't really speak about return to center since I never really paid attention to it.

When I upgraded to the Solo kit, it changed my suspension geometry a bit (caster, toe in/out when the suspension cycles, etc.) Not to mention it took out all the slop in my steering. Caster above 2.7 really causes the car to wander and track onto every little imperfection on the road above 65mph.

It's a trade off and the feel is subjective.
 

Kpack

Adventurer
When I still had OEM spindles, LBJs, and tie rods, 3deg caster was fine. In fact, I preferred 2.6-3.1deg of caster. It felt more stable. Can't really speak about return to center since I never really paid attention to it.

When I upgraded to the Solo kit, it changed my suspension geometry a bit (caster, toe in/out when the suspension cycles, etc.) Not to mention it took out all the slop in my steering. Caster above 2.7 really causes the car to wander and track onto every little imperfection on the road above 65mph.

It's a trade off and the feel is subjective.
Ahh, yes. I had forgotten you switched over to the Solo kit. That makes way more sense now.
 

LRNAD90

Adventurer
All I can say is Wow, quite the build thread. It has been bookmarked, and a lot of your photos saved, much appreciate all the trouble you went to share so much detail.

I've been trying to research Sequoias, thinking about picking on up, and came across this thread. I couldn't stop till I got to the end. It would be mostly a street, light trail truck for me, so I wouldn't be going anywhere near the level of hard core modifications you have. I'm thinking springs, shocks, wheel spacers and 33's primarily. Couple of questions, born mostly out of my 'web search research', as I have no real experience with the trucks...

1) Was looking for a 2005-2007 primarily because I understand there were significant differences to the four wheel drive system (as well as the VVTi engine and 5 speed gearbox), and had read about the earlier trucks only keeping the center diff locked in 1st gear, and unlocking it in reverse, and such. I didn't see any mention of any updates to circumvent this, and was trying to see if there was some 'cut this wire' simple fix to that issue. I see you have ARB Lockers front and rear, so I have to assume you found a way to address the center diff lock issue, and I just missed it?

2) I see you went from one to three jerry cans out back, with the spare removed from under the truck, why not run an Aux Fuel tank in that spot?

3) How many miles are on it, and any issues with items like the buried starter, or Alternator? I've become aware of the week ball joint issue in the front end and the rear hatch handle that breaks frequently, but these things seem pretty bullet proof otherwise?

Again, truck looks great, thanks for sharing your journey with all of us..
 

Sal R.

Active member
All I can say is Wow, quite the build thread. It has been bookmarked, and a lot of your photos saved, much appreciate all the trouble you went to share so much detail.

I've been trying to research Sequoias, thinking about picking on up, and came across this thread. I couldn't stop till I got to the end. It would be mostly a street, light trail truck for me, so I wouldn't be going anywhere near the level of hard core modifications you have. I'm thinking springs, shocks, wheel spacers and 33's primarily. Couple of questions, born mostly out of my 'web search research', as I have no real experience with the trucks...

If you use Facebook, join the Toyota Sequoia Off Road group. Lots if helpful lads in there that can also answer questions.

There's also SequoiaForums, but it's not as active as TSOR.

1) Was looking for a 2005-2007 primarily because I understand there were significant differences to the four wheel drive system (as well as the VVTi engine and 5 speed gearbox), and had read about the earlier trucks only keeping the center diff locked in 1st gear, and unlocking it in reverse, and such. I didn't see any mention of any updates to circumvent this, and was trying to see if there was some 'cut this wire' simple fix to that issue. I see you have ARB Lockers front and rear, so I have to assume you found a way to address the center diff lock issue, and I just missed it?

03s and up have the factory included option to lock the transfer case anytime in 4wd. Only 01-02 were limited to 1st gear 4lo.

I, personally, haven't had a need with the transfer case locked in 4hi, so I never did the mod.

01-02 can be modified to enable locking in 4hi like 03s and up using a switch, diode, and relay.

2) I see you went from one to three jerry cans out back, with the spare removed from under the truck, why not run an Aux Fuel tank in that spot?

No one makes one and not worth the trouble, IMO.

While the extra range would be great, even daily driving, the weight is not welcome.

Plus, that spot is taken up my onboard shower system.

3) How many miles are on it, and any issues with items like the buried starter, or Alternator? I've become aware of the week ball joint issue in the front end and the rear hatch handle that breaks frequently, but these things seem pretty bullet proof otherwise?

Again, truck looks great, thanks for sharing your journey with all of us..
Currently at 257k miles. I've put 124k since the purchase 7 years ago. The only major issue was the transmission. Not like it quit on me or suffered a major failure, but I lost 4th gear.

I did suffer through the LBJ issue, but that was because I didn't use OEM joints from a reputable source.

I track everything so here's my stats:

In the past 7 years of ownership, I've spent 7.7k in repairs, which include 3.5k for a new transmission. Factoring that out, it breaks down to $38 per month average for the last 7 years. Still on the starter and alternator that came with car. This number does include items I've broken doing mods. ?

So yeah, I think she's a super solid car. Reliable for multiple multi-thousand mile trips per year and some hundred or so miles in the desert, mountains, and snow.

Thanks for taking the time. ?
 
Last edited:

Sal R.

Active member
MODIFICATION: Portable 12V Diesel Heater

GOAL:

Portable heater to take the edge off winter camping and make ski bumming result in less shrinkage.

PURPOSE:
I love to camp in the winter. Not to mention bum it around the mountain ski resorts.

However, as a SoCal resident, my preferred temperature range is small. As a result, I needed a heater solution that didn't burn the air I breath *cough* Buddy Heater *cough*, portable, and able to keep either my tent or cab cozy.

I went with a portable setup because the diesel heater I bought is pretty big, relatively speaking. Considering I'd probably only be using it a half dozen times over a 4 month period every year, give or take, it just didn't make sense to permanently install it in the Sequoia when usable space is so limited. It ain't no RV. Not to mention, I tent camp it when I can bear it.

DURATION: 5 Hours

MATERIALS:
Happybuy 5KW Diesel Air Heater 12V Diesel Parking Heater
Rigid Toolbox
1"x48" "L" Aluminum Rails (x3)
5L Fuel Tank
10ft 10awg wiring
3" ABS drain
Exhaust hull fitting
Misc hardware and rivet nuts

COST: $300

HOW-TO:
This mod covers all the steps taken to package up the heater into the Rigid toolbox. I looked into different installations and implementations. In the end, @toyotech's implementation made the most sense for my goals, which were:
  • Compact
  • Portable
  • Self-contained
  • Easy to manipulate
  • Easy setup/breakdown
I put my own spin on it, of course.

Originally, the heater comes with a 10 liter tank. Because I wanted to keep it all together, I opted to purchase a smaller 5 liter tank. The 5 liter tank will fit into the Rigid toolbox.
IMG_20191204_213303.jpg

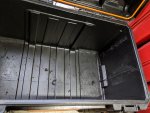
First thing required was to hog out the brand spanking new toolbox to make more flat surfaces to mount everything plus room for the tank.

Trimmed the sides to allow for mounting an aluminum tray:
IMG_20191127_161720.jpg

Trimmed the front to allow mounting of the 5L tank:
IMG_20191204_184105.jpg

Clearanced the lid to clear the tank spout:
IMG_20191204_184016.jpg

Next up is to make the tray to hold the heater. I didn't want the hoses protruding from the box, so I opted to create a tray the width of the mounting plate that came with the kit with space underneath to allow routing of the exhaust, intake, and fuel line inside the toolbox. The tray would be supported from the side for easy assembly/disassembly for servicing and/or troubleshooting.

To create the tray, I:
  • Marked a depth of 5.5" from the lip for the toolbox opening on LHS/RHS
  • Cut a section of the "L" aluminum rail the width of the heater mount bracket 6.75" long (qty 2)
  • Match drilled holes locating the "L" rails 5.5" below the toolbox lip opening on LHS/RHS
  • Cut a section of the "L" aluminum rail the width of the toolbox 22" long (qty 2)
  • Riveted all four "L" rails together to create a square tray.
The 6.75" "L" rails are supported from the side using thru bolts into rivet nuts mount on the rail:
MVIMG_20191127_170742.jpg

With the tray created, it was time to determine the heater placement. To utilize the space efficiently, I opted to have the hot air outlet poking thru the toolbox. The thought was to make it easy to slip on the plumbing without having to route it within the box. To determine the heater placement, I first needed to cut out the hot air outlet hole. I used a 3.5" hole saw I had on hand.

To locate the hole, I:
  • Temporarily taped the 3" ABS drain (which has a 3.5" diameter lip) to the hot air outlet
  • Placed the heater on rails
  • Butt it up against the toolbox wall
  • Marked the hole circumference with tape
  • Remove the heater
  • Located the hole center using markings
  • Drill out using hole saw
IMG_20191204_1815492.jpg

With the hole created, I can determine heater placement on the rails. I marked the mounting holes using a sharpie and drilled it out.
IMG_20191204_183424.jpg

IMG_20191128_091253.jpg

Most everything is secured using rivnuts.

With the heater properly located, you can take steps to mount the tank. I mounted high so that it aligned with flat faces on the toolbox. I did not want to have to use spacers or standoffs to get the tank to sit right and flush.

Once I set the height I wanted on the tank, I match drilled the mounting holes from the tank onto the front face of the toolbox. I used rivet nuts on the tank to make assembly/disassembly easier since clearances get tight with the heater in the way.

Continued in next section...
 
Last edited:

Sal R.

Active member
MODIFICATION: Portable 12V Diesel Heater (cont.)

Heater placed.

Tank placed.

On the pic below, you can see the bolts that support the "L" tray and the fuel tank.
IMG_20191204_212450.jpg

Time for plumbing.

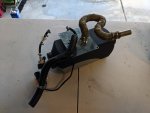
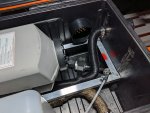
Clearances are tight below the heater. As a result, I had to trim off ~2" from the exhaust pipe to make it fit. This was necessary to keep a low profile.
IMG_20191128_111004.jpg

I had 3.5" of space under the heater. As a result, all lines were attached and formed so as to stay withing the allocated space.
IMG_20191128_113011.jpg

Once forming was complete, I finished up the pluming by applying some heat wrap around the exhaust pipe. Hope this will keep temps down inside the box.
IMG_20191128_131217.jpg

To make servicing simpler, I mounted the fuel pump on a quickfist instead of the supplied rubber bracket.
IMG_20191204_212430.jpg

I opted not to use the supplied fuel fitting. I did not want to drill into the bottom of the tank and add risk of a fuel leak. Instead, I routed a stand pipe to pick up fuel from the top of the tank.

Once everything was installed, I proceeded to cut openings for the air intake, air filter, and exhaust pipe.

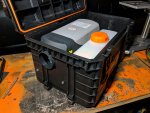
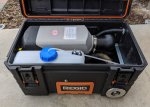
All packaged up.
IMG_20191221_121647-146-147.jpg

Backside of the toolbox is a 3" ABS drain that serves the fresh air source for the heater. On the left is the air intake silencer for the heater.
IMG_20191204_212335.jpg
 
Last edited:

Sal R.

Active member
MODIFICATION: Portable 12V Diesel Heater (cont.)

Since the component installation is all but complete, it was time to address wiring. The kit came with an excess amount of wiring. To house it all in the box would be messy.

I broke apart the wiring loom on the heater side to trace the corresponding wires on the LCD controller side.

I addressed the fuel pump first. From the heater the wire colors are both brown, then turns into white with green stripe after the connector to the fuel pump.
IMG_20191205_112950-122.jpg

Routed.
IMG_20191205_115915-123.jpg

Next up was power. The heater came with roughly 8ft of 14awg wire. Considering the draw required on start up and the run length, 14ga was too small. So, I replaced that with 10ft of 10awg wire.

I used a bulkhead fitting to create an easy disconnect. The idea is to connect the power without opening the hood and plugging it into the box.
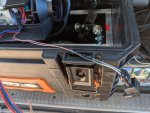
IMG_20191213_121814-128.jpg

All the was left was the controller loom. Considering that this was going to be out in the elements, I added some split loom to protect the wire.
IMG_20191205_115826-124.jpg

Also, when I cut the wires from the connector, I left pigtails and I didn't de-pin the connector. With this method, I'll always have a reference how it was originally wired up before all the modifications.
IMG_20191205_114451-125.jpg

She is live.
IMG_20191219_104053-138-141.jpg

IMG_20191230_070415-151-152.jpg
 
Last edited:

Forum statistics

Threads
188,395
Messages
2,904,137
Members
230,274
Latest member
mbauerus1
Top